{"authorId":"","cover":"/content/images/2016/08/IMG_7487.jpg","heroes":{"39b4d054f7e0bce8c6537f8d80a0a2e3":"/content/images/2017/04/IMG_0528.JPG","3acdd82a1141d1b5d59605b33fc27712":"/content/images/2017/04/IMG_0541.JPG","729c9a4edc92eaa4171ac274dda70ca2":"/content/images/2019/11/IMG_9531.JPG","72b96875d26f256ca5a8e7bea23a0319":"/content/images/2017/07/logo.png","7a23b4fc9f63f7327ef52913289d4327":"/content/images/2017/12/20171201-4K4X9516.jpg","8060d348c89d6a36c962a8c289b54bab":"/content/images/2017/03/IMG_0381.JPG","901f2fab2646e83671fe8f6e5500c117":"/content/images/2018/11/IMG_6734.jpg","94b2de371382ec793a64ed49343c14c6":"/content/images/2017/11/IMG_3194.JPG","bfd1ec8875b9ff5807a23c1e5275e668":"/content/images/2017/06/IMG_1248.jpg","e1df6d8cca38bcc838098d61f321952d":"/content/images/2017/11/IMG_3182.jpg"},"kind":"index","logo":"/content/images/2016/08/projectable-me-4.png","nav":[{"id":"62e854d471683dea63488bcbca5c6188","label":"Home","url":"/","sortOrder":0},{"id":"1bc84fb15620acd635df7735a0b8ddd8","label":"Raspberry Pi","url":"/tag/raspberry-pi/","sortOrder":1},{"id":"3207e2fec51d66d2a5b3d8d04feb9dd8","label":"Sim Racing","url":"/tag/sim-racing/","sortOrder":2},{"id":"59115afd52e59a74faa4b386e00ae3fa","label":"About","url":"/about-me/","sortOrder":3}],"page":1,"perPage":10,"posts":[{"id":"729c9a4edc92eaa4171ac274dda70ca2","siteId":"projectable","slug":"comcast-business-ipv6-on-ubiquiti-unifi","title":"Comcast Business IPv6 on Ubiquiti Unifi","markdown":"If you are reading this it is likely you were like me, on the edge of giving up on IPv6 on your network. After combining a few small pieces from posts outlining **Comcast Business IPv6** using Ubiquiti EdgeRouters along with the [**USG Advanced Configuration**](https://help.ubnt.com/hc/en-us/articles/215458888-UniFi-USG-Advanced-Configuration) guide I was able to get something that not only works correctly, but persists correctly also.\n\nThe trick was getting the right settings defined in the web interface and the one setting not available in the web interface. It's pretty straight forward, so for sake of simplicity I will just tell you what things need to be set. *This configuration has 1 of my internal networks having IPv6, I did not want to spend any more time trying to make this work across multiple internal networks, but it probably isn't hard.*\n\n#### WAN Interface\n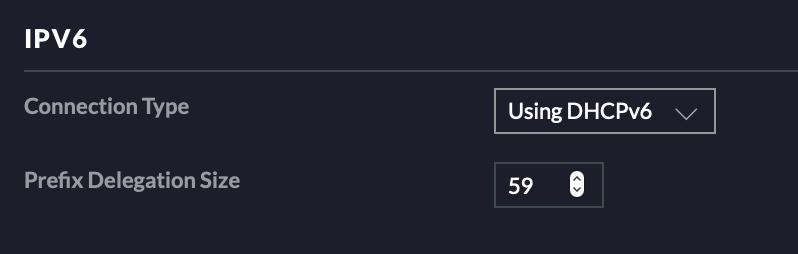\n\nSet your WAN interface **IPv6 Connection Type** to `Using DHCPv6`. You will need to ensure that your cable modem has DHCPv6 enabled, it usually is by default. The **Prefix Delegation Size** should be set to `59` as 56 didn't seem to work.\n\n\n### LAN Interface\n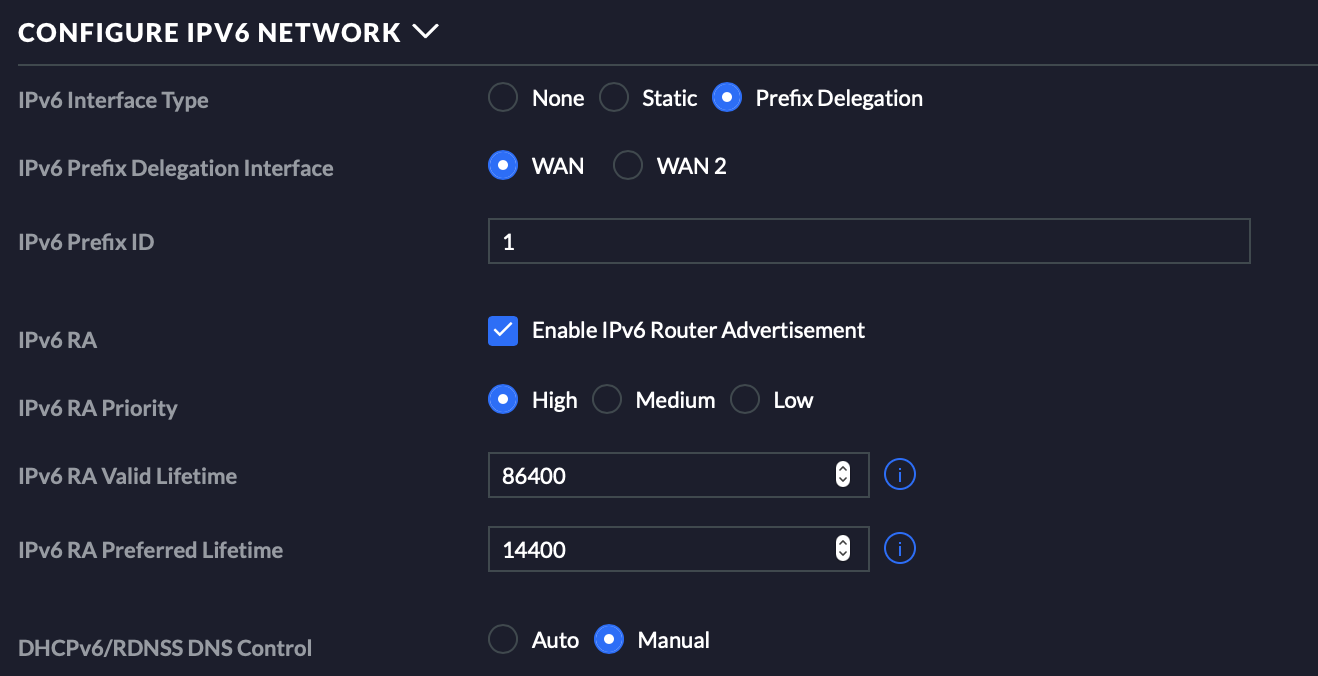\n\n**IPv6 Interface Type** gets set to `Prefix Delegation`, you select the WAN interface you used earlier, and you set the **IPv6 Prefix ID** to `1`. \n\nI suggest setting **DHCPv6/RDNSS DNS Control** to `Auto`, mine is set to `Manual` due to having a [Pi-hole](https://pi-hole.net) on my network that I use for DNS recursion/caching.\n\n\n### The Backend Stuff\nYou will need to follow the **USG Advanced Configuration** guide found here: https://help.ubnt.com/hc/en-us/articles/215458888-UniFi-USG-Advanced-Configuration.\n\nFollowing that guide you create your own `config.gateway.json` file and can paste the following.\n```\n{\n \"interfaces\": {\n \"ethernet\": {\n \"eth2\": {\n \"dhcpv6-pd\": {\n \"rapid-commit\": \"disable\"\n }\n }\n }\n }\n}\n```\nIf you are using **WAN2** instead of **WAN** change `eth2` to `eth3`. \n\n### Finishing Up\nIf you followed the guide and **Force provision**ed your **USG** you should be good to go. \nMy linux hosts picked up the IPv6 IPs automatically, and on my Apple products I just disabled then re-enabled Wifi.","html":"\u003cp\u003eIf you are reading this it is likely you were like me, on the edge of giving up on IPv6 on your network. After combining a few small pieces from posts outlining \u003cstrong\u003eComcast Business IPv6\u003c/strong\u003e using Ubiquiti EdgeRouters along with the \u003ca href=\"https://help.ubnt.com/hc/en-us/articles/215458888-UniFi-USG-Advanced-Configuration\" rel=\"nofollow\"\u003e\u003cstrong\u003eUSG Advanced Configuration\u003c/strong\u003e\u003c/a\u003e guide I was able to get something that not only works correctly, but persists correctly also.\u003c/p\u003e\n\u003cp\u003eThe trick was getting the right settings defined in the web interface and the one setting not available in the web interface. It\u0026#39;s pretty straight forward, so for sake of simplicity I will just tell you what things need to be set. \u003cem\u003eThis configuration has 1 of my internal networks having IPv6, I did not want to spend any more time trying to make this work across multiple internal networks, but it probably isn\u0026#39;t hard.\u003c/em\u003e\u003c/p\u003e\n\u003ch4\u003eWAN Interface\u003c/h4\u003e\n\u003cimg src=\"/content/images/2019/11/Screen-Shot-2019-11-05-at-7-49-35-AM.png\" alt=\"\"\u003e\n\u003cp\u003eSet your WAN interface \u003cstrong\u003eIPv6 Connection Type\u003c/strong\u003e to \u003ccode\u003eUsing DHCPv6\u003c/code\u003e. You will need to ensure that your cable modem has DHCPv6 enabled, it usually is by default. The \u003cstrong\u003ePrefix Delegation Size\u003c/strong\u003e should be set to \u003ccode\u003e59\u003c/code\u003e as 56 didn\u0026#39;t seem to work.\u003c/p\u003e\n\u003ch3\u003eLAN Interface\u003c/h3\u003e\n\u003cimg src=\"/content/images/2019/11/Screen-Shot-2019-11-05-at-7-52-39-AM.png\" alt=\"\"\u003e\n\u003cp\u003e\u003cstrong\u003eIPv6 Interface Type\u003c/strong\u003e gets set to \u003ccode\u003ePrefix Delegation\u003c/code\u003e, you select the WAN interface you used earlier, and you set the \u003cstrong\u003eIPv6 Prefix ID\u003c/strong\u003e to \u003ccode\u003e1\u003c/code\u003e.\u003c/p\u003e\n\u003cp\u003eI suggest setting \u003cstrong\u003eDHCPv6/RDNSS DNS Control\u003c/strong\u003e to \u003ccode\u003eAuto\u003c/code\u003e, mine is set to \u003ccode\u003eManual\u003c/code\u003e due to having a \u003ca href=\"https://pi-hole.net\" rel=\"nofollow\"\u003ePi-hole\u003c/a\u003e on my network that I use for DNS recursion/caching.\u003c/p\u003e\n\u003ch3\u003eThe Backend Stuff\u003c/h3\u003e\n\u003cp\u003eYou will need to follow the \u003cstrong\u003eUSG Advanced Configuration\u003c/strong\u003e guide found here: \u003ca href=\"https://help.ubnt.com/hc/en-us/articles/215458888-UniFi-USG-Advanced-Configuration\" rel=\"nofollow\"\u003ehttps://help.ubnt.com/hc/en-us/articles/215458888-UniFi-USG-Advanced-Configuration\u003c/a\u003e.\u003c/p\u003e\n\u003cp\u003eFollowing that guide you create your own \u003ccode\u003econfig.gateway.json\u003c/code\u003e file and can paste the following.\u003c/p\u003e\n\u003cpre\u003e\u003ccode\u003e{\n \u0026#34;interfaces\u0026#34;: {\n \u0026#34;ethernet\u0026#34;: {\n \u0026#34;eth2\u0026#34;: {\n \u0026#34;dhcpv6-pd\u0026#34;: {\n \u0026#34;rapid-commit\u0026#34;: \u0026#34;disable\u0026#34;\n }\n }\n }\n }\n}\n\u003c/code\u003e\u003c/pre\u003e\n\u003cp\u003eIf you are using \u003cstrong\u003eWAN2\u003c/strong\u003e instead of \u003cstrong\u003eWAN\u003c/strong\u003e change \u003ccode\u003eeth2\u003c/code\u003e to \u003ccode\u003eeth3\u003c/code\u003e.\u003c/p\u003e\n\u003ch3\u003eFinishing Up\u003c/h3\u003e\n\u003cp\u003eIf you followed the guide and \u003cstrong\u003eForce provision\u003c/strong\u003eed your \u003cstrong\u003eUSG\u003c/strong\u003e you should be good to go.\nMy linux hosts picked up the IPv6 IPs automatically, and on my Apple products I just disabled then re-enabled Wifi.\u003c/p\u003e\n","excerpt":"","metaTitle":"","metaDescription":"","status":"published","featured":false,"publishedAt":"2019-11-05T13:07:15Z","authorId":"190160de54f2192bd5b8734ec8808086","authorName":"Daniel Chote","authorSlug":"daniel","heroMediaId":"a89f927e3c656e9526008e3aee6a678d","projectId":"","tags":[{"id":"d35708b28e494df332afc857416da120","name":"Unifi","slug":"unifi"},{"id":"75282f5450b7d8d38ca5570b768f4816","name":"Ubiquiti","slug":"ubiquiti"},{"id":"ef5b5edfc8d3f826a59d61a4be854fd8","name":"Networking","slug":"networking"}],"createdAt":"2026-10-18T13:16:27Z","updatedAt":"2026-10-18T13:16:27Z"},{"id":"901f2fab2646e83671fe8f6e5500c117","siteId":"projectable","slug":"a-simple-etcher-6-slot-sd-card-jig","title":"A simple Etcher 6 slot SD card jig","markdown":"I've been working with Kubernetes a lot lately, I am using Kubernetes at [Filament](https://filament.com) as a way to manage sandbox blockchain environments, so naturally I wanted to try and replicate this environment using Raspberry Pis. This is actually easier said than done, even though the 3B/3B+ has 1GB of RAM, once you start bringing in persistent storage layers it becomes apparent that it just isn't enough memory to run anything but the simplest of kubernetes containers.\n\n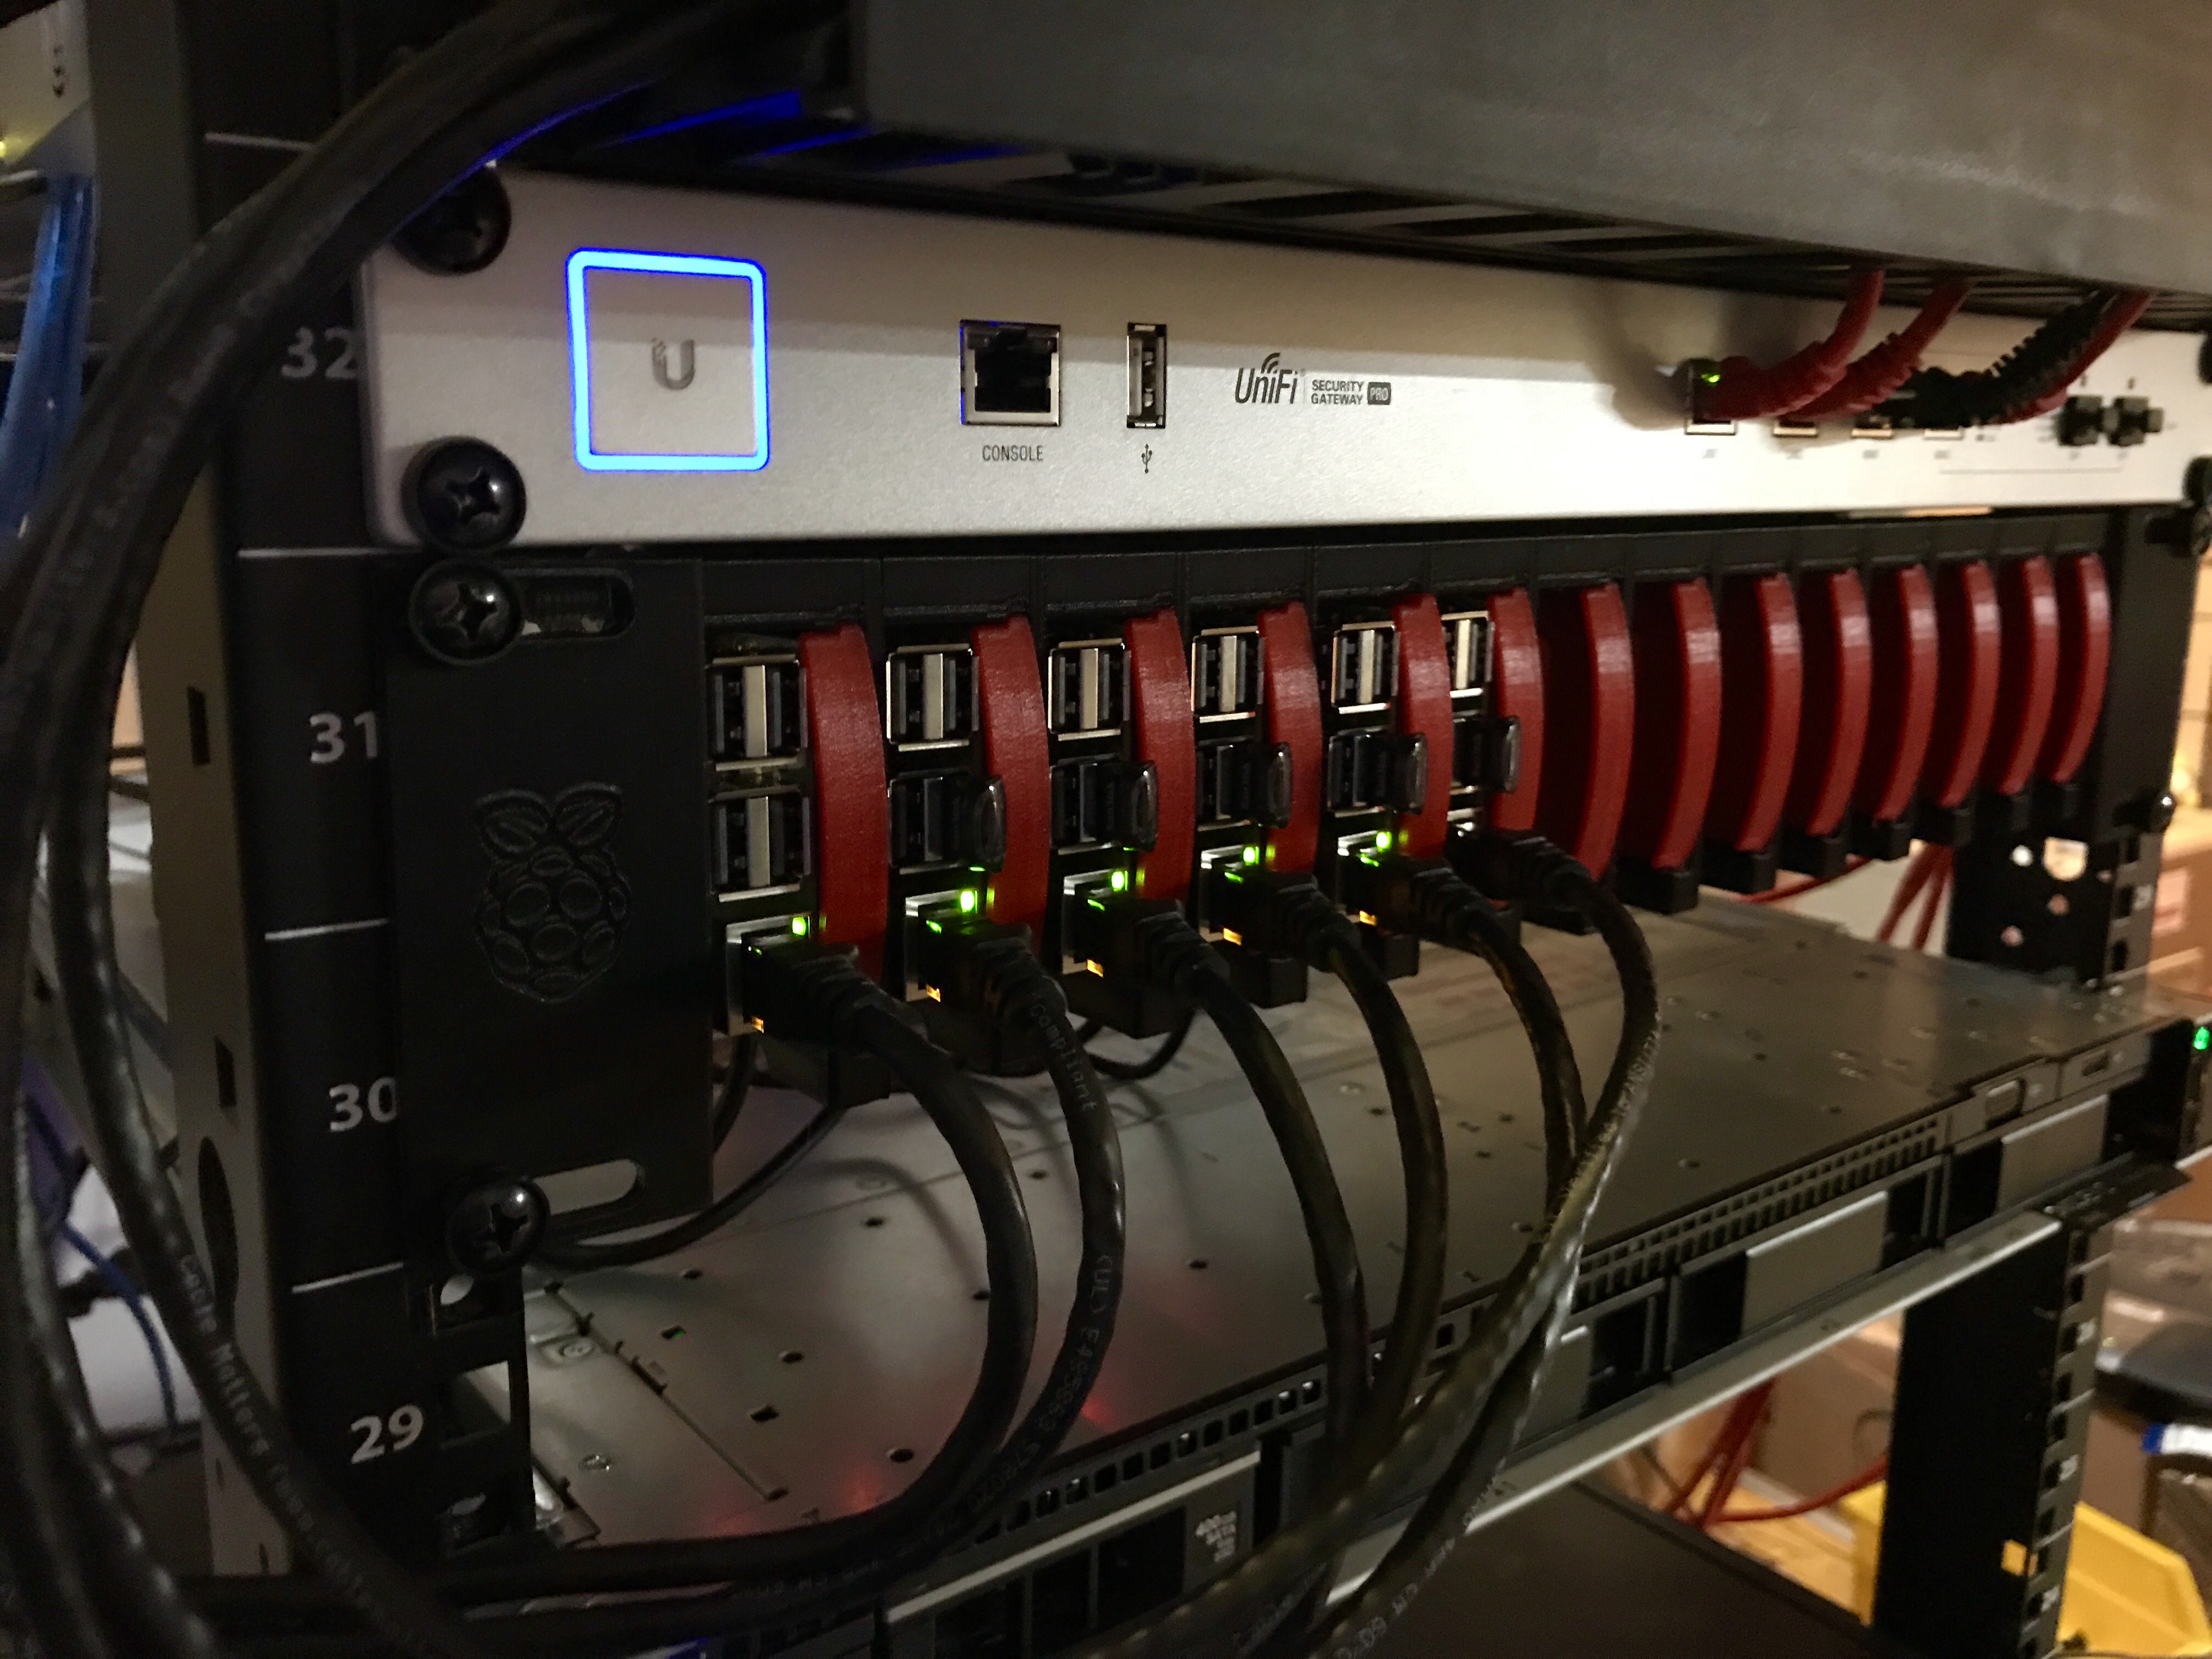\n\nThroughout the testing and validation of Kubernetes on my 6 node 3B cluster I was constantly re-imaging the SD cards. I tested Raspbian and Ubuntu 18 64bit, with various full resets along the way. The process of imaging 6 cards with only 1 SD reader is a bit monotonous, so I set out to find out what options there were for multiple card writing systems. I was very quickly overwhelmed by the $1500+ SD card duplication systems out there and I realized I would have to cobble something together myself.\n\n####Doing the jig\n\nA quick search on Amazon and I found a [USB 3.0 dual SD/Micro SD card reader](http://a.co/d/fkdFMf3), I figured I could get 3 of these and plug them in to a hub to give me the 6 card slots I needed. I was then pleasantly surprised to find the manufacturer of the card readers also had a [4 port USB 3.0 hub](http://a.co/d/bhqes7W) that was the same size! Once I got all the hardware in hand I could see that the hub was almost exactly the same base dimensions as the 3 dual card readers stacked next to each other!\n\n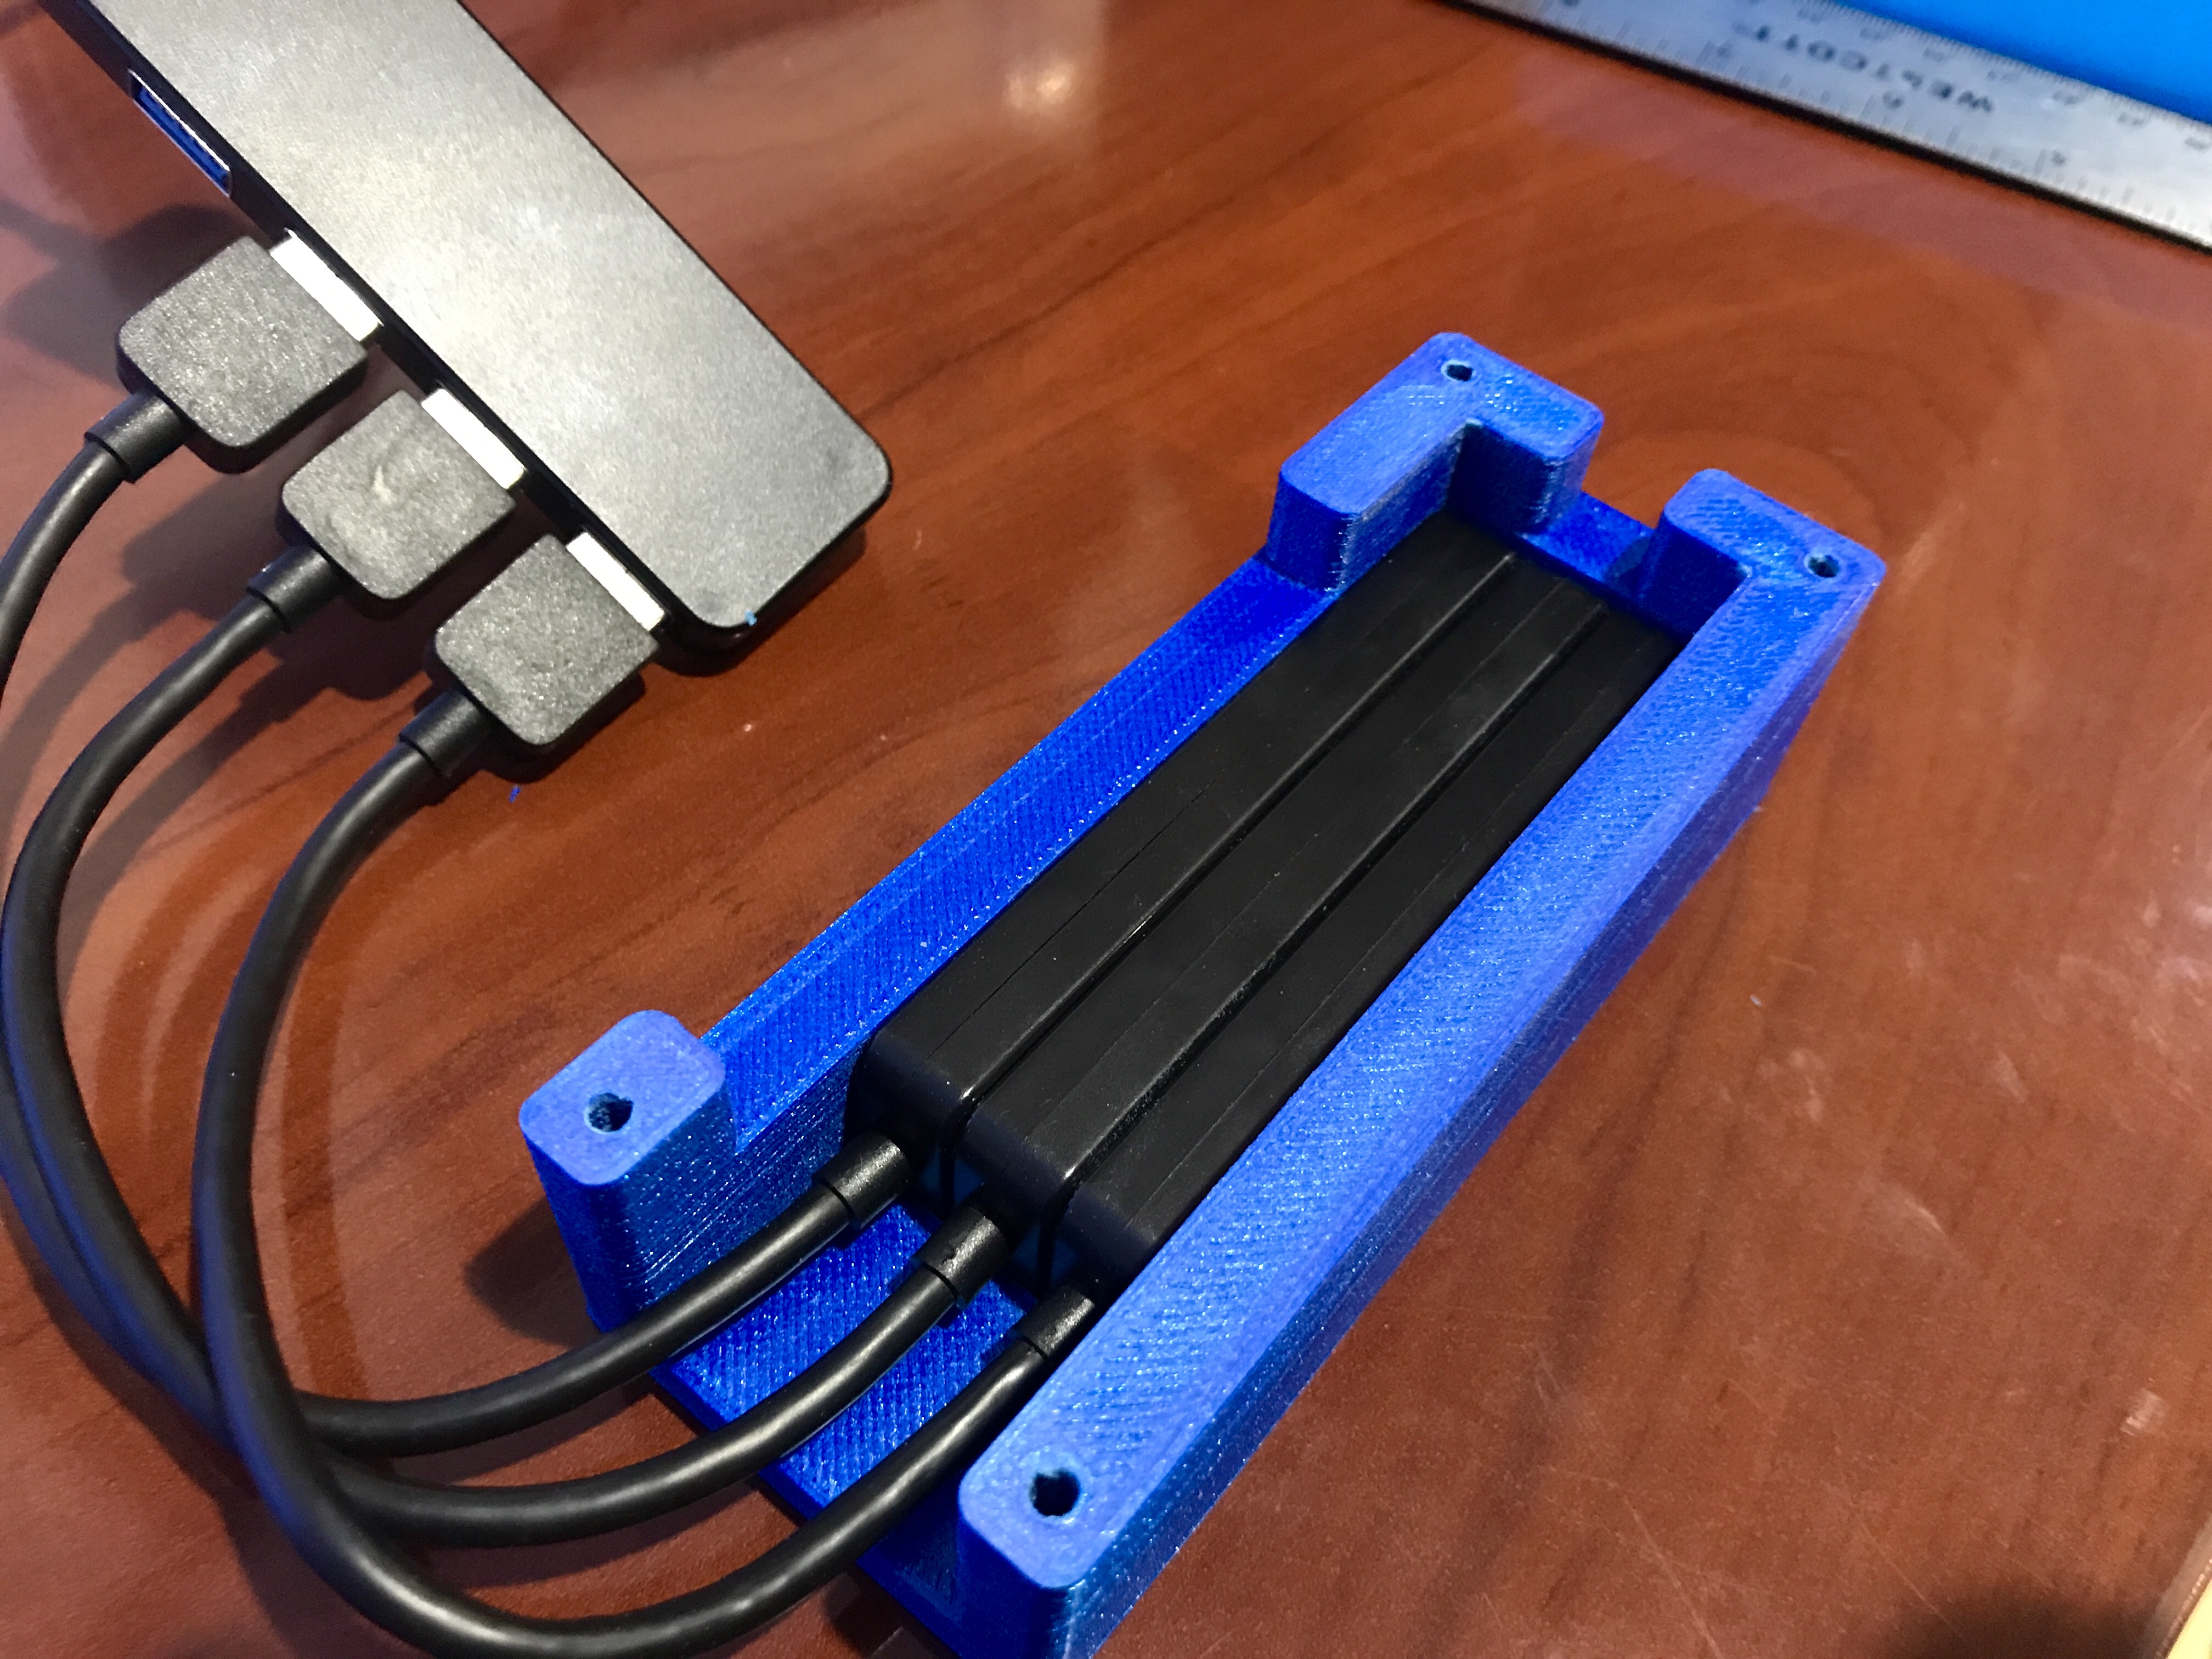\n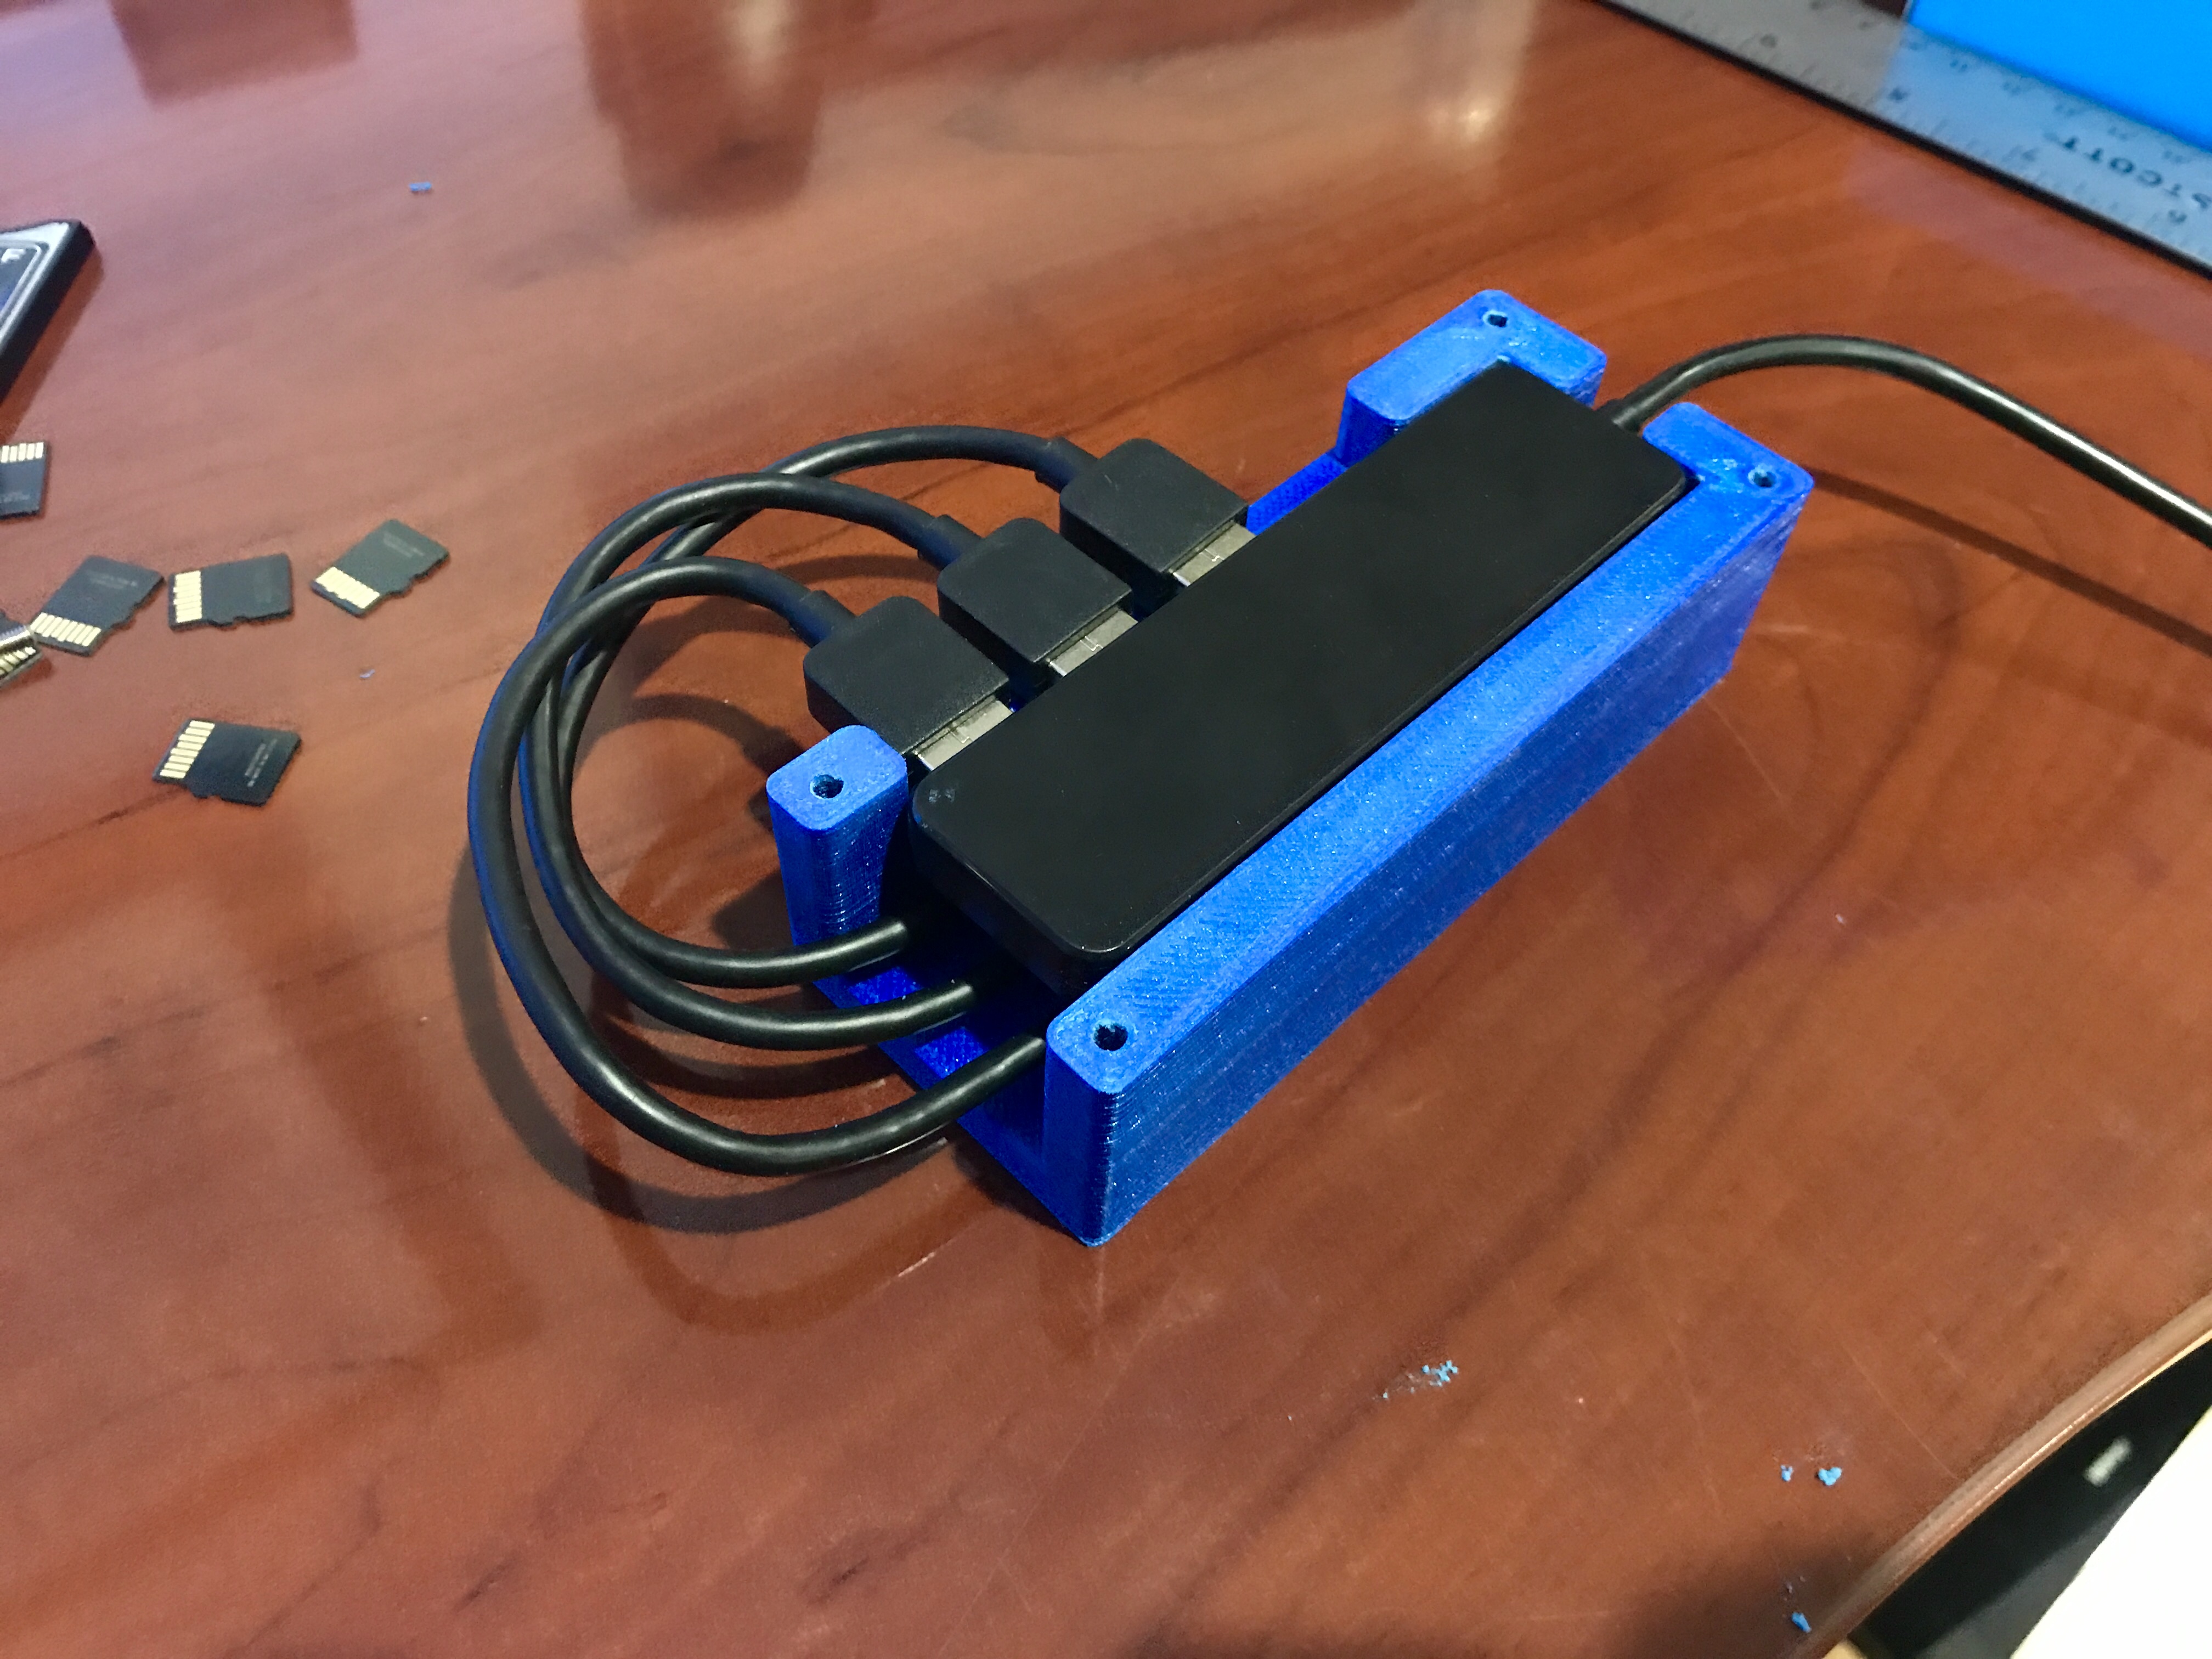\n\nI designed a simple 3D printable enclosure in Fusion360 and then printed it using Proto-Pasta Metallic Blue HTPLA. It is held together using M3 hardware.\n\n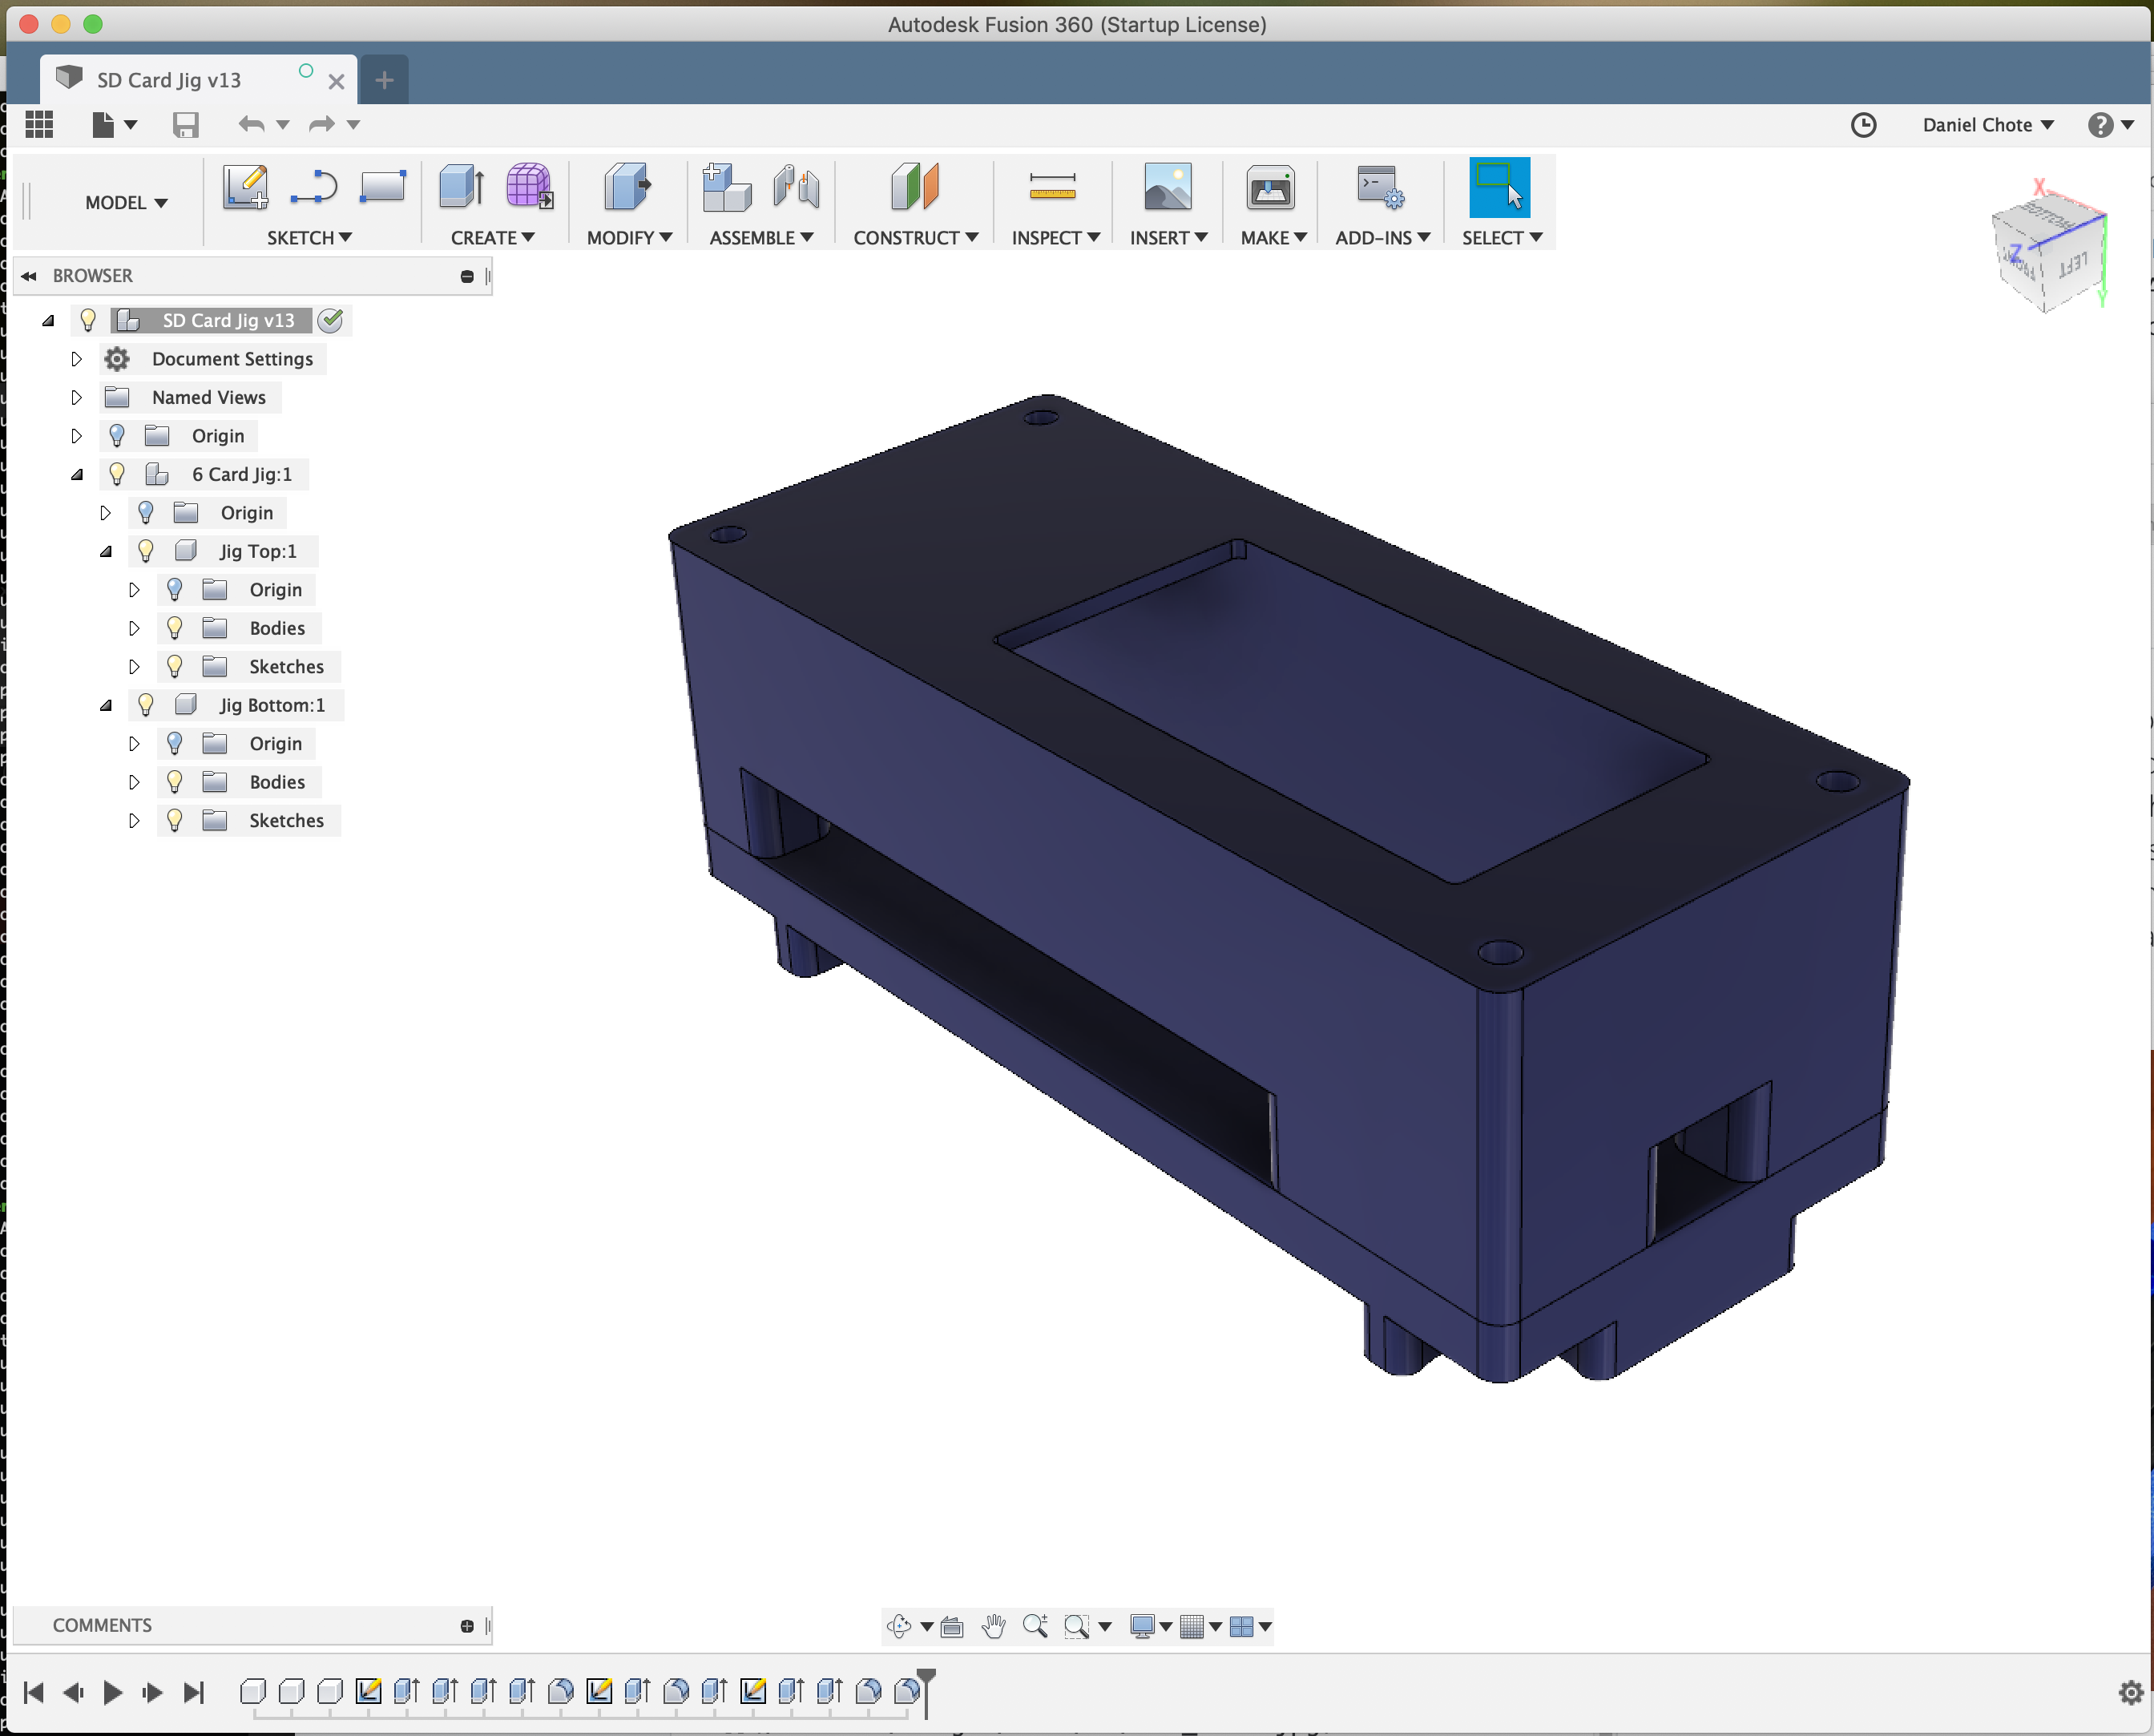\n\nThe finished enclosure keeps everything together, and doesn't look half bad!\n\n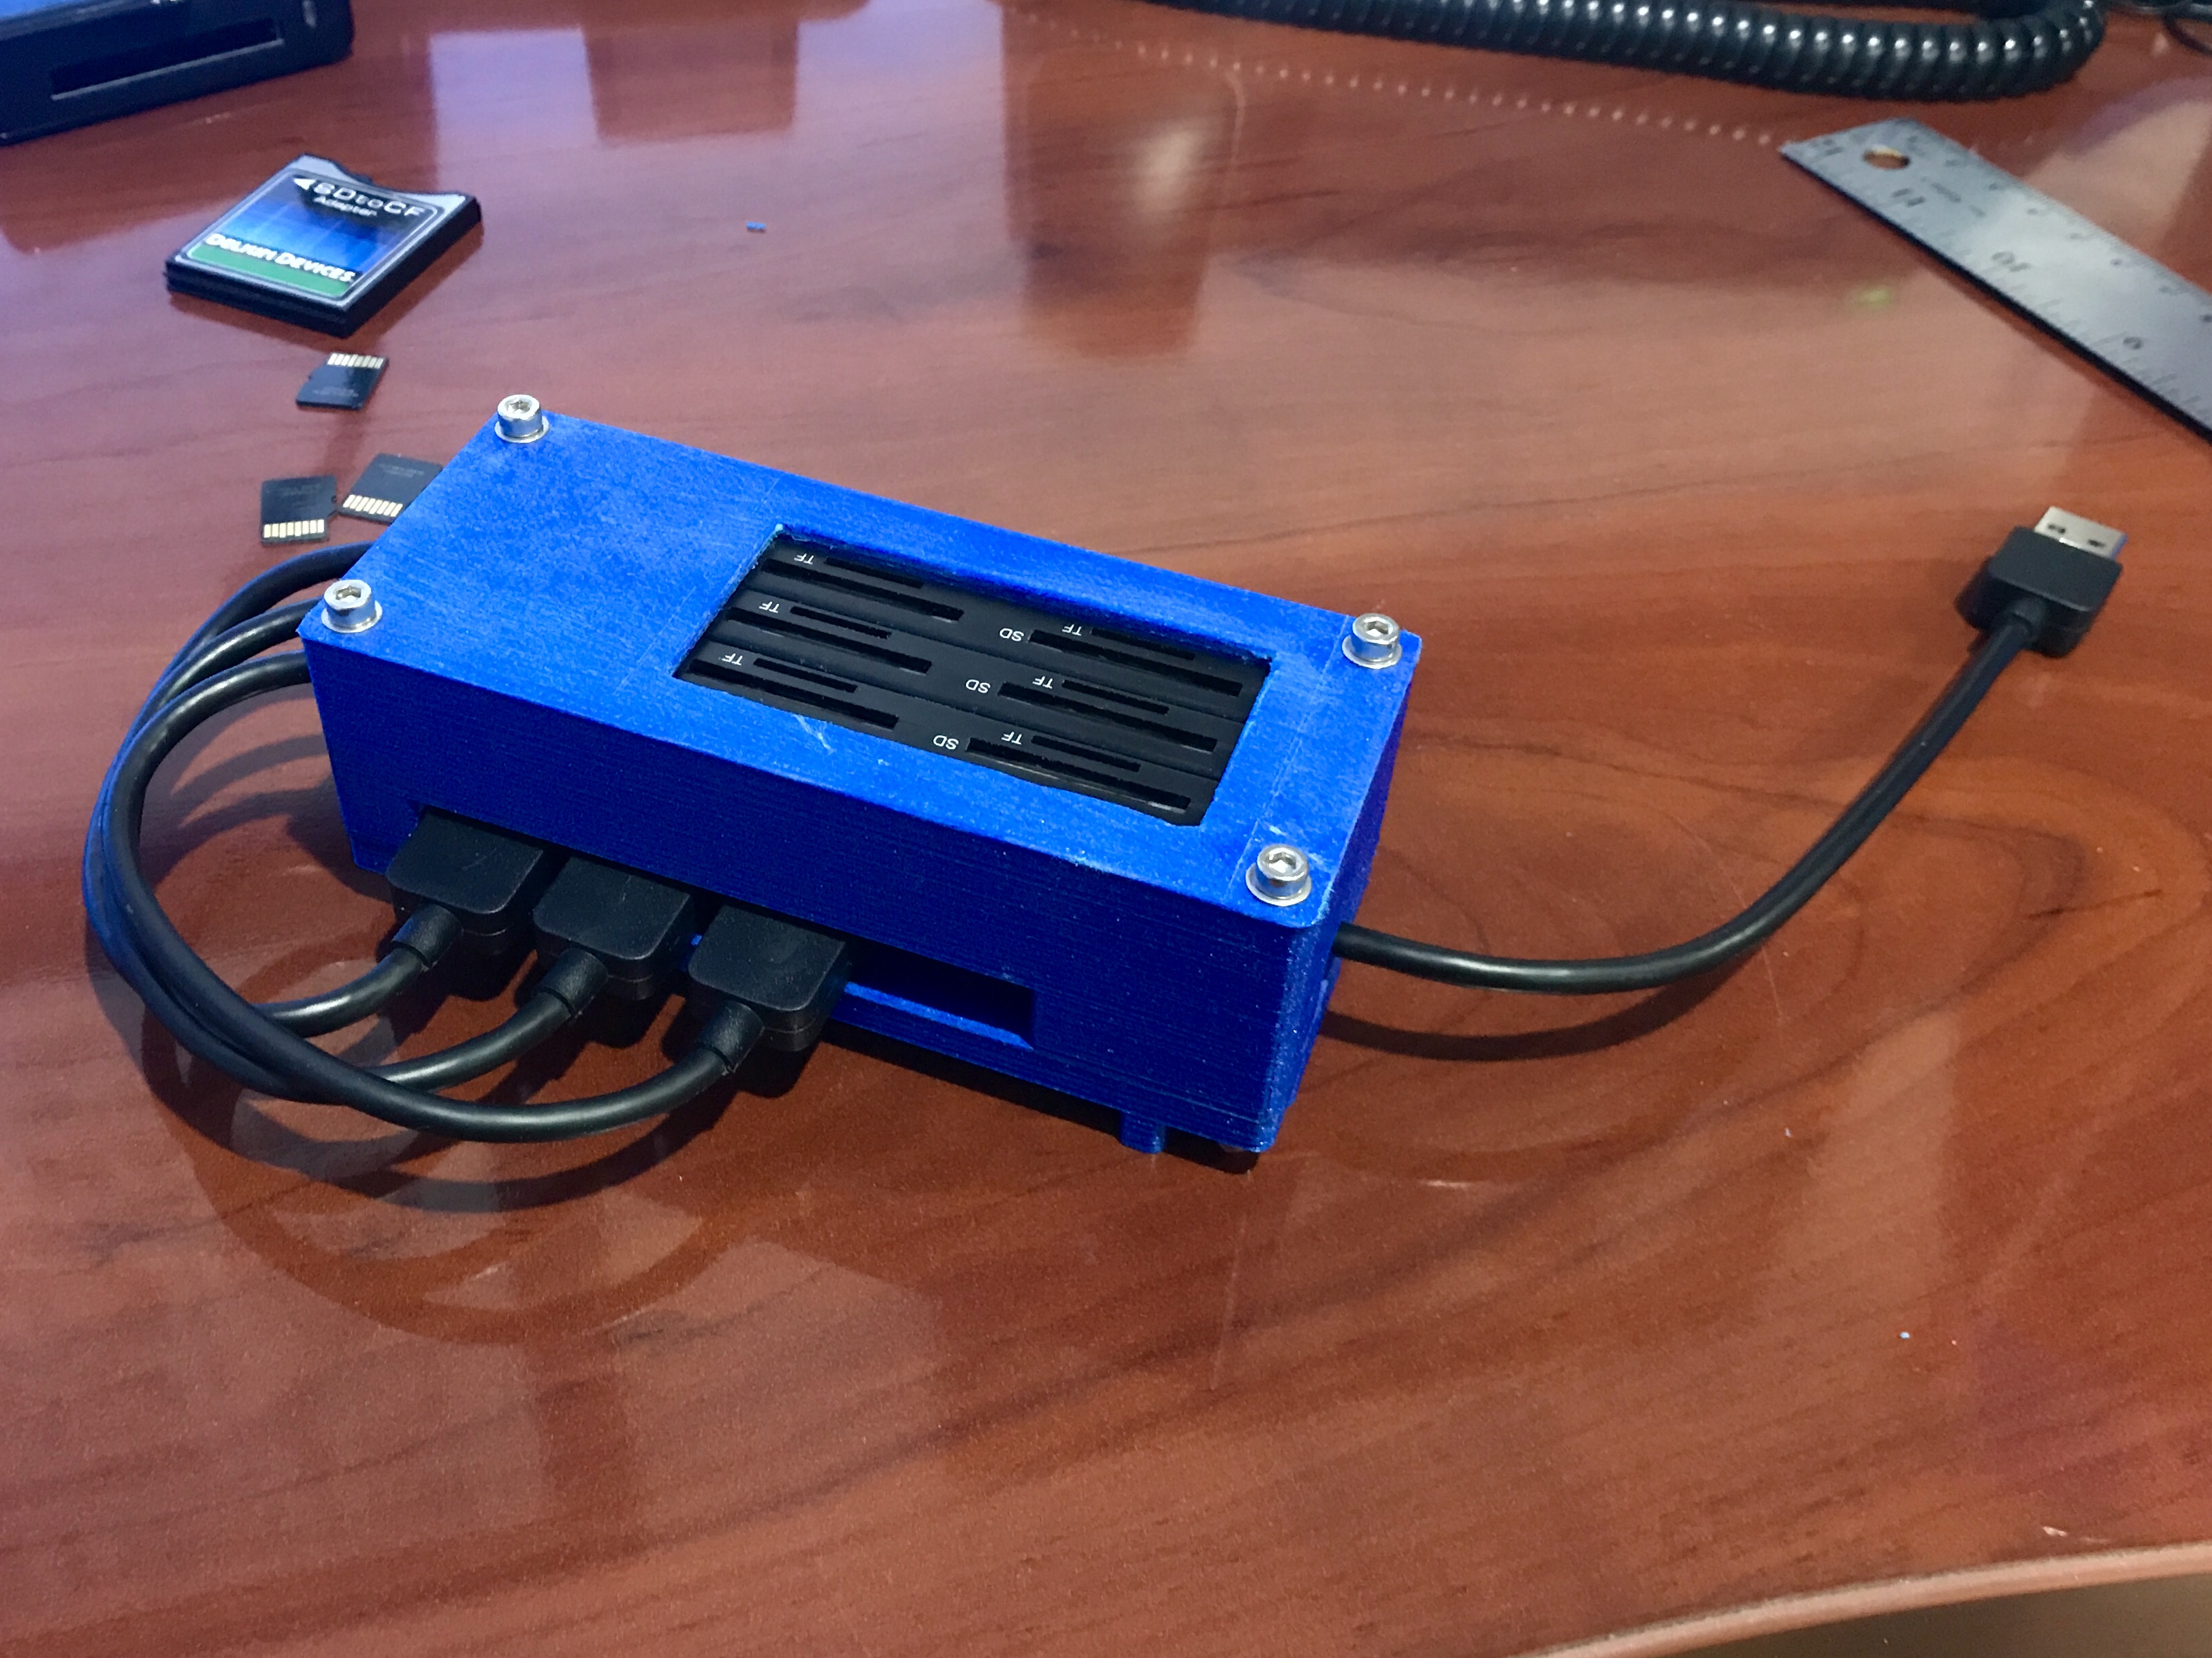\n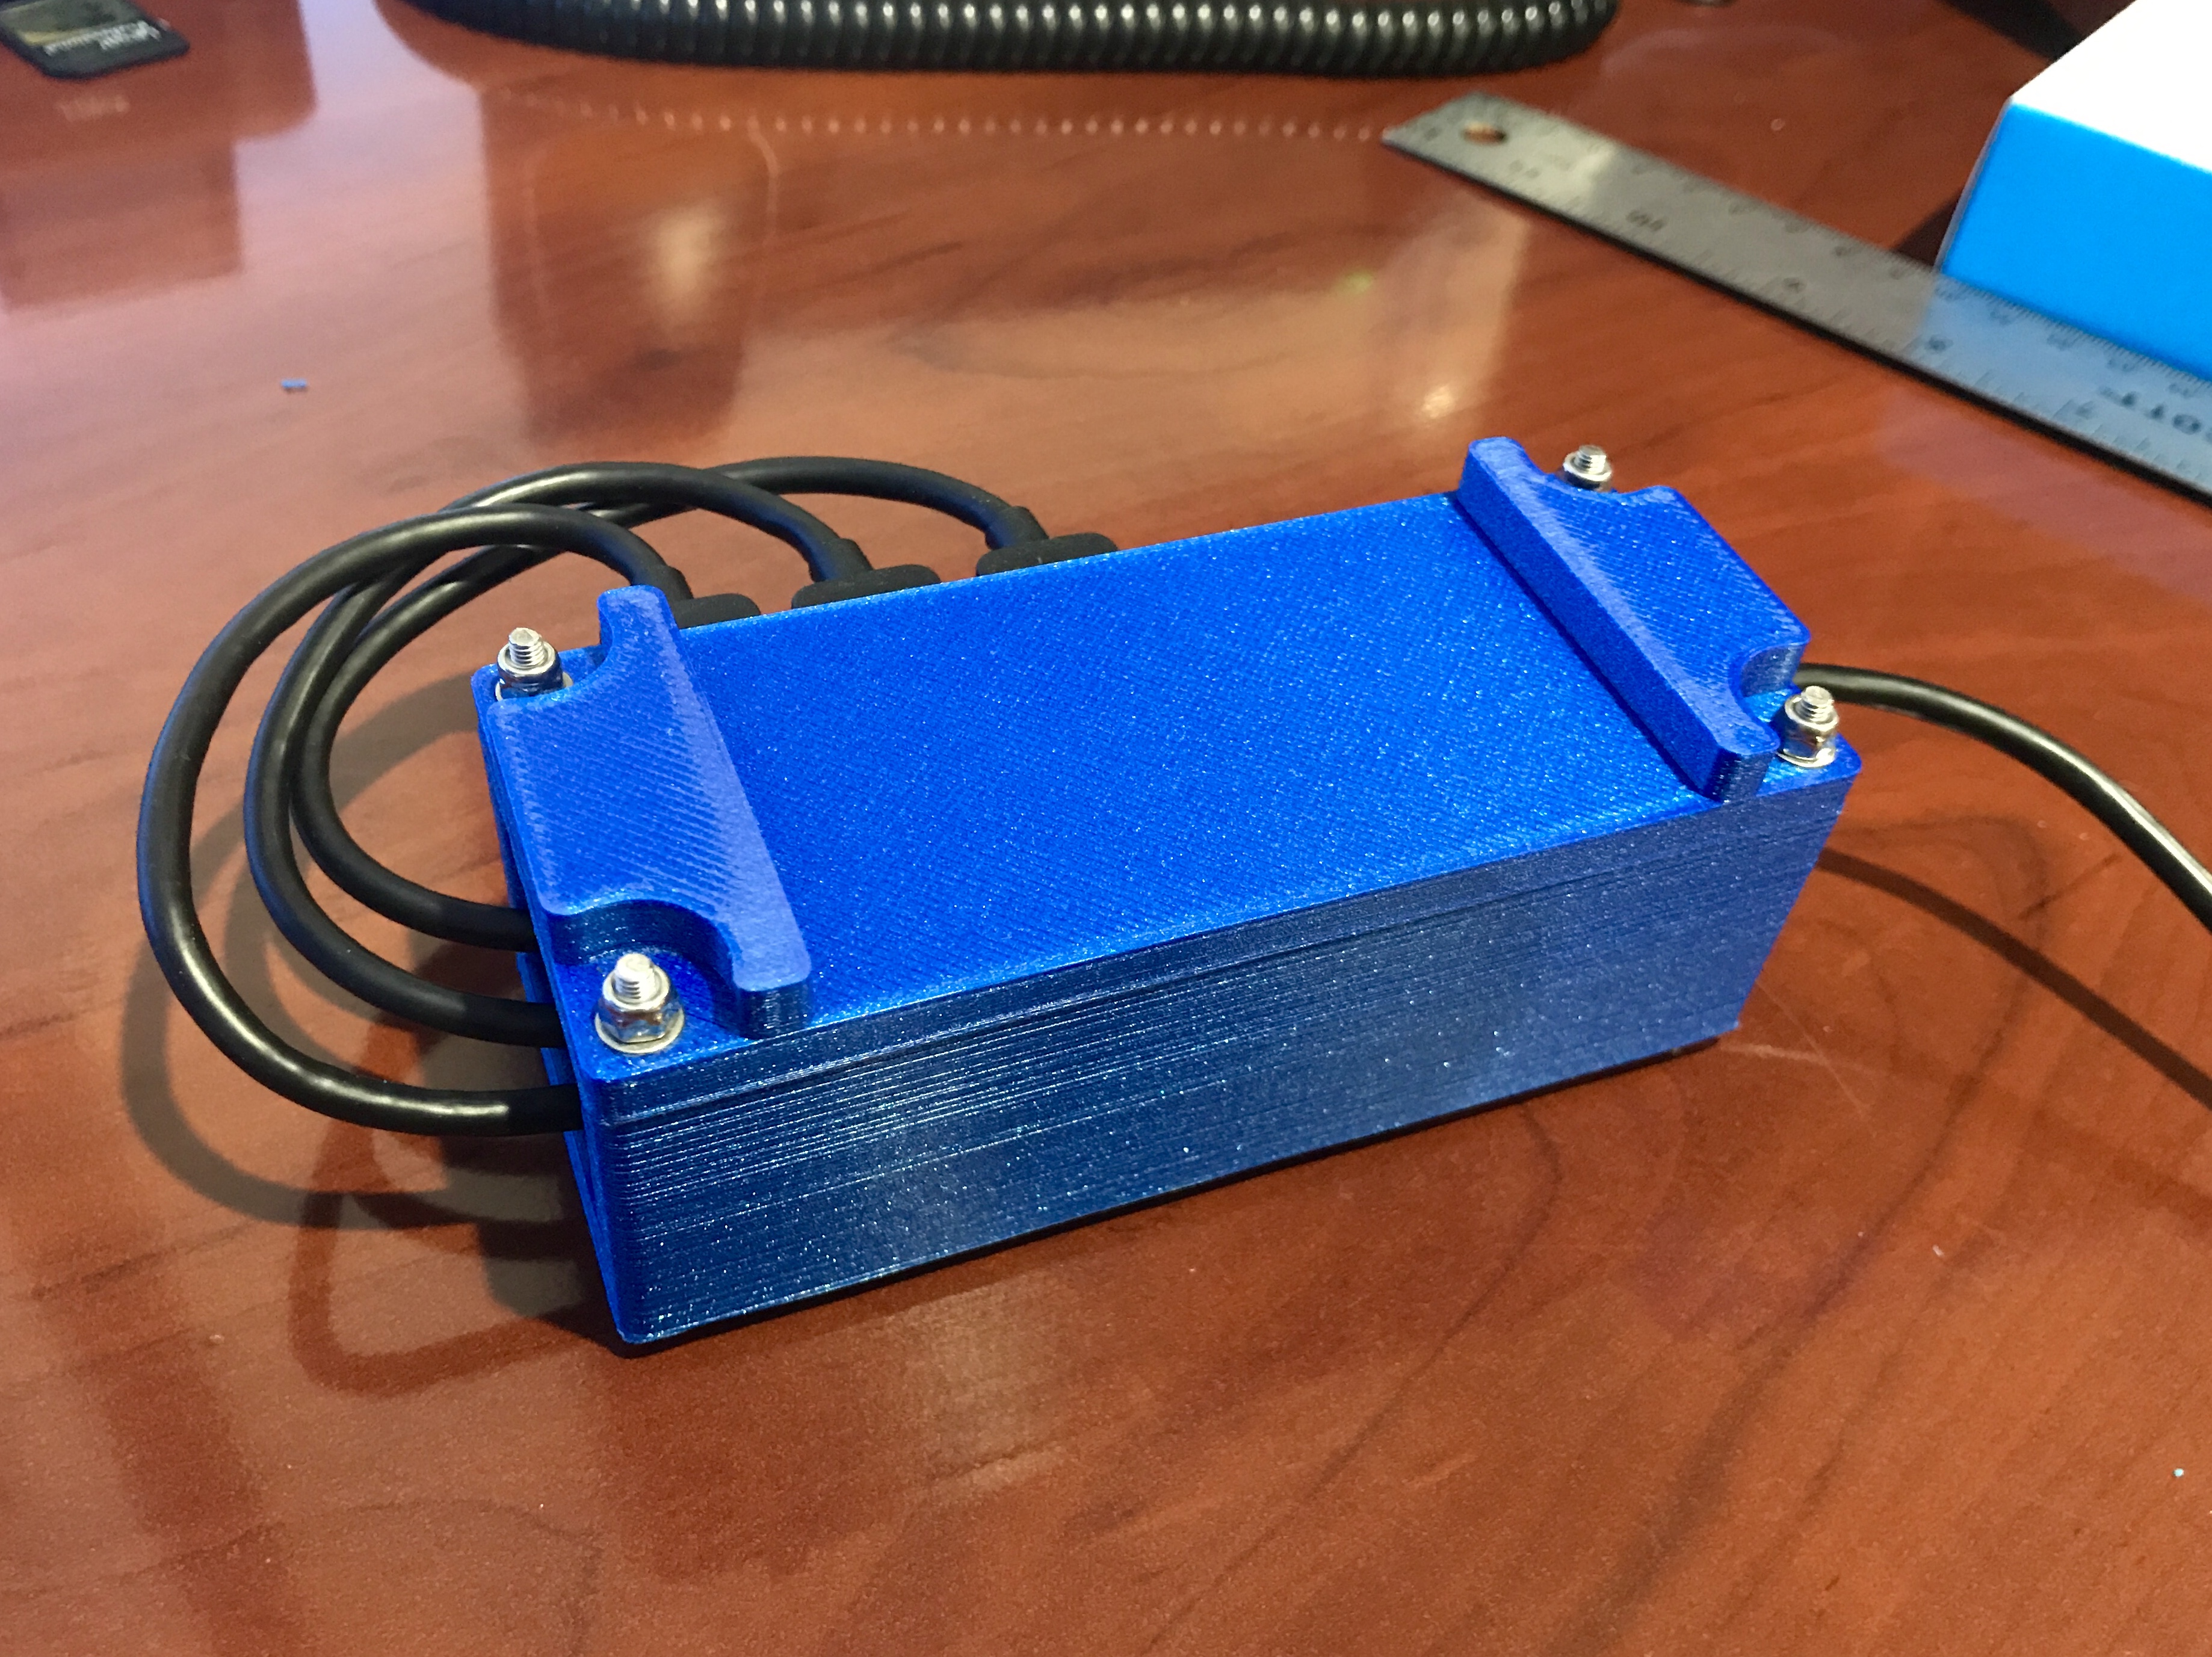\n\nThis setup gives you 6 usable SD/Micro SD card slots with 1 USB 3.0 cable, and a spare USB 3.0 port to daisy-chain more of these jigs if needed! [Etcher](https://www.balena.io/etcher/) can write to all of the SD cards at the same time, cutting the burn time significantly!\n\n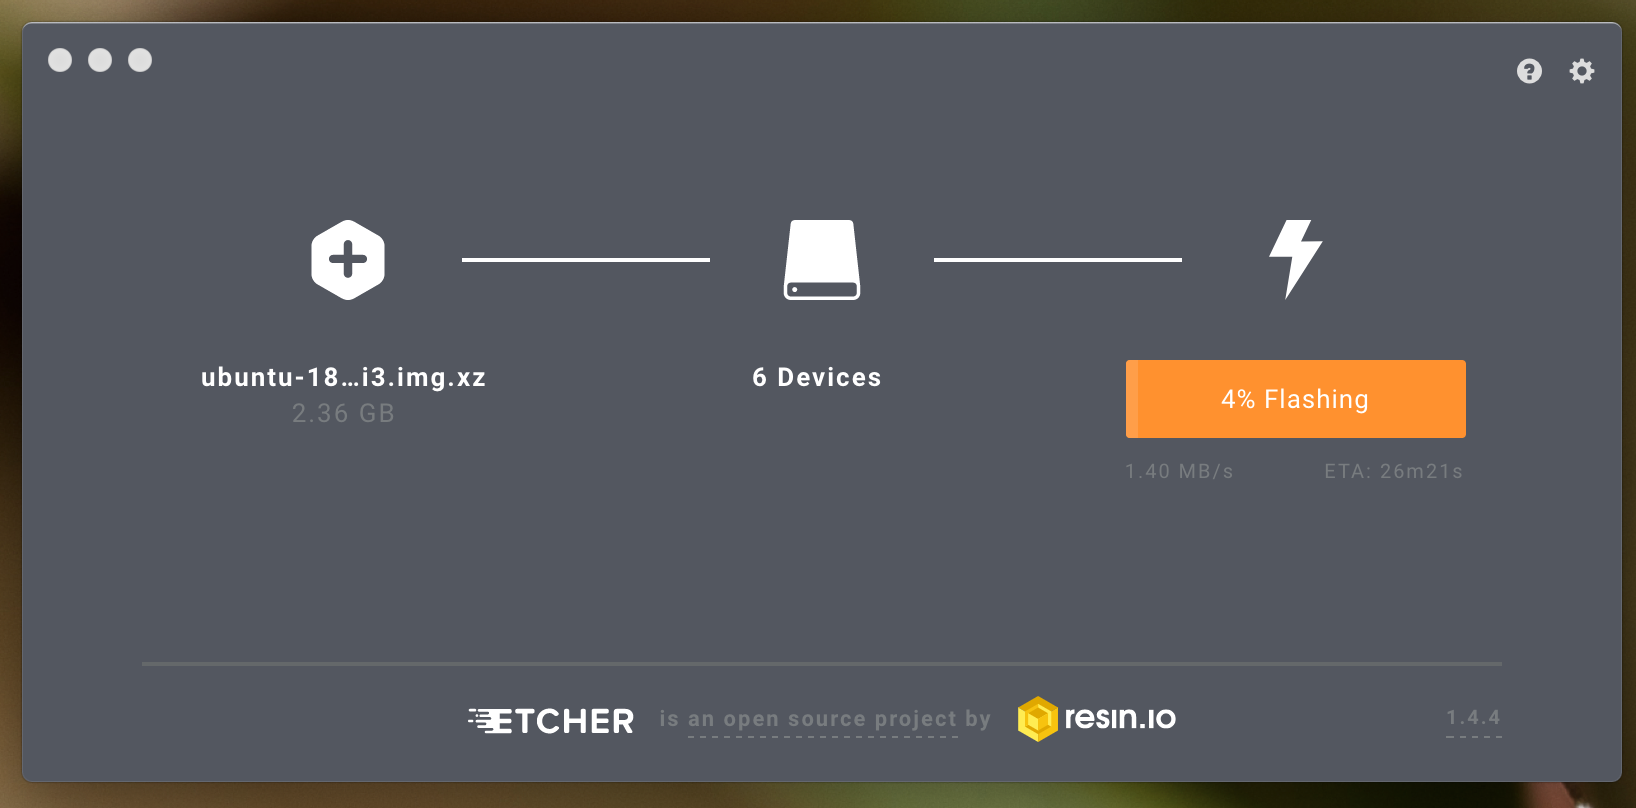\n\nA big thanks to [Balena](https://www.balena.io) (previously Resin.io) for releasing [Etcher](https://www.balena.io/etcher/) to the world, its a fantastic tool that scales well!\n\n####Go make one yourself!\nAll of the STLs and the BOM can be found on Thingiverse: https://www.thingiverse.com/thing:3217069\n\n\n","html":"\u003cp\u003eI\u0026#39;ve been working with Kubernetes a lot lately, I am using Kubernetes at \u003ca href=\"https://filament.com\" rel=\"nofollow\"\u003eFilament\u003c/a\u003e as a way to manage sandbox blockchain environments, so naturally I wanted to try and replicate this environment using Raspberry Pis. This is actually easier said than done, even though the 3B/3B+ has 1GB of RAM, once you start bringing in persistent storage layers it becomes apparent that it just isn\u0026#39;t enough memory to run anything but the simplest of kubernetes containers.\u003c/p\u003e\n\u003cimg src=\"/content/images/2018/11/IMG_6776.jpg\" alt=\"\"\u003e\n\u003cp\u003eThroughout the testing and validation of Kubernetes on my 6 node 3B cluster I was constantly re-imaging the SD cards. I tested Raspbian and Ubuntu 18 64bit, with various full resets along the way. The process of imaging 6 cards with only 1 SD reader is a bit monotonous, so I set out to find out what options there were for multiple card writing systems. I was very quickly overwhelmed by the $1500+ SD card duplication systems out there and I realized I would have to cobble something together myself.\u003c/p\u003e\n\u003ch4\u003eDoing the jig\u003c/h4\u003e\n\u003cp\u003eA quick search on Amazon and I found a \u003ca href=\"http://a.co/d/fkdFMf3\" rel=\"nofollow\"\u003eUSB 3.0 dual SD/Micro SD card reader\u003c/a\u003e, I figured I could get 3 of these and plug them in to a hub to give me the 6 card slots I needed. I was then pleasantly surprised to find the manufacturer of the card readers also had a \u003ca href=\"http://a.co/d/bhqes7W\" rel=\"nofollow\"\u003e4 port USB 3.0 hub\u003c/a\u003e that was the same size! Once I got all the hardware in hand I could see that the hub was almost exactly the same base dimensions as the 3 dual card readers stacked next to each other!\u003c/p\u003e\n\u003cimg src=\"/content/images/2018/11/IMG_6730.jpg\" alt=\"\"\u003e\n\u003cimg src=\"/content/images/2018/11/IMG_6731.jpg\" alt=\"\"\u003e\n\u003cp\u003eI designed a simple 3D printable enclosure in Fusion360 and then printed it using Proto-Pasta Metallic Blue HTPLA. It is held together using M3 hardware.\u003c/p\u003e\n\u003cimg src=\"/content/images/2018/11/Screen-Shot-2018-11-19-at-12-50-13-PM.png\" alt=\"\"\u003e\n\u003cp\u003eThe finished enclosure keeps everything together, and doesn\u0026#39;t look half bad!\u003c/p\u003e\n\u003cimg src=\"/content/images/2018/11/IMG_6733.jpg\" alt=\"\"\u003e\n\u003cimg src=\"/content/images/2018/11/IMG_6735.jpg\" alt=\"\"\u003e\n\u003cp\u003eThis setup gives you 6 usable SD/Micro SD card slots with 1 USB 3.0 cable, and a spare USB 3.0 port to daisy-chain more of these jigs if needed! \u003ca href=\"https://www.balena.io/etcher/\" rel=\"nofollow\"\u003eEtcher\u003c/a\u003e can write to all of the SD cards at the same time, cutting the burn time significantly!\u003c/p\u003e\n\u003cimg src=\"/content/images/2018/11/Screen-Shot-2018-11-13-at-7-58-50-AM.png\" alt=\"\"\u003e\n\u003cp\u003eA big thanks to \u003ca href=\"https://www.balena.io\" rel=\"nofollow\"\u003eBalena\u003c/a\u003e (previously Resin.io) for releasing \u003ca href=\"https://www.balena.io/etcher/\" rel=\"nofollow\"\u003eEtcher\u003c/a\u003e to the world, its a fantastic tool that scales well!\u003c/p\u003e\n\u003ch4\u003eGo make one yourself!\u003c/h4\u003e\n\u003cp\u003eAll of the STLs and the BOM can be found on Thingiverse: \u003ca href=\"https://www.thingiverse.com/thing:3217069\" rel=\"nofollow\"\u003ehttps://www.thingiverse.com/thing:3217069\u003c/a\u003e\u003c/p\u003e\n","excerpt":"","metaTitle":"","metaDescription":"","status":"published","featured":false,"publishedAt":"2018-11-19T17:53:22Z","authorId":"190160de54f2192bd5b8734ec8808086","authorName":"Daniel Chote","authorSlug":"daniel","heroMediaId":"453a5a37a265940047559741a496164e","projectId":"","tags":[{"id":"b529314e428273696b02c474dcf56132","name":"Raspberry Pi","slug":"raspberry-pi"},{"id":"1e4c1c80a23c5c7fa3f6f43985fffb50","name":"Kubernetes","slug":"kubernetes"},{"id":"41dfeb58d853ede0e7f6fb6f9e24536c","name":"Etcher","slug":"etcher"},{"id":"e58b4788e99c9f53befd1e47b8073250","name":"3D Printing","slug":"3d-printing"}],"createdAt":"2026-10-18T13:16:27Z","updatedAt":"2026-10-18T13:16:27Z"},{"id":"7a23b4fc9f63f7327ef52913289d4327","siteId":"projectable","slug":"sim-racing-motion-rig-v2-updates","title":"Sim racing motion rig v2 updates","markdown":"With the rekindled interest in Dirt Rally that my [Car-cade](http://projectable.me/my-dirt-rally-tabletop-car-cade-game/) has given me I had a bit of a yearning to get Dirt Rally working nicely in VR on the motion rig. You can read more about my motion rig here: http://projectable.me/my-sim-racing-motion-rig-version-2/\n\n[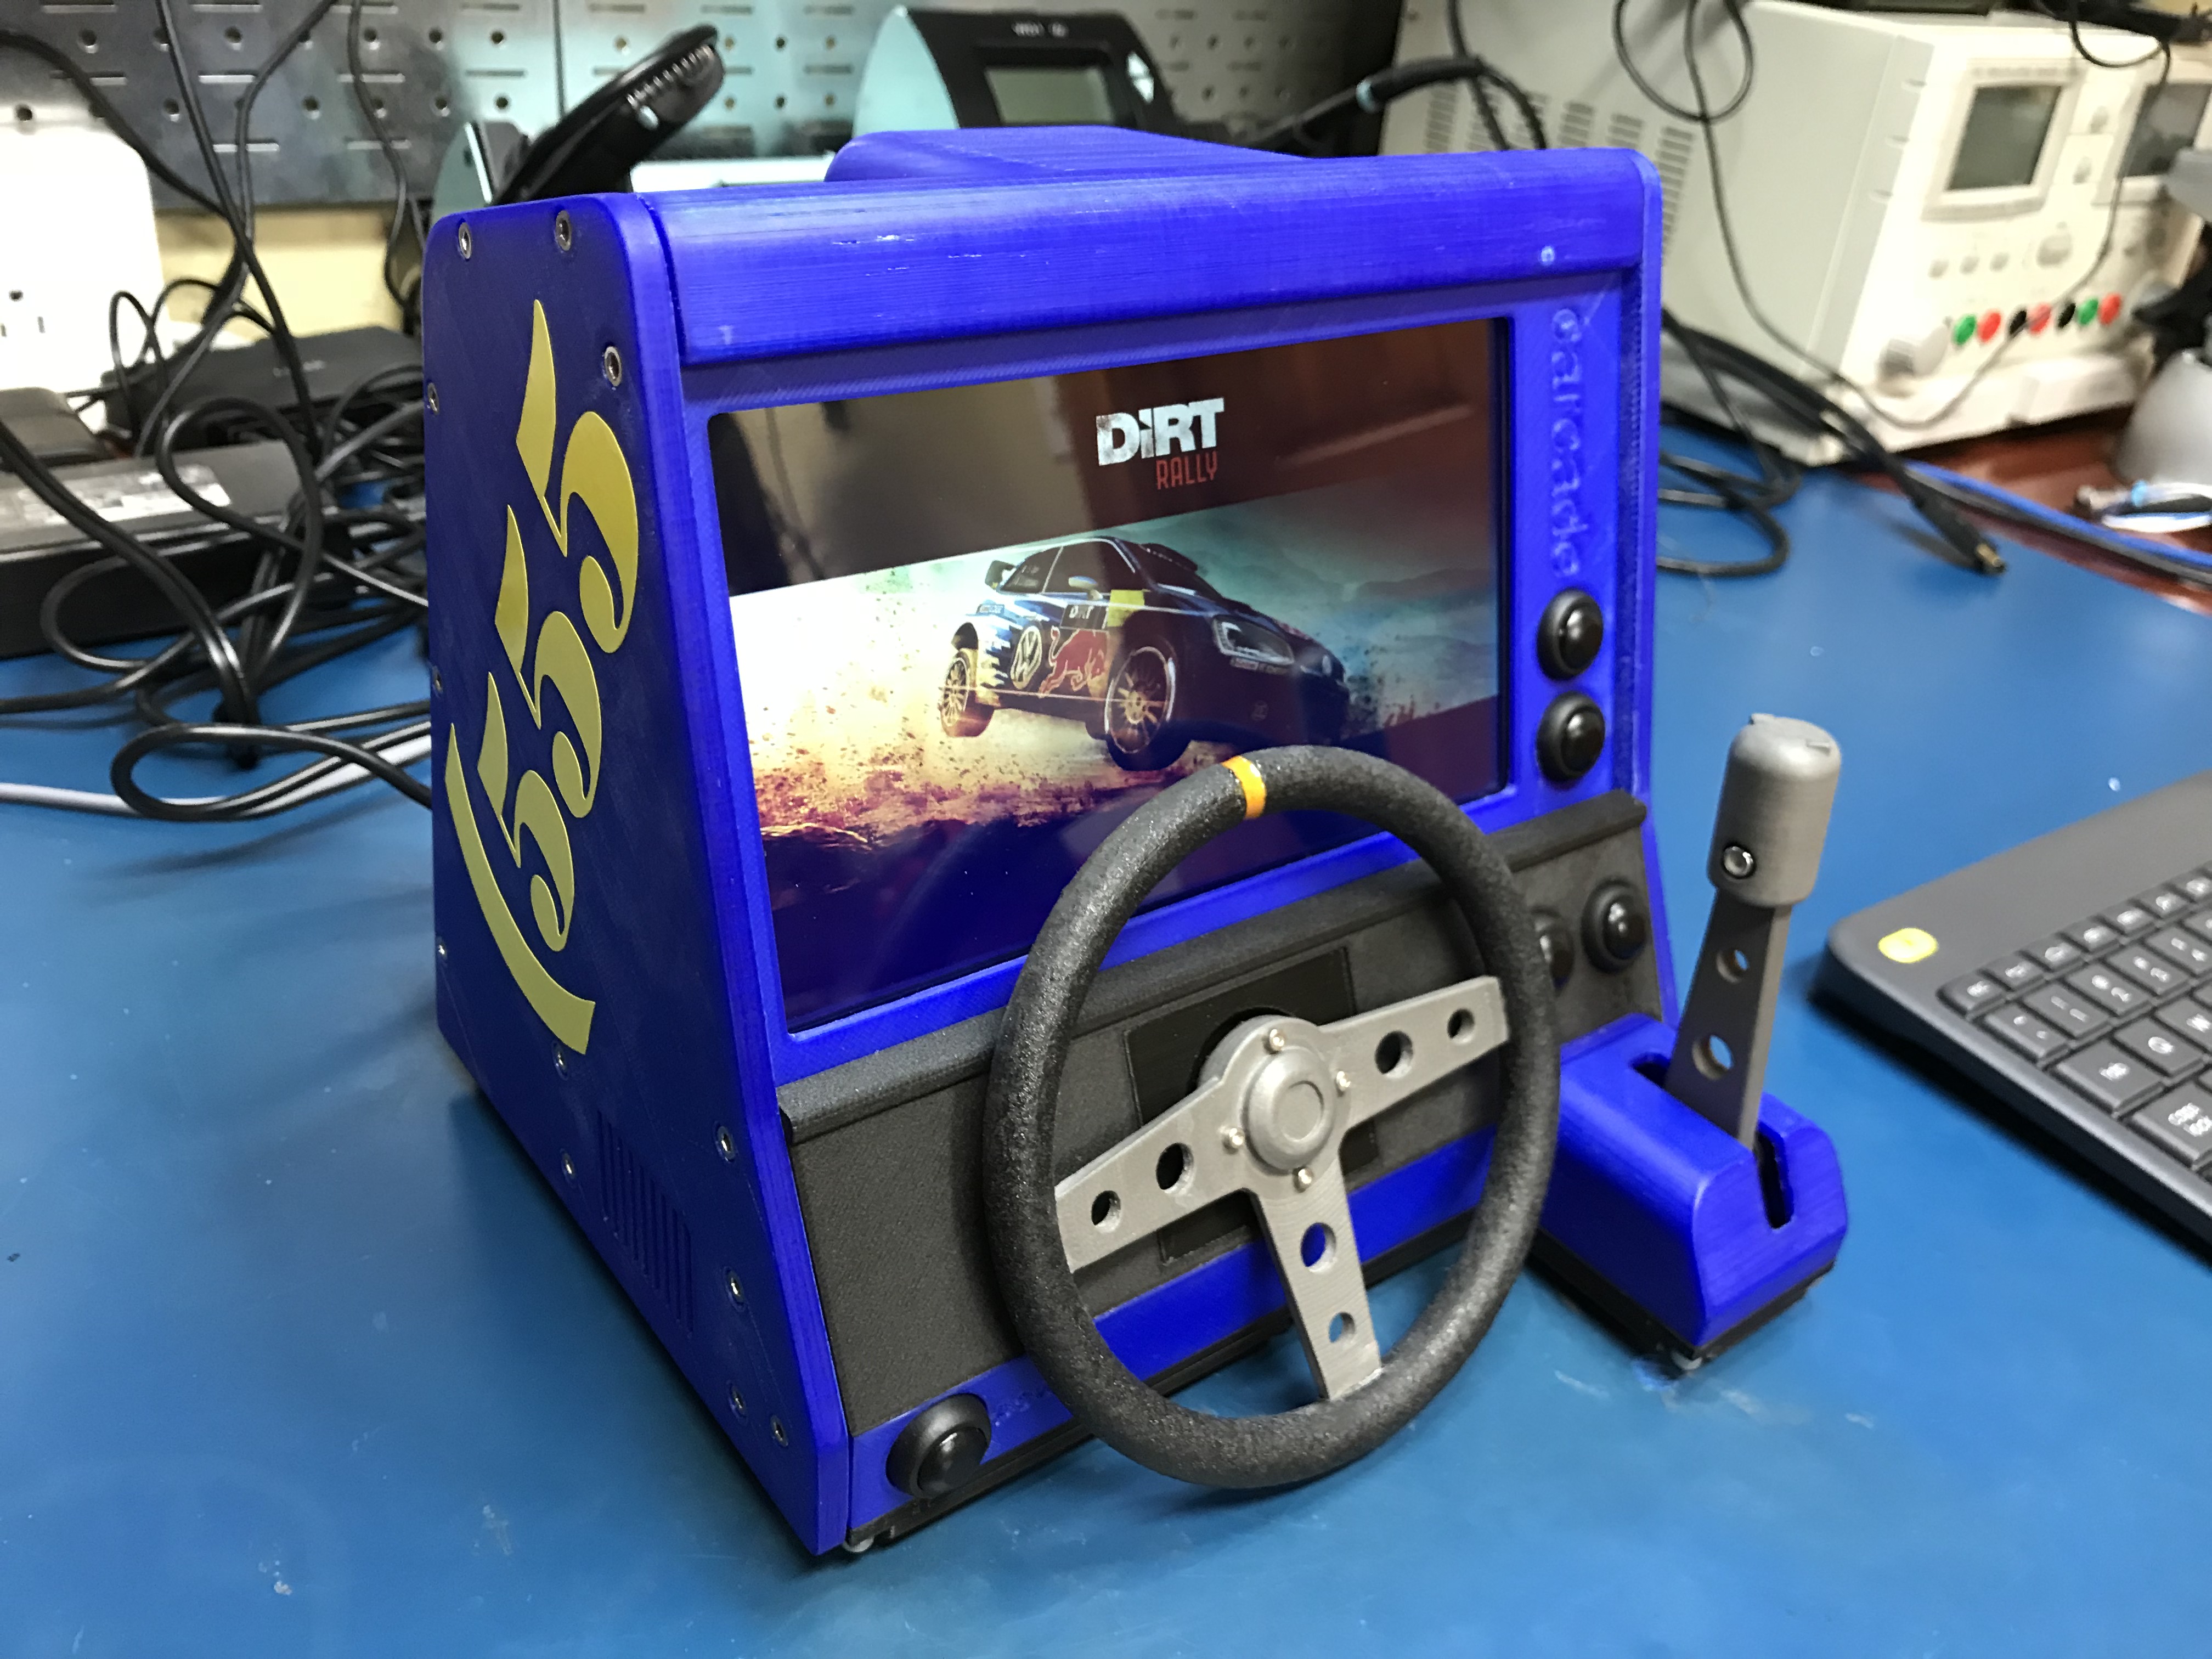](http://projectable.me/my-dirt-rally-tabletop-car-cade-game/)\n\n####The problems\nThe issue I had was 2 fold: #1 the motion was too violent, and #2 even with a GTX1080Ti the framerate was really inconsistent, leading to really bad motion sickness. I had put a small amount of time in to trying to figure it out, but in the end I just gave up due to feeling quite ill.\n\n\n####The Fixes\nI tackled the motion aspect first, it took some motion profile tuning inside SimXperience Sim Commander, mainly smoothing for the device and a smoothing filter on acceleration/braking/cornering g-forces. With the heavily smoothed profile things were less back-breaking.\n\nSecondly I dived in to the graphics quality, testing how each change \"felt\" and eventually ending up with a profile that was mostly medium and low settings. The only things left on high were track and car detail. Its a bit of a shame to end up with such low settings on such a high end graphics card, but thats what I ended up with after \"gut checking\" them.\n\nAfter testing and doing a few runs I was quite happy that I no longer wanted to loose my lunch. It shows just how important high FPS without any stutter is to avoid motion sickness in VR.\n\n####Some tweaking\nDuring all the testing I found that the actuator bar was hitting the back of the seat, meaning there was a LOT of flex and disconnect between the seat and the seat platform. I quickly bent up a bracket to fix this. The seat had an M8 bolt at the top that I used to mount back to the top of the seat platform. This extra rigidity helps a LOT! It's not pretty, but it works. I had to use a rubber bushing between the bracket and the seat, as without it there was a lot of actuator noise that was resinating in the seat itself.\n\n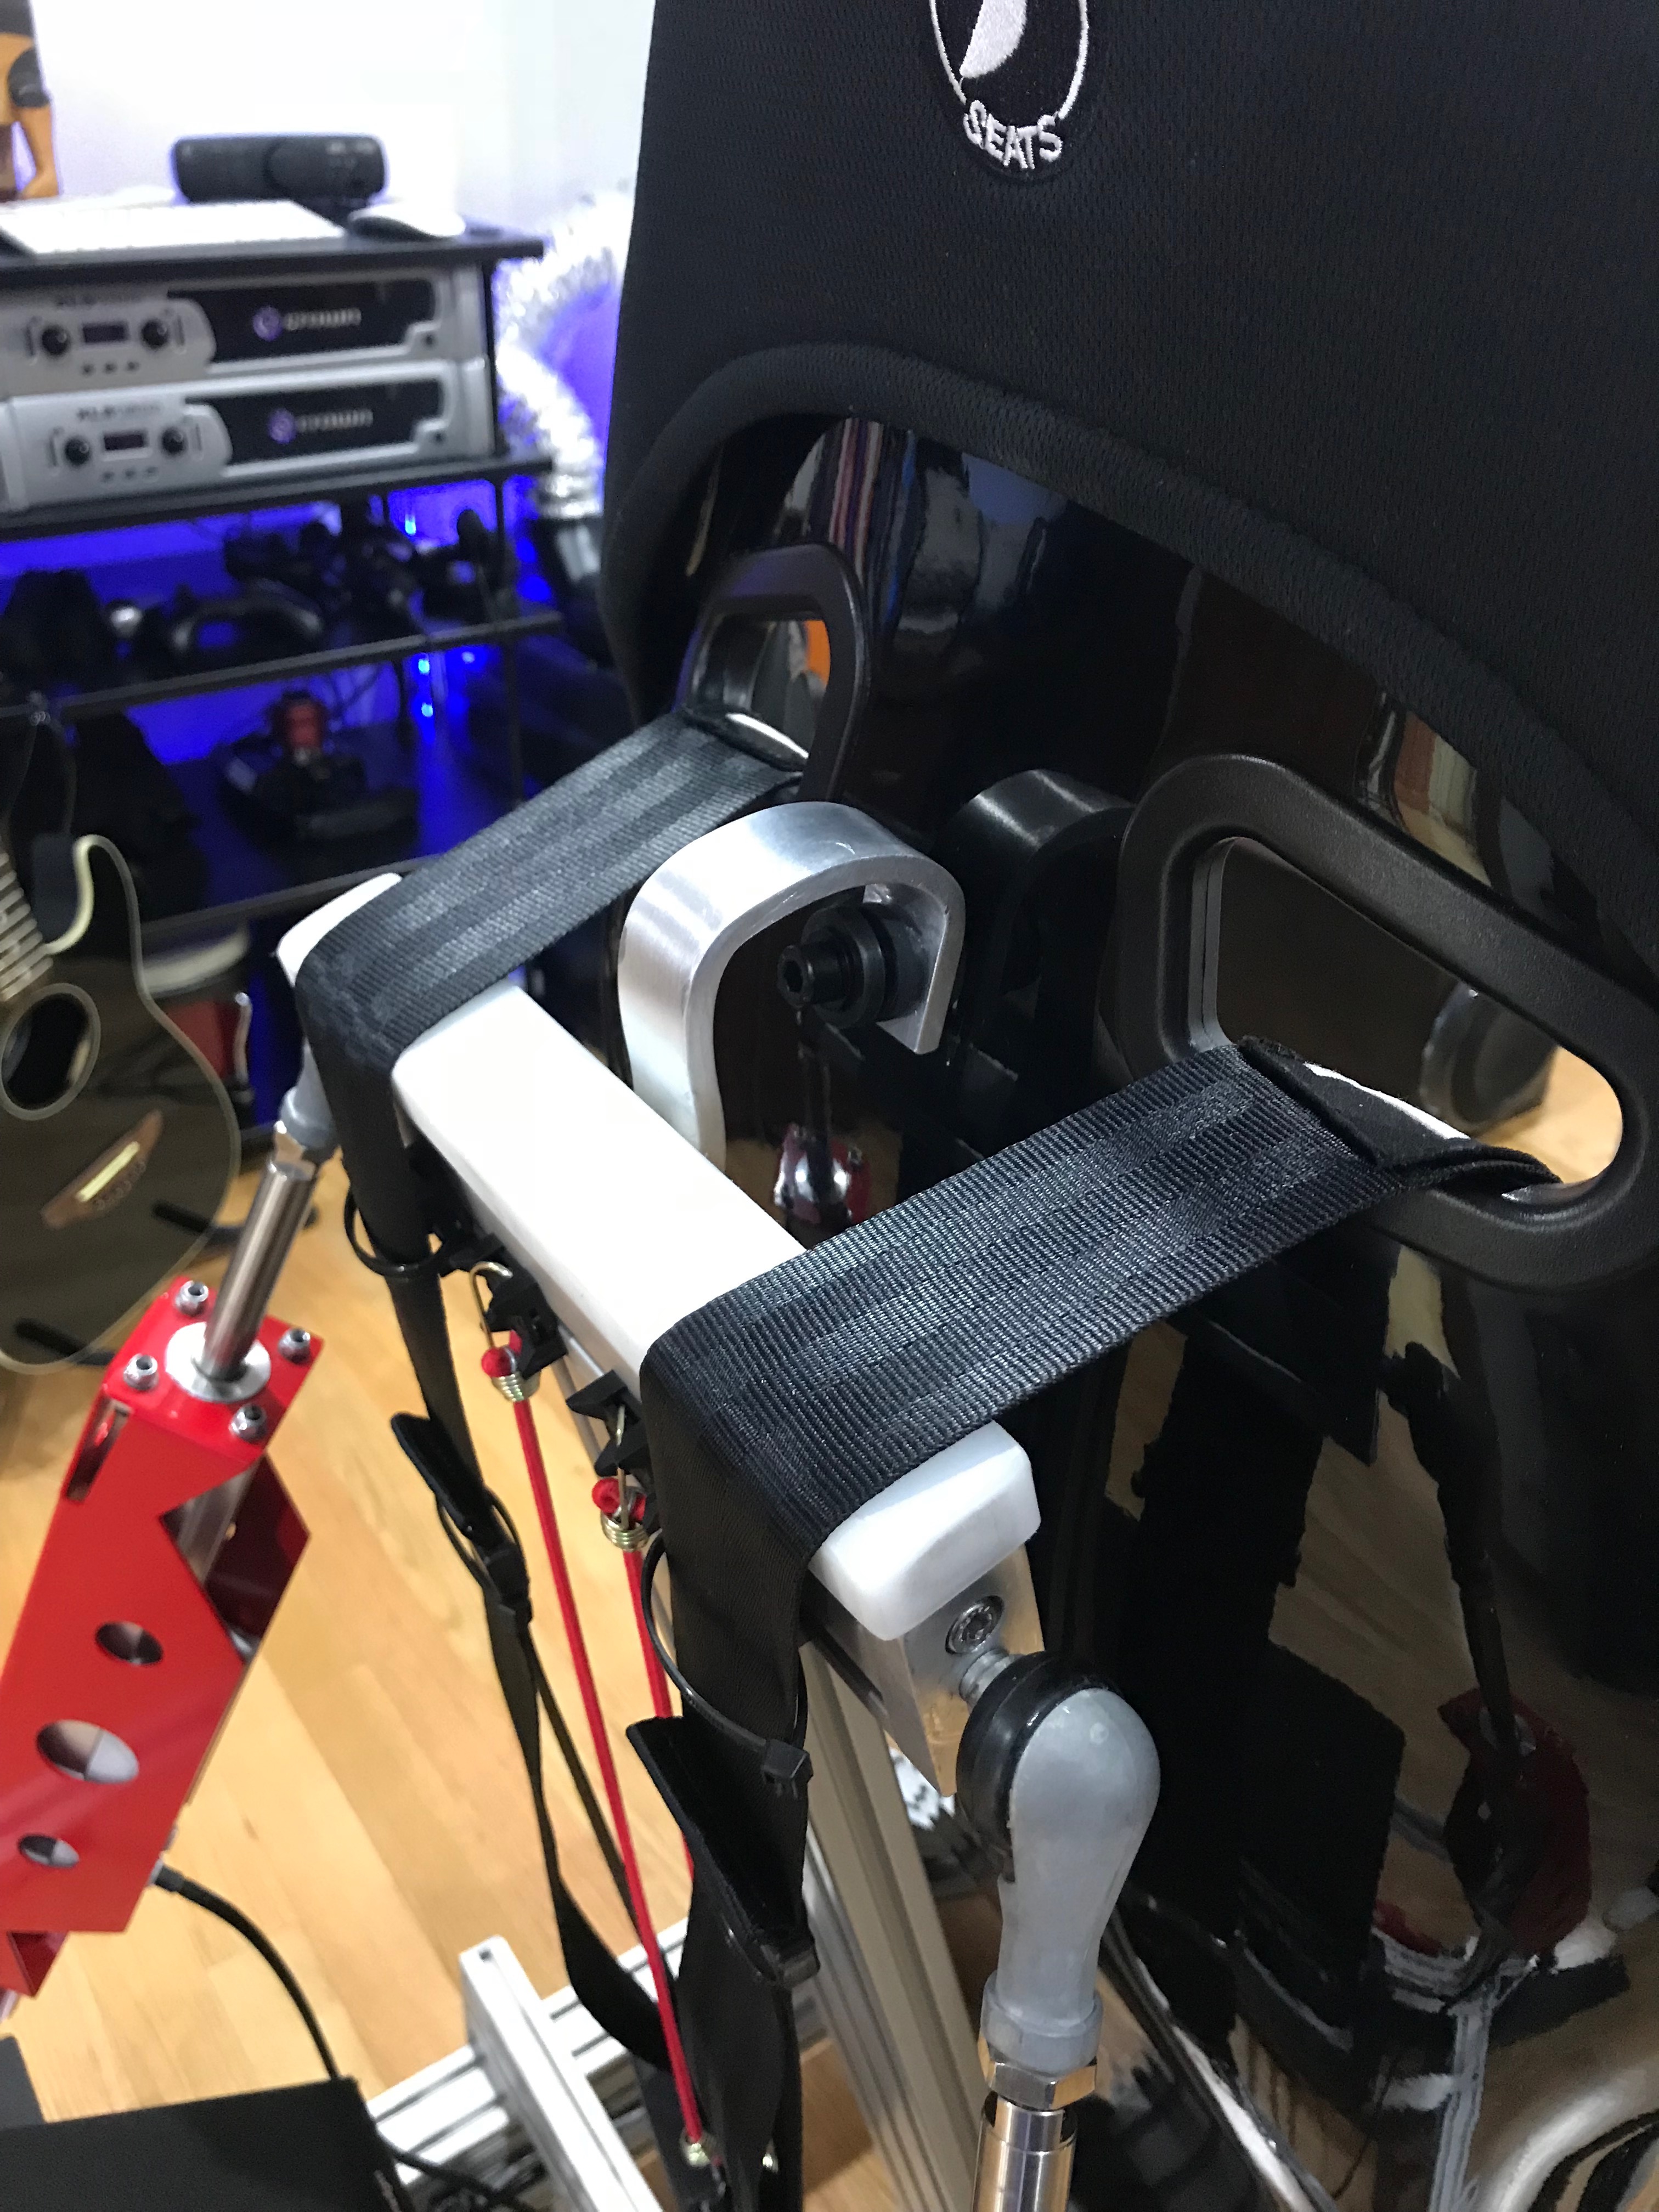\n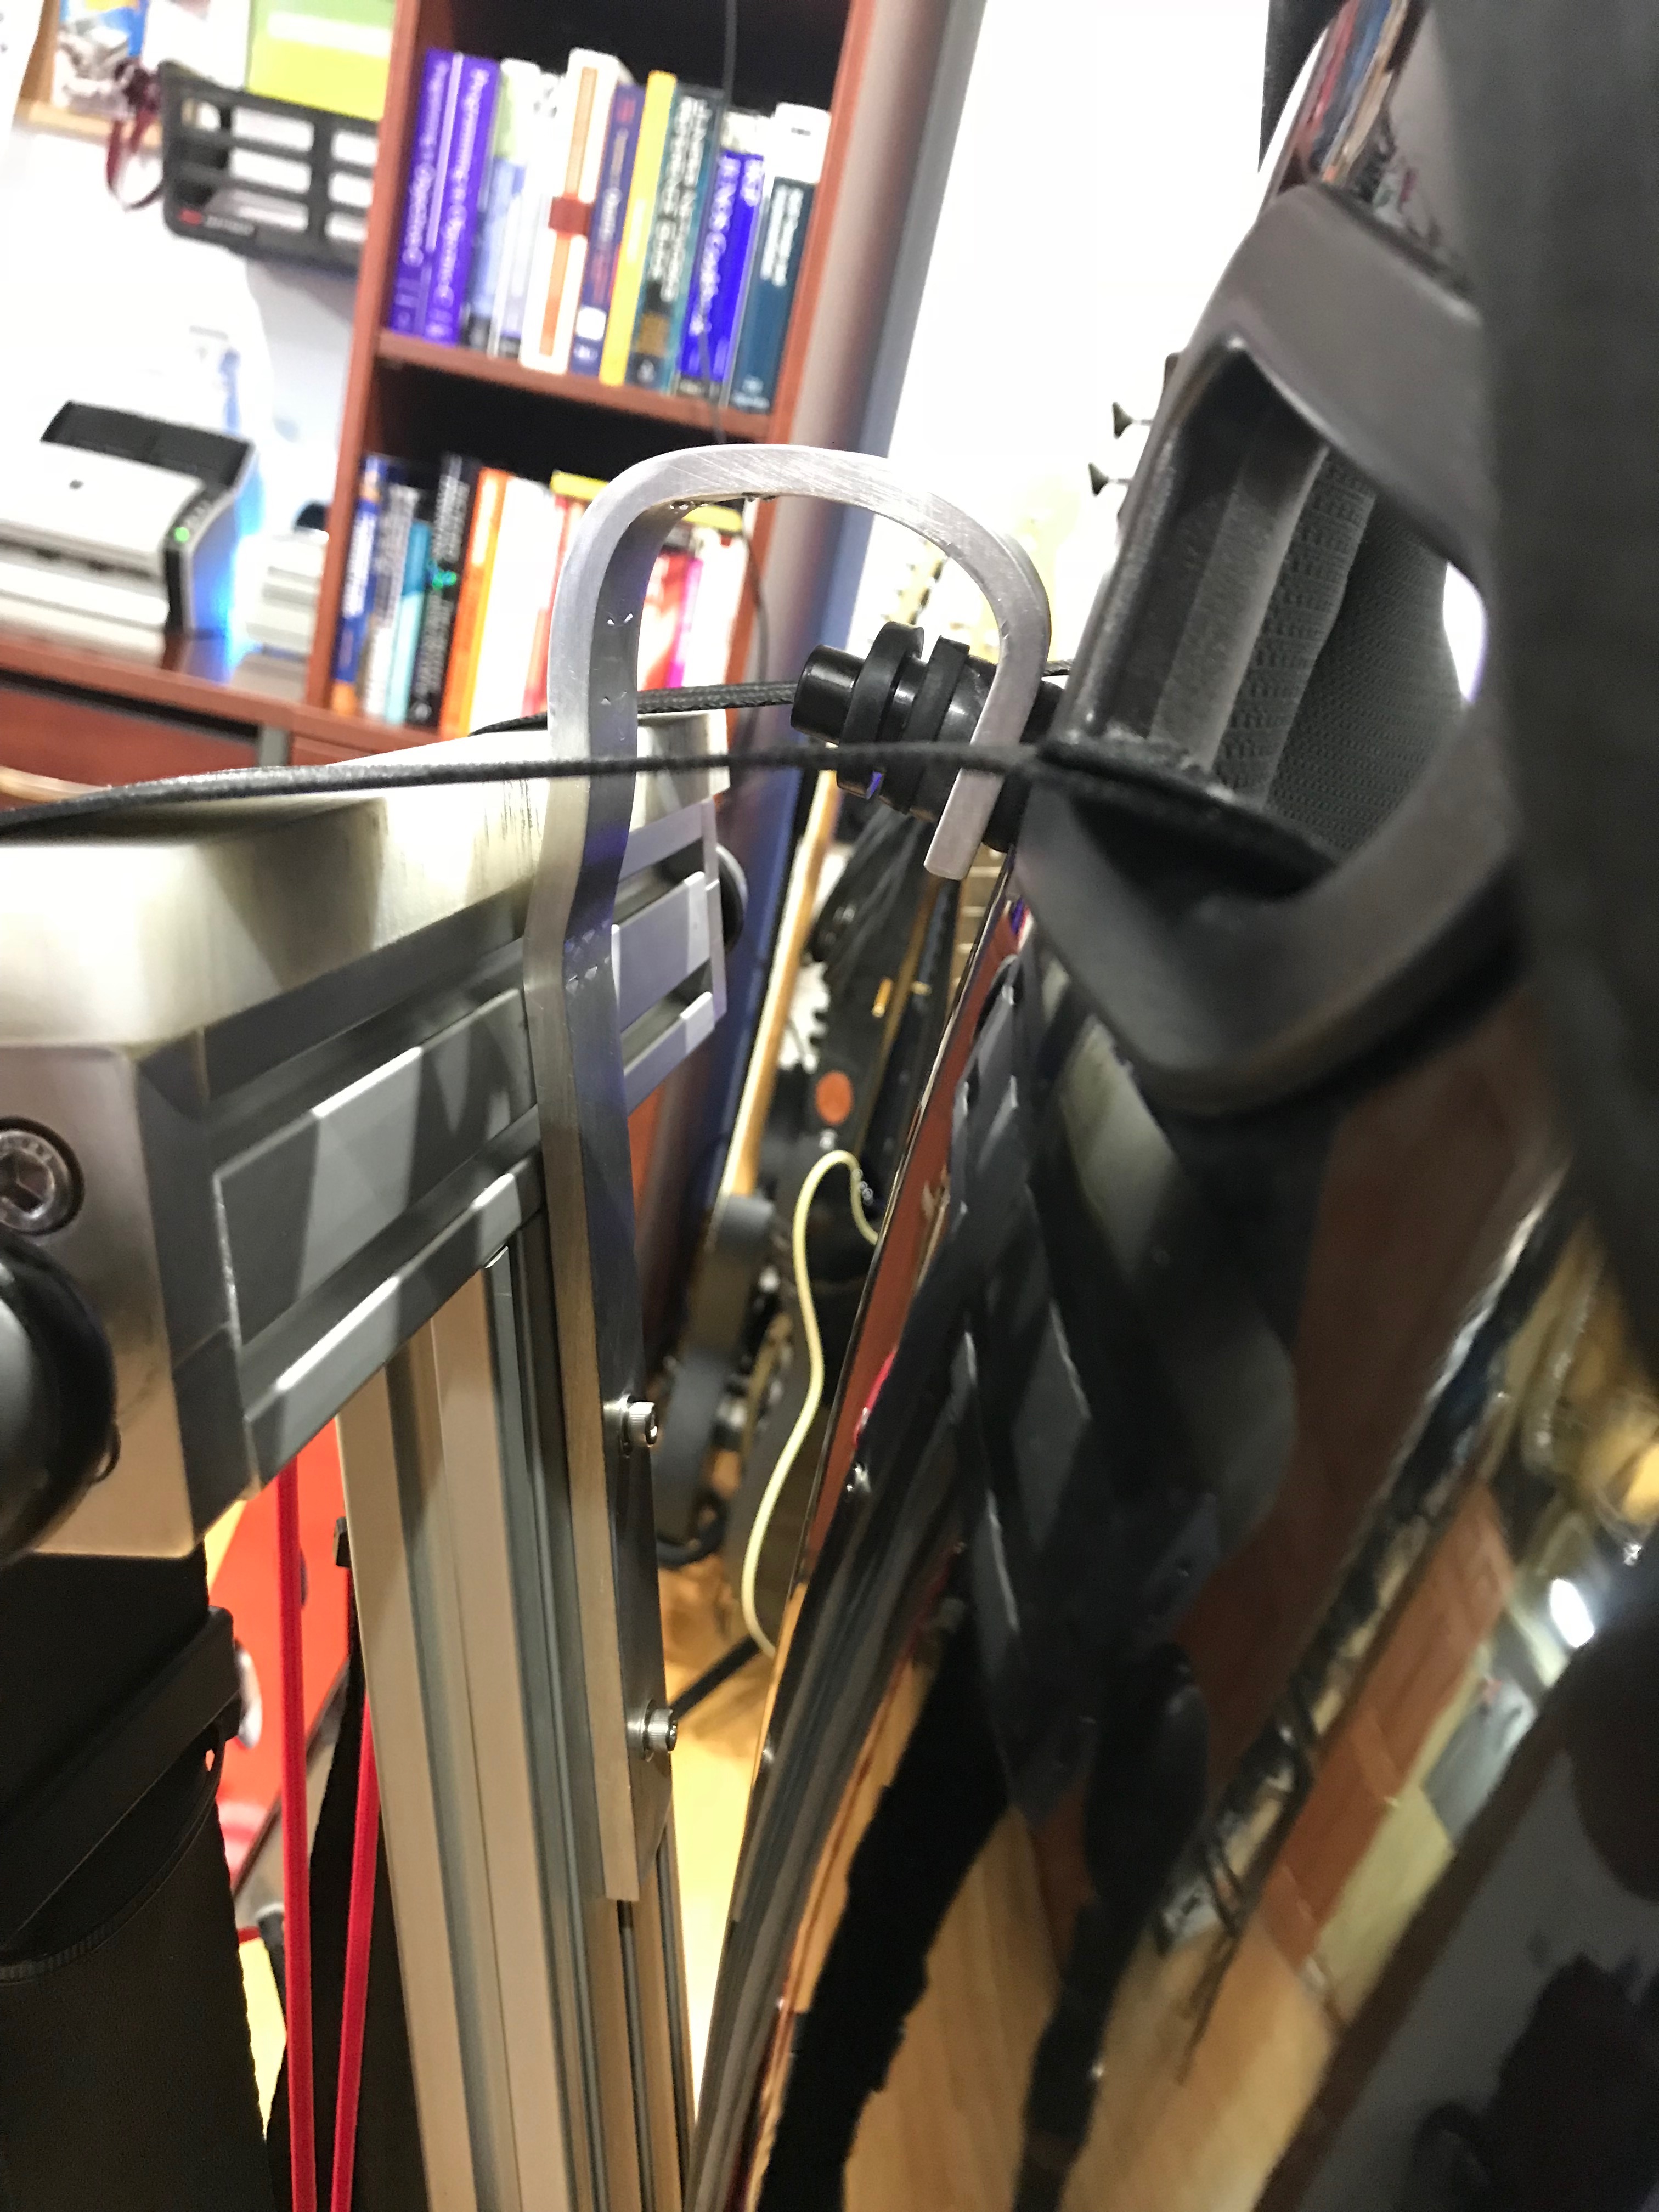\n\n\u003ciframe width=\"560\" height=\"315\" src=\"https://www.youtube.com/embed/wZdebttwHCM\" frameborder=\"0\" allowfullscreen\u003e\u003c/iframe\u003e\n\n\n####Final Thoughts\nSo there we have it. Small tweaks and changes to the rig to help enhance the experience, and some game settings tweaks along with motion profile changes to make Dirt Rally a playable experience in motion VR!\n\n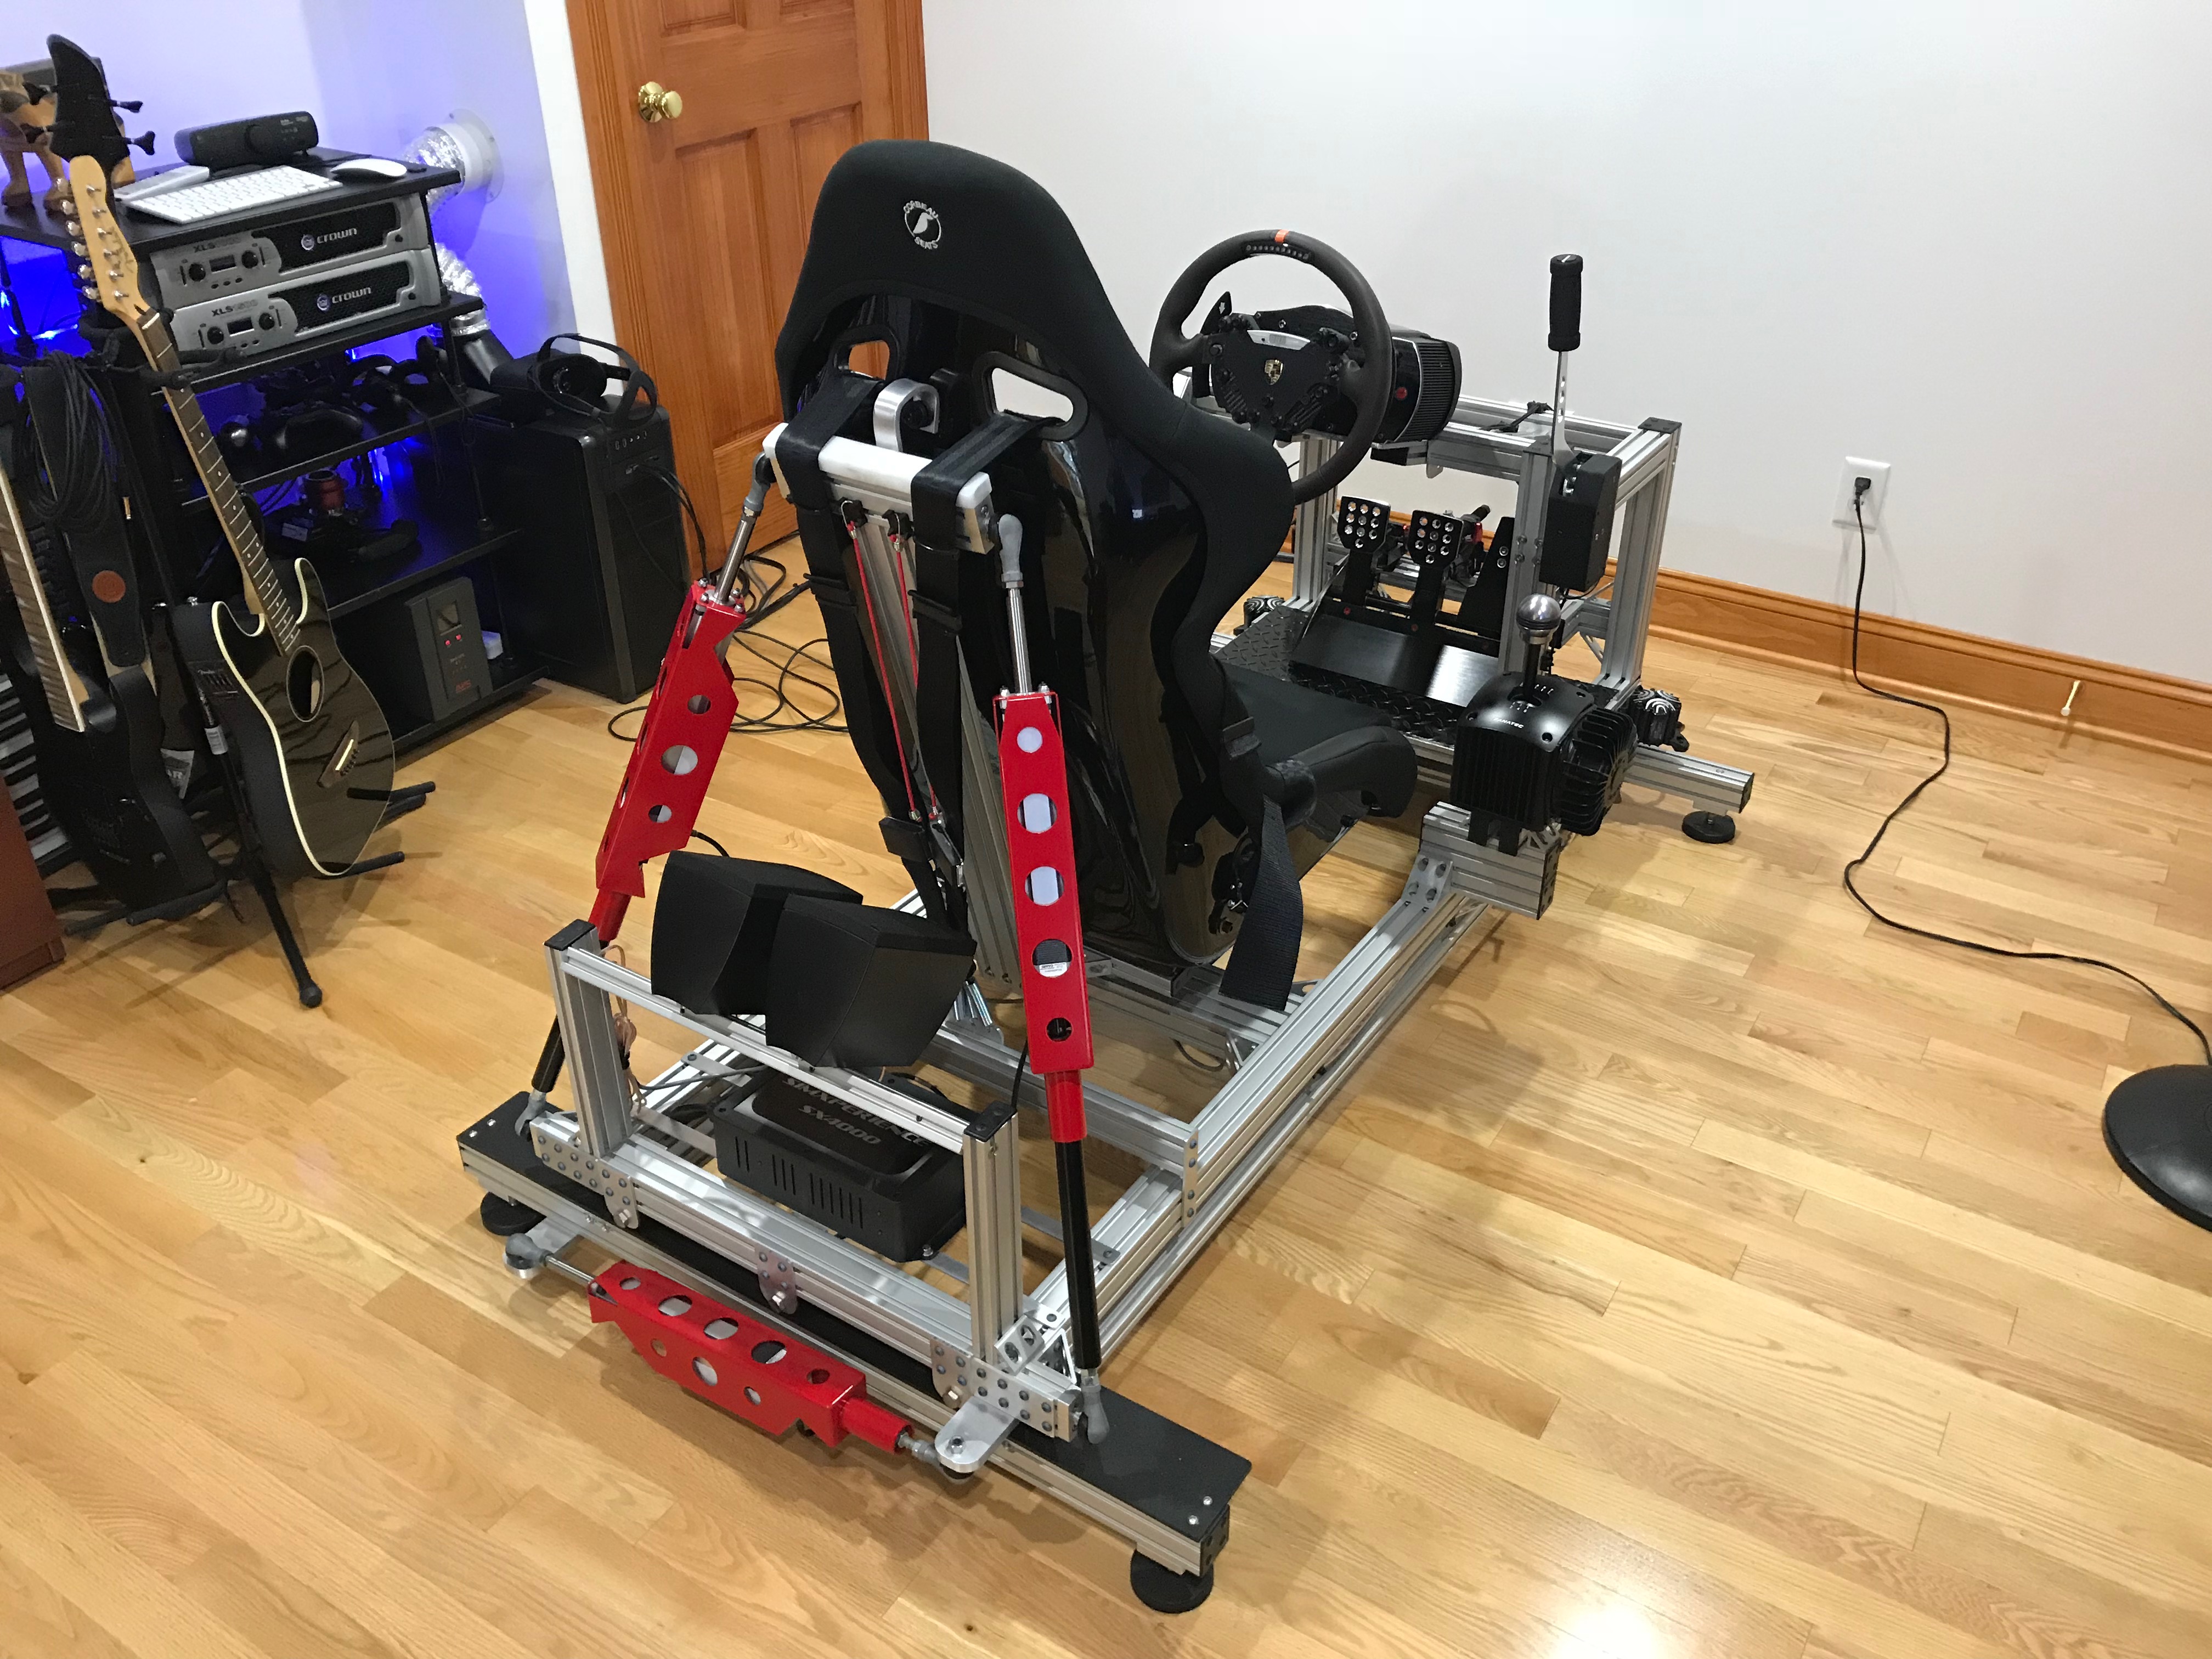\n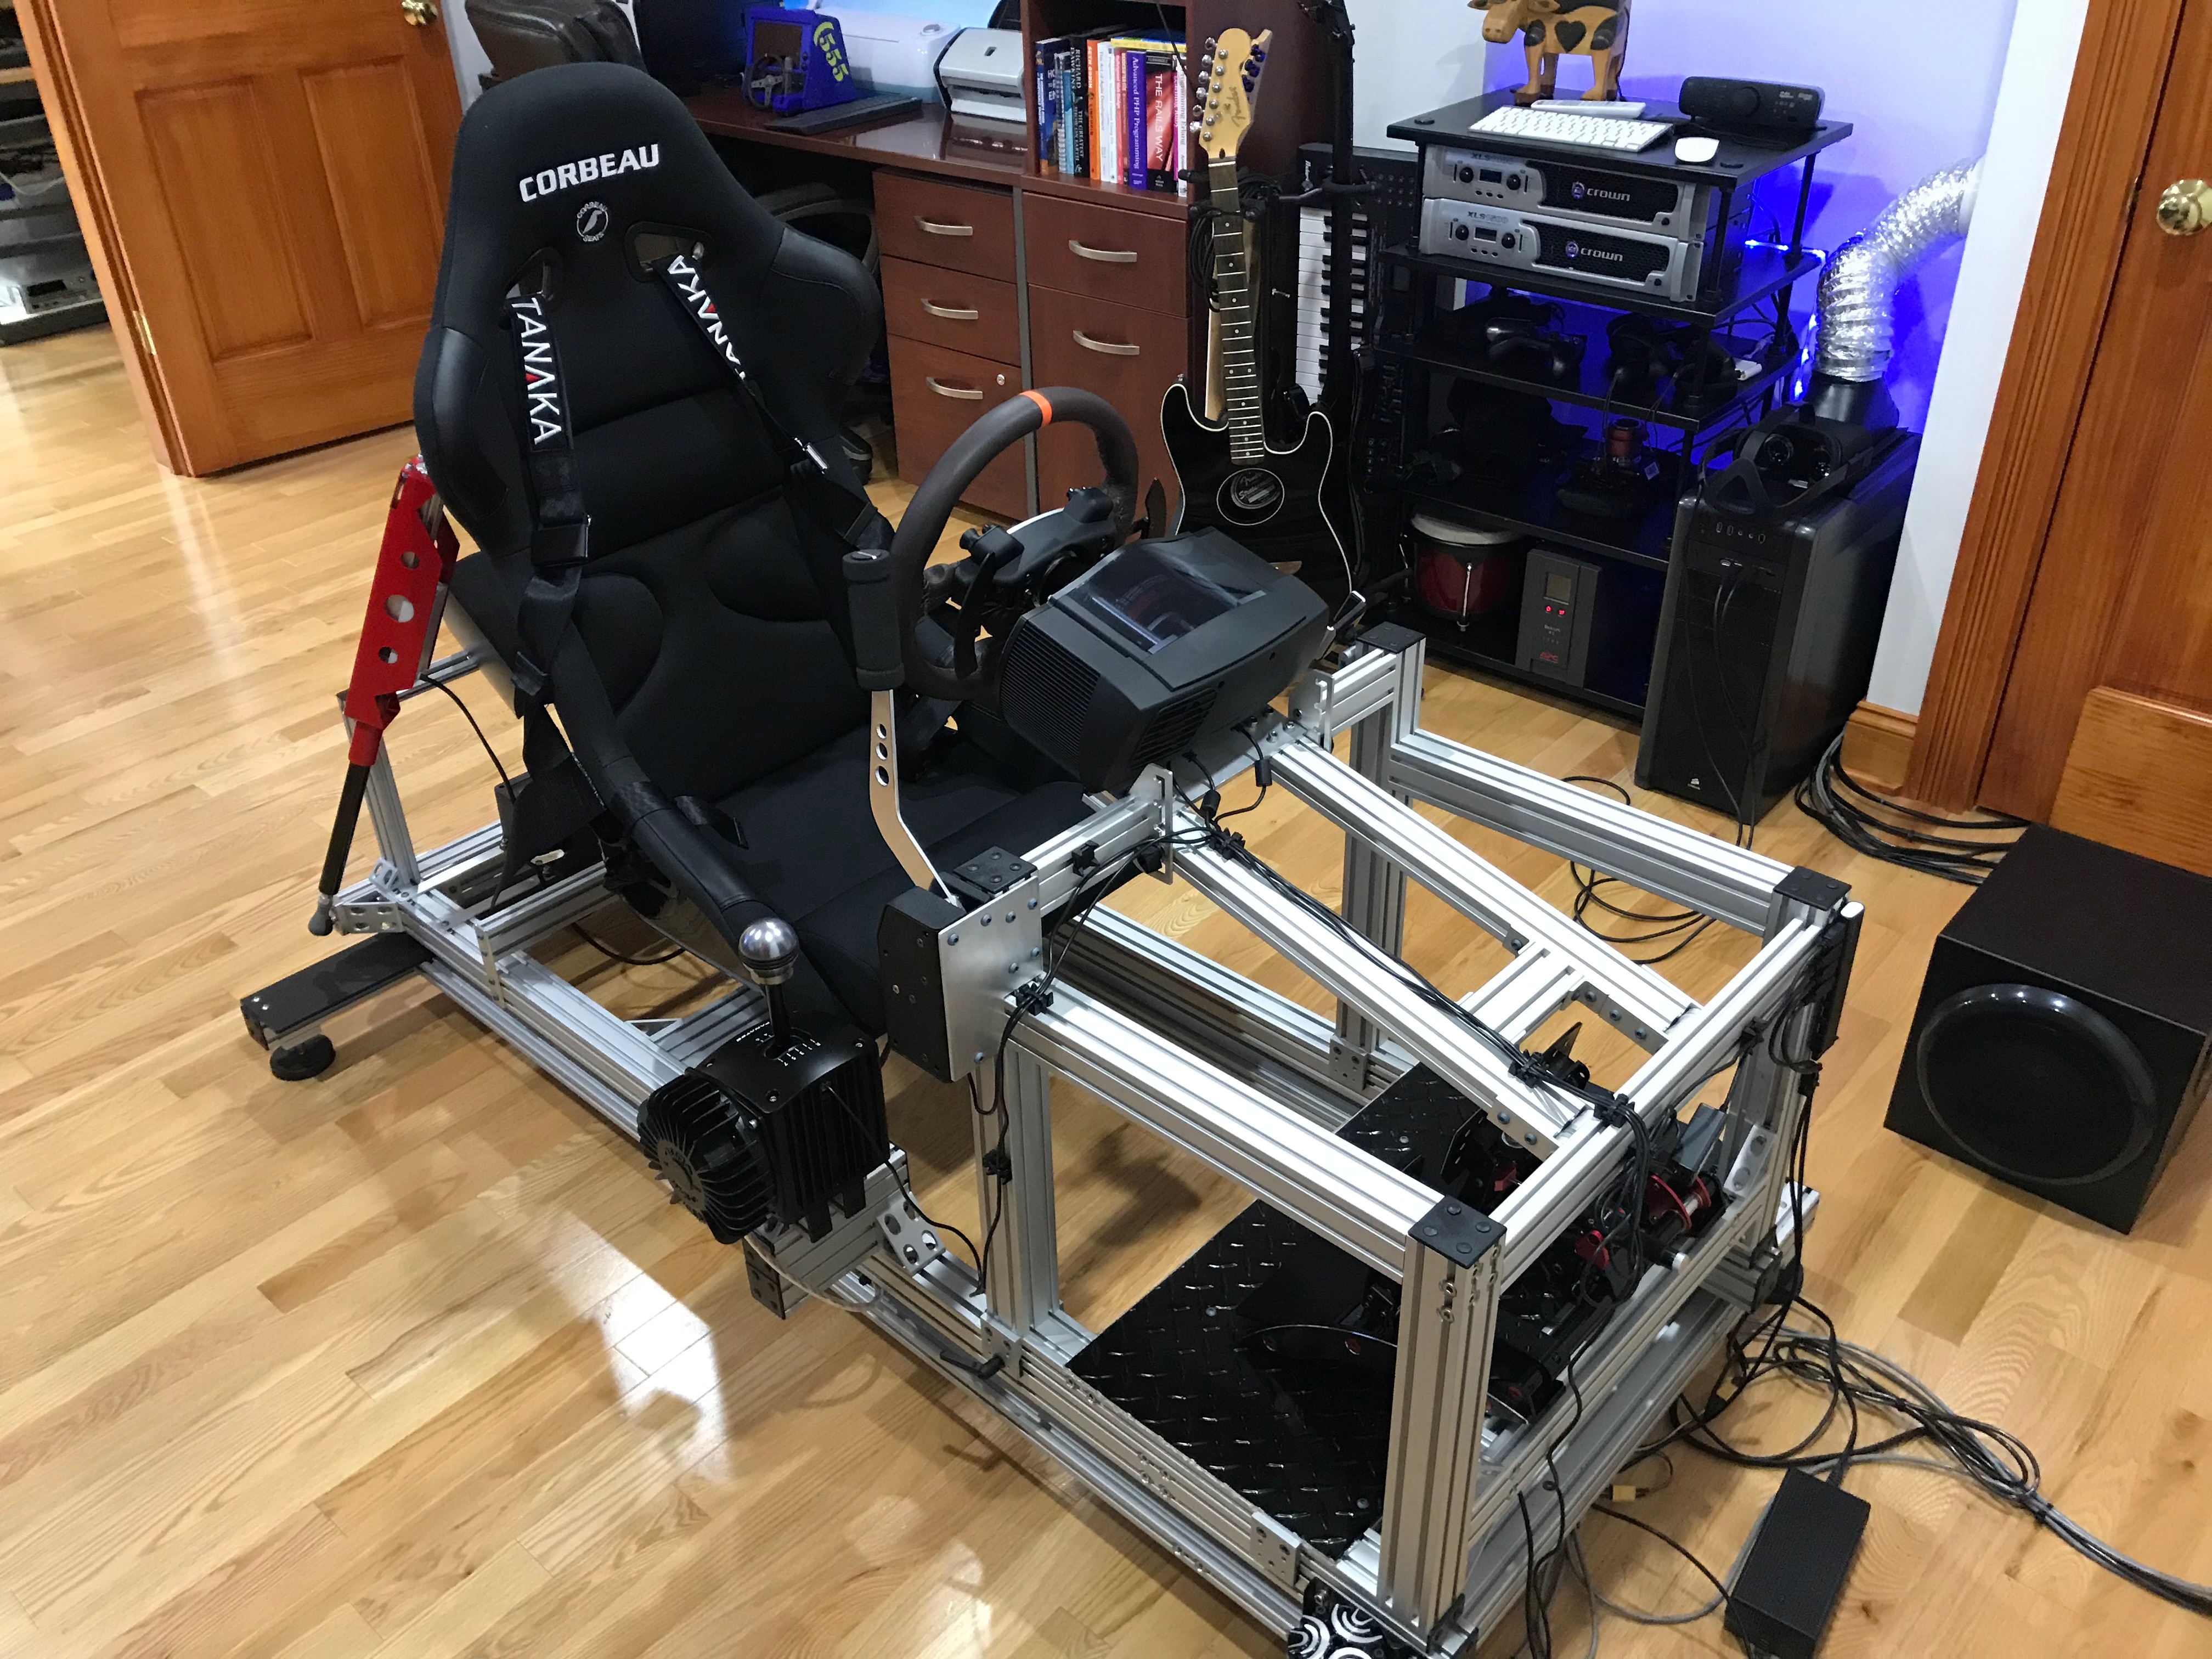\n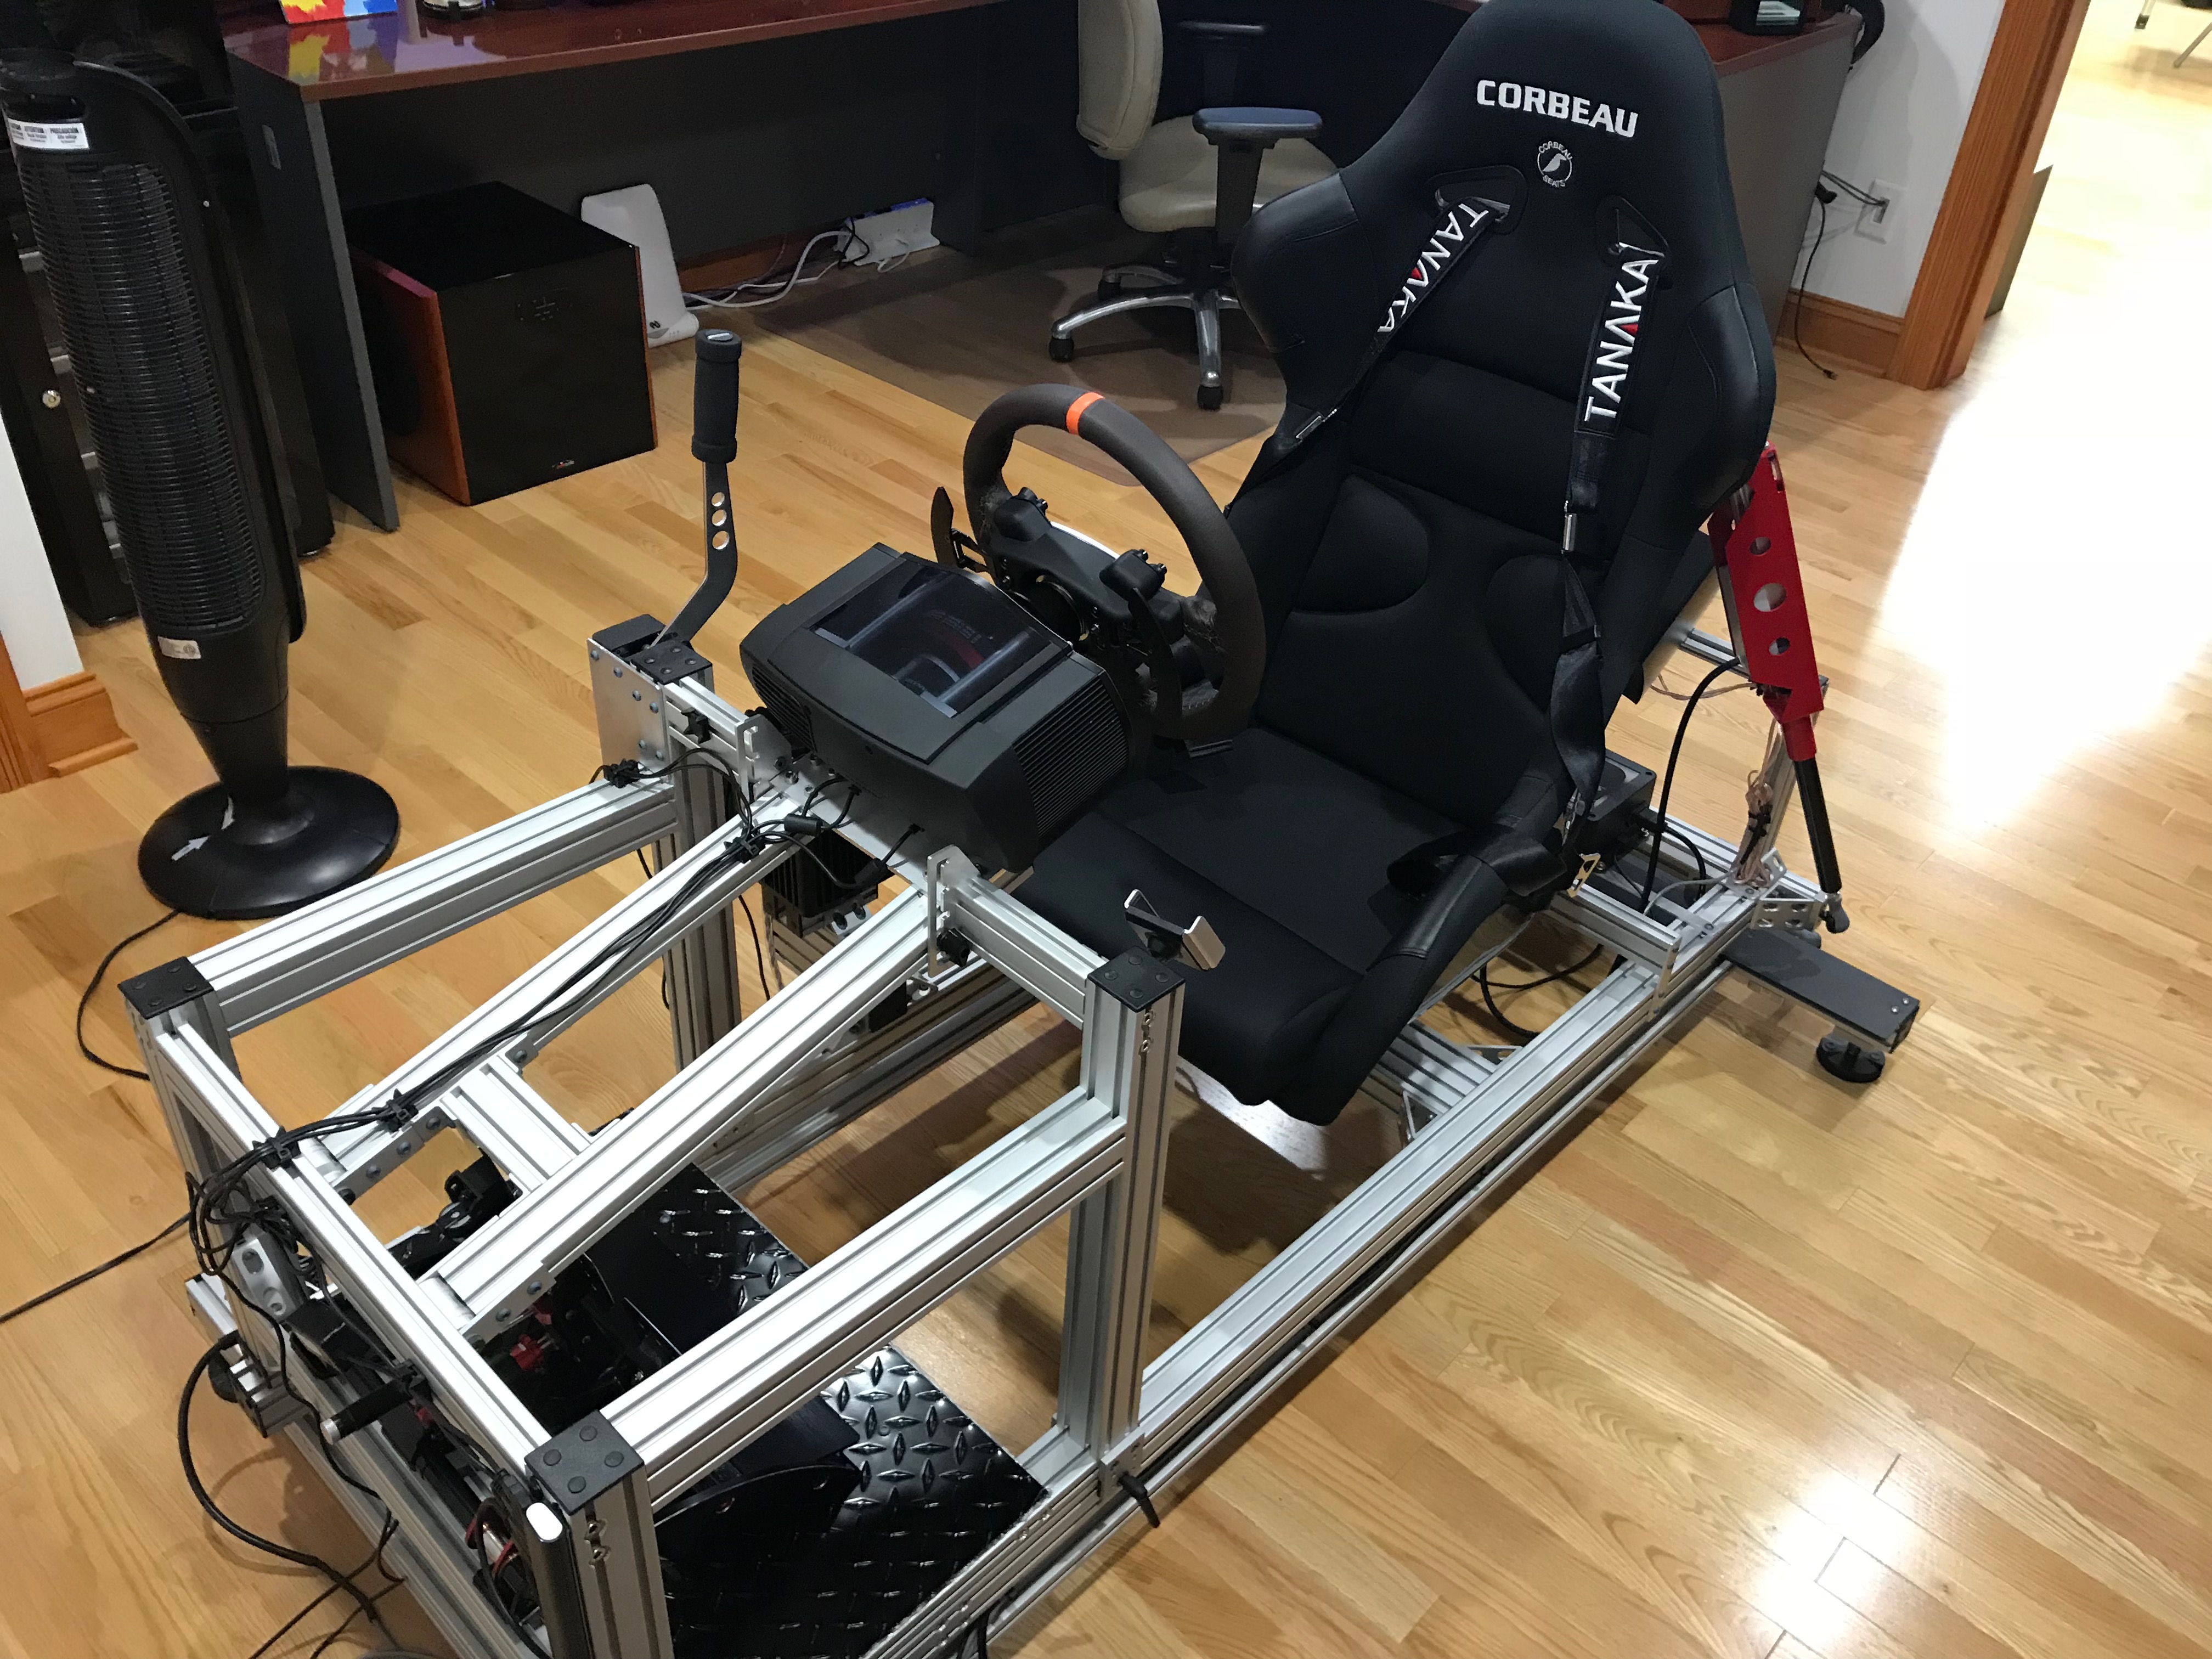\n\n\n####System Specifications\n\n#####PC\n- i7-5820K\n- 32G ram\n- GTX 1080Ti\n- Benq W1080ST projector projecting on the wall\n- Oculus Rift CV1\n\n#####Motion Rig\n- Custom 8020 aluminum extrusion rig\n- SimXperience DIY motion platform\n- Fanatec CSW V2\n- Fanatec CSW Pedals V3\n- Fanatec Sequential Shifter V1.5\n- Fanatec Handbrake","html":"\u003cp\u003eWith the rekindled interest in Dirt Rally that my \u003ca href=\"http://projectable.me/my-dirt-rally-tabletop-car-cade-game/\" rel=\"nofollow\"\u003eCar-cade\u003c/a\u003e has given me I had a bit of a yearning to get Dirt Rally working nicely in VR on the motion rig. You can read more about my motion rig here: \u003ca href=\"http://projectable.me/my-sim-racing-motion-rig-version-2/\" rel=\"nofollow\"\u003ehttp://projectable.me/my-sim-racing-motion-rig-version-2/\u003c/a\u003e\u003c/p\u003e\n\u003cp\u003e\u003ca href=\"http://projectable.me/my-dirt-rally-tabletop-car-cade-game/\" rel=\"nofollow\"\u003e\u003cimg src=\"/content/images/2017/12/IMG_3182.jpg\" alt=\"\"\u003e\u003c/a\u003e\u003c/p\u003e\n\u003ch4\u003eThe problems\u003c/h4\u003e\n\u003cp\u003eThe issue I had was 2 fold: #1 the motion was too violent, and #2 even with a GTX1080Ti the framerate was really inconsistent, leading to really bad motion sickness. I had put a small amount of time in to trying to figure it out, but in the end I just gave up due to feeling quite ill.\u003c/p\u003e\n\u003ch4\u003eThe Fixes\u003c/h4\u003e\n\u003cp\u003eI tackled the motion aspect first, it took some motion profile tuning inside SimXperience Sim Commander, mainly smoothing for the device and a smoothing filter on acceleration/braking/cornering g-forces. With the heavily smoothed profile things were less back-breaking.\u003c/p\u003e\n\u003cp\u003eSecondly I dived in to the graphics quality, testing how each change \u0026#34;felt\u0026#34; and eventually ending up with a profile that was mostly medium and low settings. The only things left on high were track and car detail. Its a bit of a shame to end up with such low settings on such a high end graphics card, but thats what I ended up with after \u0026#34;gut checking\u0026#34; them.\u003c/p\u003e\n\u003cp\u003eAfter testing and doing a few runs I was quite happy that I no longer wanted to loose my lunch. It shows just how important high FPS without any stutter is to avoid motion sickness in VR.\u003c/p\u003e\n\u003ch4\u003eSome tweaking\u003c/h4\u003e\n\u003cp\u003eDuring all the testing I found that the actuator bar was hitting the back of the seat, meaning there was a LOT of flex and disconnect between the seat and the seat platform. I quickly bent up a bracket to fix this. The seat had an M8 bolt at the top that I used to mount back to the top of the seat platform. This extra rigidity helps a LOT! It\u0026#39;s not pretty, but it works. I had to use a rubber bushing between the bracket and the seat, as without it there was a lot of actuator noise that was resinating in the seat itself.\u003c/p\u003e\n\u003cimg src=\"/content/images/2017/12/IMG_3346-1.JPG\" alt=\"\"\u003e\n\u003cimg src=\"/content/images/2017/12/IMG_3347.JPG\" alt=\"\"\u003e\n\u003ciframe width=\"560\" height=\"315\" src=\"https://www.youtube.com/embed/wZdebttwHCM\" frameborder=\"0\" allowfullscreen=\"\"\u003e\u003c/iframe\u003e\n\u003ch4\u003eFinal Thoughts\u003c/h4\u003e\n\u003cp\u003eSo there we have it. Small tweaks and changes to the rig to help enhance the experience, and some game settings tweaks along with motion profile changes to make Dirt Rally a playable experience in motion VR!\u003c/p\u003e\n\u003cimg src=\"/content/images/2017/12/IMG_3348-1.JPG\" alt=\"\"\u003e\n\u003cimg src=\"/content/images/2017/12/IMG_3349.JPG\" alt=\"\"\u003e\n\u003cimg src=\"/content/images/2017/12/IMG_3350.JPG\" alt=\"\"\u003e\n\u003ch4\u003eSystem Specifications\u003c/h4\u003e\n\u003ch5\u003ePC\u003c/h5\u003e\n\u003cul\u003e\n\u003cli\u003ei7-5820K\u003c/li\u003e\n\u003cli\u003e32G ram\u003c/li\u003e\n\u003cli\u003eGTX 1080Ti\u003c/li\u003e\n\u003cli\u003eBenq W1080ST projector projecting on the wall\u003c/li\u003e\n\u003cli\u003eOculus Rift CV1\u003c/li\u003e\n\u003c/ul\u003e\n\u003ch5\u003eMotion Rig\u003c/h5\u003e\n\u003cul\u003e\n\u003cli\u003eCustom 8020 aluminum extrusion rig\u003c/li\u003e\n\u003cli\u003eSimXperience DIY motion platform\u003c/li\u003e\n\u003cli\u003eFanatec CSW V2\u003c/li\u003e\n\u003cli\u003eFanatec CSW Pedals V3\u003c/li\u003e\n\u003cli\u003eFanatec Sequential Shifter V1.5\u003c/li\u003e\n\u003cli\u003eFanatec Handbrake\u003c/li\u003e\n\u003c/ul\u003e\n","excerpt":"","metaTitle":"","metaDescription":"","status":"published","featured":false,"publishedAt":"2017-12-03T02:51:45Z","authorId":"190160de54f2192bd5b8734ec8808086","authorName":"Daniel Chote","authorSlug":"daniel","heroMediaId":"5dfef4da0e8654d6e59930c9093f63ff","projectId":"","tags":[{"id":"ecaaace3f367d1a9865ae0933d53d715","name":"Sim Racing","slug":"sim-racing"},{"id":"9c4230a56ffd914aade79798824d9d23","name":"SimXperience","slug":"simxperience"},{"id":"ab4bc19e35909615ae7bc6a344a2b50a","name":"Motion Simulator","slug":"motion-simulator"},{"id":"bda7da089cef0417916d7e03950af340","name":"Dirt Rally","slug":"dirt-rally"}],"createdAt":"2026-10-18T13:16:27Z","updatedAt":"2026-10-18T13:16:27Z"},{"id":"94b2de371382ec793a64ed49343c14c6","siteId":"projectable","slug":"talkiepi-nov2017-updates","title":"talkiepi Updates (November 2017)","markdown":"##Introducing [talkiepi](https://github.com/dchote/talkiepi)\n\n[talkiepi](https://github.com/dchote/talkiepi) is a wifi \"walkie\" talkie for your kids and their friends. It provides a very simple \"push to talk\" interface. When you push the button and talk, all the other talkiepis in the channel will hear what is being said.\n\n##November 2017 Updates\n[talkiepi](https://github.com/dchote/talkiepi) has been out in the world for a little over a year now and it has been quite a successful project! I have seen 4+ different magazine articles (read some: [here](https://www.raspberrypi.org/magpi-issues/MagPi62.pdf), [here](https://issuu.com/futurepublishing/docs/piu02.issuu/2?ff=true), and [here](https://magazinesubscriptionsdigital.zinio.com/browse/issues/index.jsp;jsessionid=FCDE8D752BEF8FE767D9CF82D567CB65.prd-main-news2?skuId=416414901\u0026prnt=\u0026categoryId=cat1960026)), and I have even seen it included in school course curriculum!!\n\nI am getting back in to [Go](https://golang.org) development for work, and the process of working in [Go](https://golang.org) again gave me the hankering to update [talkiepi](https://github.com/dchote/talkiepi) and try and work out some of its kinks. I'll be working on enhancements to talkiepi over the next few weeks when I get the time. My goal is to get talkiepi working flawlessly on a [Raspberry Pi Zero W](https://www.adafruit.com/product/3400).\n\n**Talkiepi can be found over on github: https://github.com/dchote/talkiepi**","html":"\u003ch2\u003eIntroducing \u003ca href=\"https://github.com/dchote/talkiepi\" rel=\"nofollow\"\u003etalkiepi\u003c/a\u003e\u003c/h2\u003e\n\u003cp\u003e\u003ca href=\"https://github.com/dchote/talkiepi\" rel=\"nofollow\"\u003etalkiepi\u003c/a\u003e is a wifi \u0026#34;walkie\u0026#34; talkie for your kids and their friends. It provides a very simple \u0026#34;push to talk\u0026#34; interface. When you push the button and talk, all the other talkiepis in the channel will hear what is being said.\u003c/p\u003e\n\u003ch2\u003eNovember 2017 Updates\u003c/h2\u003e\n\u003cp\u003e\u003ca href=\"https://github.com/dchote/talkiepi\" rel=\"nofollow\"\u003etalkiepi\u003c/a\u003e has been out in the world for a little over a year now and it has been quite a successful project! I have seen 4+ different magazine articles (read some: \u003ca href=\"https://www.raspberrypi.org/magpi-issues/MagPi62.pdf\" rel=\"nofollow\"\u003ehere\u003c/a\u003e, \u003ca href=\"https://issuu.com/futurepublishing/docs/piu02.issuu/2?ff=true\" rel=\"nofollow\"\u003ehere\u003c/a\u003e, and \u003ca href=\"https://magazinesubscriptionsdigital.zinio.com/browse/issues/index.jsp;jsessionid=FCDE8D752BEF8FE767D9CF82D567CB65.prd-main-news2?skuId=416414901\u0026amp;prnt=\u0026amp;categoryId=cat1960026\" rel=\"nofollow\"\u003ehere\u003c/a\u003e), and I have even seen it included in school course curriculum!!\u003c/p\u003e\n\u003cp\u003eI am getting back in to \u003ca href=\"https://golang.org\" rel=\"nofollow\"\u003eGo\u003c/a\u003e development for work, and the process of working in \u003ca href=\"https://golang.org\" rel=\"nofollow\"\u003eGo\u003c/a\u003e again gave me the hankering to update \u003ca href=\"https://github.com/dchote/talkiepi\" rel=\"nofollow\"\u003etalkiepi\u003c/a\u003e and try and work out some of its kinks. I\u0026#39;ll be working on enhancements to talkiepi over the next few weeks when I get the time. My goal is to get talkiepi working flawlessly on a \u003ca href=\"https://www.adafruit.com/product/3400\" rel=\"nofollow\"\u003eRaspberry Pi Zero W\u003c/a\u003e.\u003c/p\u003e\n\u003cp\u003e\u003cstrong\u003eTalkiepi can be found over on github: \u003ca href=\"https://github.com/dchote/talkiepi\" rel=\"nofollow\"\u003ehttps://github.com/dchote/talkiepi\u003c/a\u003e\u003c/strong\u003e\u003c/p\u003e\n","excerpt":"","metaTitle":"","metaDescription":"","status":"published","featured":false,"publishedAt":"2017-11-17T15:15:46Z","authorId":"190160de54f2192bd5b8734ec8808086","authorName":"Daniel Chote","authorSlug":"daniel","heroMediaId":"f1b2883a1a2e99060f5e4a6a2f8ccebd","projectId":"","tags":[{"id":"b223b3e2ba0e78e7e6a6a8ff4349517d","name":"talkiepi","slug":"talkiepi"},{"id":"b529314e428273696b02c474dcf56132","name":"Raspberry Pi","slug":"raspberry-pi"},{"id":"88aab2a2ba262f200b248f0074011445","name":"WIFI","slug":"wifi"},{"id":"e2e48067ff28749272dbdc37a0f2023d","name":"golang","slug":"golang"},{"id":"8600a98484e169ed96ea6fbe2a034ccc","name":"VOIP","slug":"voip"}],"createdAt":"2026-10-18T13:16:27Z","updatedAt":"2026-10-18T13:16:27Z"},{"id":"e1df6d8cca38bcc838098d61f321952d","siteId":"projectable","slug":"my-dirt-rally-tabletop-car-cade-game","title":"My Dirt Rally tabletop car-cade game","markdown":"For the longest time I've had the idea to put a Raspberry Pi into one of those kids car toys from the 80s. \n\n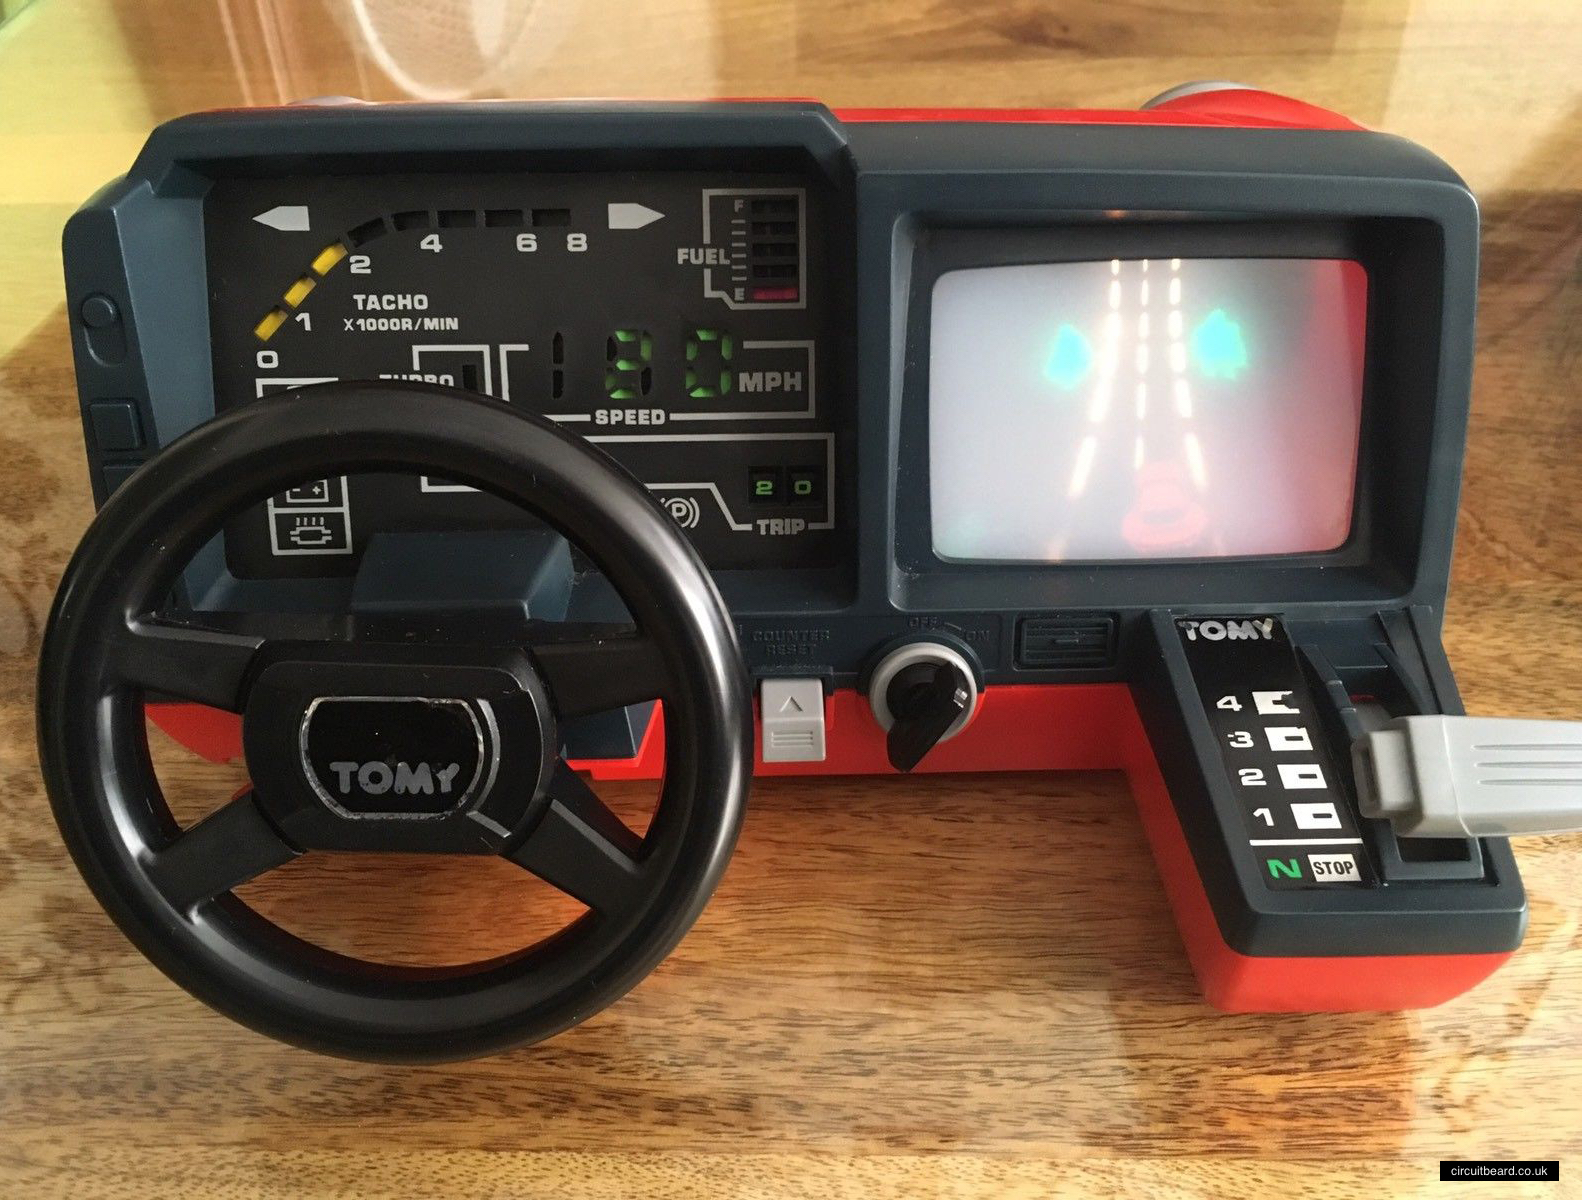\n\nIn August 2017 I was beat to the punch by [Matt Brailsford](https://twitter.com/mattbrailsford) when he published his Tomy Turnin' Turbo Dashboard Outrun Arcade on Twitter: https://twitter.com/circuitbeard/status/902513198330499073\n\n\u003cp align=\"center\"\u003e\n\u003ciframe width=\"560\" height=\"315\" src=\"https://www.youtube.com/embed/r21Zfmw7moI\" frameborder=\"0\" allowfullscreen\u003e\u003c/iframe\u003e\n\u003c/p\u003e\n\n**His project was so fantastic, I had to come up with something entirely new...**\n\n####The beginning\n\nI already had an Intel Atom powered dev board, the [MinnowBoard](https://minnowboard.org). Surprisingly, SteamOS installed on it without any issues.\n\n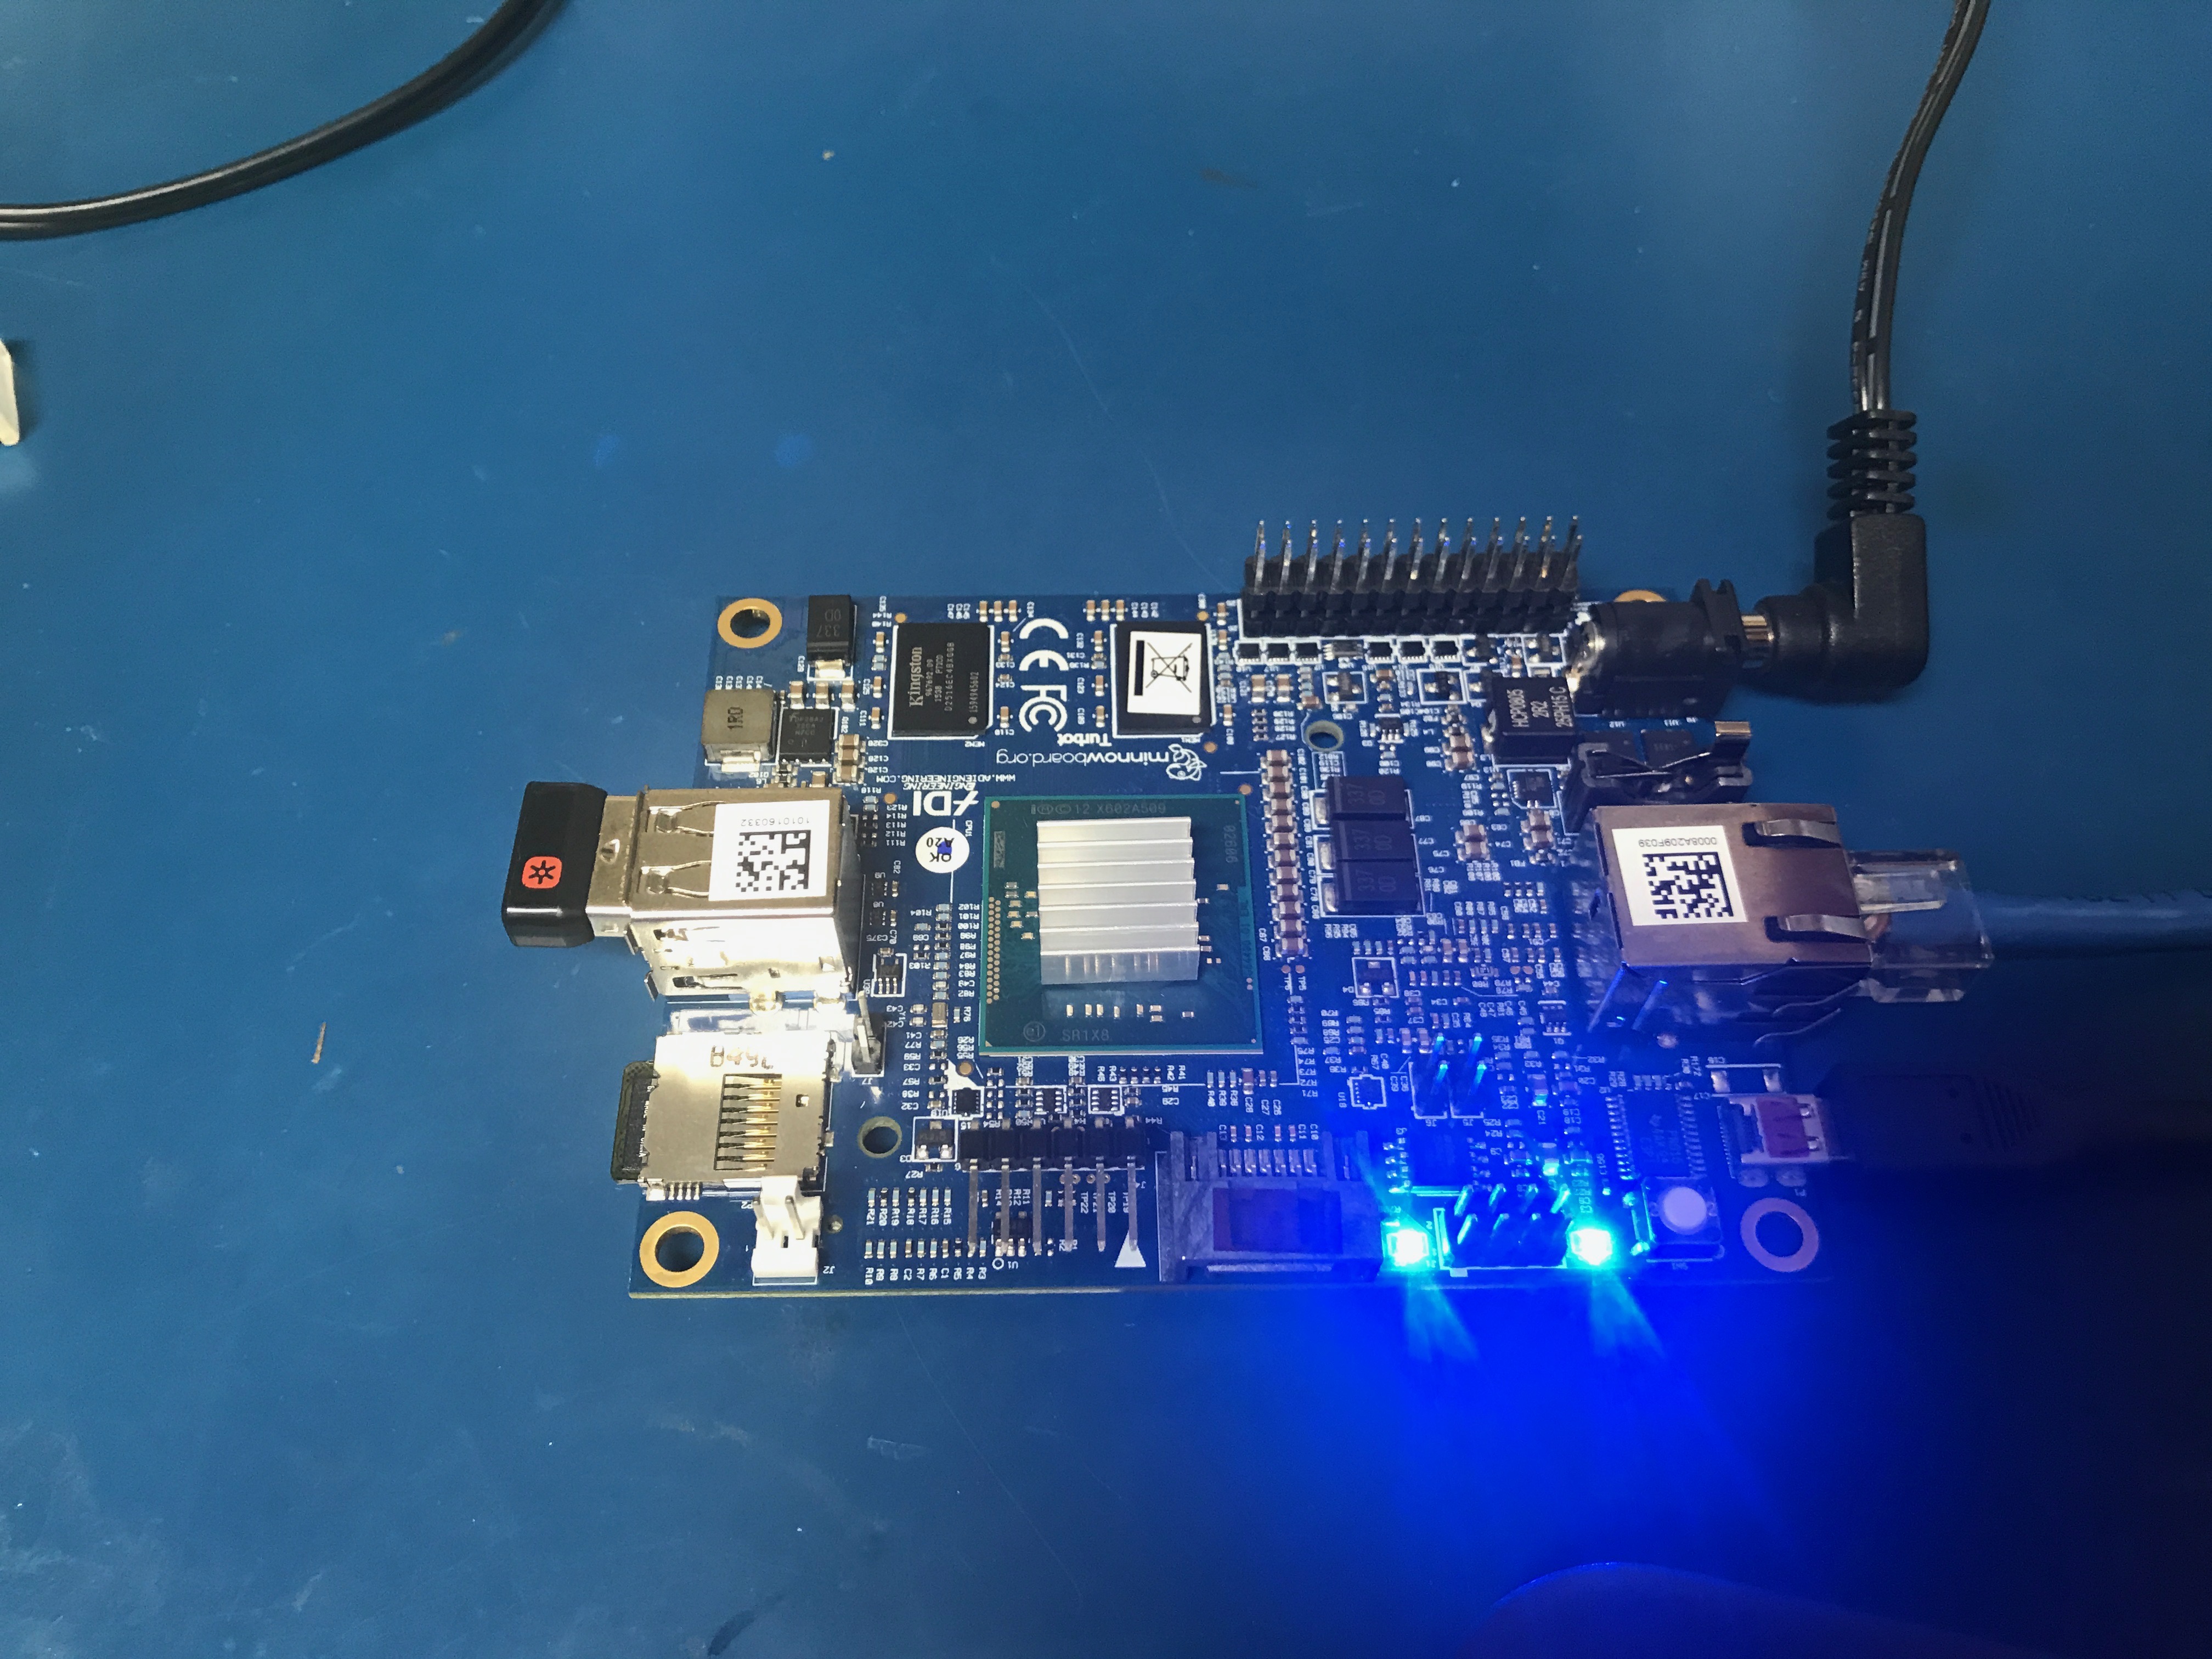\n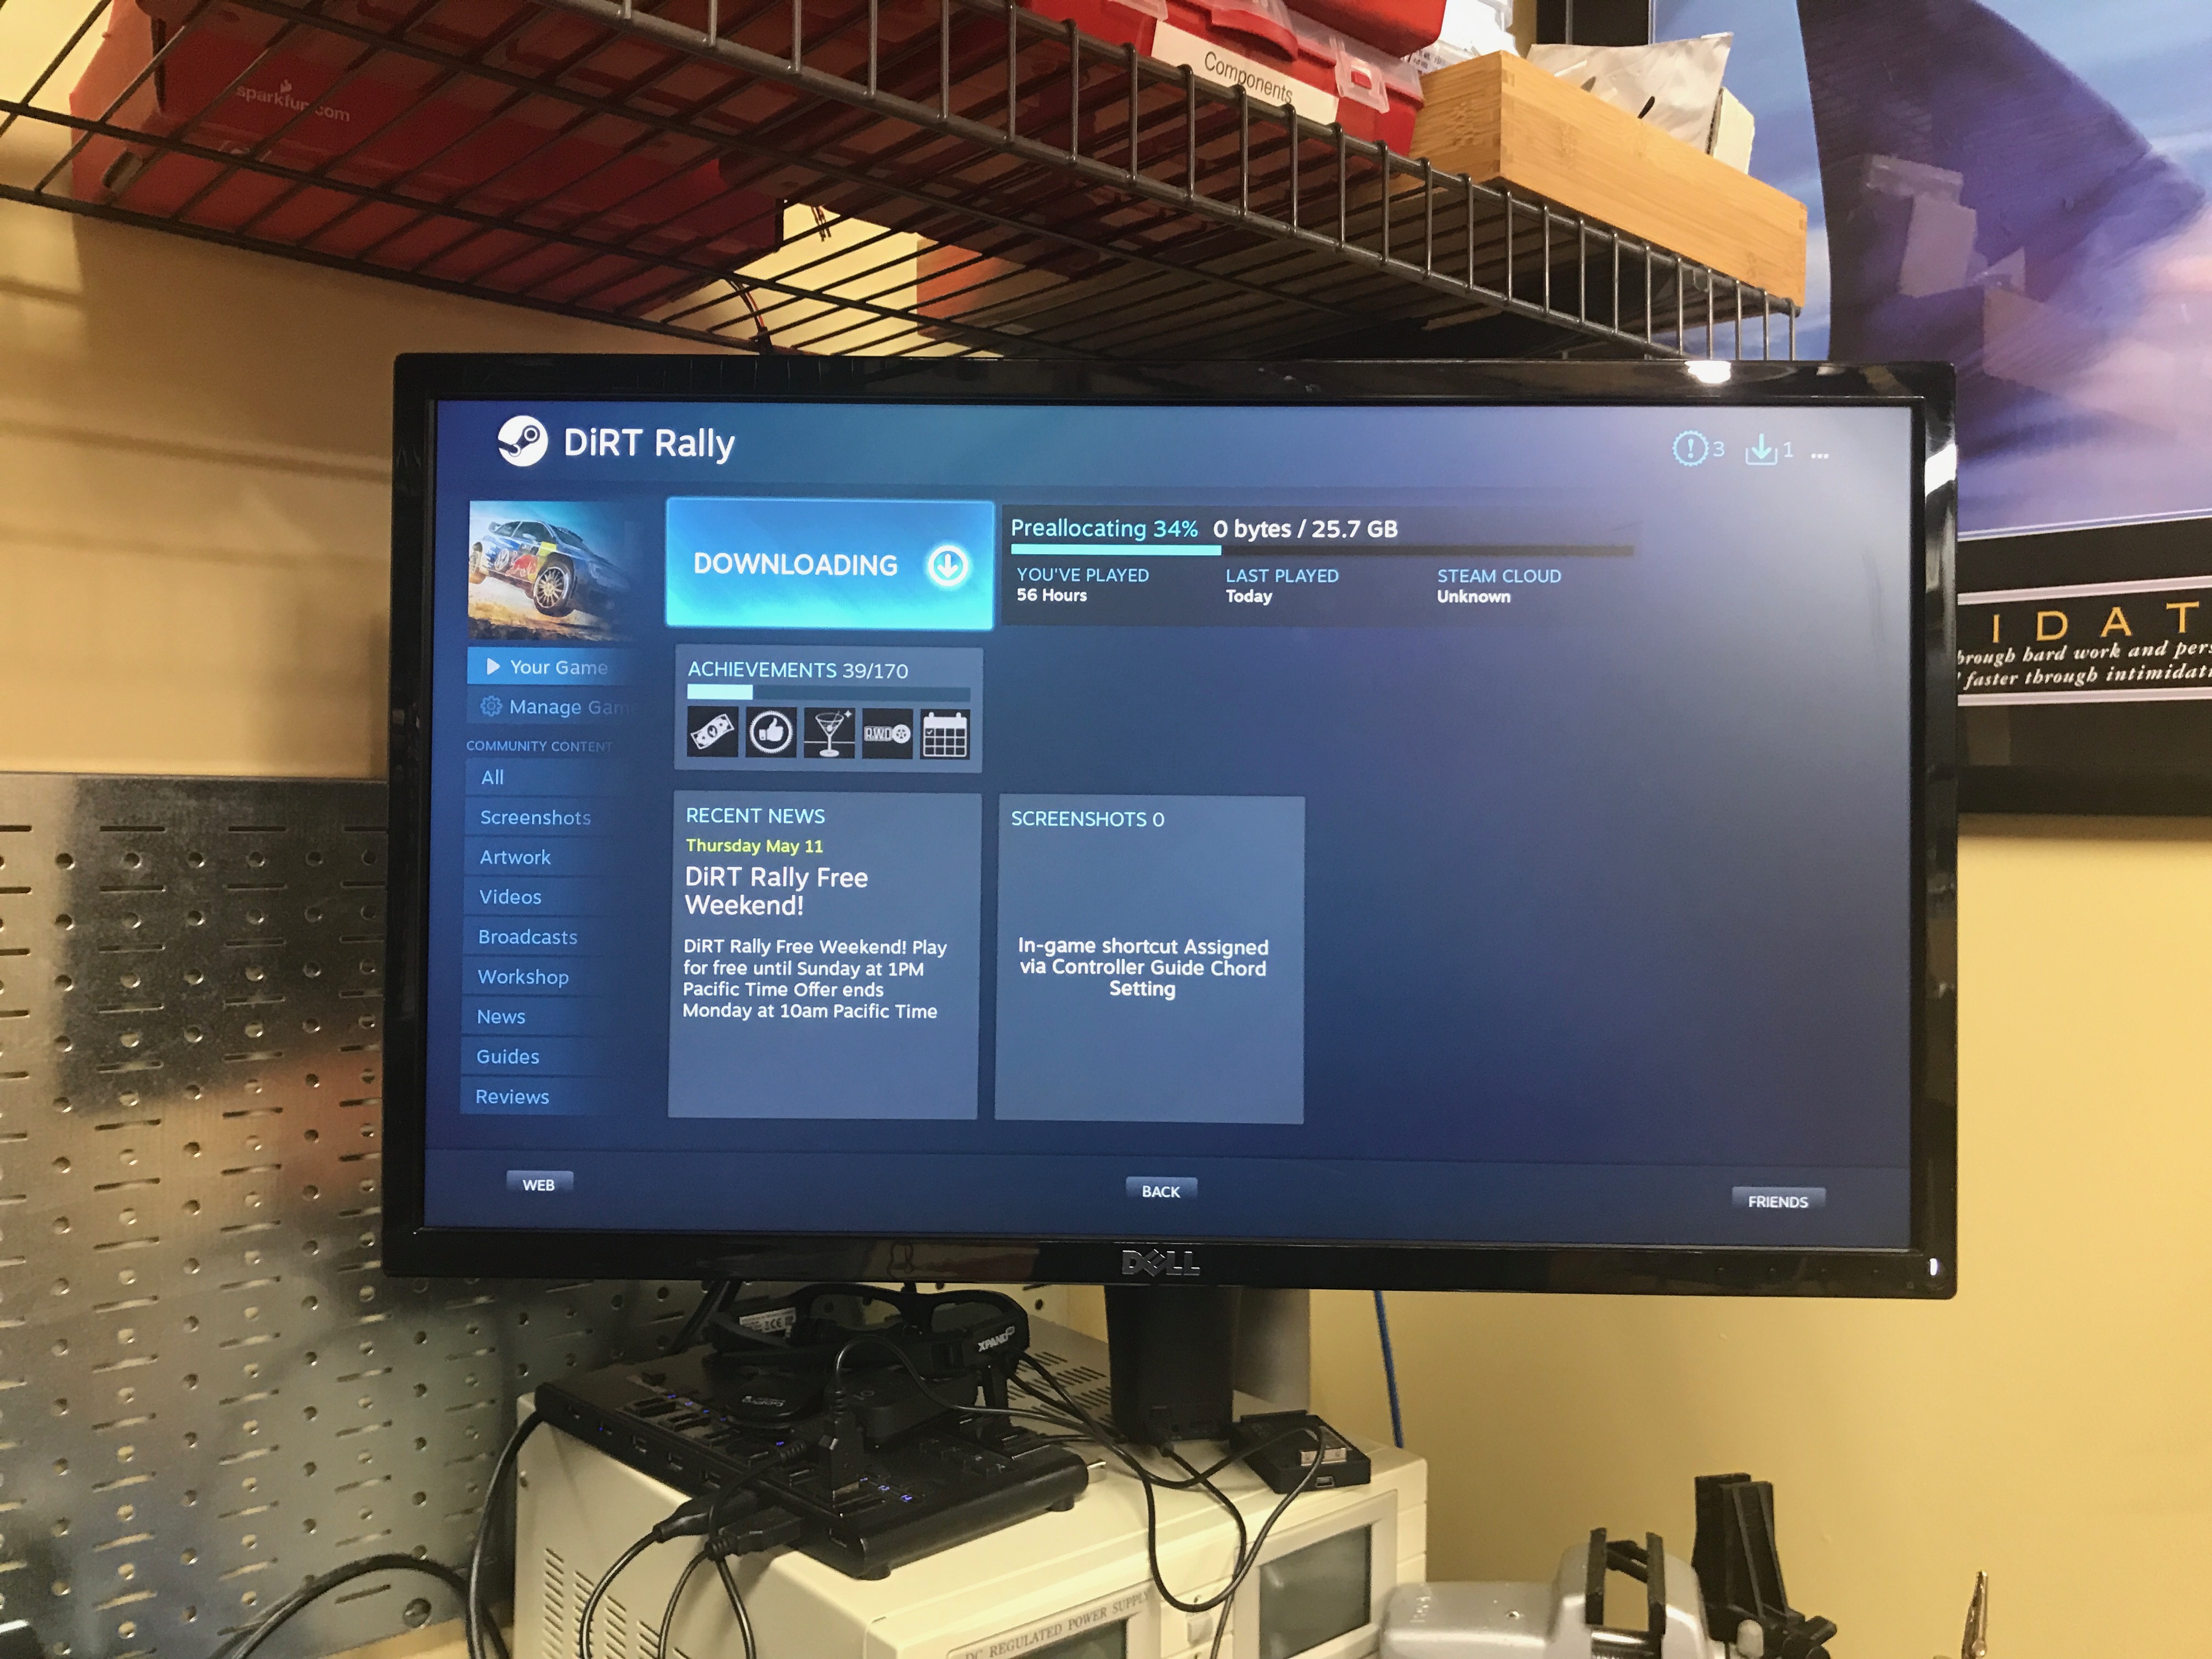\n\nAfter playing around with SteamOS and [Dirt Rally](https://www.dirtgame.com) on the [MinnowBoard](https://minnowboard.org) without much luck (talking in frames per minute, not frames per second), I settled on the idea of building a full Intel powered system running SteamOS. I would then work on designing and 3D printing the entire enclosure from scratch. \n\n\n###The Dirt Rally Car-cade!\n\n####Inspiration\nInitially I was going to design it with cues from the Audi Quattro, but I very quickly switched over to the 1995 Subaru Impreza, which is my preferred car in the game. \n\n\u003cp align=\"center\"\u003e\n\n\u003c/p\u003e\n\nI ordered the smallest motherboard I could find that had the features I needed, along with the rest of the components that I didn't already have. \n\n####System Components\n* Motherboard: [Asus H110S2/CSM](https://www.newegg.com/Product/Product.aspx?Item=N82E16813132897)\n* CPU: [Intel G4500](https://www.newegg.com/Product/Product.aspx?Item=N82E16819117624)\n* CPU Cooler: [SILVERSTONE NT07-115X](https://www.newegg.com/Product/Product.aspx?Item=N82E16835220067)\n* Ram: [G.SKILL Ripjaws 8GB](https://www.newegg.com/Product/Product.aspx?Item=N82E16820232146)\n* Storage: [Samsung 950 Pro M.2](https://www.newegg.com/Product/Product.aspx?Item=N82E16820147467)\n\n####Other Components\n* LCD: [7\" 1024x600 capacitive touch LCD](https://www.ebay.com/itm/7-Inch-HDMI-Capacitive-IPS-Display-LCD-for-Raspberry-Pi-1024-600-/262941998848?roken=cUgayN\u0026soutkn=unc8RL)\n* USB Controller: [Pimoroni Picade Controller PCB](https://www.adafruit.com/product/2708)\n* 2x Speakers: [3W enclosed speaker from Adafruit](https://www.adafruit.com/product/3351)\n* Push Buttons: [Pack of 10 black pushbuttons](http://a.co/cee6jZP)\n* Potentiometer: [Pack of 5 10k ohm linear potentiometers](http://a.co/blt4qxJ)\n\n####The Design Process\nThe process of designing and printing was an iterative one. I initially designed and iterated the steering and throttle components until I was happy with how they worked. The USB controller interface is managed by a [Pimoroni Picade PCB](https://shop.pimoroni.com/products/picade-controller-board) (it's basically an arduino with an onboard amplifier for speakers). The steering and throttle are analog inputs using potentiometers. The steering wheel and throttle both self center (kindof) using rubber bands integrated into my design.\n\n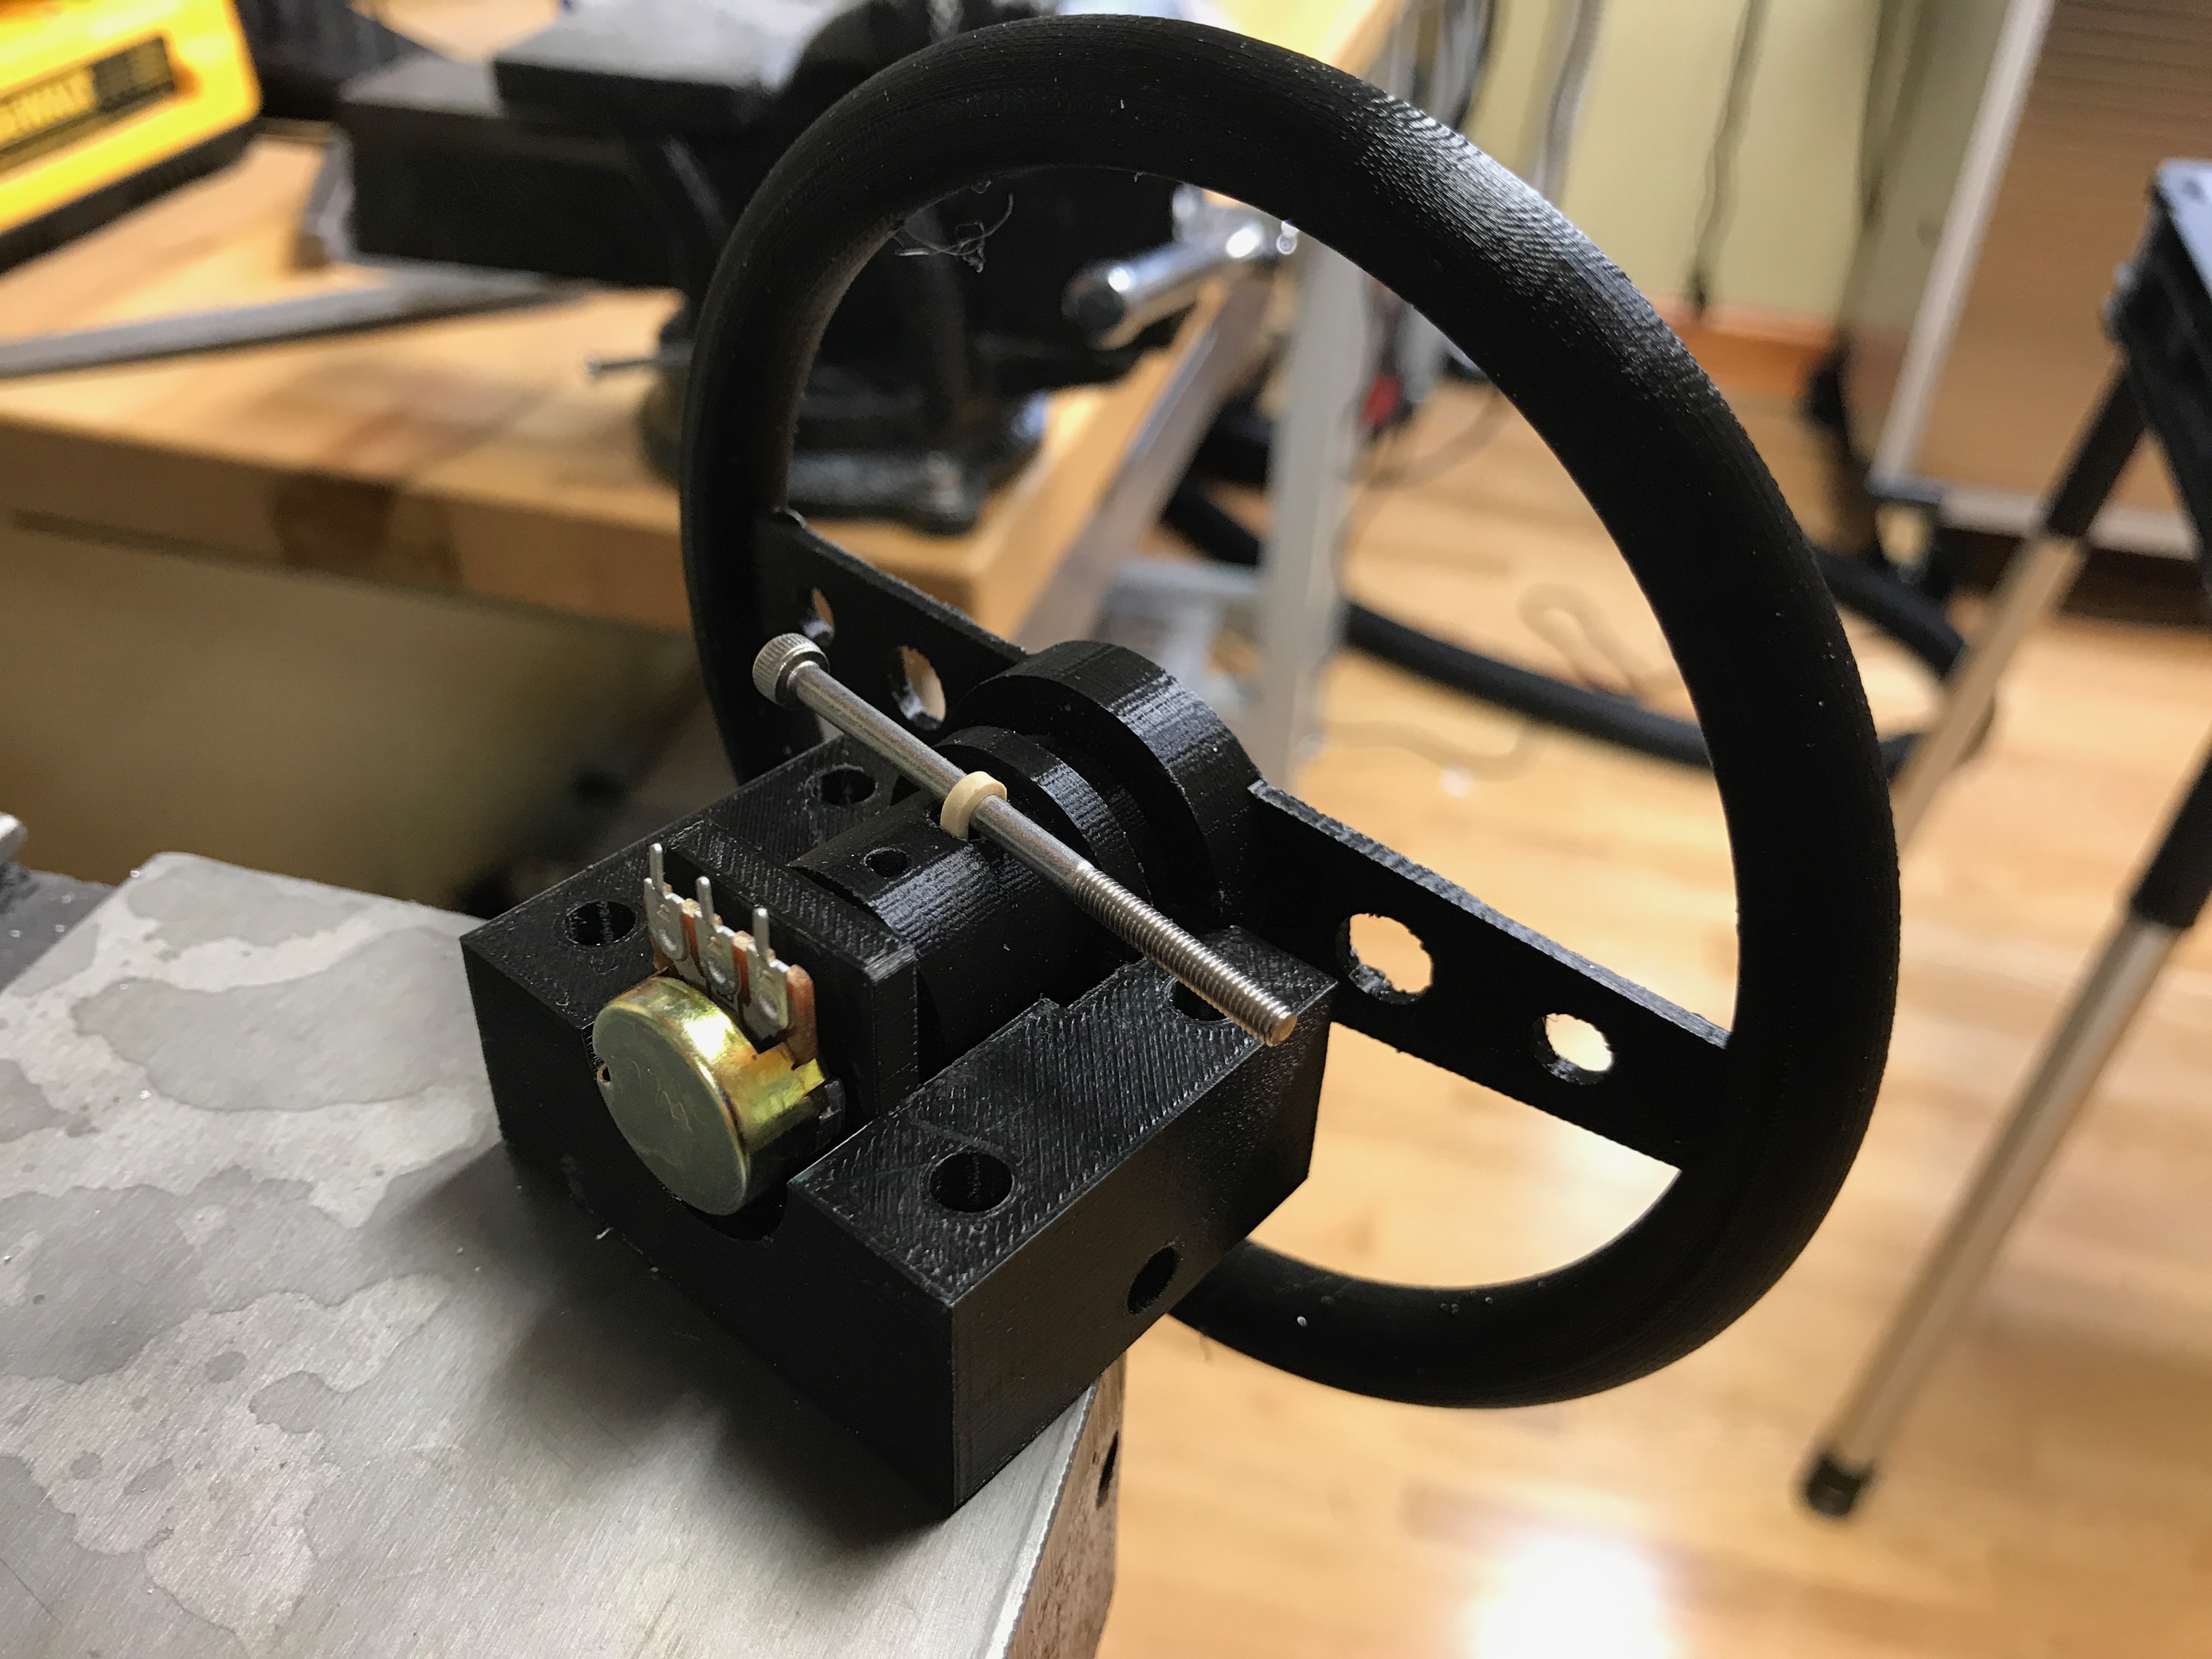\n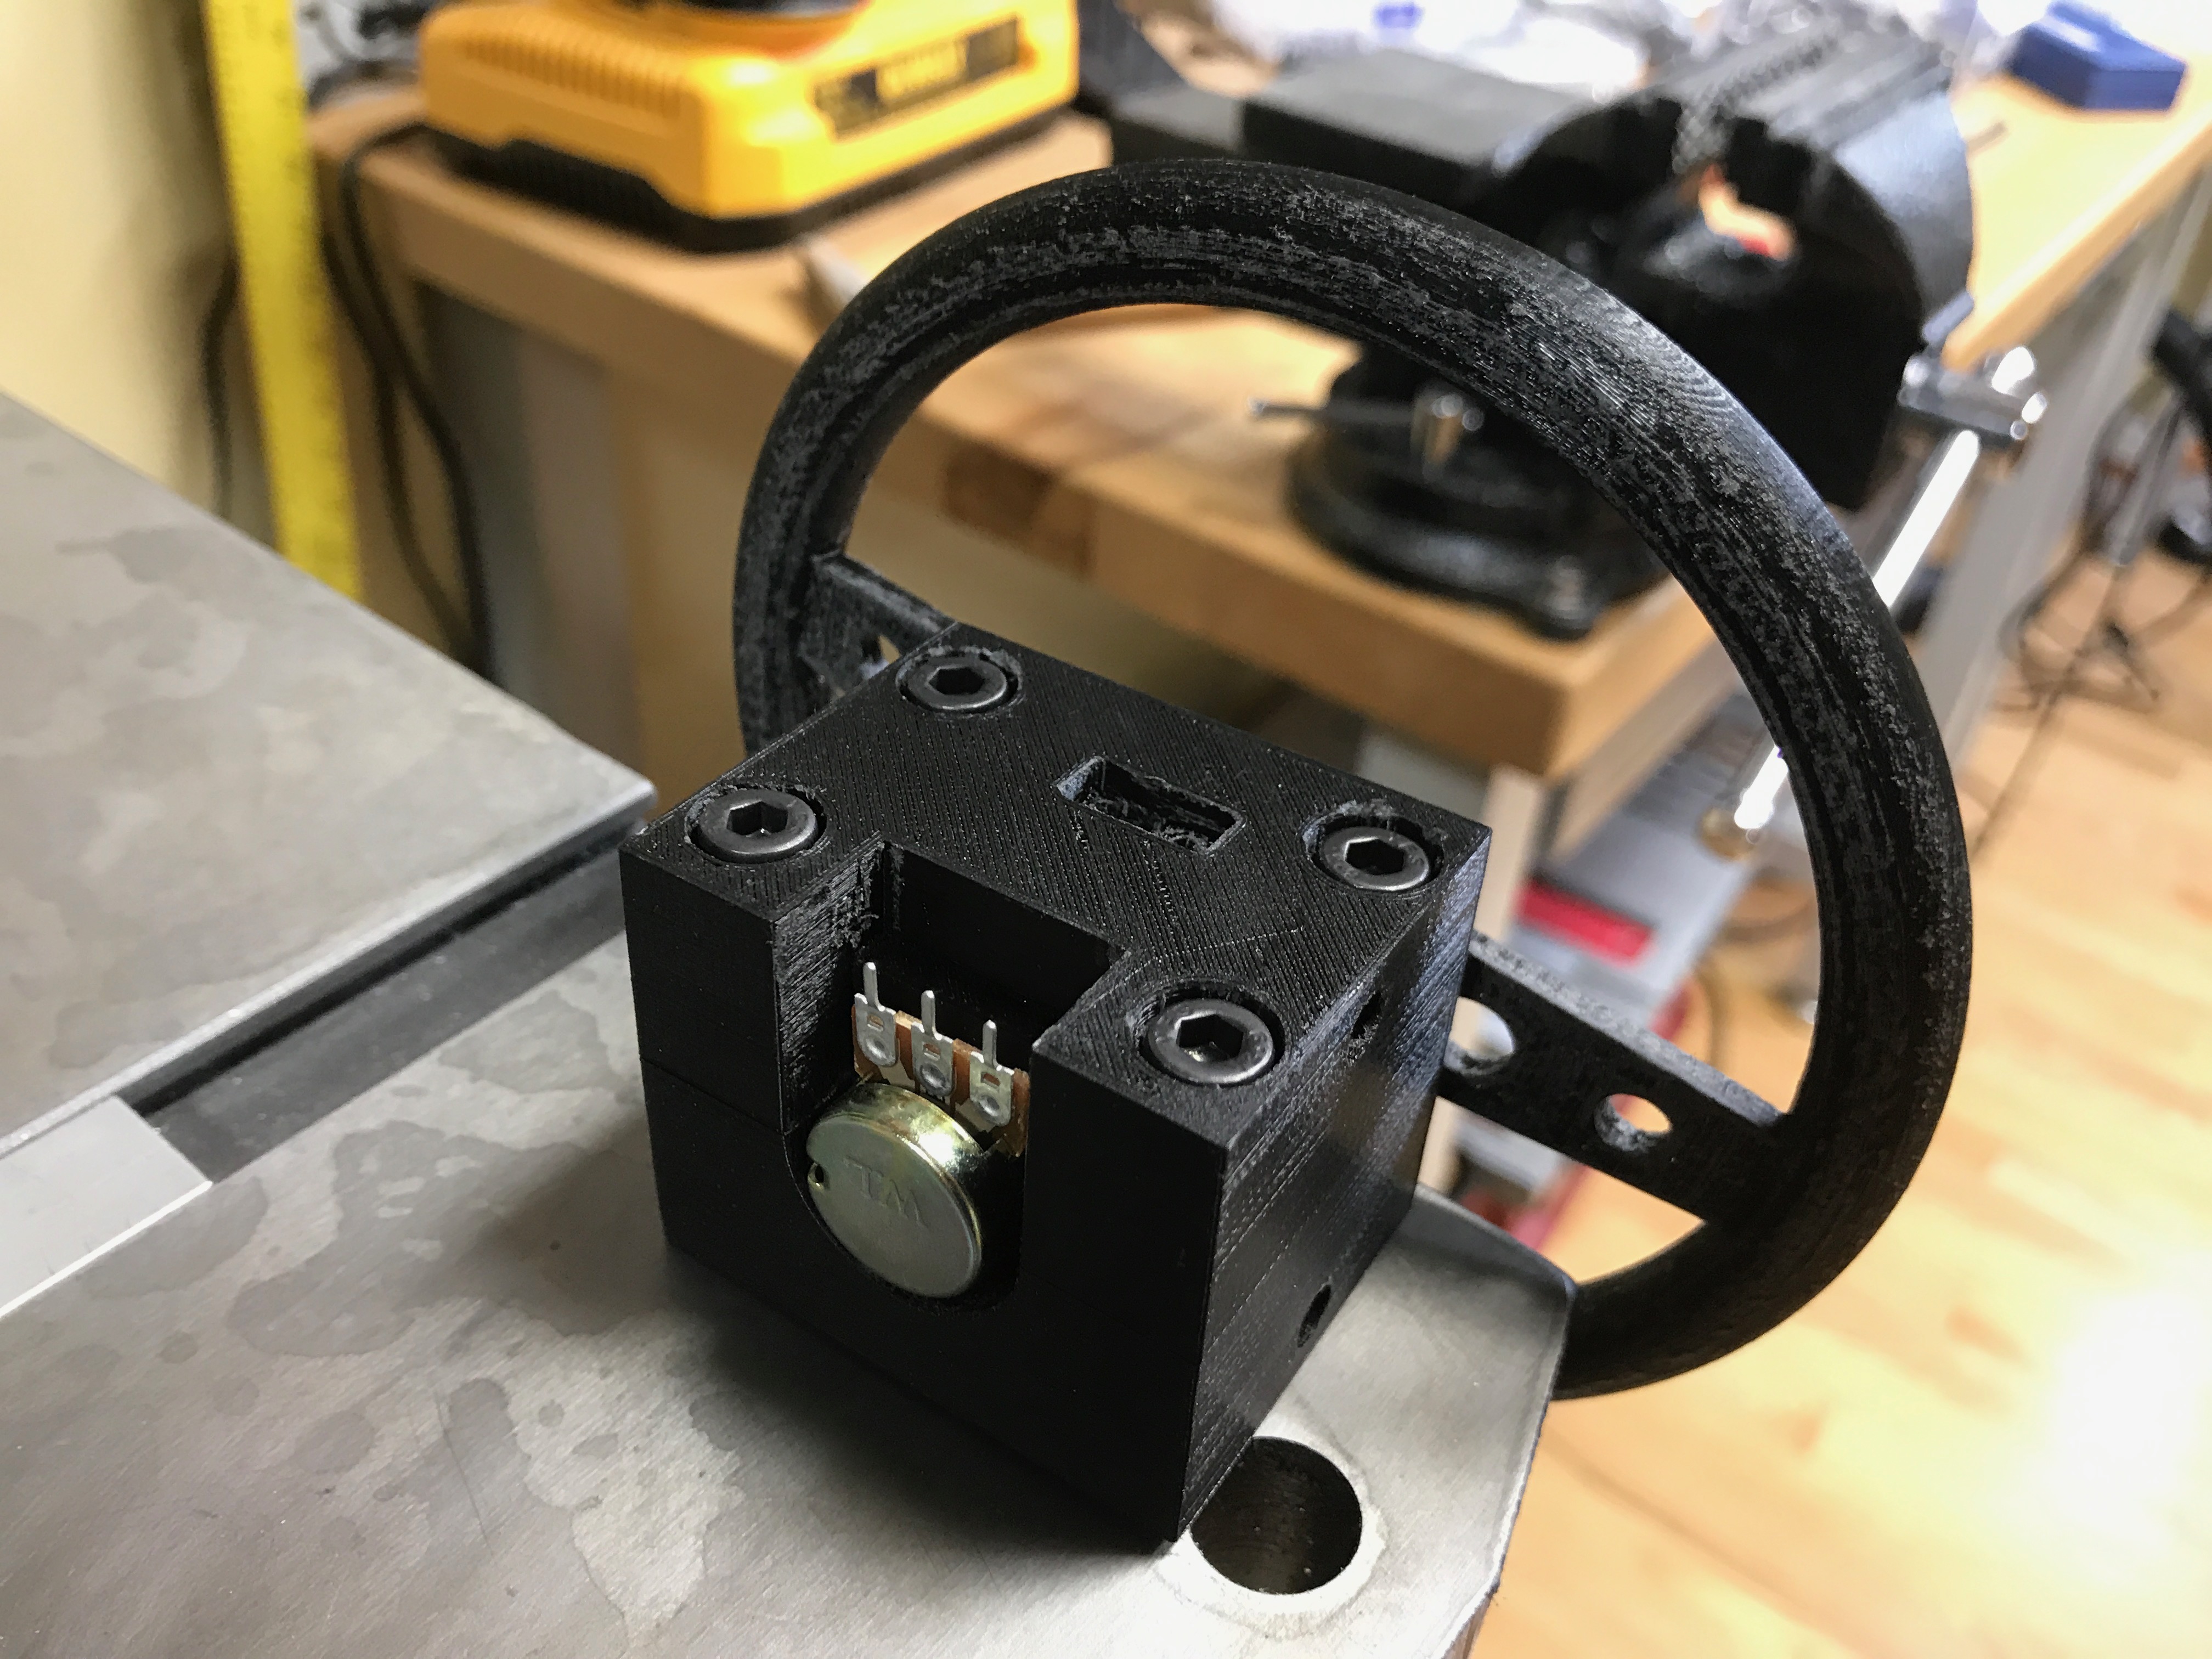\n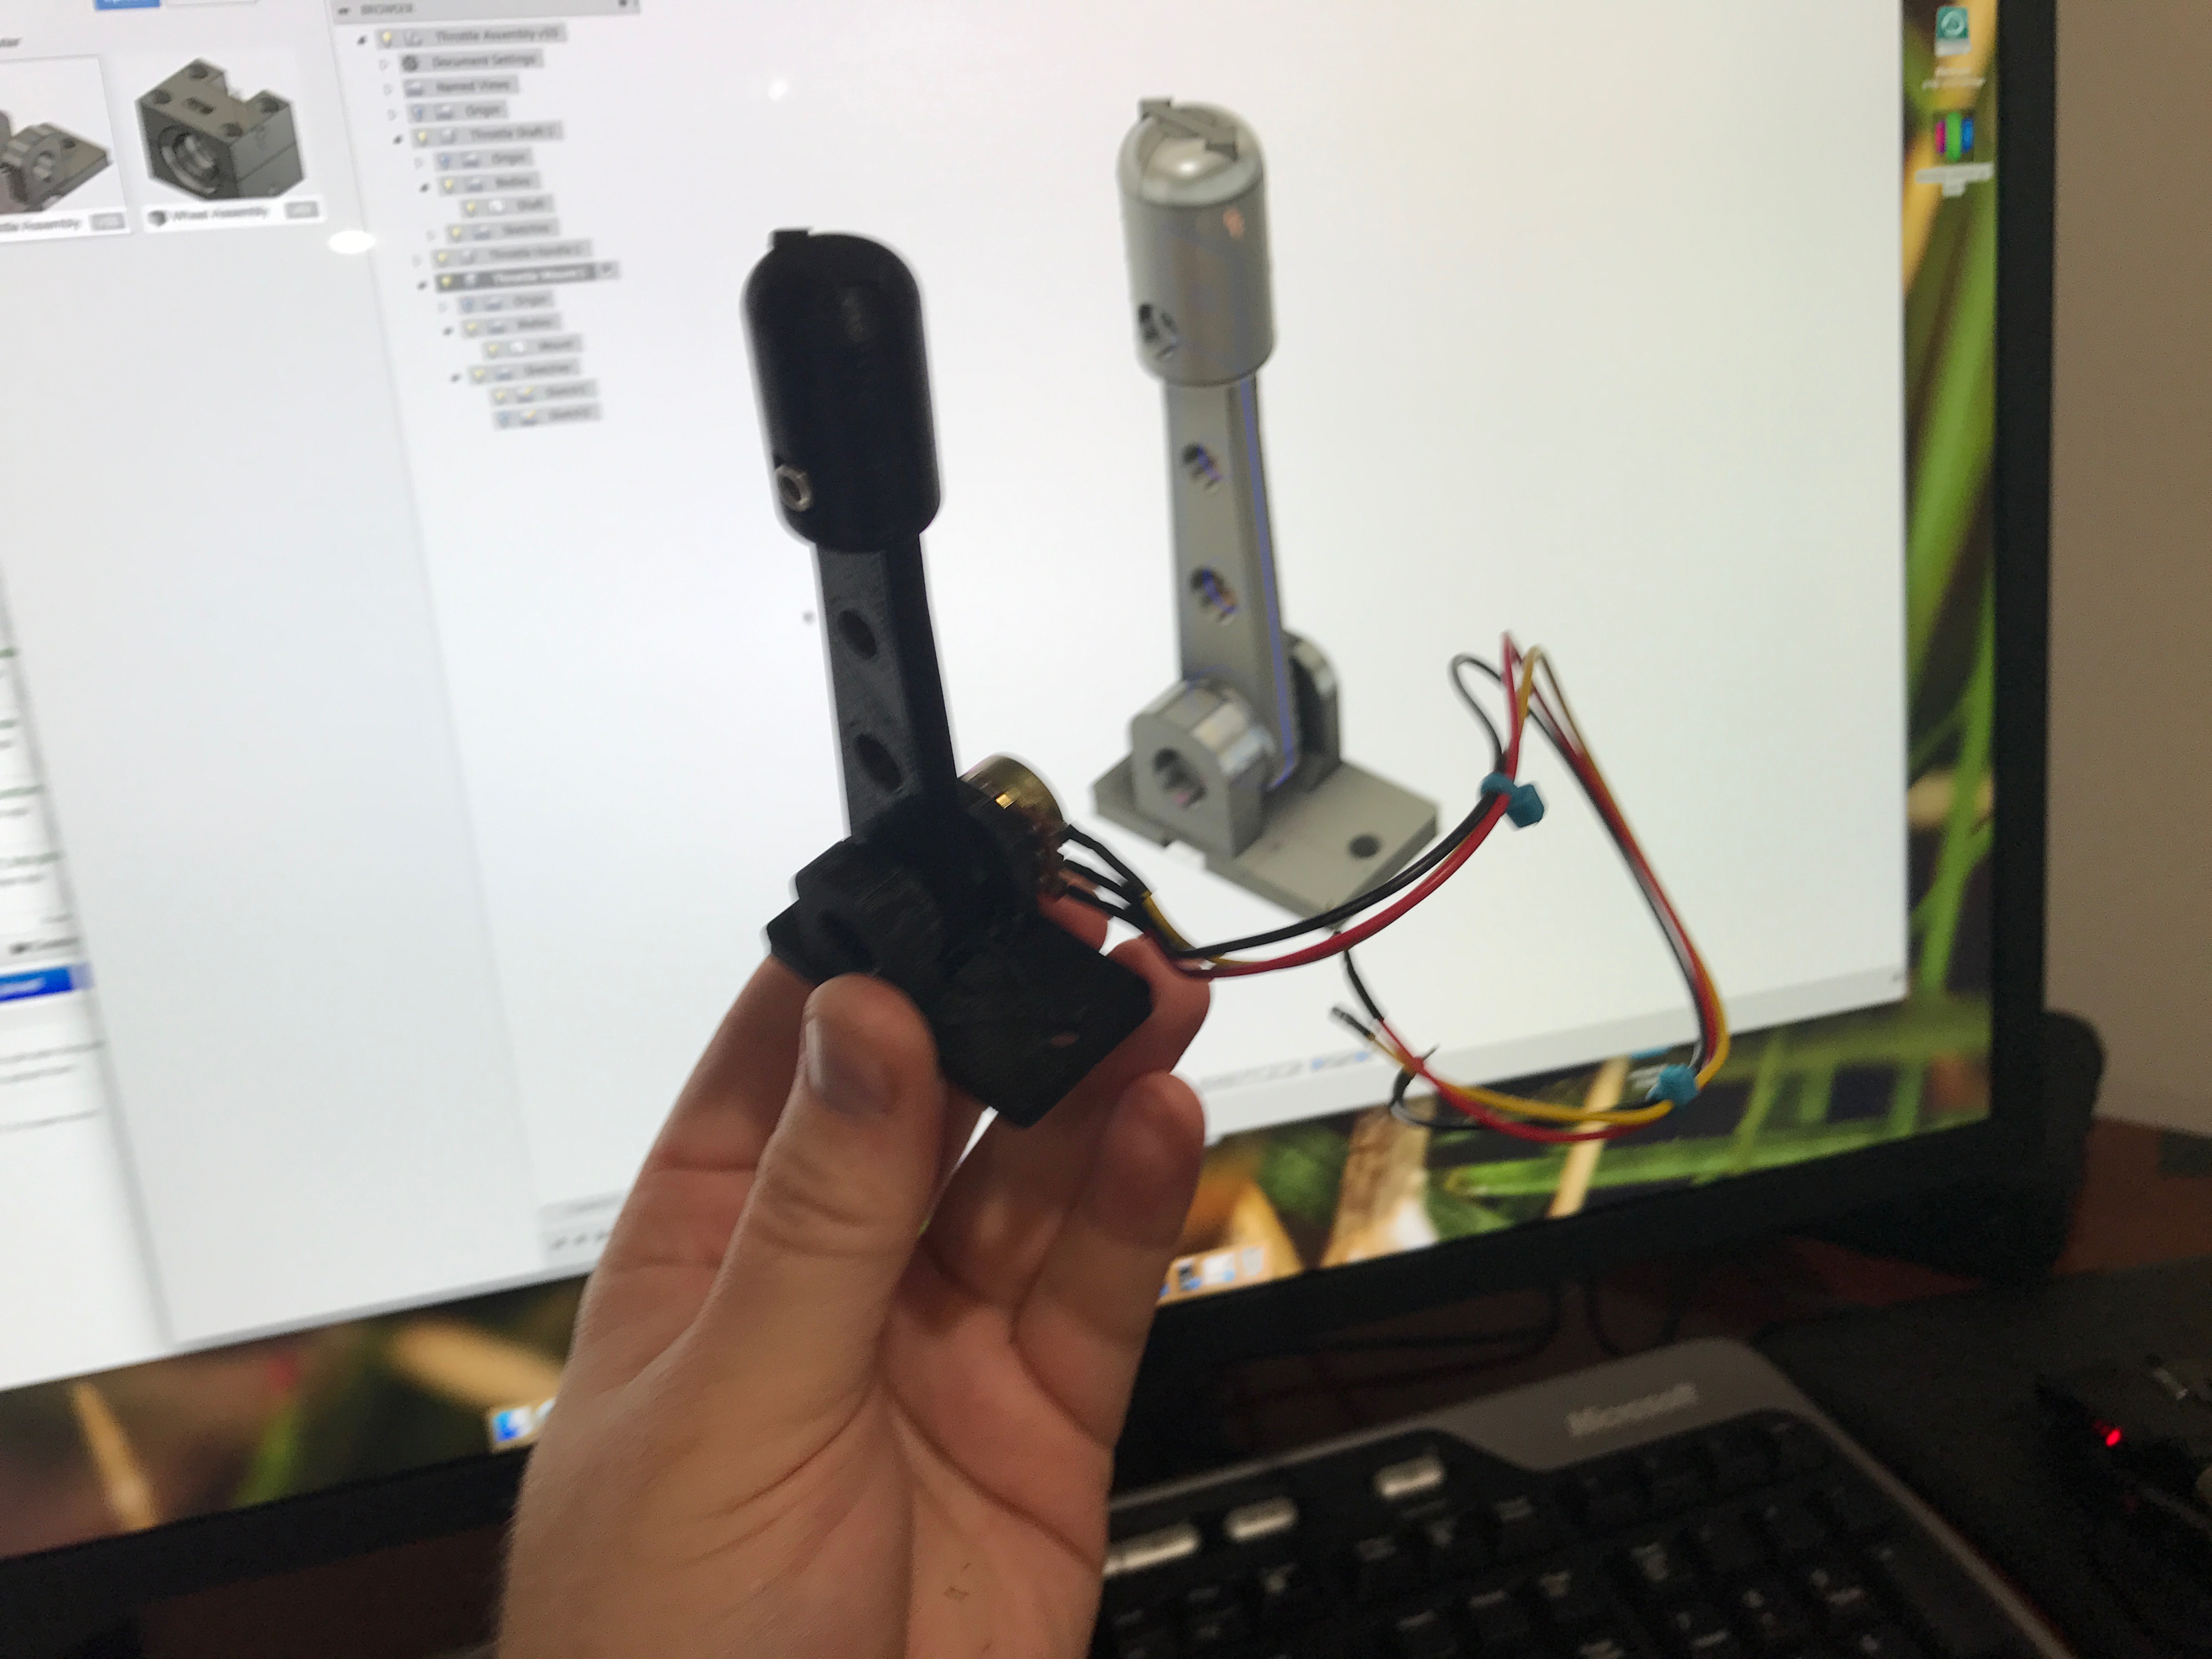\n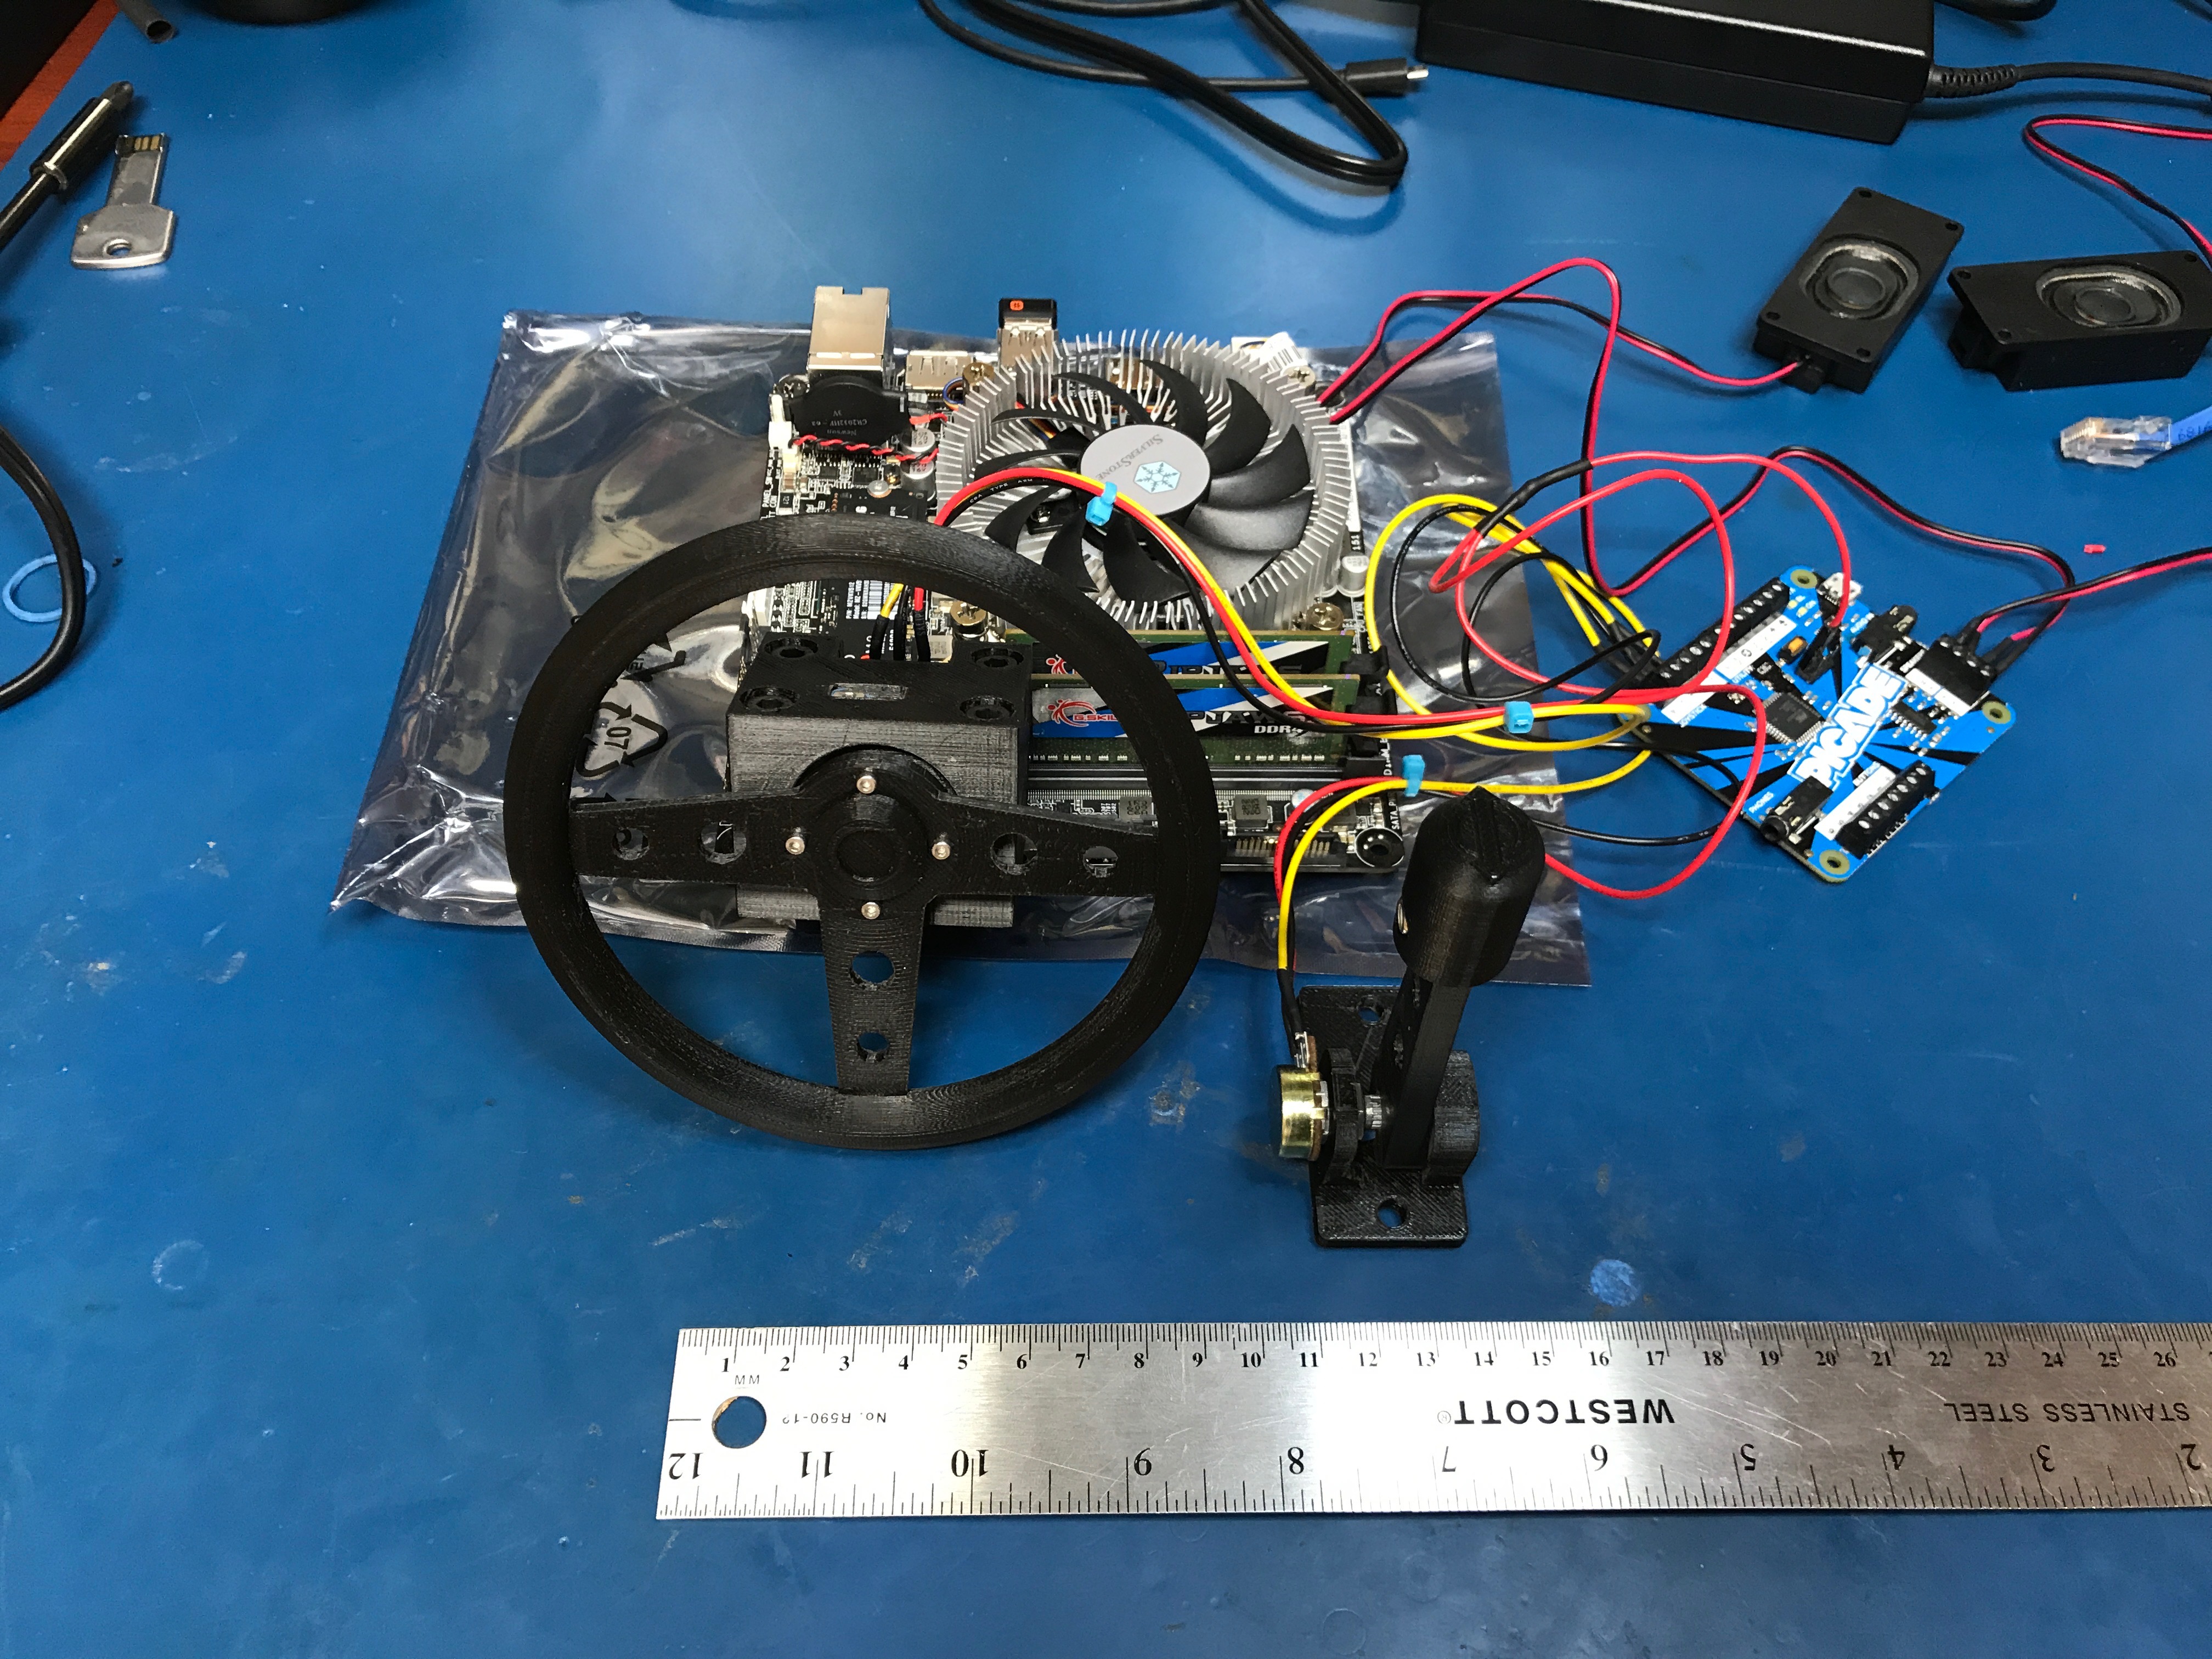\n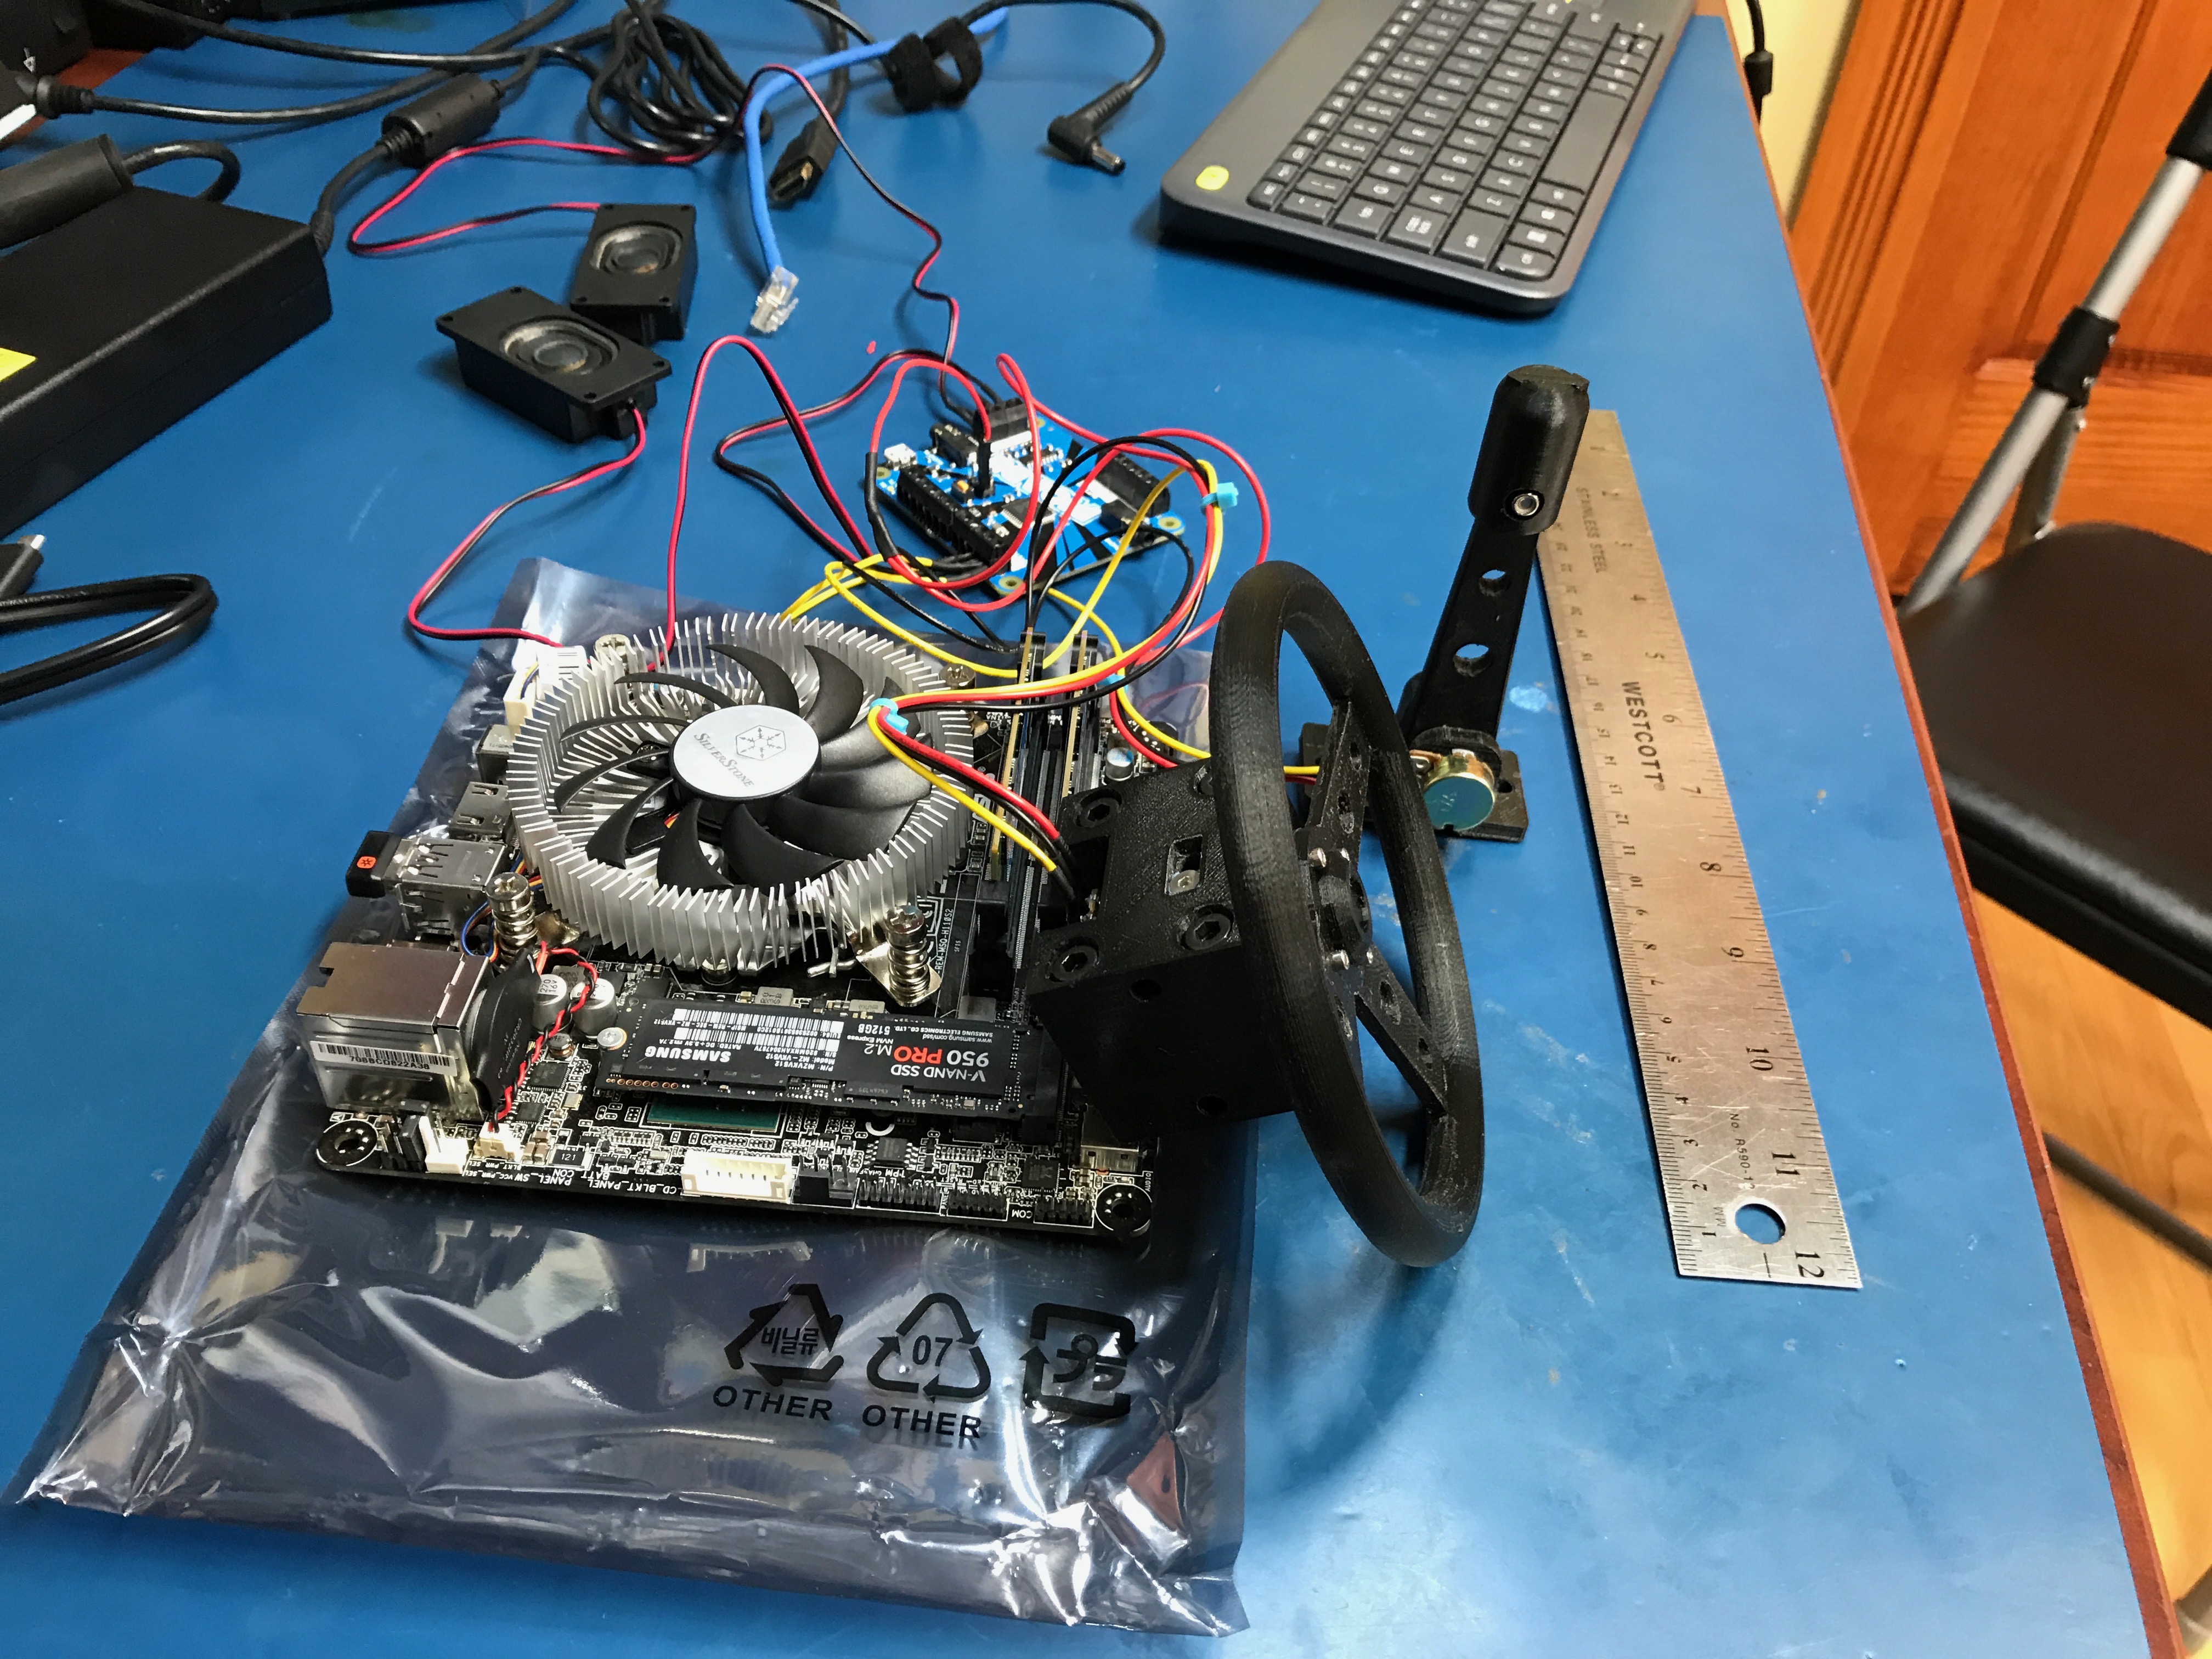\n\nI then went about planning the smallest footprint possible for the Car-cade... Ensuring that I was able to 3D print everything using my Anet A8.\n\n\u003cp align=\"center\"\u003e\n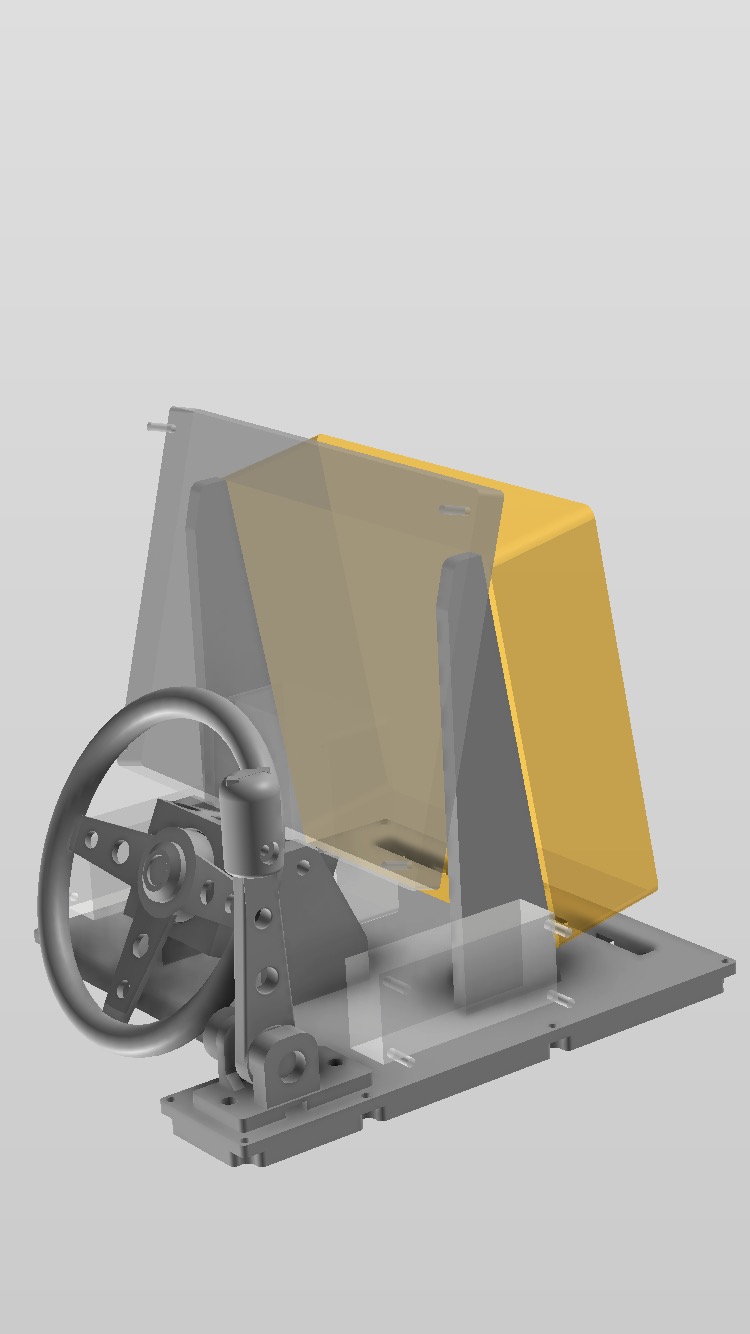\n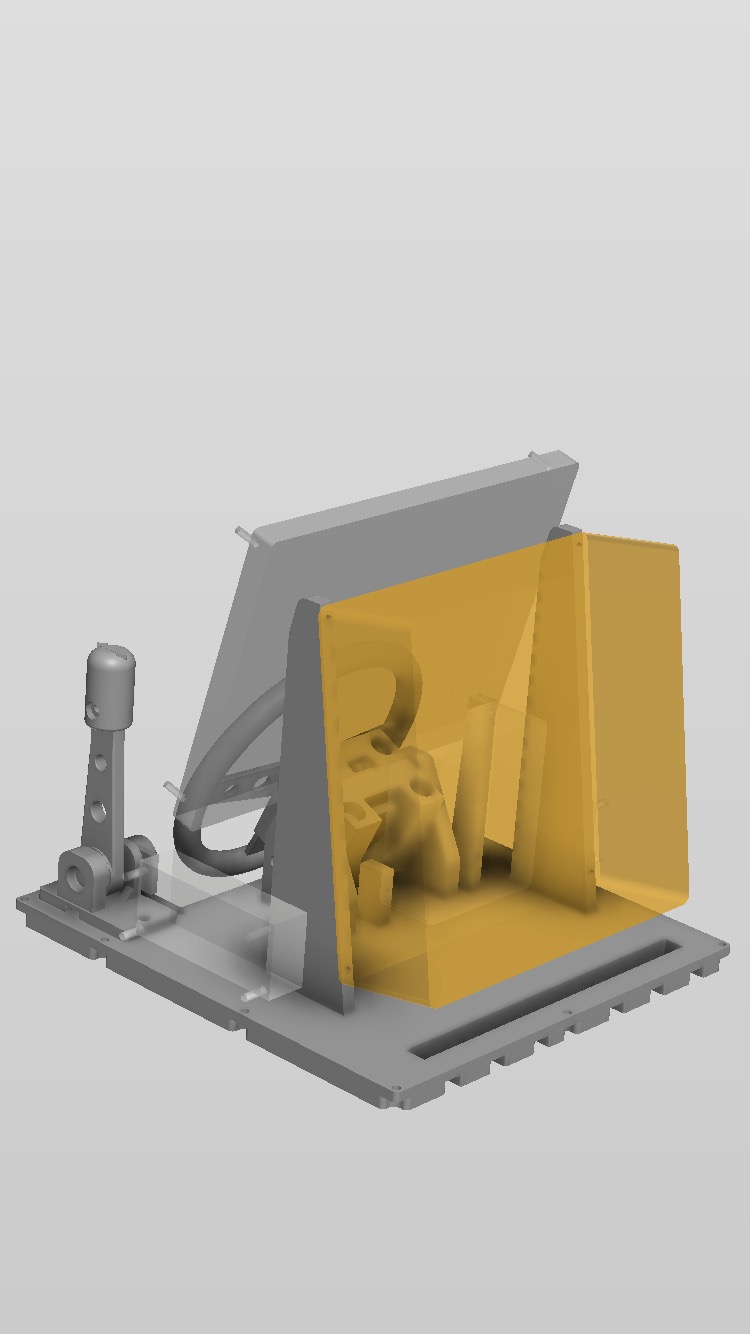\n\u003c/p\u003e\n\nAs I worked through designing each part and printing it, I got a better picture of how everything would come together. It didn't take much effort once the ball was in motion.\n\n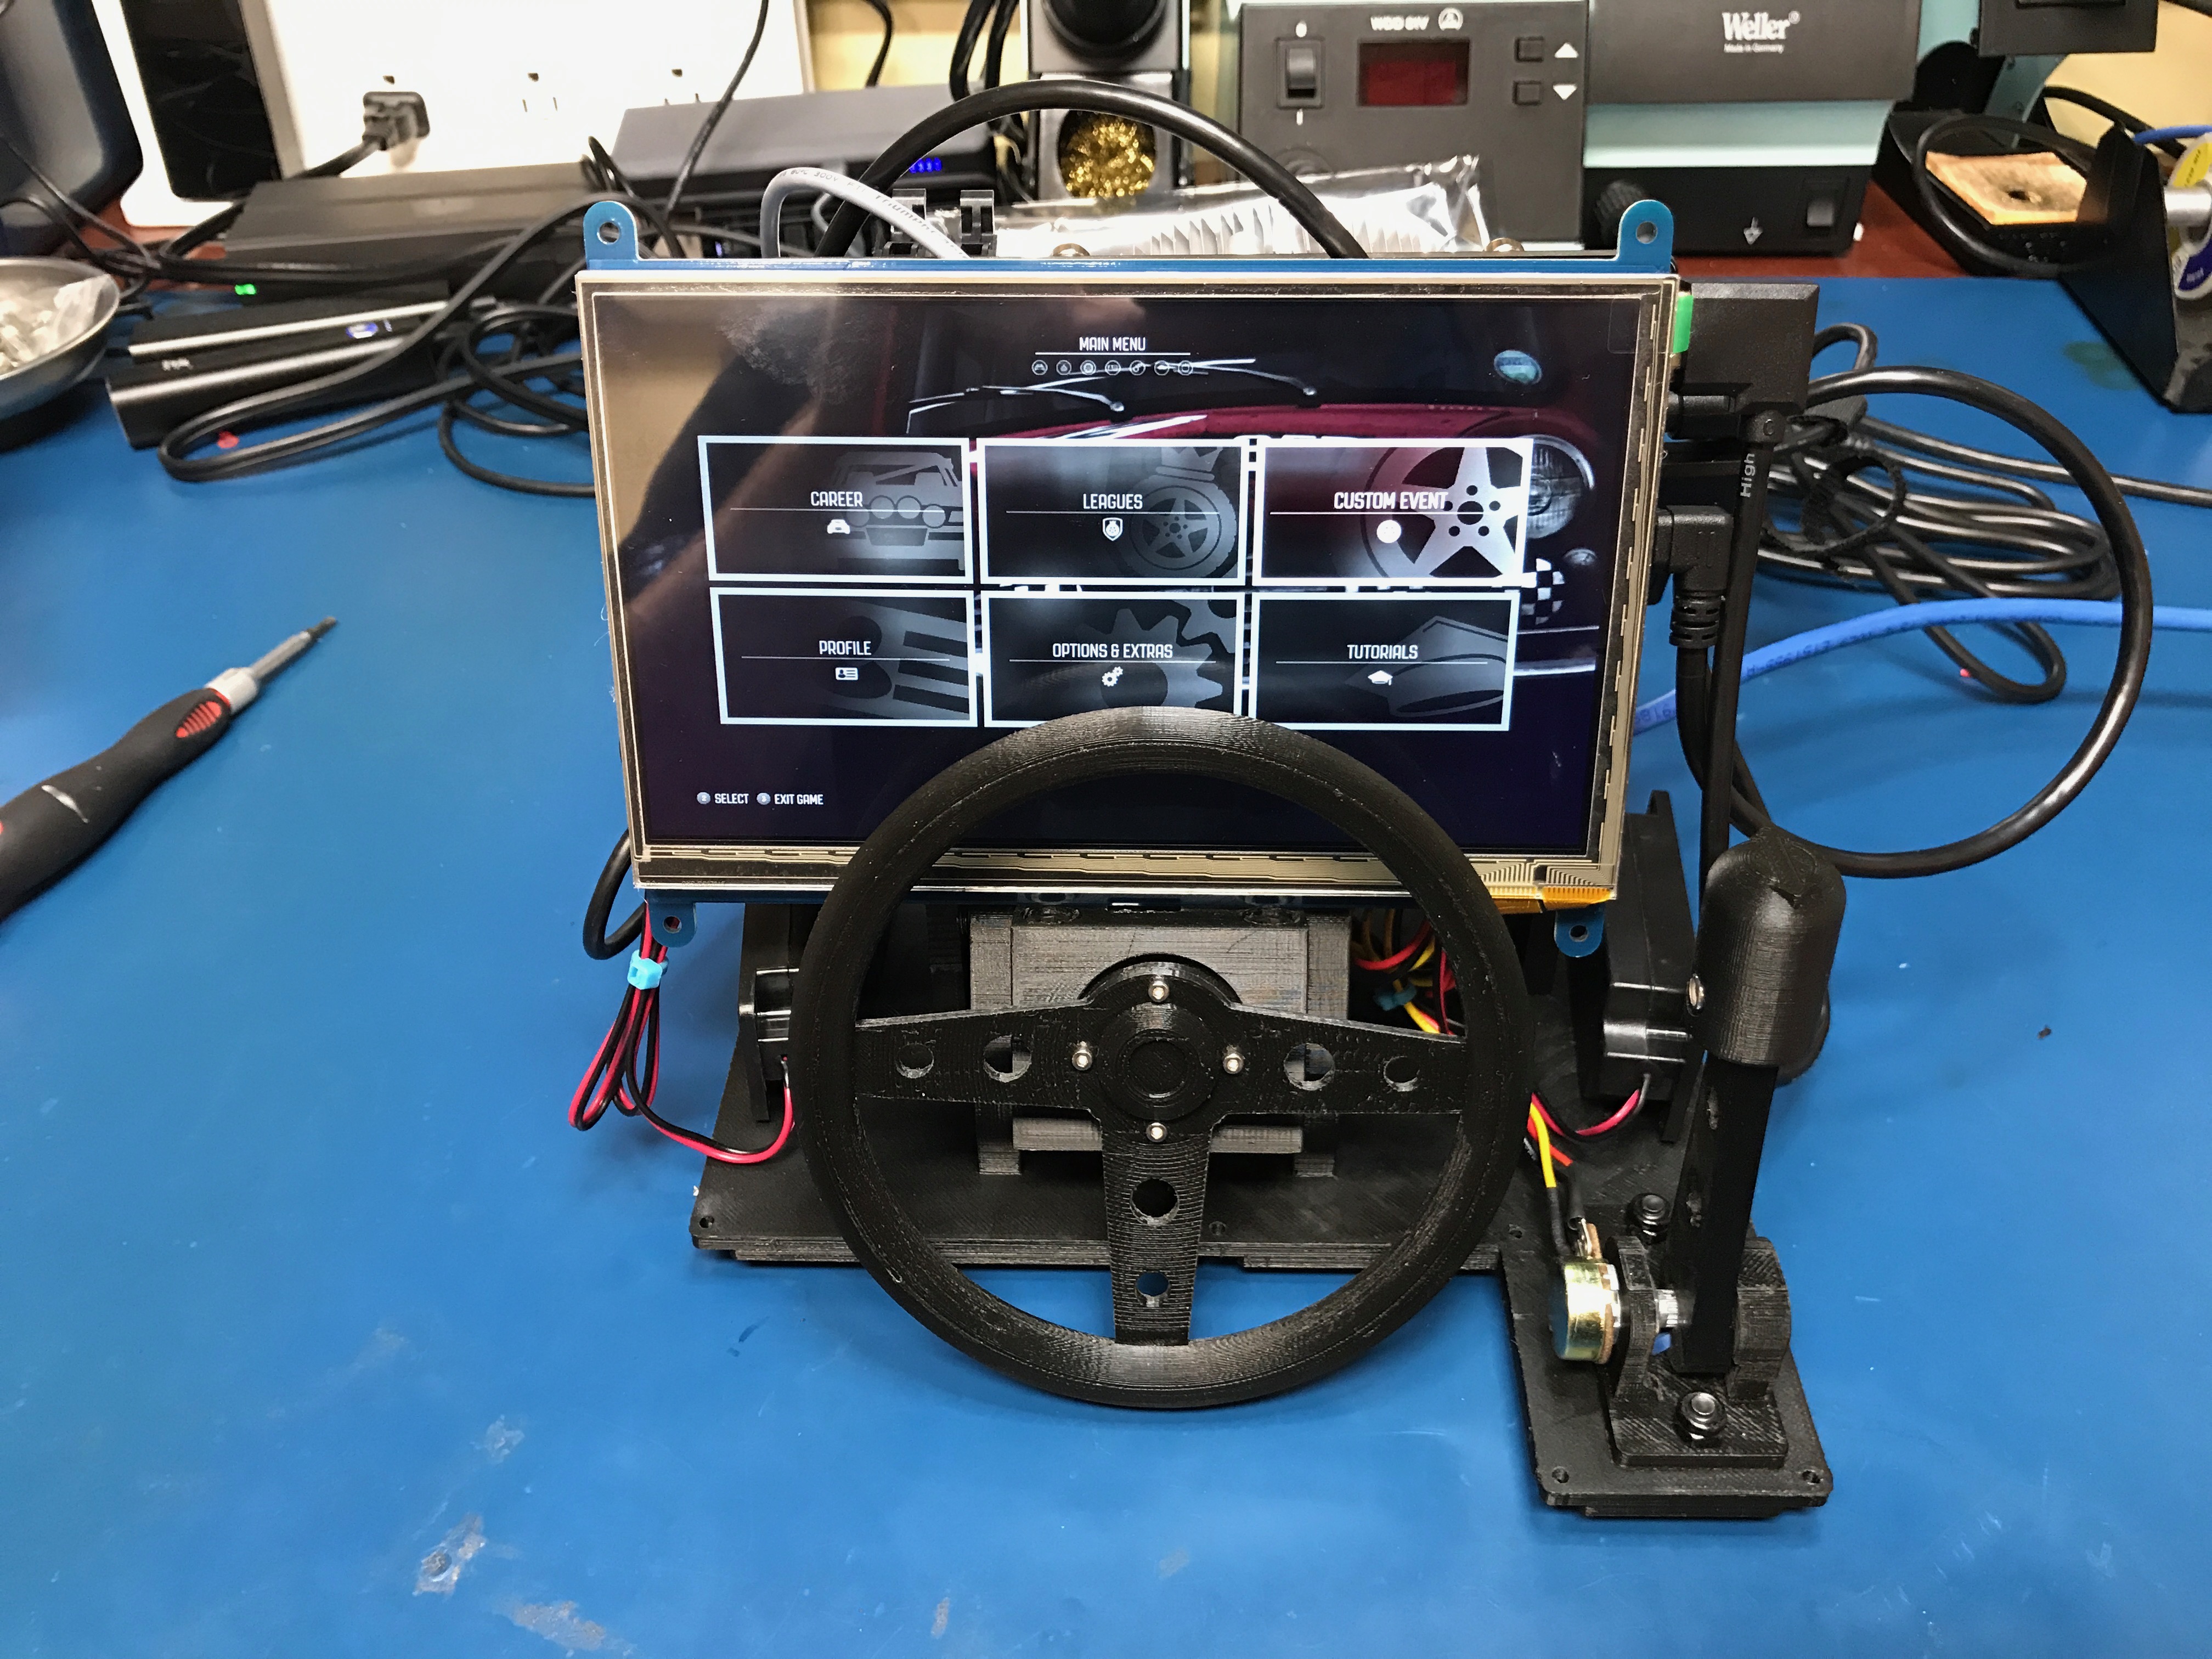\n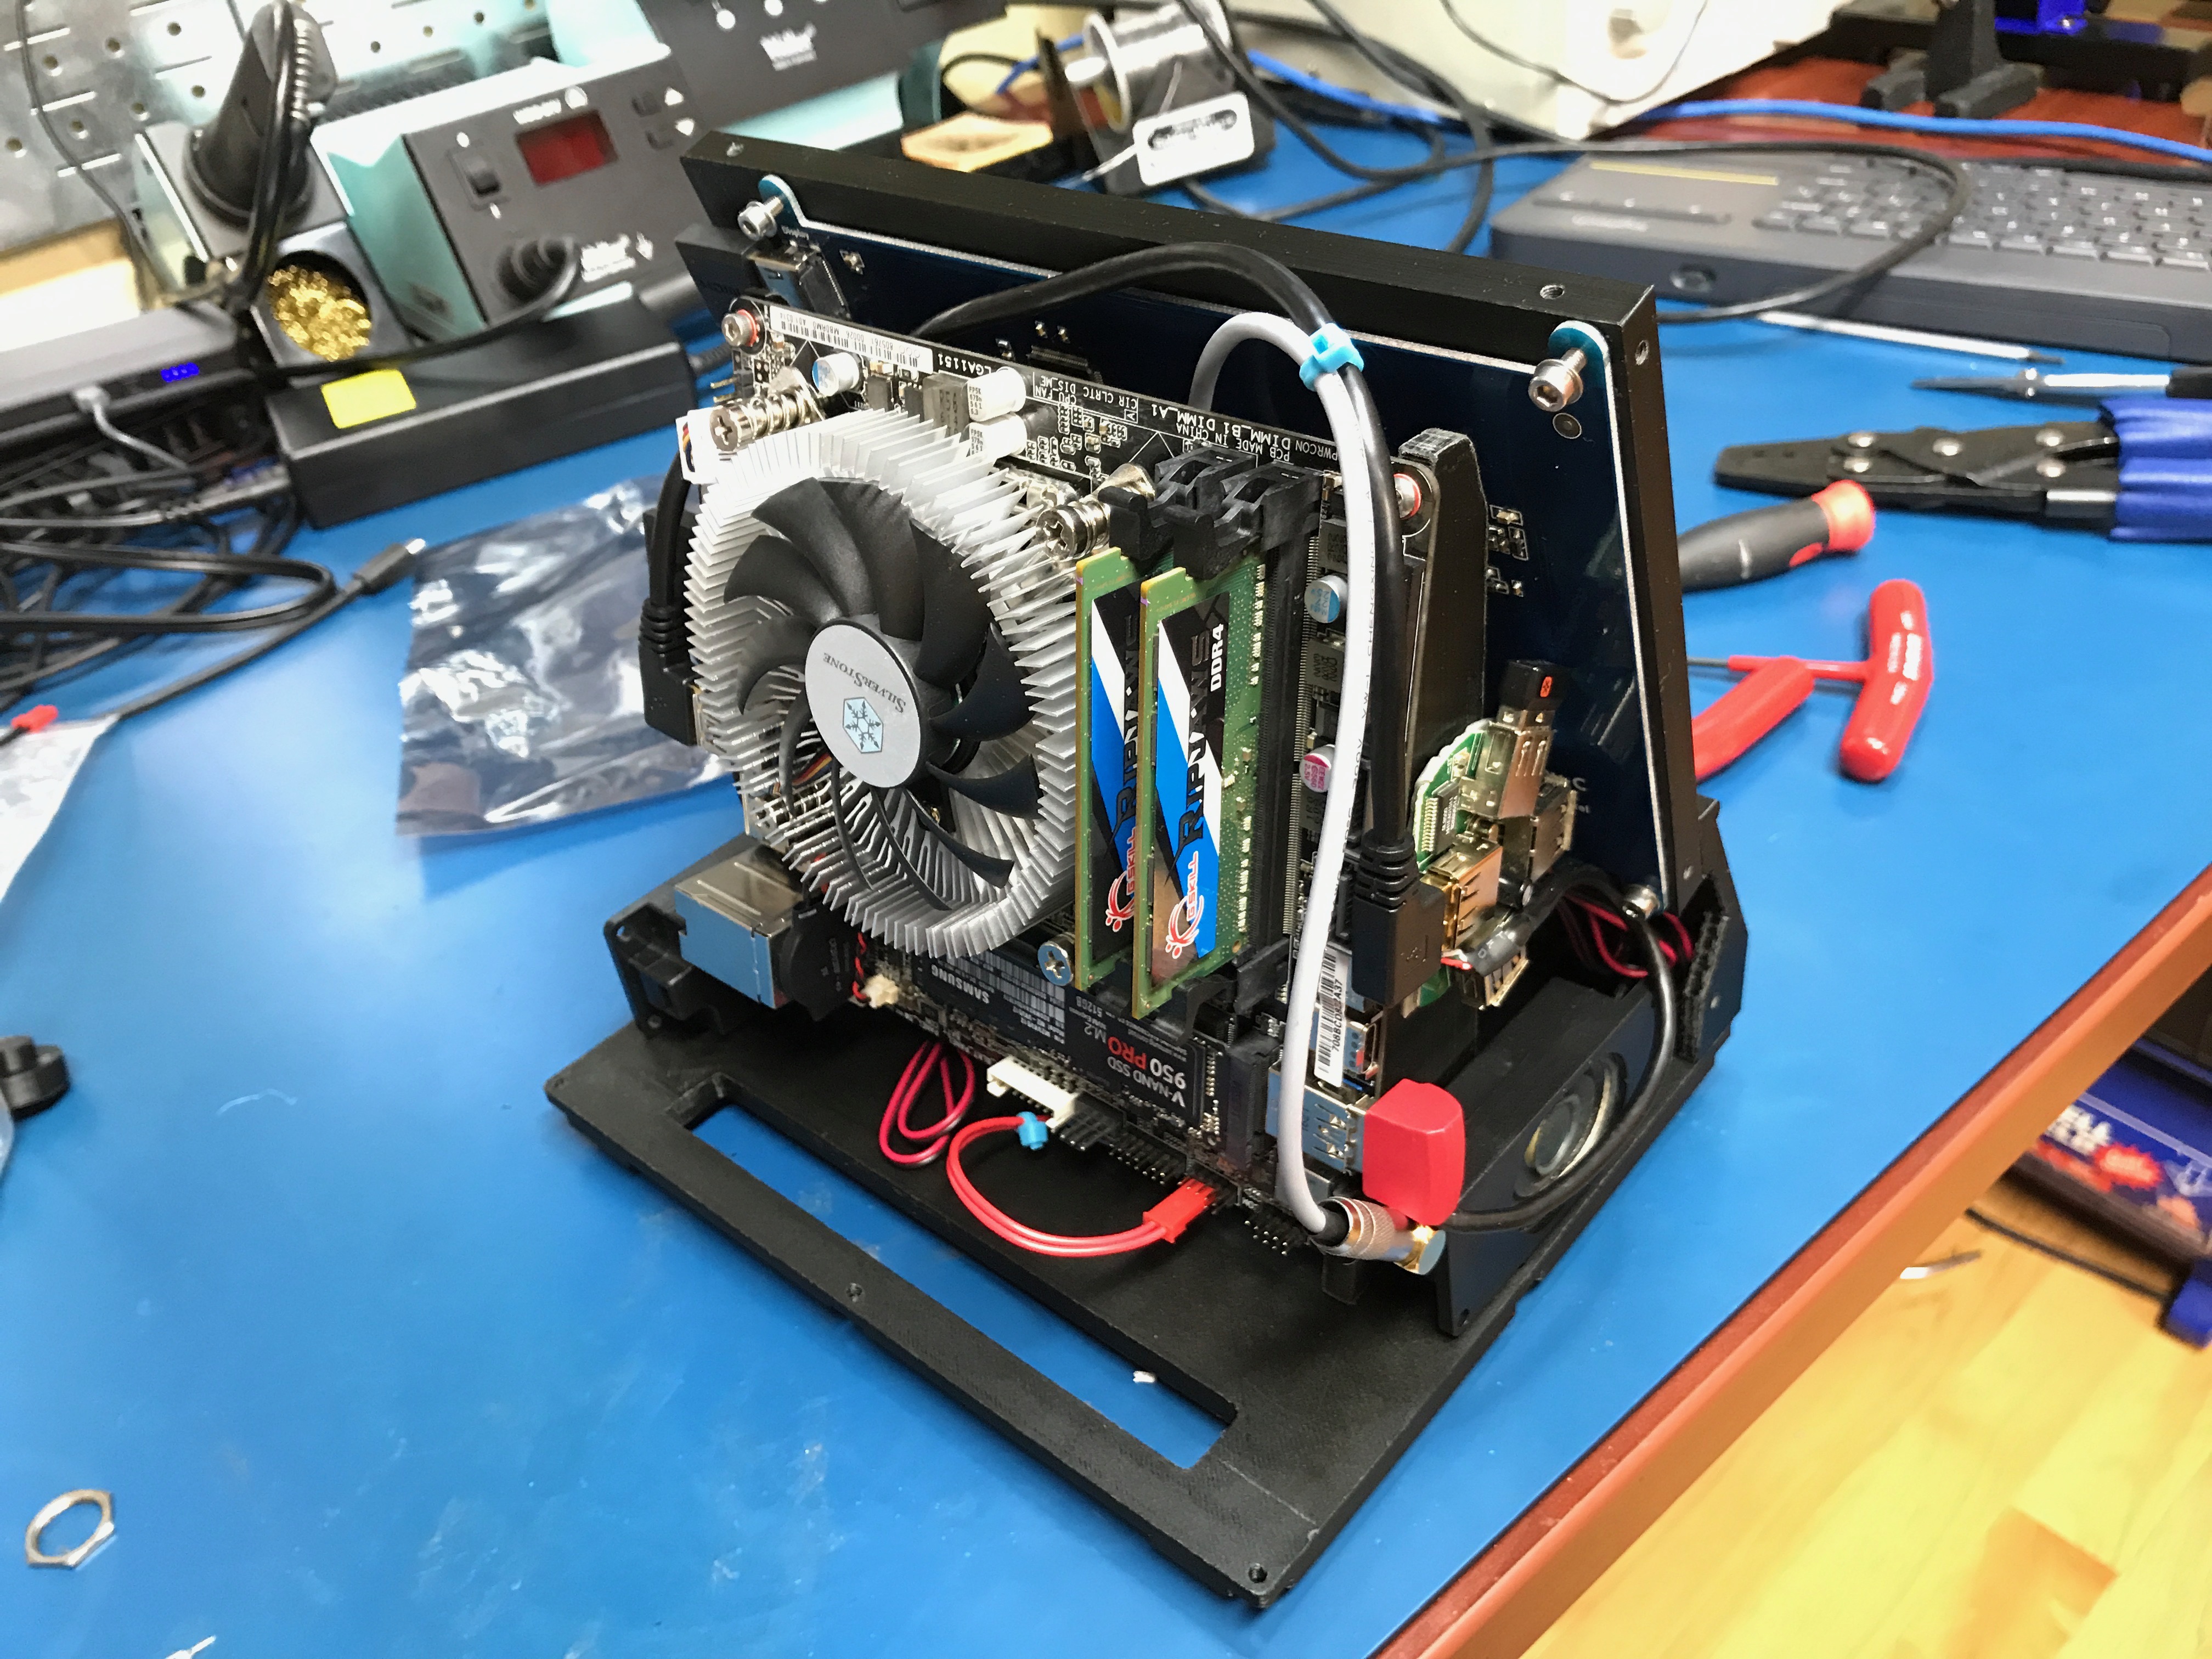\n\n####Social Media Interest\nI recorded a video of my friend Eric playing on the Car-cade and put it up on Twitter showing off the progress. A few large social media publishers contacted me and asked if they could share the video. It got quite a lot of views on their networks!\n\n\u003ciframe width=\"560\" height=\"315\" src=\"https://www.youtube.com/embed/Ss-si82NqcI\" frameborder=\"0\" allowfullscreen\u003e\u003c/iframe\u003e\n\n####Designing Around the Parts\nEverything was designed around being as small as possible. As you can see, minimal clearance was given around the motherboard. I had a balancing act between the maximum print area on my 3D printer and how much room I needed for cables plugging in to the motherboard.\n\n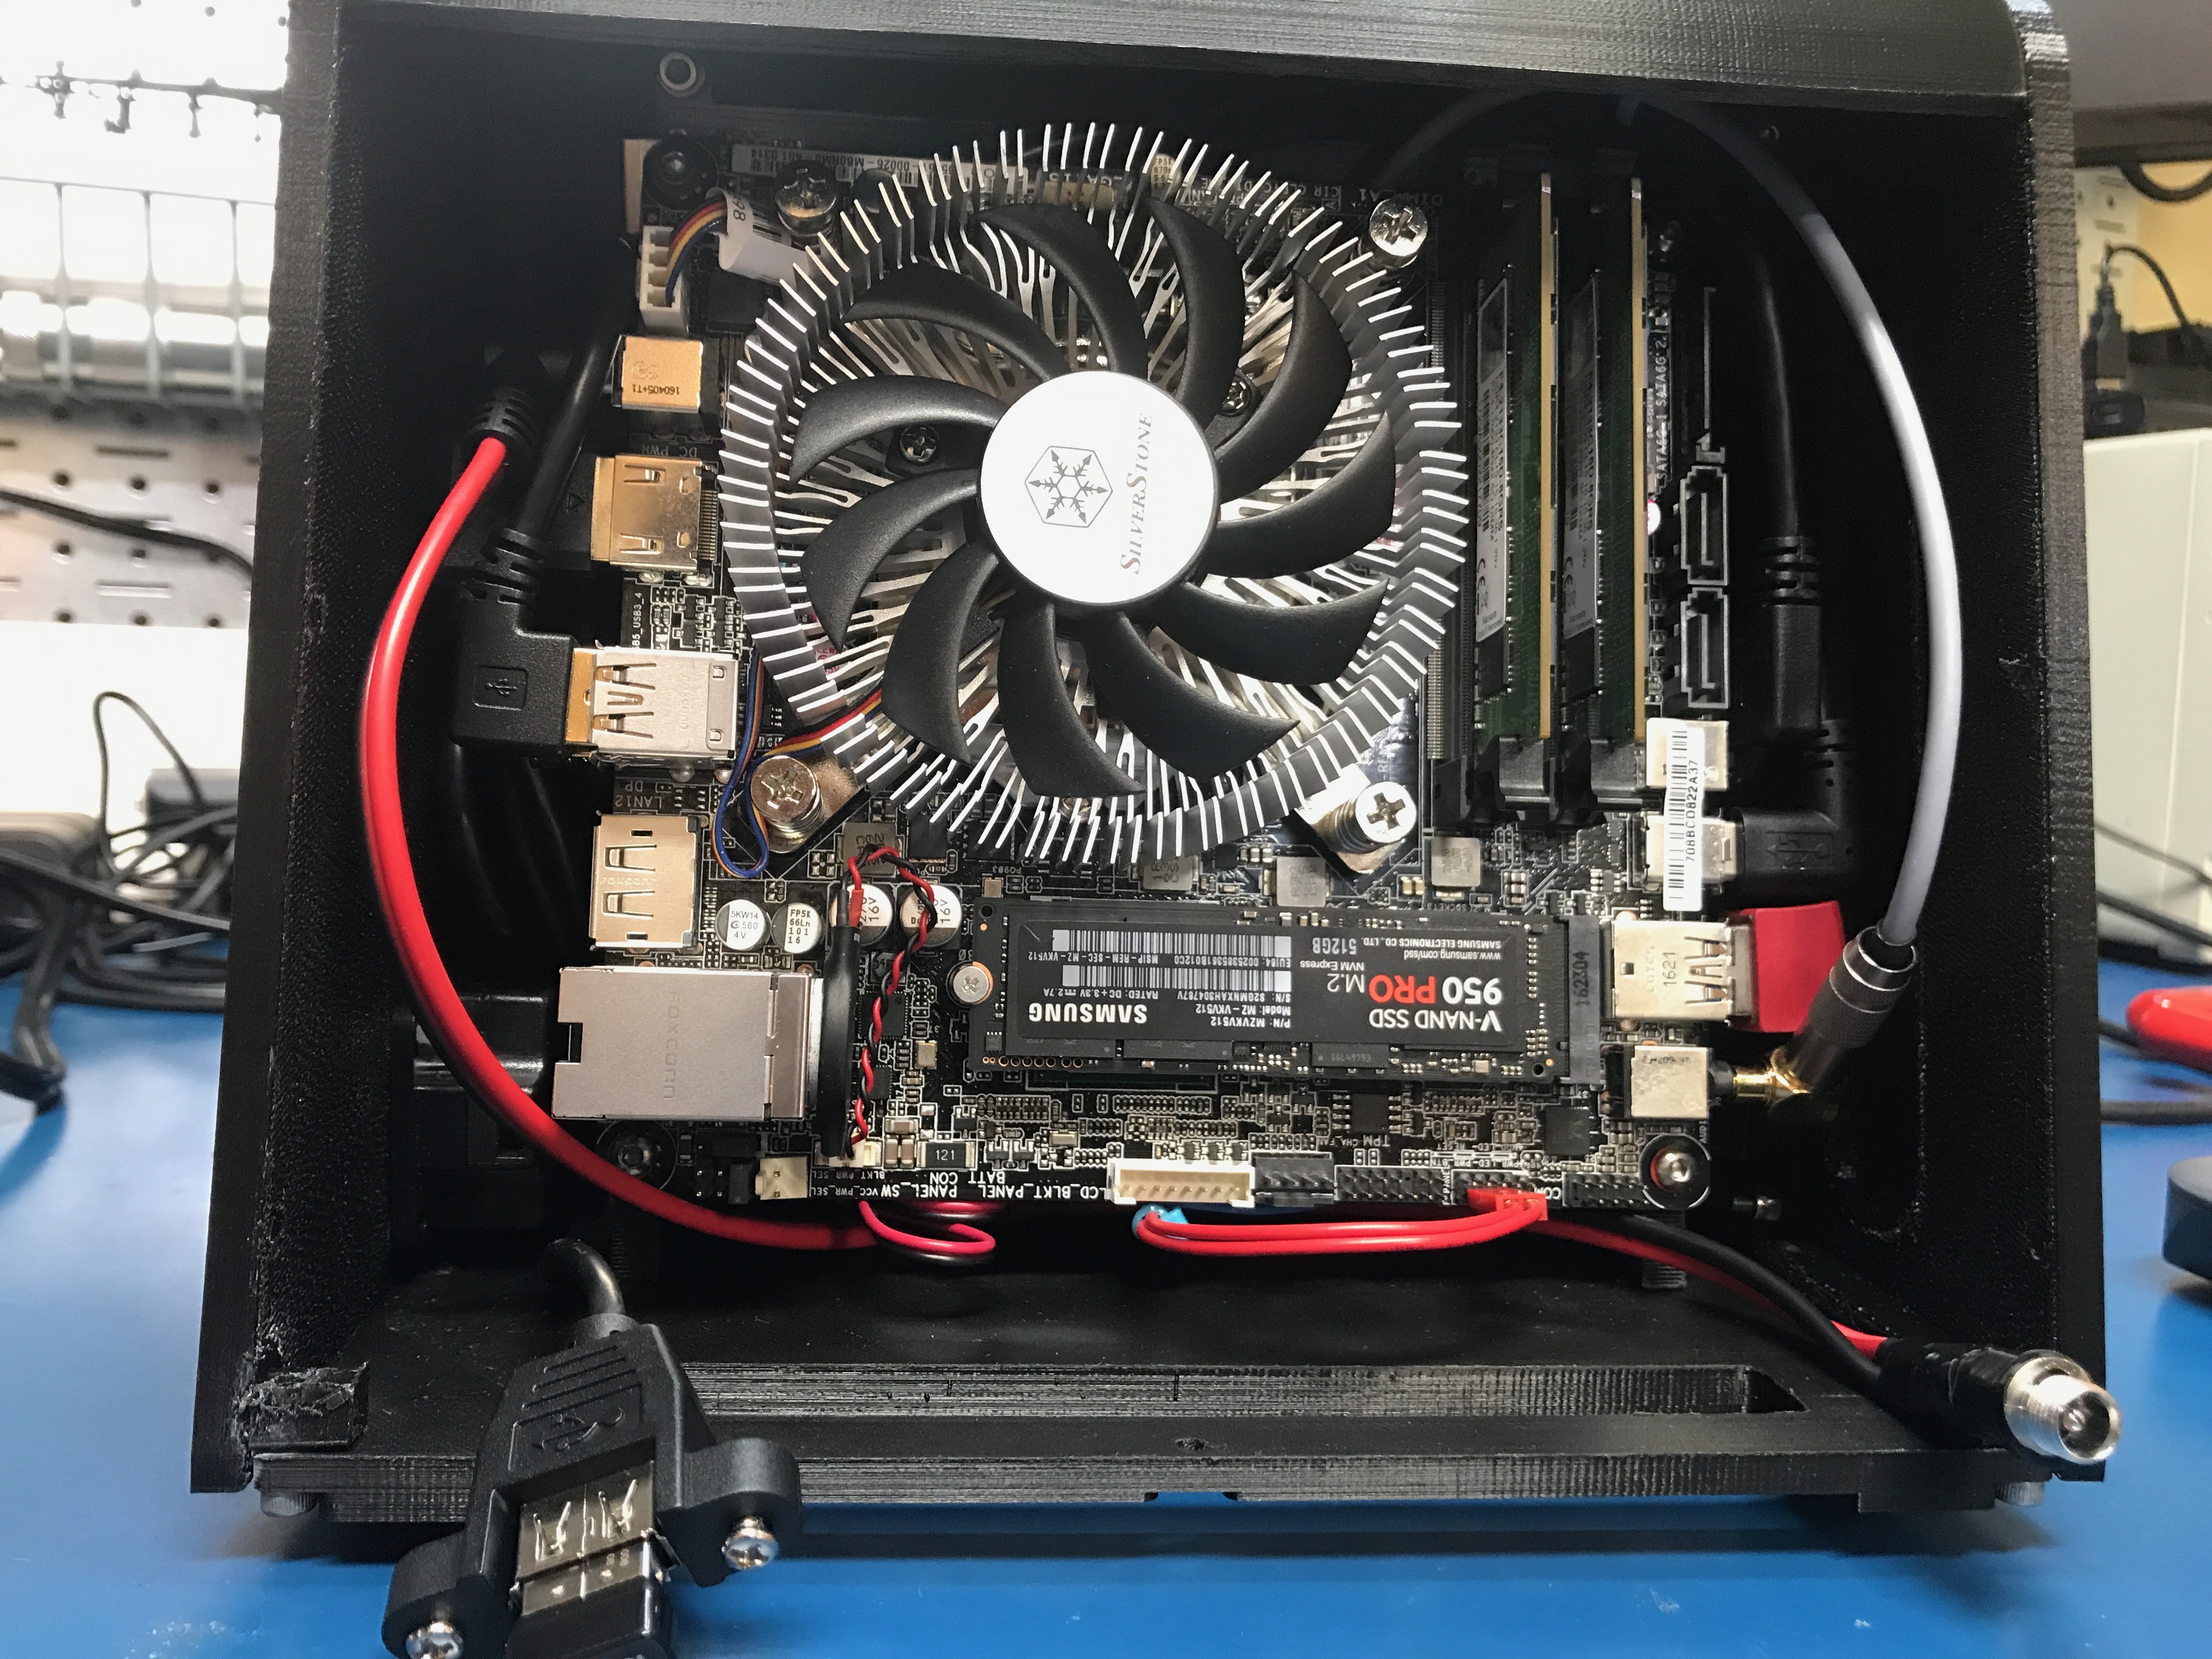\n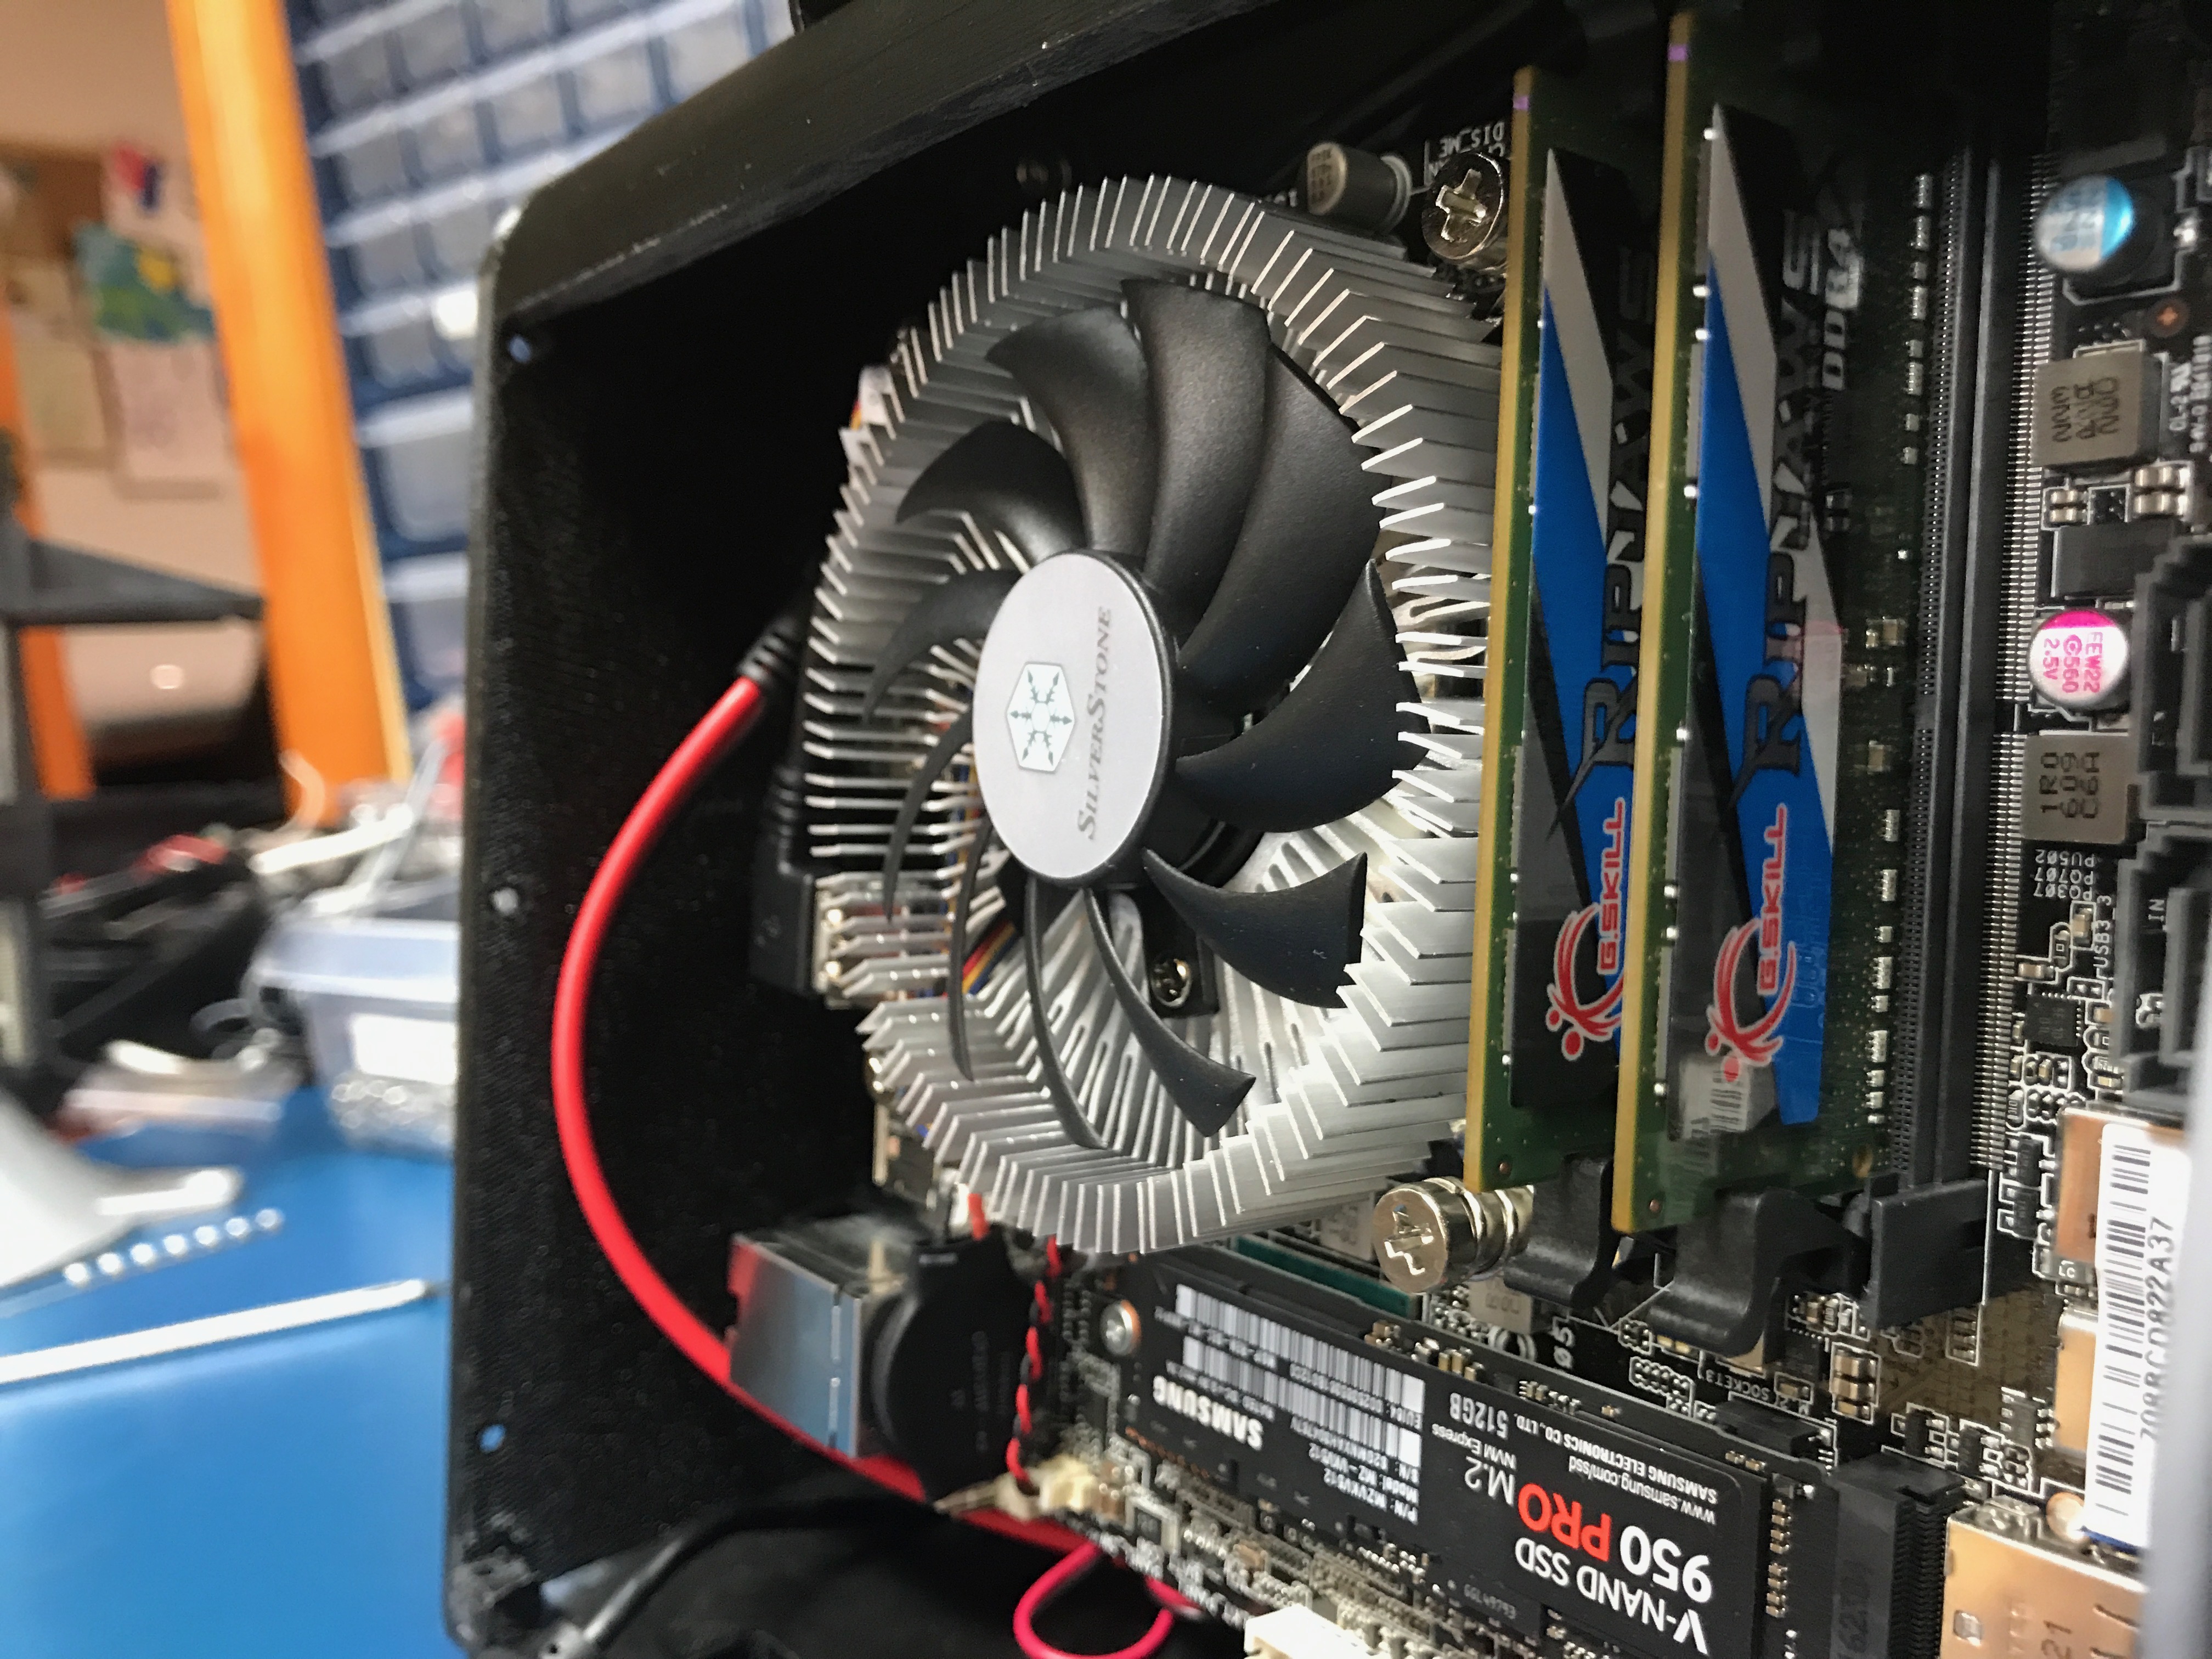\n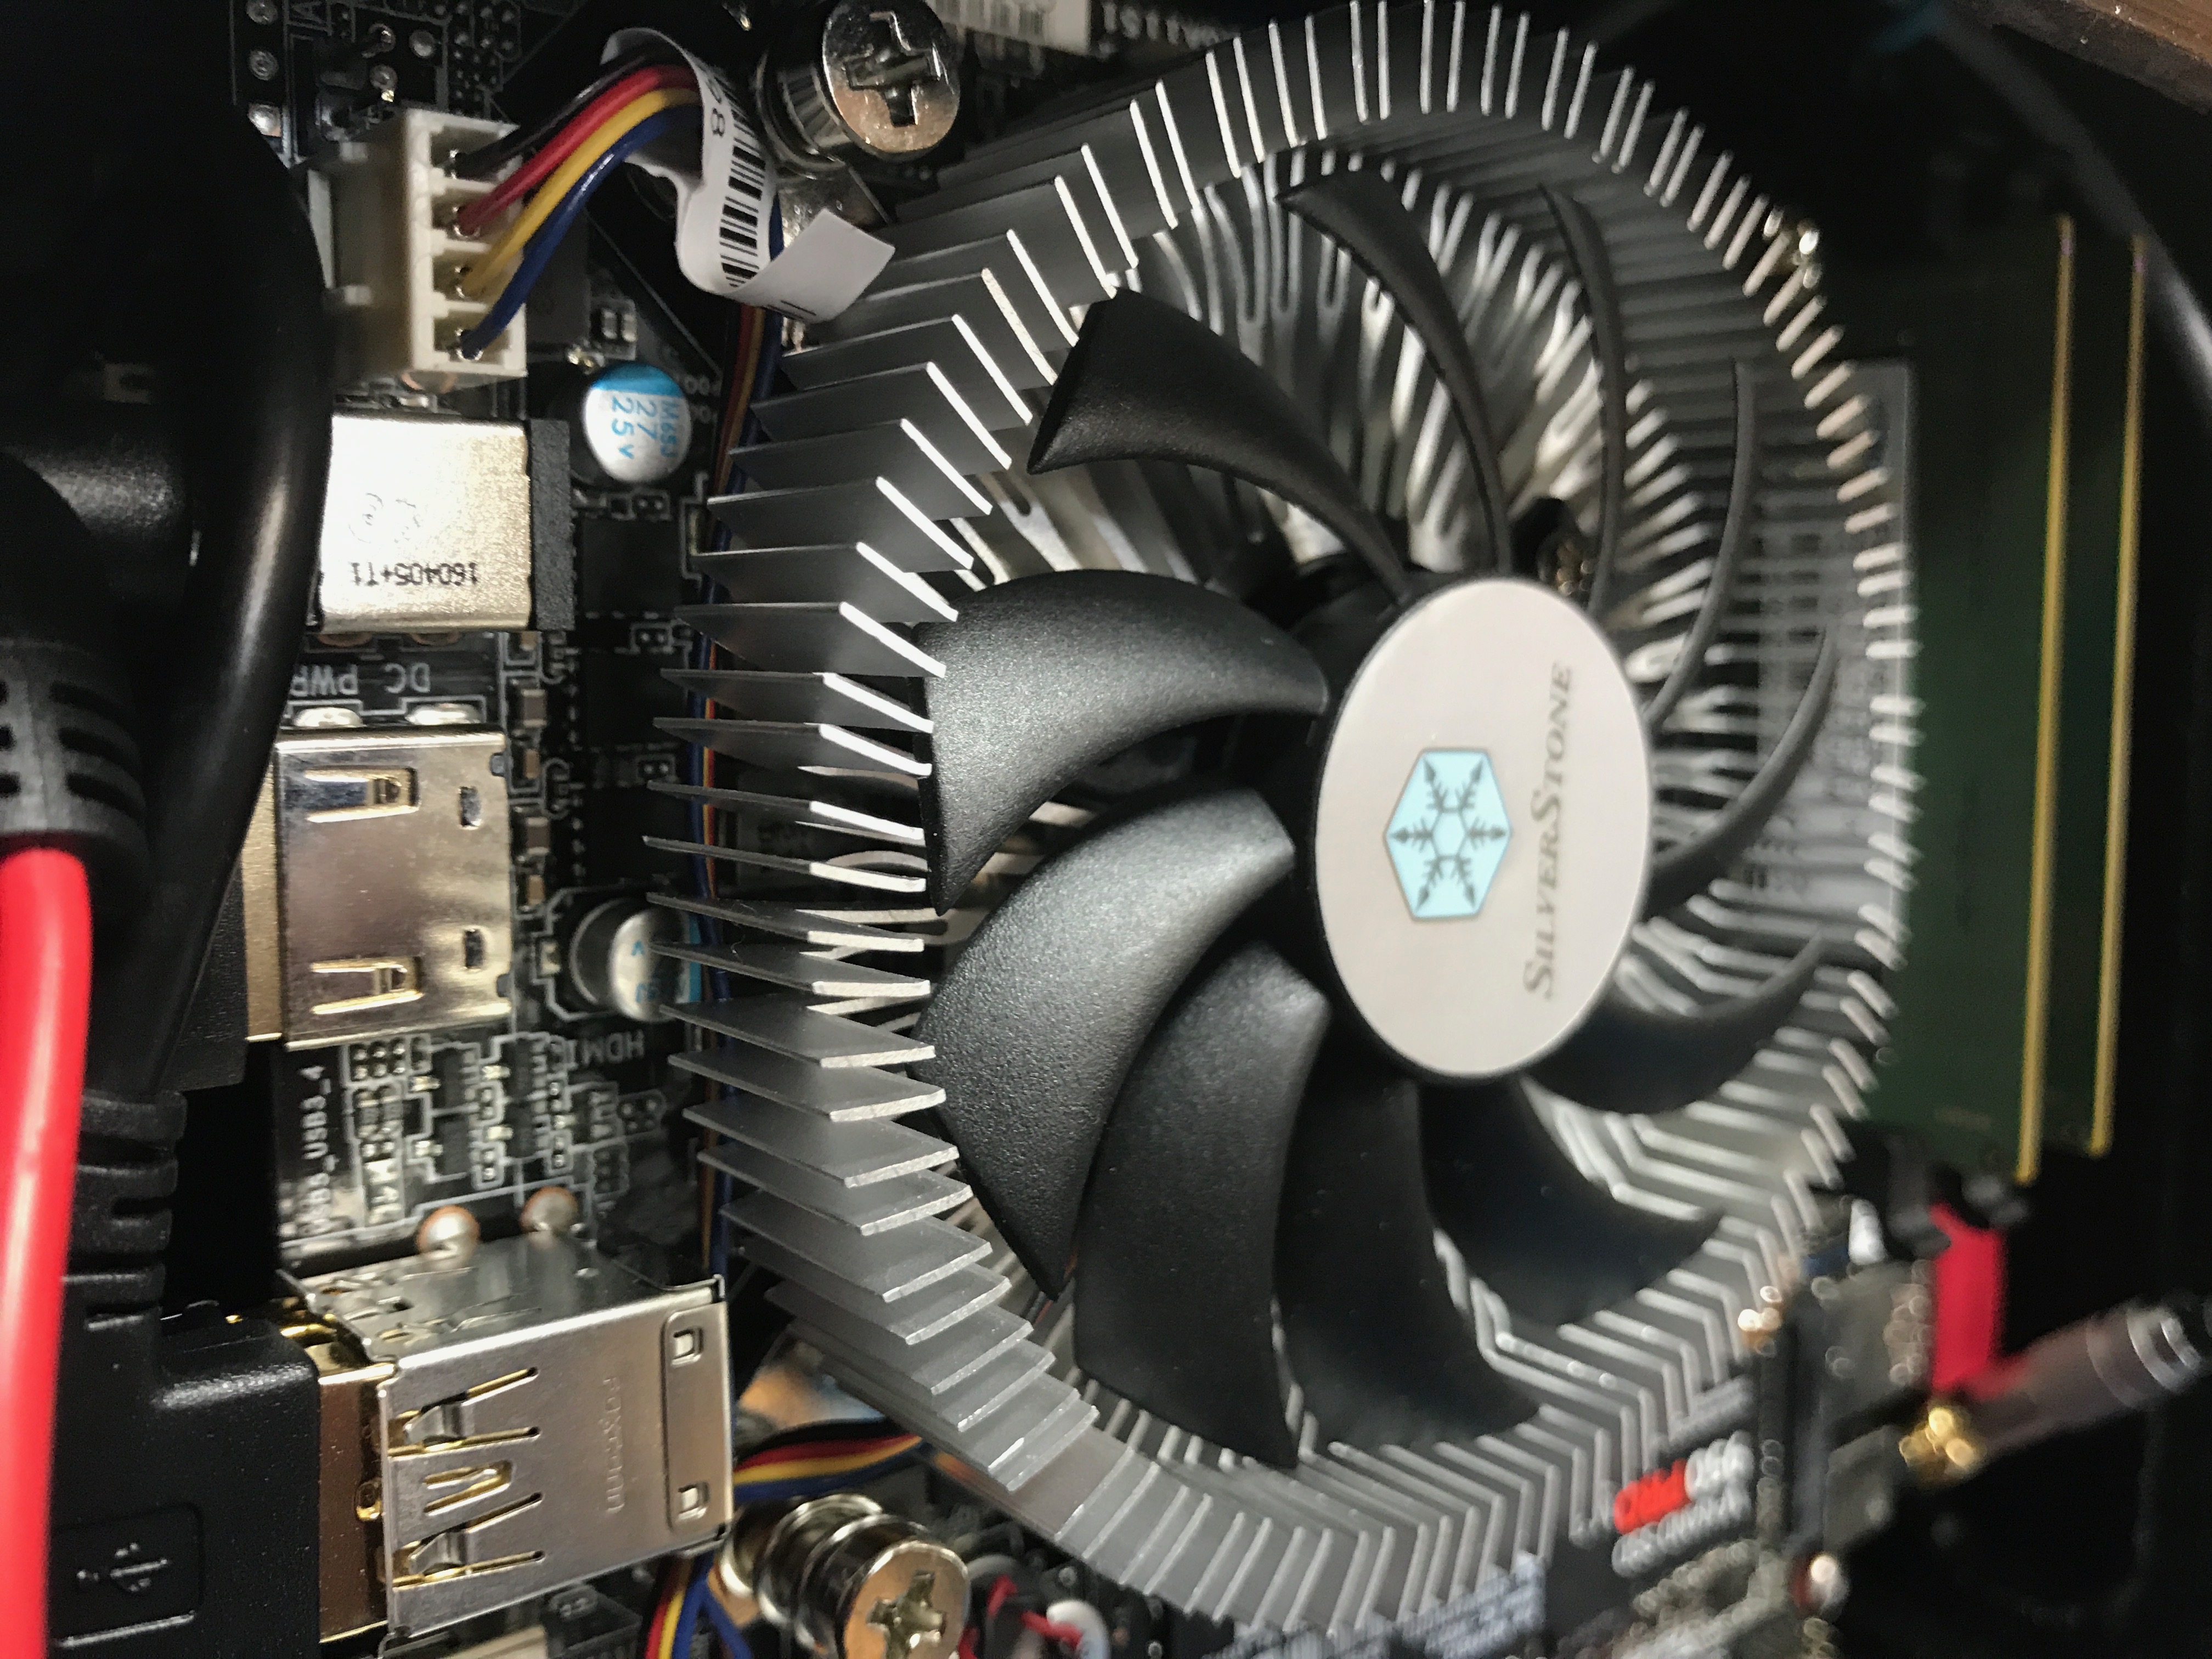\n\nOnce I had all the components finished and the first prototype assembled I went on to experiment with finishing methods.\n\n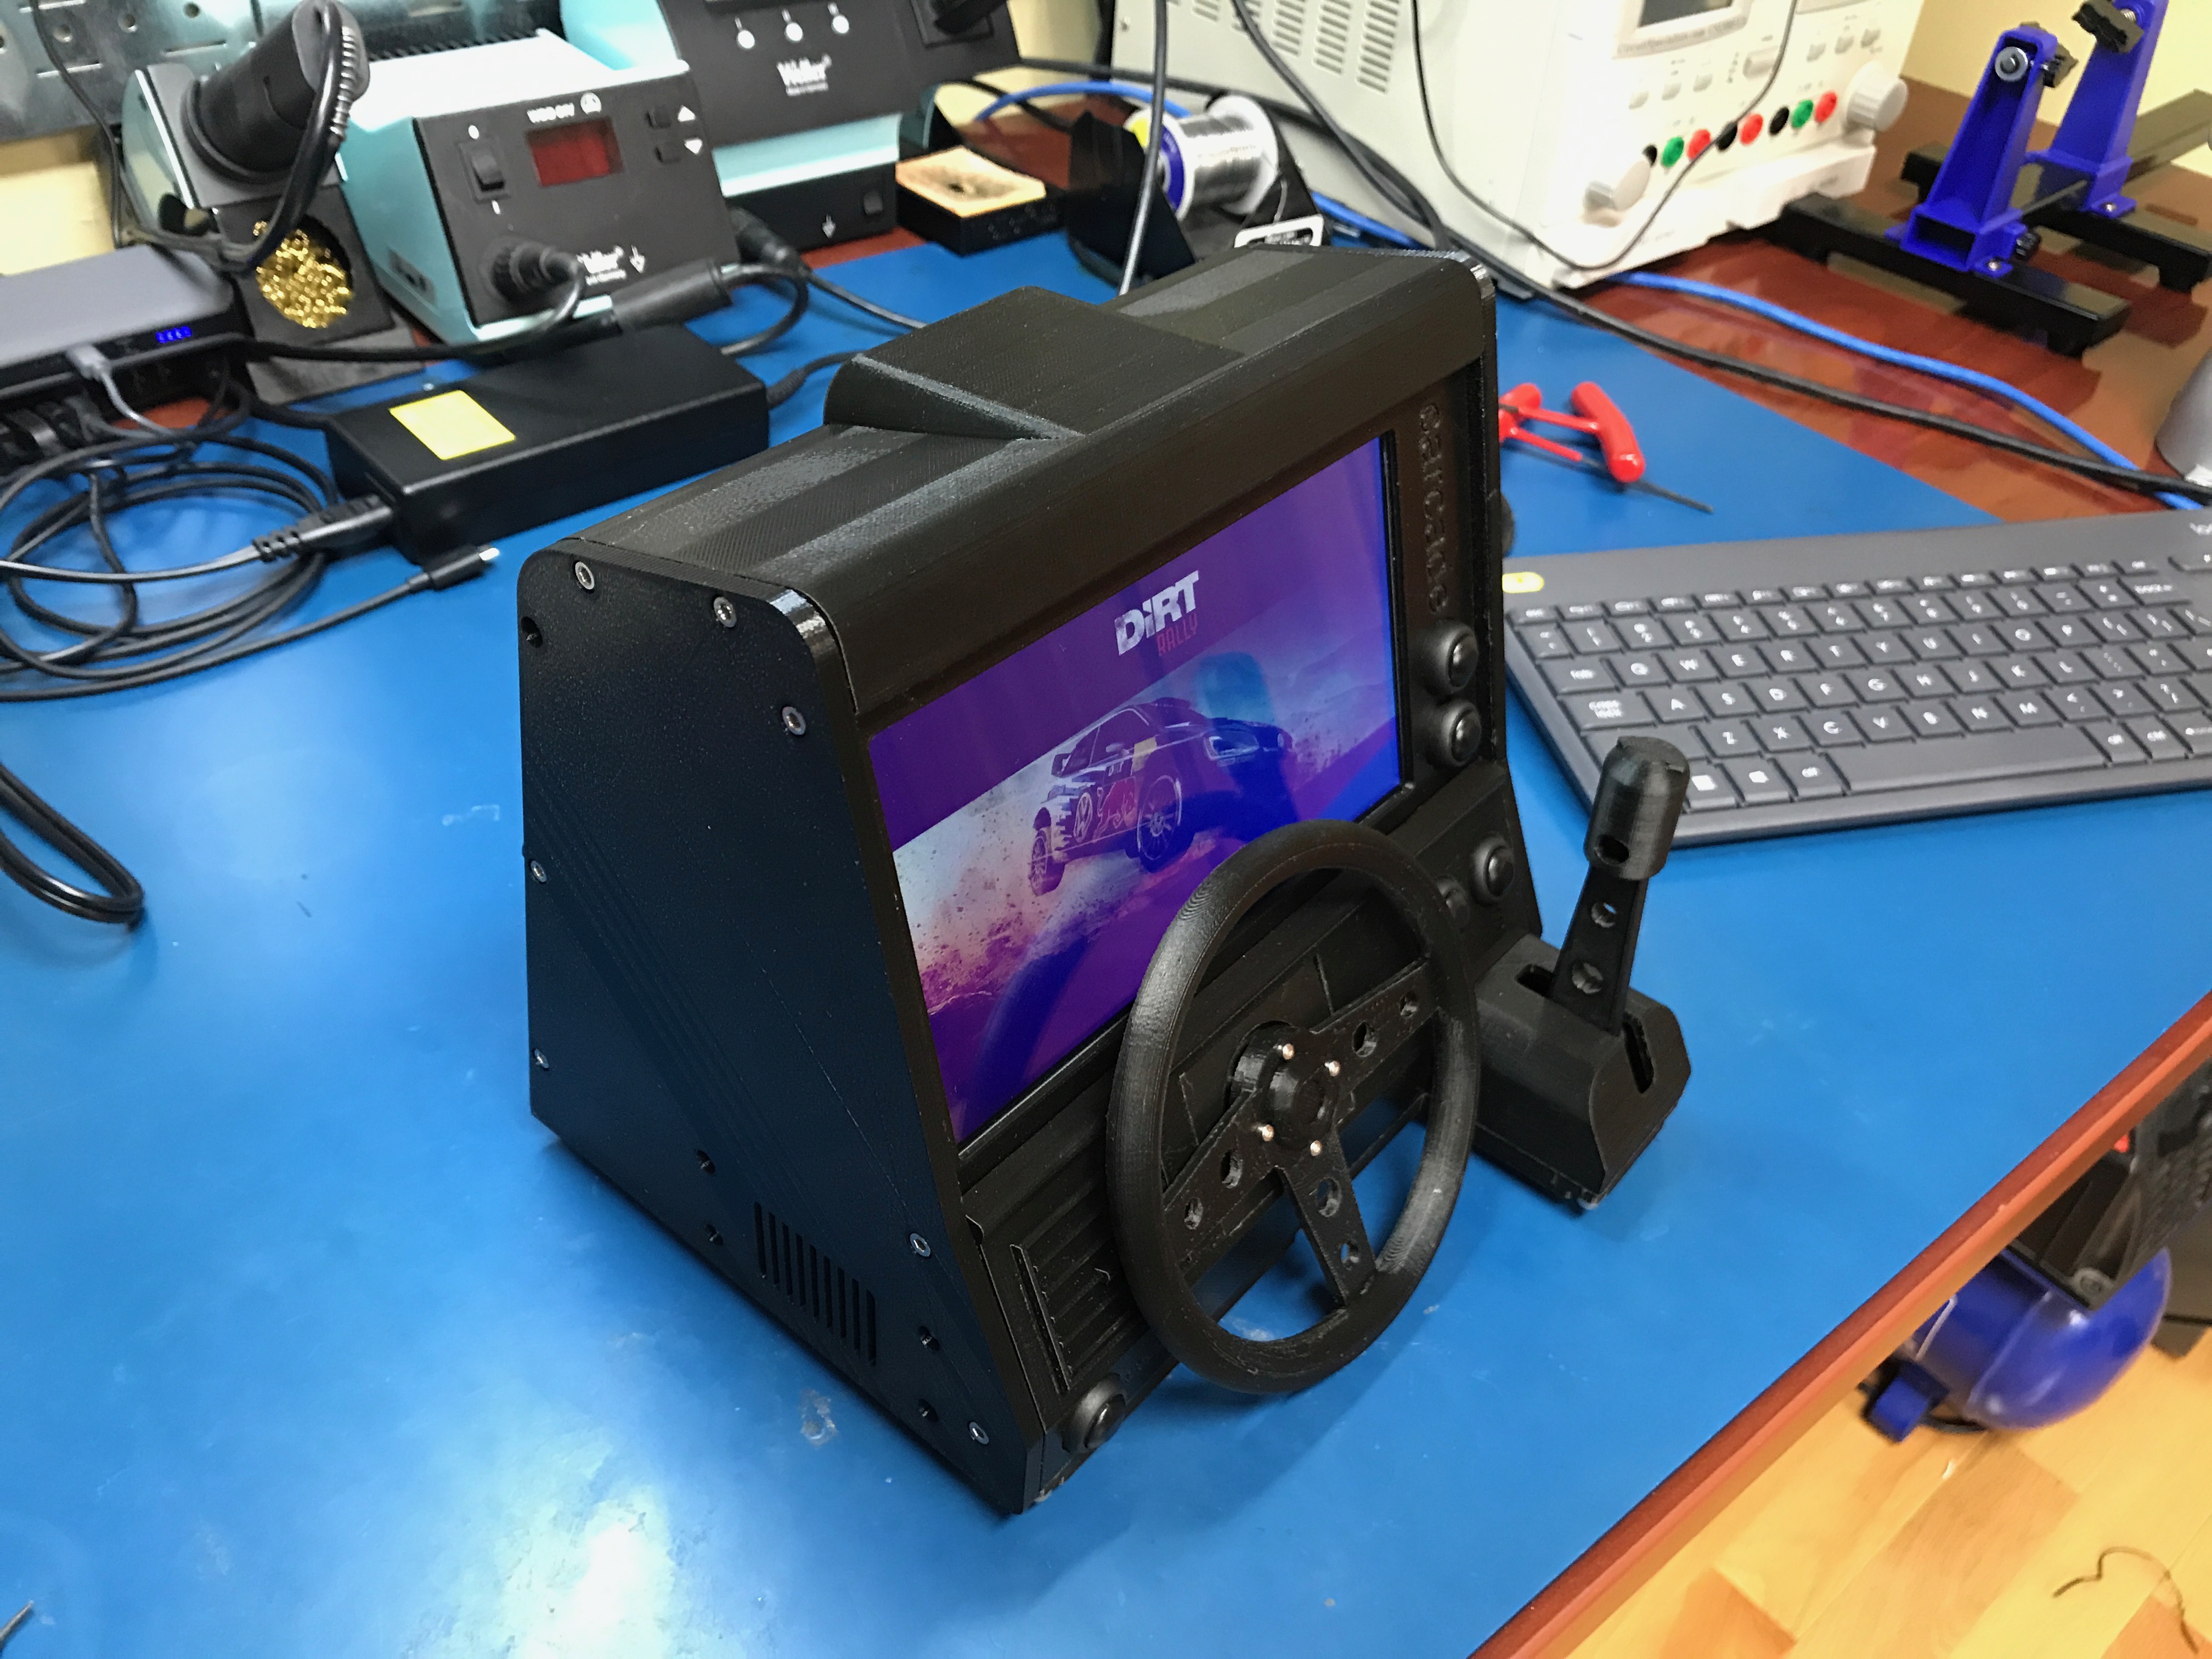\n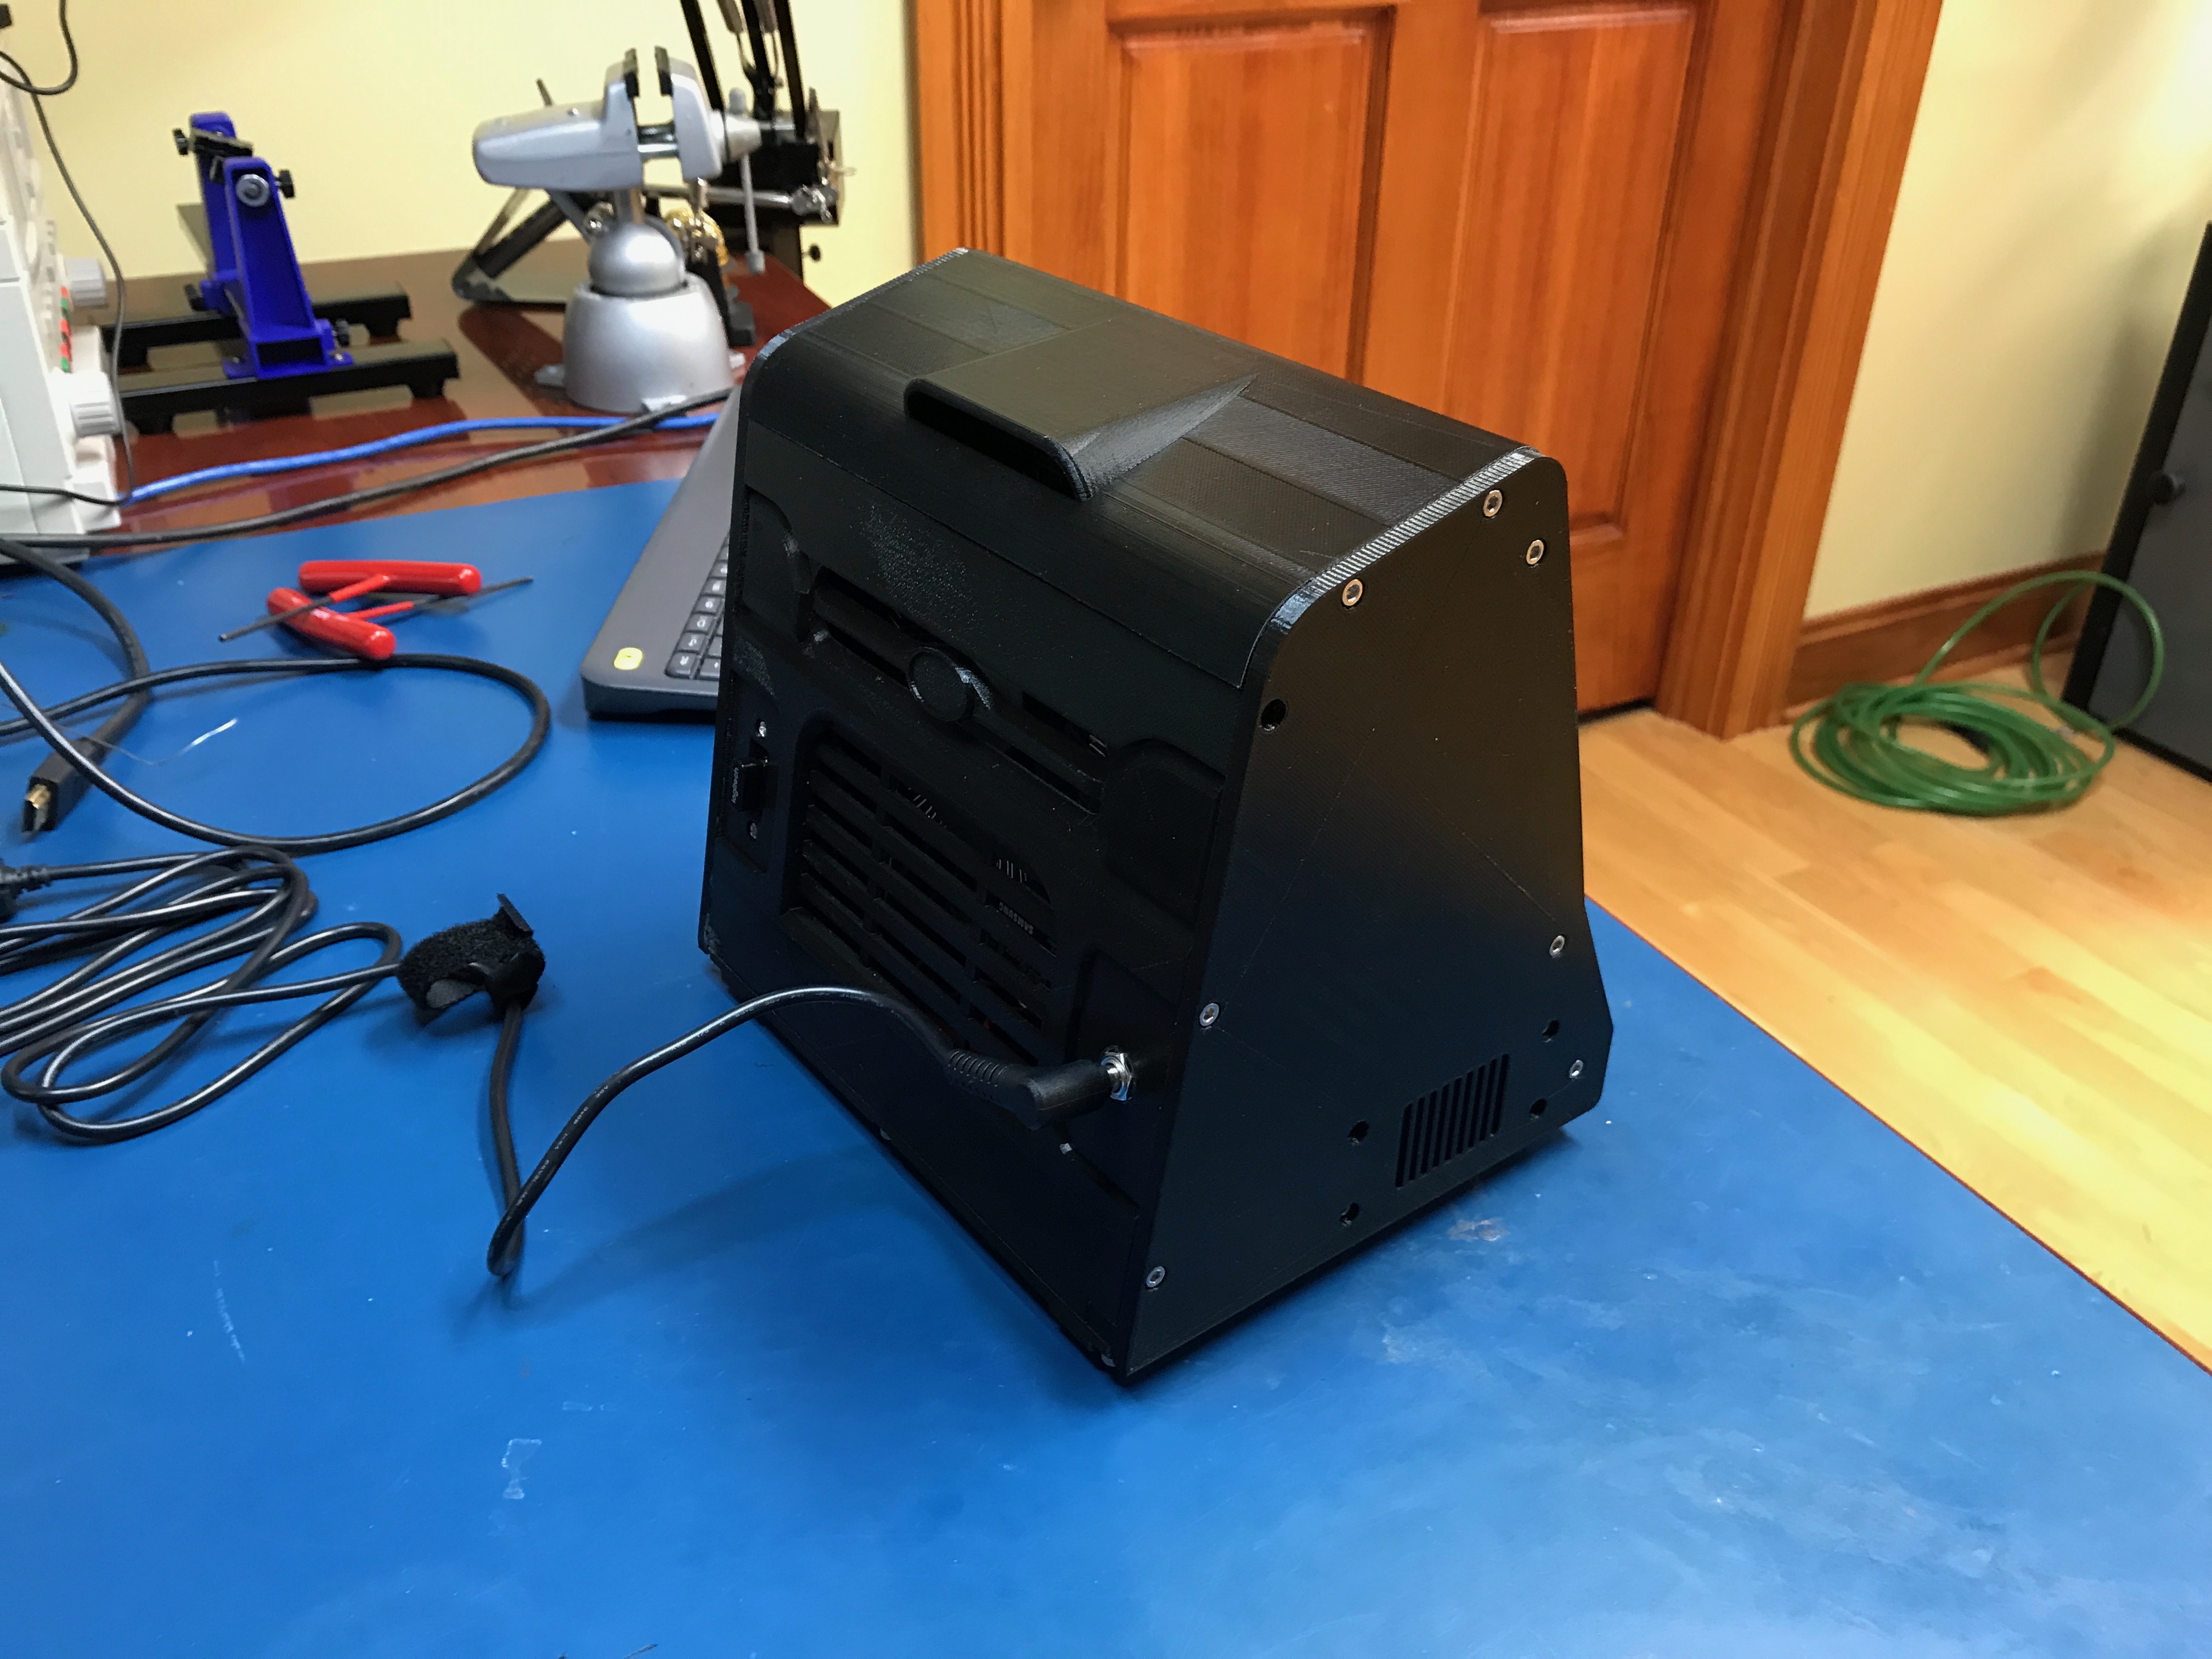\n\n\n####Post-Processing\nInitially I thought that I should sand, primer, paint, then clear coat. I managed to pick up a can of World Rally Blue paint. It looks amazing... But after attempting the process I realized it was too much effort to go to for a project of this size.\n\n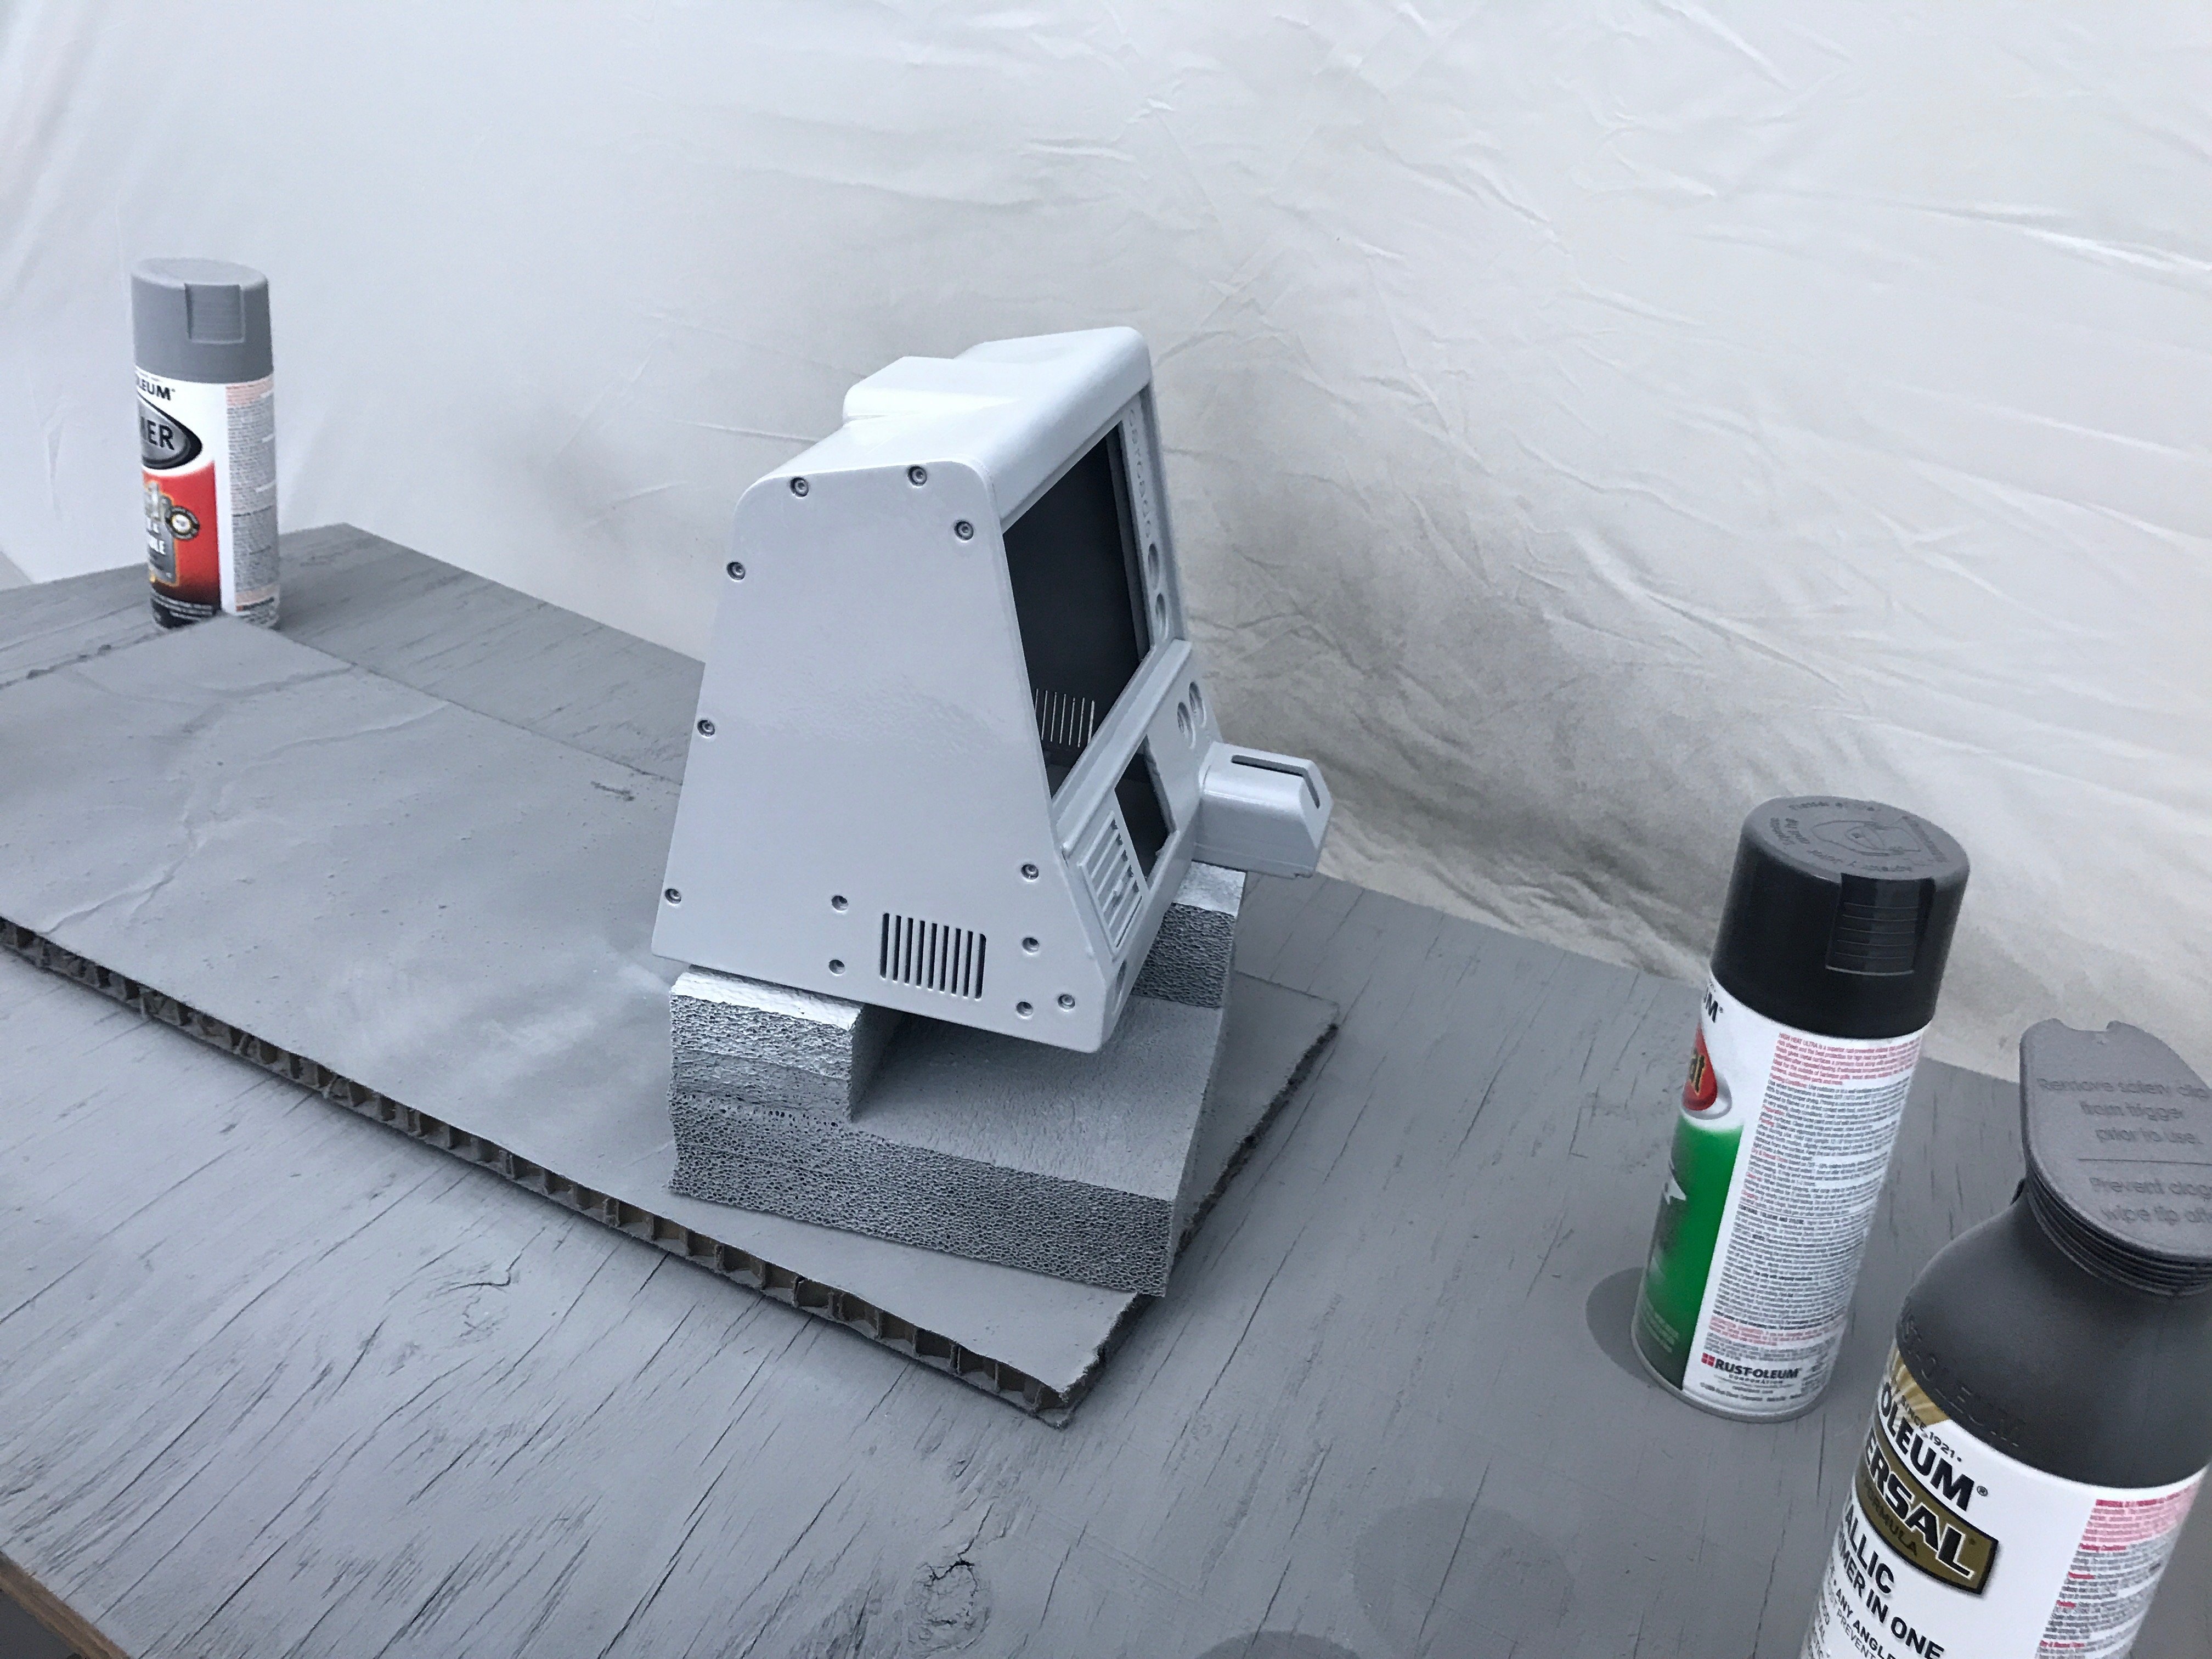\n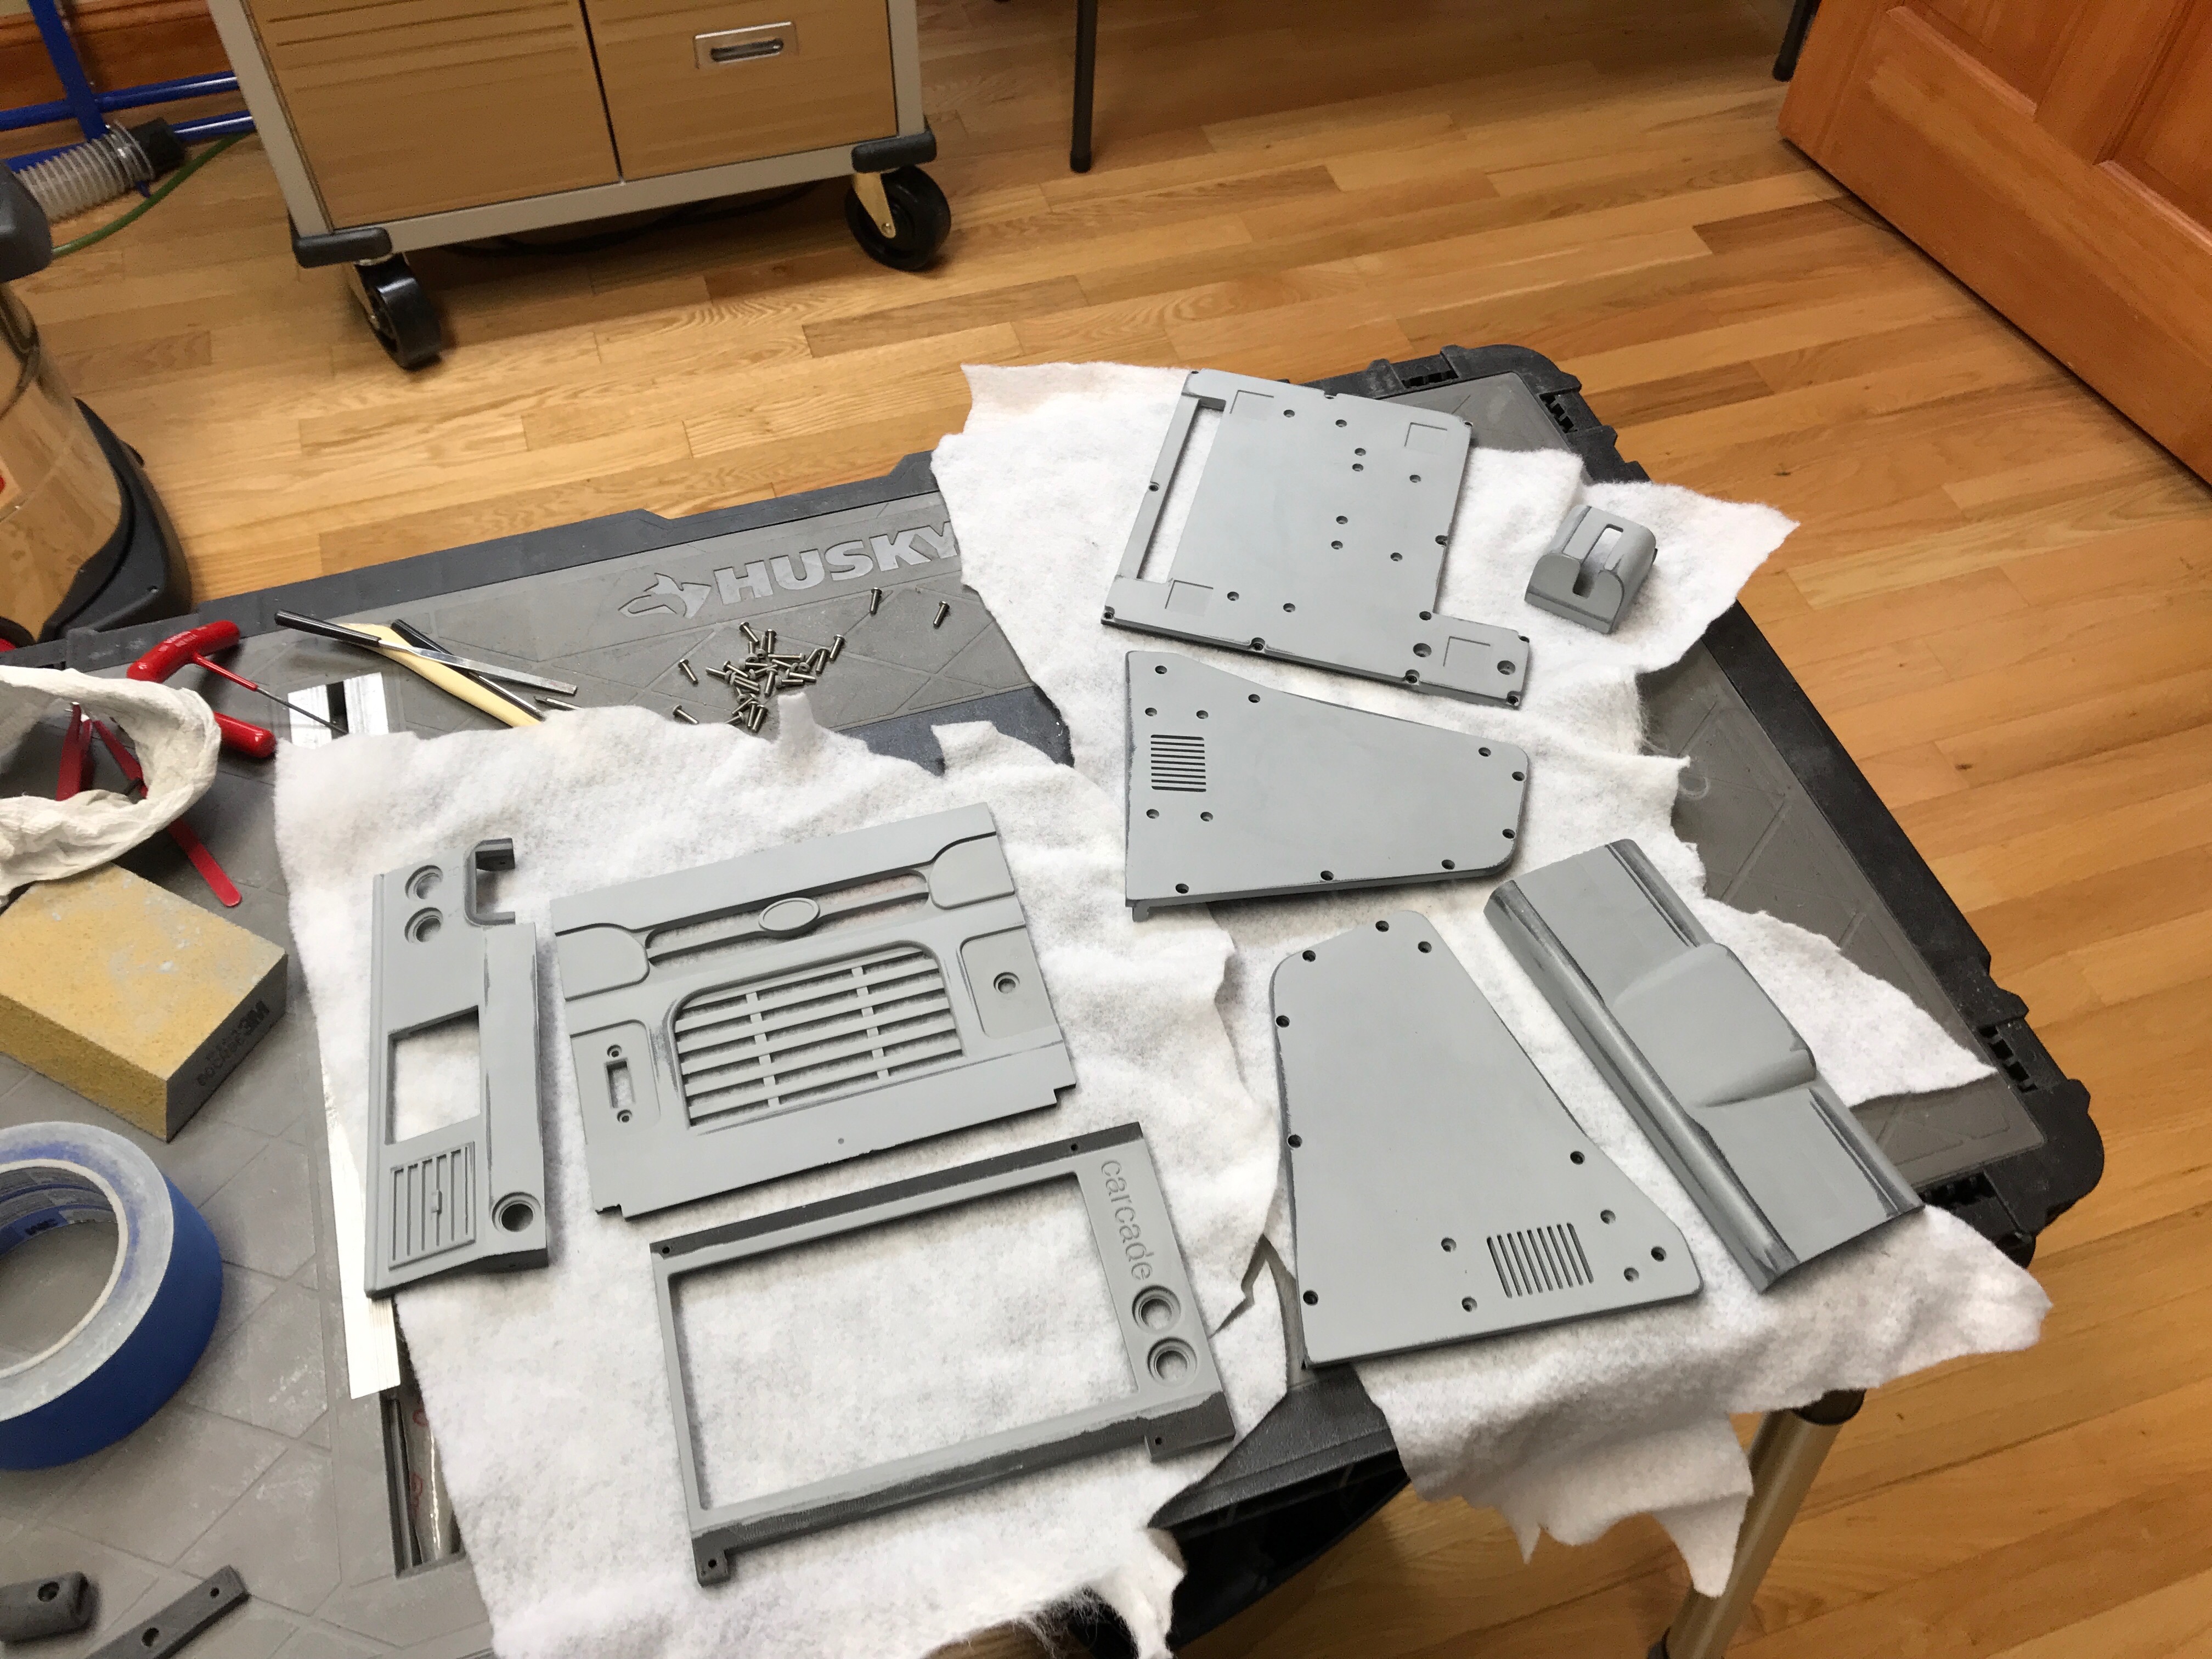\n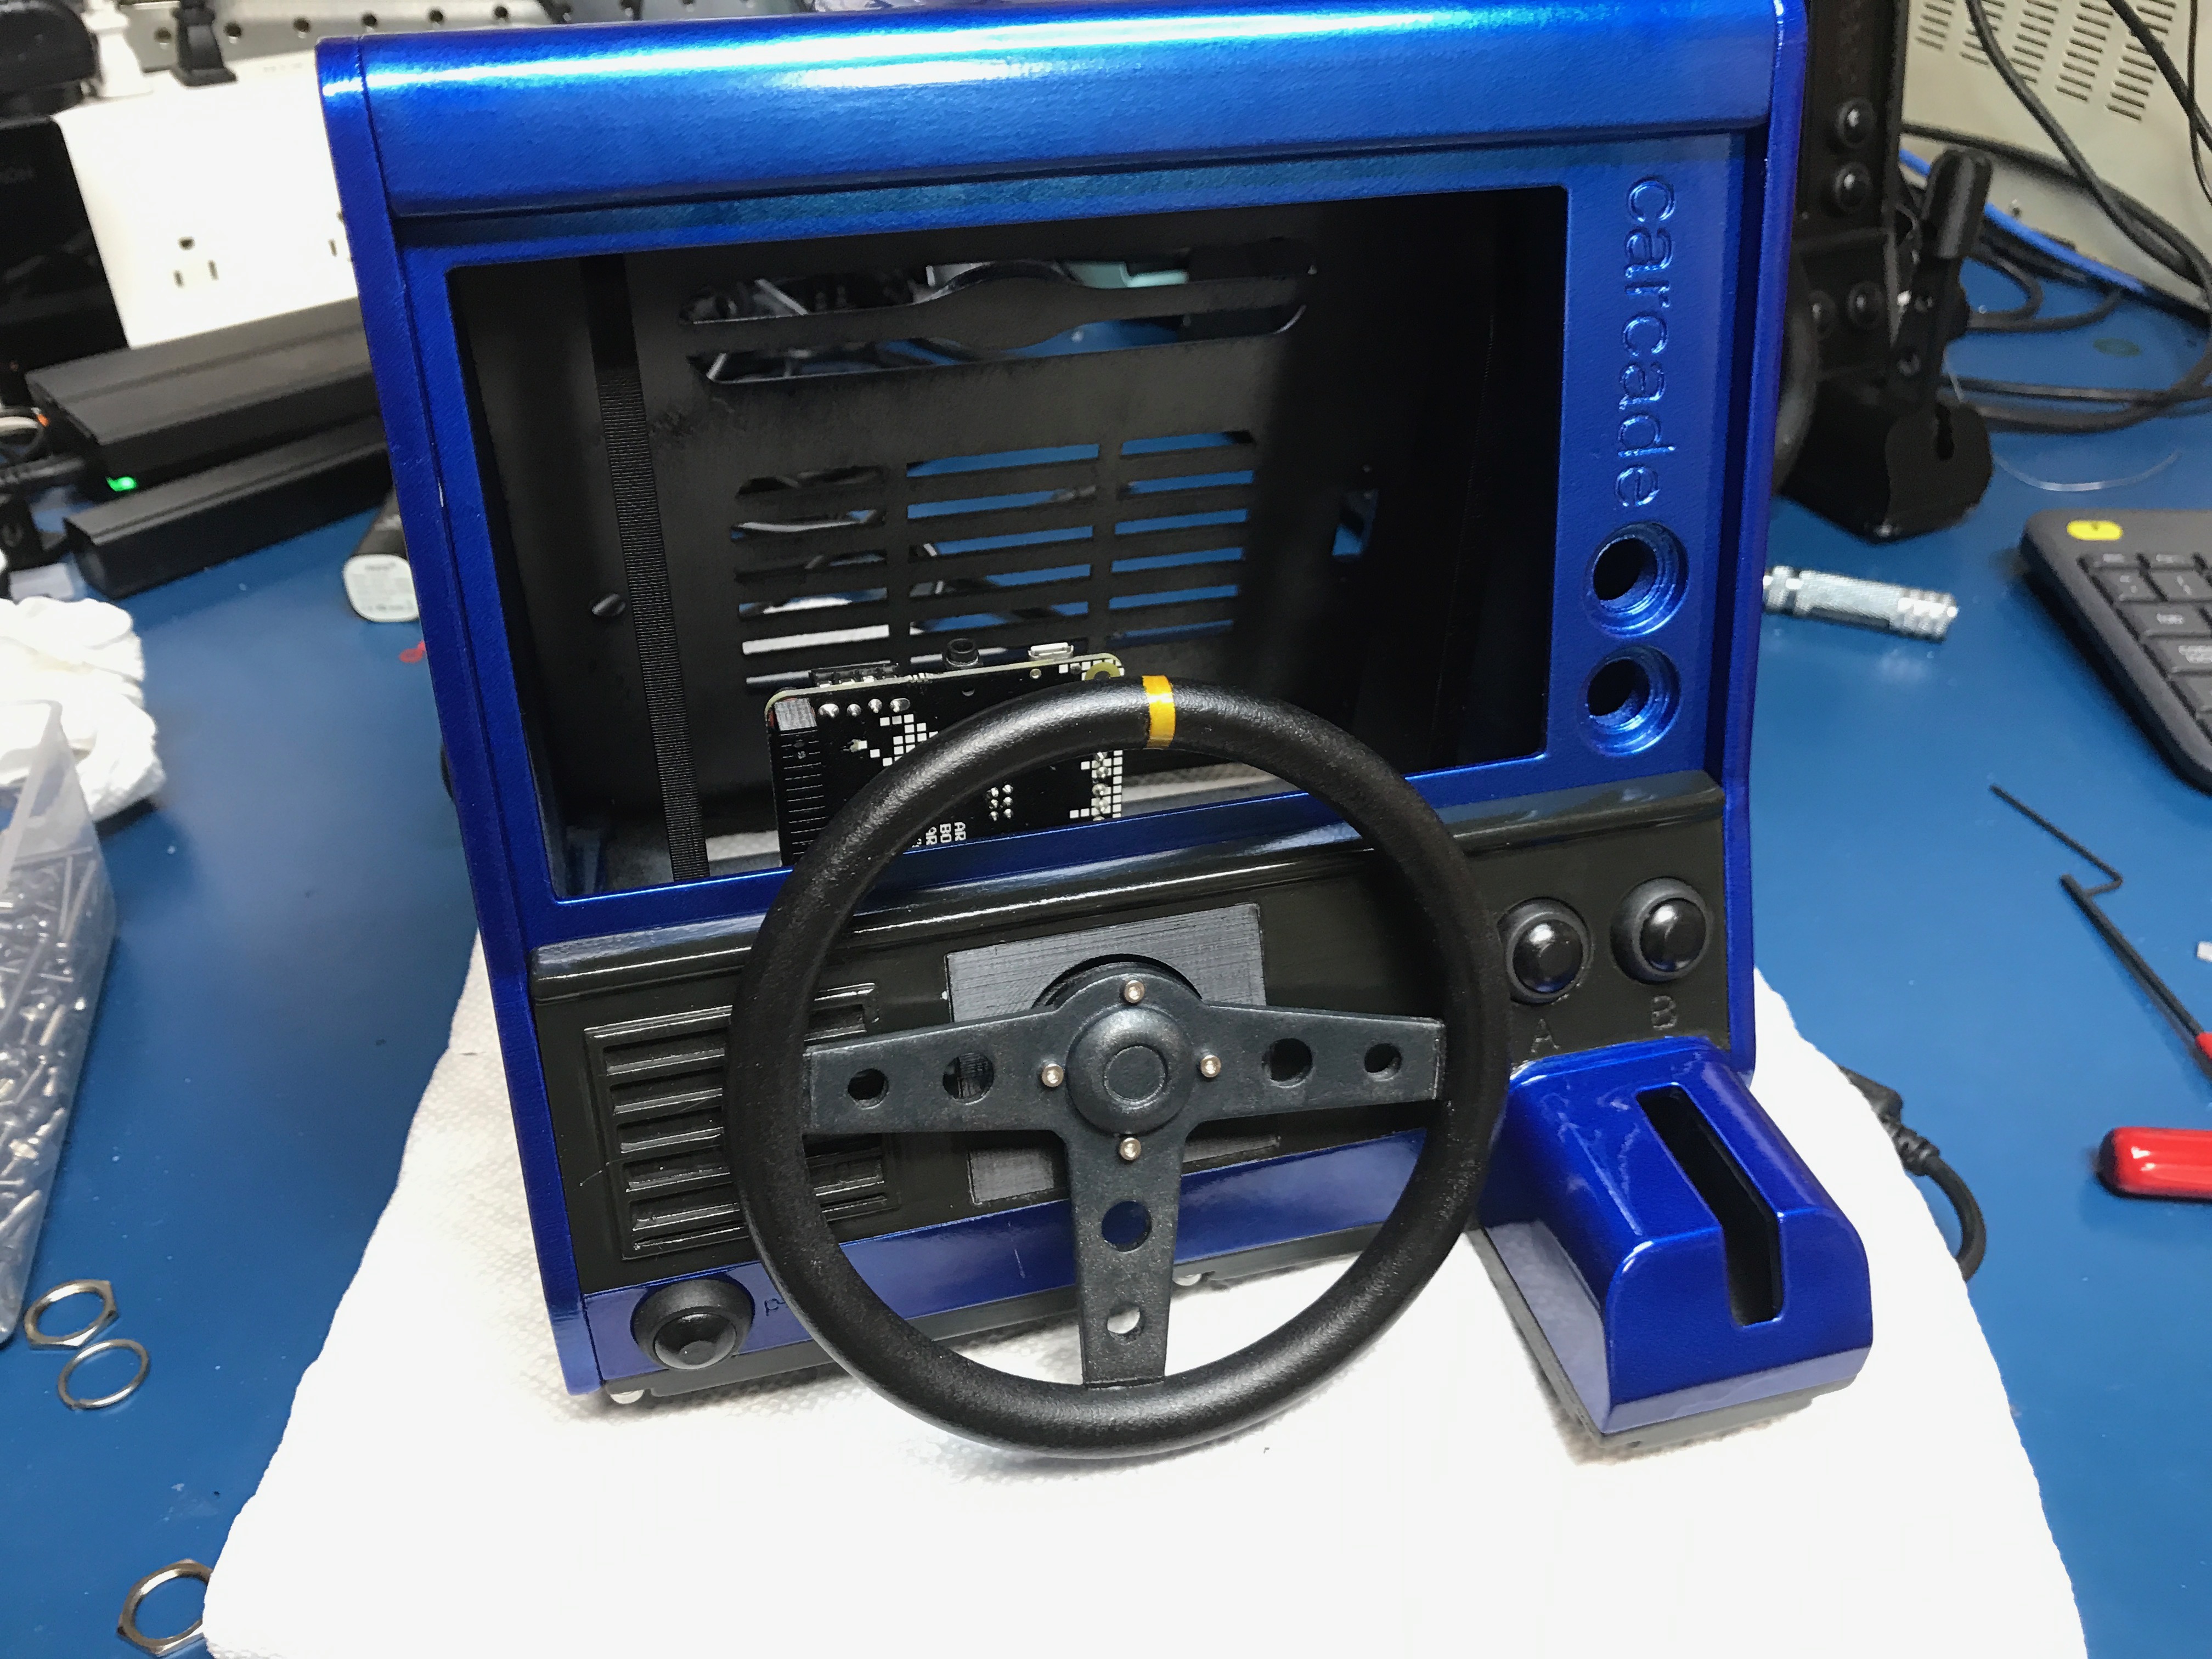\n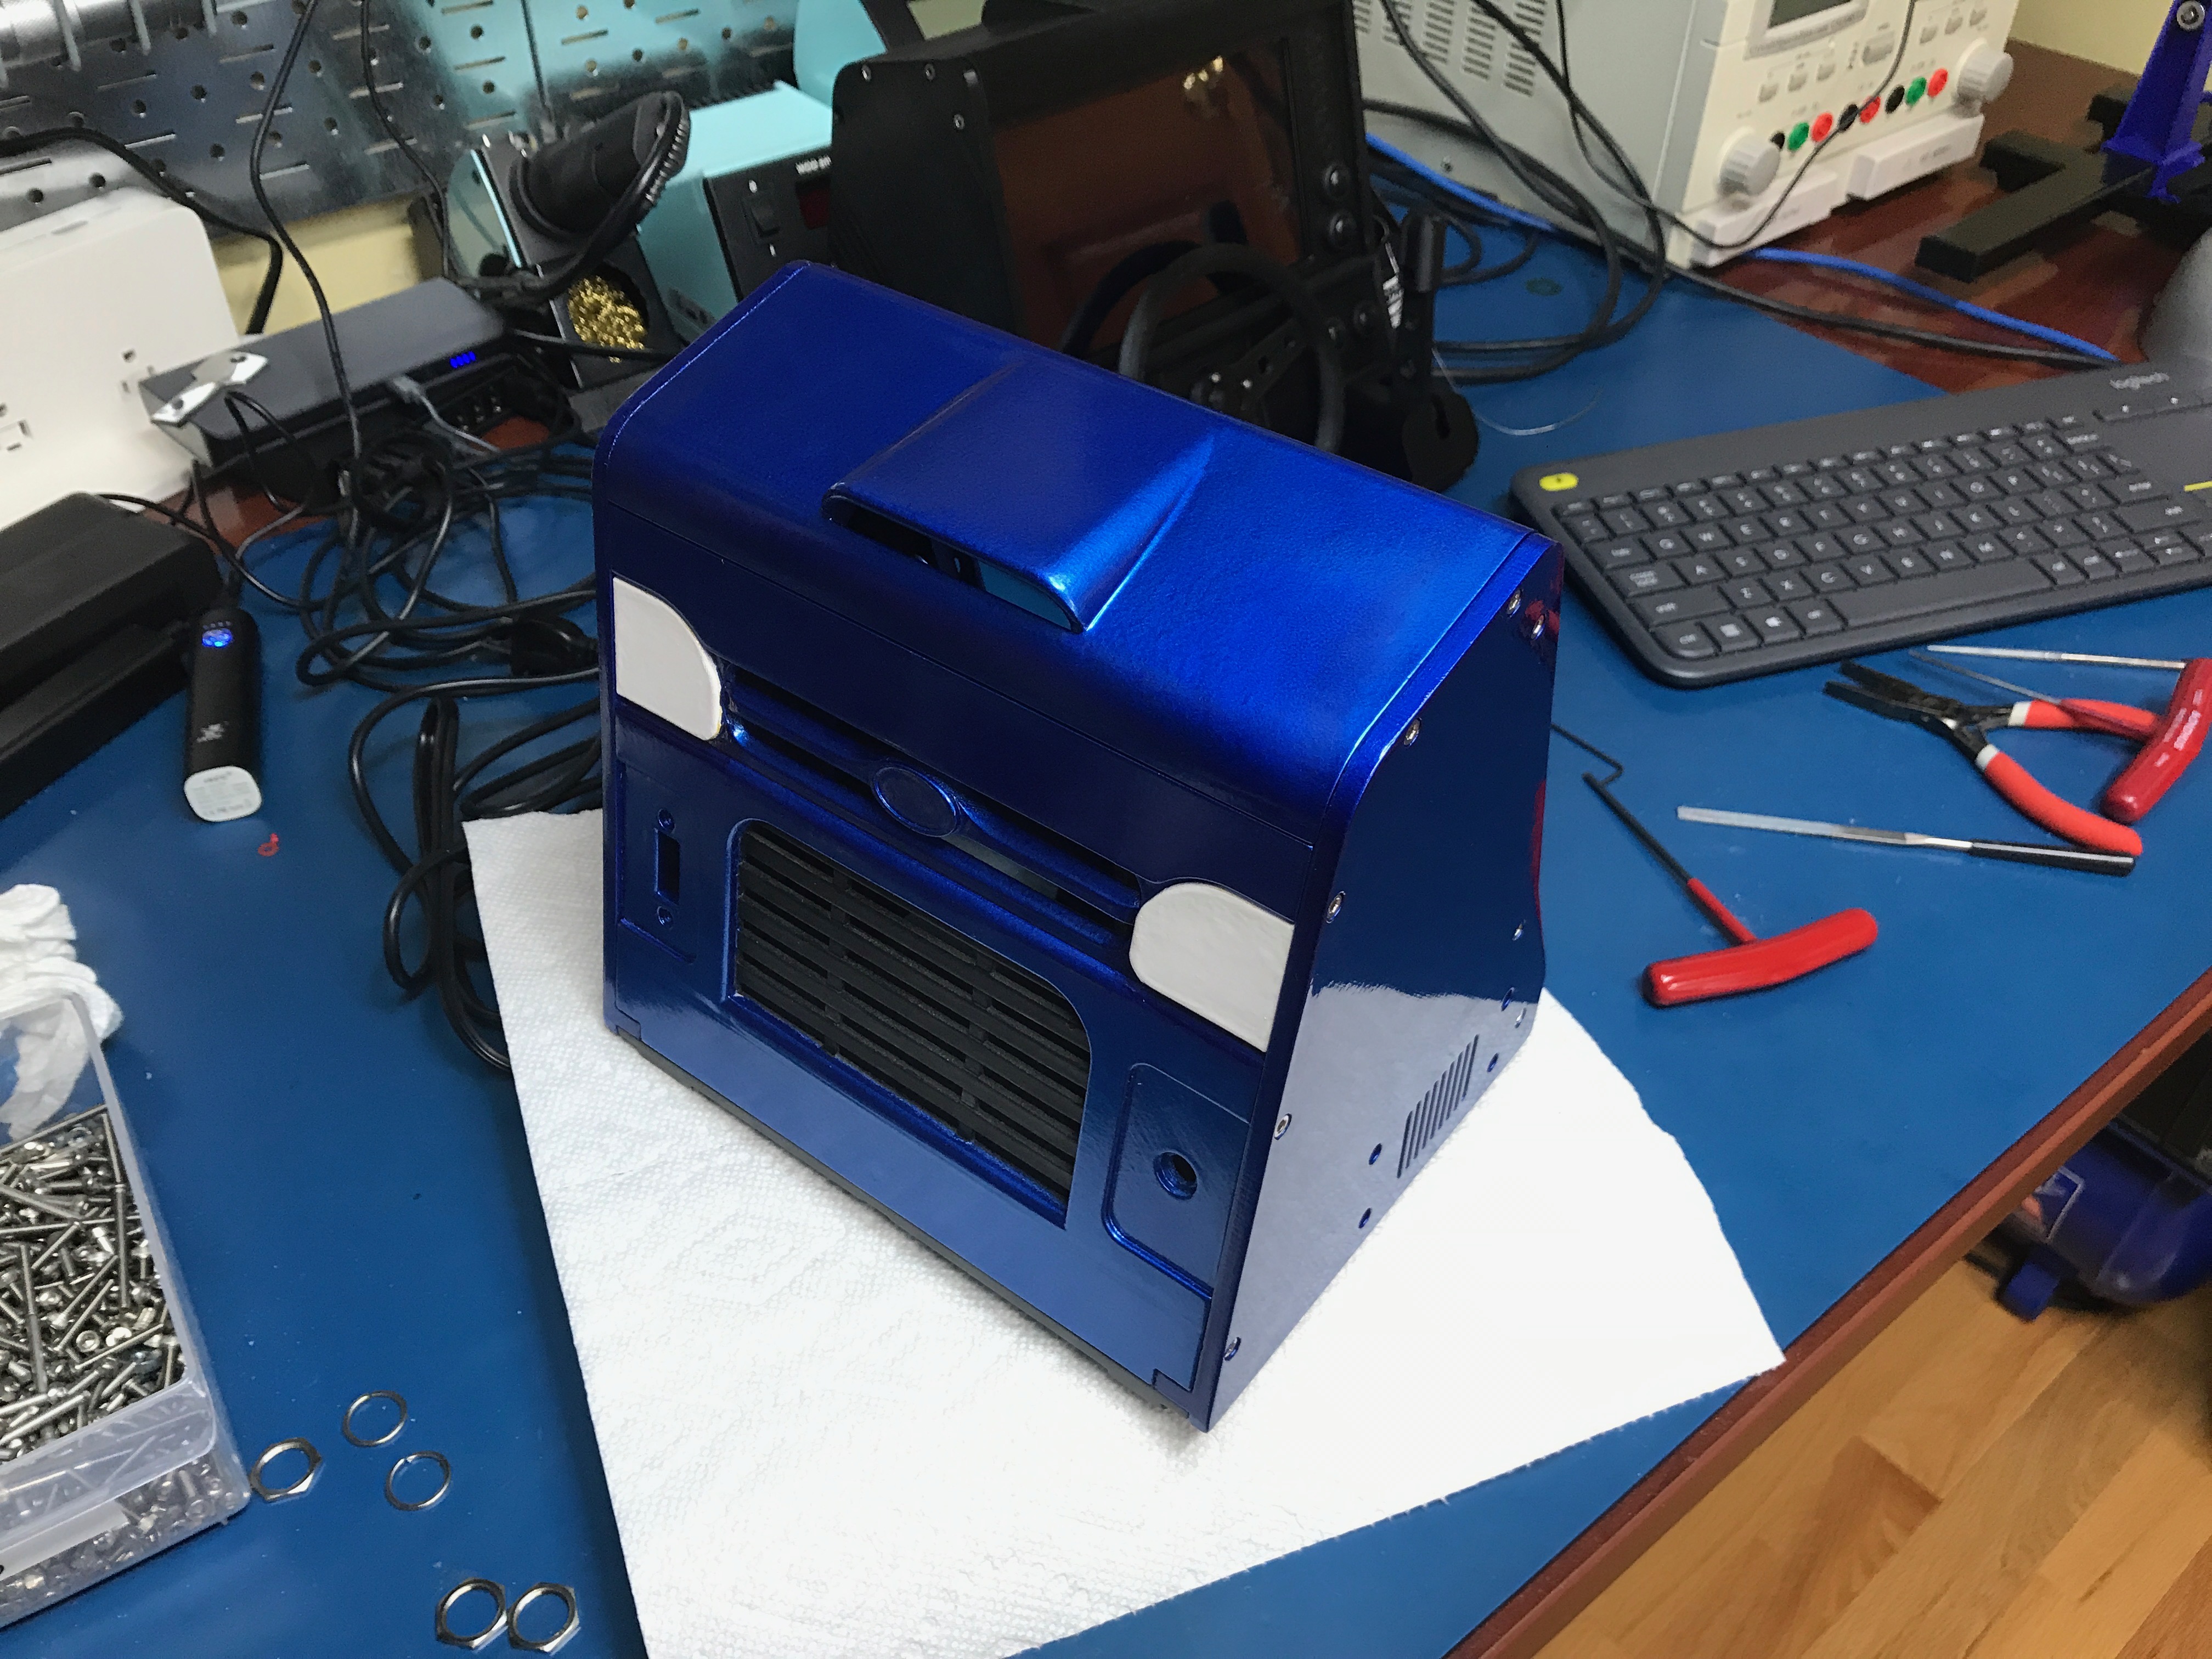\n\n\n####Project Recognition\nIt was at this time that I received a package from Codemasters!!! I got sent SWAG!!\n\n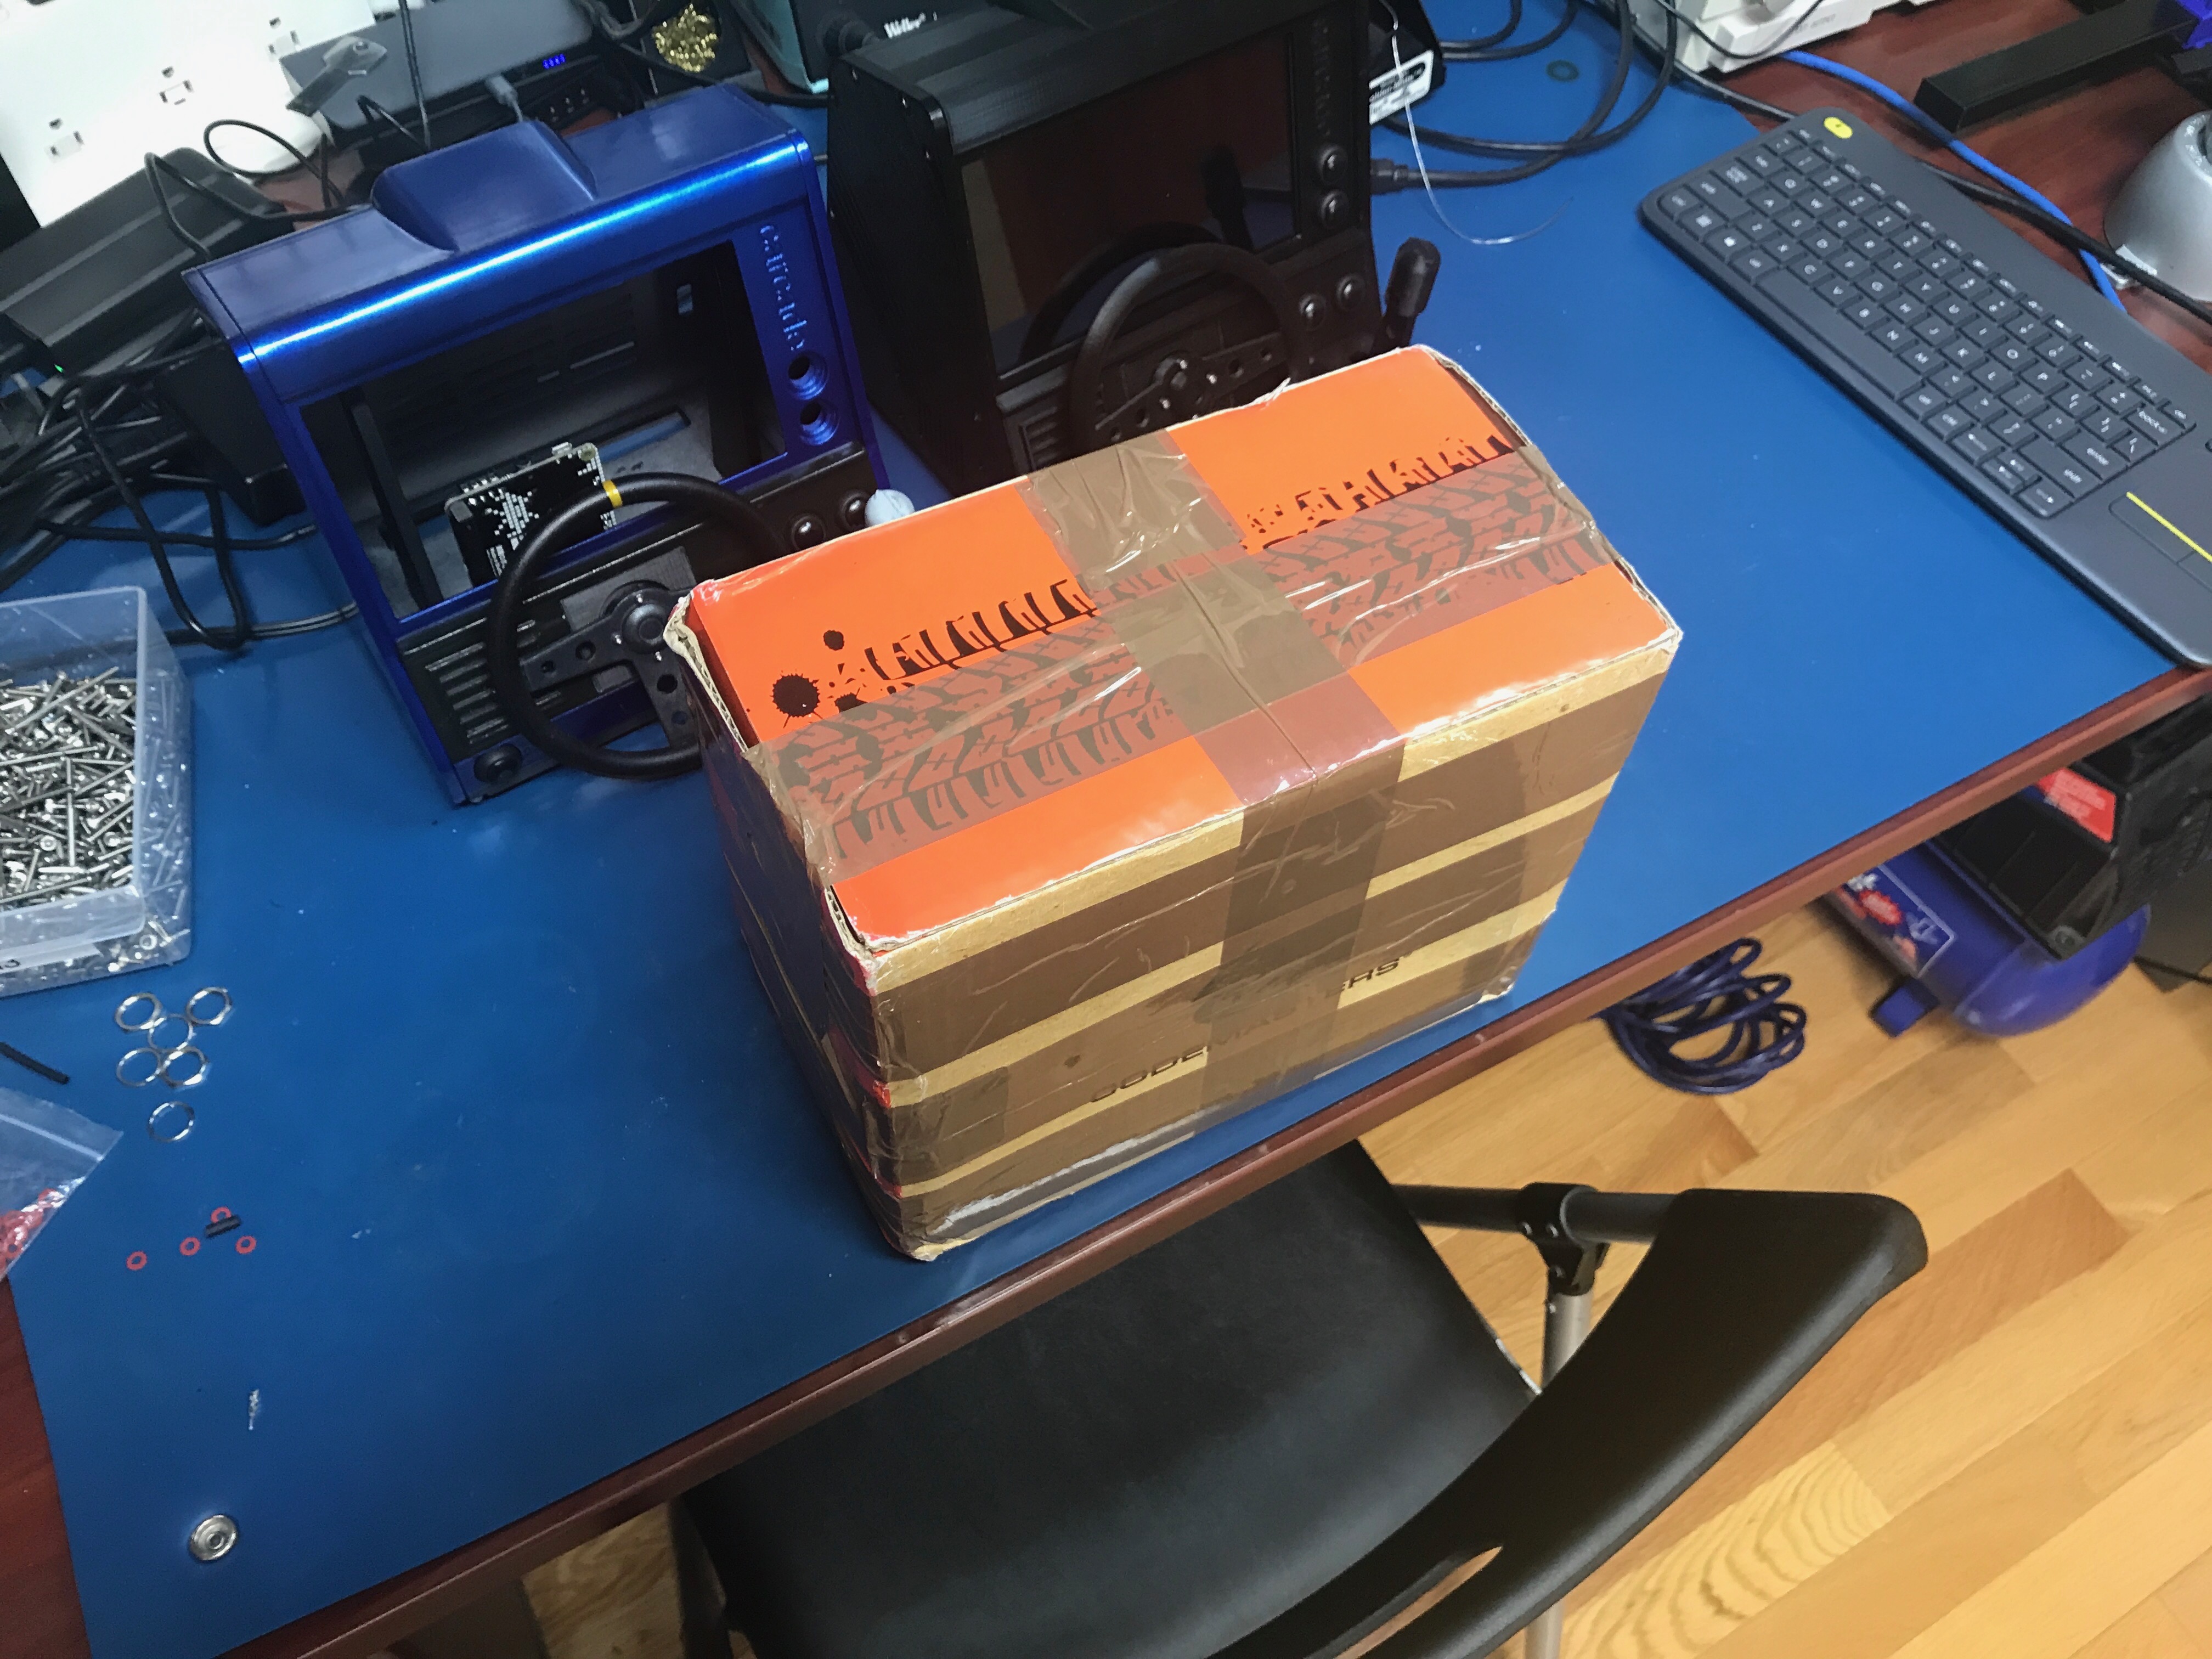\n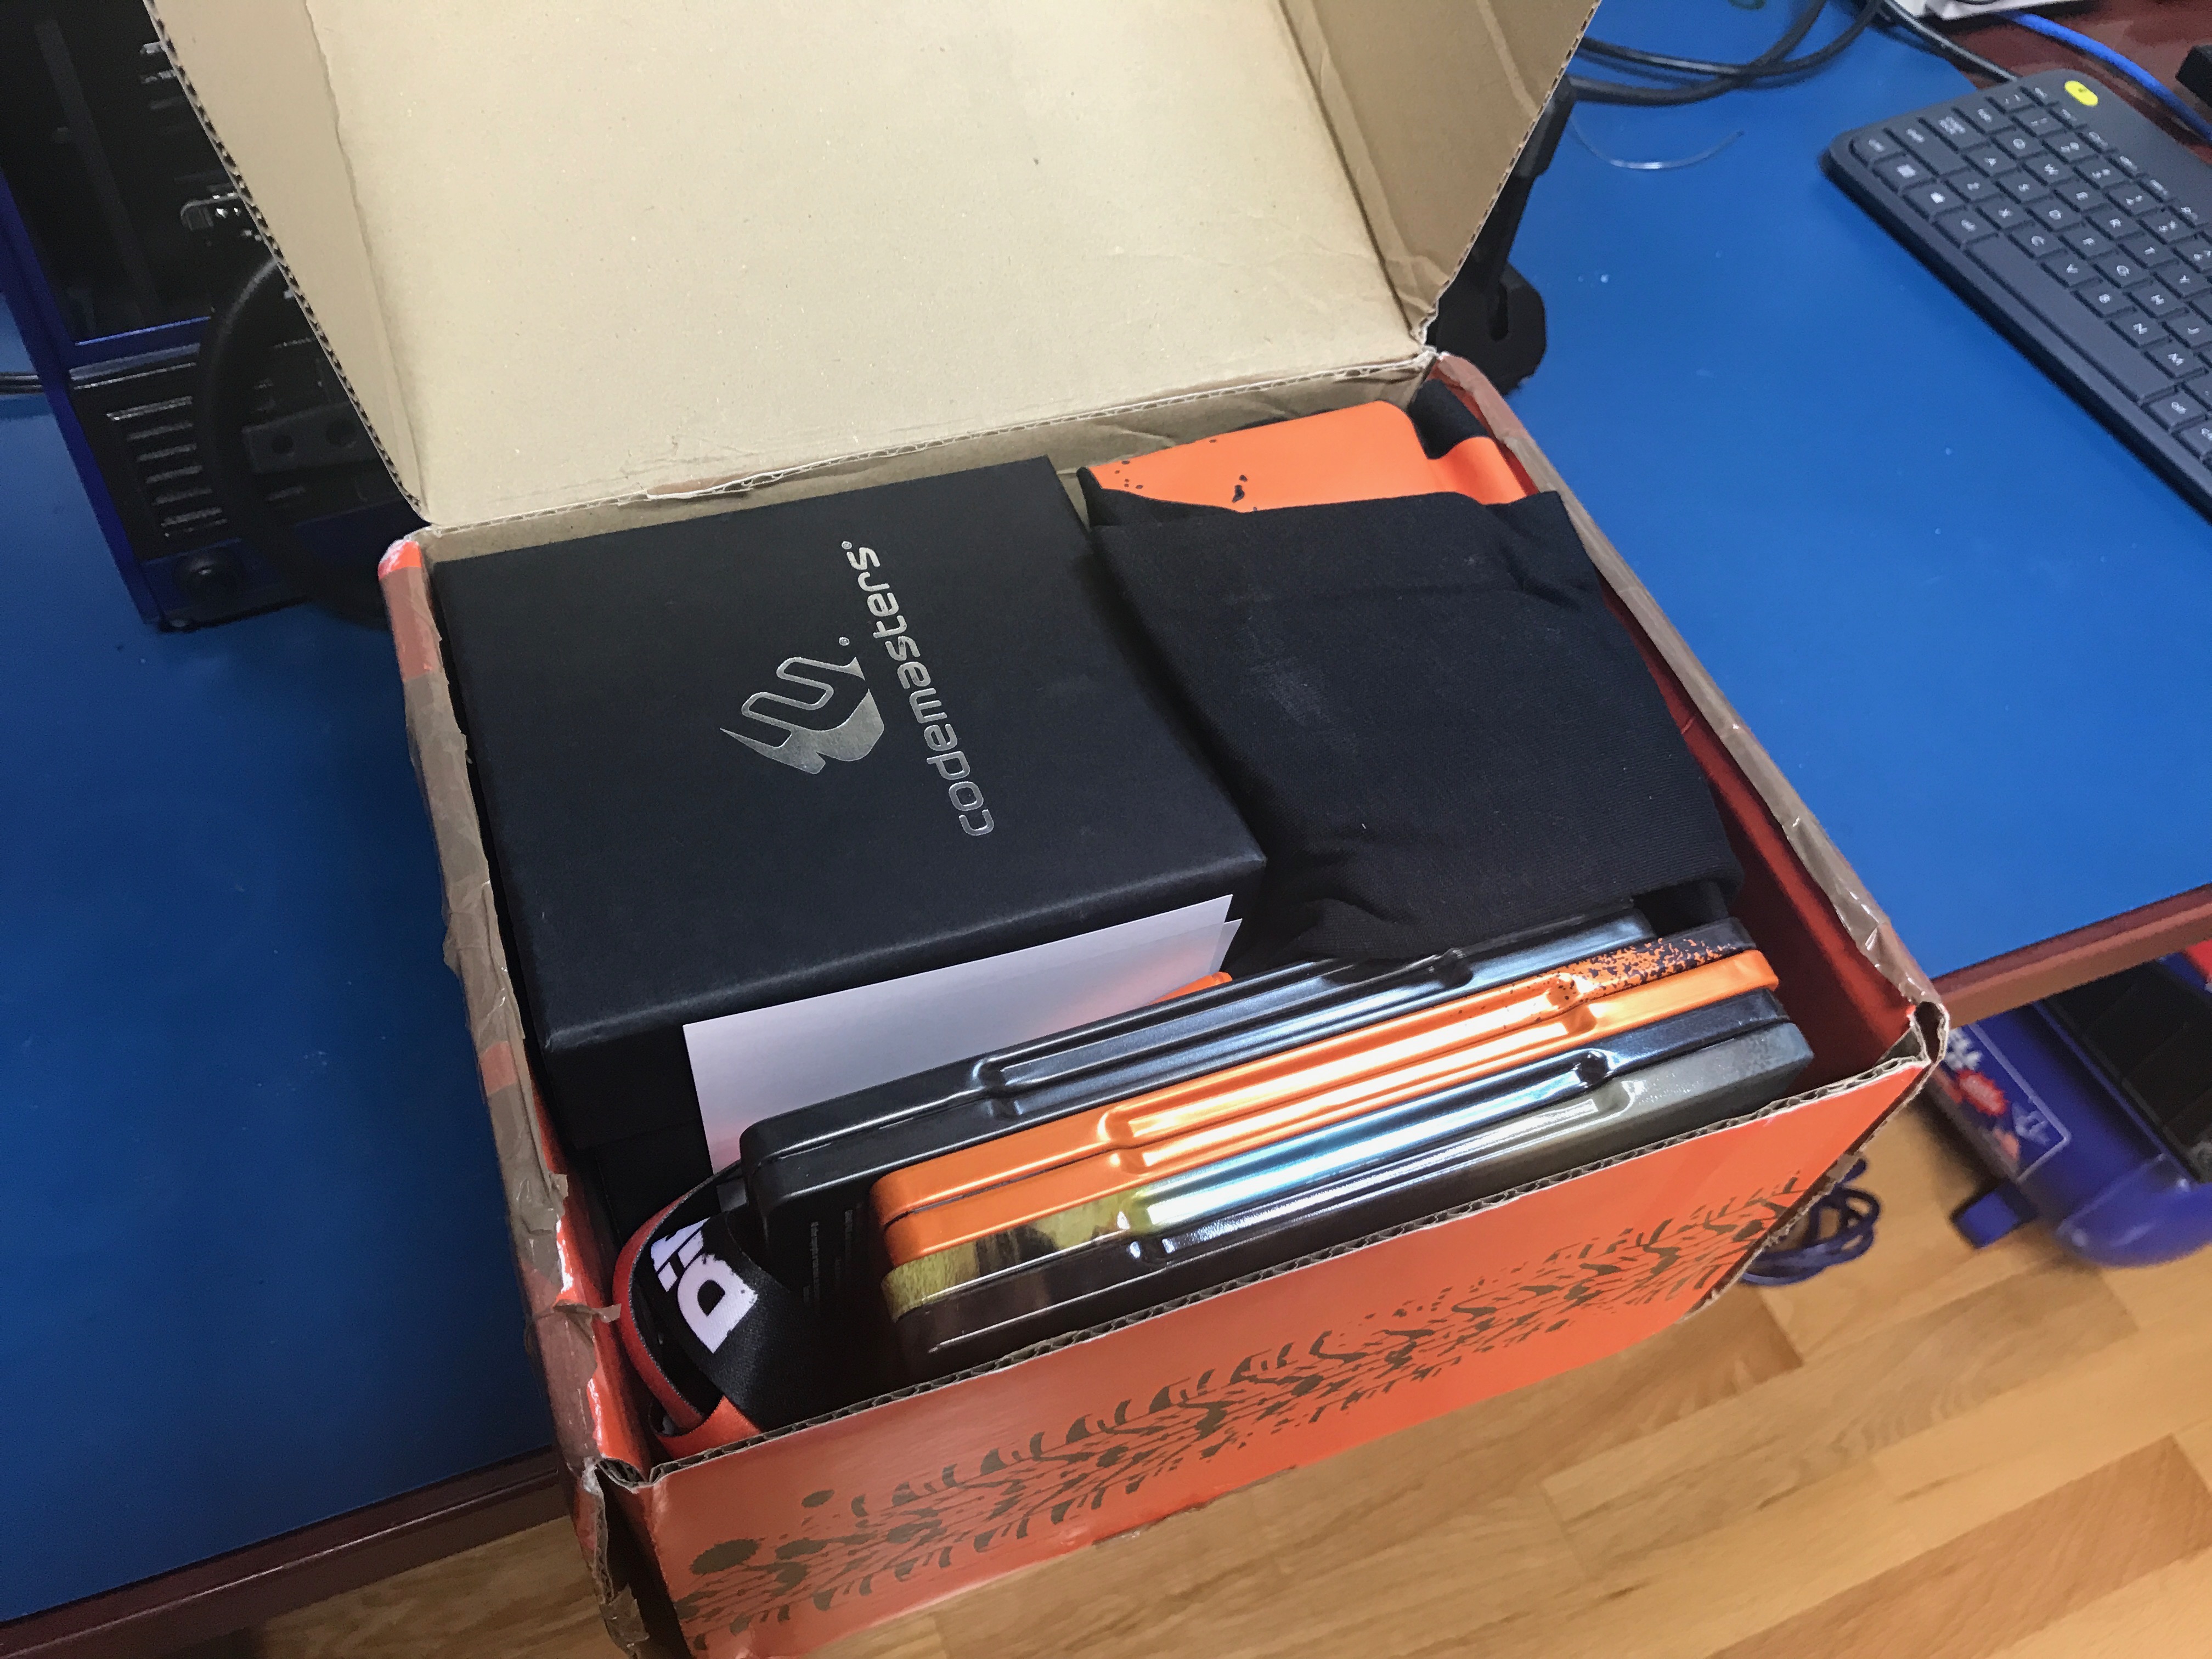\n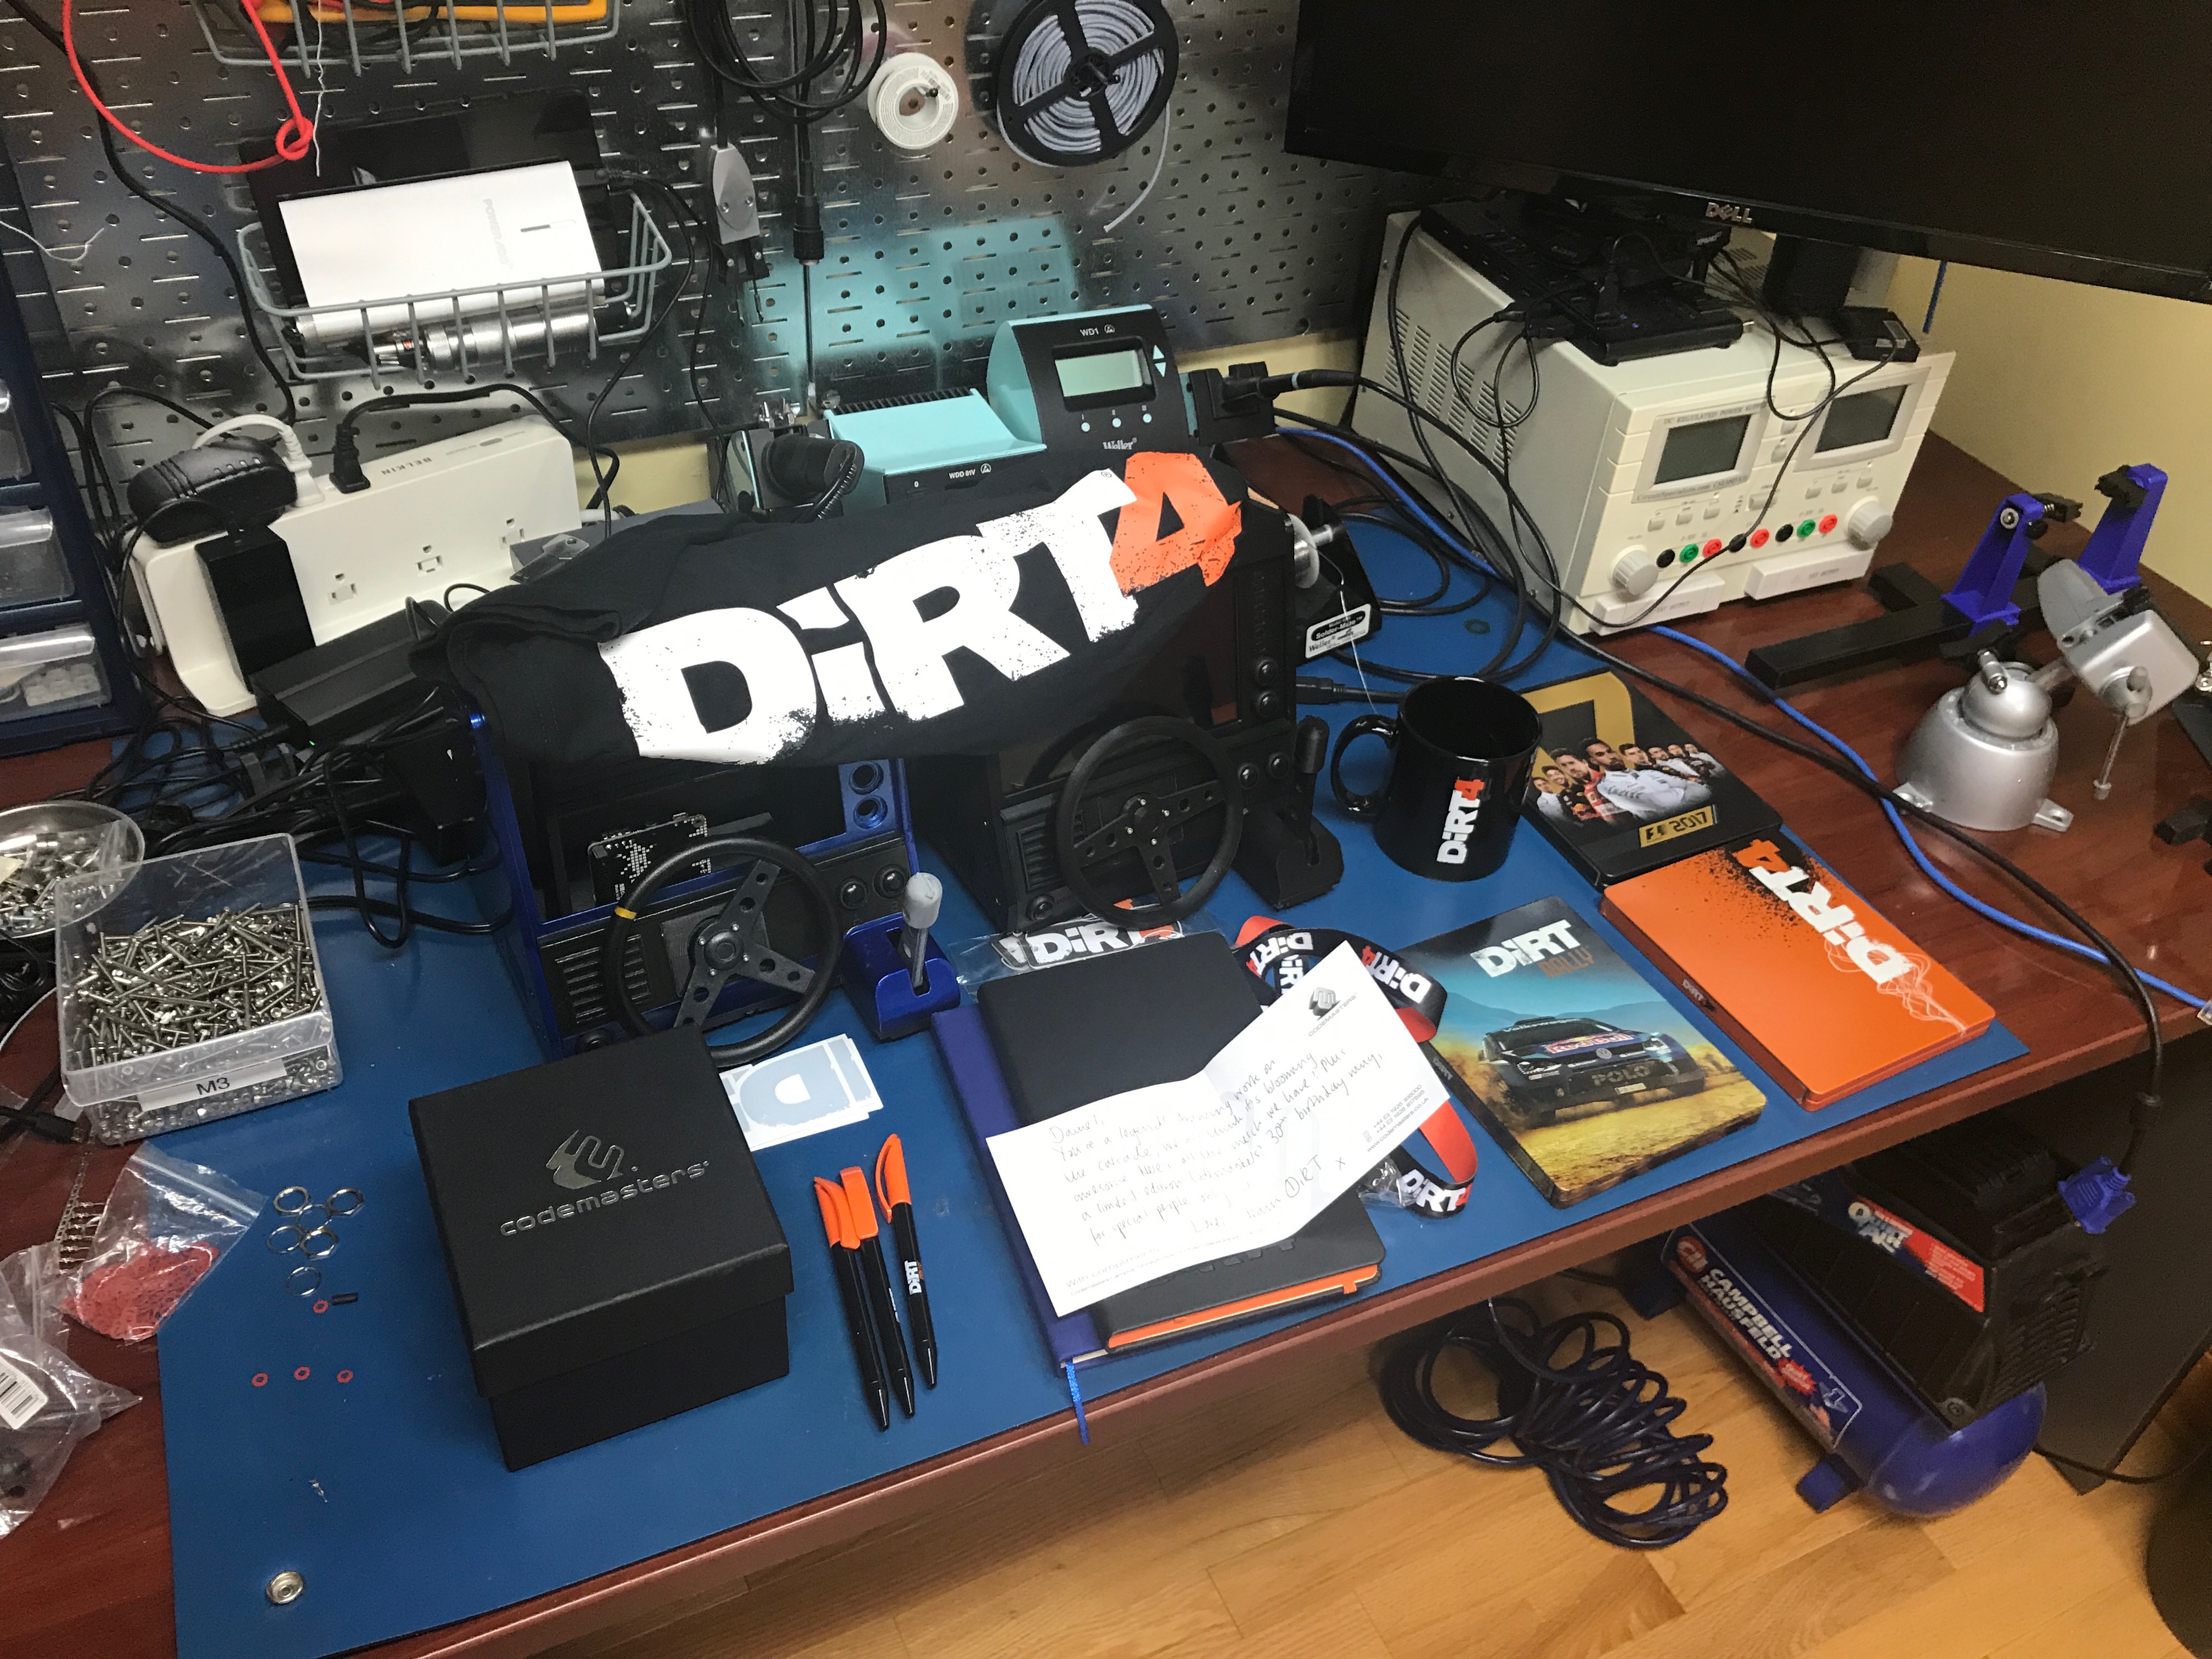\n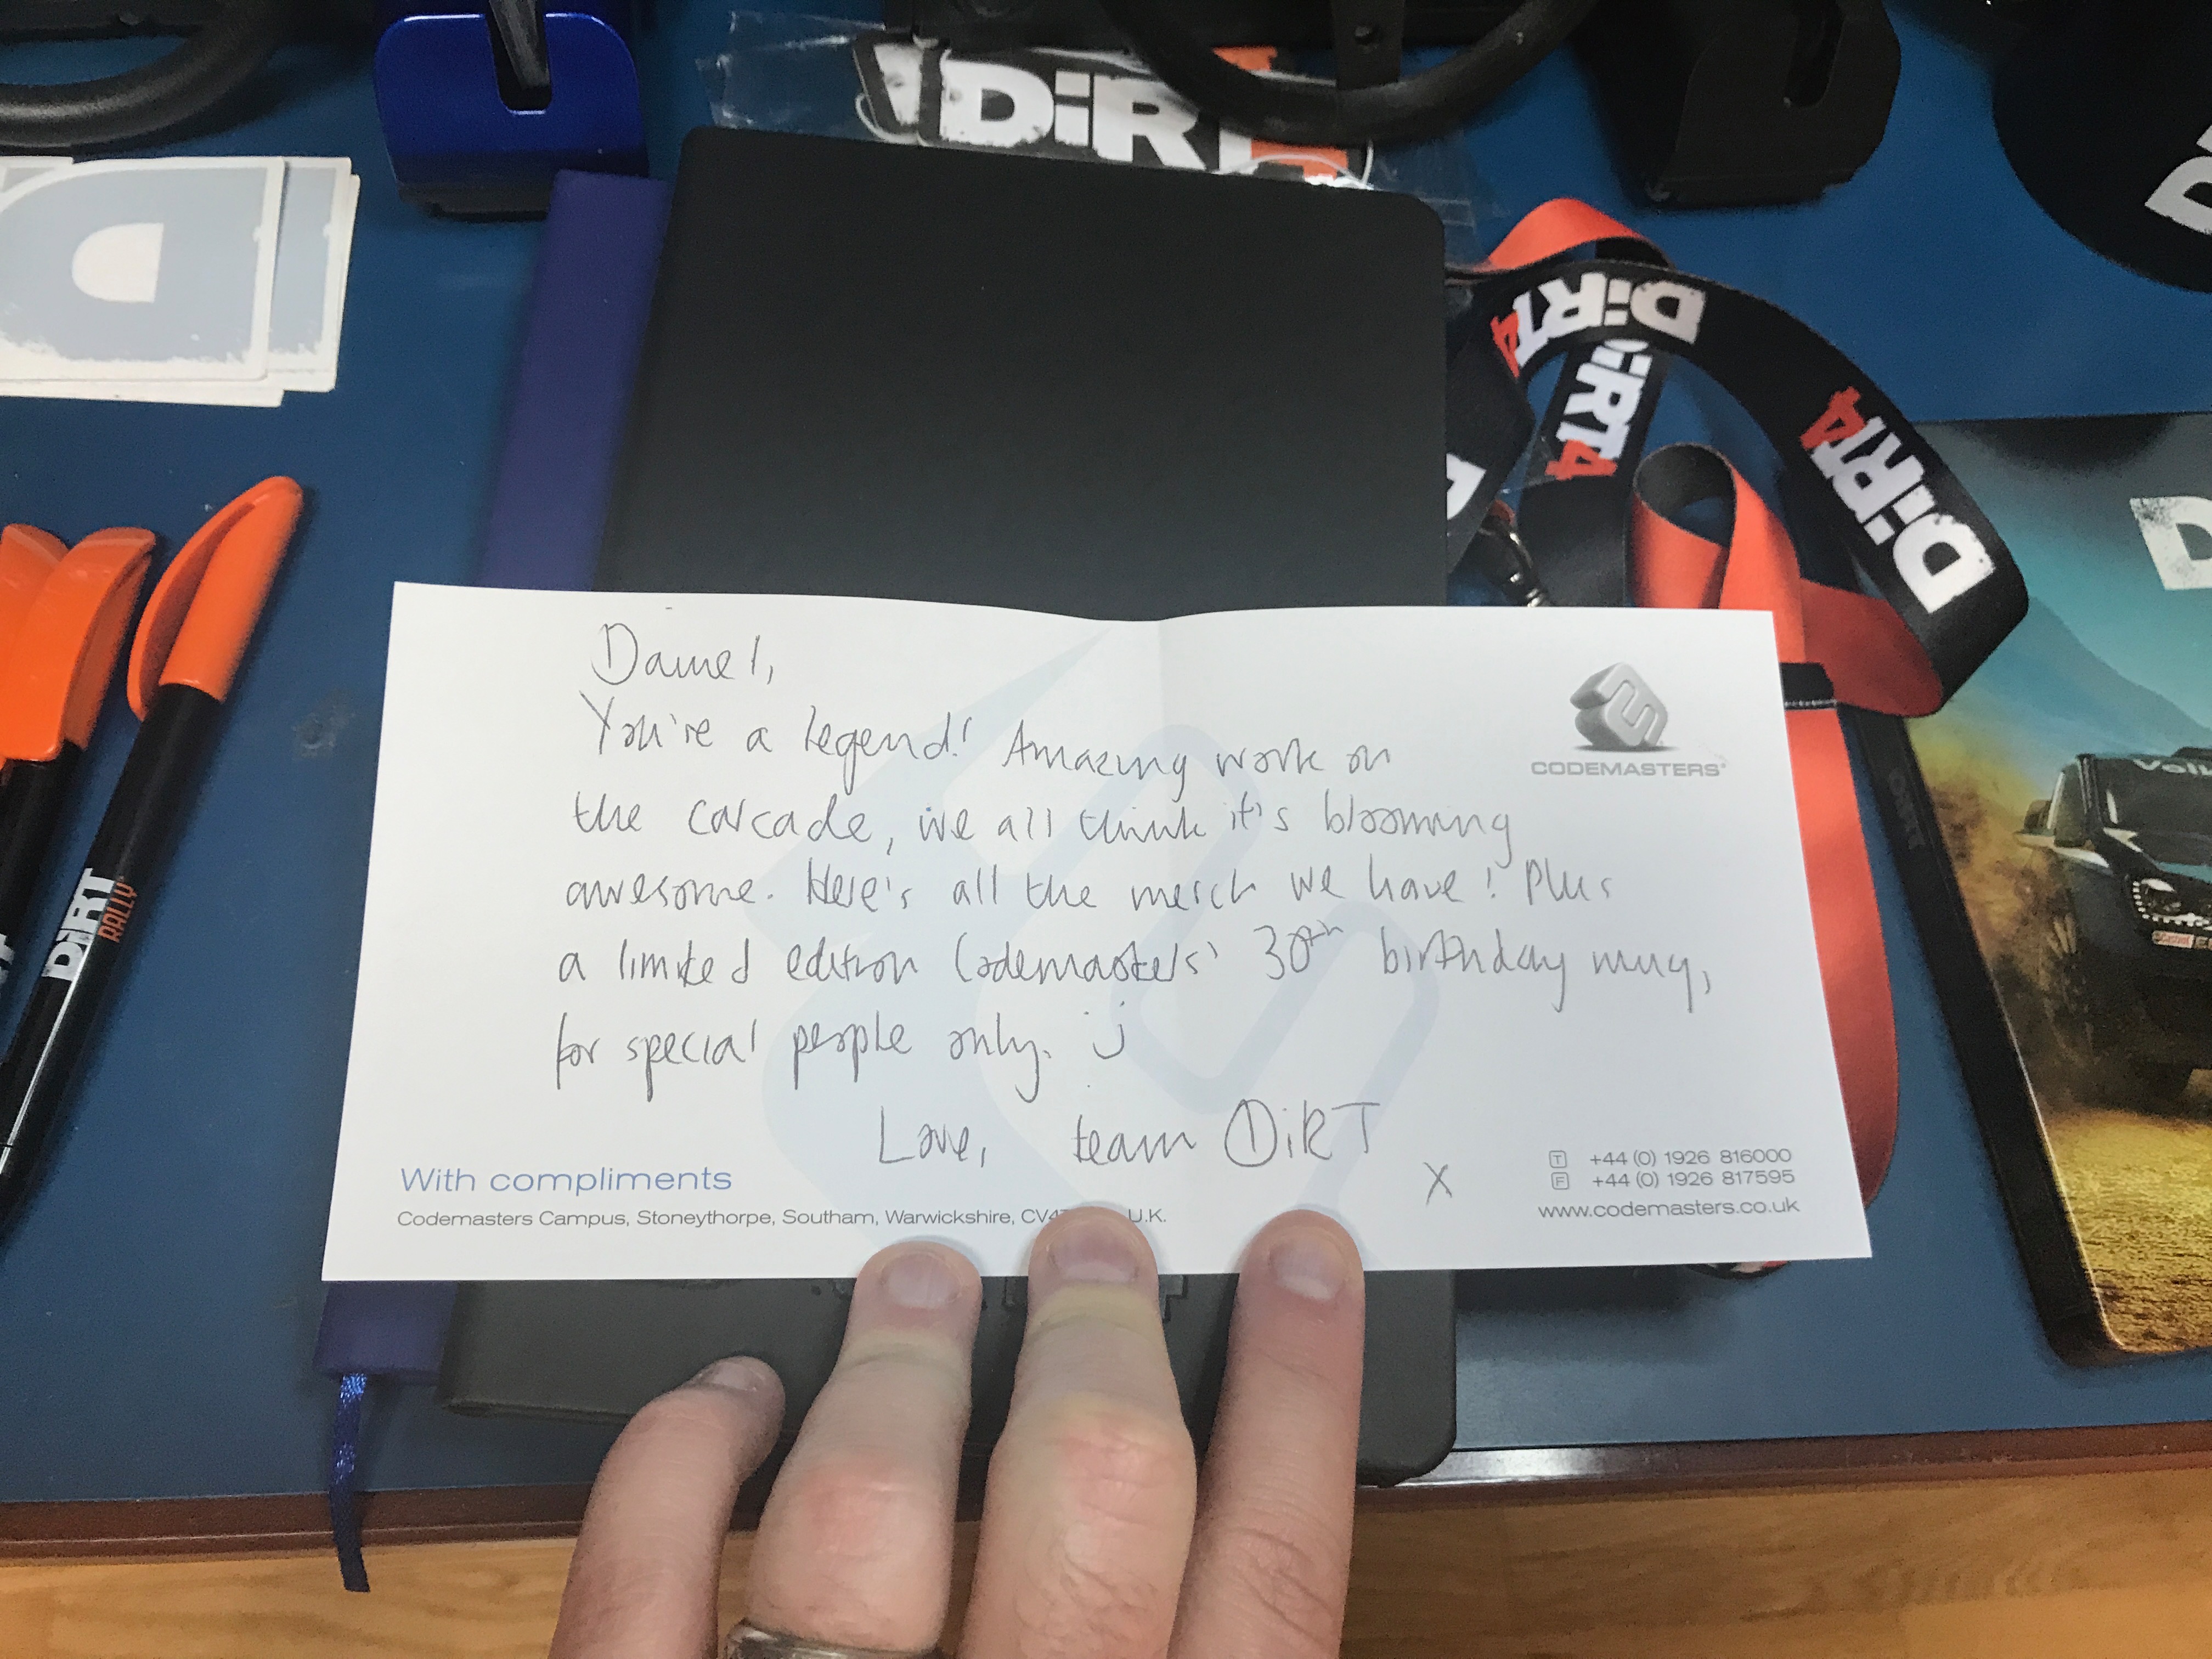\n\nMany thanks to the Dirt team at Codemasters. It's awesome to see them support the community the way they do!!\n\n\n####Post-Processing, Part 2\nAfter a lot of debating about the pros and cons of extensive post processing to finish 3d prints, I decided to switch to printing the parts using **different colored filament**. This process took a **LONG** time. I experimented with 4 different rolls of blue filament alone. I also spent the time to break up the design so that I could print the rear panel in different pieces and glue them together. I ended up going with [ColorFabb Ultra Marine Blue PLA](https://colorfabb.com/ultra-marine-blue) for the bulk of the enclosure. The dashboard is printed in [ProtoPasta Matte Fiber PLA](https://www.proto-pasta.com/products/high-performance-htpla-matte-fiber), the base, rear panel insert, and all the internal mounts are printed in Hatchbox Black PLA, and the headlights are printed in Hatchbox Glow in the Dark PLA.\n\n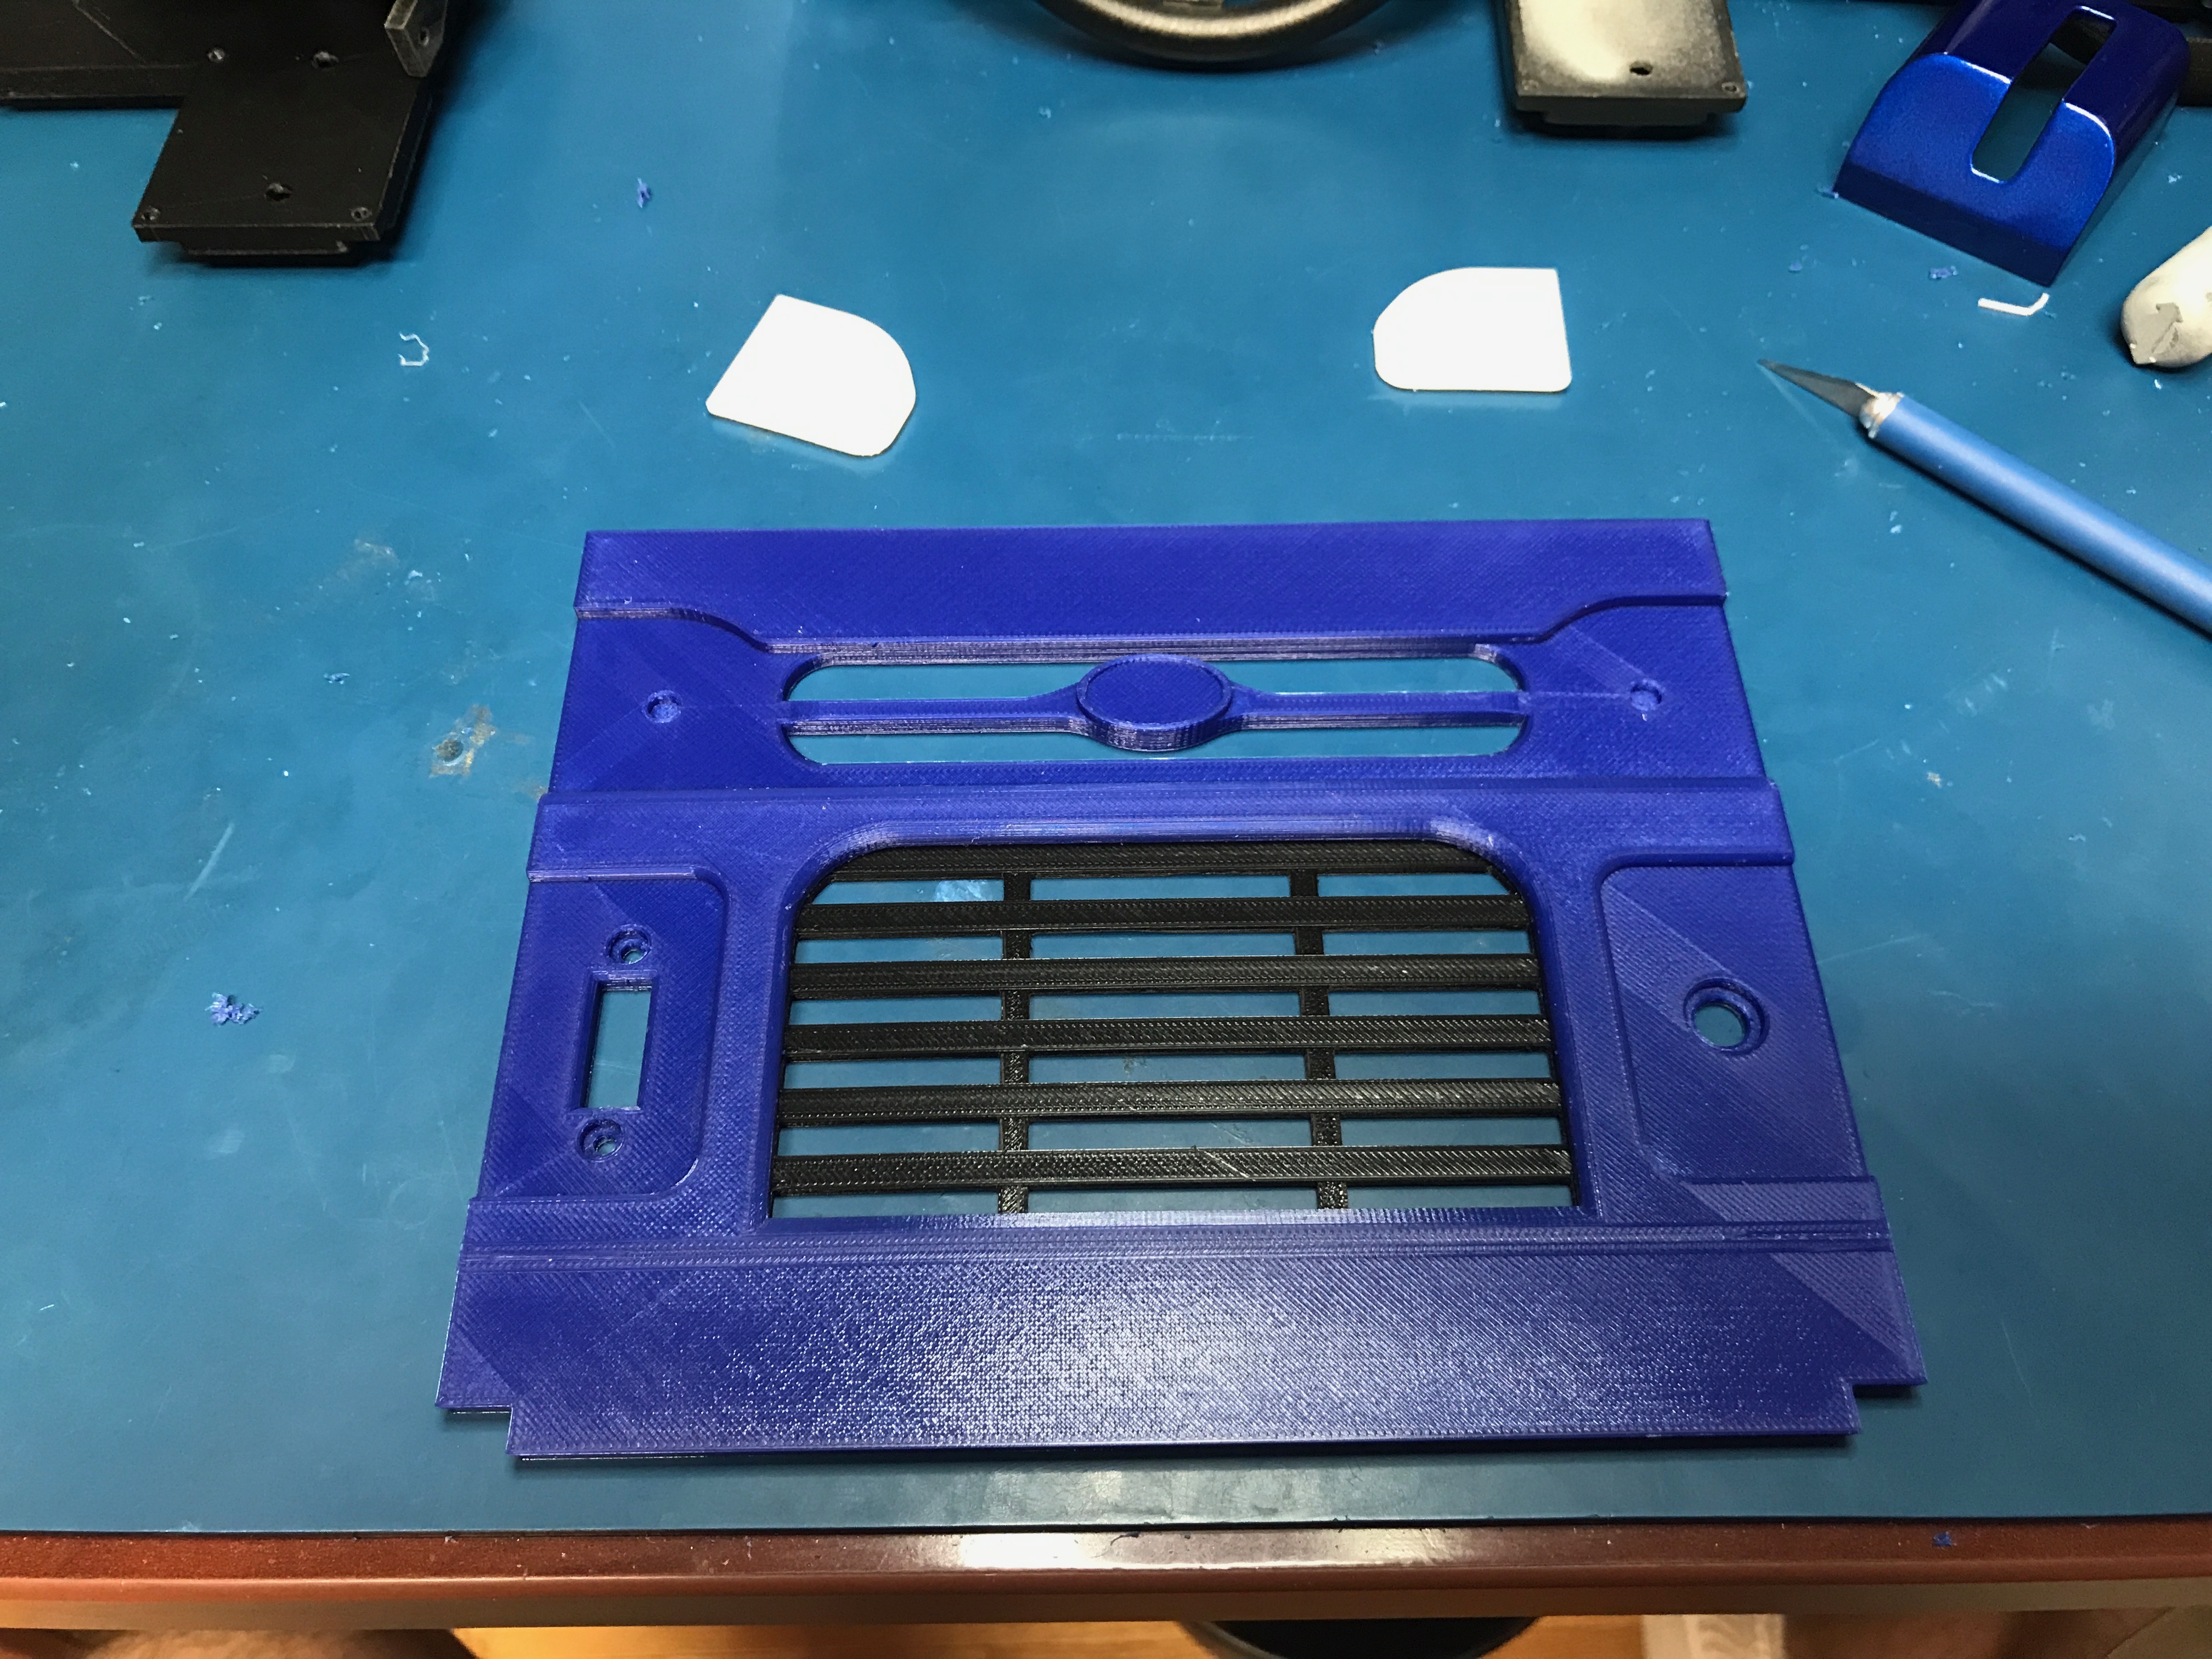\n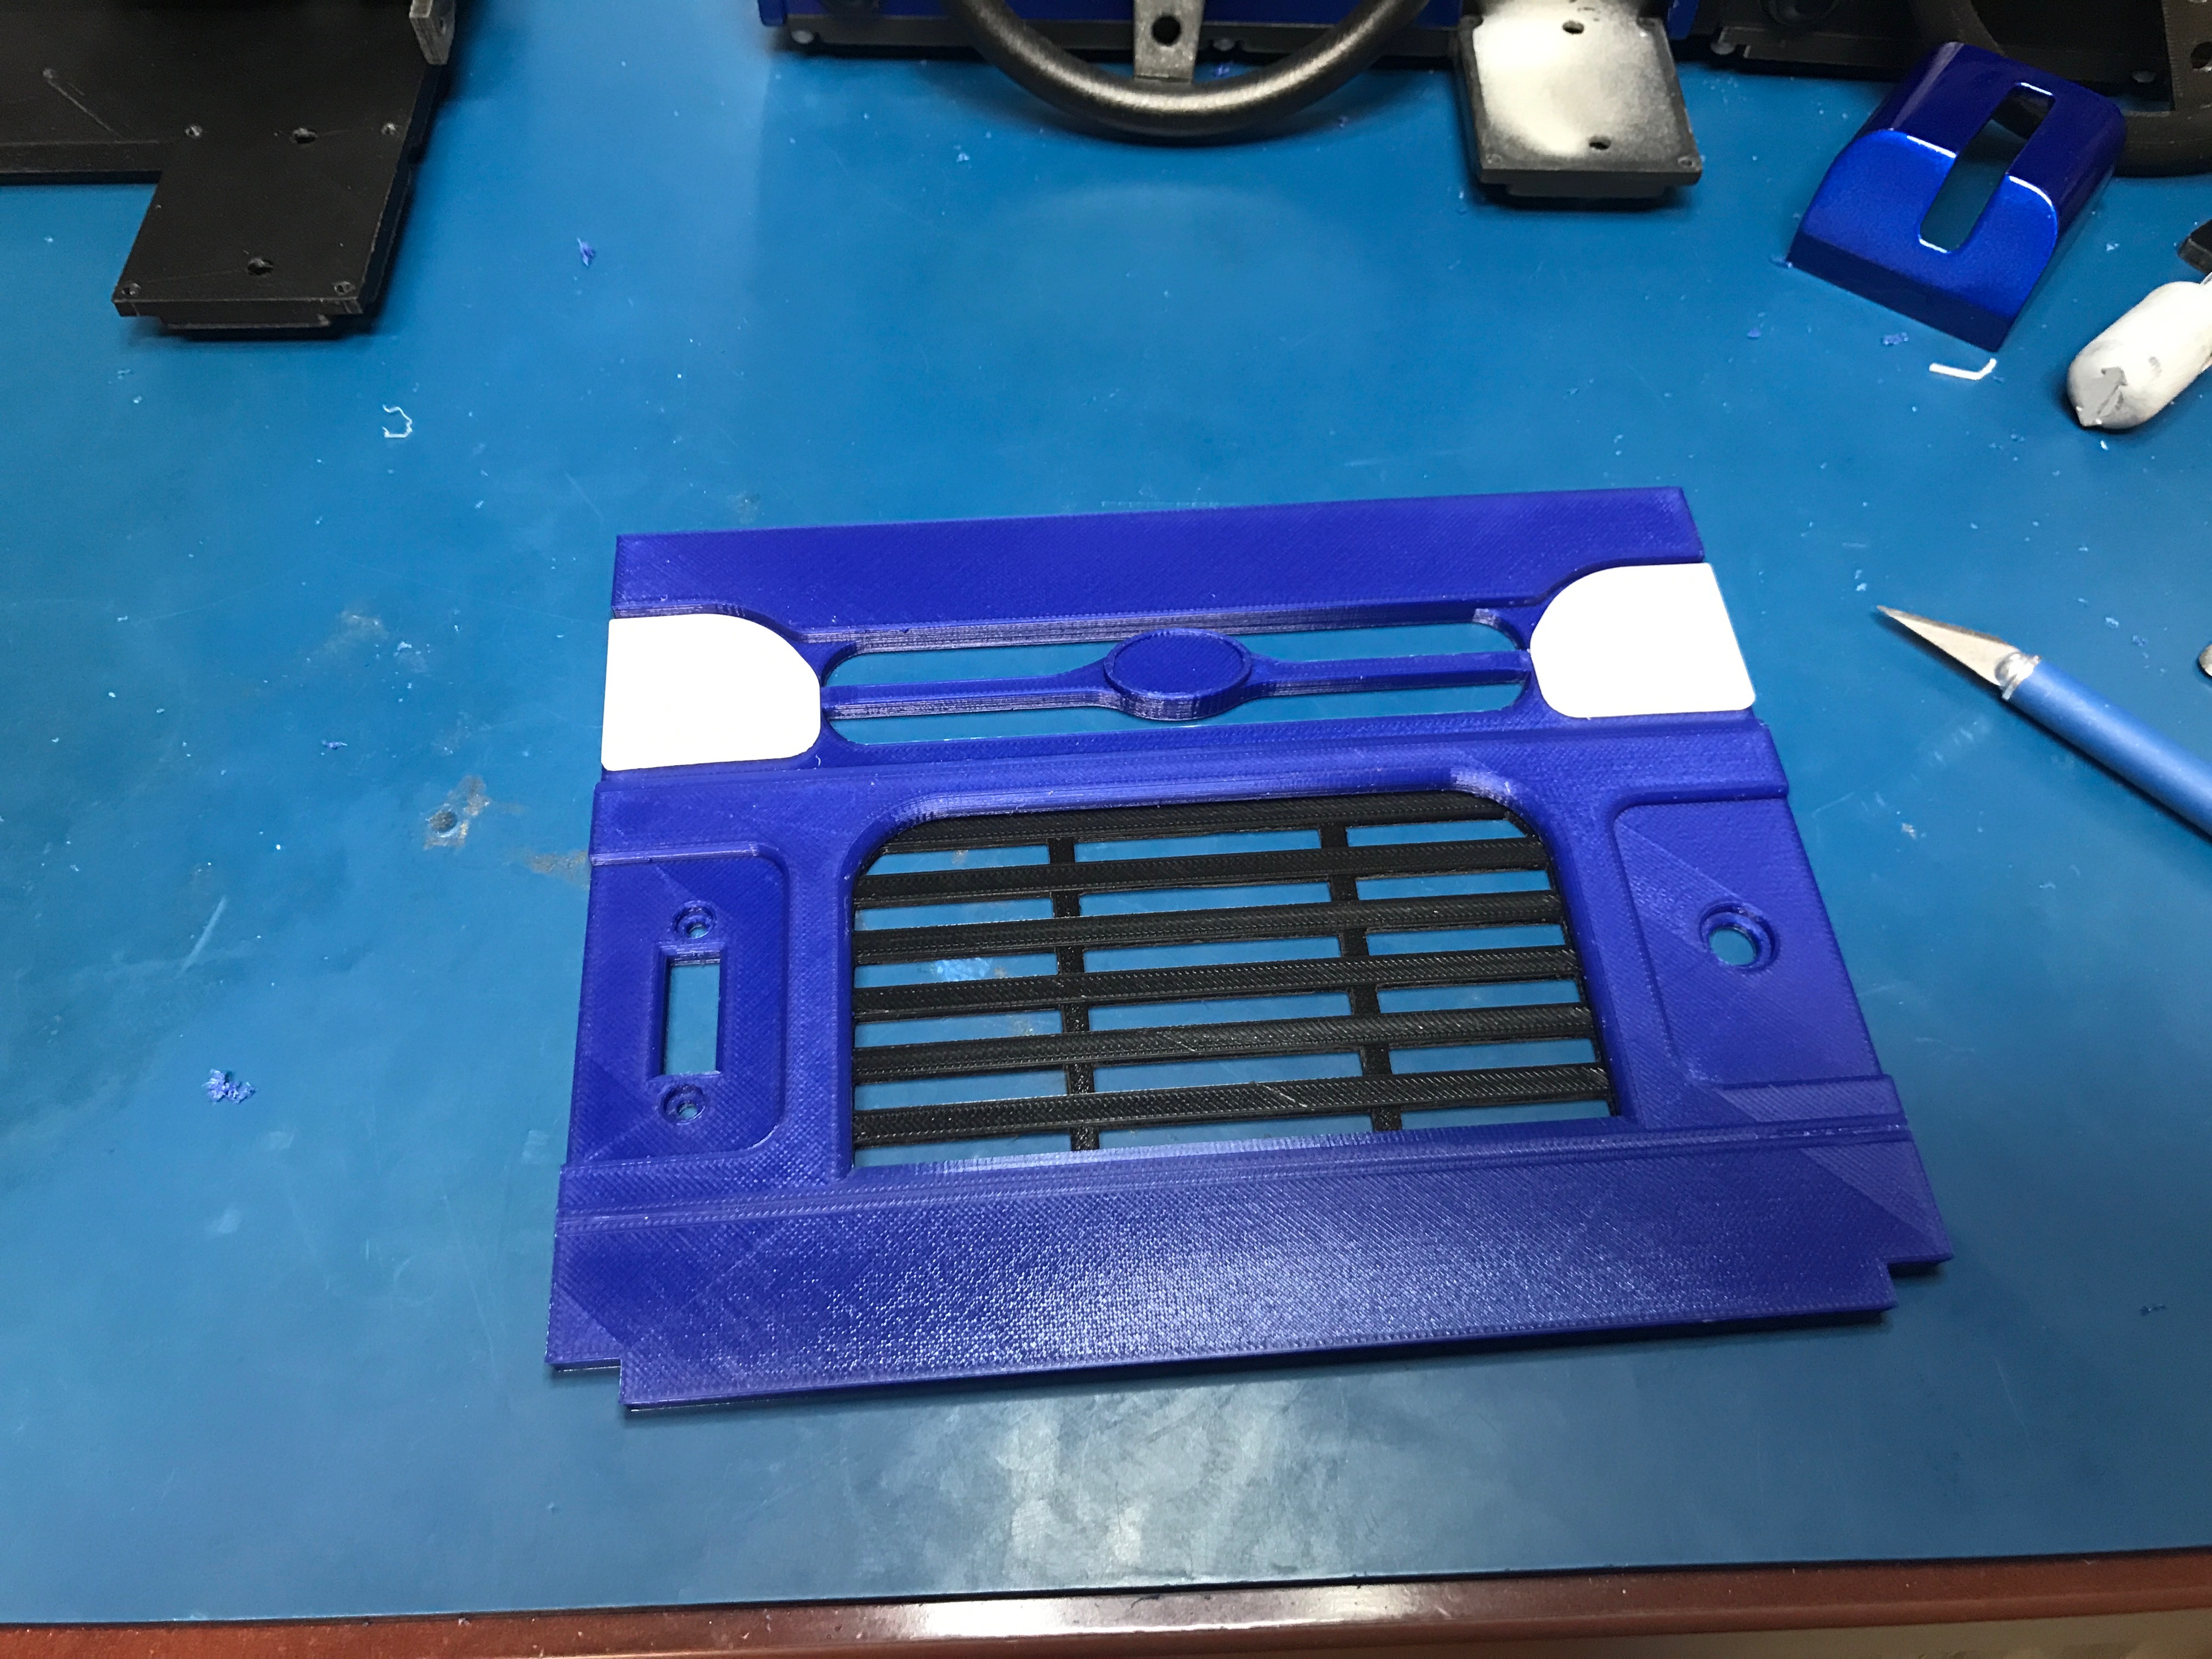\n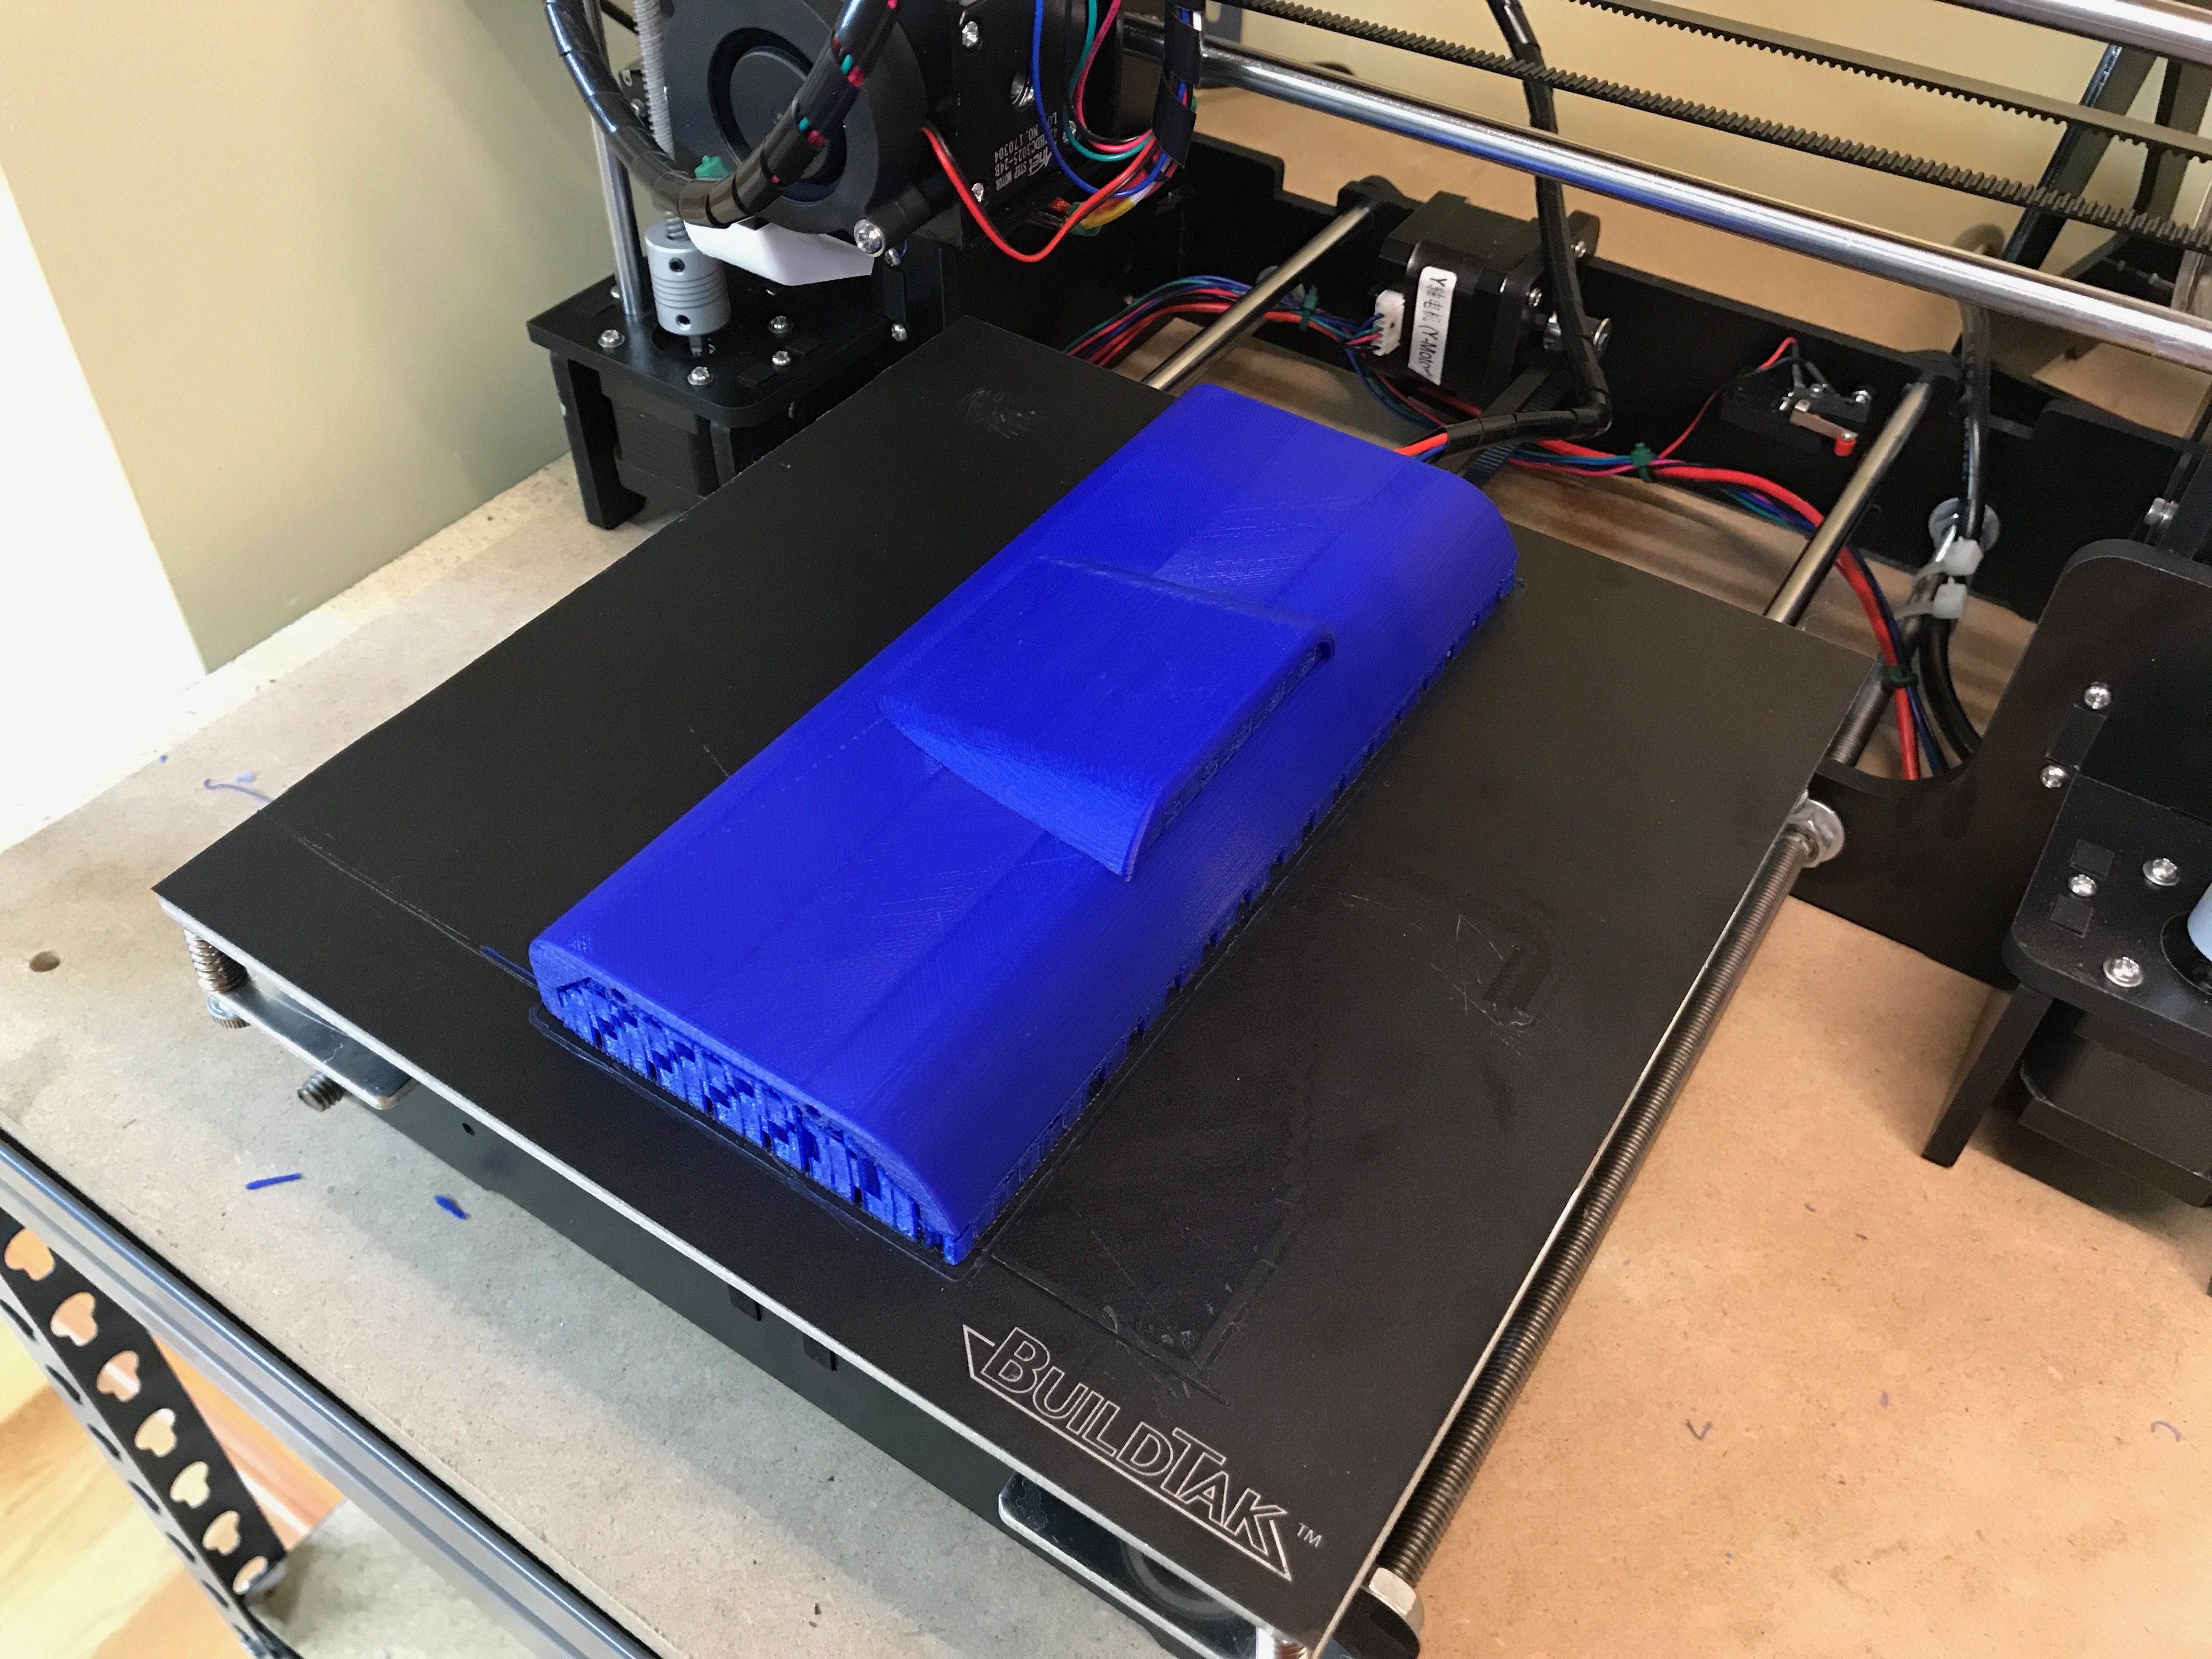\n\nThe steering wheel and throttle are printed using [ProtoPasta Polishable Stainless Steel PLA](https://www.proto-pasta.com/collections/exotic-composite-pla/products/stainless-steel-pla), the steering wheel rim has been painted with PlastiDip Rubber Paint, and the small stripe is Testors orange.\n\n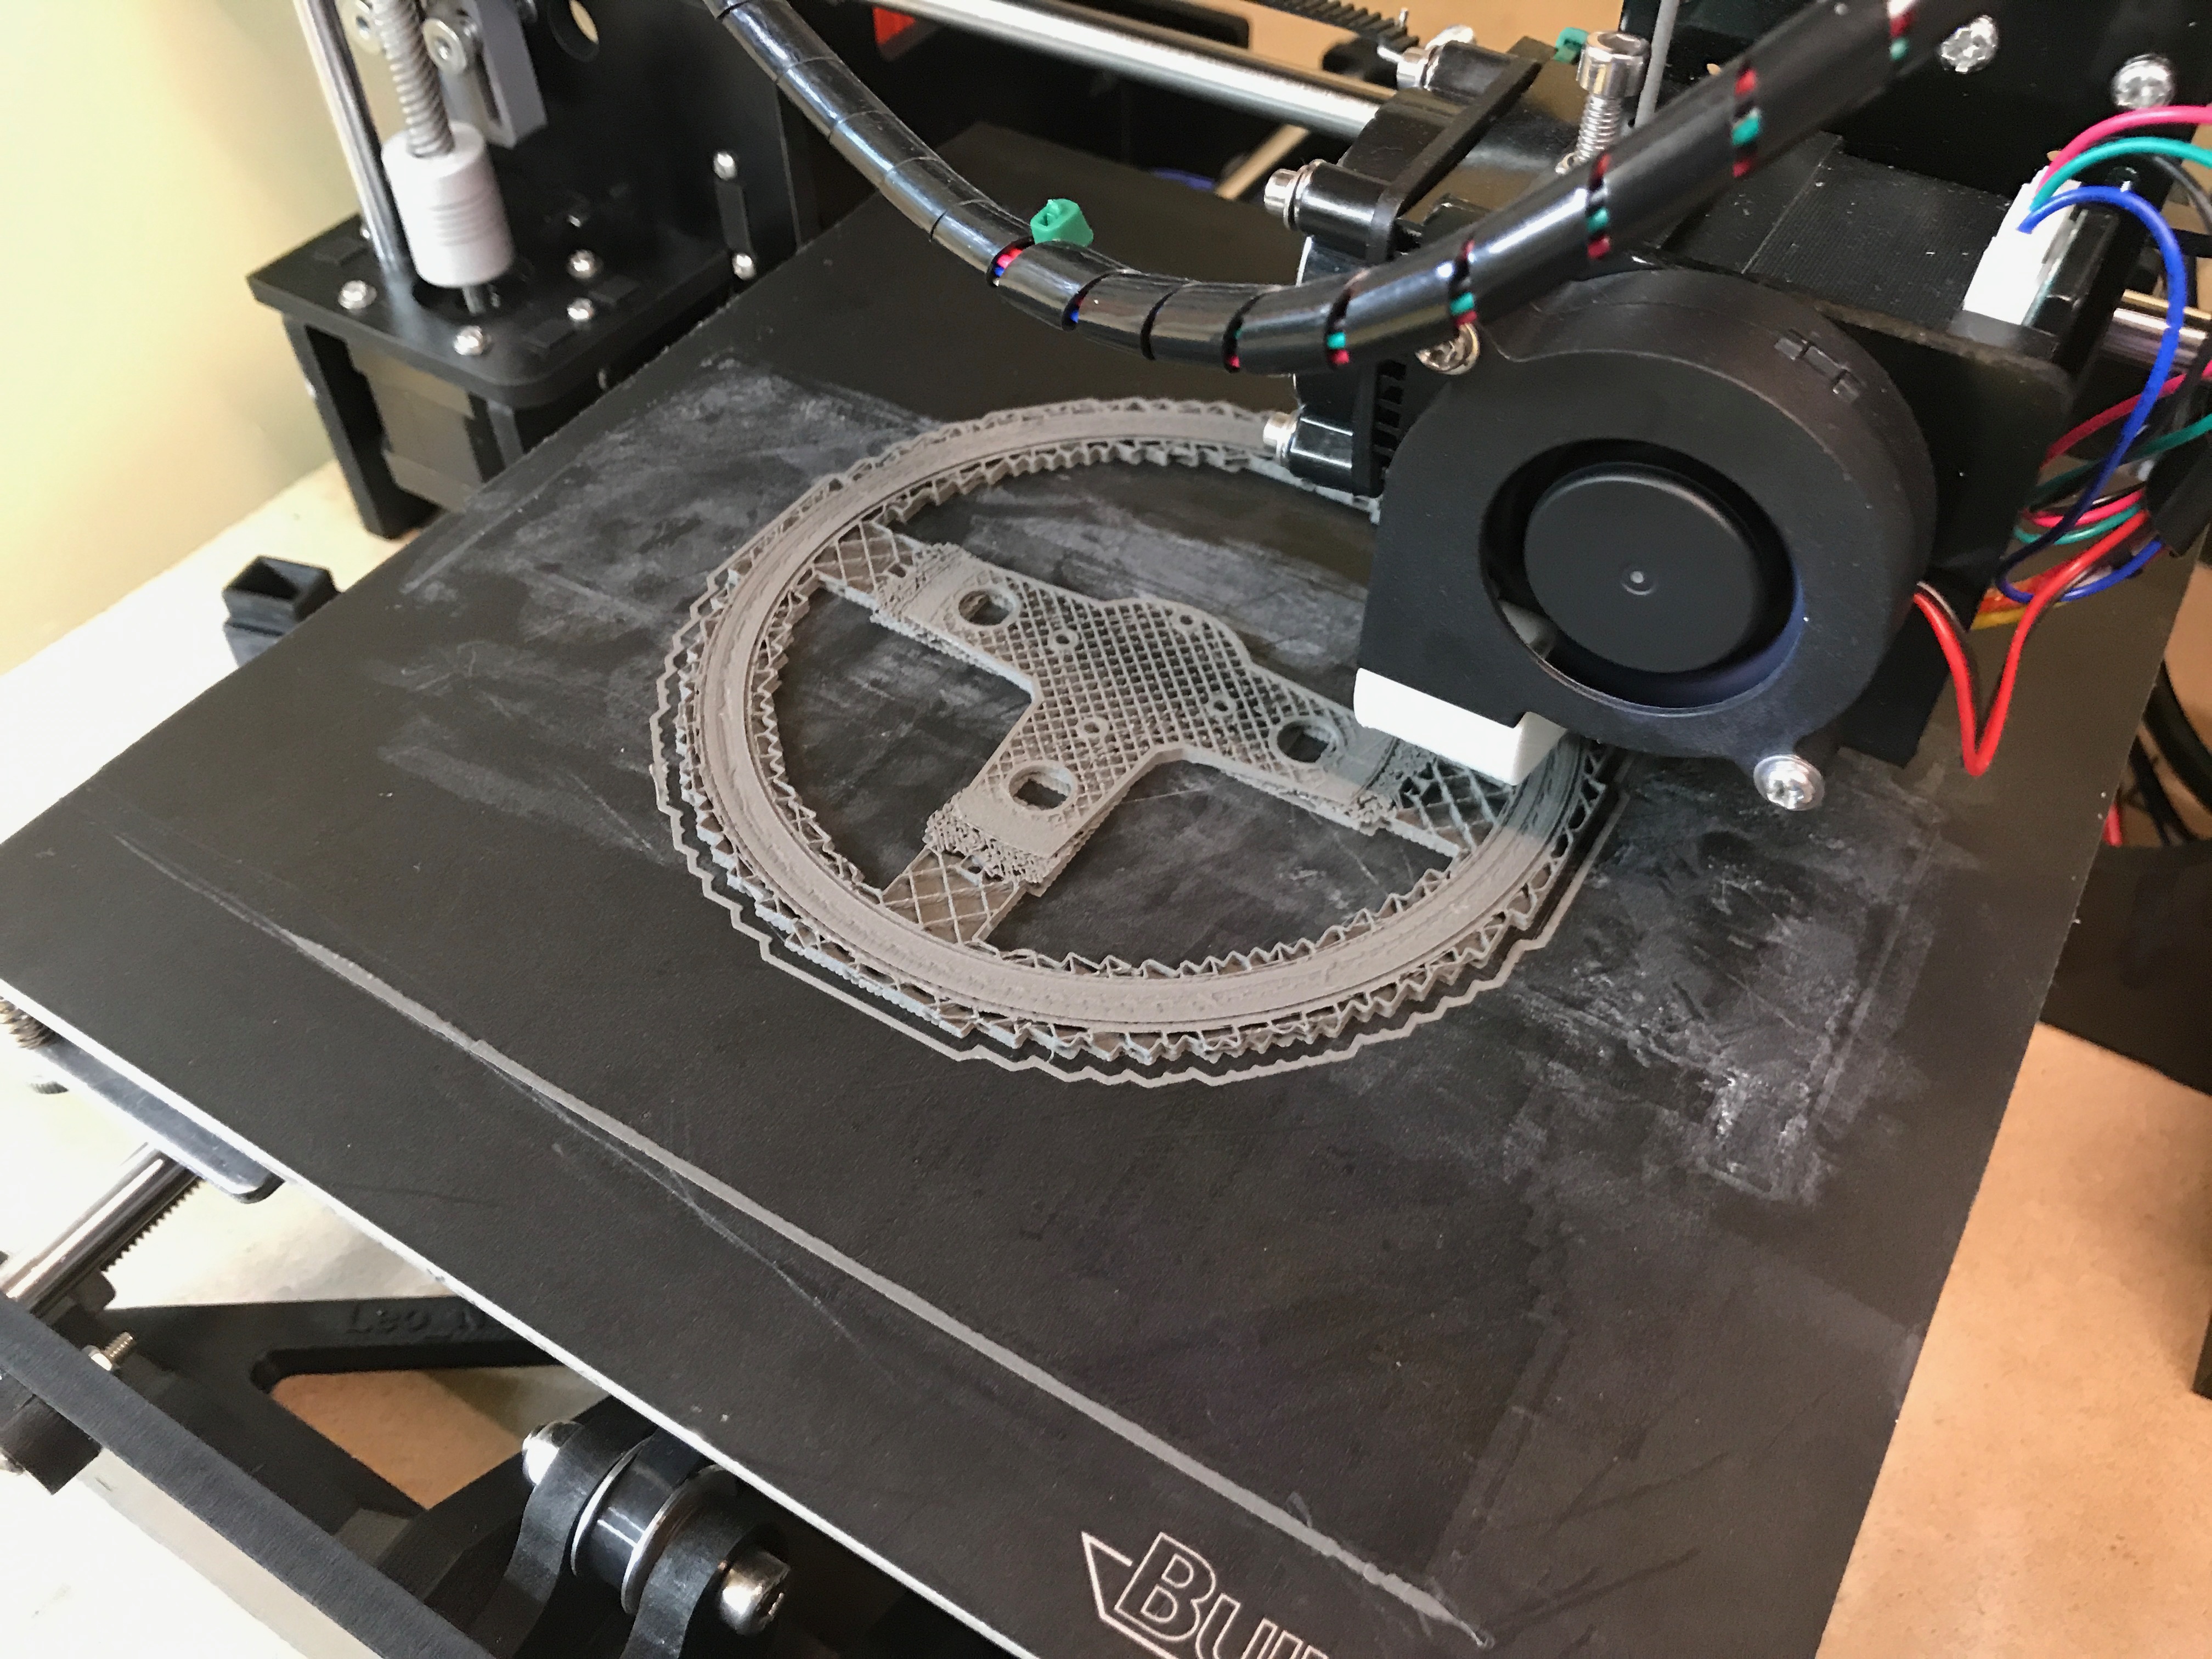\n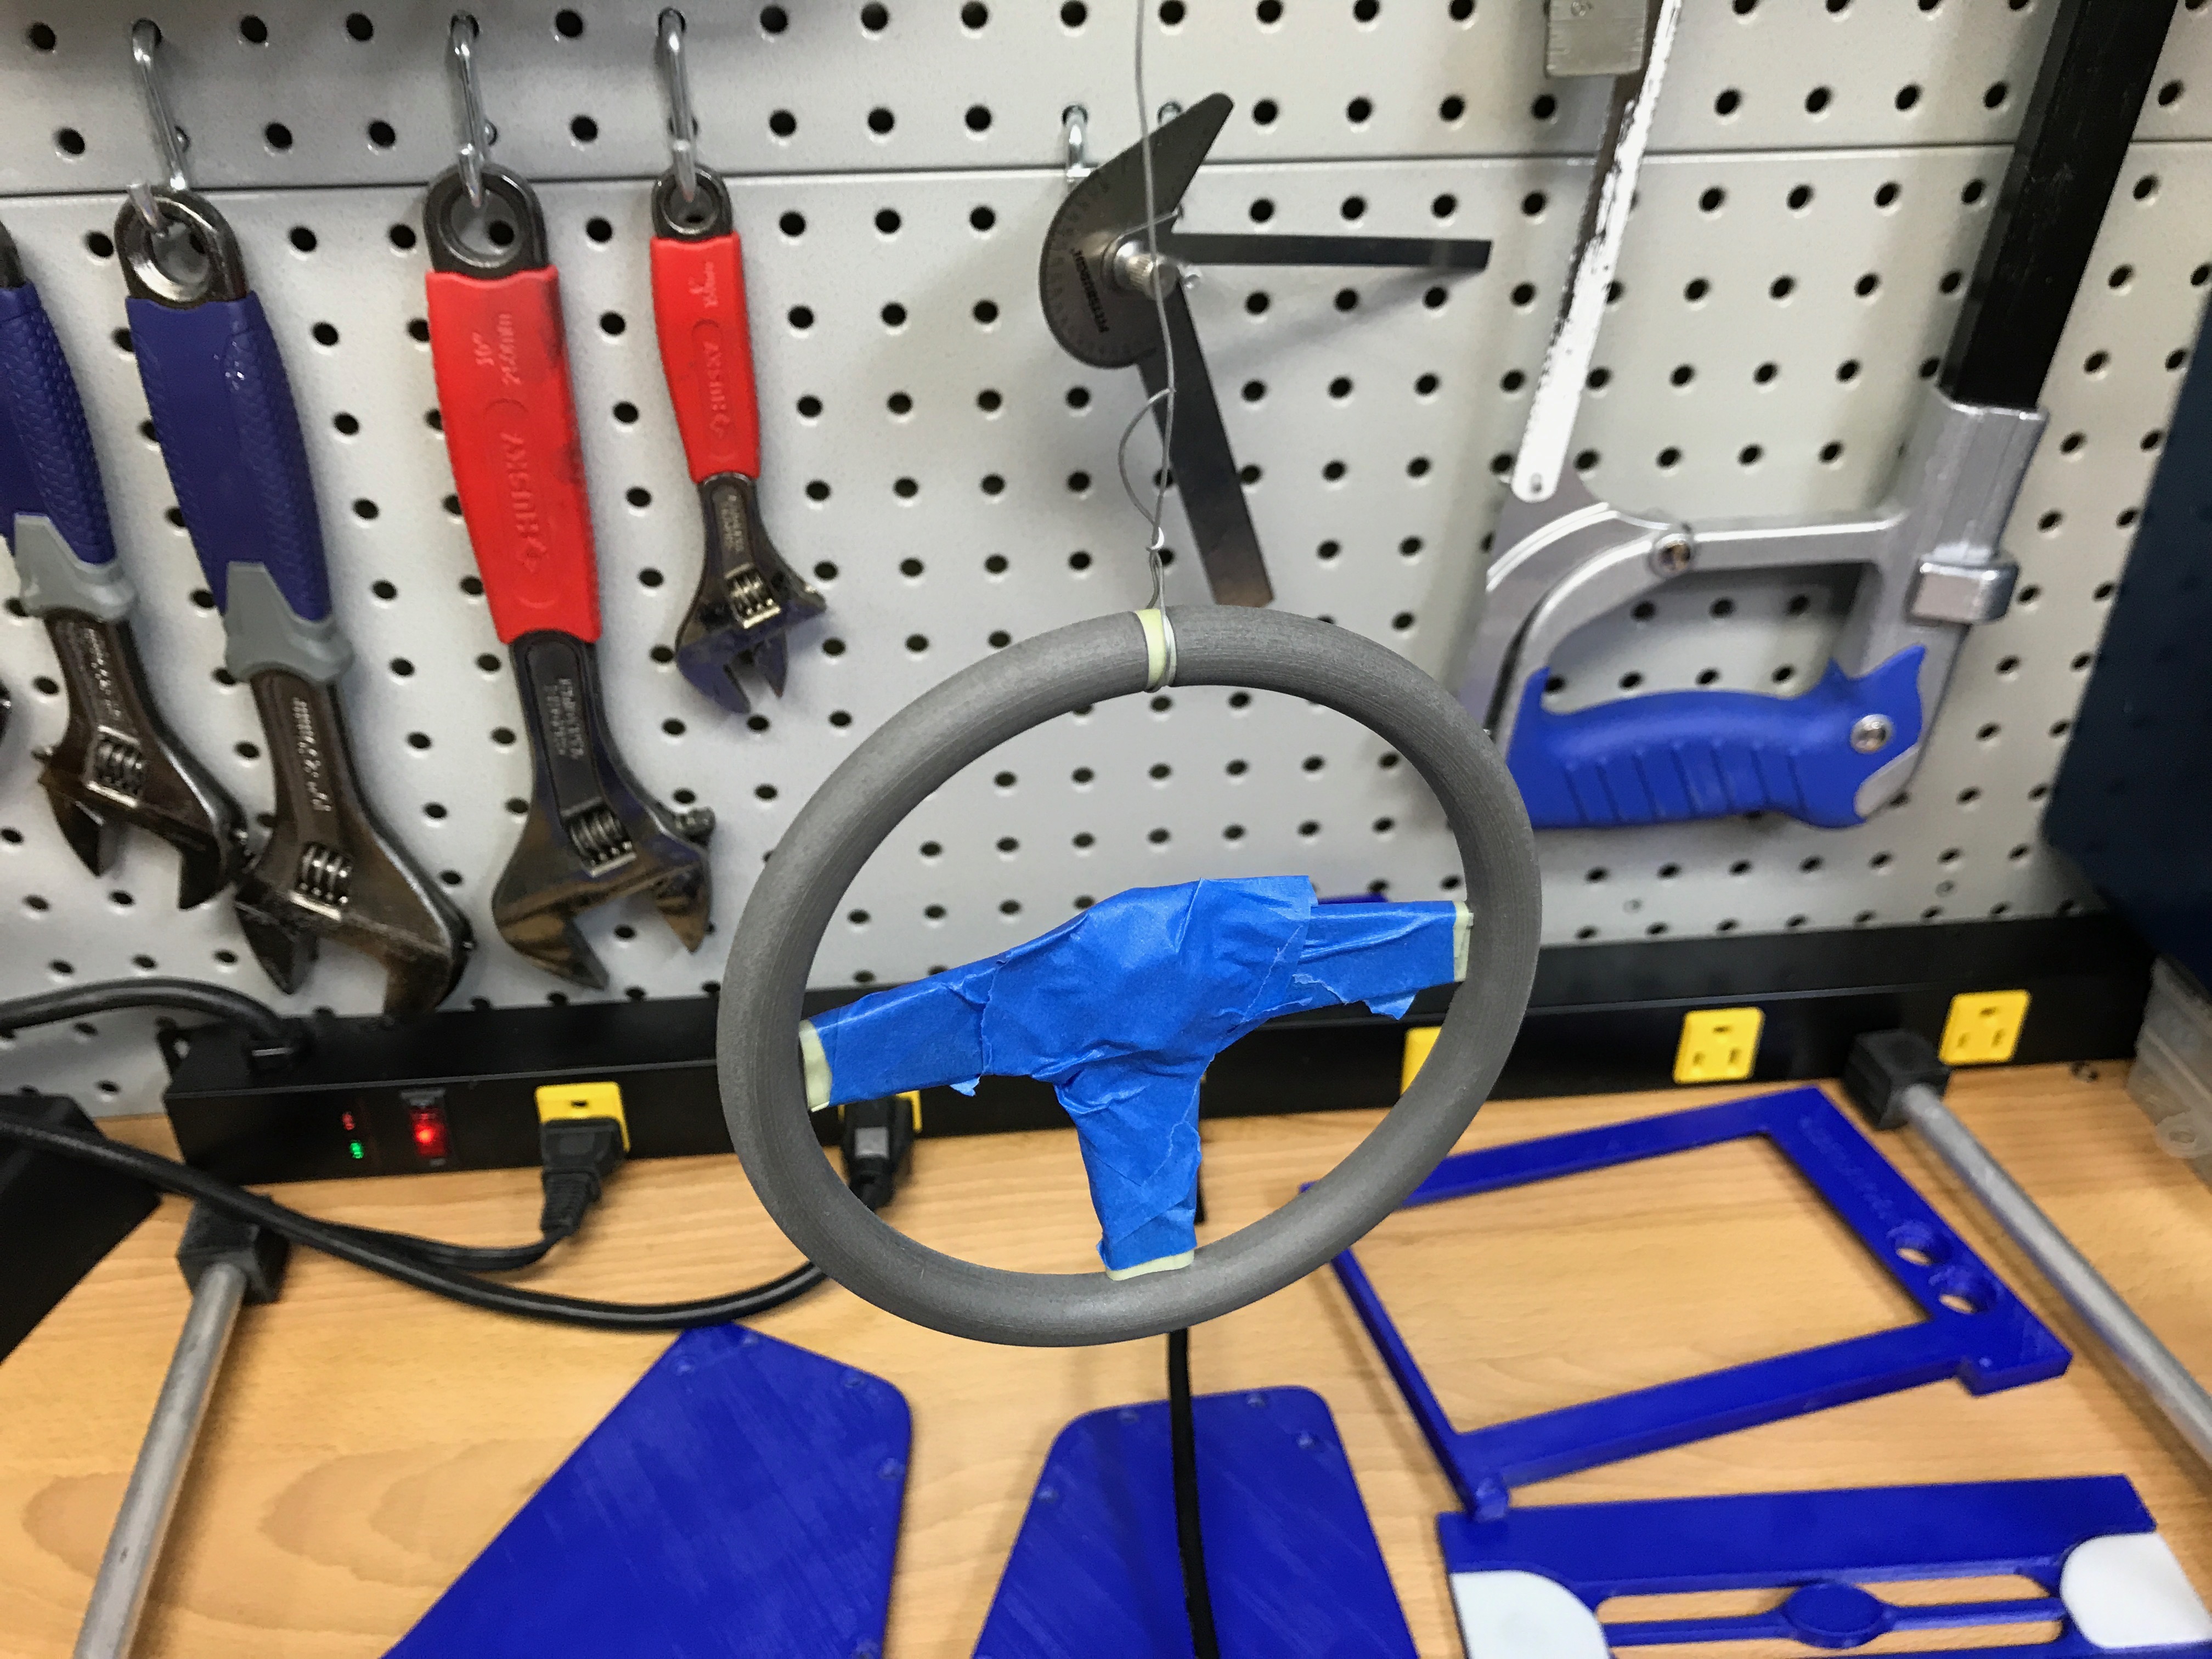\n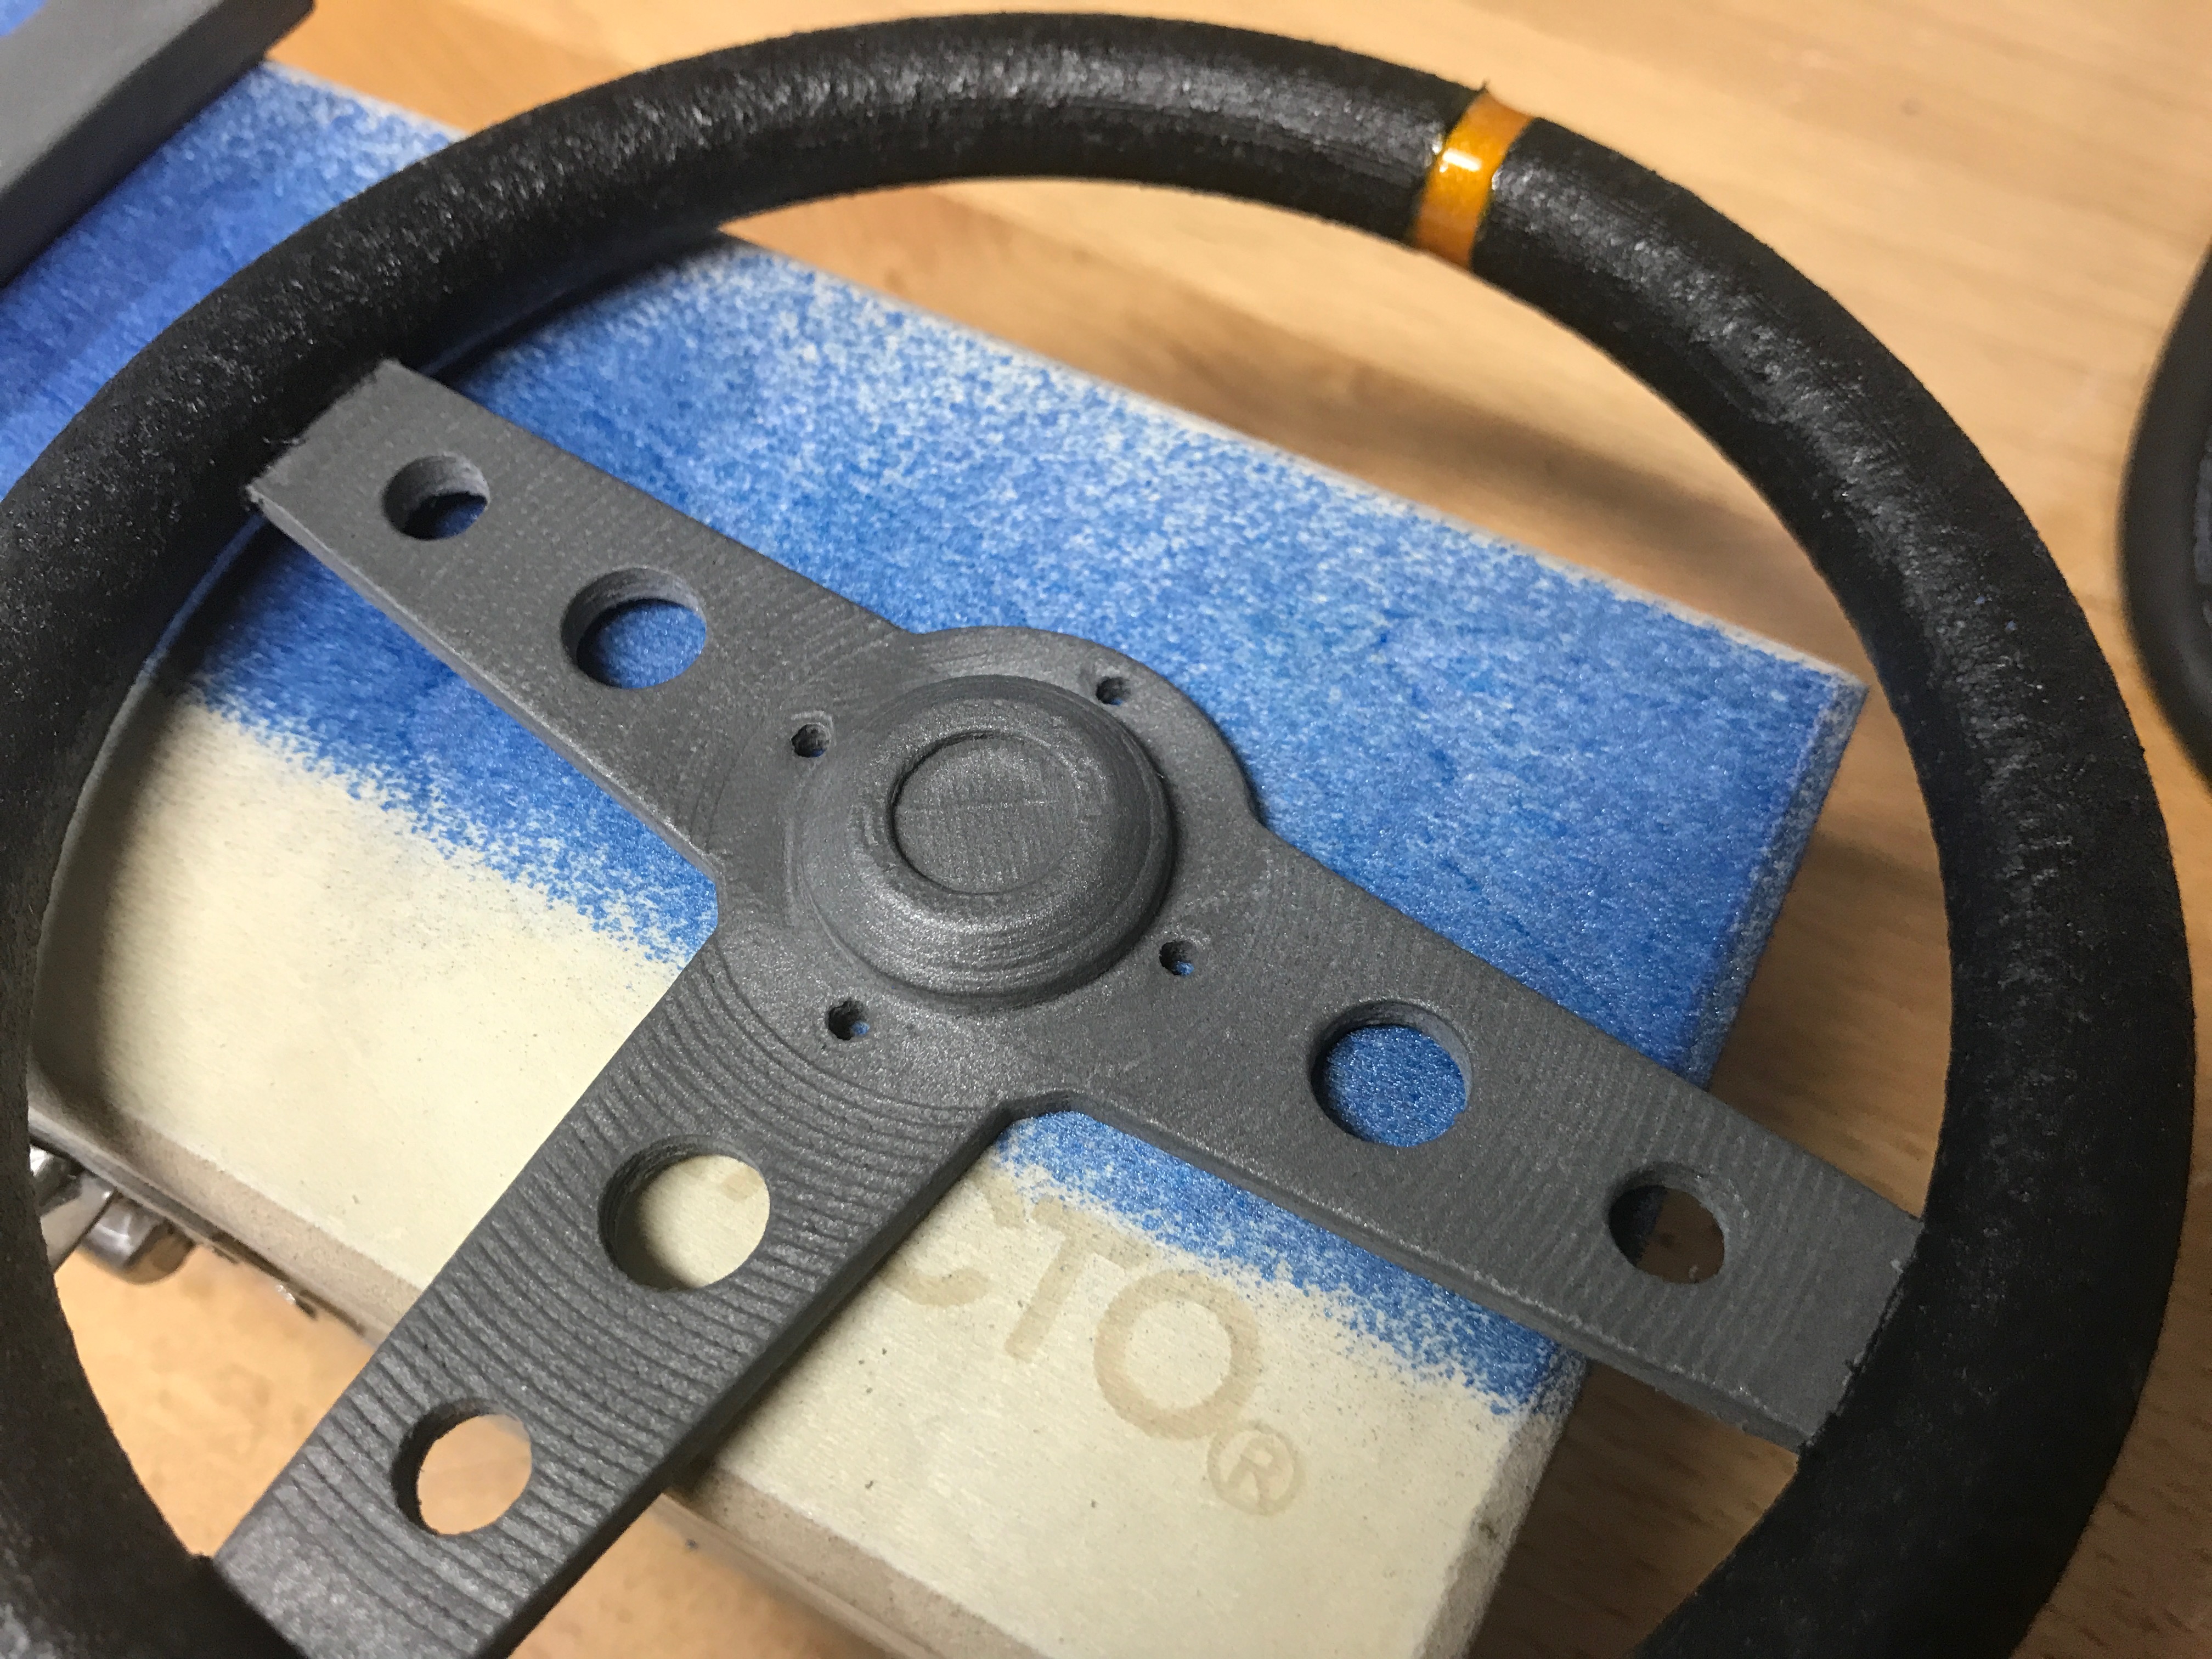\n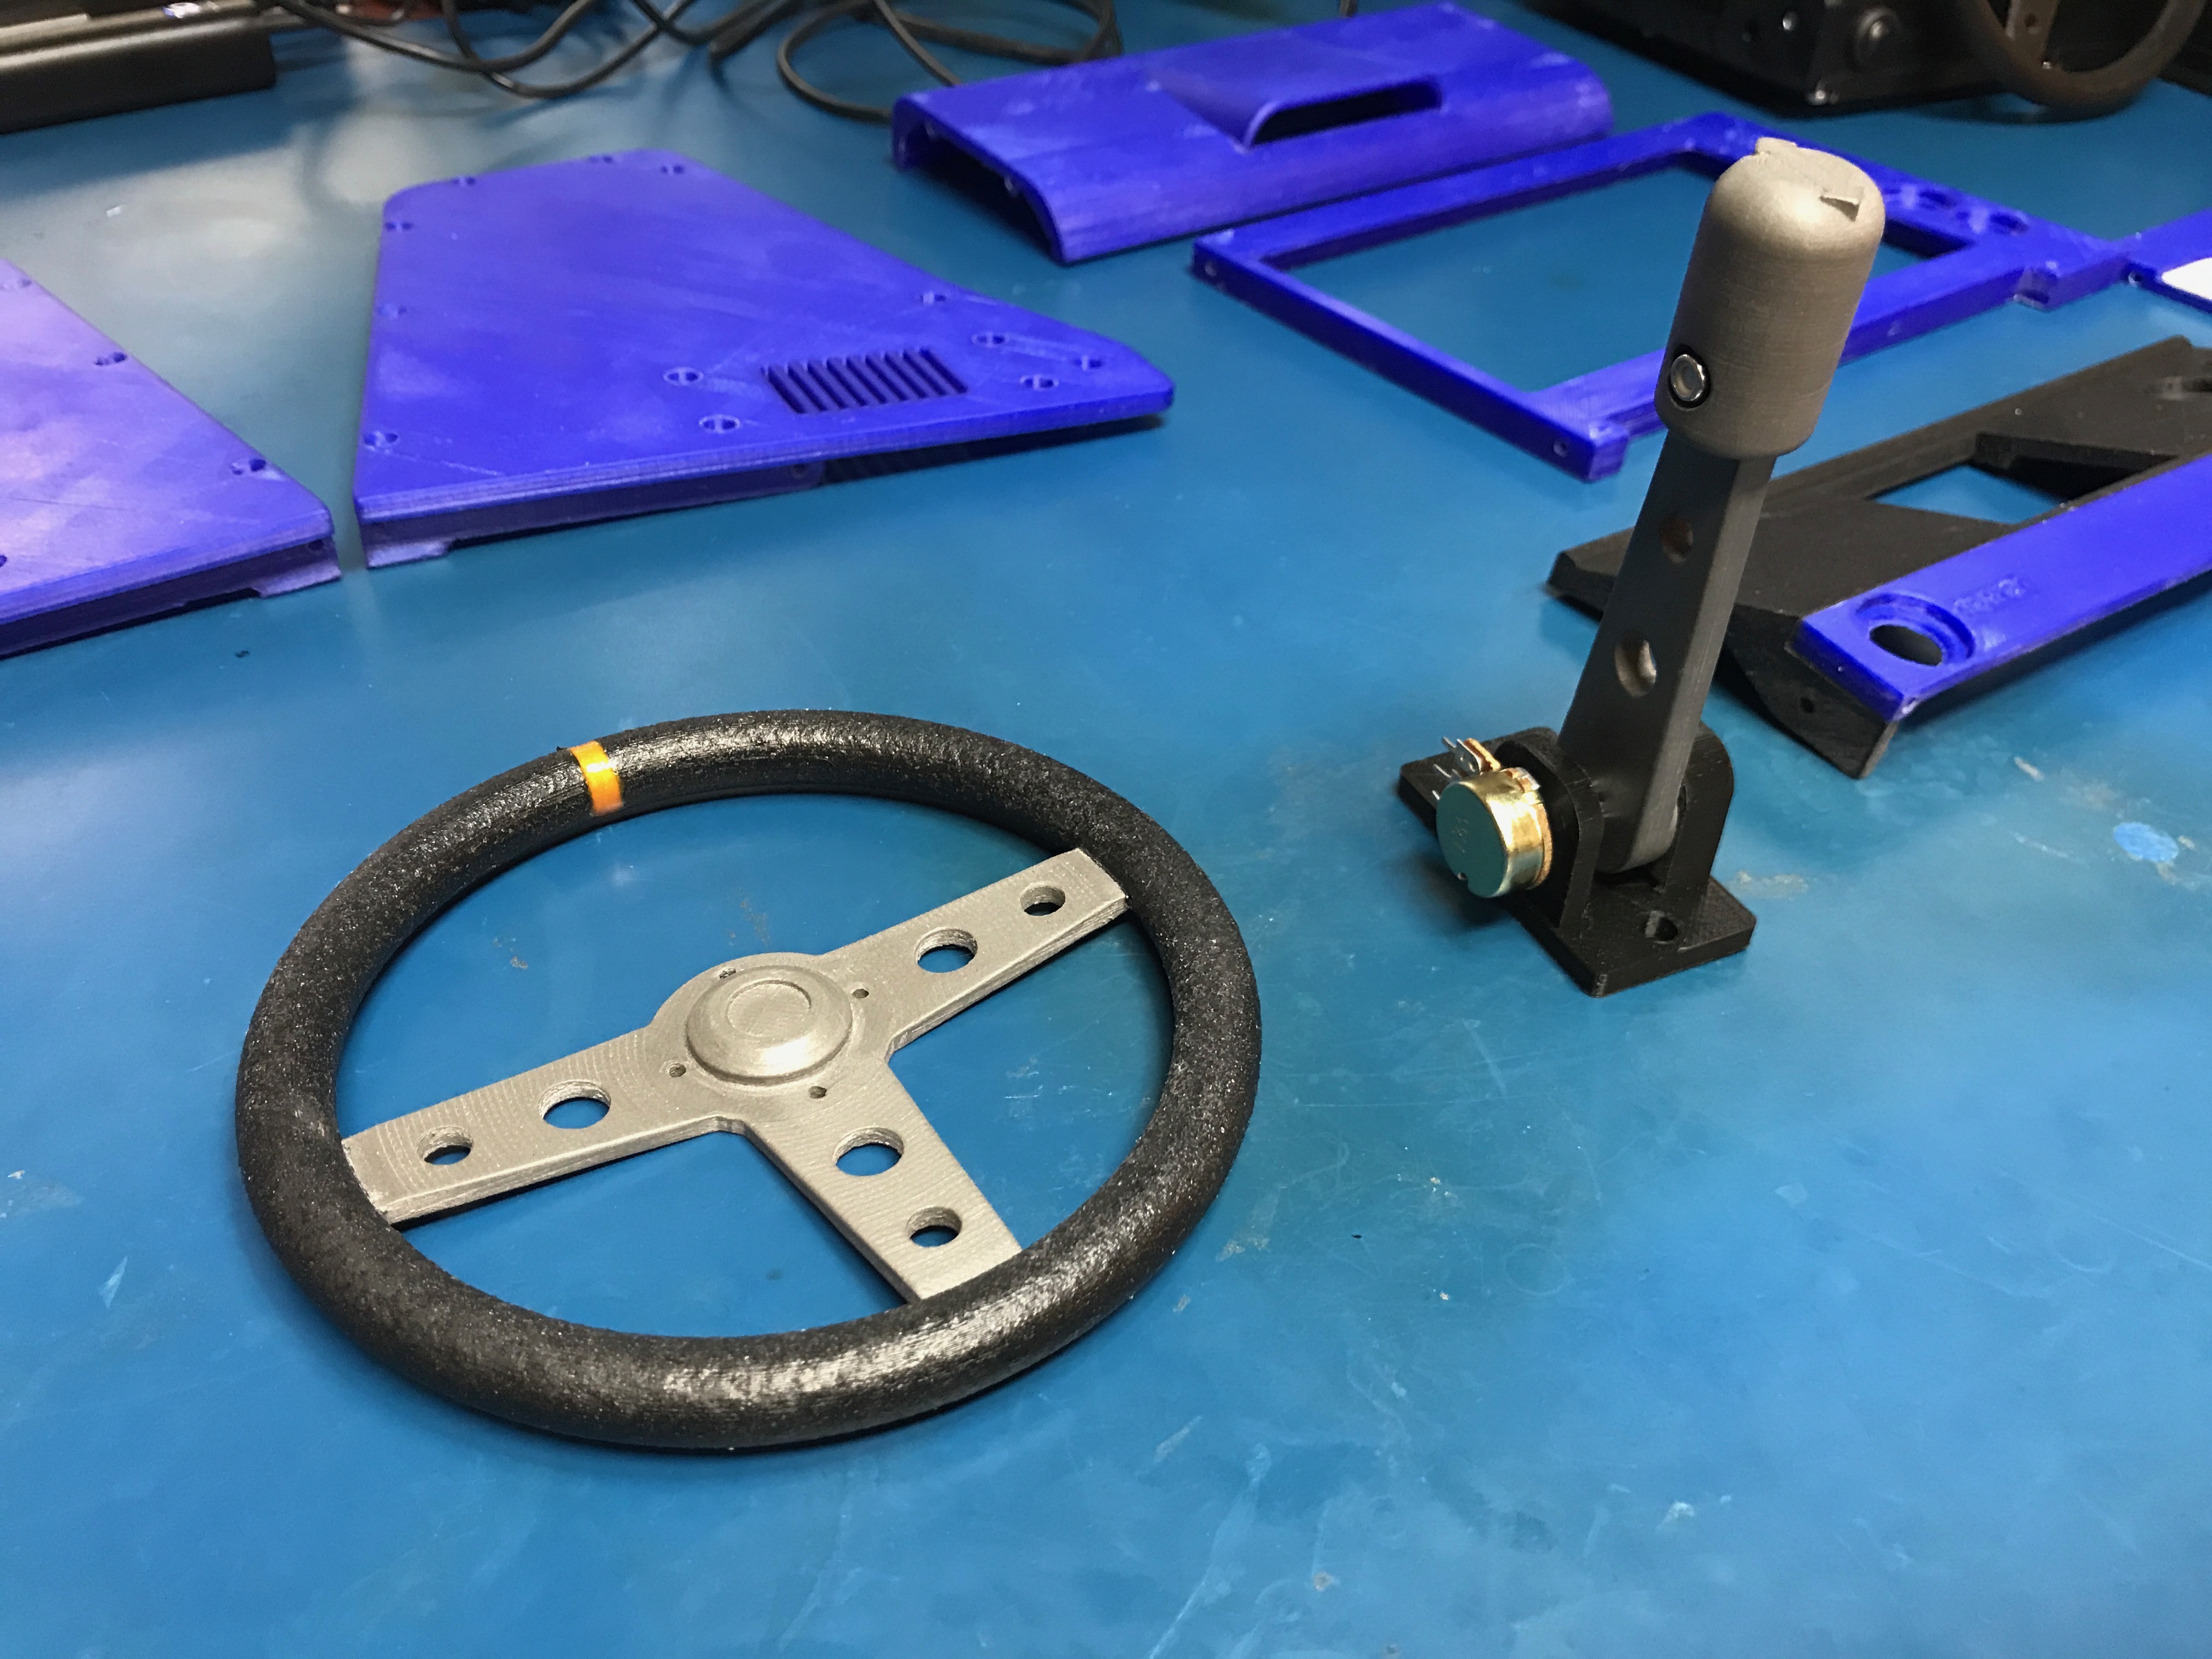\n\n\n####Final Assembly\nWith all the parts finally printed, I went about assembling the final product!\n\n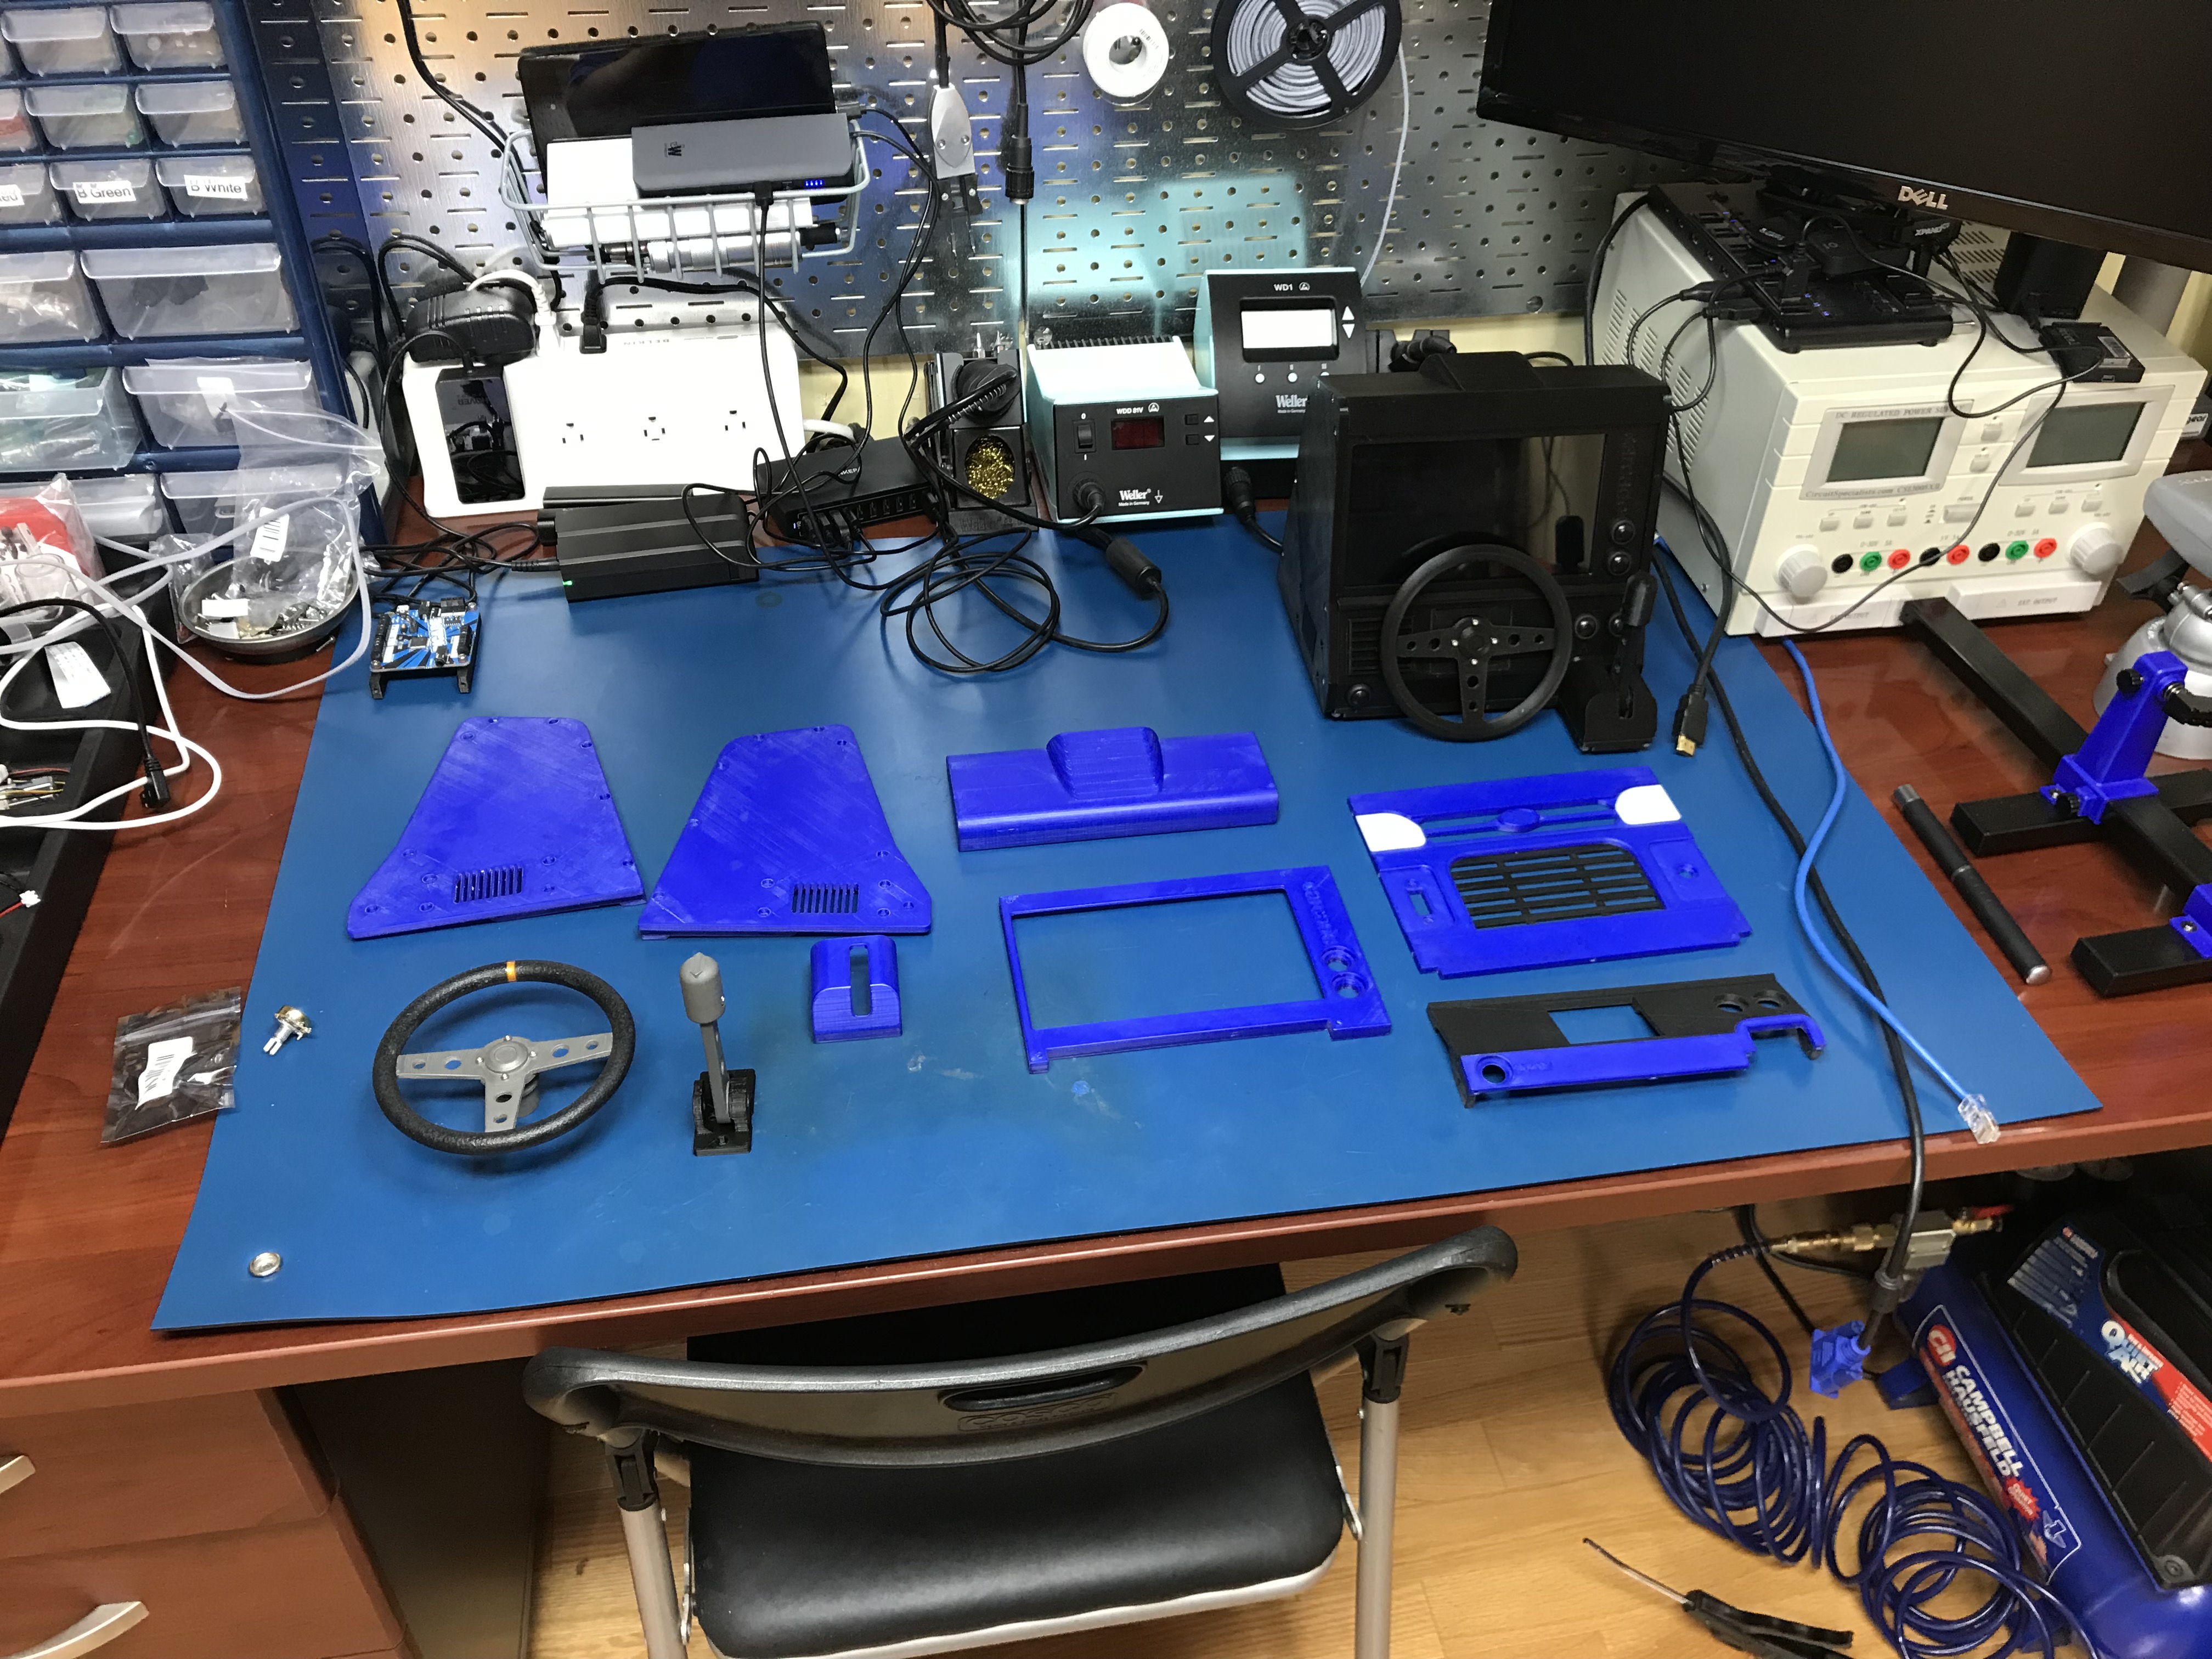\n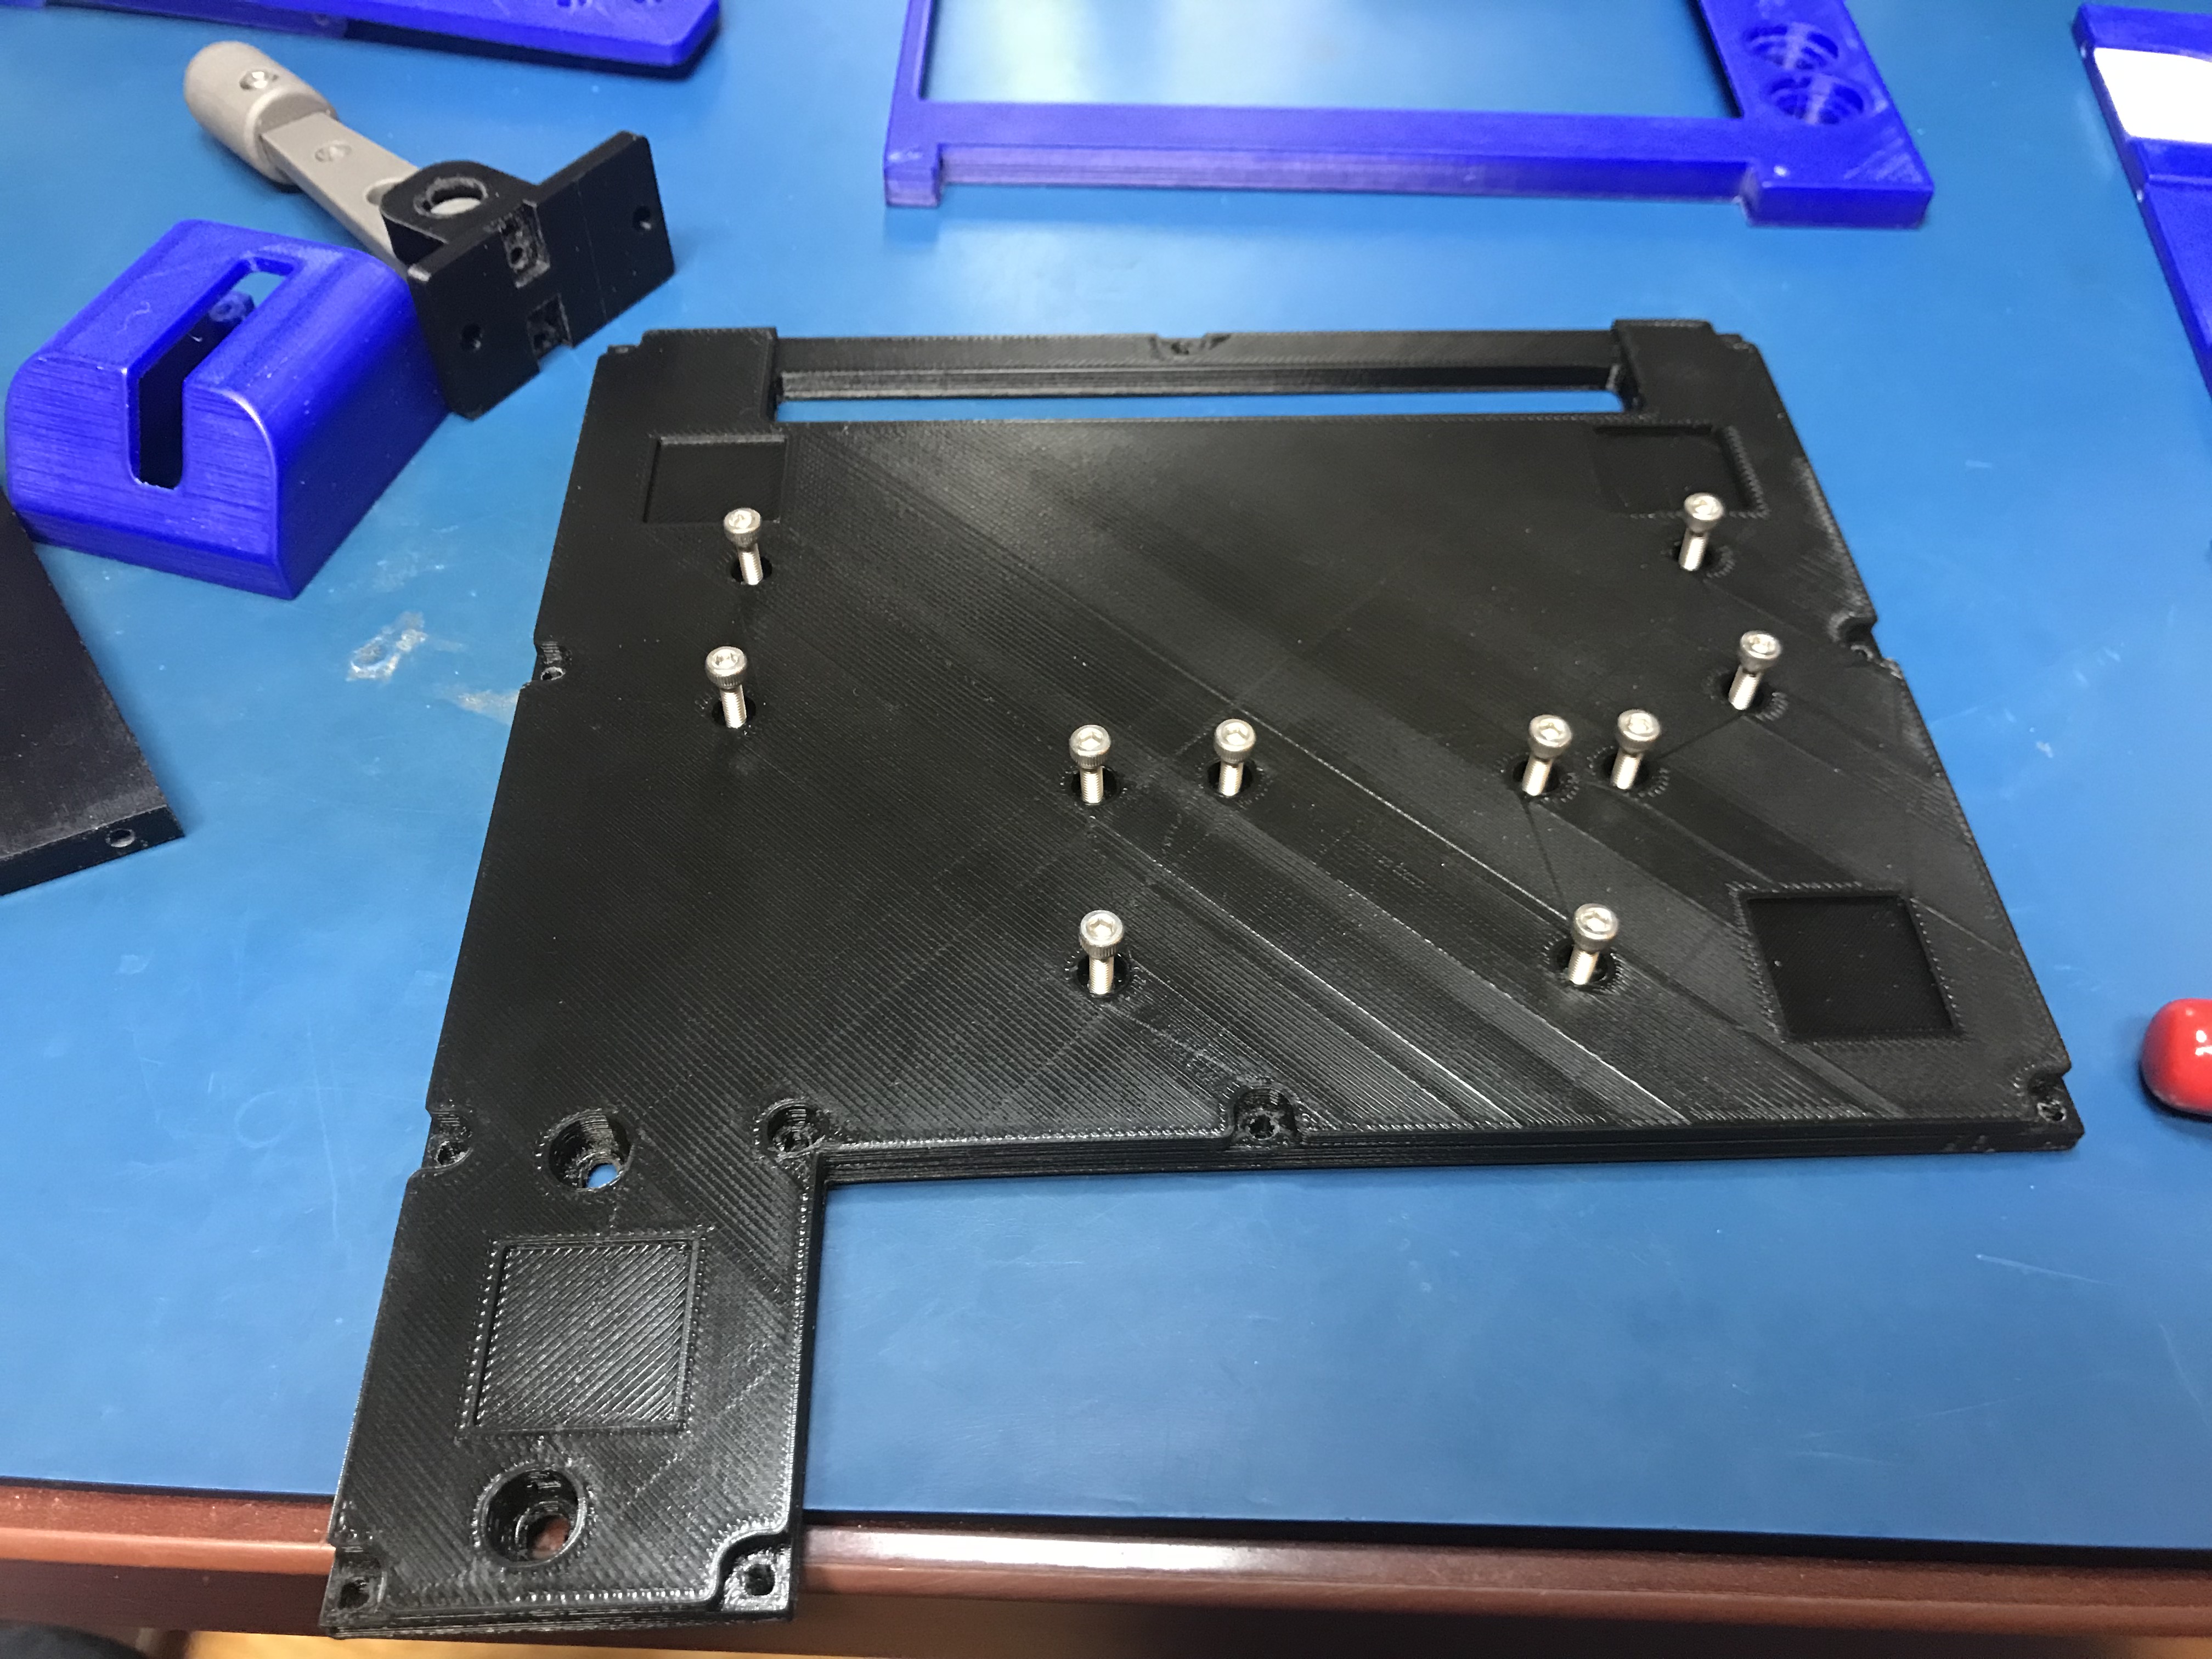\n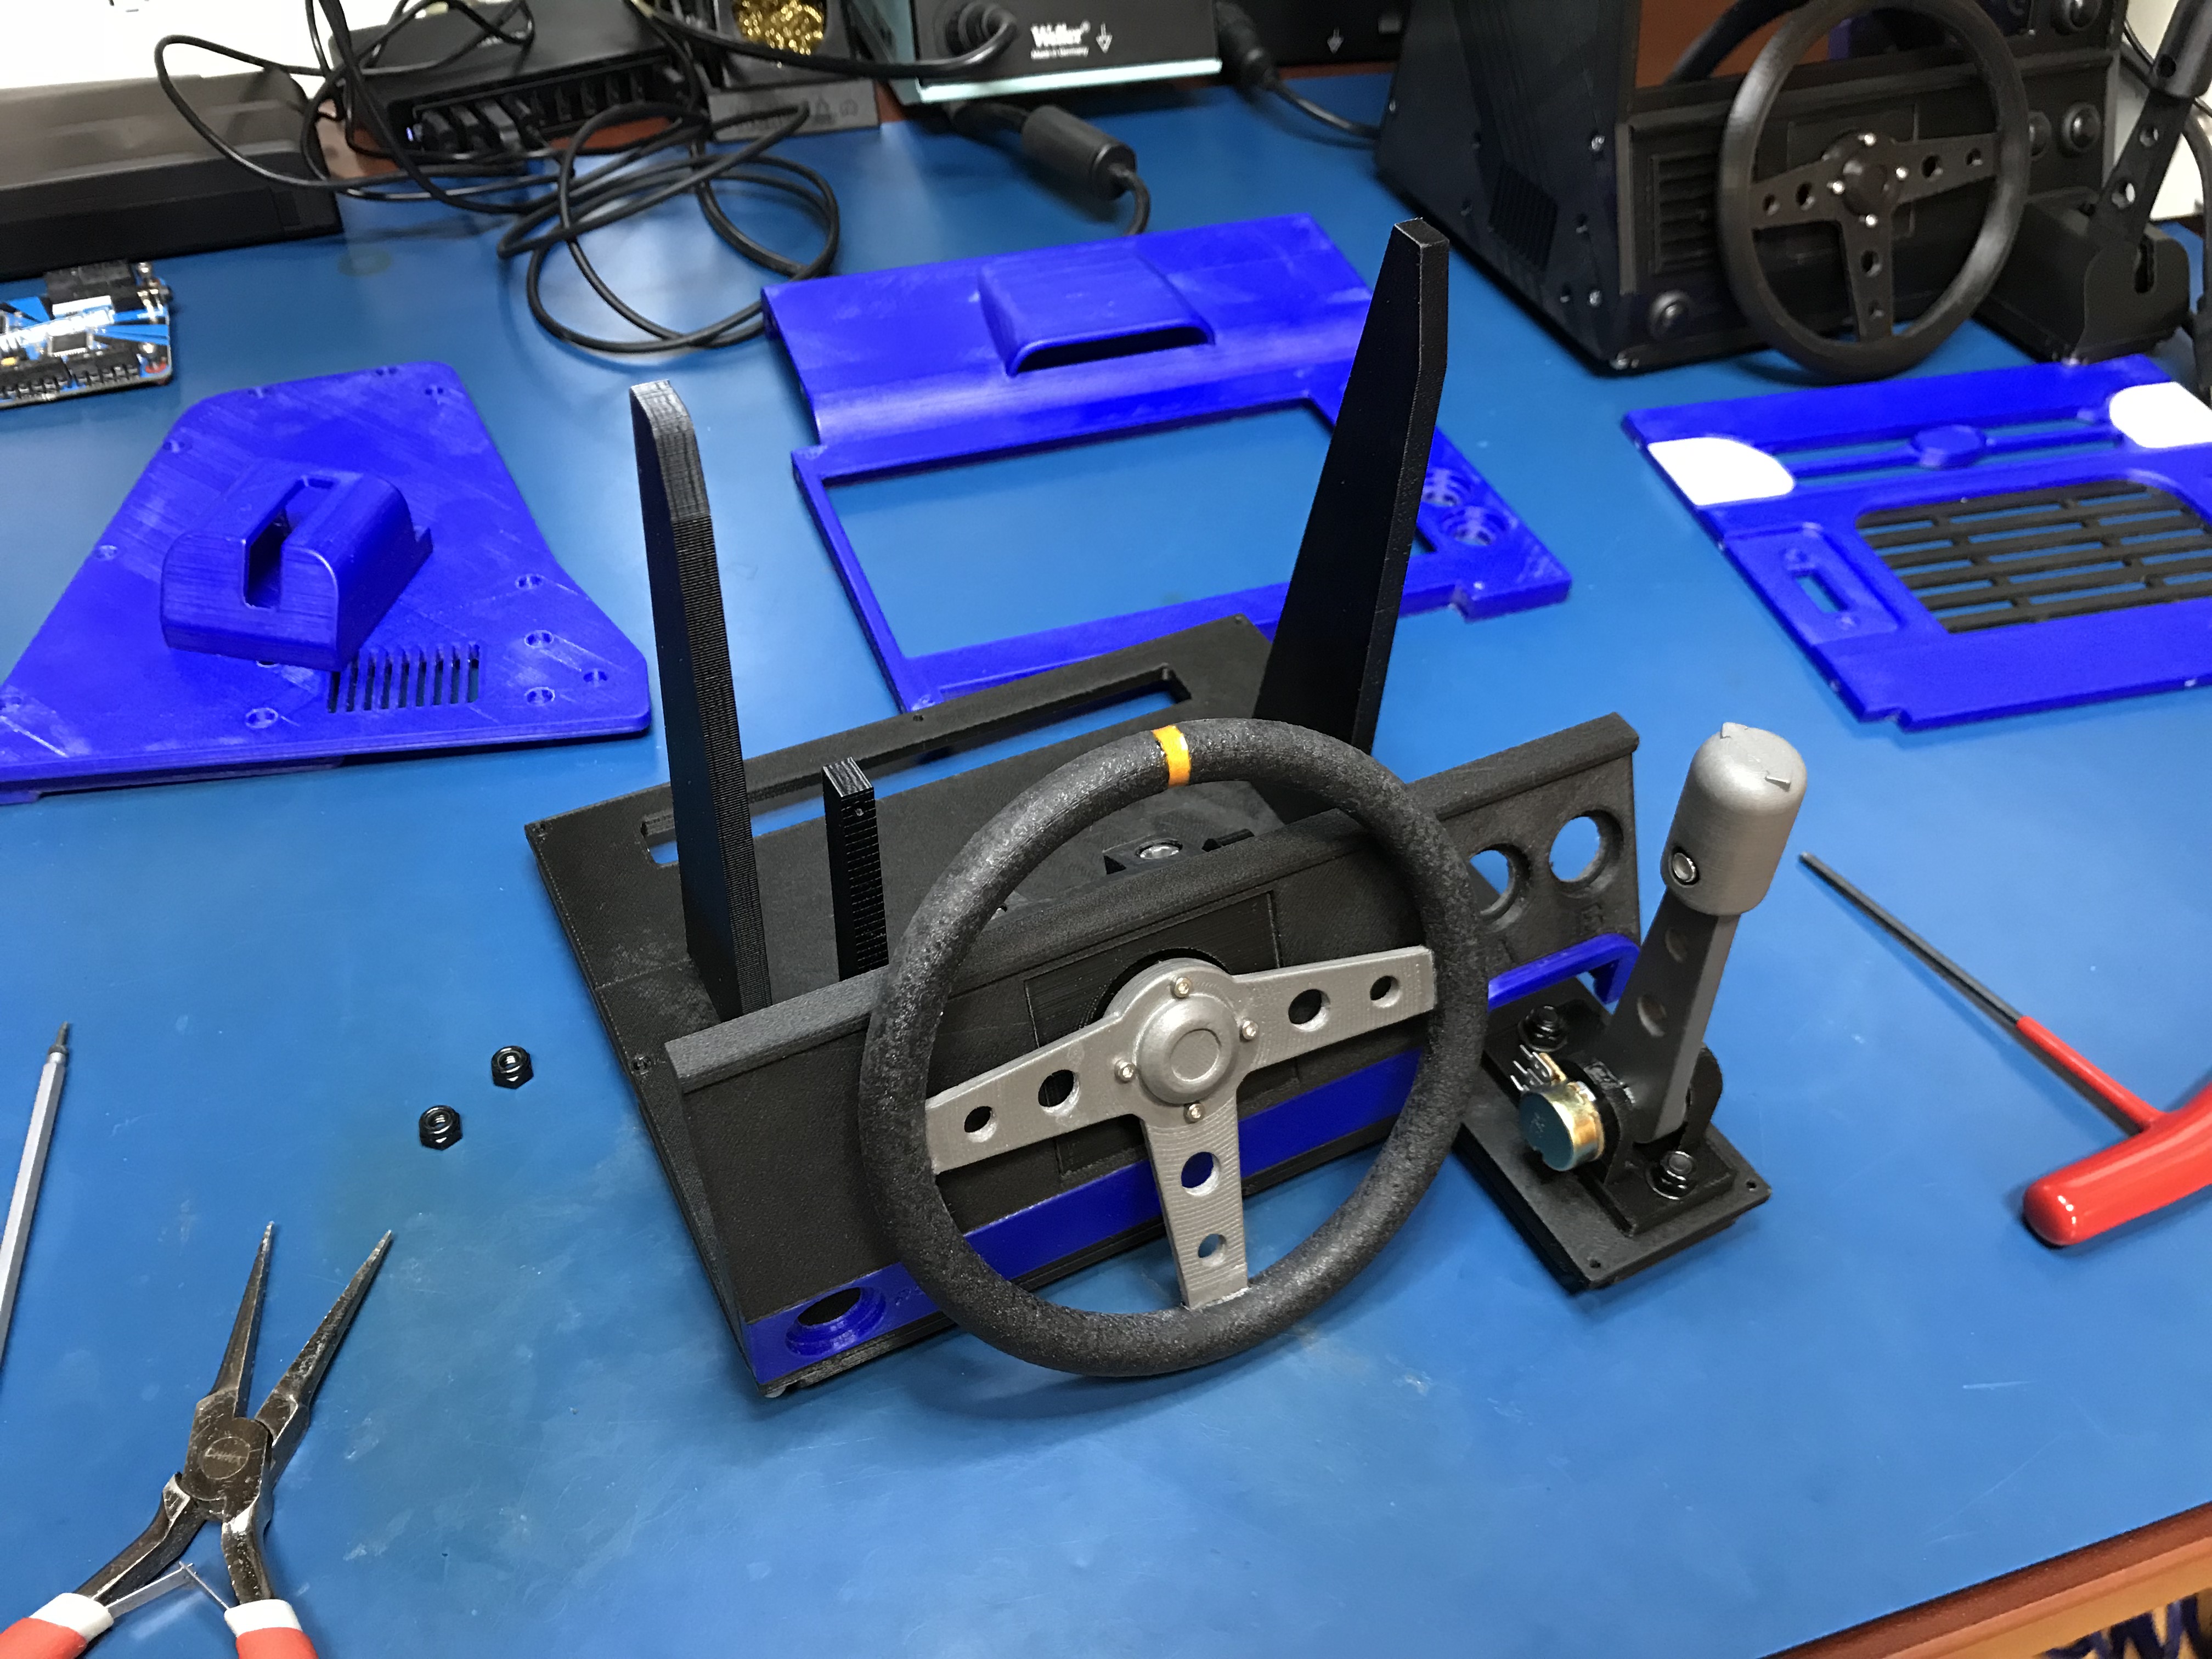\n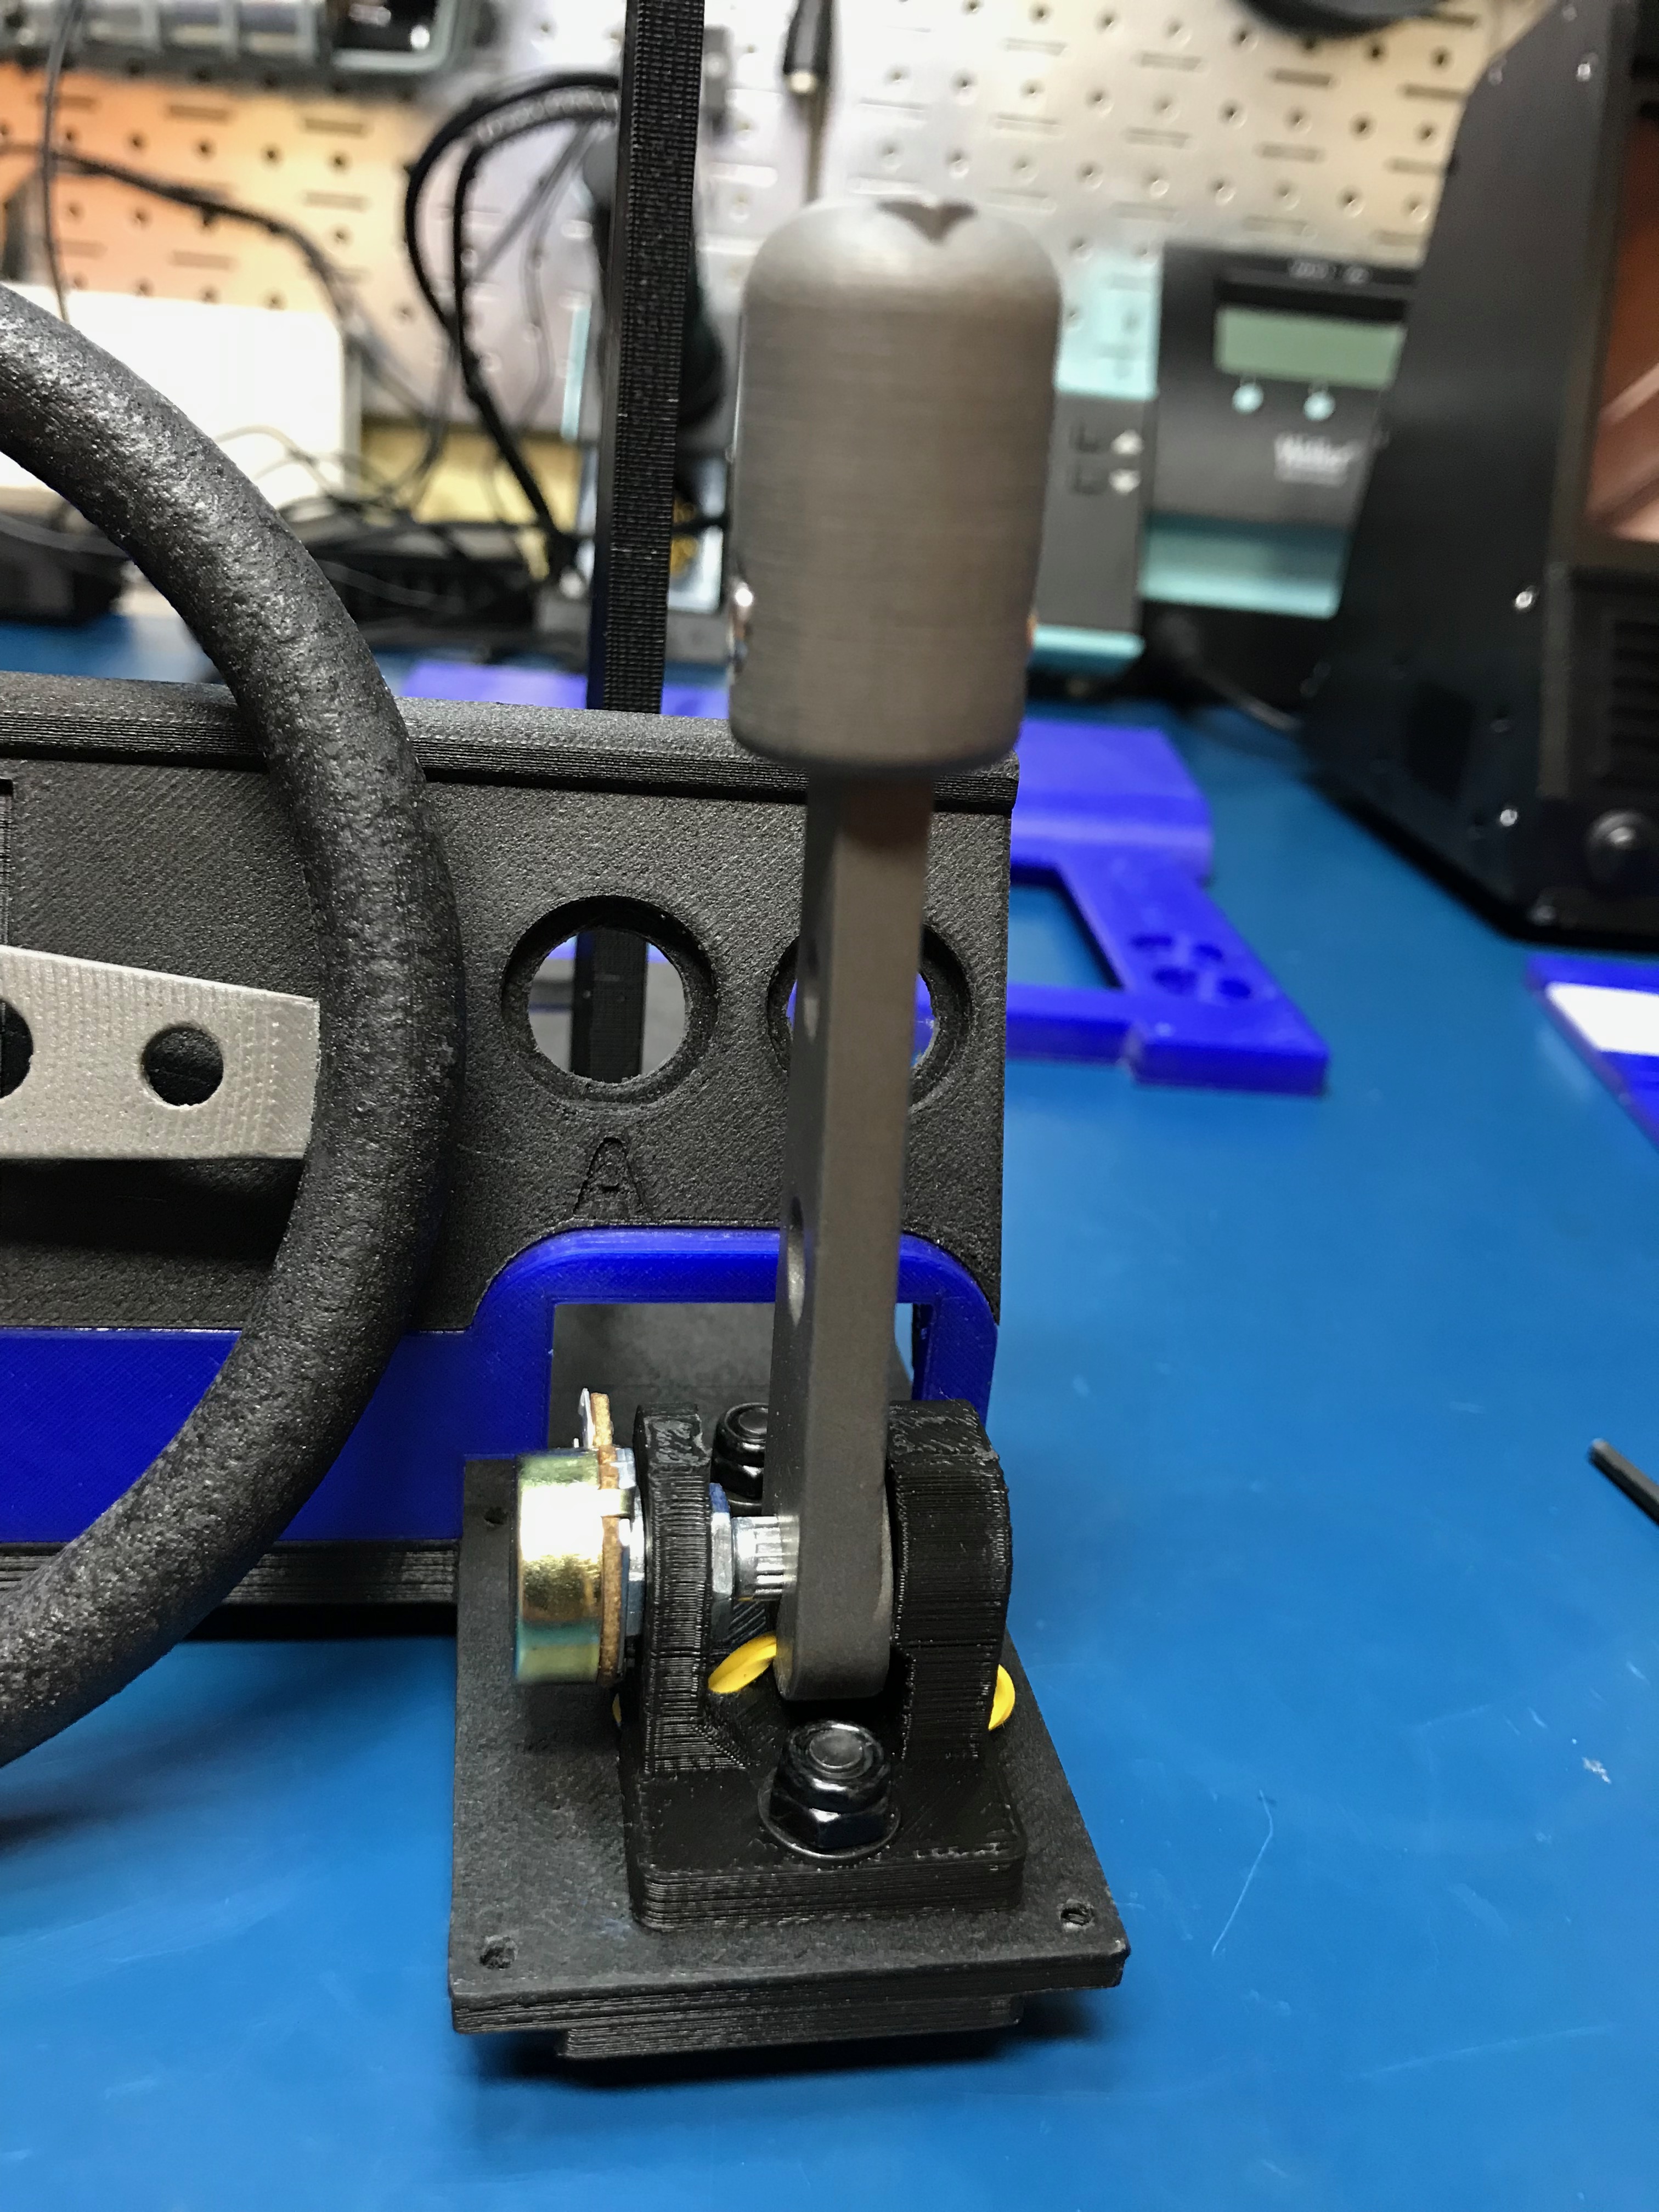\n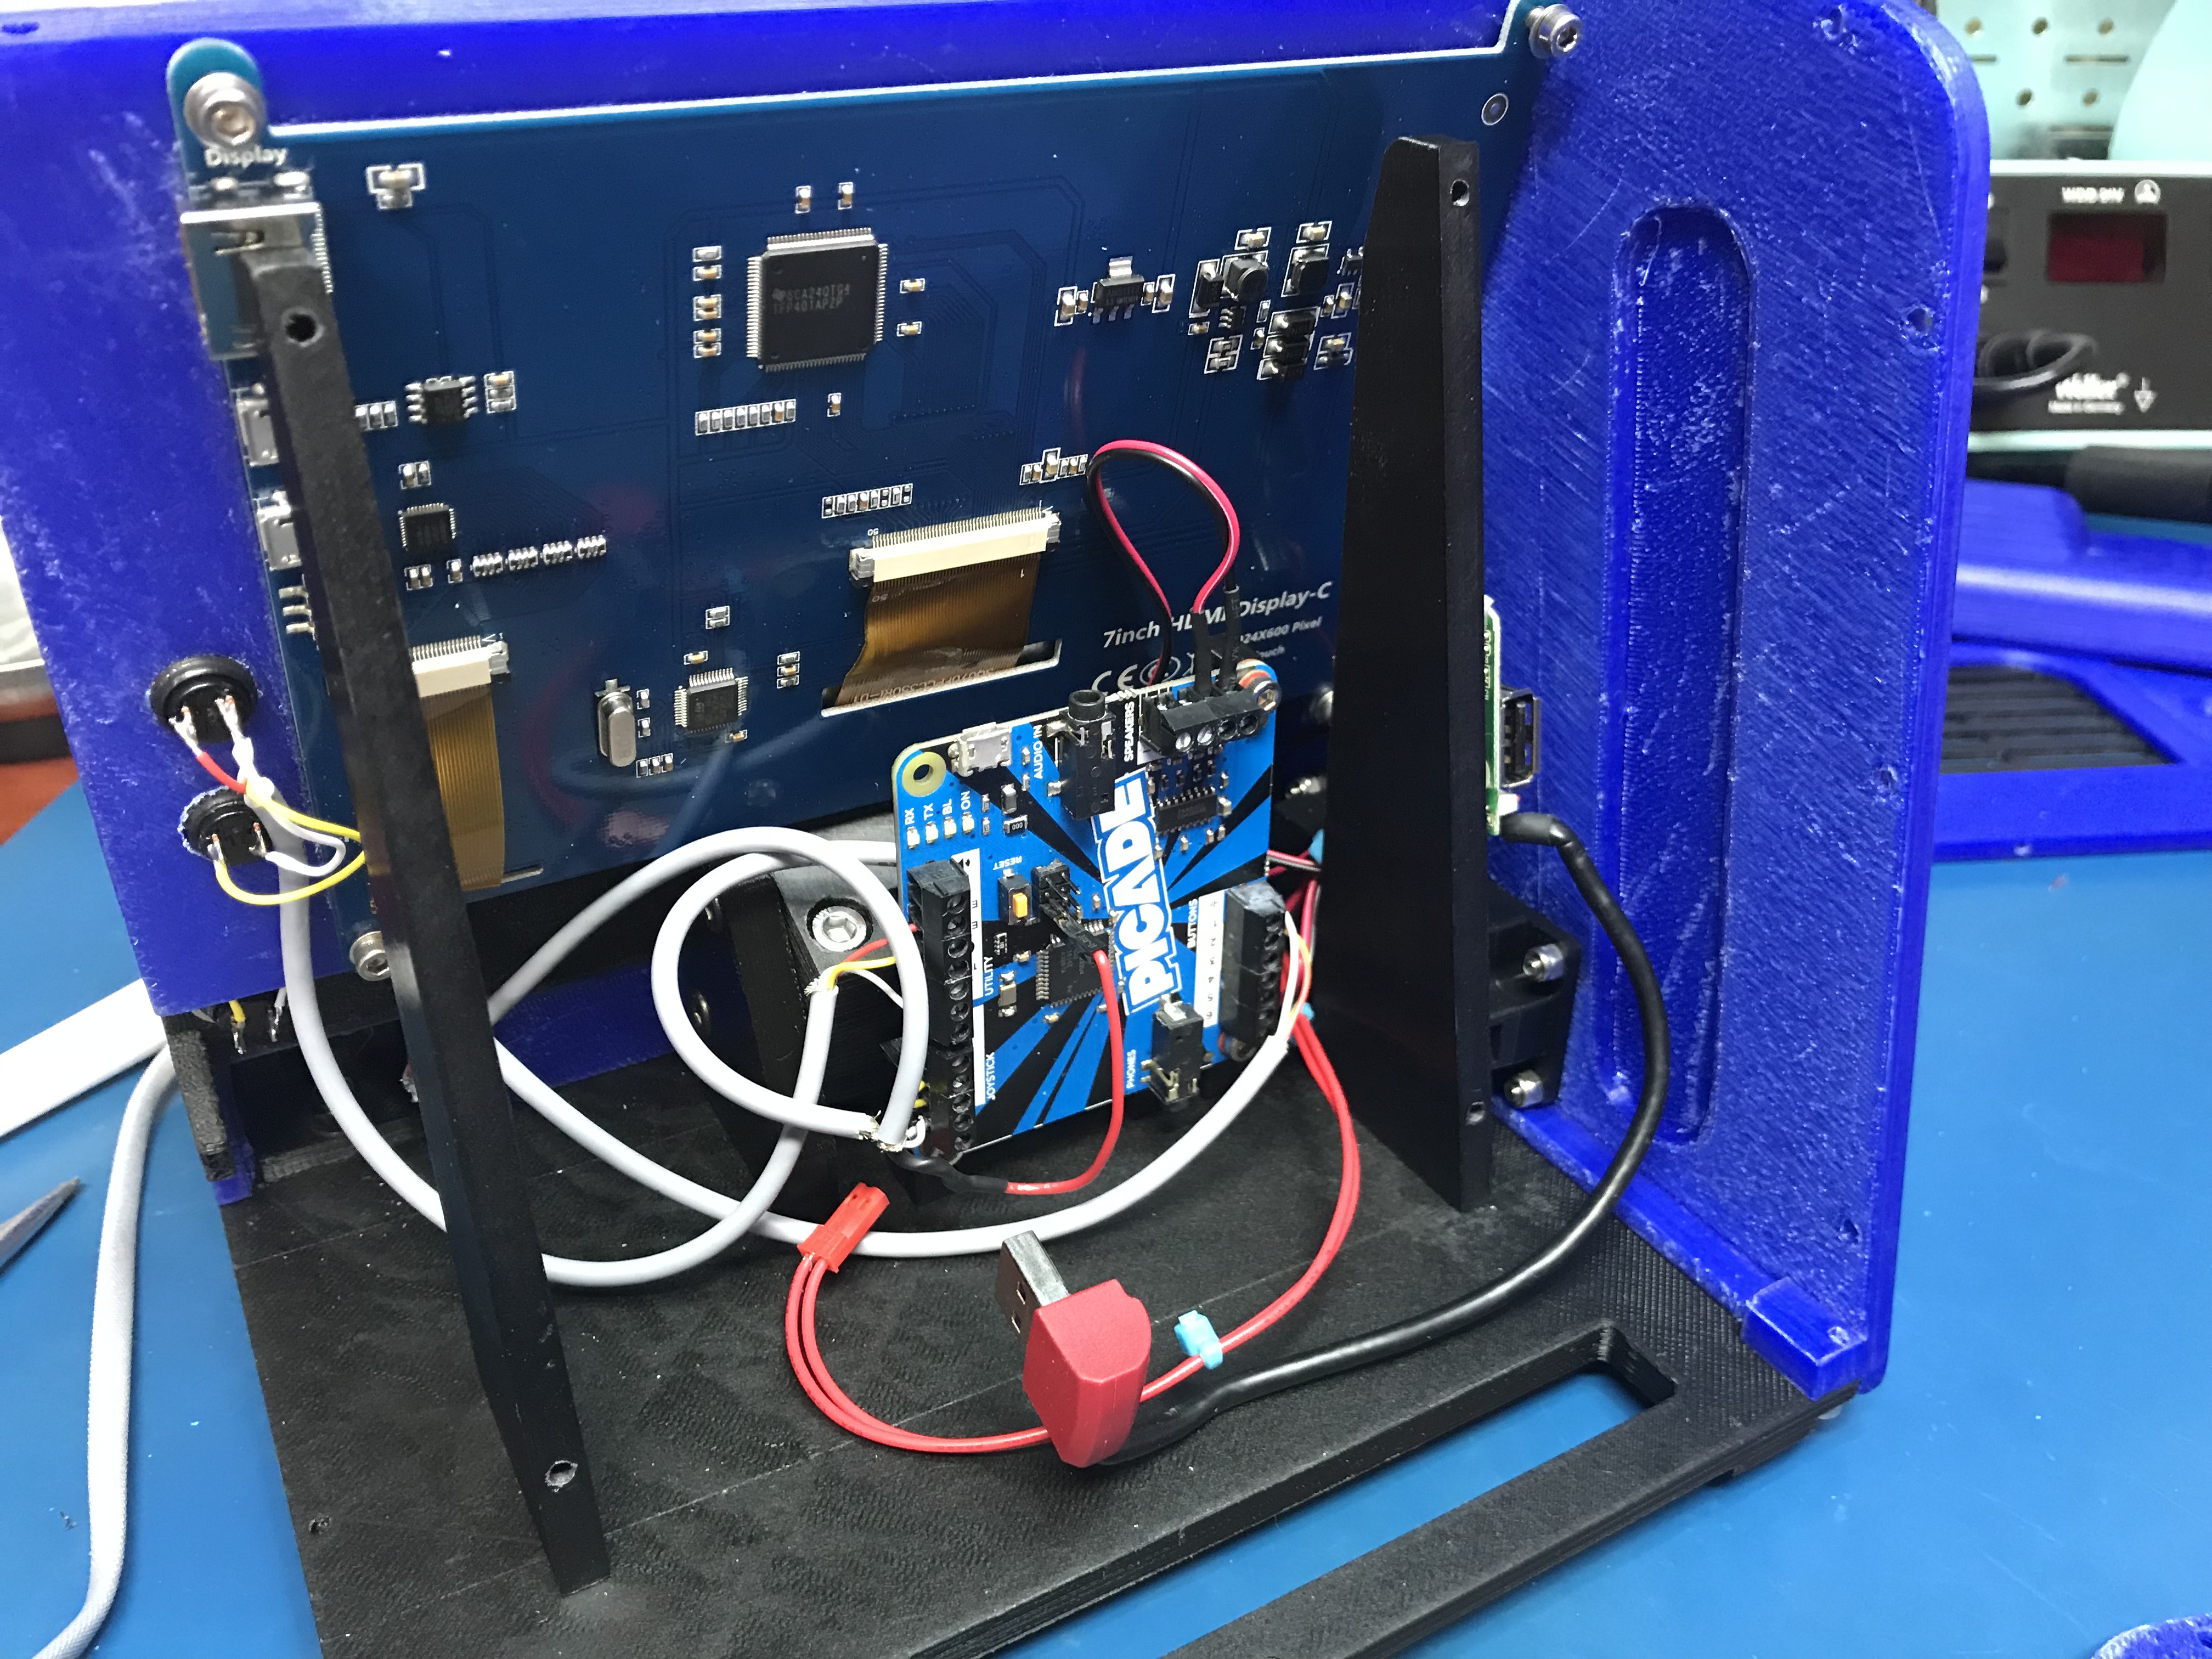\n\n\n####Final Touches\nAfter assembly, I used my Cricut to cut some vinyl decals, giving us the finished Dirt Rally Car-cade!\n\n\n\n\n\n\n\u003ciframe width=\"560\" height=\"315\" src=\"https://www.youtube.com/embed/RuAd2cMFF6Y\" frameborder=\"0\" allowfullscreen\u003e\u003c/iframe\u003e\n\n###🍌Banana For Scale 🤣\n\n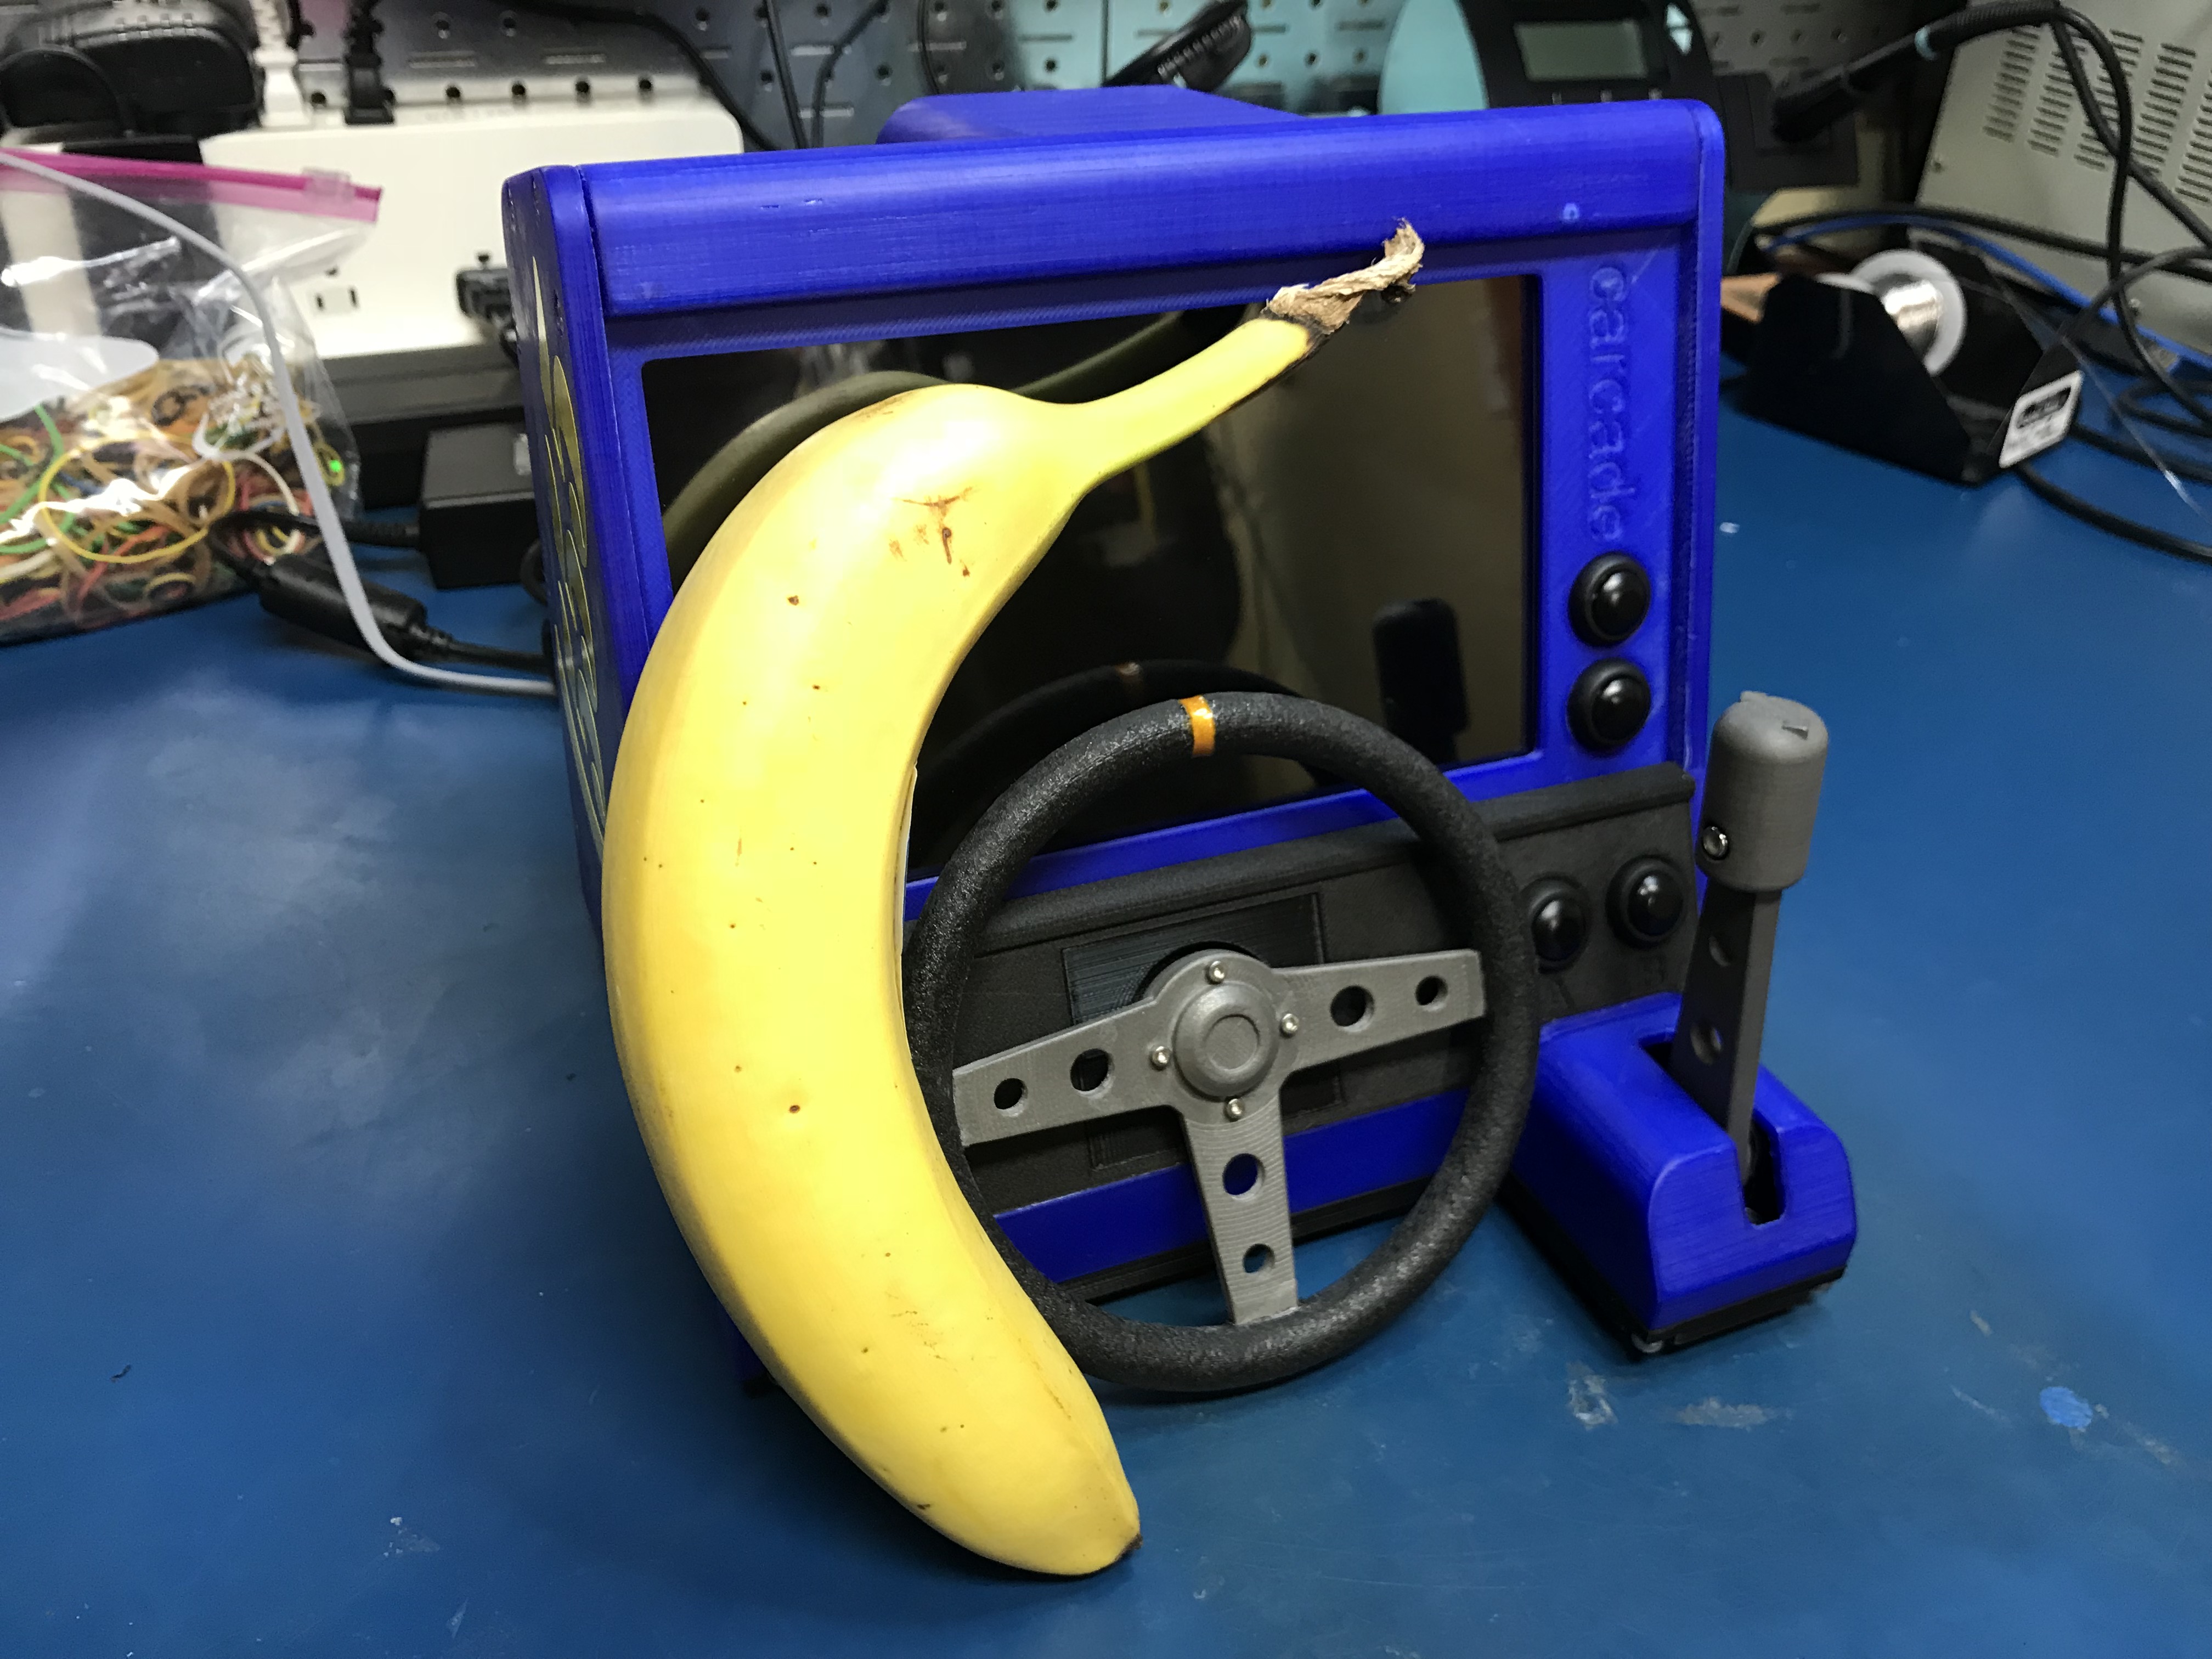\n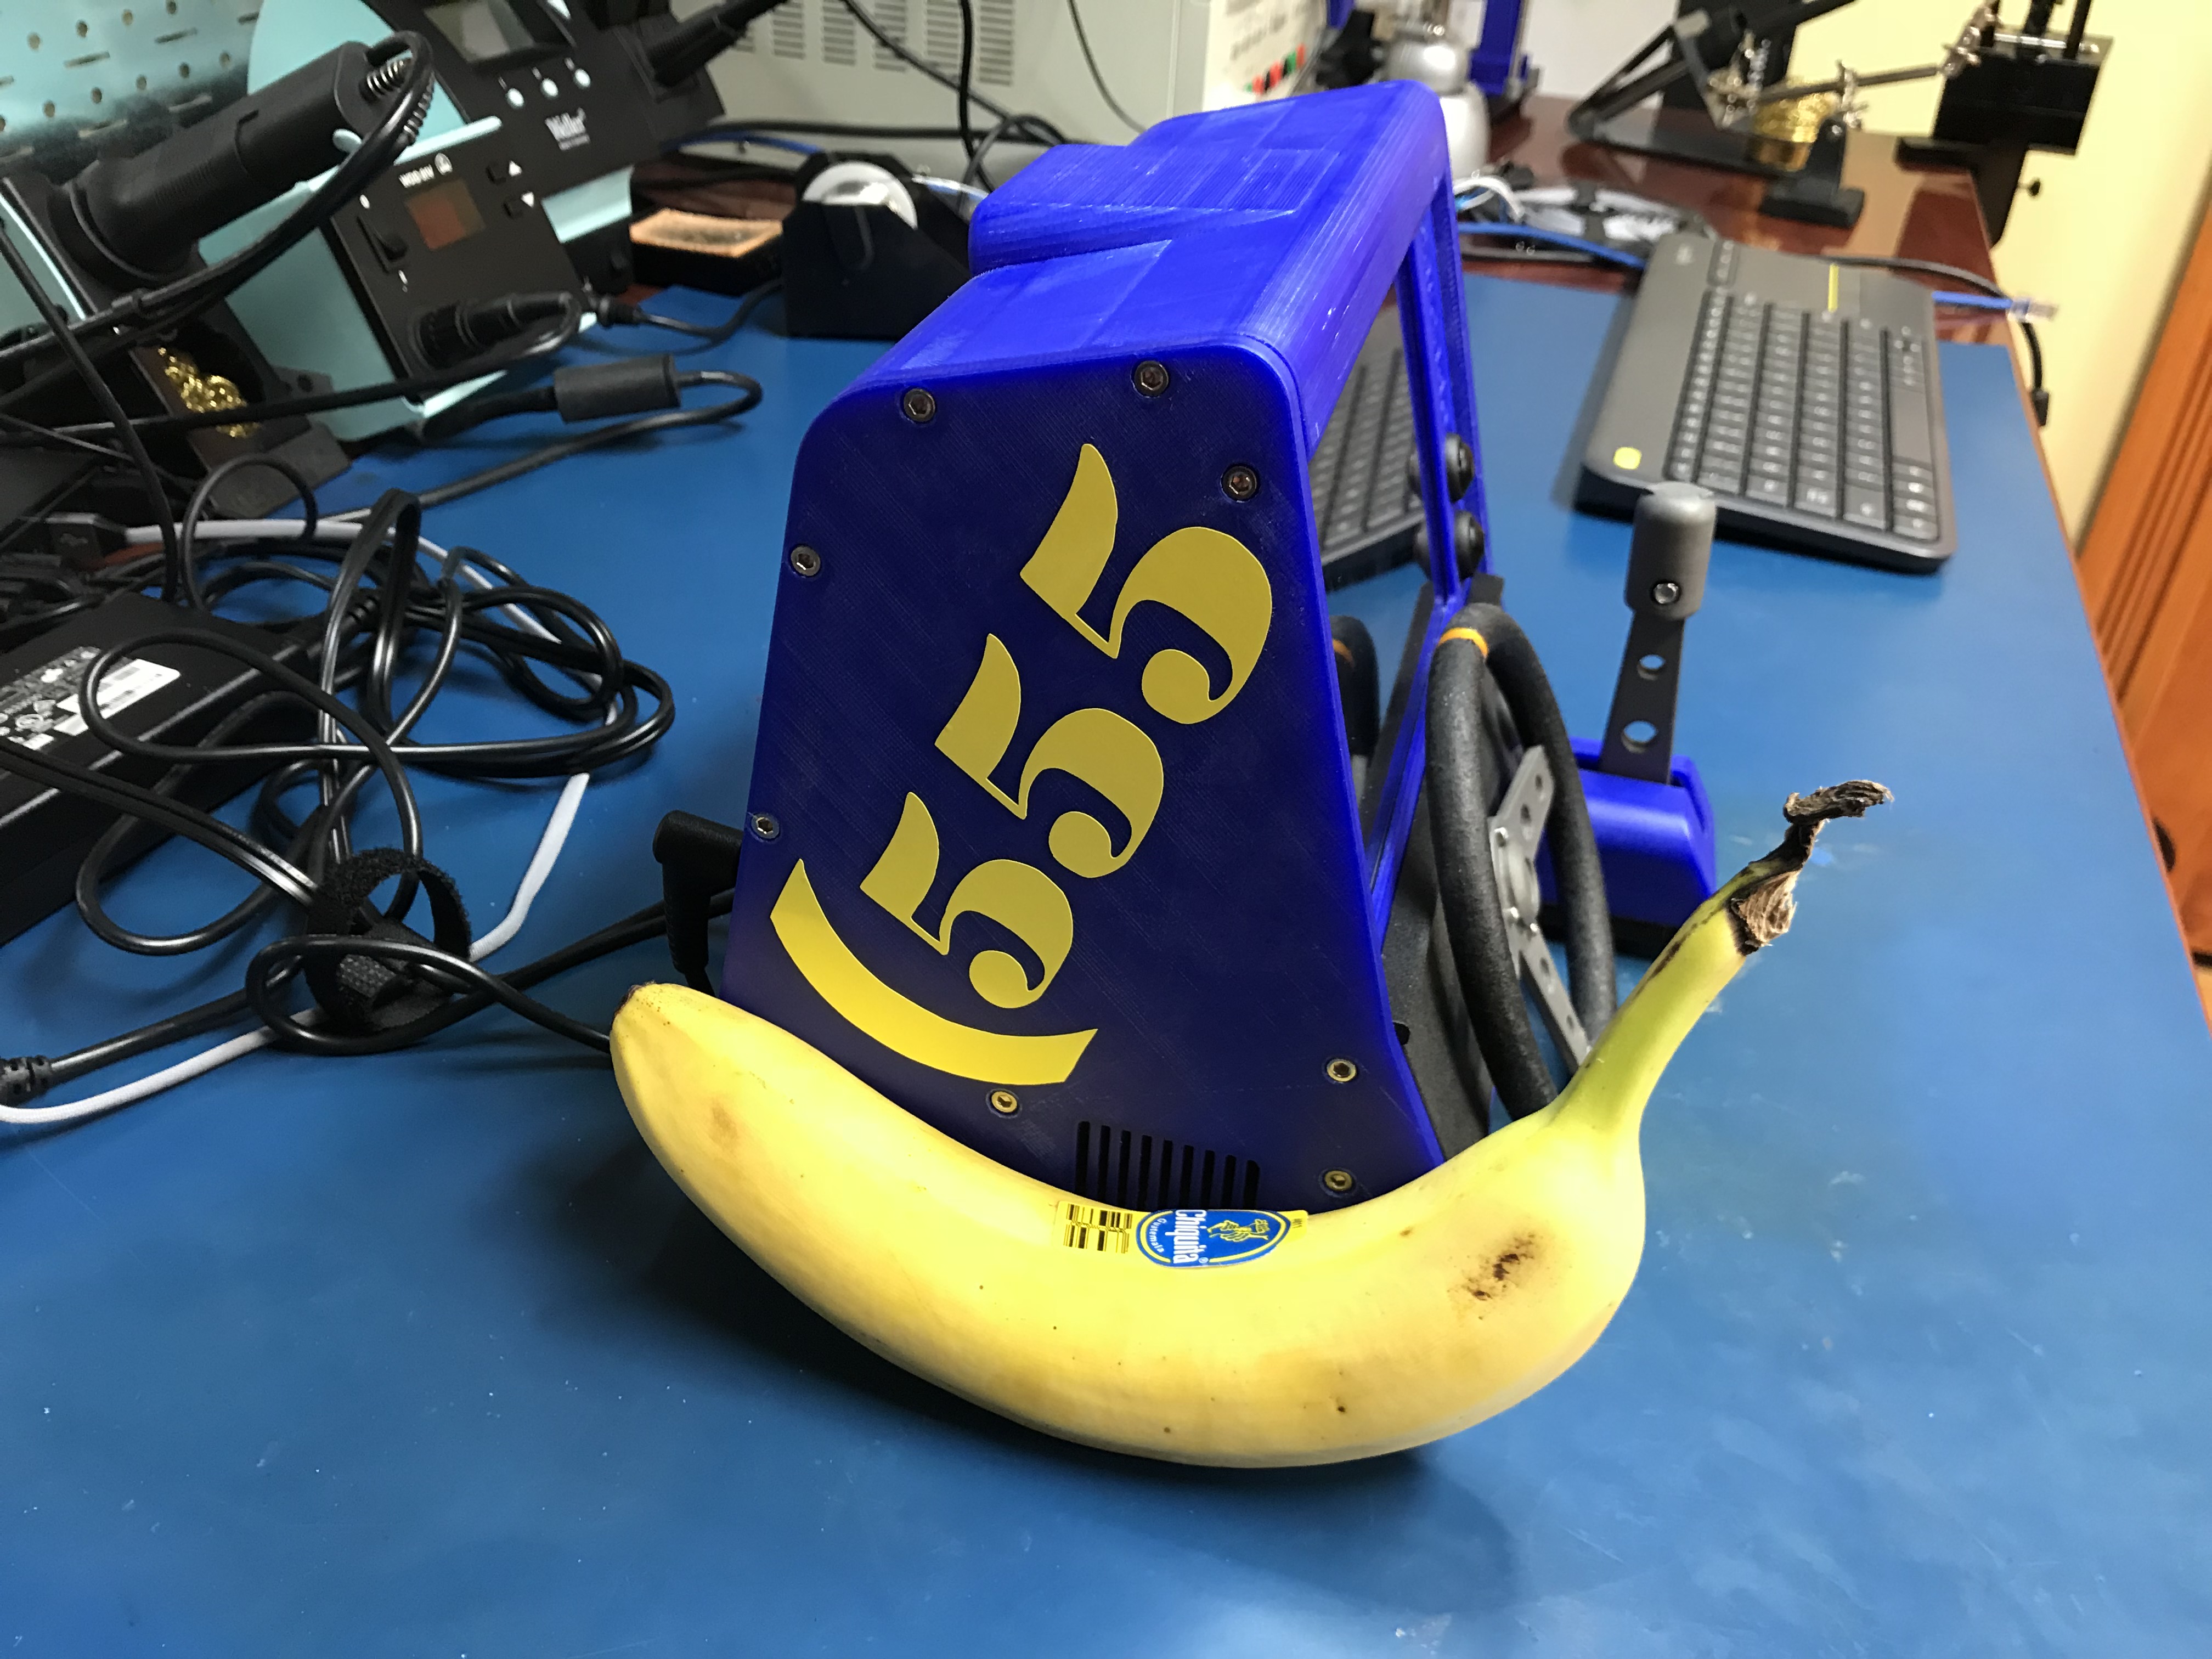\n\n####Gameplay Videos\n\n\u003ciframe width=\"560\" height=\"315\" src=\"https://www.youtube.com/embed/ieWfV6zoHNw\" frameborder=\"0\" allowfullscreen\u003e\u003c/iframe\u003e\n\n----\n\n\u003ciframe width=\"560\" height=\"315\" src=\"https://www.youtube.com/embed/bi_dIsvflY4\" frameborder=\"0\" allowfullscreen\u003e\u003c/iframe\u003e\n\n----\n\n\u003ciframe width=\"560\" height=\"315\" src=\"https://www.youtube.com/embed/8HmKj4H8PdA\" frameborder=\"0\" gesture=\"media\" allow=\"encrypted-media\" allowfullscreen\u003e\u003c/iframe\u003e\n\n\n####More About the Car-cade\nI have a few more videos of the Car-cade prototype on YouTube: https://www.youtube.com/playlist?list=PLGYb5mIm0WYwEnWkQ1j9M1dFWMHfyMOBq\n\n\n####Build Your OWN Car-cade!\nI have published the 3d objects, and will **SOON** be writing build instructions over on github: https://github.com/dchote/carcade","html":"\u003cp\u003eFor the longest time I\u0026#39;ve had the idea to put a Raspberry Pi into one of those kids car toys from the 80s.\u003c/p\u003e\n\u003cimg src=\"/content/images/2017/11/05-1.jpg\" alt=\"\"\u003e\n\u003cp\u003eIn August 2017 I was beat to the punch by \u003ca href=\"https://twitter.com/mattbrailsford\" rel=\"nofollow\"\u003eMatt Brailsford\u003c/a\u003e when he published his Tomy Turnin\u0026#39; Turbo Dashboard Outrun Arcade on Twitter: \u003ca href=\"https://twitter.com/circuitbeard/status/902513198330499073\" rel=\"nofollow\"\u003ehttps://twitter.com/circuitbeard/status/902513198330499073\u003c/a\u003e\u003c/p\u003e\n\u003cp align=\"center\"\u003e\n\u003ciframe width=\"560\" height=\"315\" src=\"https://www.youtube.com/embed/r21Zfmw7moI\" frameborder=\"0\" allowfullscreen=\"\"\u003e\u003c/iframe\u003e\n\u003c/p\u003e\n\u003cp\u003e\u003cstrong\u003eHis project was so fantastic, I had to come up with something entirely new...\u003c/strong\u003e\u003c/p\u003e\n\u003ch4\u003eThe beginning\u003c/h4\u003e\n\u003cp\u003eI already had an Intel Atom powered dev board, the \u003ca href=\"https://minnowboard.org\" rel=\"nofollow\"\u003eMinnowBoard\u003c/a\u003e. Surprisingly, SteamOS installed on it without any issues.\u003c/p\u003e\n\u003cimg src=\"/content/images/2017/11/IMG_1989.jpg\" alt=\"\"\u003e\n\u003cimg src=\"/content/images/2017/11/IMG_1988.jpg\" alt=\"\"\u003e\n\u003cp\u003eAfter playing around with SteamOS and \u003ca href=\"https://www.dirtgame.com\" rel=\"nofollow\"\u003eDirt Rally\u003c/a\u003e on the \u003ca href=\"https://minnowboard.org\" rel=\"nofollow\"\u003eMinnowBoard\u003c/a\u003e without much luck (talking in frames per minute, not frames per second), I settled on the idea of building a full Intel powered system running SteamOS. I would then work on designing and 3D printing the entire enclosure from scratch.\u003c/p\u003e\n\u003ch3\u003eThe Dirt Rally Car-cade!\u003c/h3\u003e\n\u003ch4\u003eInspiration\u003c/h4\u003e\n\u003cp\u003eInitially I was going to design it with cues from the Audi Quattro, but I very quickly switched over to the 1995 Subaru Impreza, which is my preferred car in the game.\u003c/p\u003e\n\u003cp align=\"center\"\u003e\n\u003cimg src=\"/content/images/2017/11/IMG_2580.jpg\" alt=\"\"\u003e\n\u003c/p\u003e\n\u003cp\u003eI ordered the smallest motherboard I could find that had the features I needed, along with the rest of the components that I didn\u0026#39;t already have.\u003c/p\u003e\n\u003ch4\u003eSystem Components\u003c/h4\u003e\n\u003cul\u003e\n\u003cli\u003eMotherboard: \u003ca href=\"https://www.newegg.com/Product/Product.aspx?Item=N82E16813132897\" rel=\"nofollow\"\u003eAsus H110S2/CSM\u003c/a\u003e\u003c/li\u003e\n\u003cli\u003eCPU: \u003ca href=\"https://www.newegg.com/Product/Product.aspx?Item=N82E16819117624\" rel=\"nofollow\"\u003eIntel G4500\u003c/a\u003e\u003c/li\u003e\n\u003cli\u003eCPU Cooler: \u003ca href=\"https://www.newegg.com/Product/Product.aspx?Item=N82E16835220067\" rel=\"nofollow\"\u003eSILVERSTONE NT07-115X\u003c/a\u003e\u003c/li\u003e\n\u003cli\u003eRam: \u003ca href=\"https://www.newegg.com/Product/Product.aspx?Item=N82E16820232146\" rel=\"nofollow\"\u003eG.SKILL Ripjaws 8GB\u003c/a\u003e\u003c/li\u003e\n\u003cli\u003eStorage: \u003ca href=\"https://www.newegg.com/Product/Product.aspx?Item=N82E16820147467\" rel=\"nofollow\"\u003eSamsung 950 Pro M.2\u003c/a\u003e\u003c/li\u003e\n\u003c/ul\u003e\n\u003ch4\u003eOther Components\u003c/h4\u003e\n\u003cul\u003e\n\u003cli\u003eLCD: \u003ca href=\"https://www.ebay.com/itm/7-Inch-HDMI-Capacitive-IPS-Display-LCD-for-Raspberry-Pi-1024-600-/262941998848?roken=cUgayN\u0026amp;soutkn=unc8RL\" rel=\"nofollow\"\u003e7\u0026#34; 1024x600 capacitive touch LCD\u003c/a\u003e\u003c/li\u003e\n\u003cli\u003eUSB Controller: \u003ca href=\"https://www.adafruit.com/product/2708\" rel=\"nofollow\"\u003ePimoroni Picade Controller PCB\u003c/a\u003e\u003c/li\u003e\n\u003cli\u003e2x Speakers: \u003ca href=\"https://www.adafruit.com/product/3351\" rel=\"nofollow\"\u003e3W enclosed speaker from Adafruit\u003c/a\u003e\u003c/li\u003e\n\u003cli\u003ePush Buttons: \u003ca href=\"http://a.co/cee6jZP\" rel=\"nofollow\"\u003ePack of 10 black pushbuttons\u003c/a\u003e\u003c/li\u003e\n\u003cli\u003ePotentiometer: \u003ca href=\"http://a.co/blt4qxJ\" rel=\"nofollow\"\u003ePack of 5 10k ohm linear potentiometers\u003c/a\u003e\u003c/li\u003e\n\u003c/ul\u003e\n\u003ch4\u003eThe Design Process\u003c/h4\u003e\n\u003cp\u003eThe process of designing and printing was an iterative one. I initially designed and iterated the steering and throttle components until I was happy with how they worked. The USB controller interface is managed by a \u003ca href=\"https://shop.pimoroni.com/products/picade-controller-board\" rel=\"nofollow\"\u003ePimoroni Picade PCB\u003c/a\u003e (it\u0026#39;s basically an arduino with an onboard amplifier for speakers). The steering and throttle are analog inputs using potentiometers. The steering wheel and throttle both self center (kindof) using rubber bands integrated into my design.\u003c/p\u003e\n\u003cimg src=\"/content/images/2017/11/IMG_2022.jpg\" alt=\"\"\u003e\n\u003cimg src=\"/content/images/2017/11/IMG_2047.jpg\" alt=\"\"\u003e\n\u003cimg src=\"/content/images/2017/11/IMG_2096.jpg\" alt=\"\"\u003e\n\u003cimg src=\"/content/images/2017/11/IMG_2105.jpg\" alt=\"\"\u003e\n\u003cimg src=\"/content/images/2017/11/IMG_2106.jpg\" alt=\"\"\u003e\n\u003cp\u003eI then went about planning the smallest footprint possible for the Car-cade... Ensuring that I was able to 3D print everything using my Anet A8.\u003c/p\u003e\n\u003cp align=\"center\"\u003e\n\u003cimg src=\"/content/images/2017/11/IMG_2114.jpg\" alt=\"\"\u003e\n\u003cimg src=\"/content/images/2017/11/IMG_2115.jpg\" alt=\"\"\u003e\n\u003c/p\u003e\n\u003cp\u003eAs I worked through designing each part and printing it, I got a better picture of how everything would come together. It didn\u0026#39;t take much effort once the ball was in motion.\u003c/p\u003e\n\u003cimg src=\"/content/images/2017/11/IMG_2182.jpg\" alt=\"\"\u003e\n\u003cimg src=\"/content/images/2017/11/IMG_2262.jpg\" alt=\"\"\u003e\n\u003ch4\u003eSocial Media Interest\u003c/h4\u003e\n\u003cp\u003eI recorded a video of my friend Eric playing on the Car-cade and put it up on Twitter showing off the progress. A few large social media publishers contacted me and asked if they could share the video. It got quite a lot of views on their networks!\u003c/p\u003e\n\u003ciframe width=\"560\" height=\"315\" src=\"https://www.youtube.com/embed/Ss-si82NqcI\" frameborder=\"0\" allowfullscreen=\"\"\u003e\u003c/iframe\u003e\n\u003ch4\u003eDesigning Around the Parts\u003c/h4\u003e\n\u003cp\u003eEverything was designed around being as small as possible. As you can see, minimal clearance was given around the motherboard. I had a balancing act between the maximum print area on my 3D printer and how much room I needed for cables plugging in to the motherboard.\u003c/p\u003e\n\u003cimg src=\"/content/images/2017/11/IMG_2342.jpg\" alt=\"\"\u003e\n\u003cimg src=\"/content/images/2017/11/IMG_2343.jpg\" alt=\"\"\u003e\n\u003cimg src=\"/content/images/2017/11/IMG_2344.jpg\" alt=\"\"\u003e\n\u003cp\u003eOnce I had all the components finished and the first prototype assembled I went on to experiment with finishing methods.\u003c/p\u003e\n\u003cimg src=\"/content/images/2017/11/IMG_2359.jpg\" alt=\"\"\u003e\n\u003cimg src=\"/content/images/2017/11/IMG_2360.jpg\" alt=\"\"\u003e\n\u003ch4\u003ePost-Processing\u003c/h4\u003e\n\u003cp\u003eInitially I thought that I should sand, primer, paint, then clear coat. I managed to pick up a can of World Rally Blue paint. It looks amazing... But after attempting the process I realized it was too much effort to go to for a project of this size.\u003c/p\u003e\n\u003cimg src=\"/content/images/2017/11/IMG_2467.jpg\" alt=\"\"\u003e\n\u003cimg src=\"/content/images/2017/11/IMG_2474.jpg\" alt=\"\"\u003e\n\u003cimg src=\"/content/images/2017/11/IMG_2526.jpg\" alt=\"\"\u003e\n\u003cimg src=\"/content/images/2017/11/IMG_2523.jpg\" alt=\"\"\u003e\n\u003ch4\u003eProject Recognition\u003c/h4\u003e\n\u003cp\u003eIt was at this time that I received a package from Codemasters!!! I got sent SWAG!!\u003c/p\u003e\n\u003cimg src=\"/content/images/2017/11/IMG_2531.jpg\" alt=\"\"\u003e\n\u003cimg src=\"/content/images/2017/11/IMG_2533.jpg\" alt=\"\"\u003e\n\u003cimg src=\"/content/images/2017/11/IMG_2534.jpg\" alt=\"\"\u003e\n\u003cimg src=\"/content/images/2017/11/IMG_2535.jpg\" alt=\"\"\u003e\n\u003cp\u003eMany thanks to the Dirt team at Codemasters. It\u0026#39;s awesome to see them support the community the way they do!!\u003c/p\u003e\n\u003ch4\u003ePost-Processing, Part 2\u003c/h4\u003e\n\u003cp\u003eAfter a lot of debating about the pros and cons of extensive post processing to finish 3d prints, I decided to switch to printing the parts using \u003cstrong\u003edifferent colored filament\u003c/strong\u003e. This process took a \u003cstrong\u003eLONG\u003c/strong\u003e time. I experimented with 4 different rolls of blue filament alone. I also spent the time to break up the design so that I could print the rear panel in different pieces and glue them together. I ended up going with \u003ca href=\"https://colorfabb.com/ultra-marine-blue\" rel=\"nofollow\"\u003eColorFabb Ultra Marine Blue PLA\u003c/a\u003e for the bulk of the enclosure. The dashboard is printed in \u003ca href=\"https://www.proto-pasta.com/products/high-performance-htpla-matte-fiber\" rel=\"nofollow\"\u003eProtoPasta Matte Fiber PLA\u003c/a\u003e, the base, rear panel insert, and all the internal mounts are printed in Hatchbox Black PLA, and the headlights are printed in Hatchbox Glow in the Dark PLA.\u003c/p\u003e\n\u003cimg src=\"/content/images/2017/11/IMG_2586.jpg\" alt=\"\"\u003e\n\u003cimg src=\"/content/images/2017/11/IMG_2587.jpg\" alt=\"\"\u003e\n\u003cimg src=\"/content/images/2017/11/IMG_2836.jpg\" alt=\"\"\u003e\n\u003cp\u003eThe steering wheel and throttle are printed using \u003ca href=\"https://www.proto-pasta.com/collections/exotic-composite-pla/products/stainless-steel-pla\" rel=\"nofollow\"\u003eProtoPasta Polishable Stainless Steel PLA\u003c/a\u003e, the steering wheel rim has been painted with PlastiDip Rubber Paint, and the small stripe is Testors orange.\u003c/p\u003e\n\u003cimg src=\"/content/images/2017/11/IMG_3057.jpg\" alt=\"\"\u003e\n\u003cimg src=\"/content/images/2017/11/IMG_3078.jpg\" alt=\"\"\u003e\n\u003cimg src=\"/content/images/2017/11/IMG_3092.jpg\" alt=\"\"\u003e\n\u003cimg src=\"/content/images/2017/11/IMG_3096.jpg\" alt=\"\"\u003e\n\u003ch4\u003eFinal Assembly\u003c/h4\u003e\n\u003cp\u003eWith all the parts finally printed, I went about assembling the final product!\u003c/p\u003e\n\u003cimg src=\"/content/images/2017/11/IMG_3129.jpg\" alt=\"\"\u003e\n\u003cimg src=\"/content/images/2017/11/IMG_3131.jpg\" alt=\"\"\u003e\n\u003cimg src=\"/content/images/2017/11/IMG_3132.jpg\" alt=\"\"\u003e\n\u003cimg src=\"/content/images/2017/11/IMG_3133.jpg\" alt=\"\"\u003e\n\u003cimg src=\"/content/images/2017/11/IMG_3144.jpg\" alt=\"\"\u003e\n\u003cimg src=\"/content/images/2017/11/IMG_3145.jpg\" alt=\"\"\u003e\n\u003ch4\u003eFinal Touches\u003c/h4\u003e\n\u003cp\u003eAfter assembly, I used my Cricut to cut some vinyl decals, giving us the finished Dirt Rally Car-cade!\u003c/p\u003e\n\u003cimg src=\"/content/images/2017/11/IMG_3182-1.jpg\" alt=\"\"\u003e\n\u003cimg src=\"/content/images/2017/11/IMG_3183.jpg\" alt=\"\"\u003e\n\u003cimg src=\"/content/images/2017/11/IMG_3184.jpg\" alt=\"\"\u003e\n\u003cimg src=\"/content/images/2017/11/IMG_3185.jpg\" alt=\"\"\u003e\n\u003ciframe width=\"560\" height=\"315\" src=\"https://www.youtube.com/embed/RuAd2cMFF6Y\" frameborder=\"0\" allowfullscreen=\"\"\u003e\u003c/iframe\u003e\n\u003ch3\u003e🍌Banana For Scale 🤣\u003c/h3\u003e\n\u003cimg src=\"/content/images/2017/11/IMG_3187.jpg\" alt=\"\"\u003e\n\u003cimg src=\"/content/images/2017/11/IMG_3188.jpg\" alt=\"\"\u003e\n\u003ch4\u003eGameplay Videos\u003c/h4\u003e\n\u003ciframe width=\"560\" height=\"315\" src=\"https://www.youtube.com/embed/ieWfV6zoHNw\" frameborder=\"0\" allowfullscreen=\"\"\u003e\u003c/iframe\u003e\n\u003chr\u003e\n\u003ciframe width=\"560\" height=\"315\" src=\"https://www.youtube.com/embed/bi_dIsvflY4\" frameborder=\"0\" allowfullscreen=\"\"\u003e\u003c/iframe\u003e\n\u003chr\u003e\n\u003ciframe width=\"560\" height=\"315\" src=\"https://www.youtube.com/embed/8HmKj4H8PdA\" frameborder=\"0\" allow=\"encrypted-media\" allowfullscreen=\"\"\u003e\u003c/iframe\u003e\n\u003ch4\u003eMore About the Car-cade\u003c/h4\u003e\n\u003cp\u003eI have a few more videos of the Car-cade prototype on YouTube: \u003ca href=\"https://www.youtube.com/playlist?list=PLGYb5mIm0WYwEnWkQ1j9M1dFWMHfyMOBq\" rel=\"nofollow\"\u003ehttps://www.youtube.com/playlist?list=PLGYb5mIm0WYwEnWkQ1j9M1dFWMHfyMOBq\u003c/a\u003e\u003c/p\u003e\n\u003ch4\u003eBuild Your OWN Car-cade!\u003c/h4\u003e\n\u003cp\u003eI have published the 3d objects, and will \u003cstrong\u003eSOON\u003c/strong\u003e be writing build instructions over on github: \u003ca href=\"https://github.com/dchote/carcade\" rel=\"nofollow\"\u003ehttps://github.com/dchote/carcade\u003c/a\u003e\u003c/p\u003e\n","excerpt":"","metaTitle":"","metaDescription":"","status":"published","featured":true,"publishedAt":"2017-11-14T23:38:05Z","authorId":"190160de54f2192bd5b8734ec8808086","authorName":"Daniel Chote","authorSlug":"daniel","heroMediaId":"191f45e4117fe940fb1789d761ca0c73","projectId":"","tags":[{"id":"ecaaace3f367d1a9865ae0933d53d715","name":"Sim Racing","slug":"sim-racing"},{"id":"bda7da089cef0417916d7e03950af340","name":"Dirt Rally","slug":"dirt-rally"},{"id":"da38acfa5fecf65300448f0e5e3df9f2","name":"Car-Cade","slug":"car-cade"}],"createdAt":"2026-10-18T13:16:27Z","updatedAt":"2026-10-18T13:16:27Z"},{"id":"72b96875d26f256ca5a8e7bea23a0319","siteId":"projectable","slug":"raspberry-pi-touchscreen-octoprint-controller","title":"Raspberry Pi Touchscreen Octoprint Controller","markdown":"As everyone knows I love my Raspberry Pis. I'll put them in whatever I can fit them in. I am in the process of finishing my 3D printer rack and I wanted to get my new Anet A8 printer on wifi so that I didn't need to shuffle the difficult to remove SD card from it when I wanted to print something.\n\n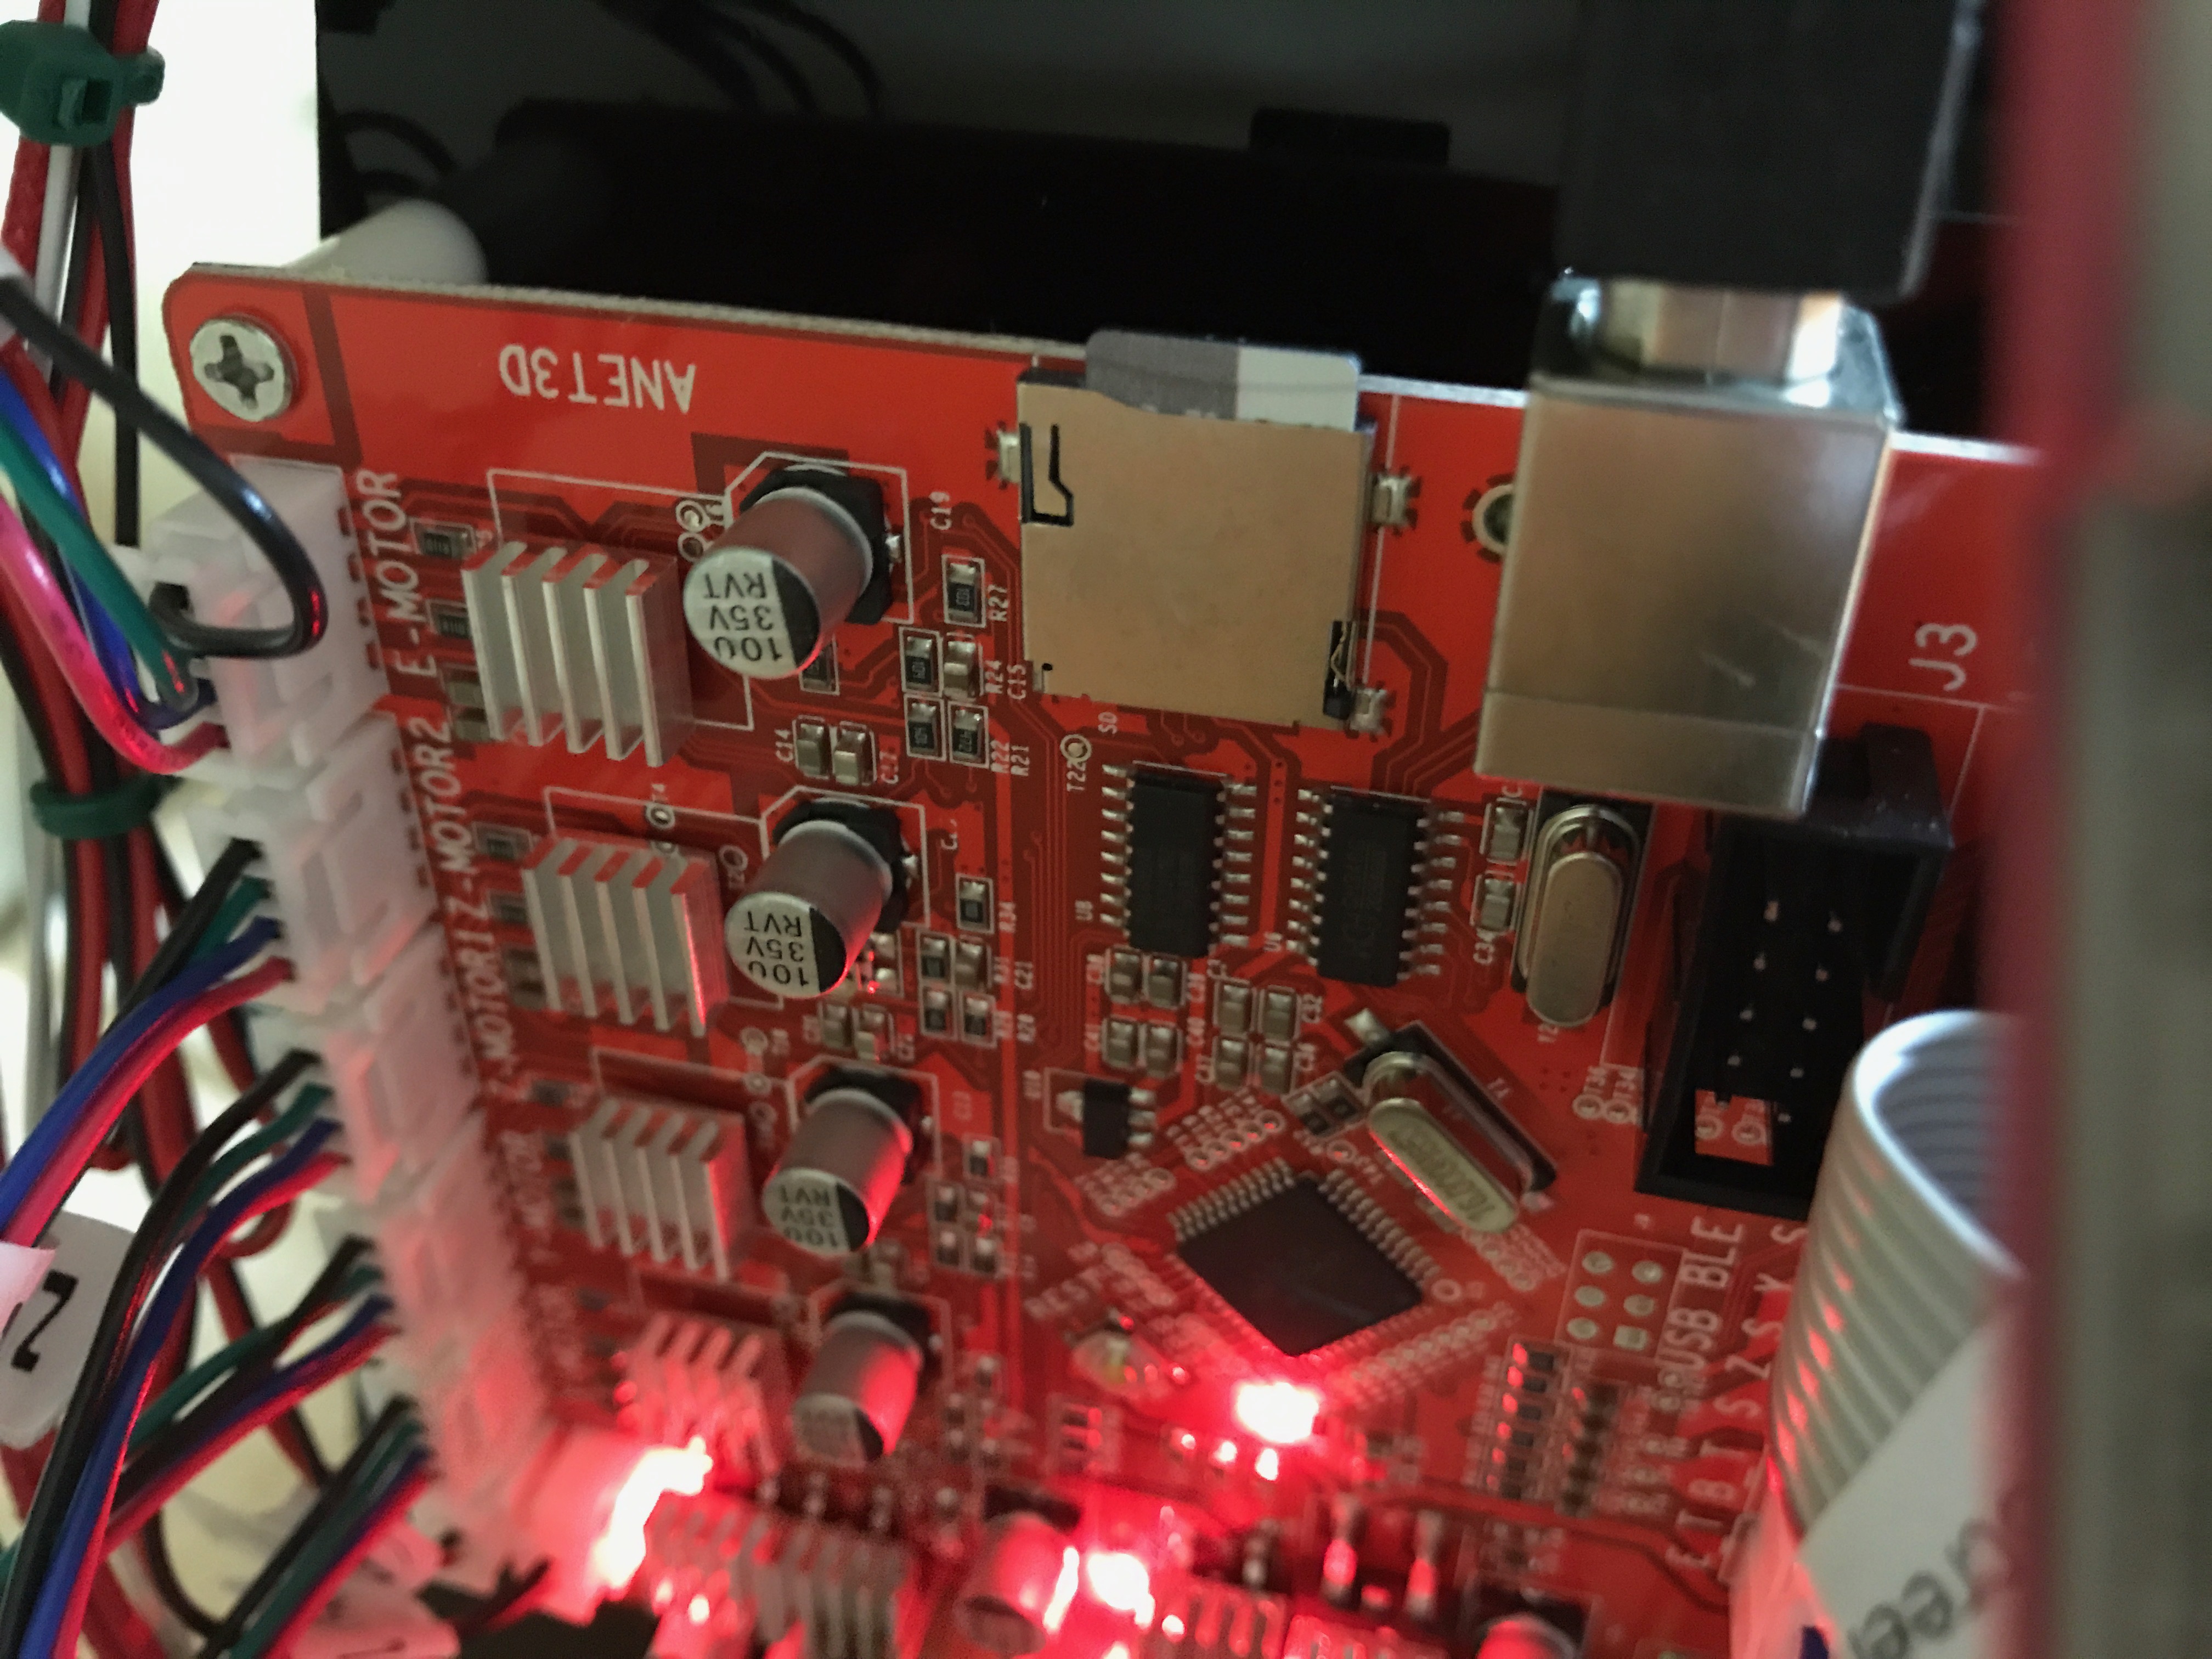\n\nAlong comes [Octoprint](http://octoprint.org)... Now, there are plenty of \"how to install octoprint on a Raspberry Pi\" documents out there, but nothing quite as pedantic as I would have liked. So I set off to do it my way.\n\nThis project uses a fantastic Adafruit designed 3D printed case: https://learn.adafruit.com/3-dot-5-pitft-octoprint-rig/3d-printed-case to wrap a [Raspberry Pi 3](https://www.adafruit.com/product/3055) + [Adafruit PiTFT Plus 3.5\" touch screen](https://www.adafruit.com/product/2441).\n\n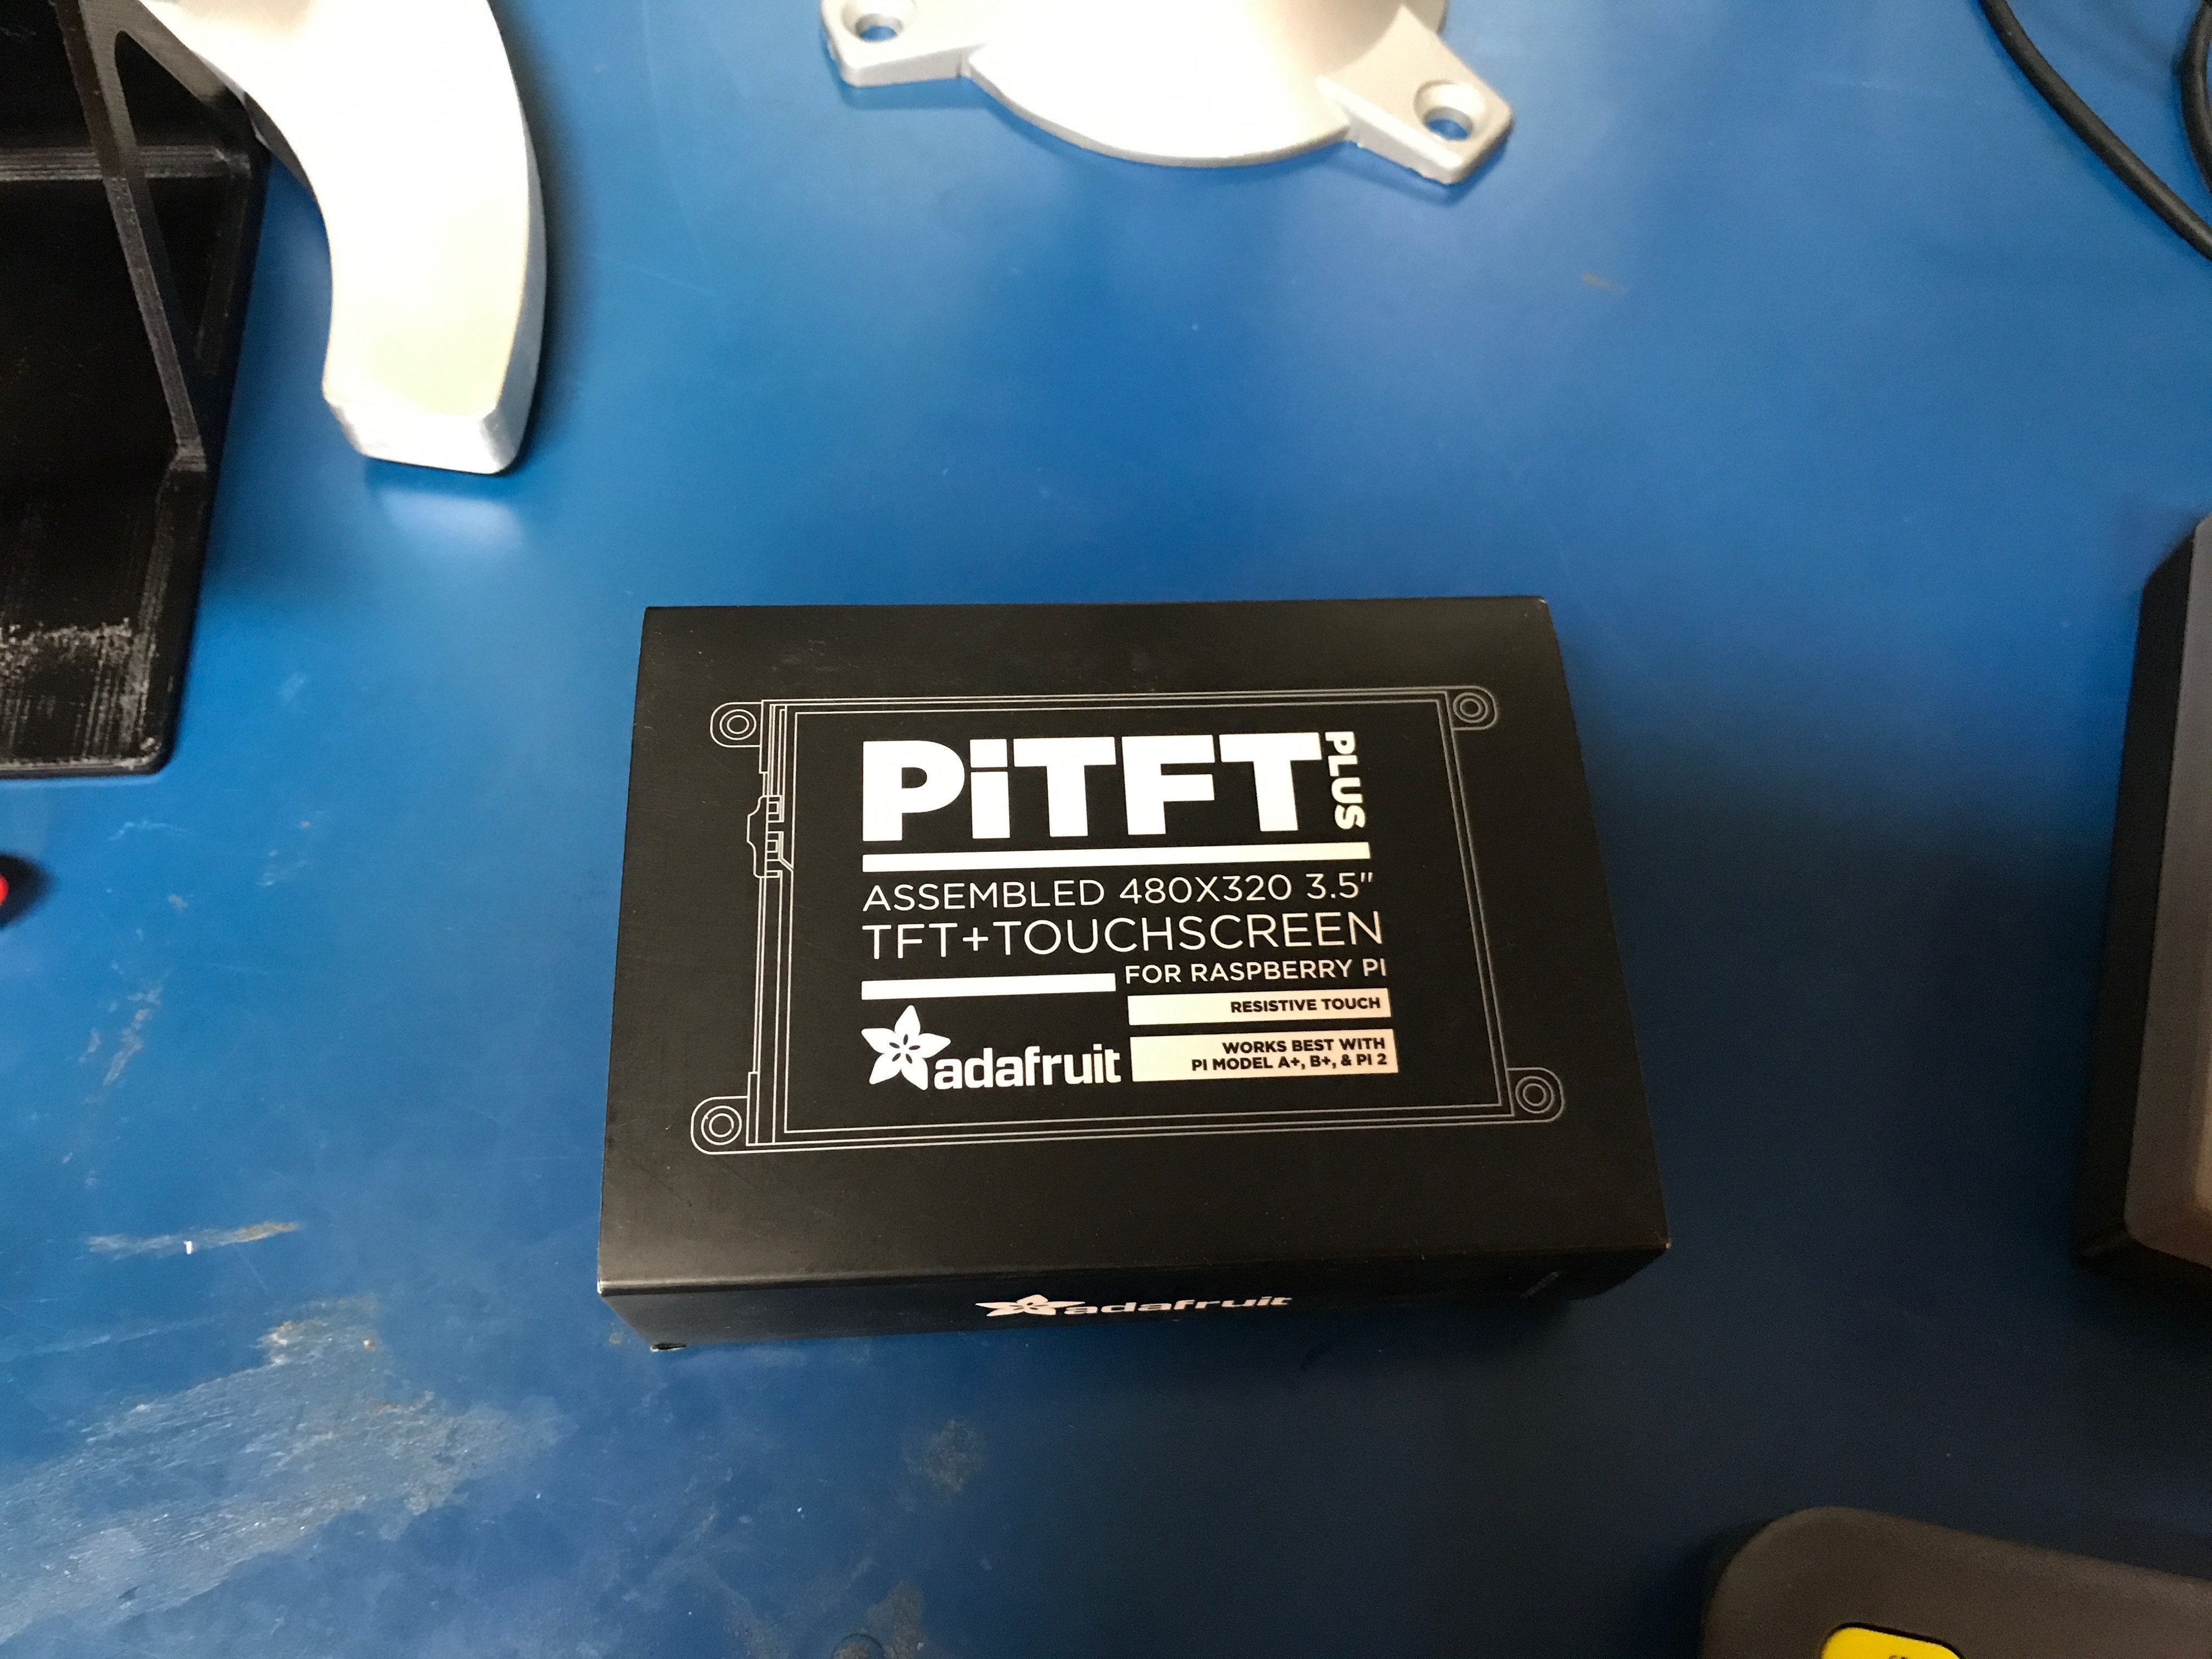\n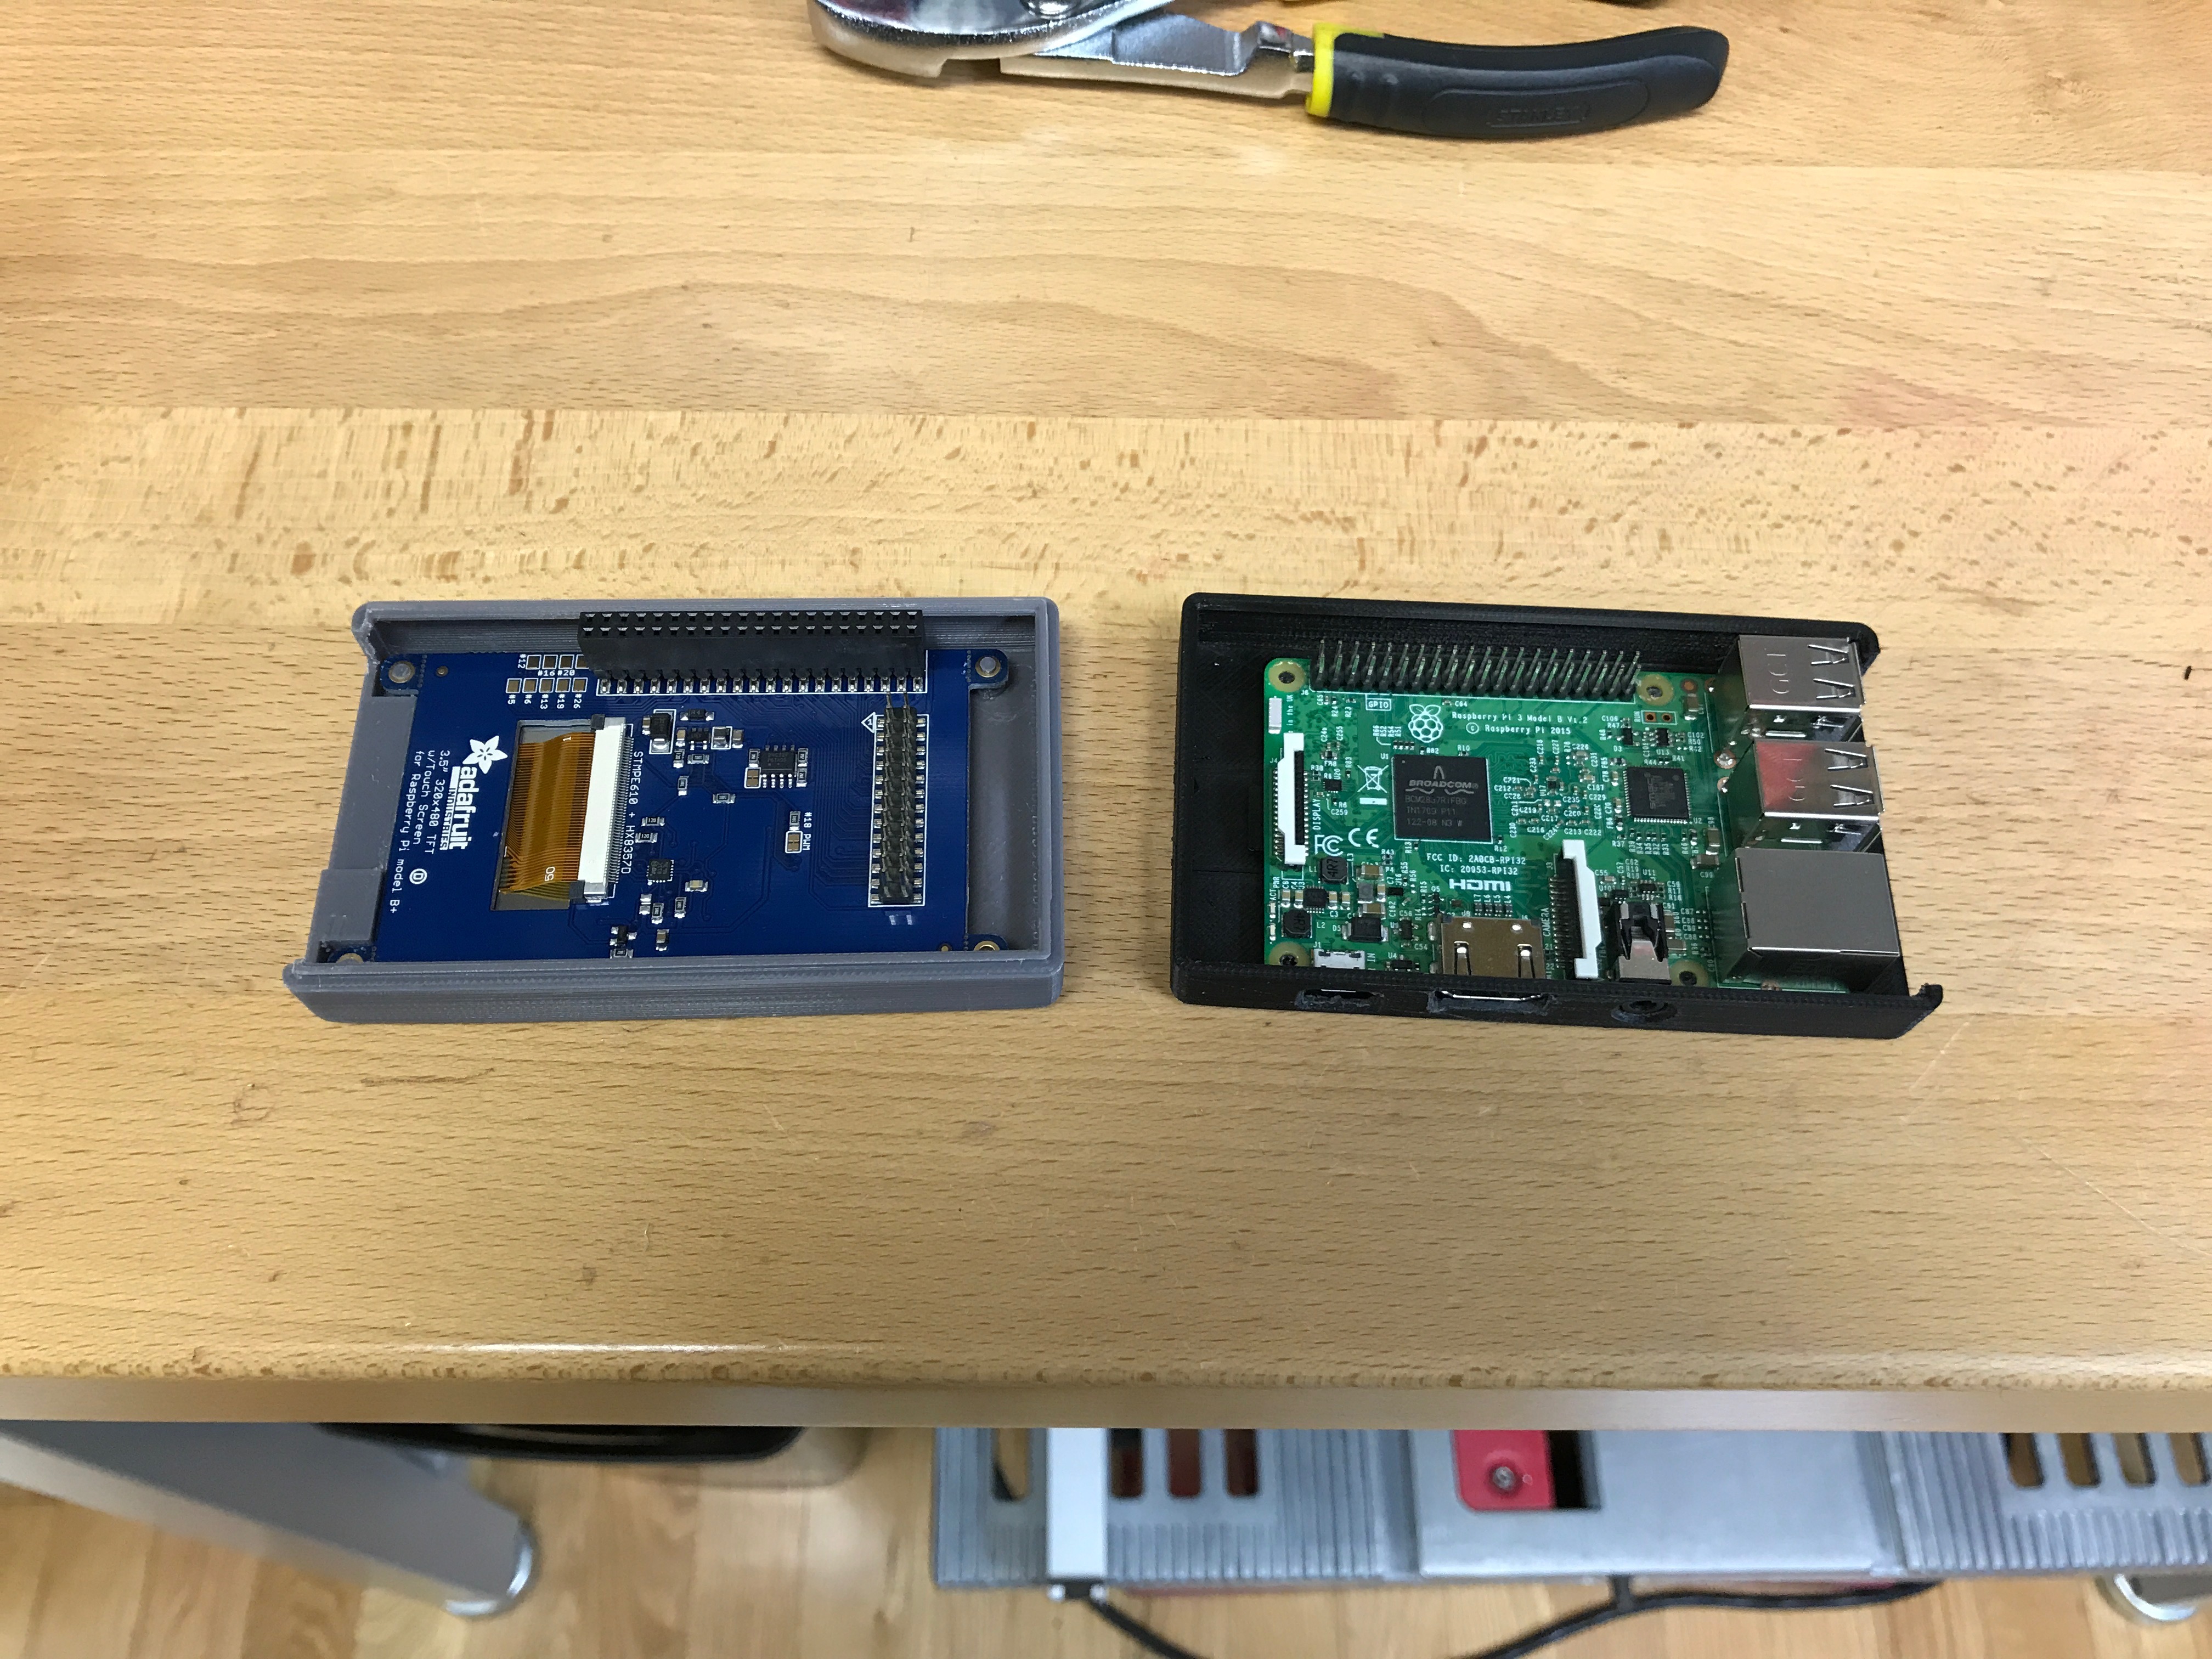\n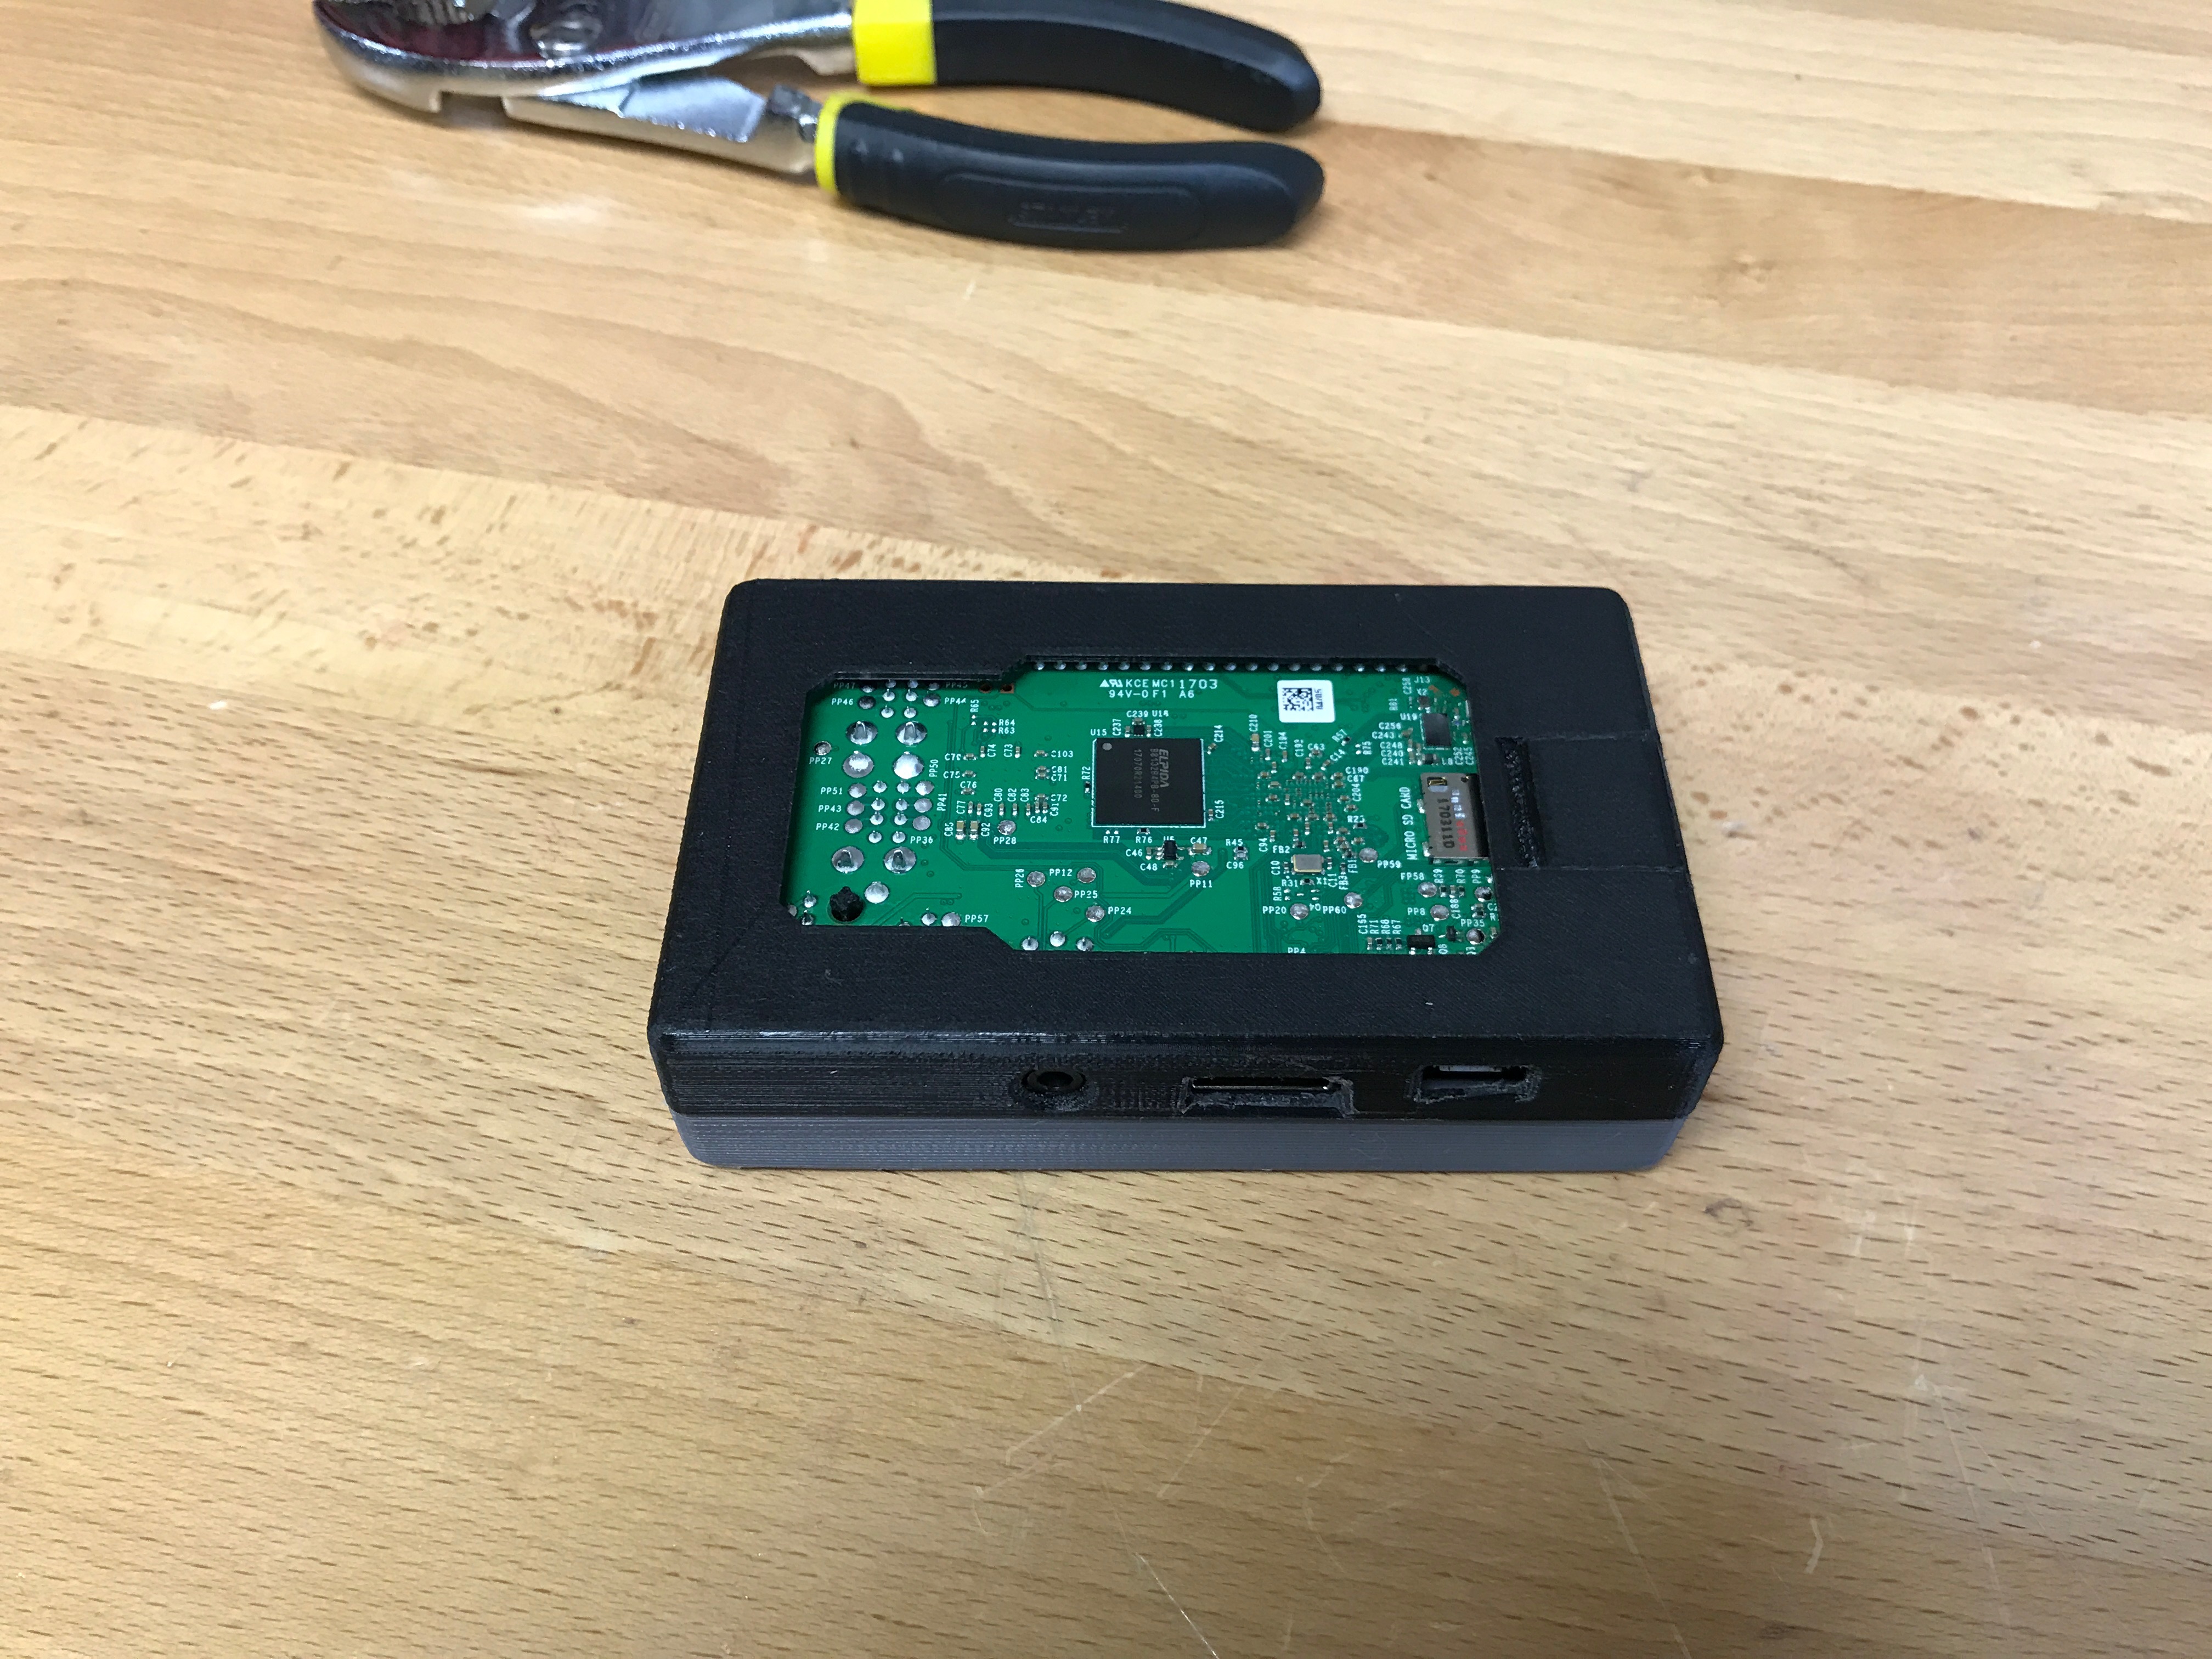\n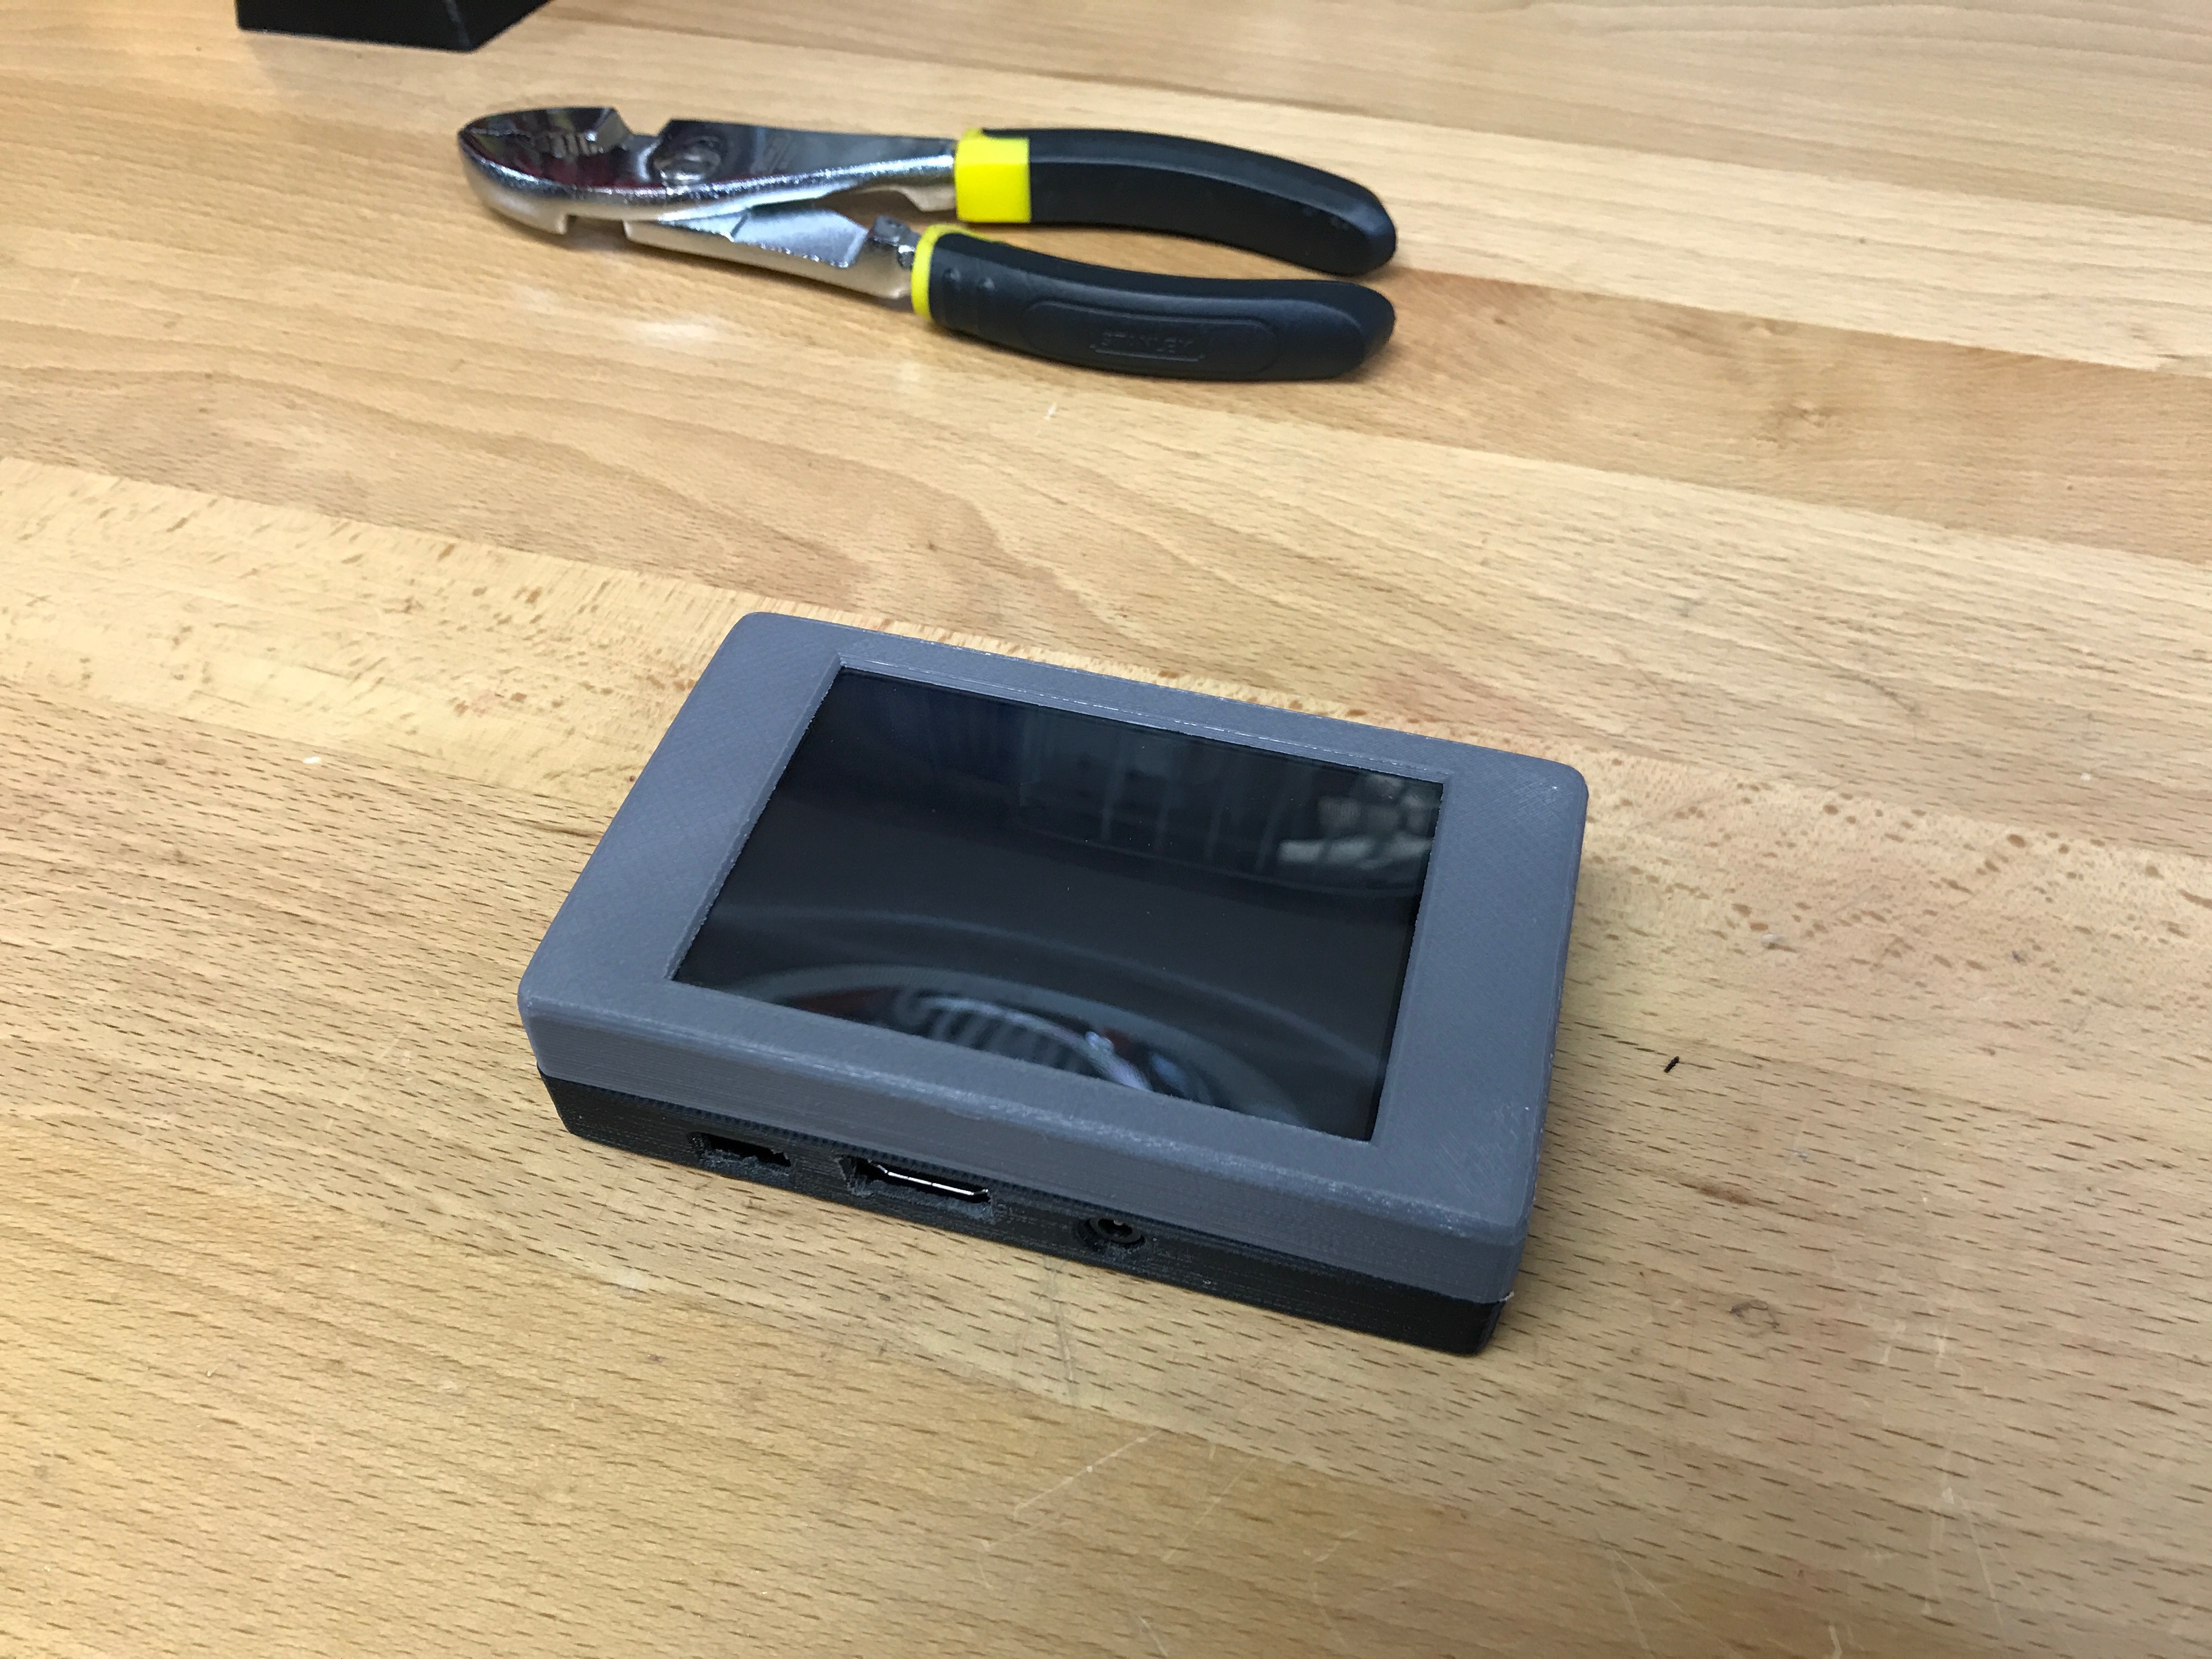\n\n\n### Getting Started\n\nThis is a very simple project. Here are the things you will need:\n\n* Raspberry Pi 3\n* PiTFT Plus 3.5\"\n* SD Card\n* 3D Printer\n\nMost of this is already covered in Adafruit's fantastic guide: https://learn.adafruit.com/3-dot-5-pitft-octoprint-rig/overview.\n\nMy approach has been updated and is a bit more bare bones... You will download the latest **Raspbian Jessie Lite** from https://www.raspberrypi.org/downloads/raspbian/, and burn it to your SD card. \n\nDo the usual Raspberry Pi setup process... Change the default password, enable SSH, get on to your wifi, etc. Once raspbian is running and secured on your Pi3 you can proceed with this guide.\n\n---\n\n### Install required packages\n\nAs root (`sudo -i`), please do the following:\n```\napt-get install python-pip python-dev python-setuptools python-virtualenv git libyaml-dev build-essential chromium-browser raspi-gpio xcompmgr dbus-x11 libgl1-mesa-dri xserver-xorg xserver-xorg-video-fbdev xserver-xorg-input-evdev xinit xfonts-100dpi xfonts-75dpi xfonts-cyrillic xfonts-scalable xinput ttf-mscorefonts-installer xinput-calibrator\n```\n---\n\n### Base setup\n\nCreate the octoprint user. This user will be used to run both the backend and the frontend of octoprint:\n\n```\nadduser --disabled-password --disabled-login --gecos \"\" octoprint \n\nusermod -a -G cdrom,audio,video,render,plugdev,users,dialout,dip,input,tty octoprint \n```\n\nFix the xorg config permissions so that a non-root user can run X correctly:\n\n```\nchmod ug+s /usr/lib/xorg/Xorg\n```\n\nNow we will update a few X config files to optimize for this use case:\n\n**edit: `/etc/X11/Xwrapper.config`**\n```\nallowed_users=anybody\nneeds_root_rights=no\n```\n\n**edit: `/etc/kbd/config`**\n```\nBLANK_TIME=0 \nBLANK_DPMS=off \nPOWERDOWN_TIME=0 \n```\n\n**edit: `/etc/X11/xinit/xinitrc`**\n```\nxset s noblank \nxset s off \nxset -dpms \n```\n\n---\n\n### Install Octoprint\n\nSwitch from root to the octoprint user `su octoprint`:\n\n```\ncd /home/octoprint\n\ngit clone https://github.com/foosel/OctoPrint.git\n\ncd OctoPrint\n\nvirtualenv venv\n./venv/bin/pip install pip --upgrade\n./venv/bin/pip install setuptools==7.0\n./venv/bin/python setup.py install\n\nmkdir ~/.octoprint\n```\n\nThis should leave you with a happy install of octoprint located at `/home/octoprint/Octoprint`.\n\n### Setup systemd services\n\n**edit: `/etc/systemd/system/octoprint-backend.service`**\n```\n[Unit]\n Description=OctoPrint service\n\n[Service]\n User=octoprint\n ExecStart=/home/octoprint/OctoPrint/venv/bin/octoprint\n\n[Install]\n WantedBy=multi-user.target\n```\n\n\n**edit: `/etc/systemd/system/octoprint-frontend.service`**\n```\n[Unit]\nDescription = Octoprint Frontend \nAfter = systemd-user-sessions.service network.target sound.target\n\n[Service]\nUser = octoprint \nGroup = octoprint \nType = simple \nExecStart = /usr/bin/xinit /usr/bin/dbus-launch --exit-with-session /usr/bin/chromium-browser --start-maximized --window-size=480,320 --window-position=0,0 --disable-restore-background-contents --noerordialogs --disable-session-crashed-bubble --disable-infobars --disable-pinch --overscroll-history-navigation=0 --incognito --kiosk http://127.0.0.1:5000 -- :0 -s 0 dpms -nocursor -nolisten tcp vt7 \nRestart = on-abort \nRestartSec = 5\n\n[Install]\nWantedBy = multi-user.target\n```\n\nEnable both services to start at boot:\n```\nsystemctl enable octoprint-backend.service\nsystemctl enable octoprint-frontend.service\n```\n\n---\n\n### Octoprint setup\n\nLog in to your octoprint instance using a browser on your computer. It should be something like http://**YOUR___PI___IP**:5000. You can find your Pi's ip address by running `ifconfig` as root. You will be presented with the \"Setup Wizard\". Follow the instructions to complete the setup process. \n \n*To keep things simple I recommend **DISABLING** access control. I would not recommend this if you are putting your Raspberry Pi on a public network.*\n\n--- \n### TouchUI plugin\n\nTo best fit on the 480x320 screen, you should enable the TouchUI plugin. On your computer connect to the octoprint instance running on the Raspberry Pi (*instructions above*). \"Under the settings section, goto the plugin manager and search for \"Touch UI\", then click the install button.\" --[Adafruit](https://learn.adafruit.com/3-dot-5-pitft-octoprint-rig/software)\n\n---\n\n### Enable the PiTFT\n\nAdafruit has a guide: https://learn.adafruit.com/adafruit-pitft-3-dot-5-touch-screen-for-raspberry-pi/easy-install, but it doesnt seem to play nice with the latest Raspbian.\n\nRun the following as root (`sudo -i`):\n```\necho \"deb http://apt.adafruit.com/raspbian/ jessie main\" \u003e\u003e /etc/apt/sources.list\n\nwget -O - -q https://apt.adafruit.com/apt.adafruit.com.gpg.key | apt-key add -\n\napt-get update\napt-get install -y adafruit-pitft-helper\n```\n\nThen run adafruit-pitft-helper:\n```\nadafruit-pitft-helper -t 35r\n```\n\nCheck `/boot/config.txt` to ensure the defined orientation will work for you. The line to review should look like:\n```\ndtoverlay=pitft35r,rotate=90,speed=42000000,fps=20\n```\n\nThe rotate= variable tells the driver to rotate the screen 0, 90, 180, or 270 degrees. \n\n * **0** is portrait, with the bottom near the USB jacks.\n * **90** is landscape, with the bottom of the screen near the headphone jack.\n * **180** is portrait, with the top near the USB jacks.\n * **270** is landscape, with the top of the screen near the headphone jack.\n\nNow reboot (`reboot`).\n\nAfter the reboot (in theory) you will see the octoprint web interface on your PiTFT. But you will need to calibrate the touchscreen before you can interact with it.\n\n---\n\n### Touch calibration\n\nAs root (`sudo -i`) run the following:\n```\nDISPLAY=:0.0 xinput_calibrator\n```\n\nFollow the onscreen calibration process:\n\u003cp align=\"center\"\u003e\n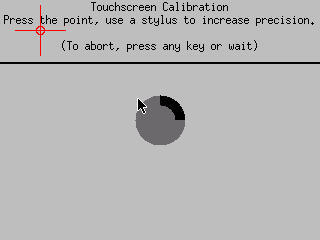\n\u003c/p\u003e\n\nOnce complete you should have a snippet of config to paste relevant to your touch screen.\n\n\n**edit: `/etc/X11/xorg.conf.d/99-calibration.conf`** and paste the output you got from xinput_calibrator.\n\n**Example output:** \n```\nSection \"InputClass\"\n\tIdentifier\t\"calibration\"\n\tMatchProduct\t\"stmpe-ts\"\n\tOption\t\"Calibration\"\t\"3932 82 141 3877\"\n\tOption\t\"SwapAxes\"\t\"1\"\n\tOption \"InvertX\" \"1\"\n\tOption \"InvertY\" \"1\"\nEndSection\n```\n\nIf your config does not contain **InvertX** or **InvertY** (*mine didn't*), you can add it manually to fix input inversion problems you may have.\n\nReboot (`reboot`), and enjoy your octoprint rig!.\n\n---\n\n### My Octoprint controller\n\nI mounted my octoprint controller to the shelving that I have my 3D printers on using double sided adhesive. Overall I am very impressed with how simple octoprint is and how well it works with my Anet A8 3D printer. \n\n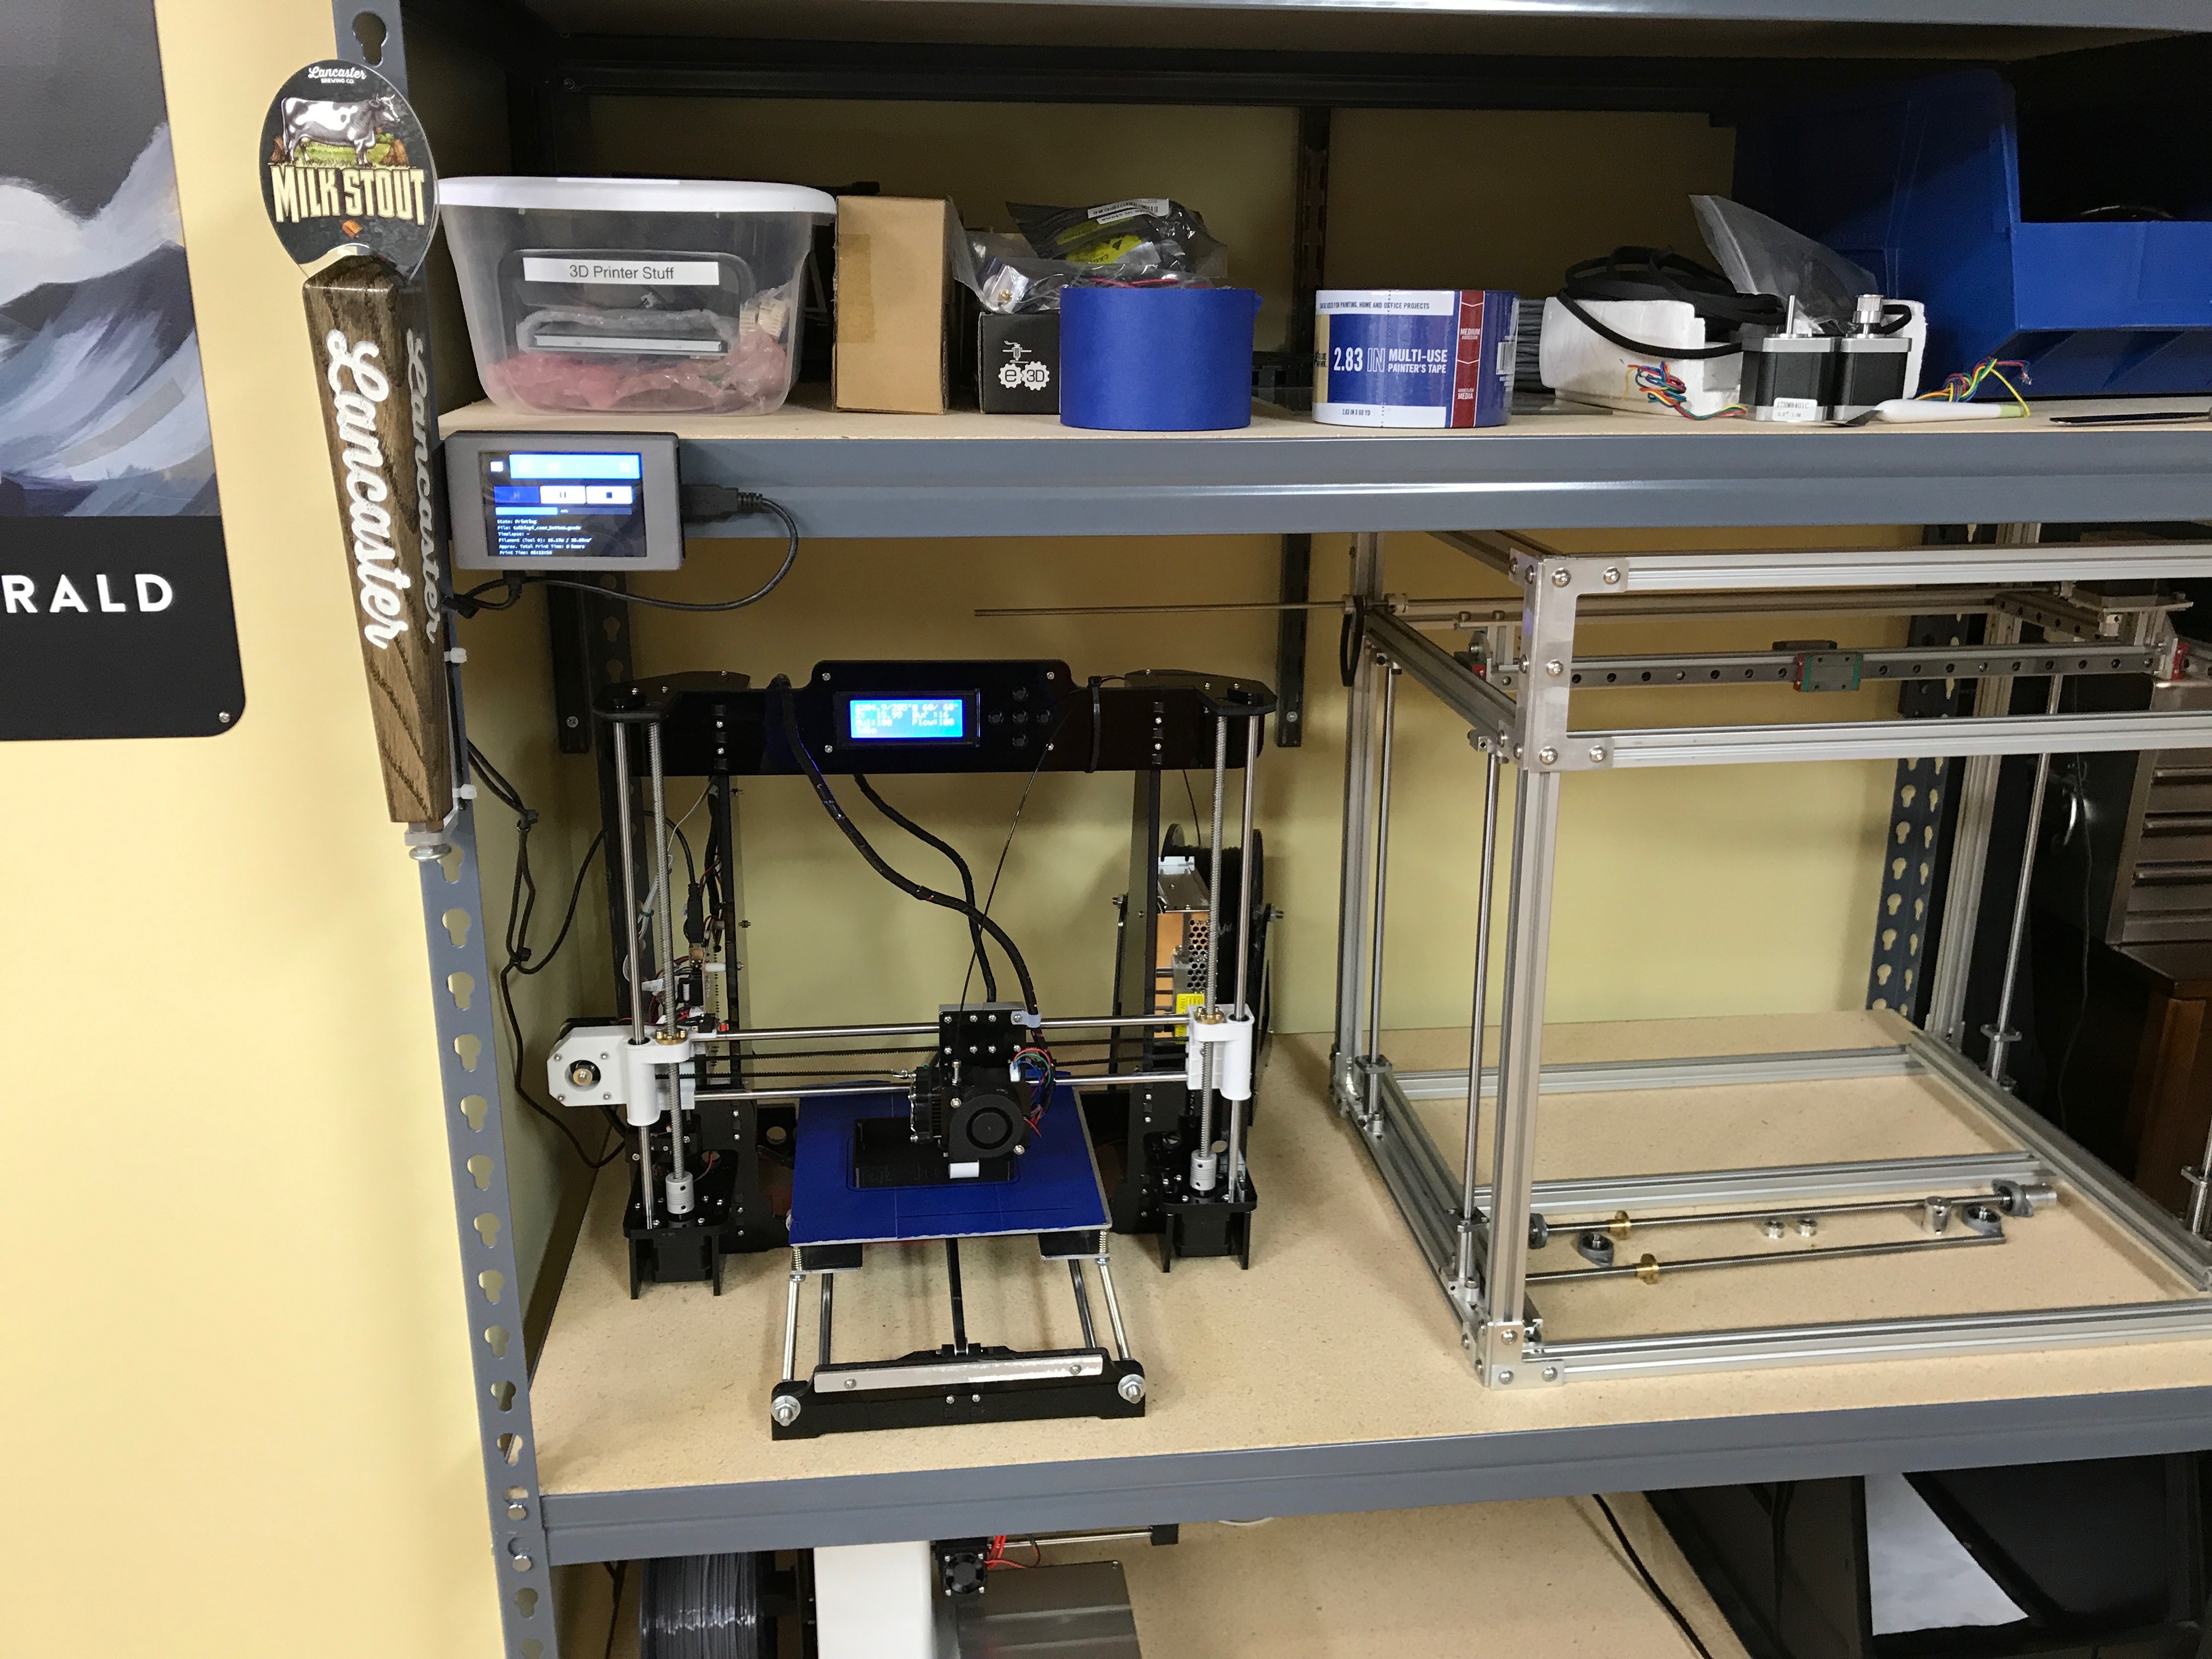\n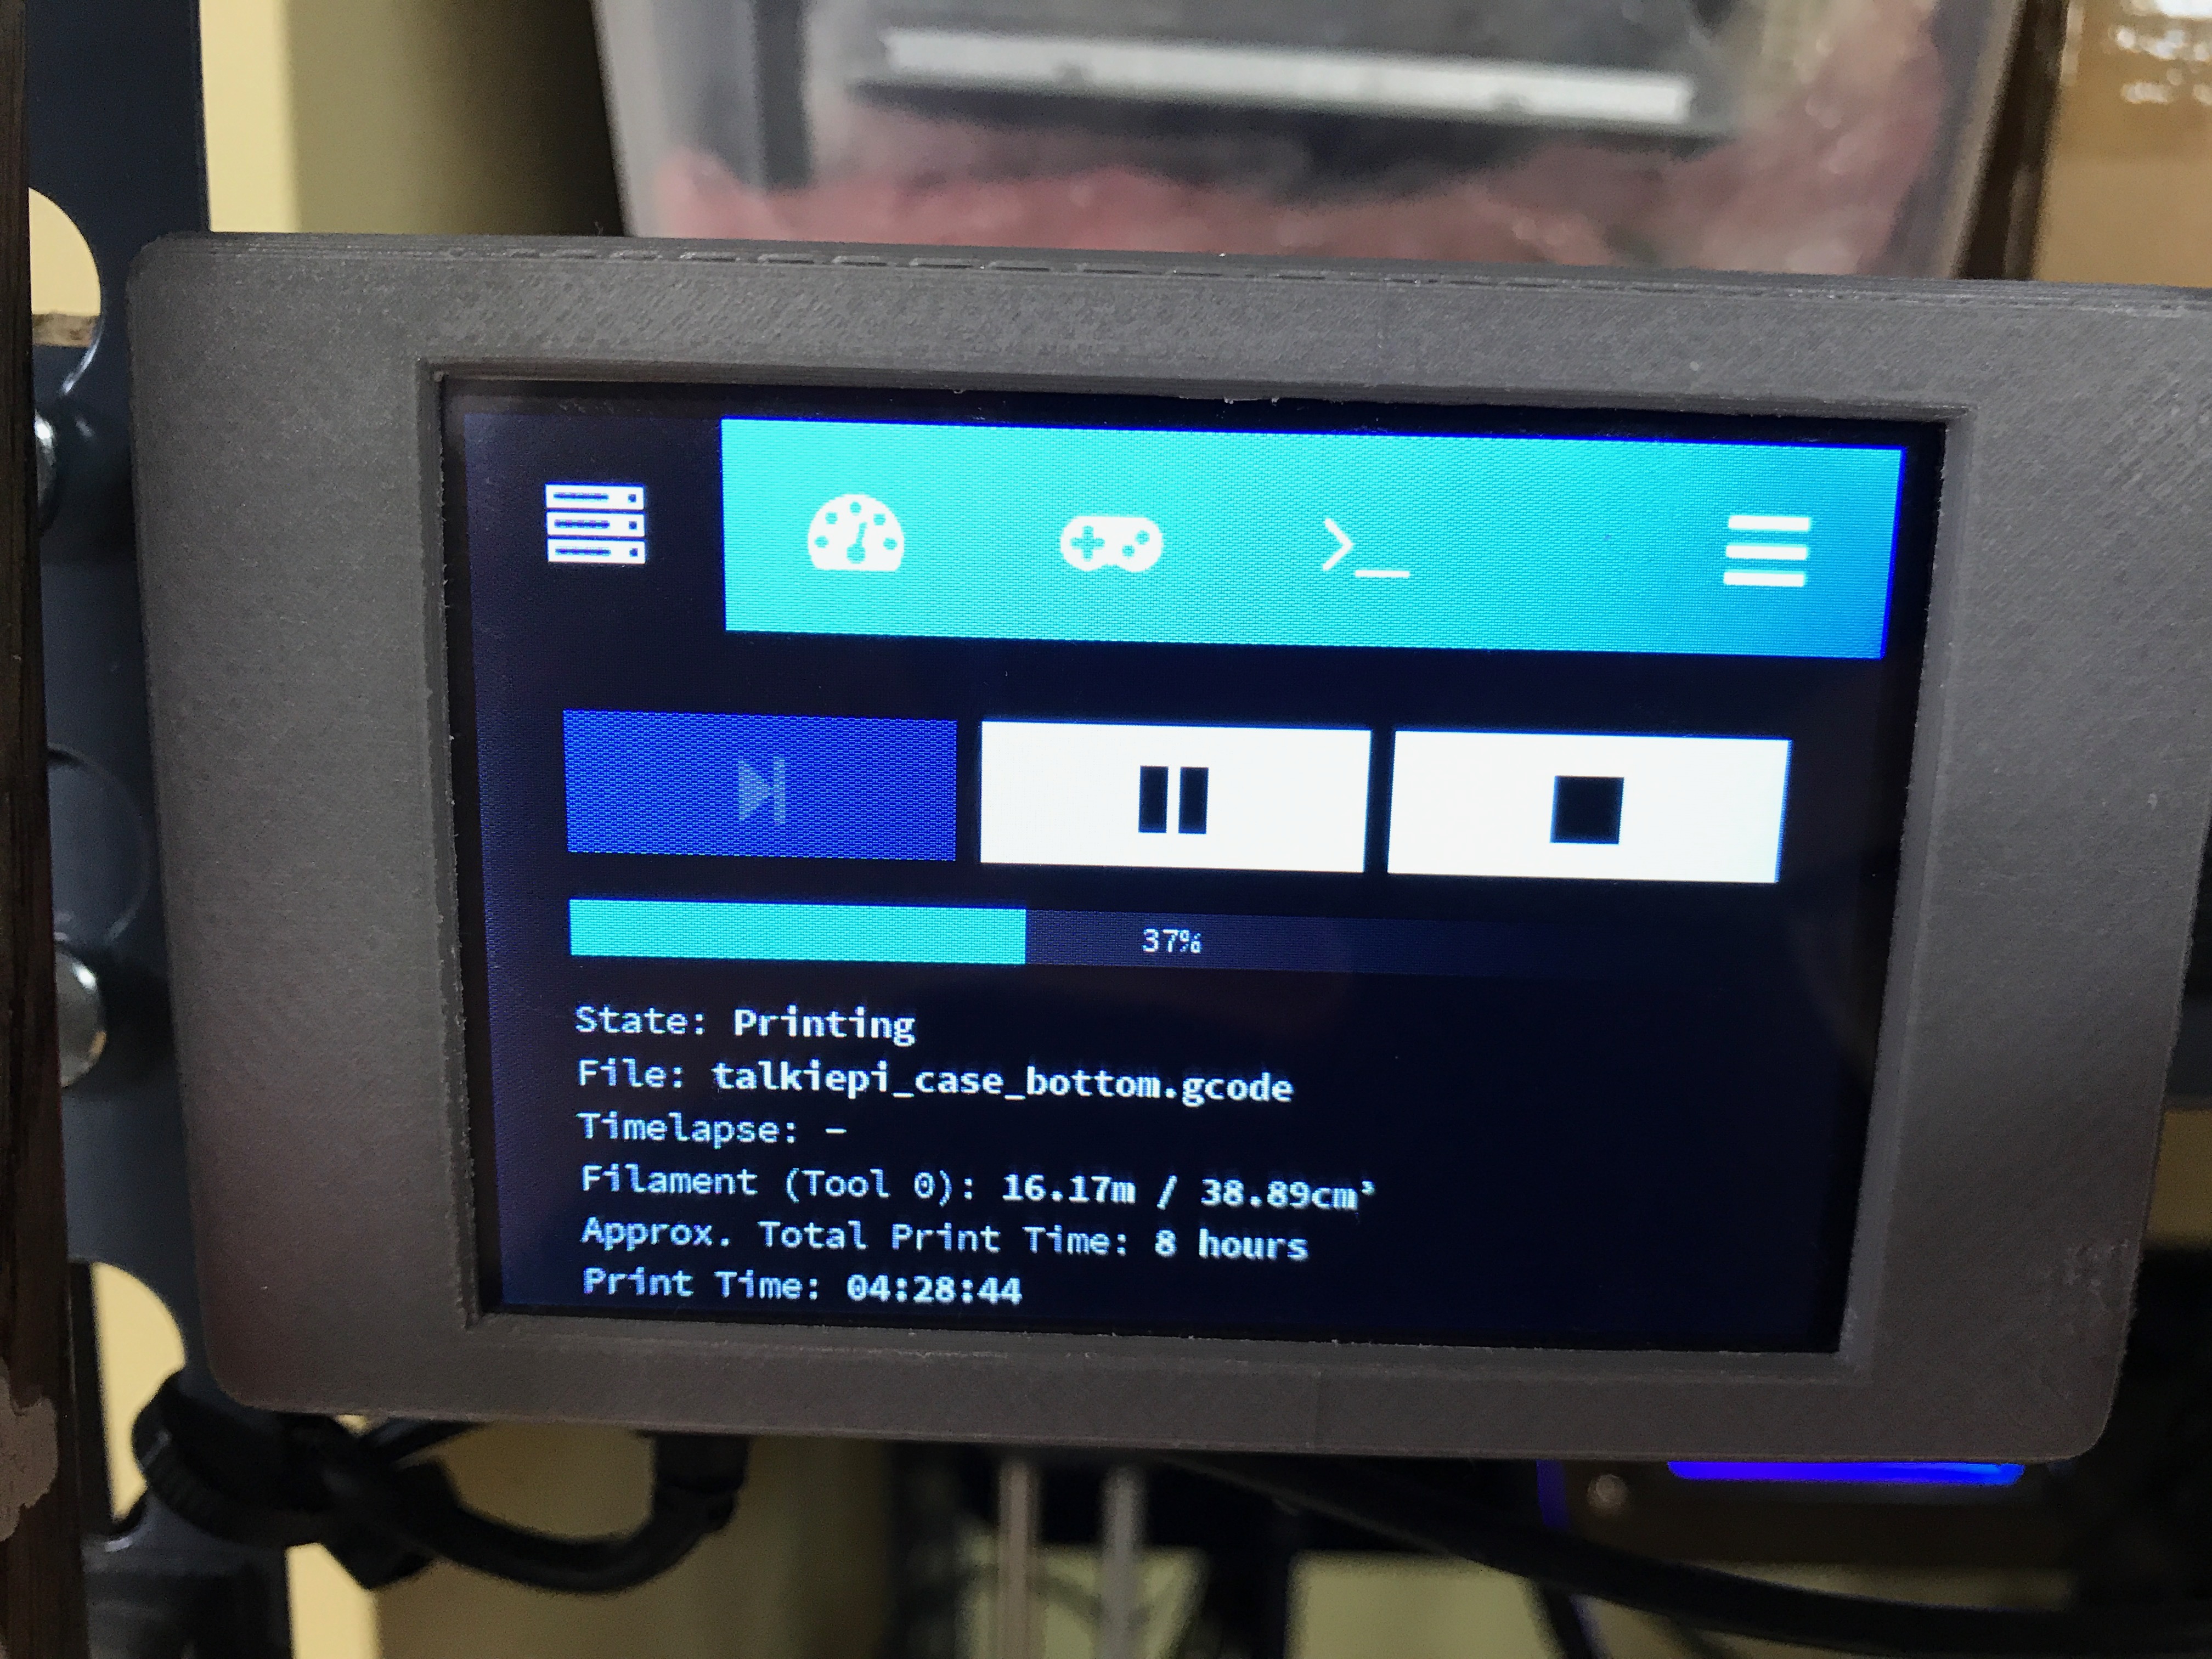\n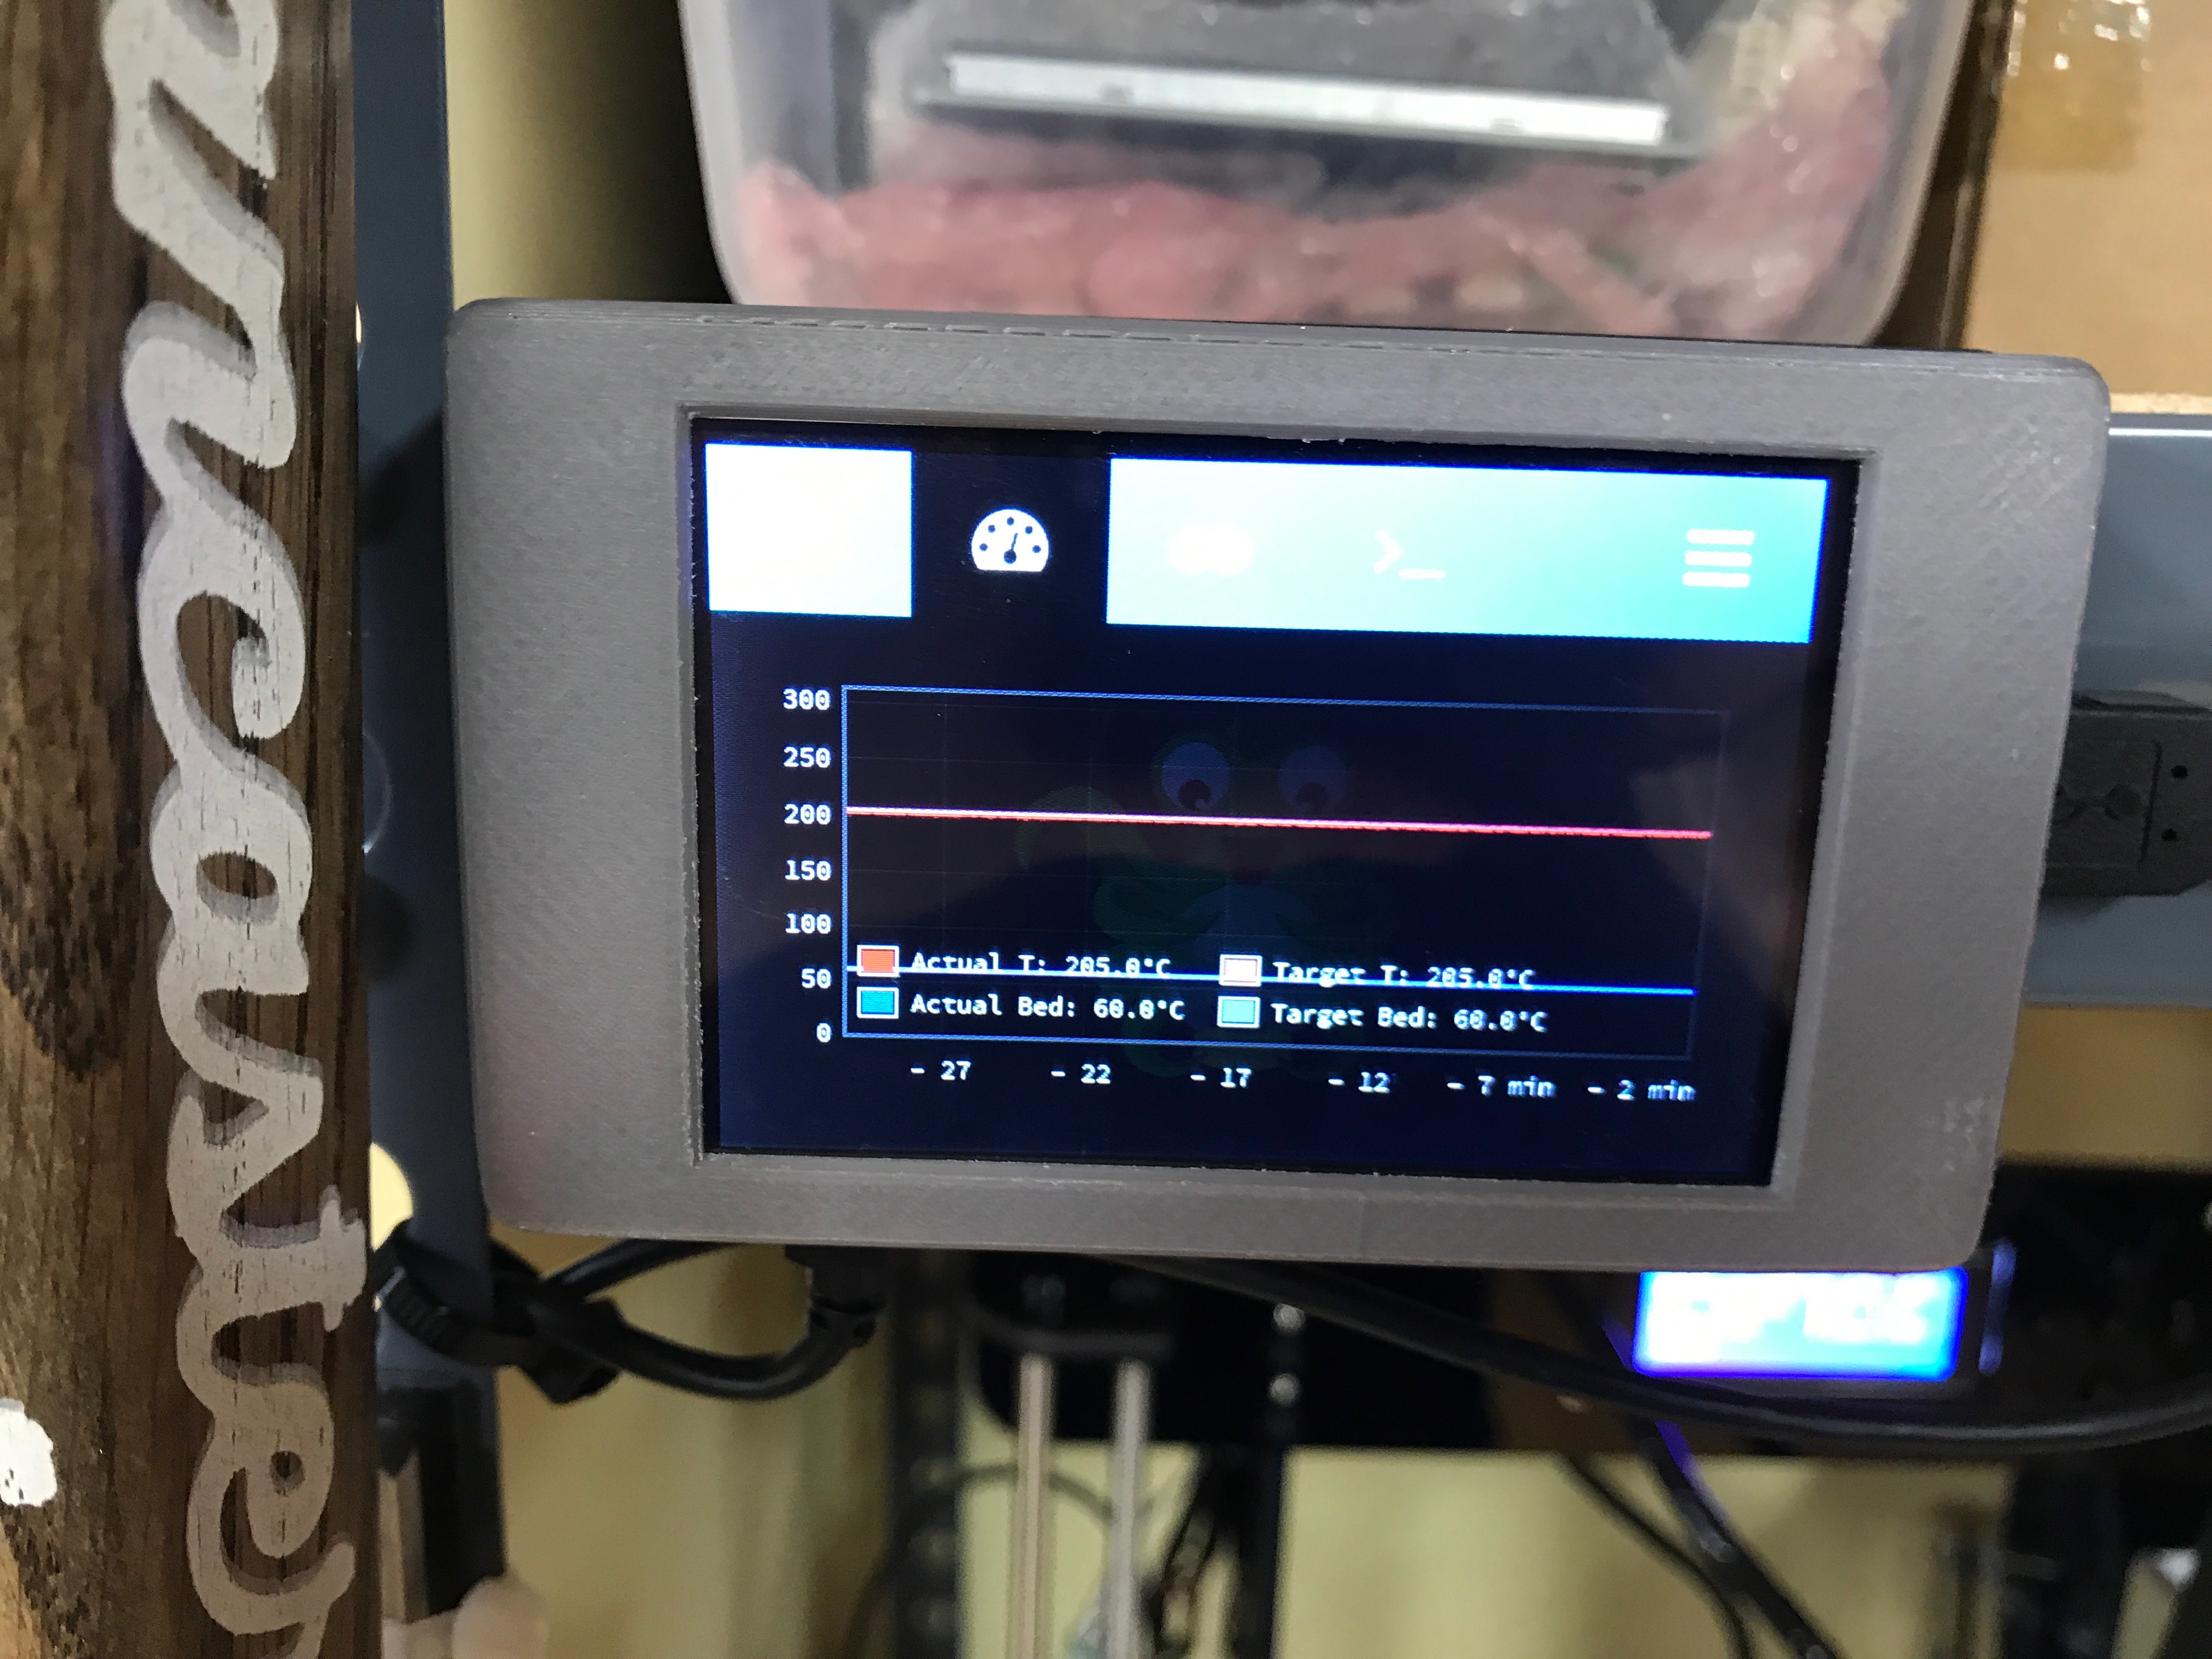\n","html":"\u003cp\u003eAs everyone knows I love my Raspberry Pis. I\u0026#39;ll put them in whatever I can fit them in. I am in the process of finishing my 3D printer rack and I wanted to get my new Anet A8 printer on wifi so that I didn\u0026#39;t need to shuffle the difficult to remove SD card from it when I wanted to print something.\u003c/p\u003e\n\u003cimg src=\"/content/images/2017/07/IMG_1559.jpg\" alt=\"\"\u003e\n\u003cp\u003eAlong comes \u003ca href=\"http://octoprint.org\" rel=\"nofollow\"\u003eOctoprint\u003c/a\u003e... Now, there are plenty of \u0026#34;how to install octoprint on a Raspberry Pi\u0026#34; documents out there, but nothing quite as pedantic as I would have liked. So I set off to do it my way.\u003c/p\u003e\n\u003cp\u003eThis project uses a fantastic Adafruit designed 3D printed case: \u003ca href=\"https://learn.adafruit.com/3-dot-5-pitft-octoprint-rig/3d-printed-case\" rel=\"nofollow\"\u003ehttps://learn.adafruit.com/3-dot-5-pitft-octoprint-rig/3d-printed-case\u003c/a\u003e to wrap a \u003ca href=\"https://www.adafruit.com/product/3055\" rel=\"nofollow\"\u003eRaspberry Pi 3\u003c/a\u003e + \u003ca href=\"https://www.adafruit.com/product/2441\" rel=\"nofollow\"\u003eAdafruit PiTFT Plus 3.5\u0026#34; touch screen\u003c/a\u003e.\u003c/p\u003e\n\u003cimg src=\"/content/images/2017/07/IMG_1532.jpg\" alt=\"\"\u003e\n\u003cimg src=\"/content/images/2017/07/IMG_1529.jpg\" alt=\"\"\u003e\n\u003cimg src=\"/content/images/2017/07/IMG_1531.jpg\" alt=\"\"\u003e\n\u003cimg src=\"/content/images/2017/07/IMG_1530.jpg\" alt=\"\"\u003e\n\u003ch3\u003eGetting Started\u003c/h3\u003e\n\u003cp\u003eThis is a very simple project. Here are the things you will need:\u003c/p\u003e\n\u003cul\u003e\n\u003cli\u003eRaspberry Pi 3\u003c/li\u003e\n\u003cli\u003ePiTFT Plus 3.5\u0026#34;\u003c/li\u003e\n\u003cli\u003eSD Card\u003c/li\u003e\n\u003cli\u003e3D Printer\u003c/li\u003e\n\u003c/ul\u003e\n\u003cp\u003eMost of this is already covered in Adafruit\u0026#39;s fantastic guide: \u003ca href=\"https://learn.adafruit.com/3-dot-5-pitft-octoprint-rig/overview\" rel=\"nofollow\"\u003ehttps://learn.adafruit.com/3-dot-5-pitft-octoprint-rig/overview\u003c/a\u003e.\u003c/p\u003e\n\u003cp\u003eMy approach has been updated and is a bit more bare bones... You will download the latest \u003cstrong\u003eRaspbian Jessie Lite\u003c/strong\u003e from \u003ca href=\"https://www.raspberrypi.org/downloads/raspbian/\" rel=\"nofollow\"\u003ehttps://www.raspberrypi.org/downloads/raspbian/\u003c/a\u003e, and burn it to your SD card.\u003c/p\u003e\n\u003cp\u003eDo the usual Raspberry Pi setup process... Change the default password, enable SSH, get on to your wifi, etc. Once raspbian is running and secured on your Pi3 you can proceed with this guide.\u003c/p\u003e\n\u003chr\u003e\n\u003ch3\u003eInstall required packages\u003c/h3\u003e\n\u003cp\u003eAs root (\u003ccode\u003esudo -i\u003c/code\u003e), please do the following:\u003c/p\u003e\n\u003cpre\u003e\u003ccode\u003eapt-get install python-pip python-dev python-setuptools python-virtualenv git libyaml-dev build-essential chromium-browser raspi-gpio xcompmgr dbus-x11 libgl1-mesa-dri xserver-xorg xserver-xorg-video-fbdev xserver-xorg-input-evdev xinit xfonts-100dpi xfonts-75dpi xfonts-cyrillic xfonts-scalable xinput ttf-mscorefonts-installer xinput-calibrator\n\u003c/code\u003e\u003c/pre\u003e\n\u003chr\u003e\n\u003ch3\u003eBase setup\u003c/h3\u003e\n\u003cp\u003eCreate the octoprint user. This user will be used to run both the backend and the frontend of octoprint:\u003c/p\u003e\n\u003cpre\u003e\u003ccode\u003eadduser --disabled-password --disabled-login --gecos \u0026#34;\u0026#34; octoprint \n\nusermod -a -G cdrom,audio,video,render,plugdev,users,dialout,dip,input,tty octoprint \n\u003c/code\u003e\u003c/pre\u003e\n\u003cp\u003eFix the xorg config permissions so that a non-root user can run X correctly:\u003c/p\u003e\n\u003cpre\u003e\u003ccode\u003echmod ug+s /usr/lib/xorg/Xorg\n\u003c/code\u003e\u003c/pre\u003e\n\u003cp\u003eNow we will update a few X config files to optimize for this use case:\u003c/p\u003e\n\u003cp\u003e\u003cstrong\u003eedit: \u003ccode\u003e/etc/X11/Xwrapper.config\u003c/code\u003e\u003c/strong\u003e\u003c/p\u003e\n\u003cpre\u003e\u003ccode\u003eallowed_users=anybody\nneeds_root_rights=no\n\u003c/code\u003e\u003c/pre\u003e\n\u003cp\u003e\u003cstrong\u003eedit: \u003ccode\u003e/etc/kbd/config\u003c/code\u003e\u003c/strong\u003e\u003c/p\u003e\n\u003cpre\u003e\u003ccode\u003eBLANK_TIME=0 \nBLANK_DPMS=off \nPOWERDOWN_TIME=0 \n\u003c/code\u003e\u003c/pre\u003e\n\u003cp\u003e\u003cstrong\u003eedit: \u003ccode\u003e/etc/X11/xinit/xinitrc\u003c/code\u003e\u003c/strong\u003e\u003c/p\u003e\n\u003cpre\u003e\u003ccode\u003exset s noblank \nxset s off \nxset -dpms \n\u003c/code\u003e\u003c/pre\u003e\n\u003chr\u003e\n\u003ch3\u003eInstall Octoprint\u003c/h3\u003e\n\u003cp\u003eSwitch from root to the octoprint user \u003ccode\u003esu octoprint\u003c/code\u003e:\u003c/p\u003e\n\u003cpre\u003e\u003ccode\u003ecd /home/octoprint\n\ngit clone https://github.com/foosel/OctoPrint.git\n\ncd OctoPrint\n\nvirtualenv venv\n./venv/bin/pip install pip --upgrade\n./venv/bin/pip install setuptools==7.0\n./venv/bin/python setup.py install\n\nmkdir ~/.octoprint\n\u003c/code\u003e\u003c/pre\u003e\n\u003cp\u003eThis should leave you with a happy install of octoprint located at \u003ccode\u003e/home/octoprint/Octoprint\u003c/code\u003e.\u003c/p\u003e\n\u003ch3\u003eSetup systemd services\u003c/h3\u003e\n\u003cp\u003e\u003cstrong\u003eedit: \u003ccode\u003e/etc/systemd/system/octoprint-backend.service\u003c/code\u003e\u003c/strong\u003e\u003c/p\u003e\n\u003cpre\u003e\u003ccode\u003e[Unit]\n Description=OctoPrint service\n\n[Service]\n User=octoprint\n ExecStart=/home/octoprint/OctoPrint/venv/bin/octoprint\n\n[Install]\n WantedBy=multi-user.target\n\u003c/code\u003e\u003c/pre\u003e\n\u003cp\u003e\u003cstrong\u003eedit: \u003ccode\u003e/etc/systemd/system/octoprint-frontend.service\u003c/code\u003e\u003c/strong\u003e\u003c/p\u003e\n\u003cpre\u003e\u003ccode\u003e[Unit]\nDescription = Octoprint Frontend \nAfter = systemd-user-sessions.service network.target sound.target\n\n[Service]\nUser = octoprint \nGroup = octoprint \nType = simple \nExecStart = /usr/bin/xinit /usr/bin/dbus-launch --exit-with-session /usr/bin/chromium-browser --start-maximized --window-size=480,320 --window-position=0,0 --disable-restore-background-contents --noerordialogs --disable-session-crashed-bubble --disable-infobars --disable-pinch --overscroll-history-navigation=0 --incognito --kiosk http://127.0.0.1:5000 -- :0 -s 0 dpms -nocursor -nolisten tcp vt7 \nRestart = on-abort \nRestartSec = 5\n\n[Install]\nWantedBy = multi-user.target\n\u003c/code\u003e\u003c/pre\u003e\n\u003cp\u003eEnable both services to start at boot:\u003c/p\u003e\n\u003cpre\u003e\u003ccode\u003esystemctl enable octoprint-backend.service\nsystemctl enable octoprint-frontend.service\n\u003c/code\u003e\u003c/pre\u003e\n\u003chr\u003e\n\u003ch3\u003eOctoprint setup\u003c/h3\u003e\n\u003cp\u003eLog in to your octoprint instance using a browser on your computer. It should be something like http://\u003cstrong\u003eYOUR___PI___IP\u003c/strong\u003e:5000. You can find your Pi\u0026#39;s ip address by running \u003ccode\u003eifconfig\u003c/code\u003e as root. You will be presented with the \u0026#34;Setup Wizard\u0026#34;. Follow the instructions to complete the setup process.\u003c/p\u003e\n\u003cp\u003e\u003cem\u003eTo keep things simple I recommend \u003cstrong\u003eDISABLING\u003c/strong\u003e access control. I would not recommend this if you are putting your Raspberry Pi on a public network.\u003c/em\u003e\u003c/p\u003e\n\u003chr\u003e\n\u003ch3\u003eTouchUI plugin\u003c/h3\u003e\n\u003cp\u003eTo best fit on the 480x320 screen, you should enable the TouchUI plugin. On your computer connect to the octoprint instance running on the Raspberry Pi (\u003cem\u003einstructions above\u003c/em\u003e). \u0026#34;Under the settings section, goto the plugin manager and search for \u0026#34;Touch UI\u0026#34;, then click the install button.\u0026#34; --\u003ca href=\"https://learn.adafruit.com/3-dot-5-pitft-octoprint-rig/software\" rel=\"nofollow\"\u003eAdafruit\u003c/a\u003e\u003c/p\u003e\n\u003chr\u003e\n\u003ch3\u003eEnable the PiTFT\u003c/h3\u003e\n\u003cp\u003eAdafruit has a guide: \u003ca href=\"https://learn.adafruit.com/adafruit-pitft-3-dot-5-touch-screen-for-raspberry-pi/easy-install\" rel=\"nofollow\"\u003ehttps://learn.adafruit.com/adafruit-pitft-3-dot-5-touch-screen-for-raspberry-pi/easy-install\u003c/a\u003e, but it doesnt seem to play nice with the latest Raspbian.\u003c/p\u003e\n\u003cp\u003eRun the following as root (\u003ccode\u003esudo -i\u003c/code\u003e):\u003c/p\u003e\n\u003cpre\u003e\u003ccode\u003eecho \u0026#34;deb http://apt.adafruit.com/raspbian/ jessie main\u0026#34; \u0026gt;\u0026gt; /etc/apt/sources.list\n\nwget -O - -q https://apt.adafruit.com/apt.adafruit.com.gpg.key | apt-key add -\n\napt-get update\napt-get install -y adafruit-pitft-helper\n\u003c/code\u003e\u003c/pre\u003e\n\u003cp\u003eThen run adafruit-pitft-helper:\u003c/p\u003e\n\u003cpre\u003e\u003ccode\u003eadafruit-pitft-helper -t 35r\n\u003c/code\u003e\u003c/pre\u003e\n\u003cp\u003eCheck \u003ccode\u003e/boot/config.txt\u003c/code\u003e to ensure the defined orientation will work for you. The line to review should look like:\u003c/p\u003e\n\u003cpre\u003e\u003ccode\u003edtoverlay=pitft35r,rotate=90,speed=42000000,fps=20\n\u003c/code\u003e\u003c/pre\u003e\n\u003cp\u003eThe rotate= variable tells the driver to rotate the screen 0, 90, 180, or 270 degrees.\u003c/p\u003e\n\u003cul\u003e\n\u003cli\u003e\u003cstrong\u003e0\u003c/strong\u003e is portrait, with the bottom near the USB jacks.\u003c/li\u003e\n\u003cli\u003e\u003cstrong\u003e90\u003c/strong\u003e is landscape, with the bottom of the screen near the headphone jack.\u003c/li\u003e\n\u003cli\u003e\u003cstrong\u003e180\u003c/strong\u003e is portrait, with the top near the USB jacks.\u003c/li\u003e\n\u003cli\u003e\u003cstrong\u003e270\u003c/strong\u003e is landscape, with the top of the screen near the headphone jack.\u003c/li\u003e\n\u003c/ul\u003e\n\u003cp\u003eNow reboot (\u003ccode\u003ereboot\u003c/code\u003e).\u003c/p\u003e\n\u003cp\u003eAfter the reboot (in theory) you will see the octoprint web interface on your PiTFT. But you will need to calibrate the touchscreen before you can interact with it.\u003c/p\u003e\n\u003chr\u003e\n\u003ch3\u003eTouch calibration\u003c/h3\u003e\n\u003cp\u003eAs root (\u003ccode\u003esudo -i\u003c/code\u003e) run the following:\u003c/p\u003e\n\u003cpre\u003e\u003ccode\u003eDISPLAY=:0.0 xinput_calibrator\n\u003c/code\u003e\u003c/pre\u003e\n\u003cp\u003eFollow the onscreen calibration process:\u003c/p\u003e\n\u003cp align=\"center\"\u003e\n\u003cimg src=\"/content/images/2017/07/raspberry_pi_xinput.png\" alt=\"\"\u003e\n\u003c/p\u003e\n\u003cp\u003eOnce complete you should have a snippet of config to paste relevant to your touch screen.\u003c/p\u003e\n\u003cp\u003e\u003cstrong\u003eedit: \u003ccode\u003e/etc/X11/xorg.conf.d/99-calibration.conf\u003c/code\u003e\u003c/strong\u003e and paste the output you got from xinput_calibrator.\u003c/p\u003e\n\u003cp\u003e\u003cstrong\u003eExample output:\u003c/strong\u003e\u003c/p\u003e\n\u003cpre\u003e\u003ccode\u003eSection \u0026#34;InputClass\u0026#34;\n\tIdentifier\t\u0026#34;calibration\u0026#34;\n\tMatchProduct\t\u0026#34;stmpe-ts\u0026#34;\n\tOption\t\u0026#34;Calibration\u0026#34;\t\u0026#34;3932 82 141 3877\u0026#34;\n\tOption\t\u0026#34;SwapAxes\u0026#34;\t\u0026#34;1\u0026#34;\n\tOption \u0026#34;InvertX\u0026#34; \u0026#34;1\u0026#34;\n\tOption \u0026#34;InvertY\u0026#34; \u0026#34;1\u0026#34;\nEndSection\n\u003c/code\u003e\u003c/pre\u003e\n\u003cp\u003eIf your config does not contain \u003cstrong\u003eInvertX\u003c/strong\u003e or \u003cstrong\u003eInvertY\u003c/strong\u003e (\u003cem\u003emine didn\u0026#39;t\u003c/em\u003e), you can add it manually to fix input inversion problems you may have.\u003c/p\u003e\n\u003cp\u003eReboot (\u003ccode\u003ereboot\u003c/code\u003e), and enjoy your octoprint rig!.\u003c/p\u003e\n\u003chr\u003e\n\u003ch3\u003eMy Octoprint controller\u003c/h3\u003e\n\u003cp\u003eI mounted my octoprint controller to the shelving that I have my 3D printers on using double sided adhesive. Overall I am very impressed with how simple octoprint is and how well it works with my Anet A8 3D printer.\u003c/p\u003e\n\u003cimg src=\"/content/images/2017/07/IMG_1557.jpg\" alt=\"\"\u003e\n\u003cimg src=\"/content/images/2017/07/IMG_1555.jpg\" alt=\"\"\u003e\n\u003cimg src=\"/content/images/2017/07/IMG_1556.jpg\" alt=\"\"\u003e\n","excerpt":"","metaTitle":"","metaDescription":"","status":"published","featured":false,"publishedAt":"2017-07-21T02:18:30Z","authorId":"190160de54f2192bd5b8734ec8808086","authorName":"Daniel Chote","authorSlug":"daniel","heroMediaId":"51fc6de0bddbd56cfebbf24db5659465","projectId":"","tags":[{"id":"b529314e428273696b02c474dcf56132","name":"Raspberry Pi","slug":"raspberry-pi"},{"id":"f9ecad390ed765b2bb4ae55d9faa7311","name":"Octoprint","slug":"octoprint"},{"id":"e58b4788e99c9f53befd1e47b8073250","name":"3D Printing","slug":"3d-printing"}],"createdAt":"2026-10-18T13:16:27Z","updatedAt":"2026-10-18T13:16:27Z"},{"id":"bfd1ec8875b9ff5807a23c1e5275e668","siteId":"projectable","slug":"my-sim-racing-motion-rig-version-2","title":"My sim racing motion rig version 2","markdown":"I have really enjoyed having a motion simulator platform for sim racing. It's fairly close to real world racing, but costs a LOT less money, and there isn't that risk of serious injury, or death ☠️\n\nI started down this path almost 3 years ago, and with the Oculus Rift bringing VR in to the picture, I am truly hooked.\n\nVersion 1 of the motion rig was thrown together using 80/20 extrusion that I already had, and it was pieced together without any real planning. One of the biggest drawbacks of version 1 was its inability to easily adjust for other drivers, especially my kids. There were a few other shortcomings: it was uncomfortable, it flexed and squeaked, the rear traction loss wasn't smooth, the rear speakers flopped around like crazy, and so on...\n\n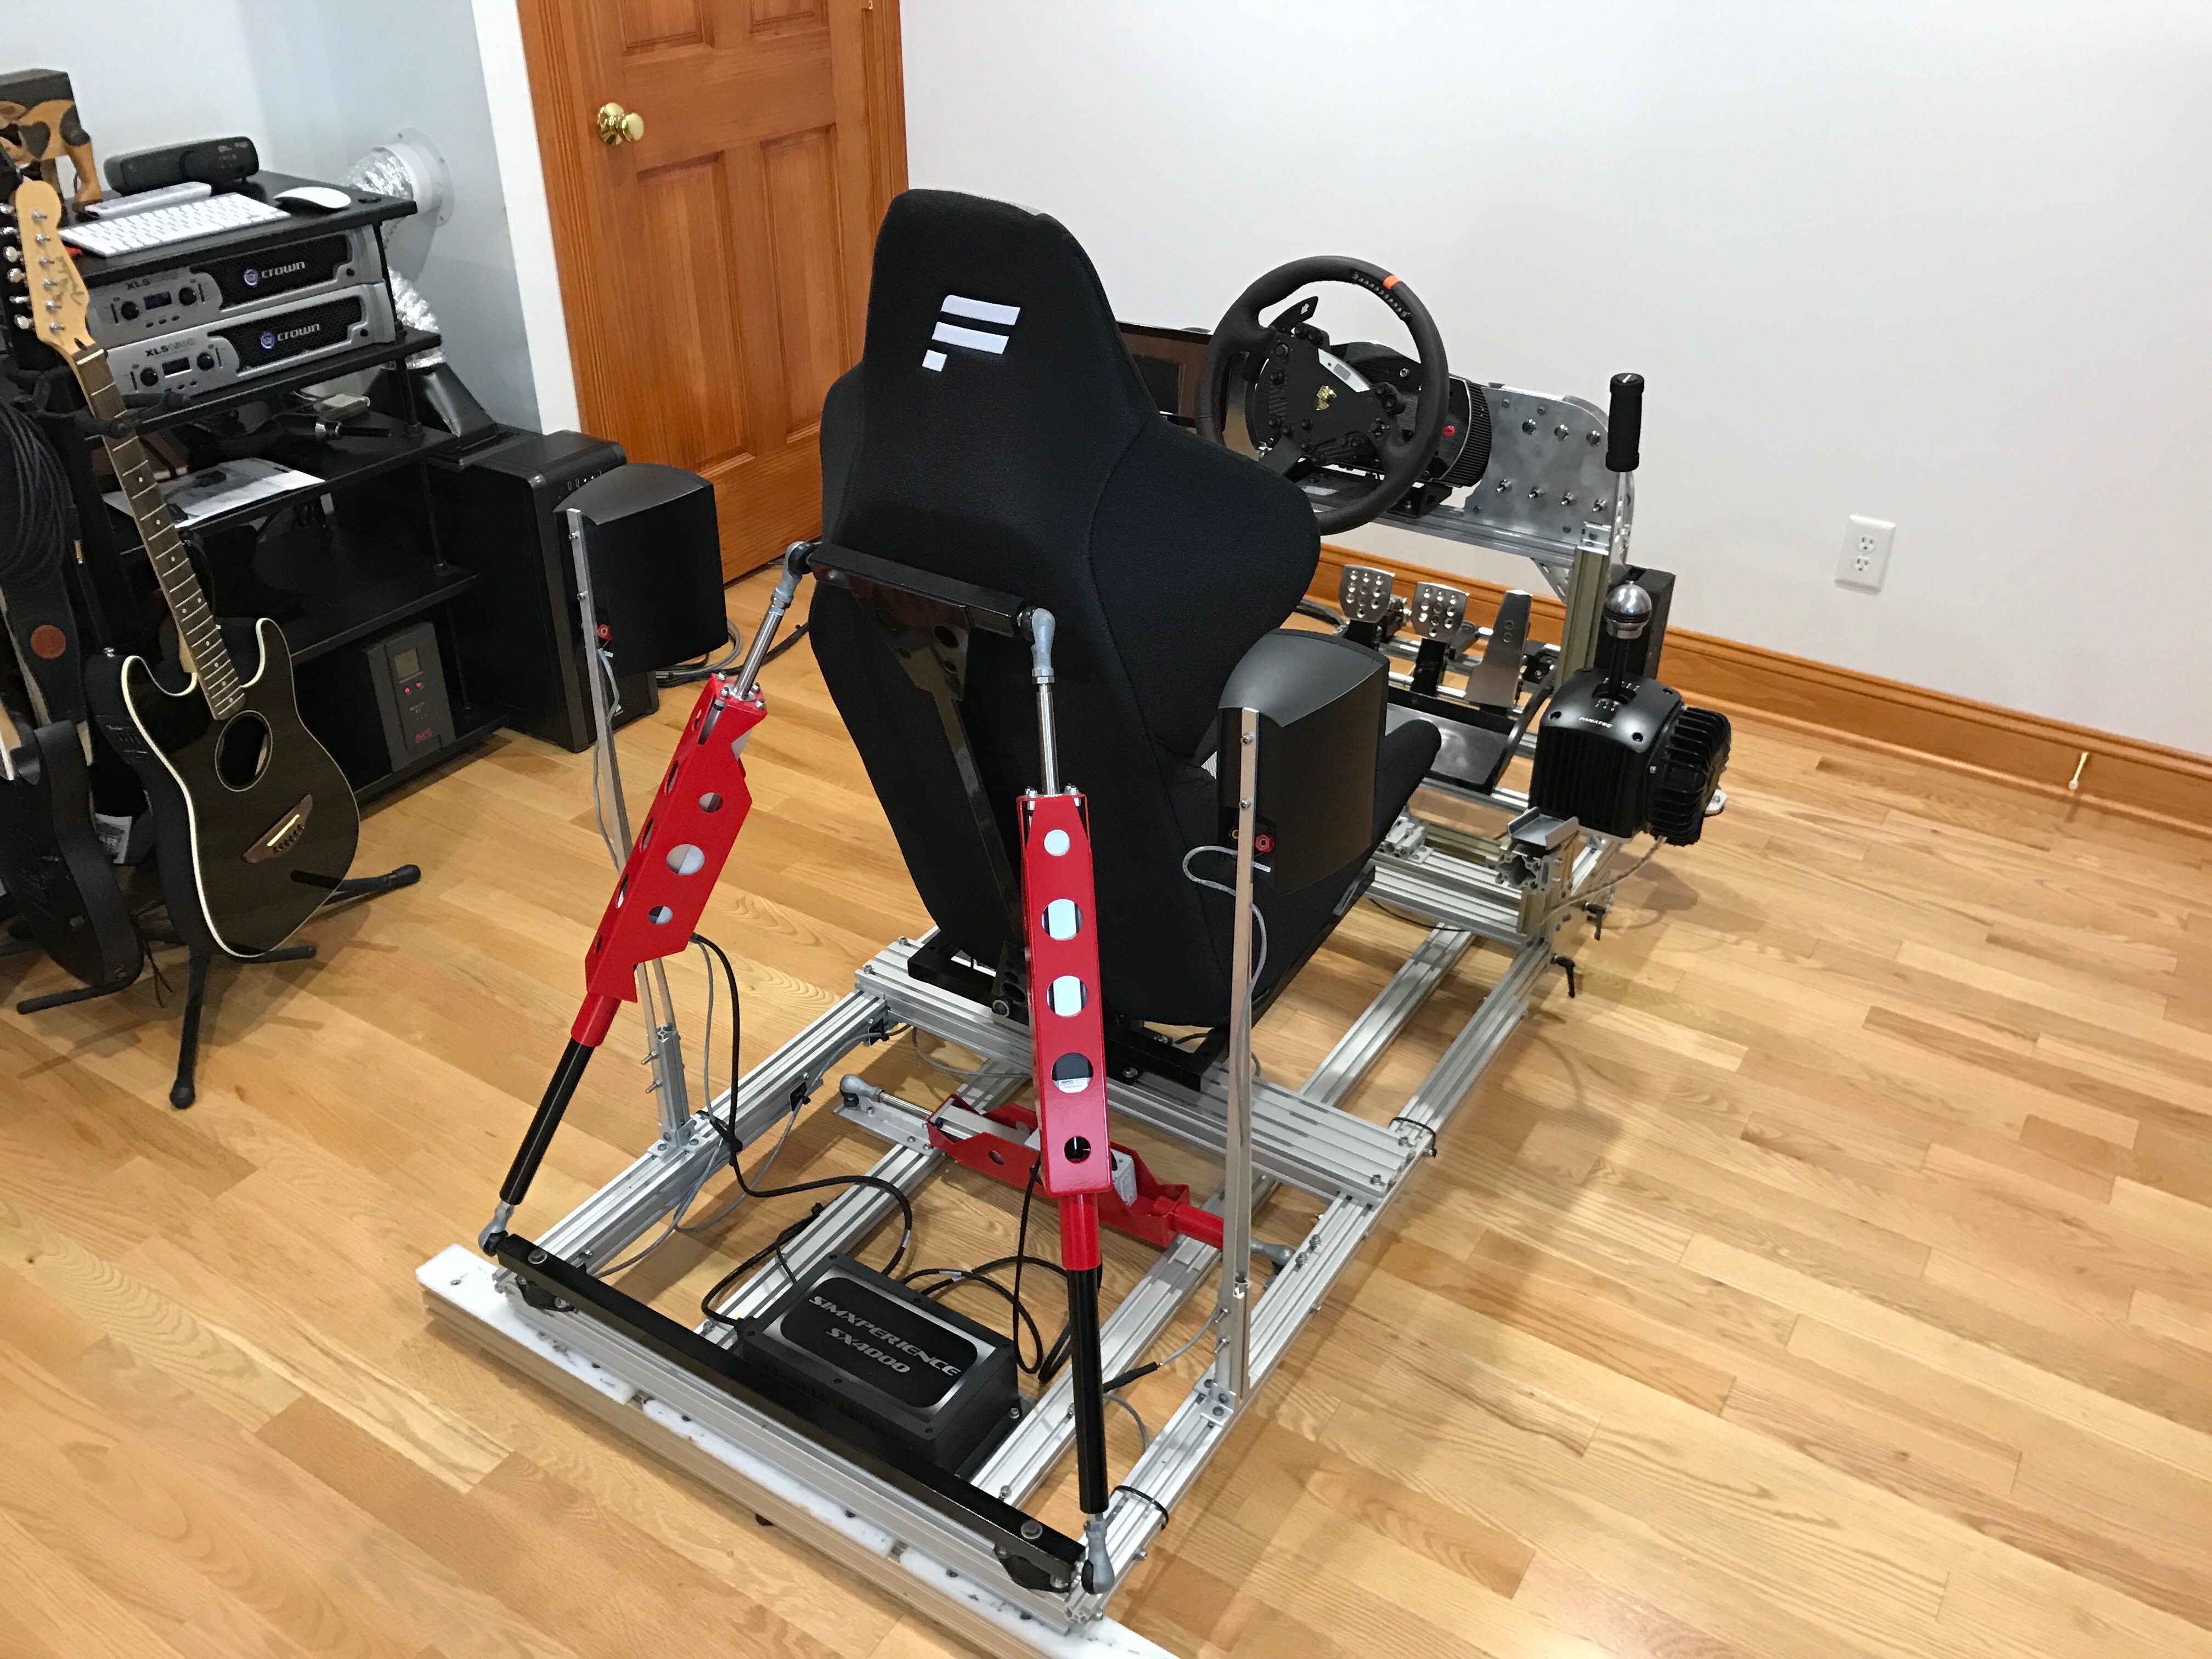\n\nI decided to spend a little while thinking about how to best resolve the big issues, and turned to Fusion360 to design a quick mockup of the main features.\n\n\u003cp align=\"center\"\u003e\n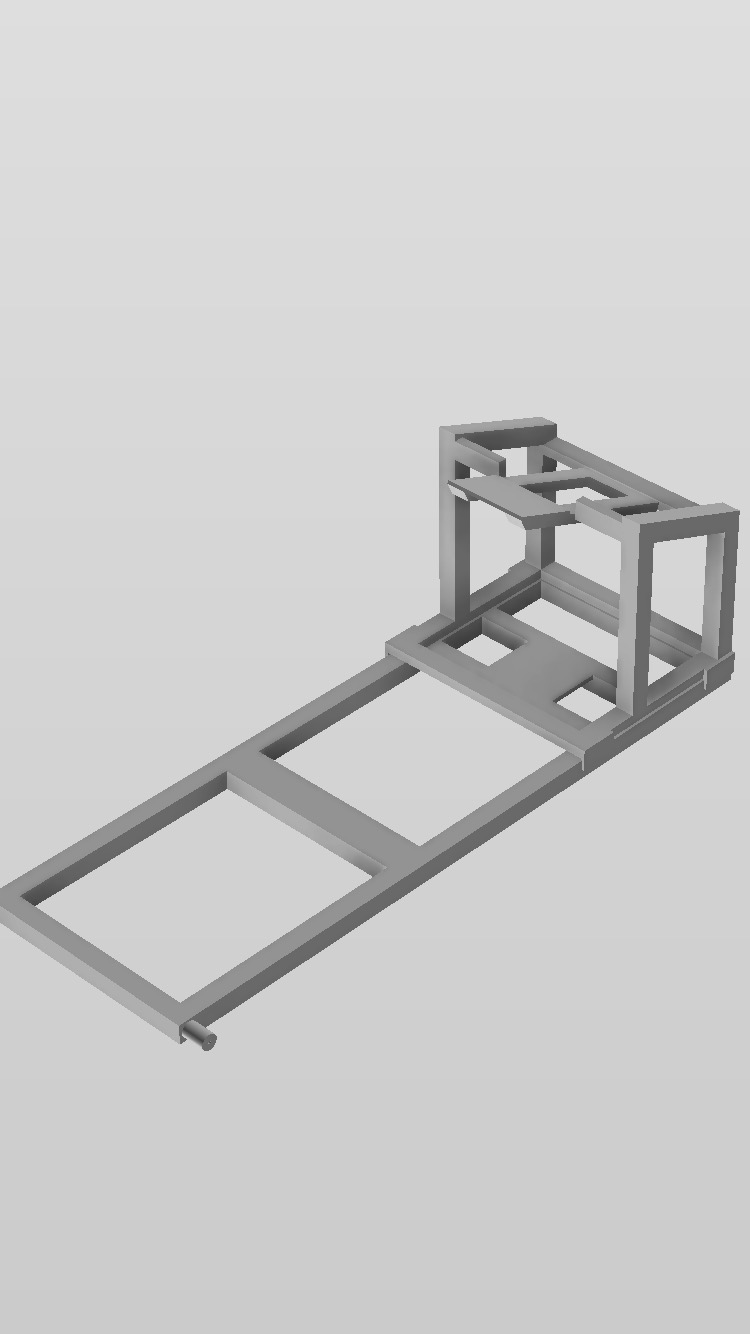\n\u003c/p\u003e\n\nThe new design became the basis of what I ordered from [80/20 Inc](https://8020.net): Extrusion, linear movement components for the sliding top frame, and the hinges for the steering bracket.\n\nOnce the extrusion arrived, I quickly mocked up how everything would fit together and came up with an implementation plan.\n\n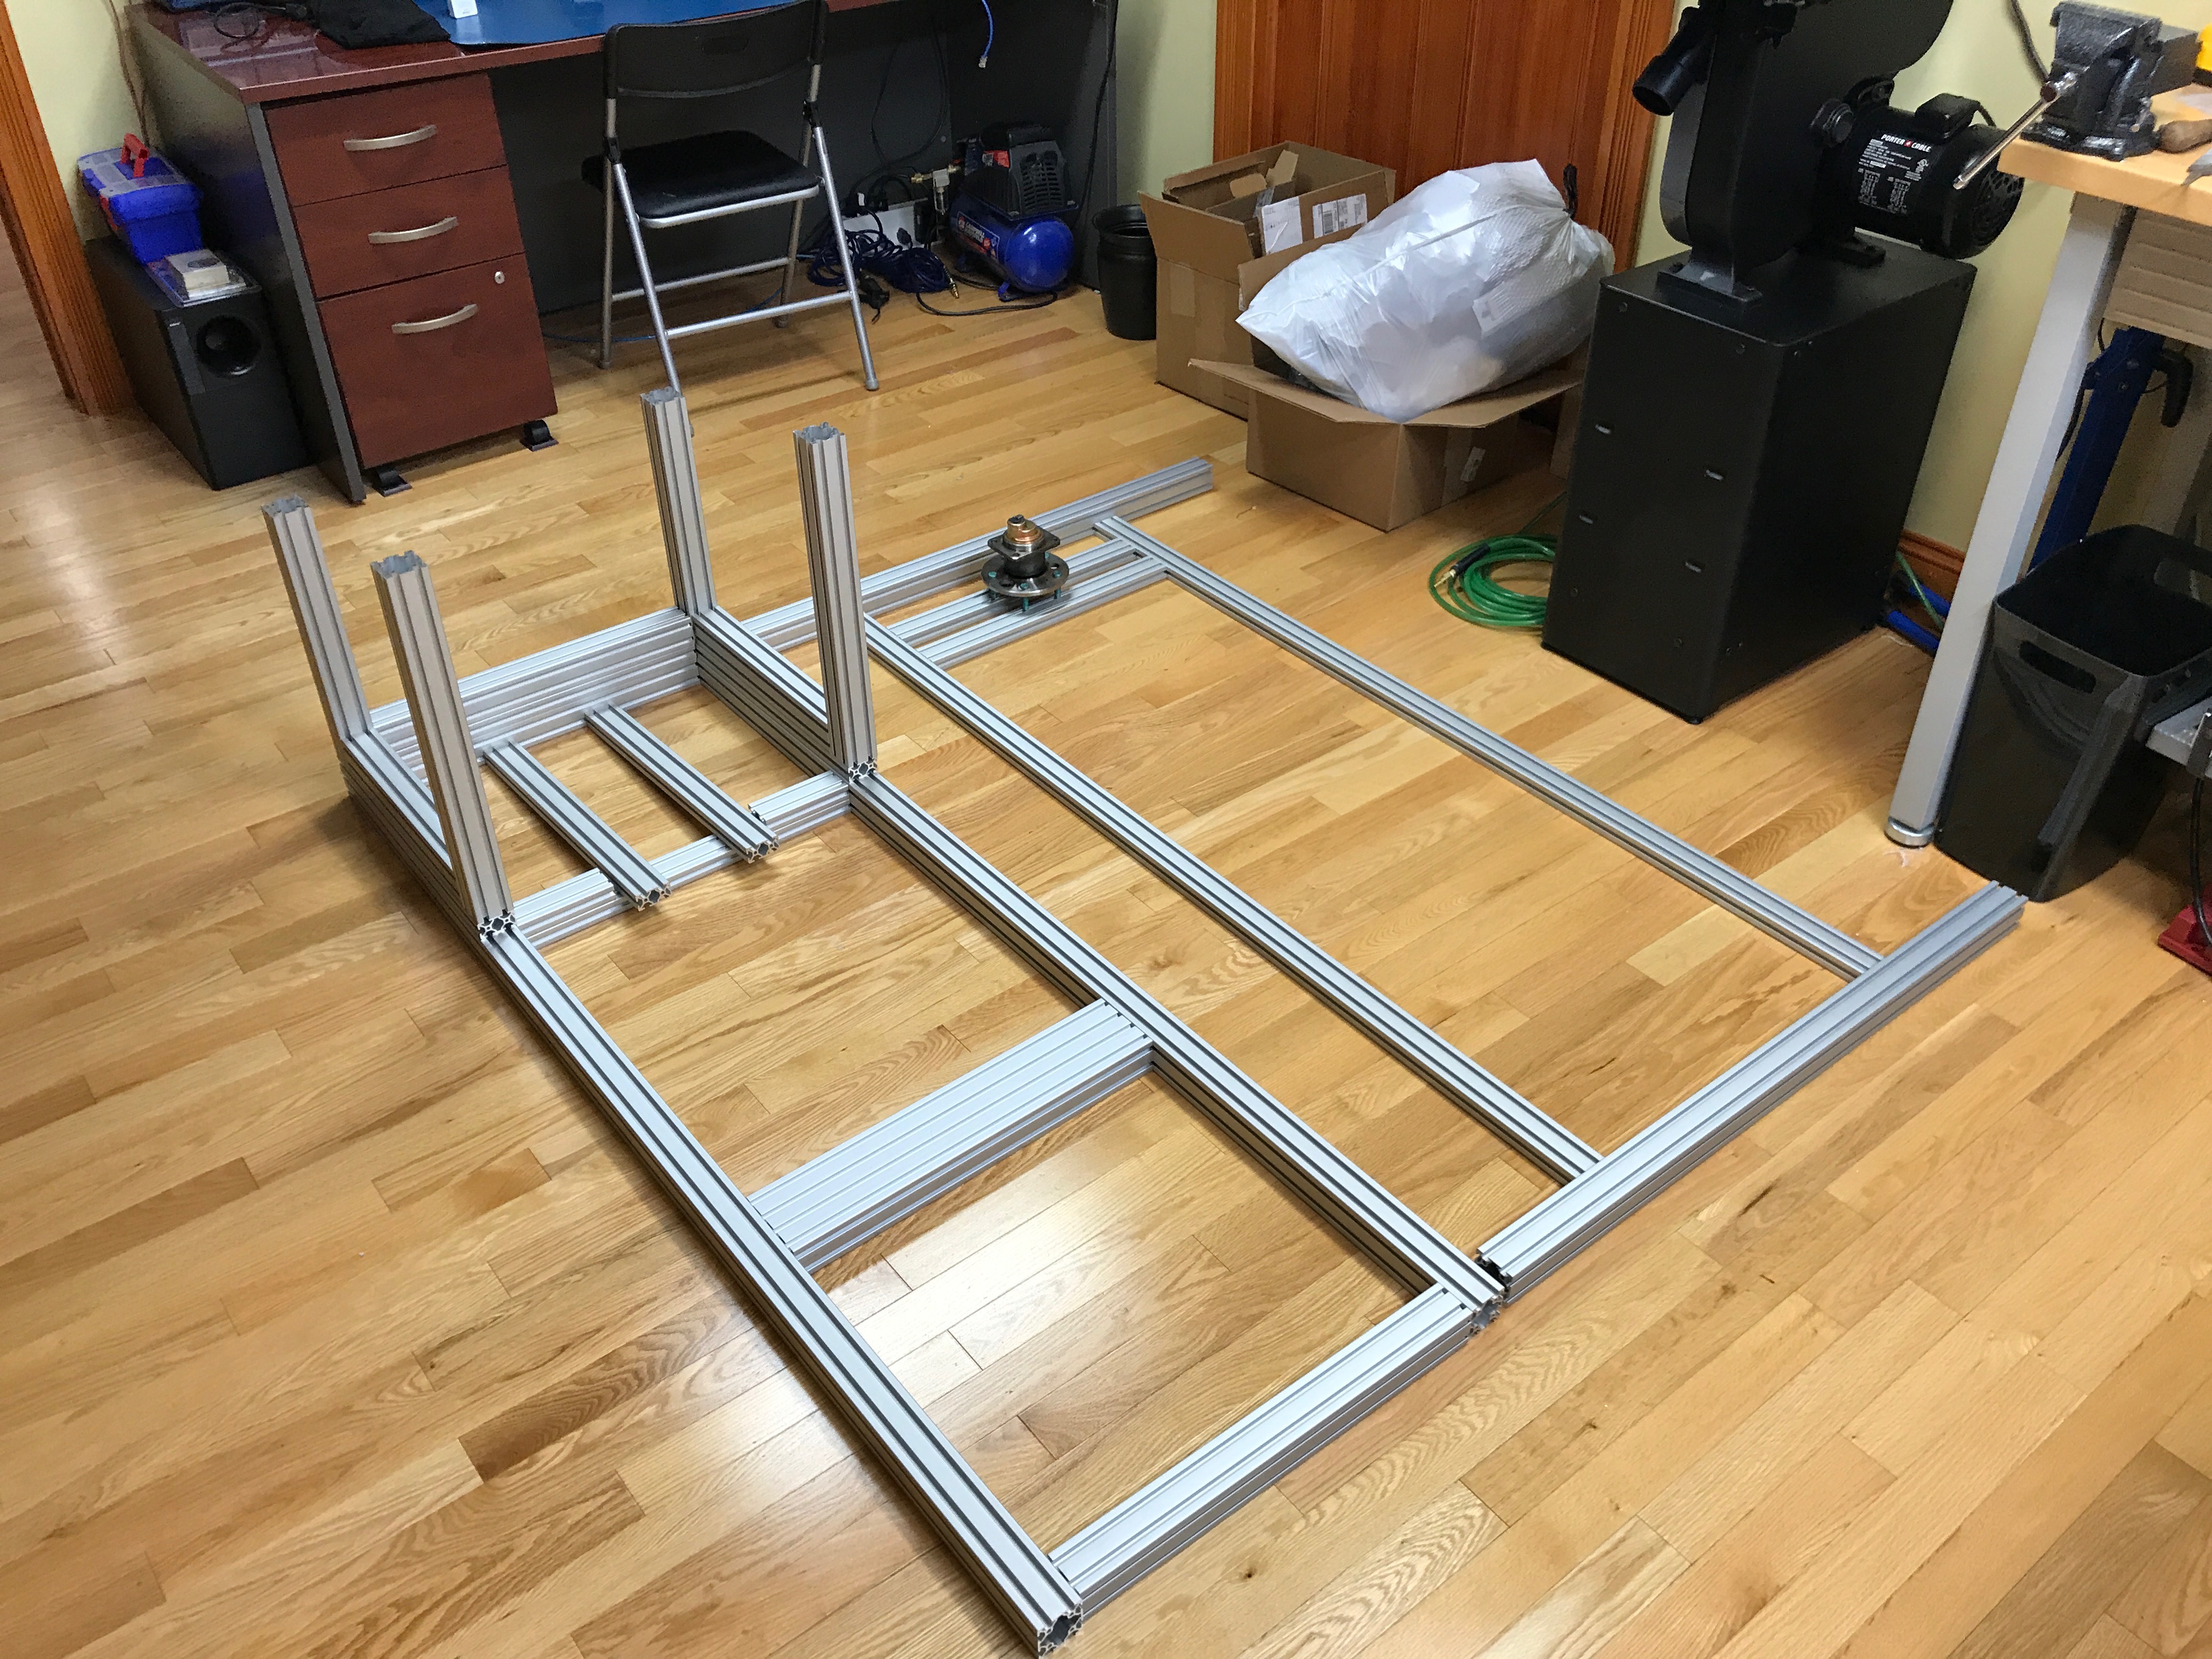\n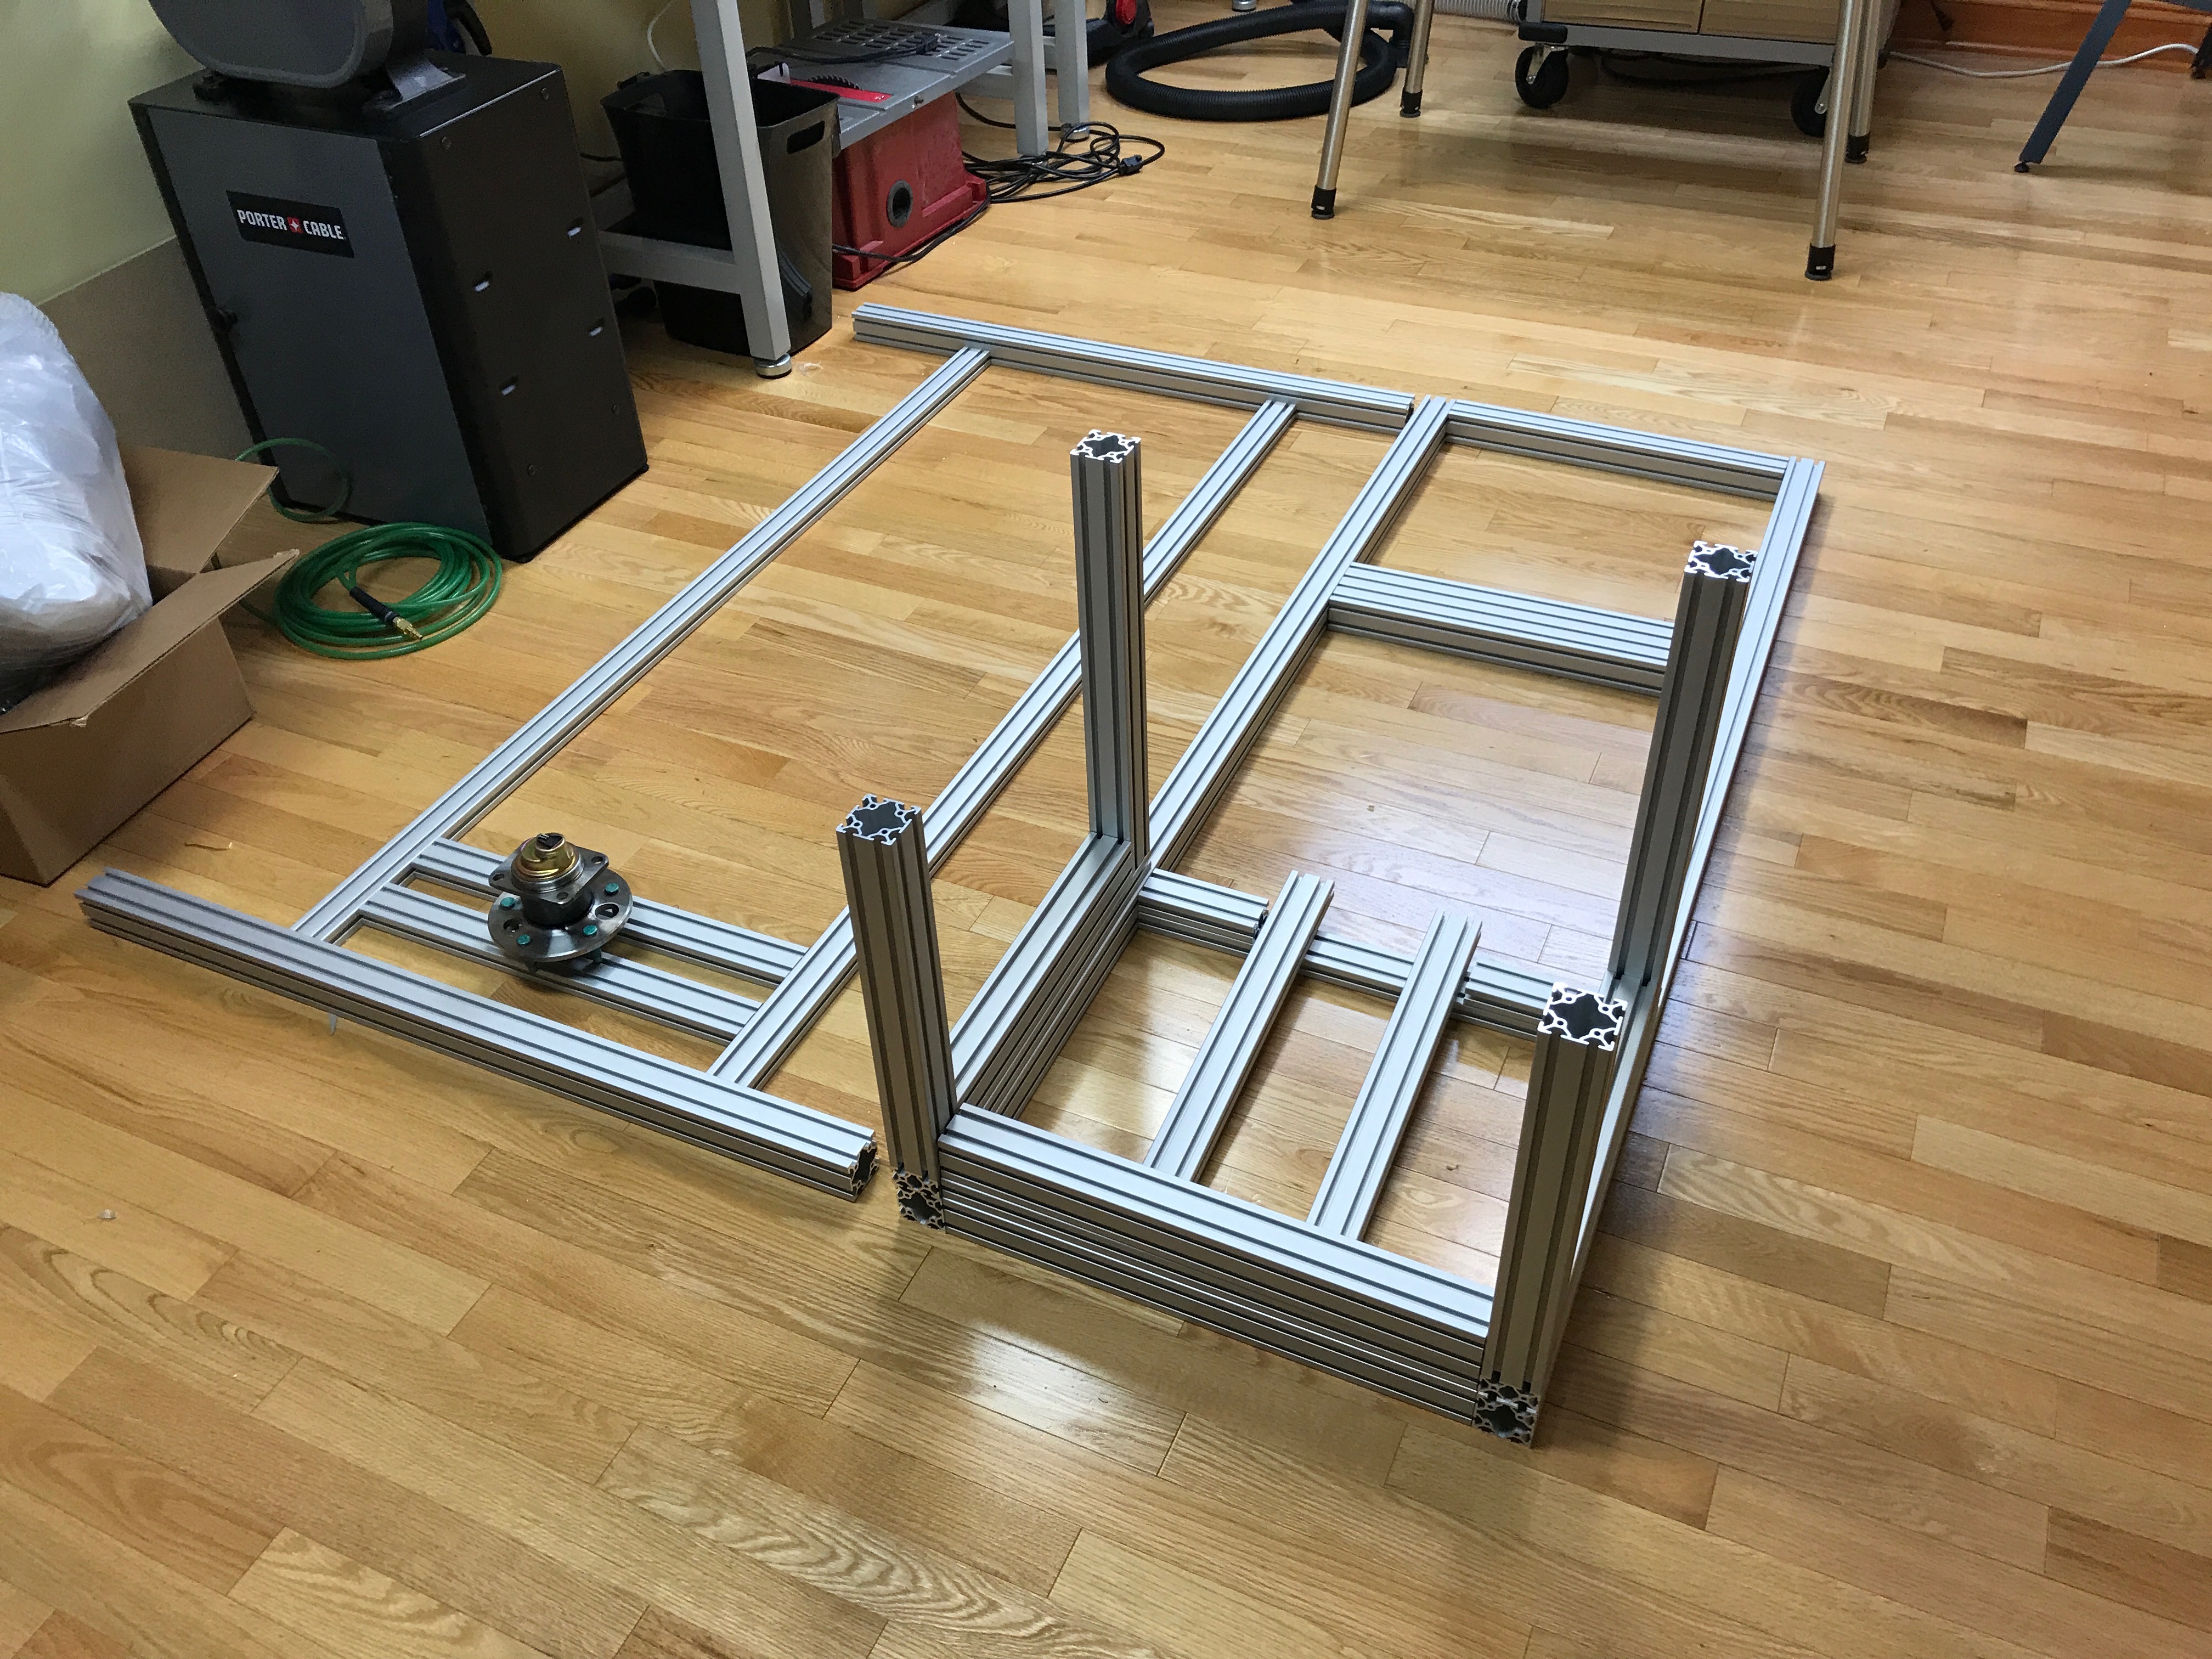\n\nStarting with the lower frame, I came up with a process of thread tapping, drilling, and milling to piece everything together.\n\n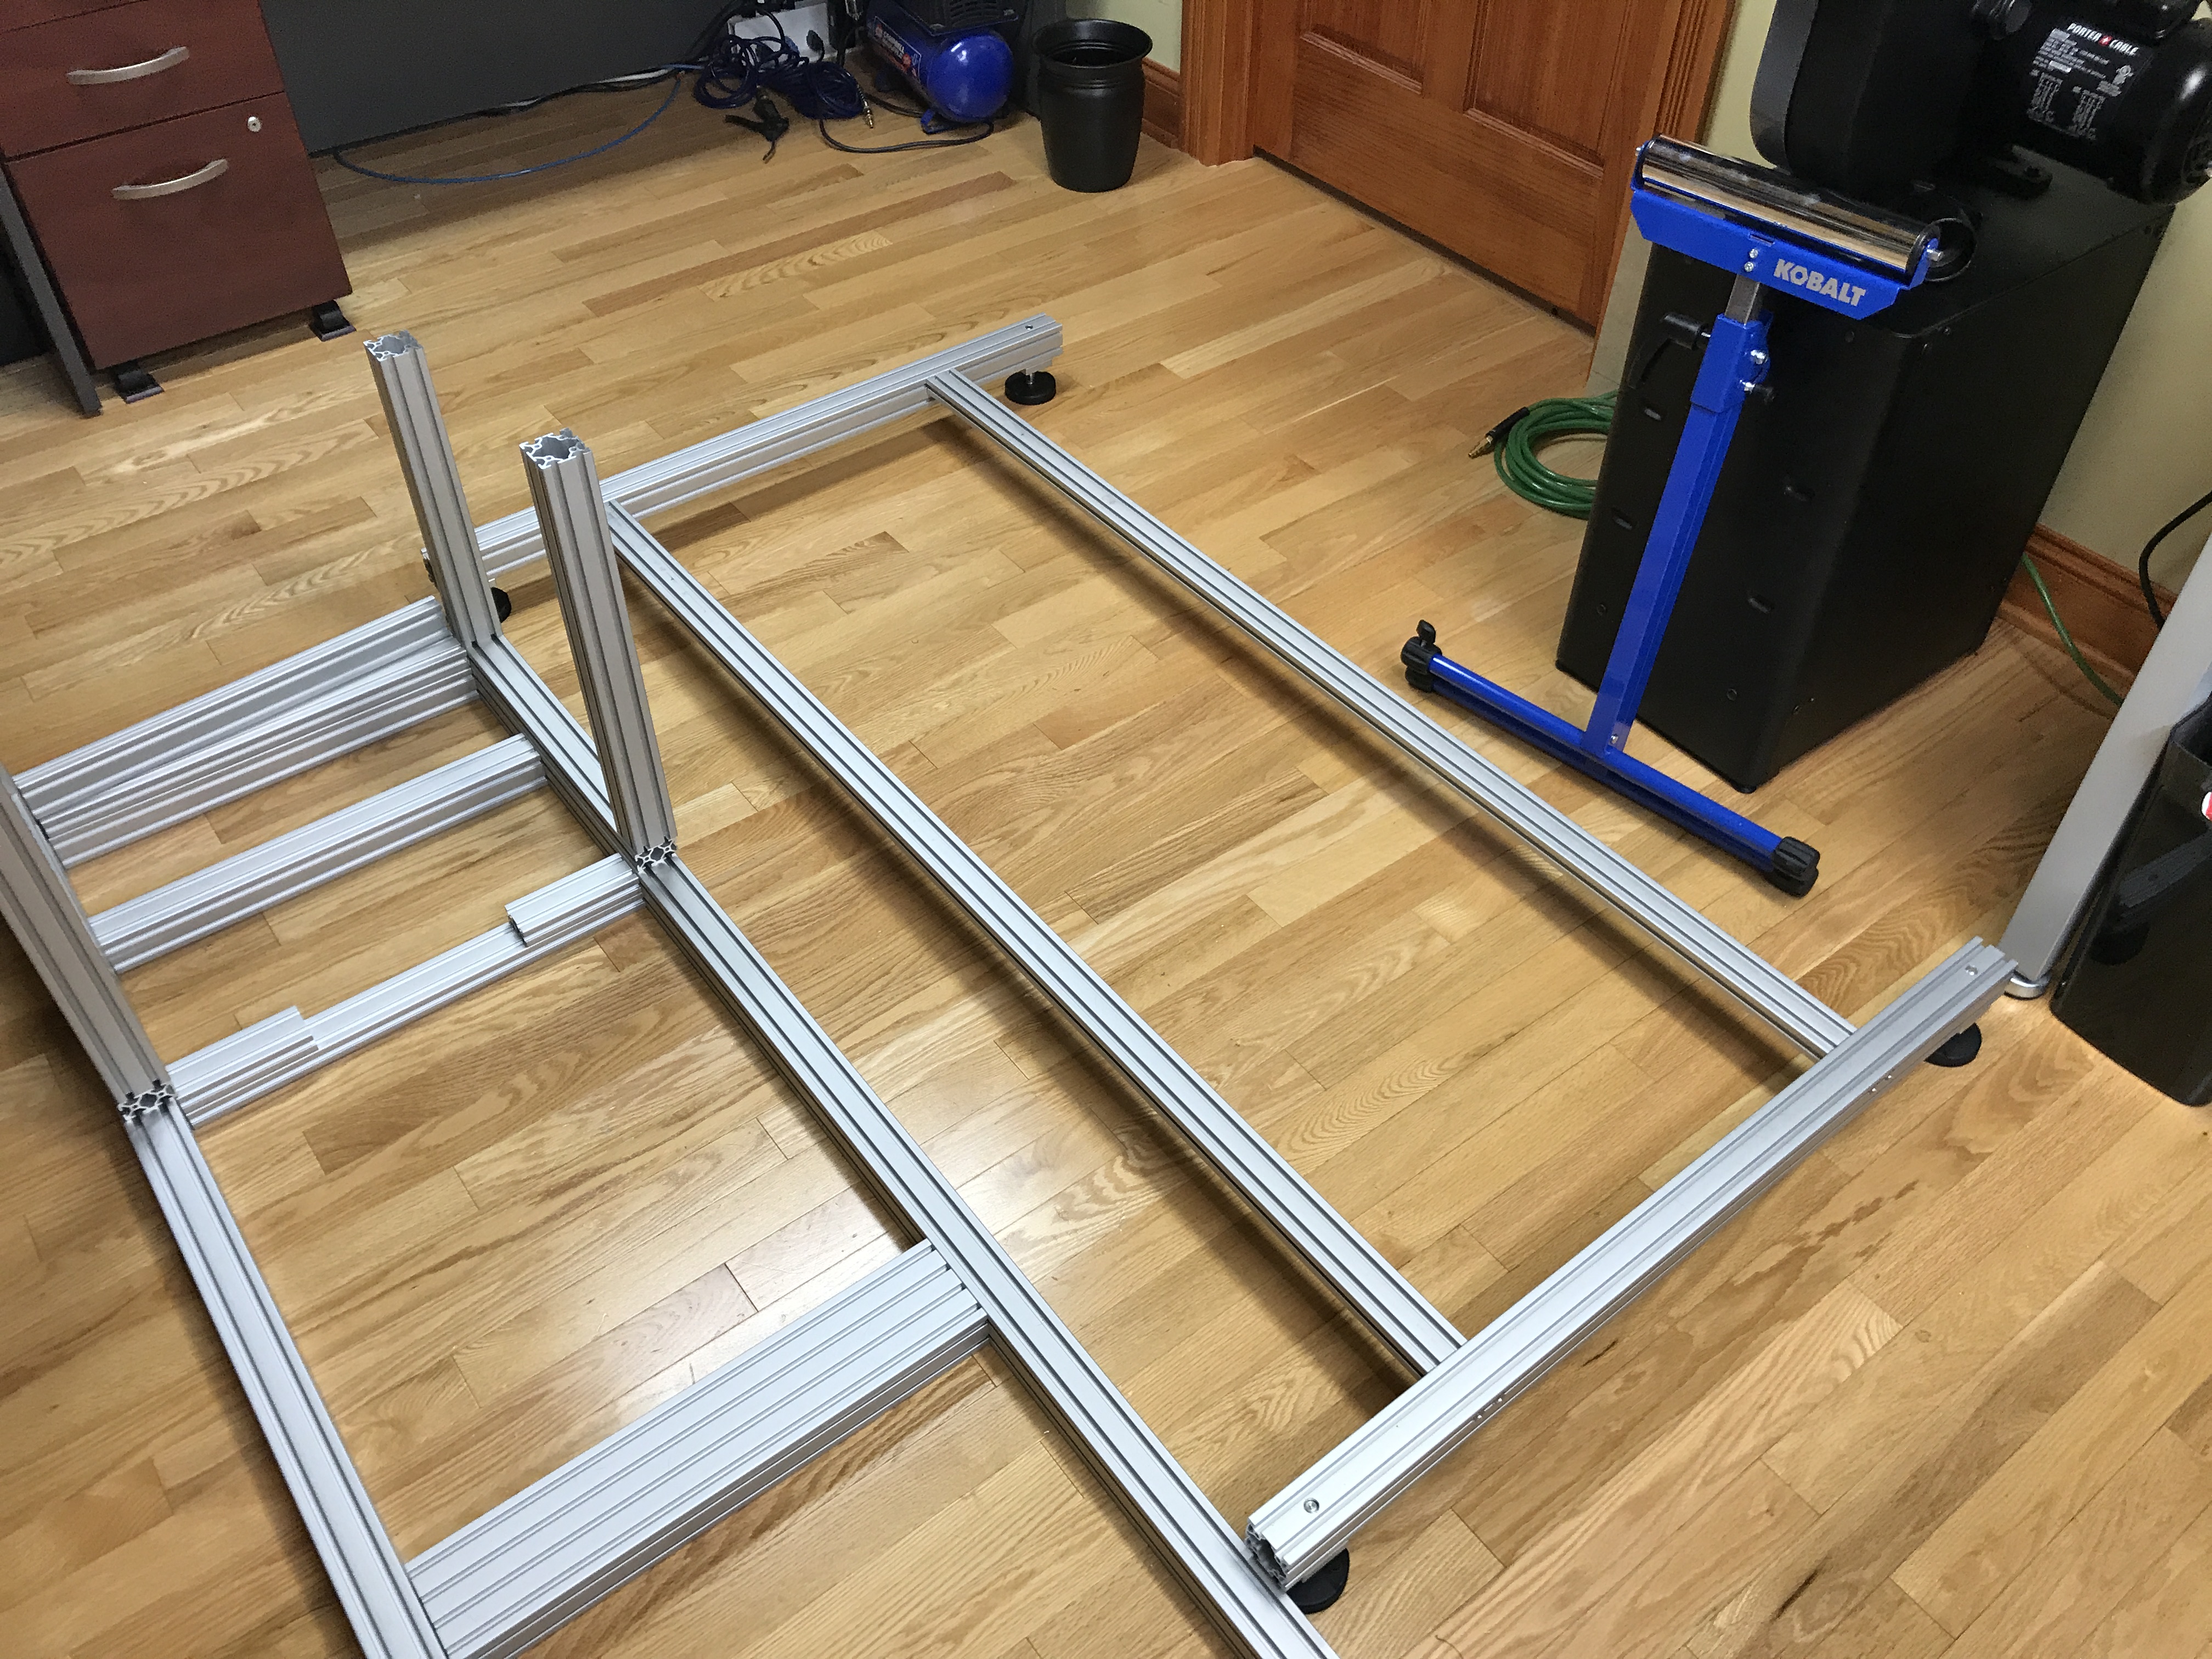\n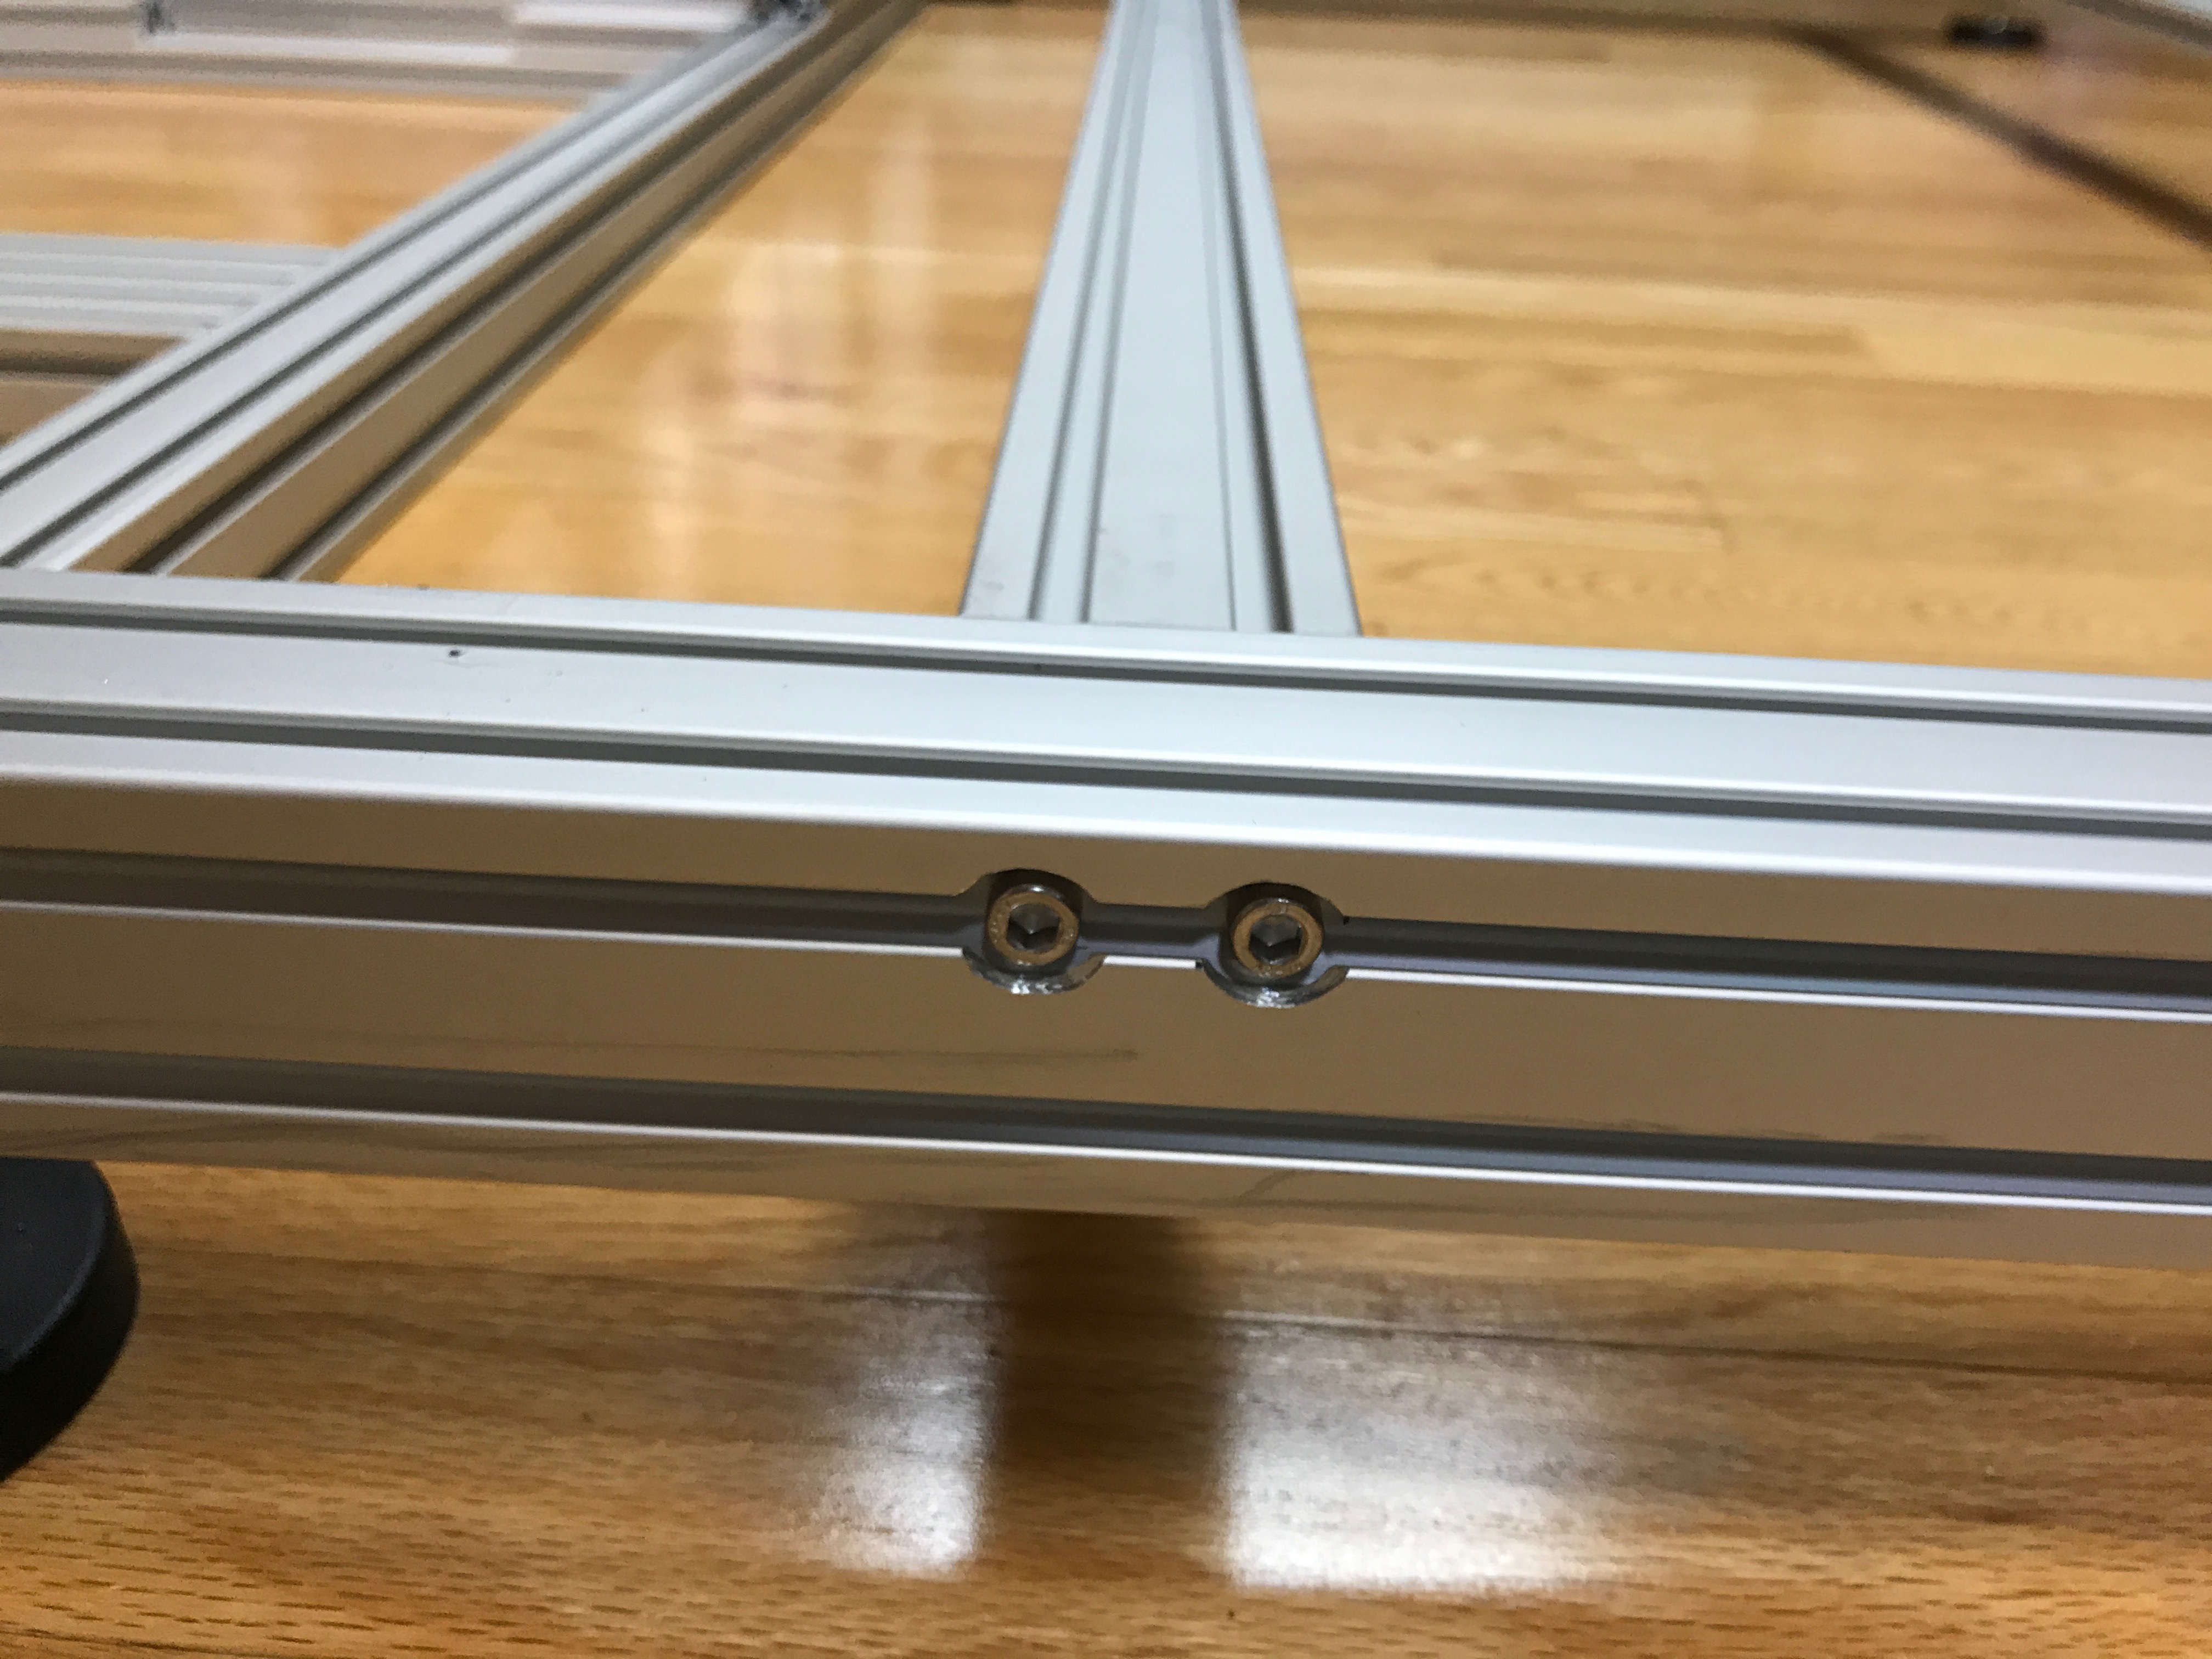\n\nUsing a mill bit in my drill press, I was able to notch out the recesses so that the bolt heads sat flush to the edge of the extrusion.\n\n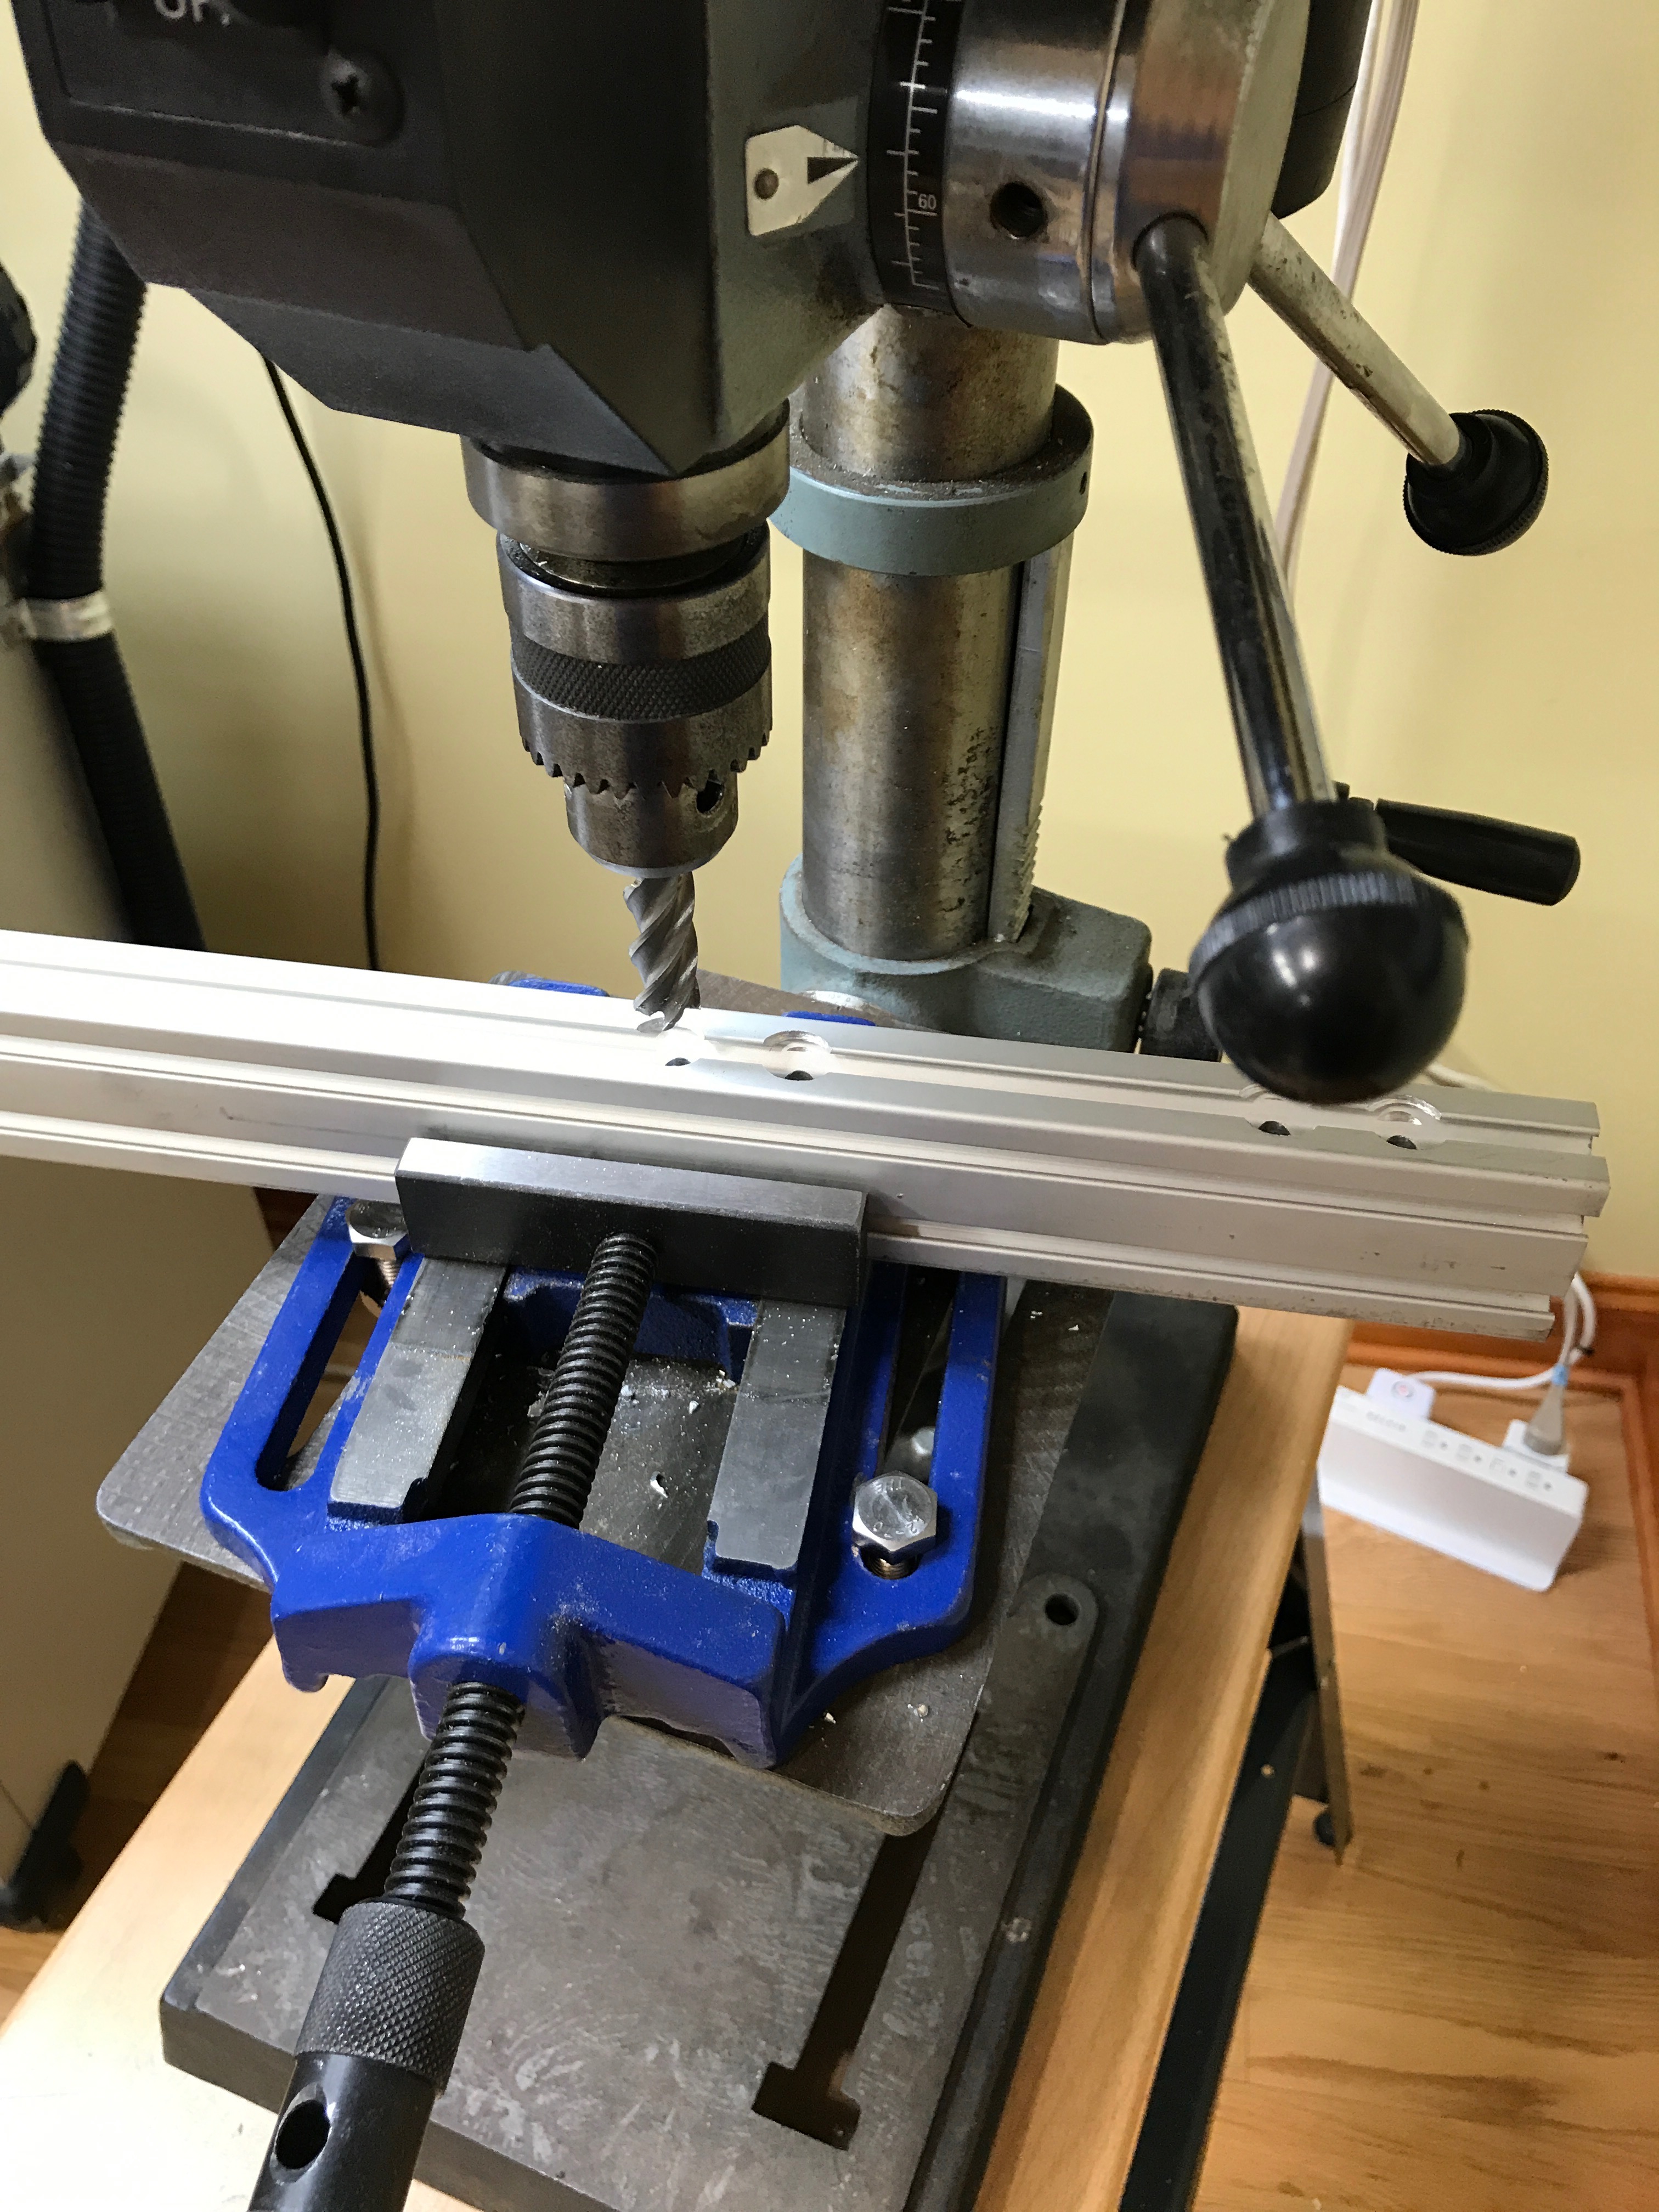\n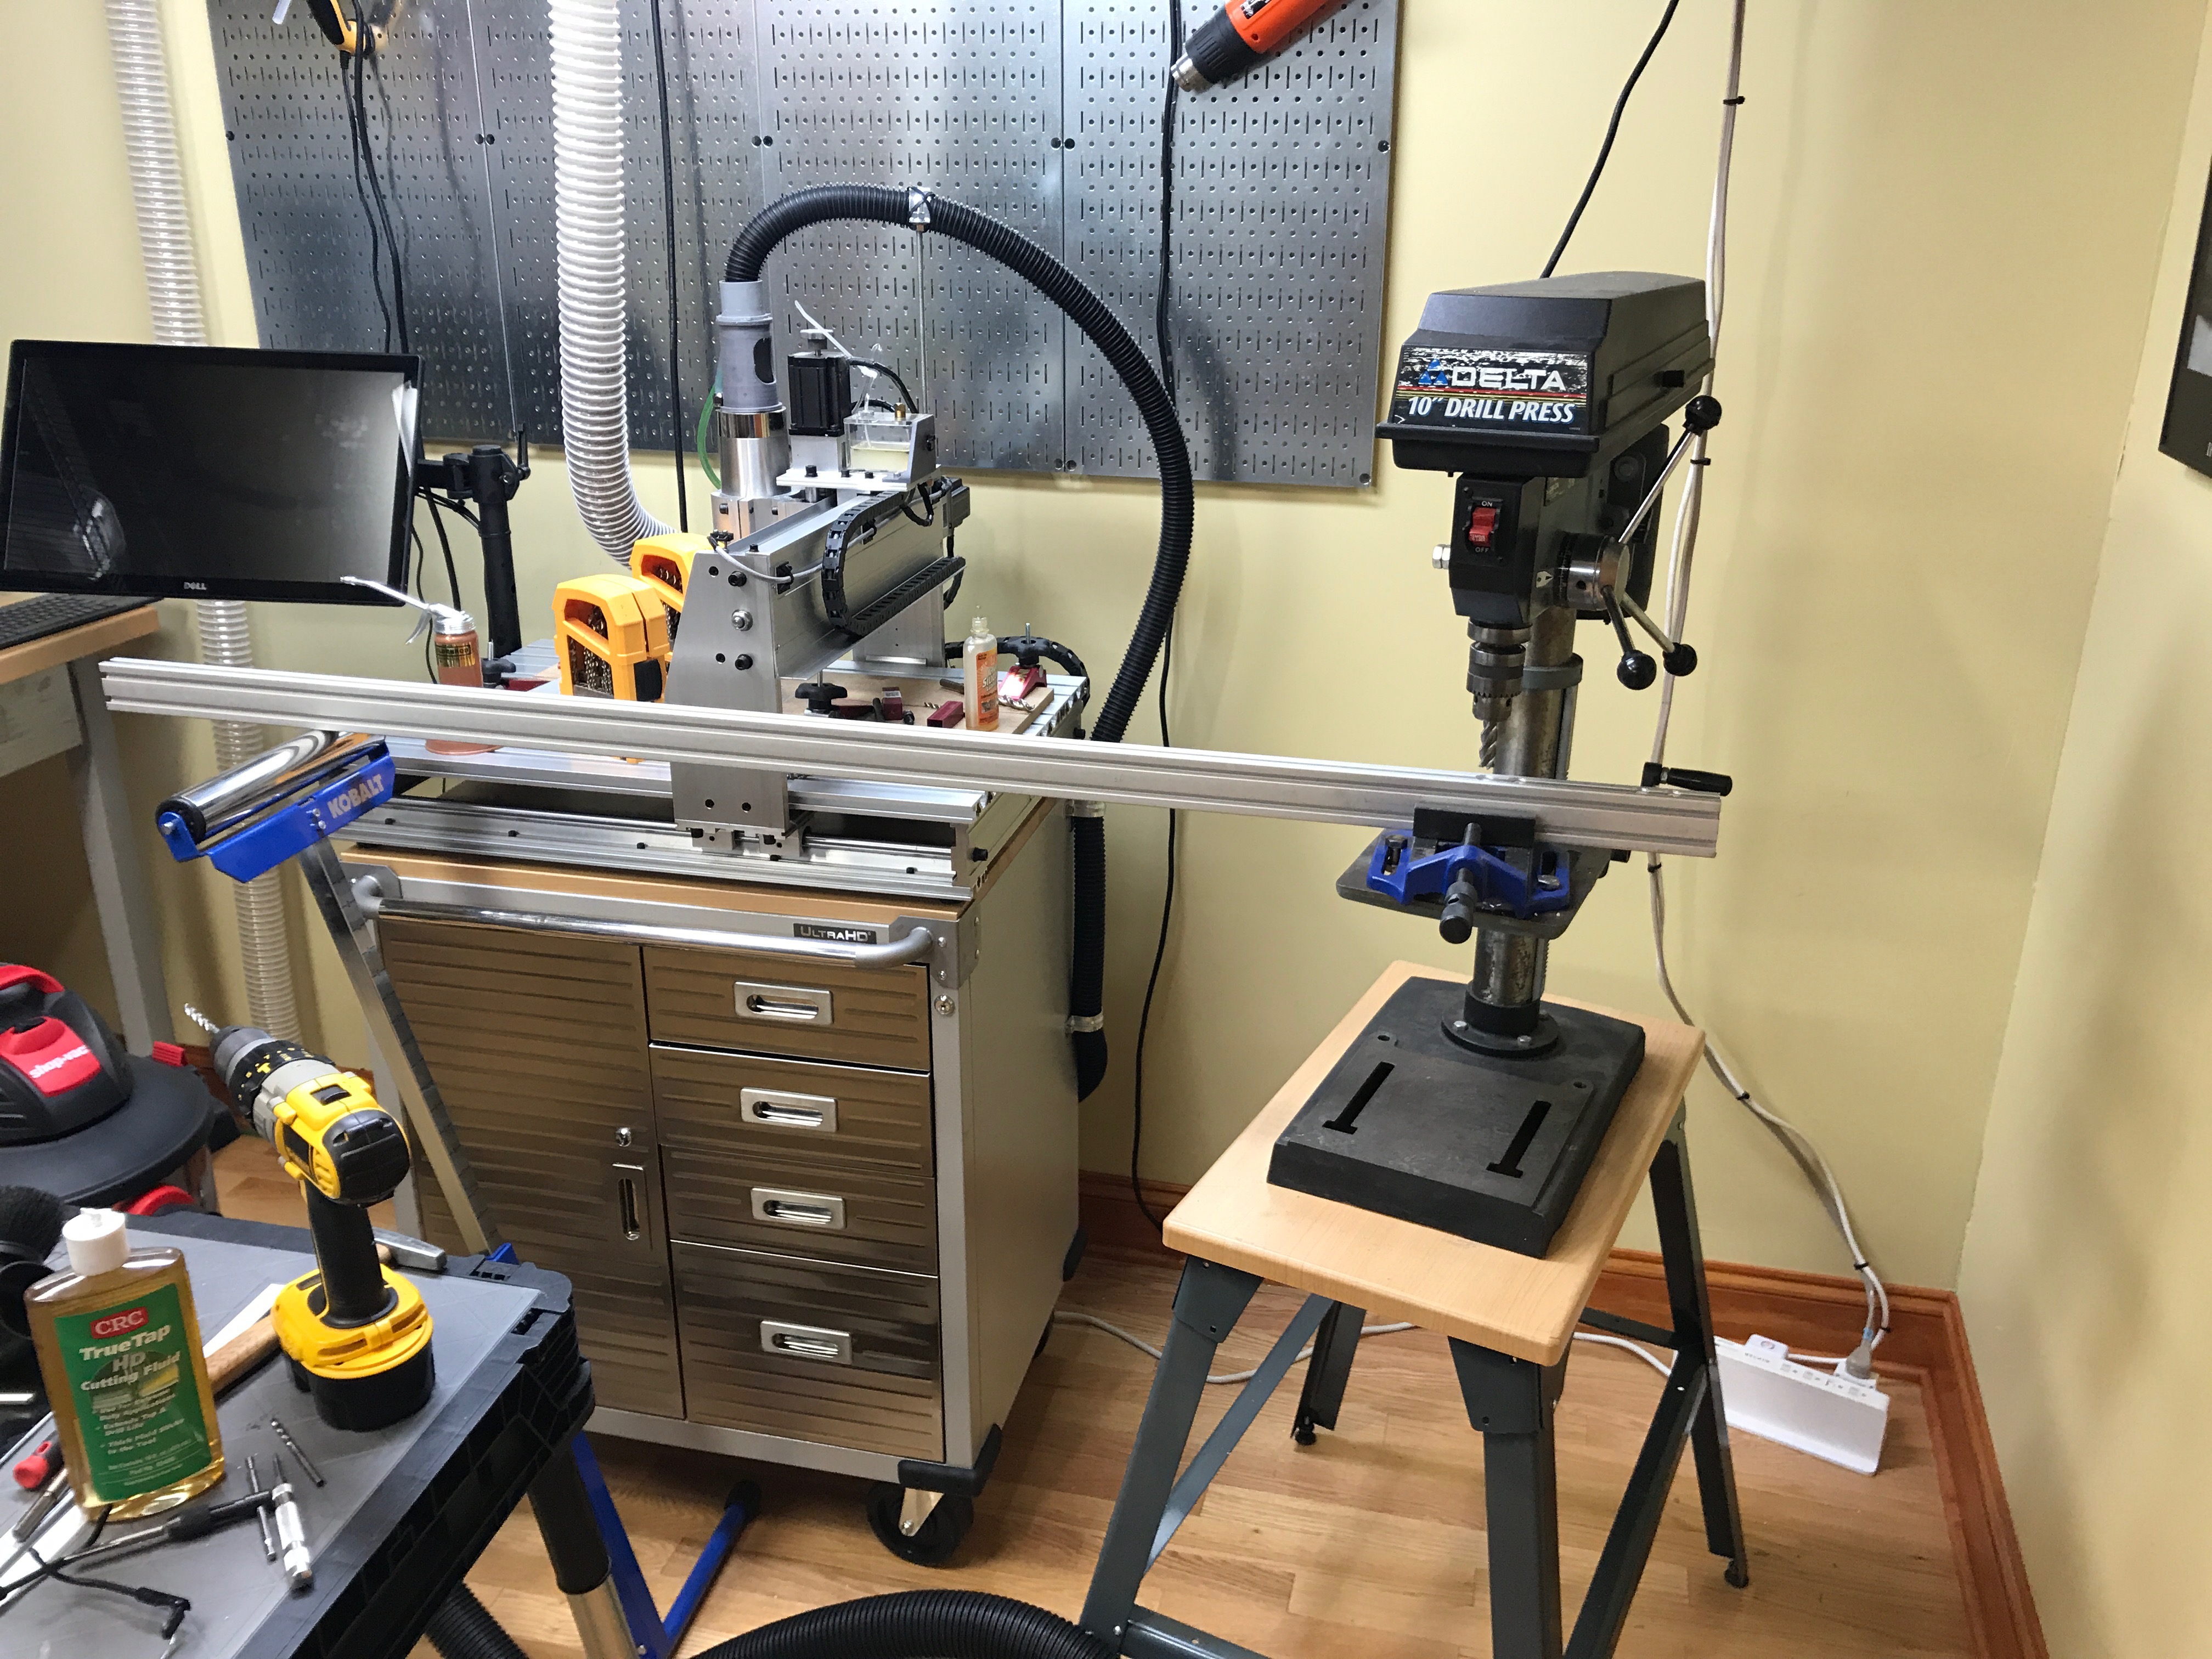\n\nThis worked out nicely, although my drill press was a little too loose to provide the most accurate cutting. The drill shaft moved all over the place, leaving some of the recesses a little out of alignment.\n\nNext was building the mid frame joint. The lower and mid frames were attached together using a GM wheel hub that I picked up on eBay for $20 shipped.\n\n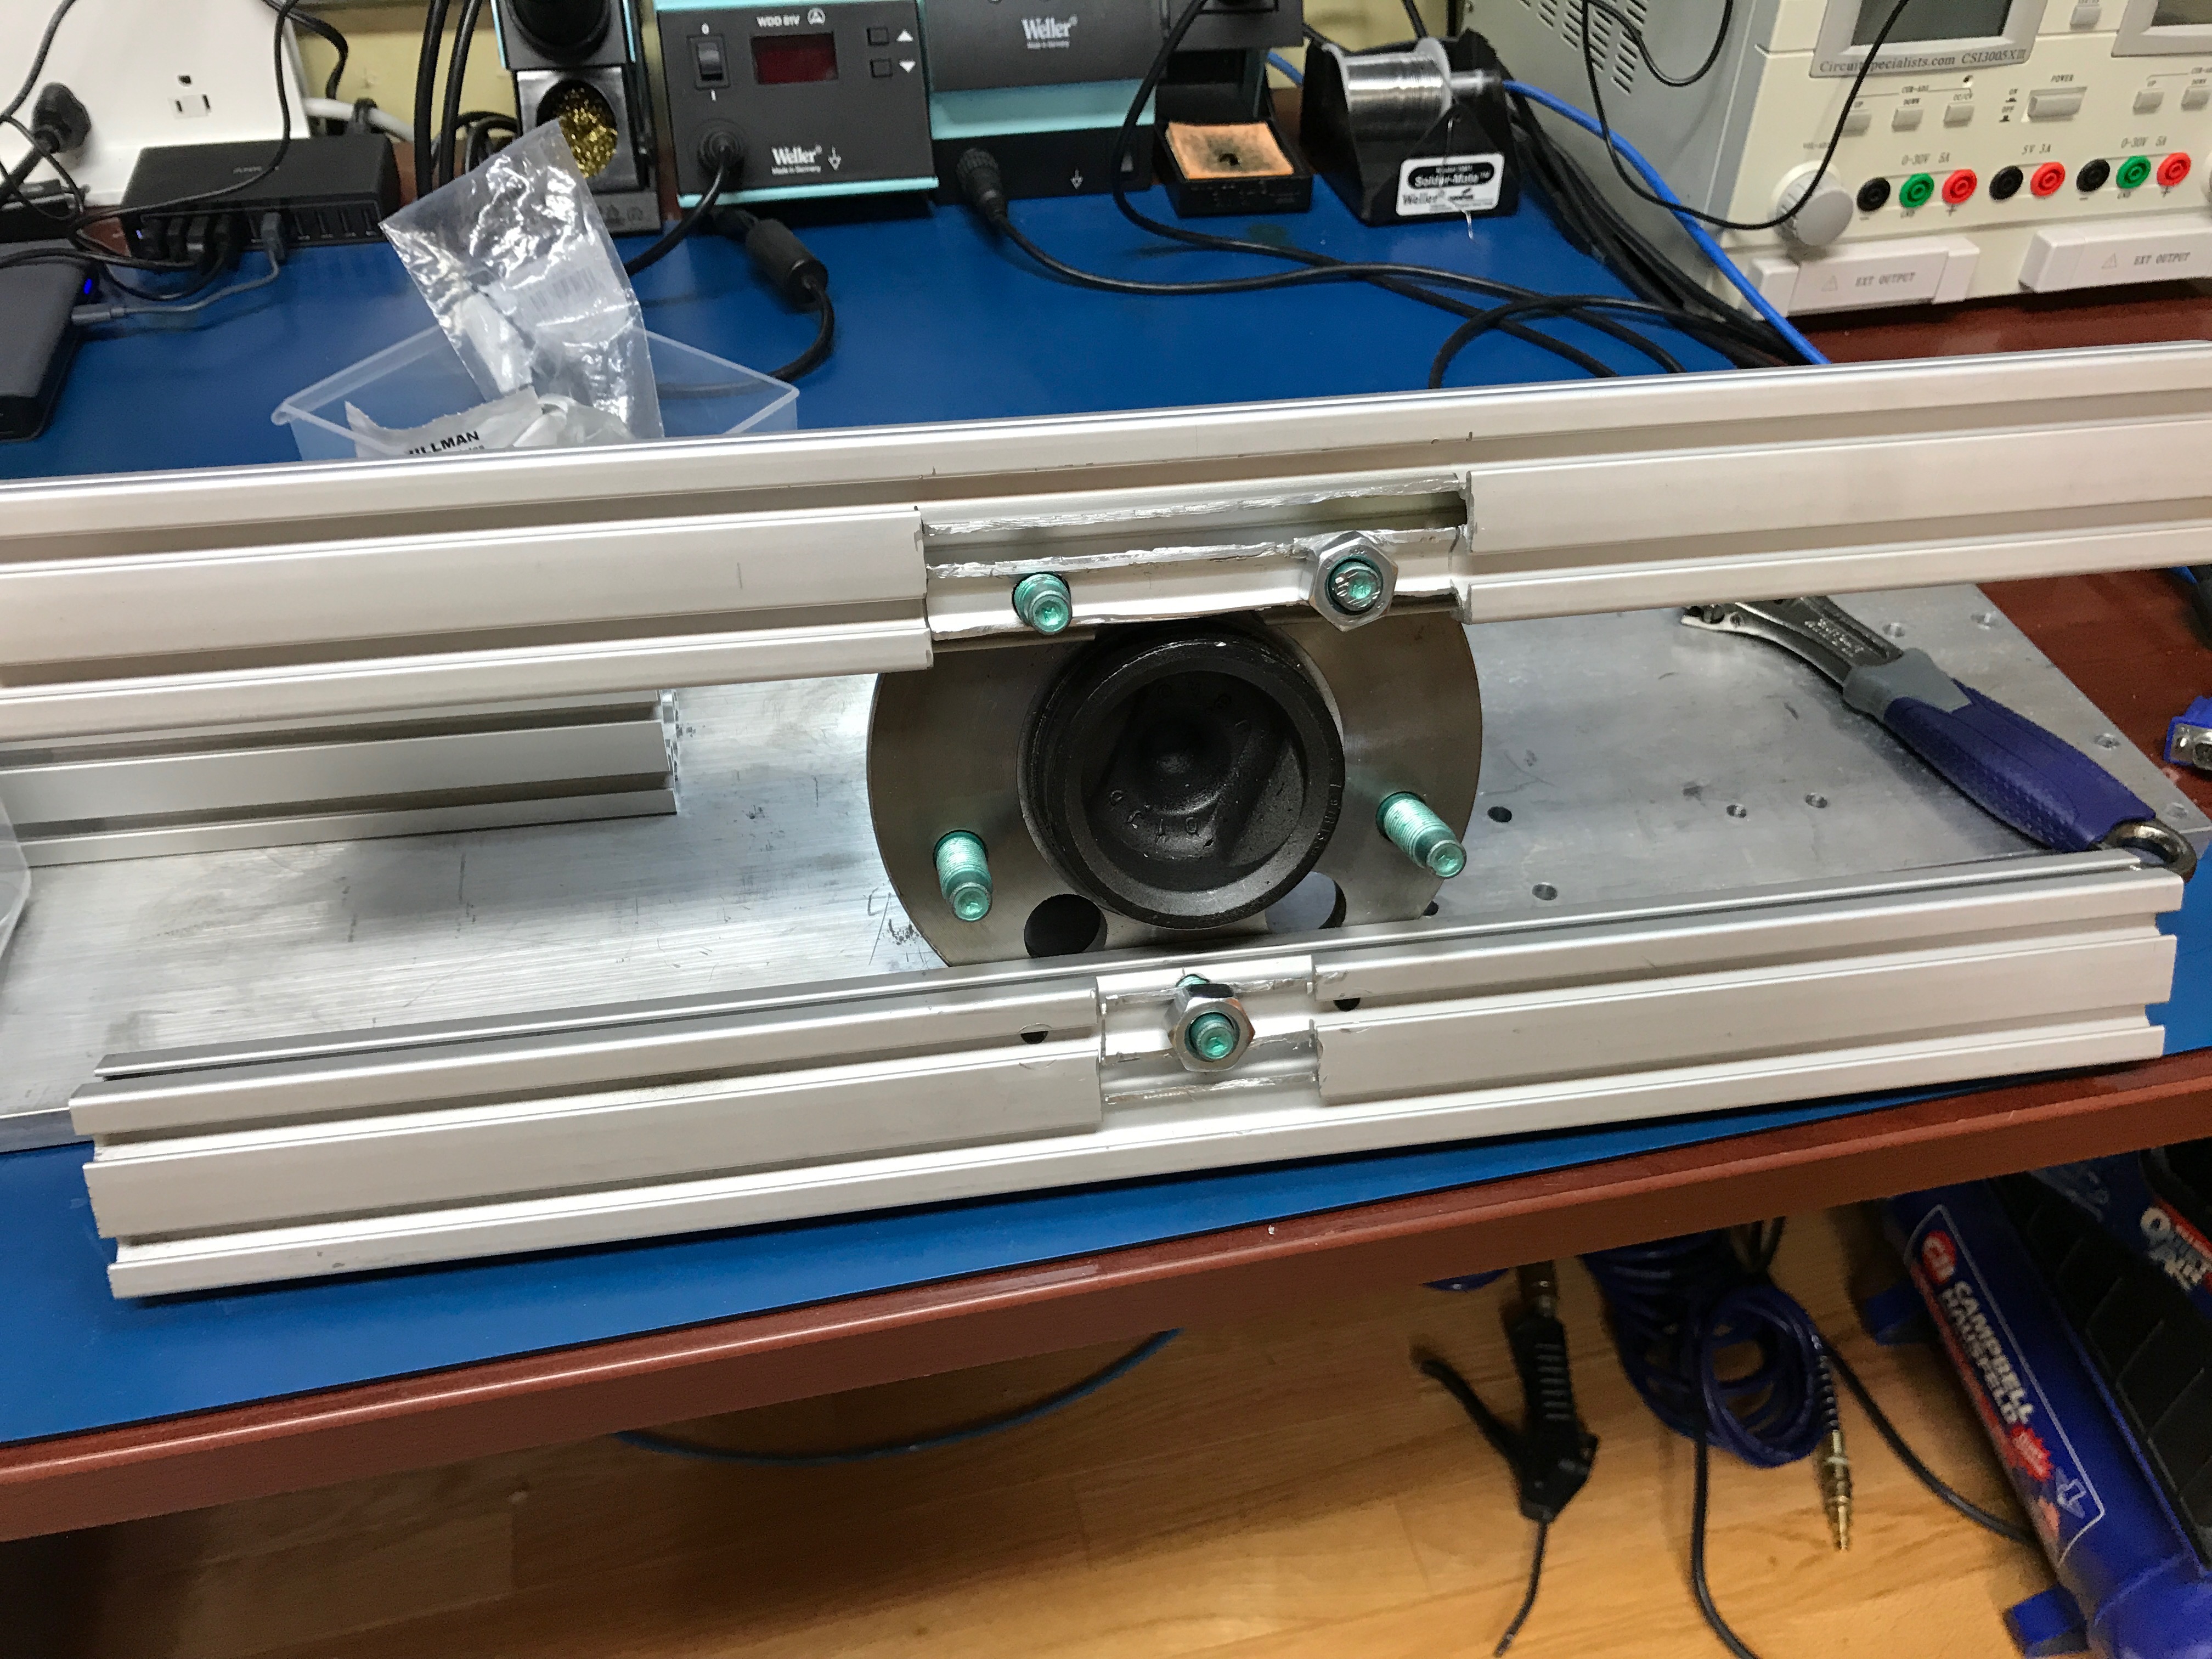\n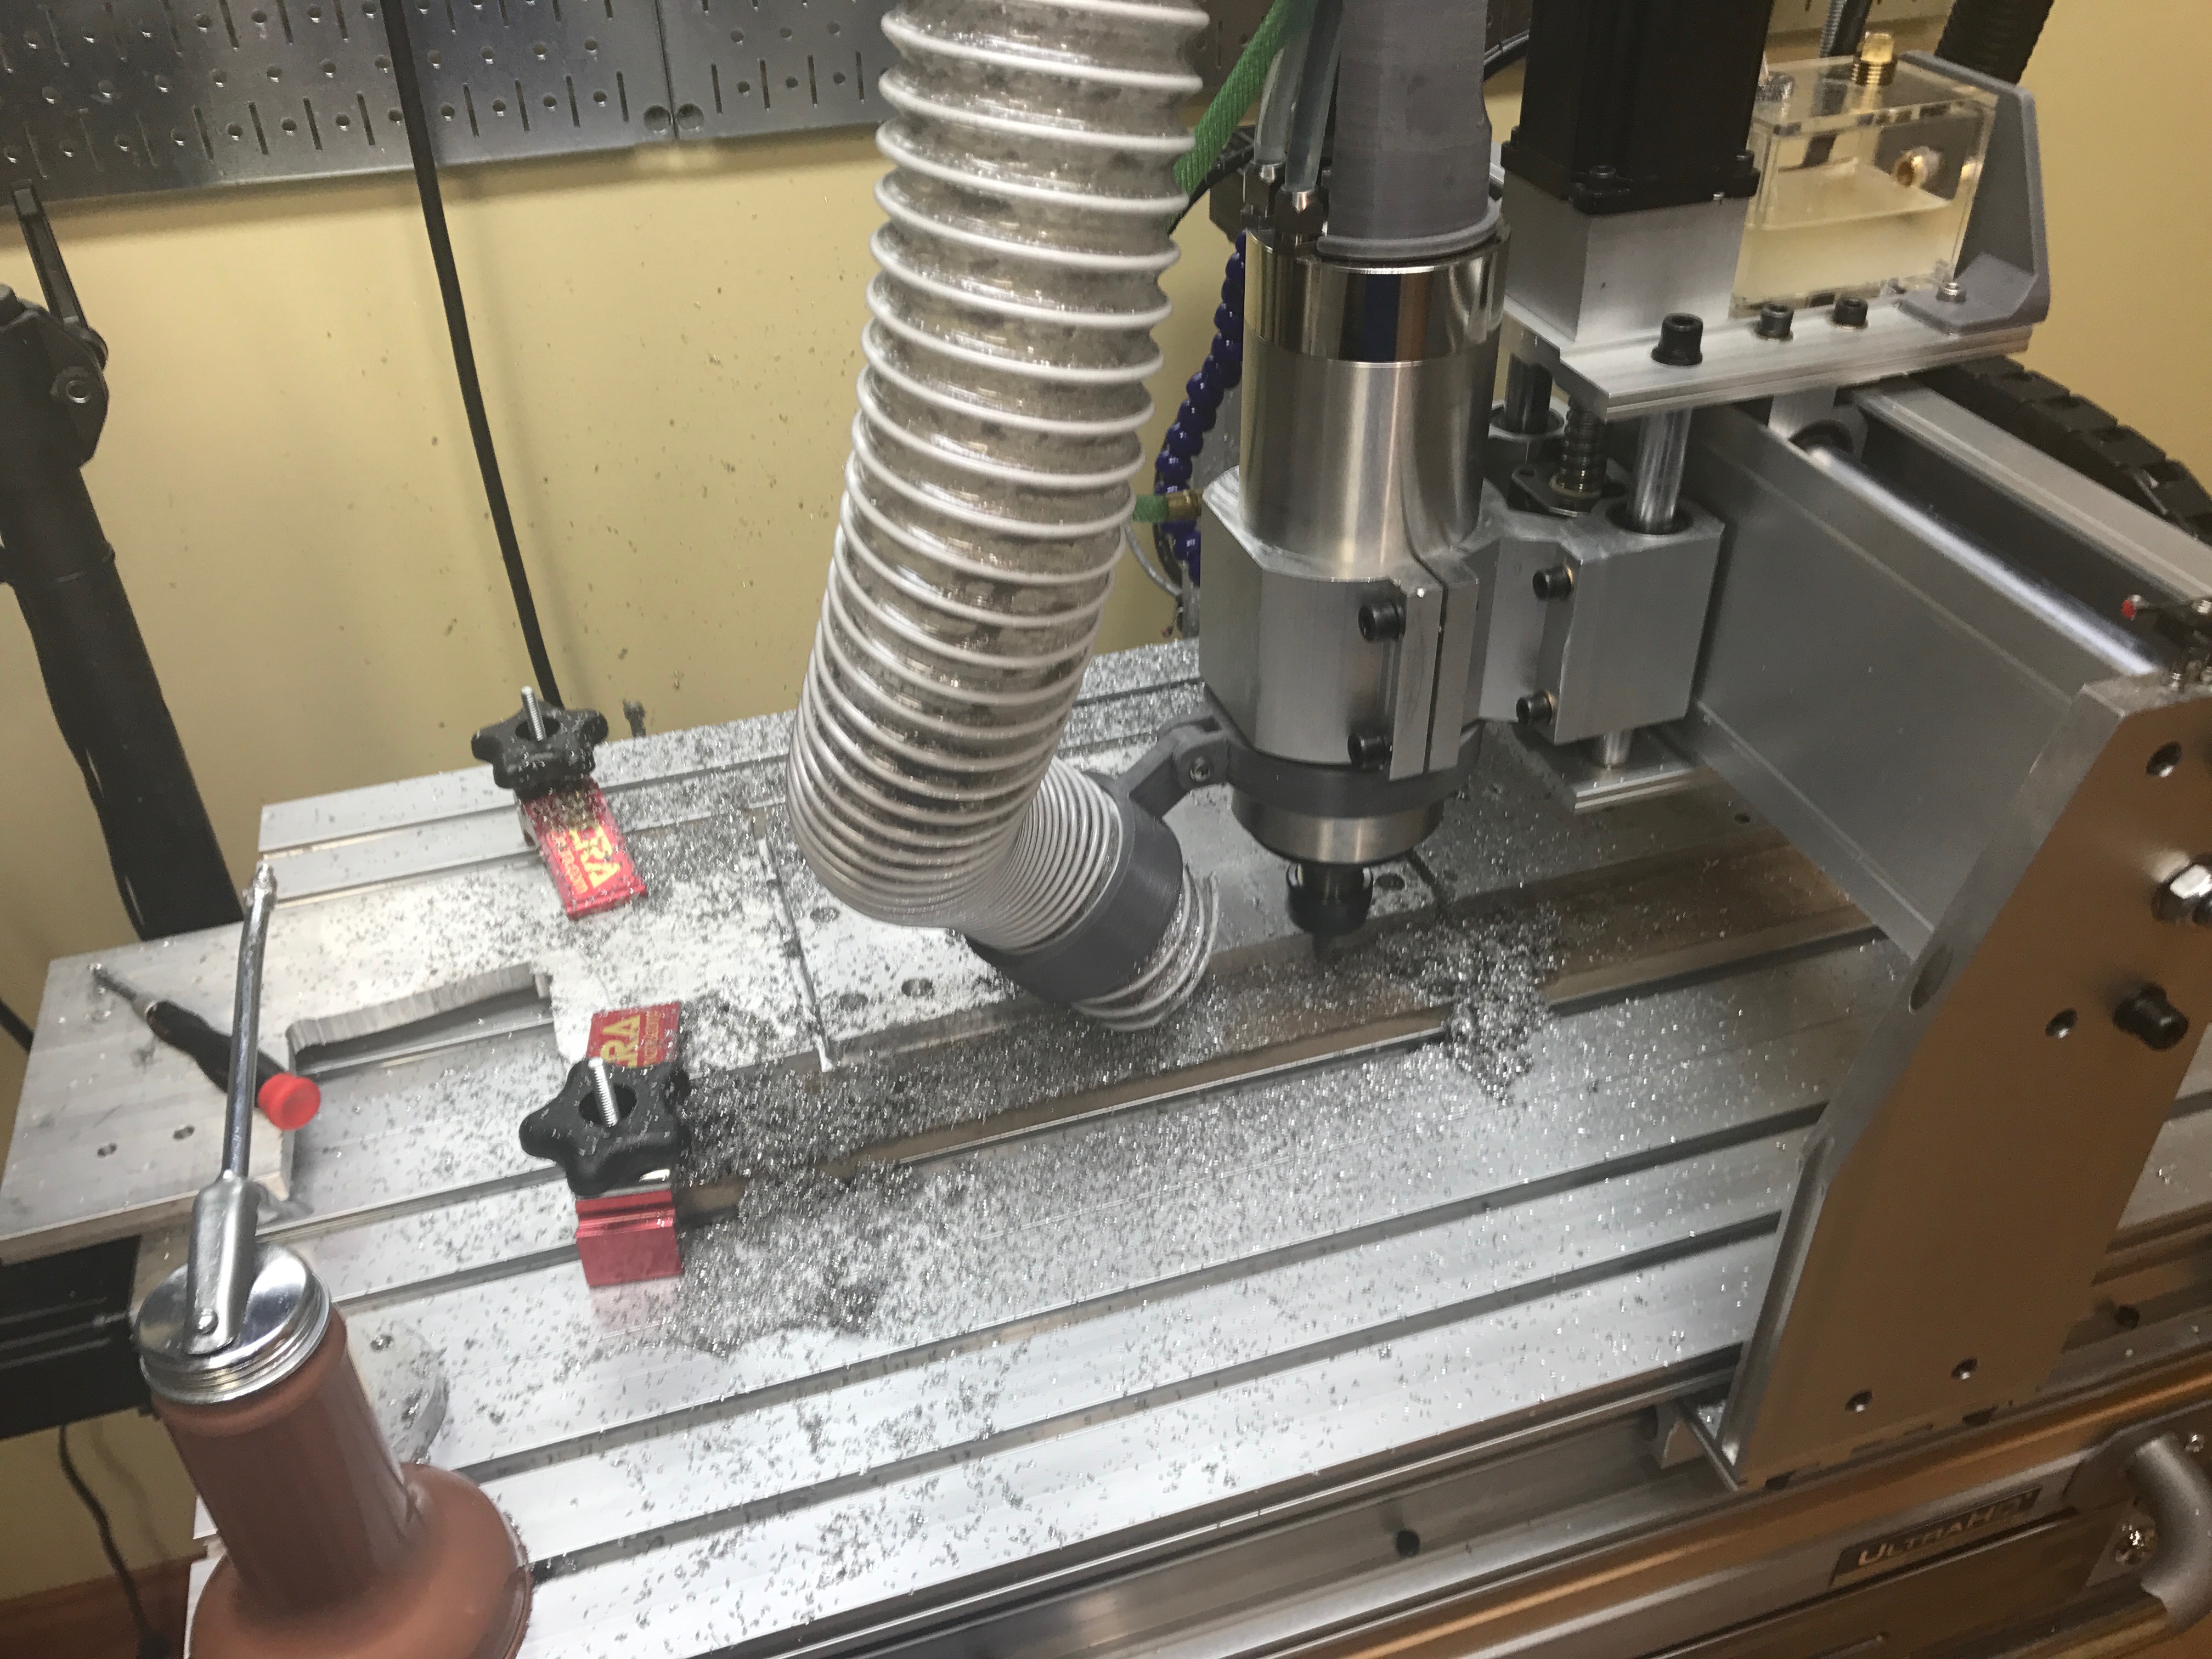\n\nI designed this in Fusion360 and milled it using the CNC that I built.\n\n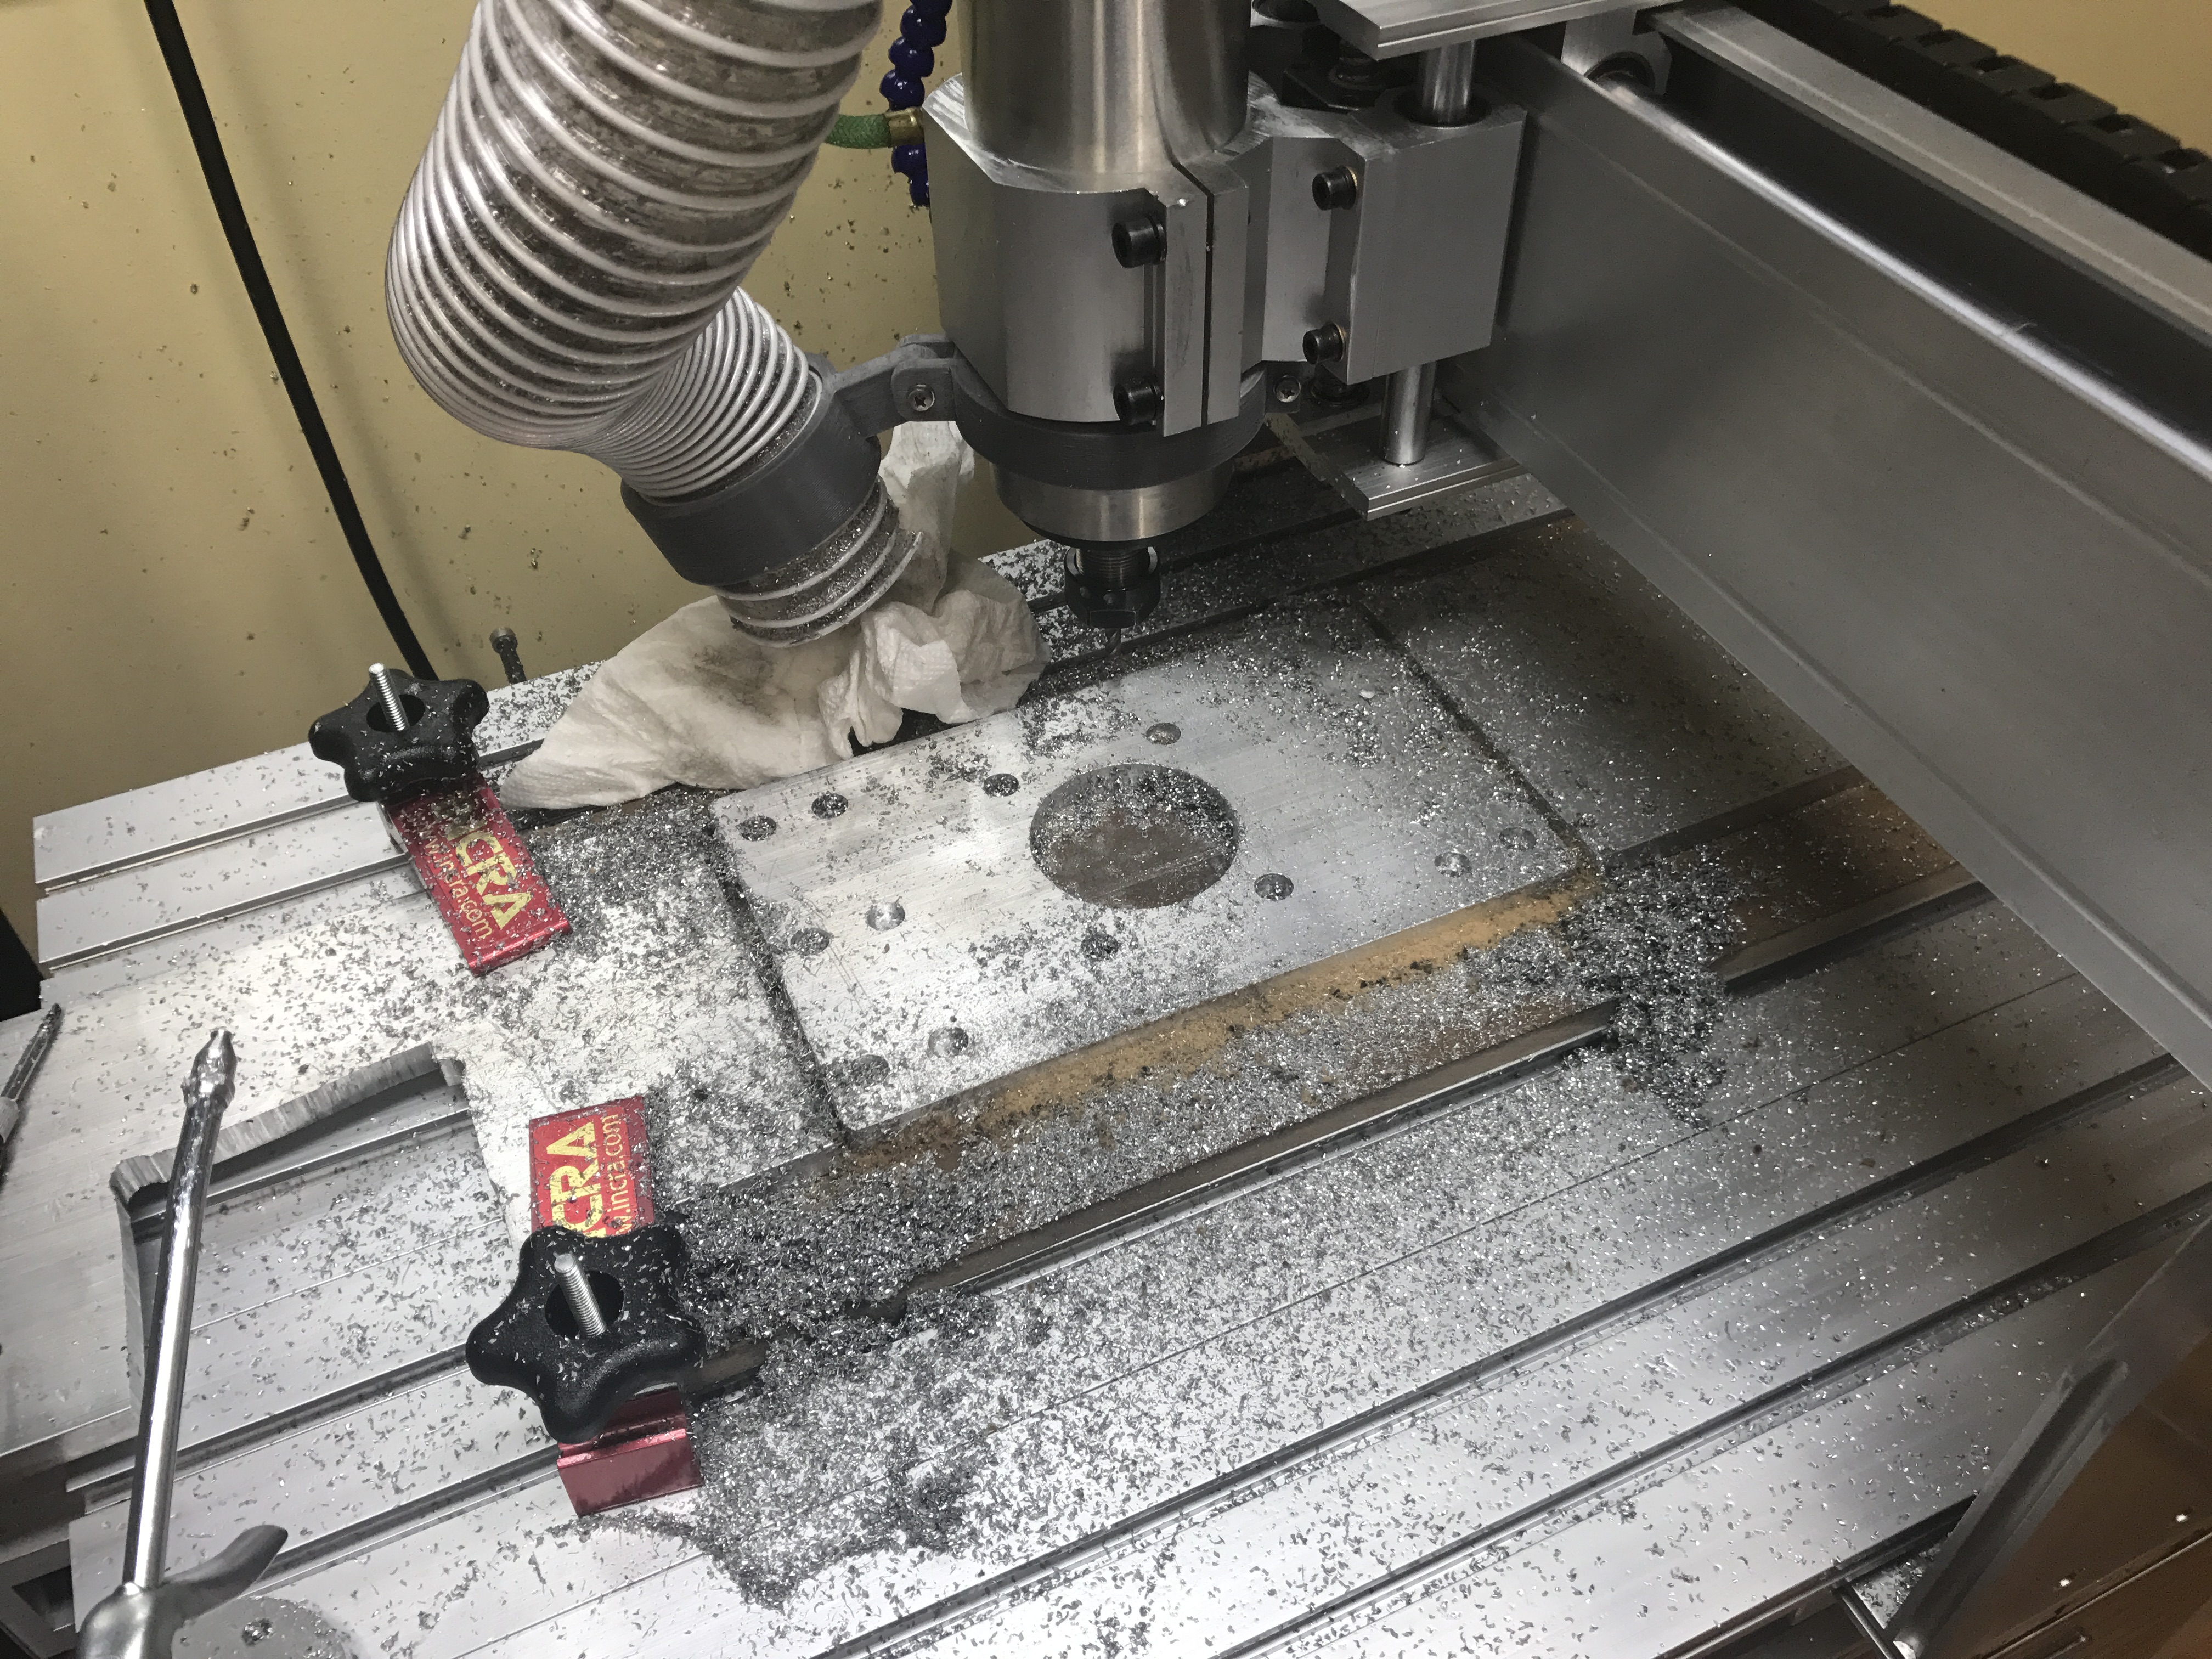\n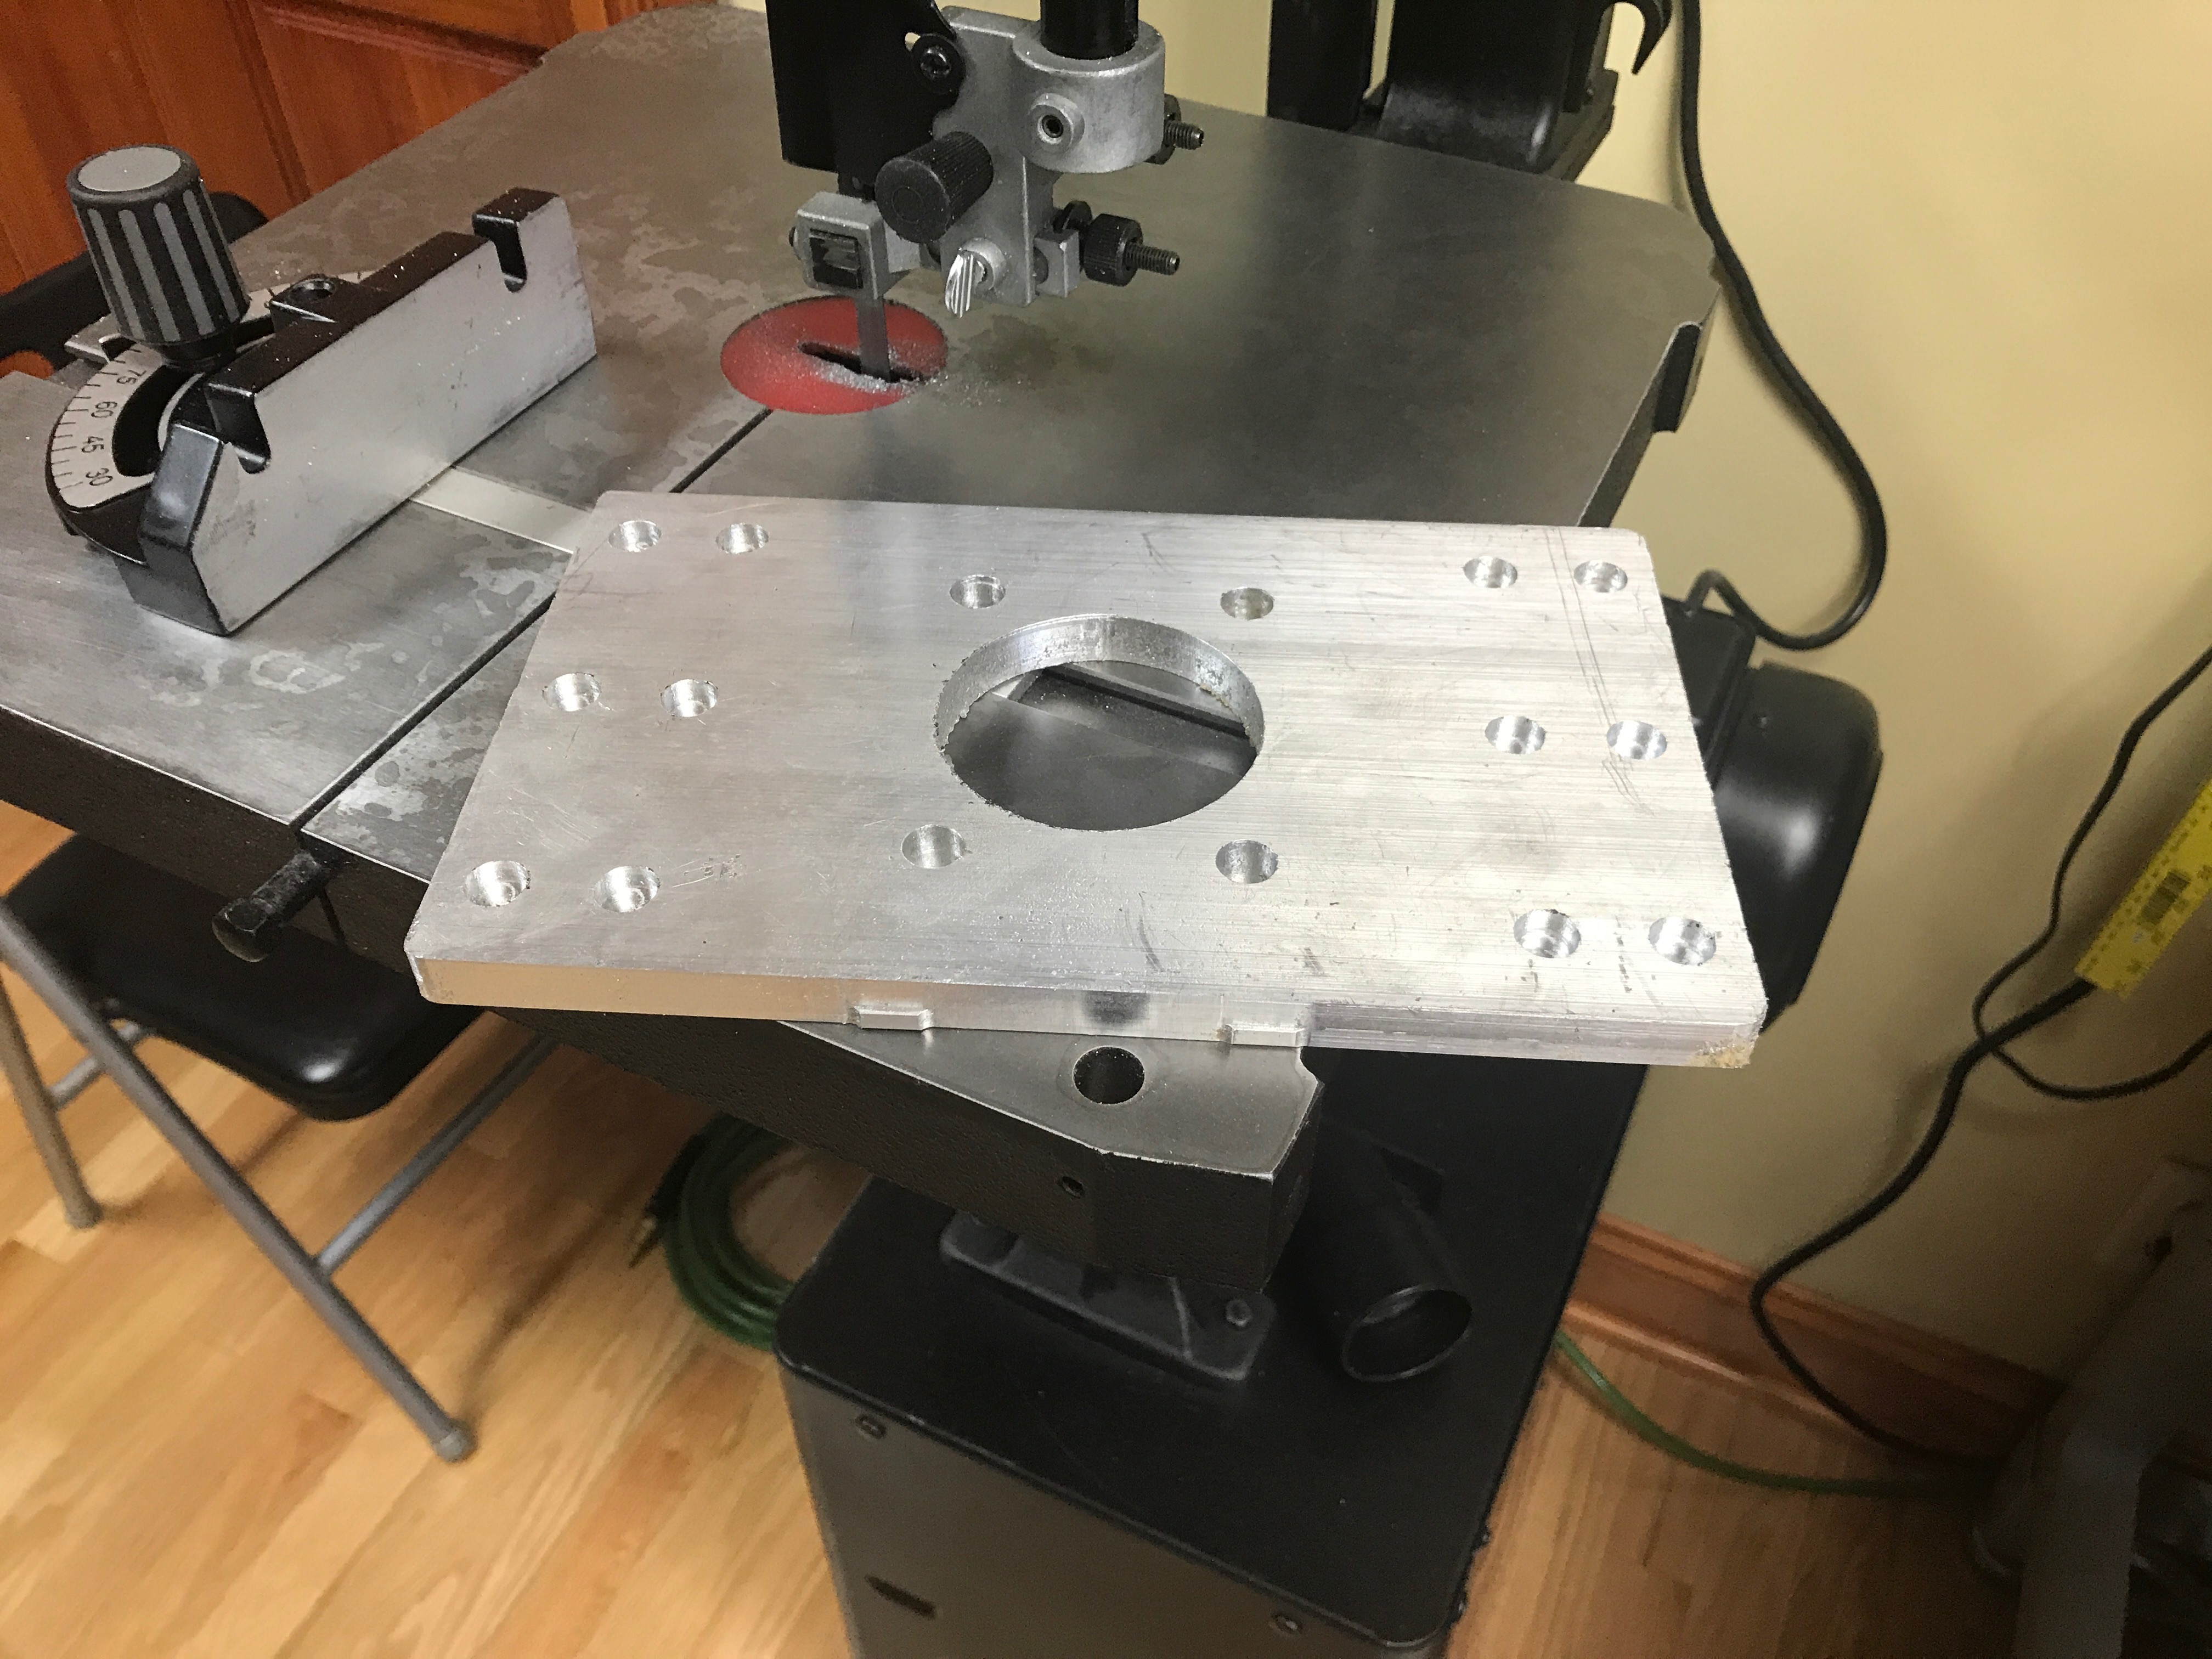\n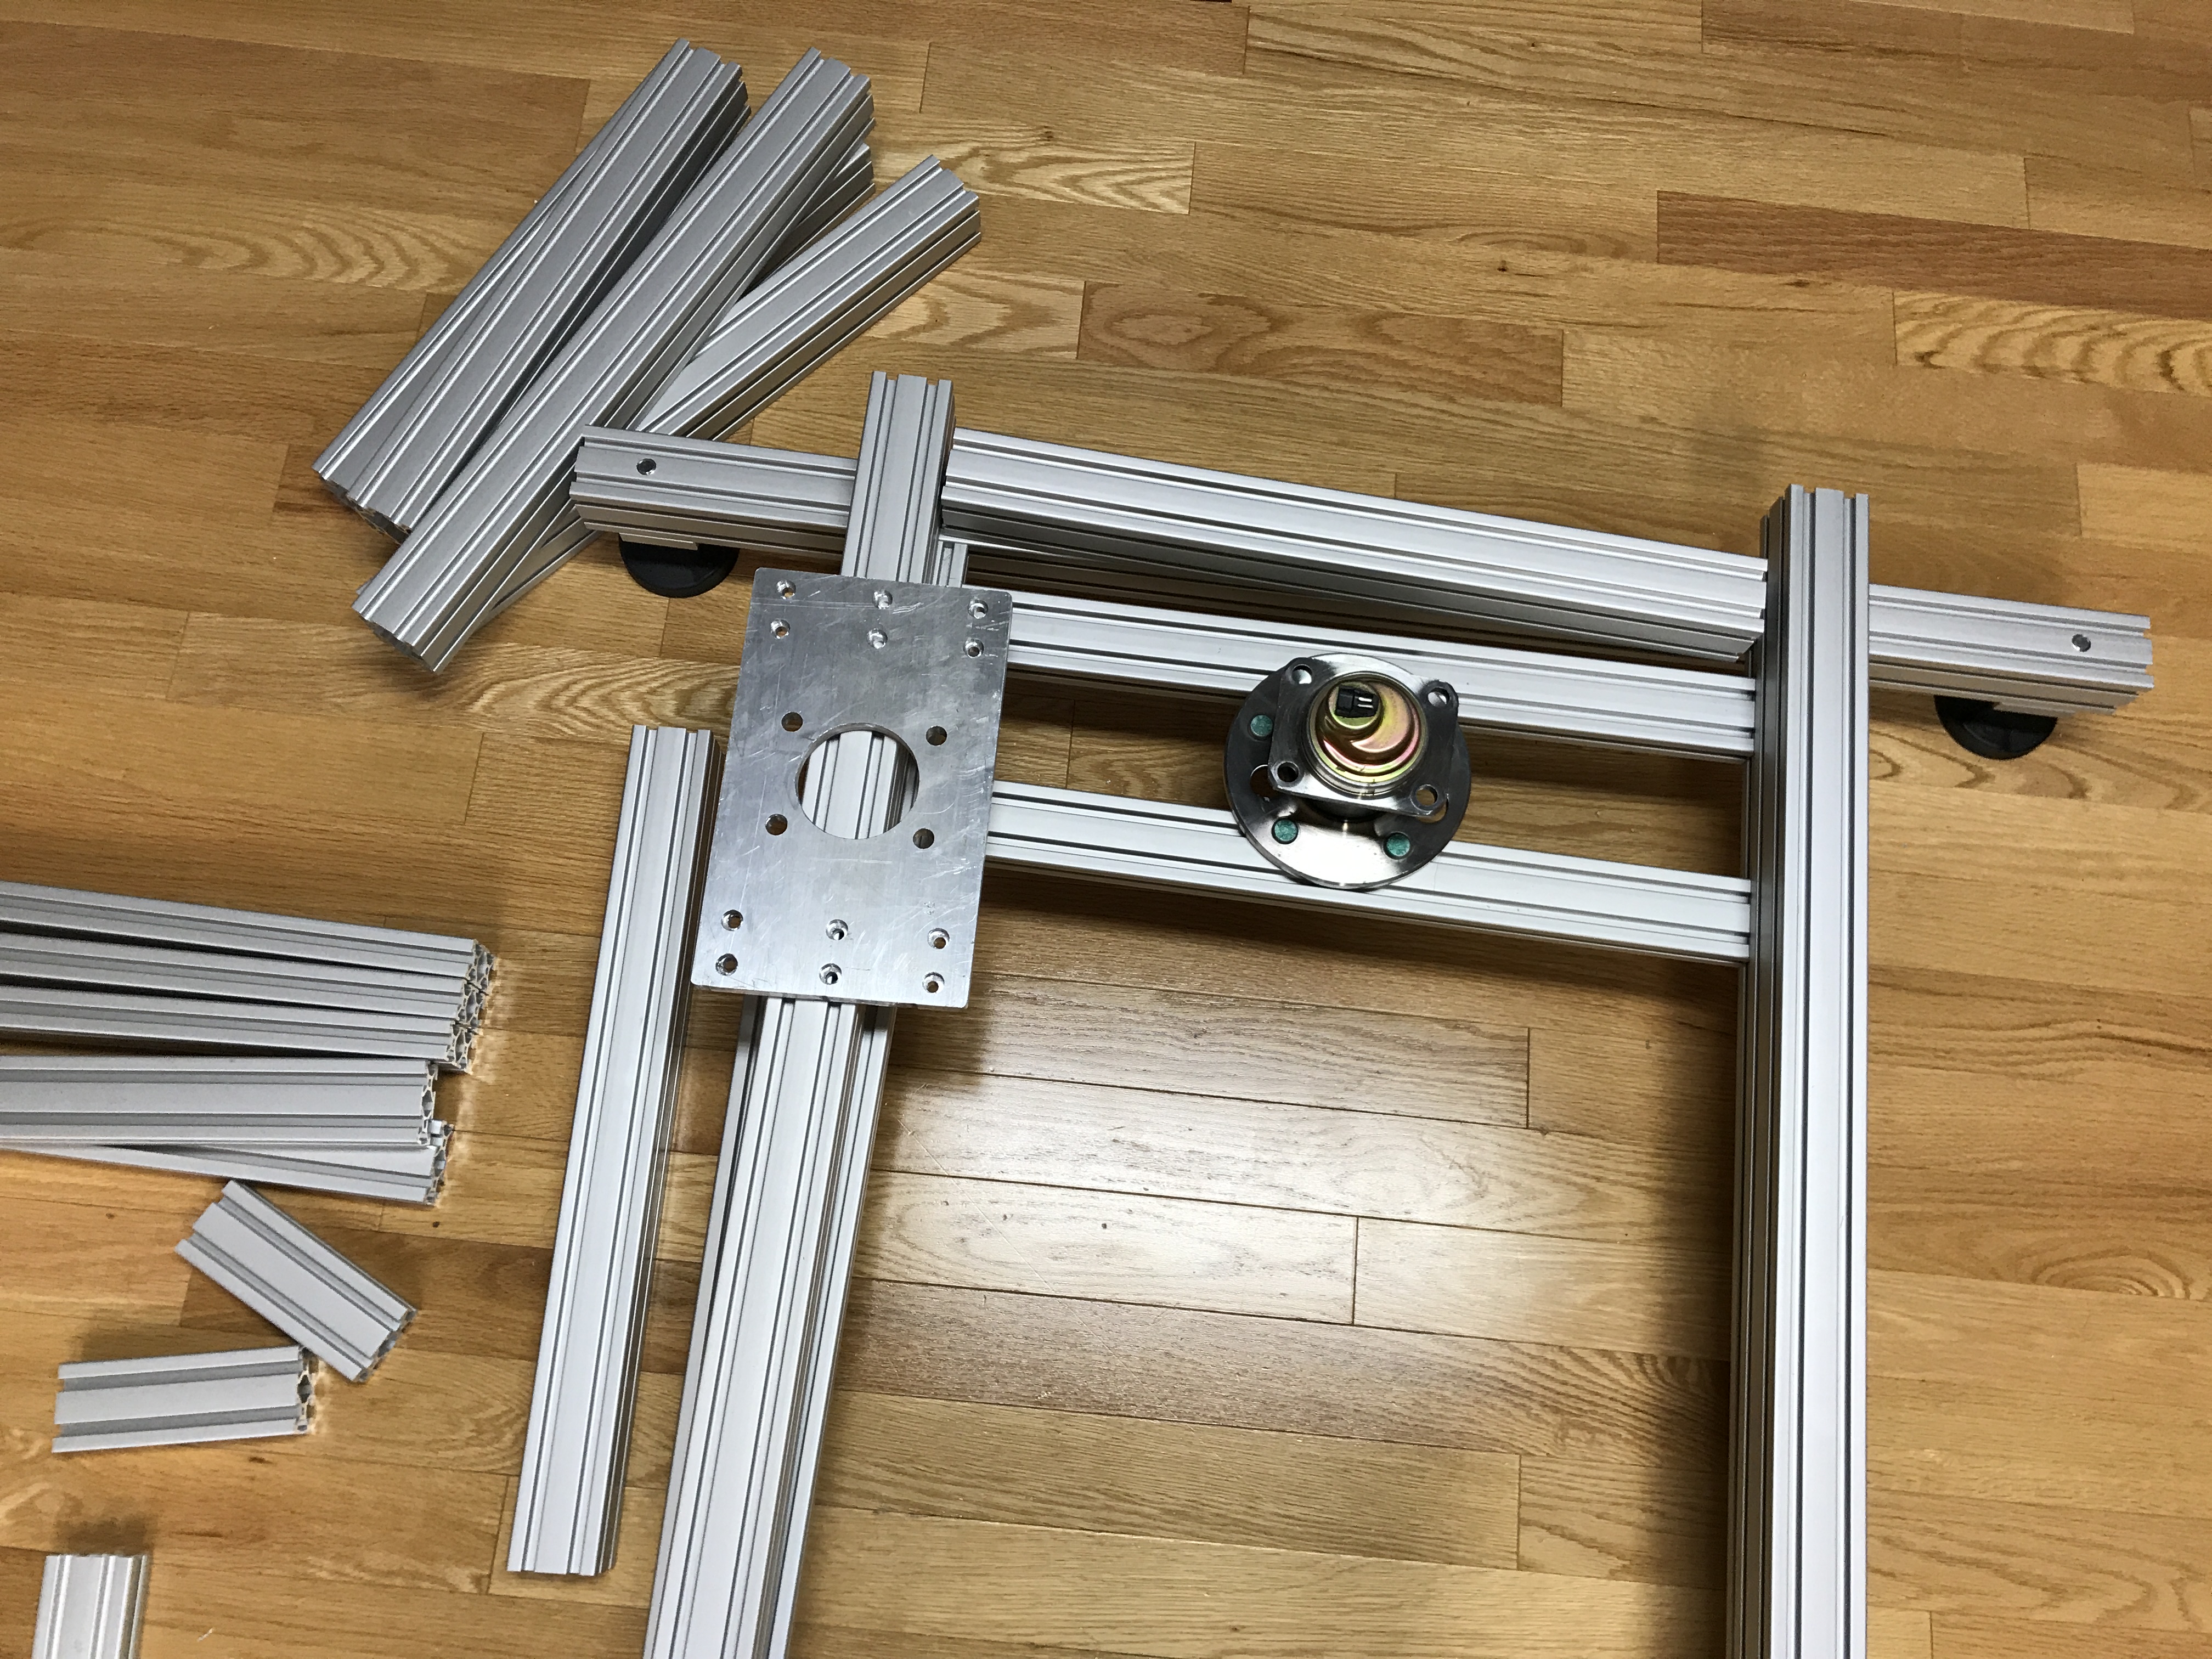\n\nOnce that was done, I was able to thread tap the extrusion for the mid frame and pre-assemble it.\n\n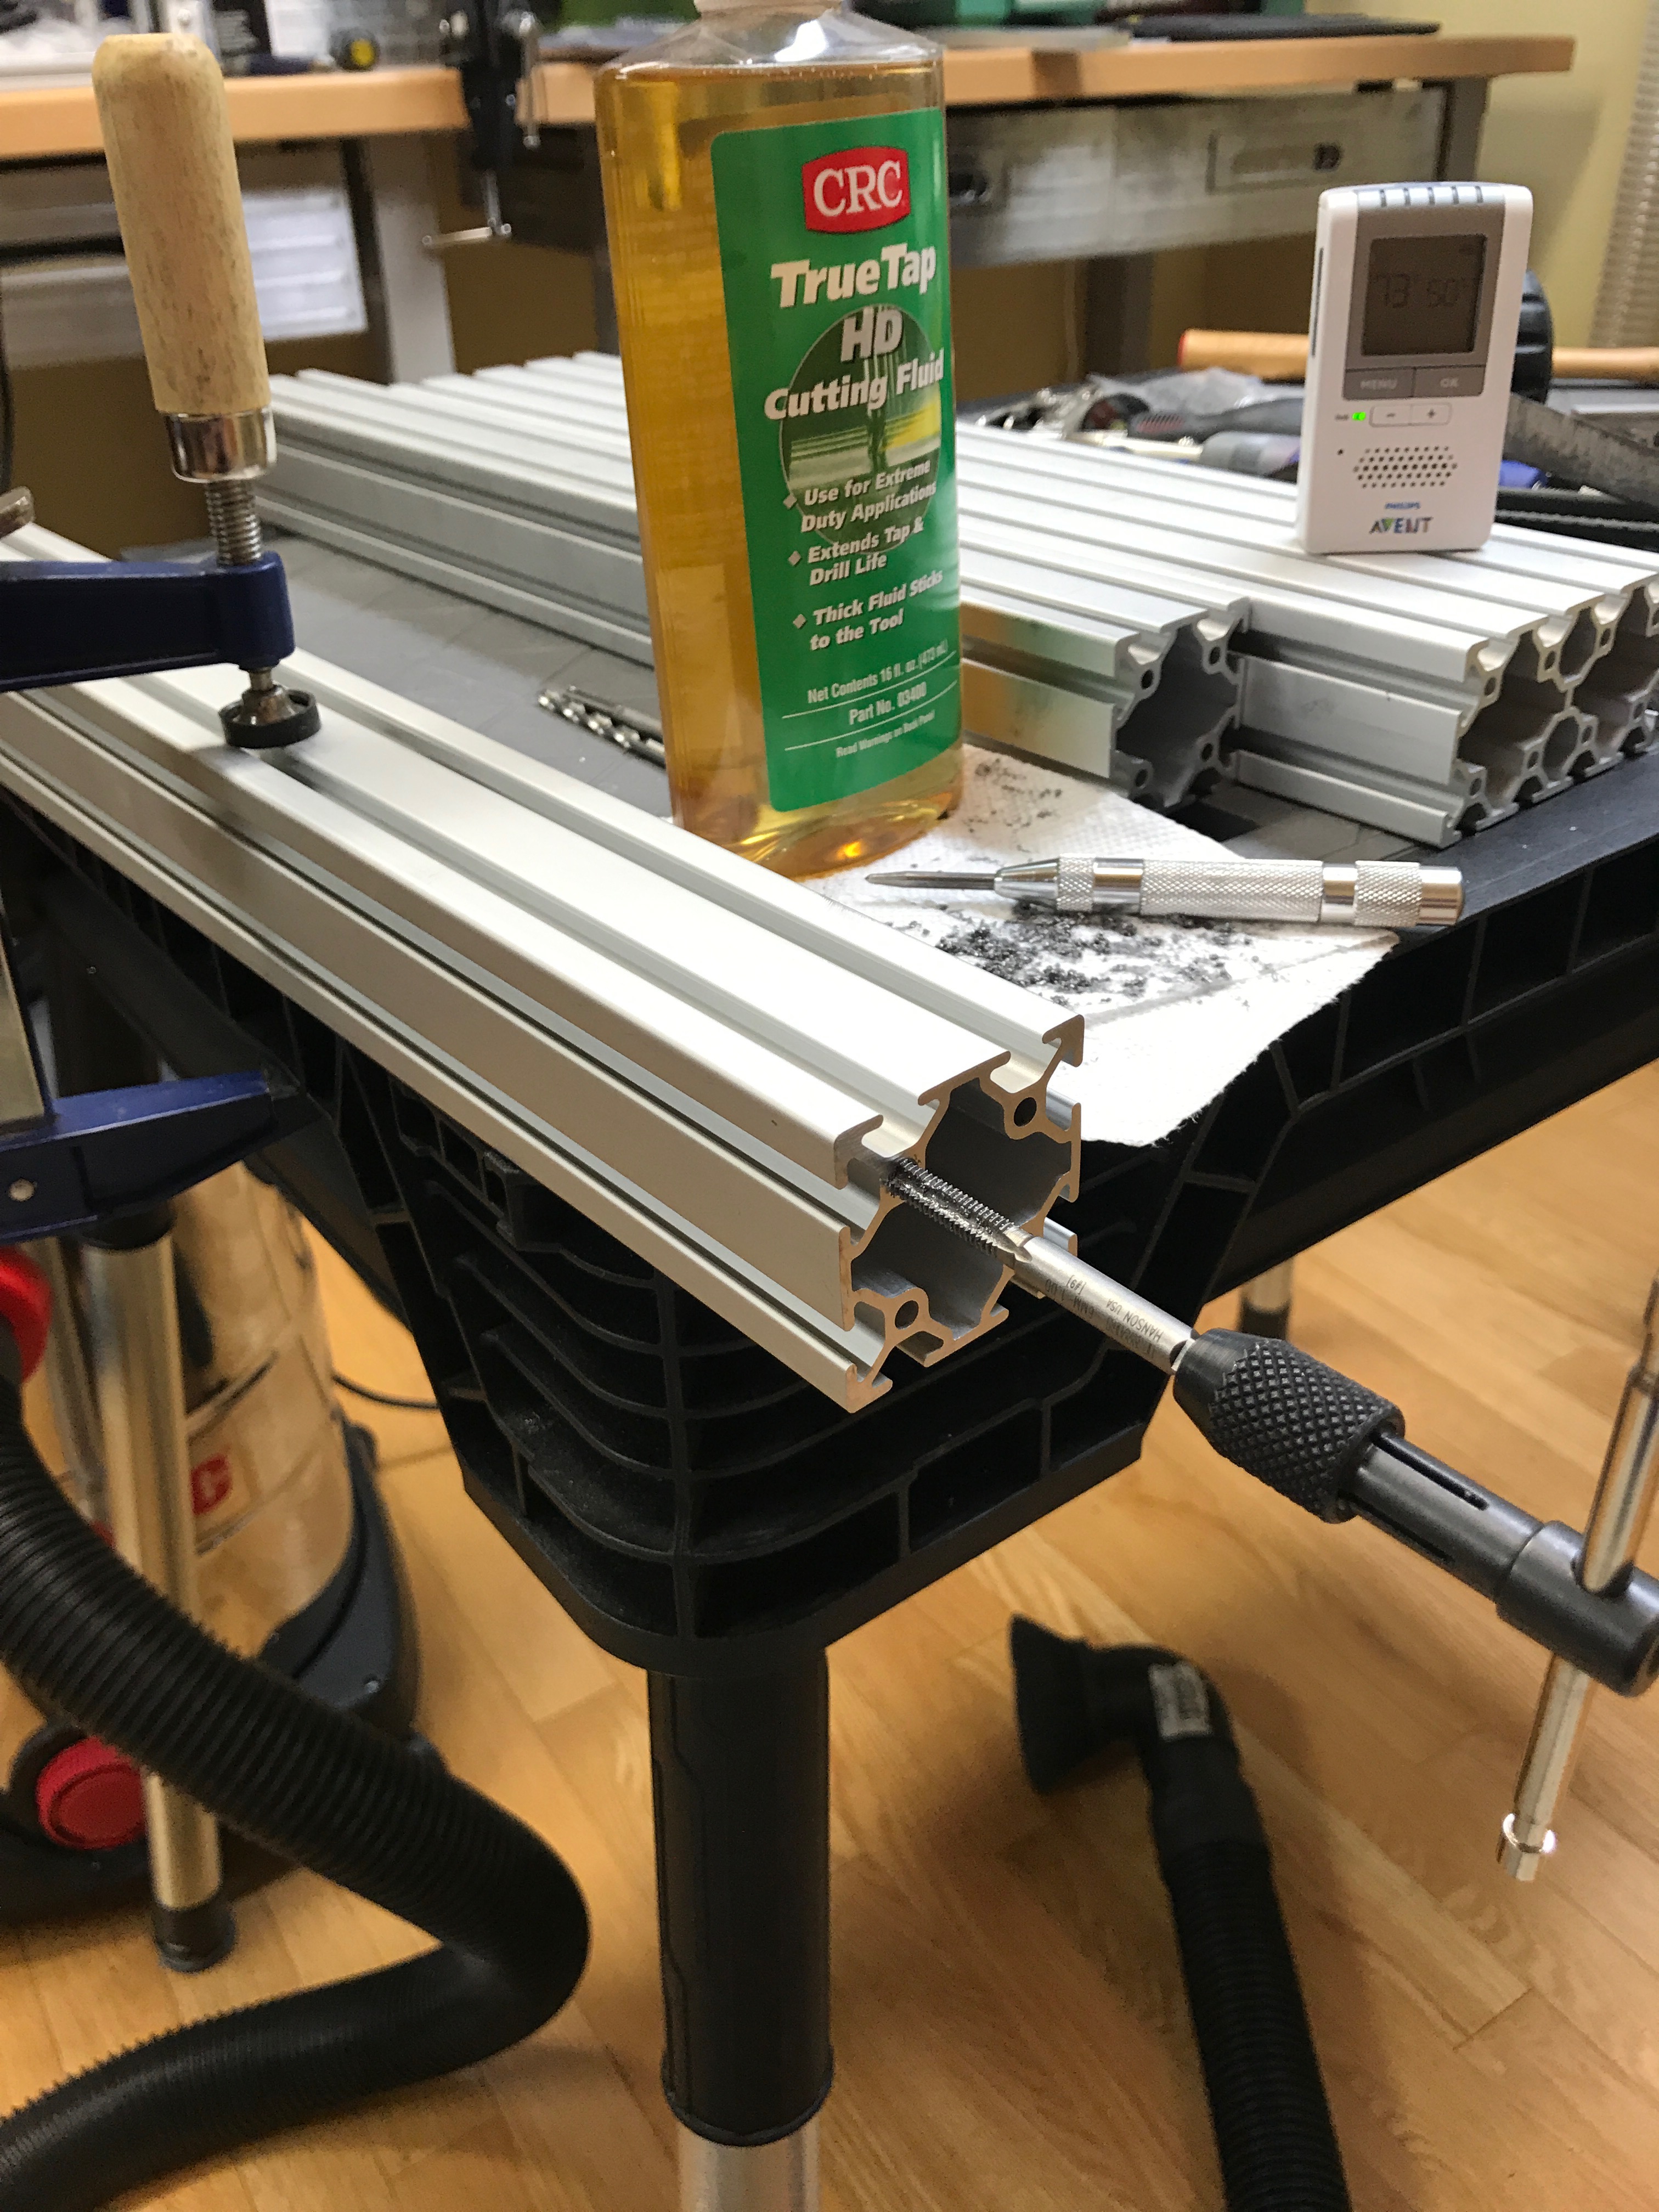\n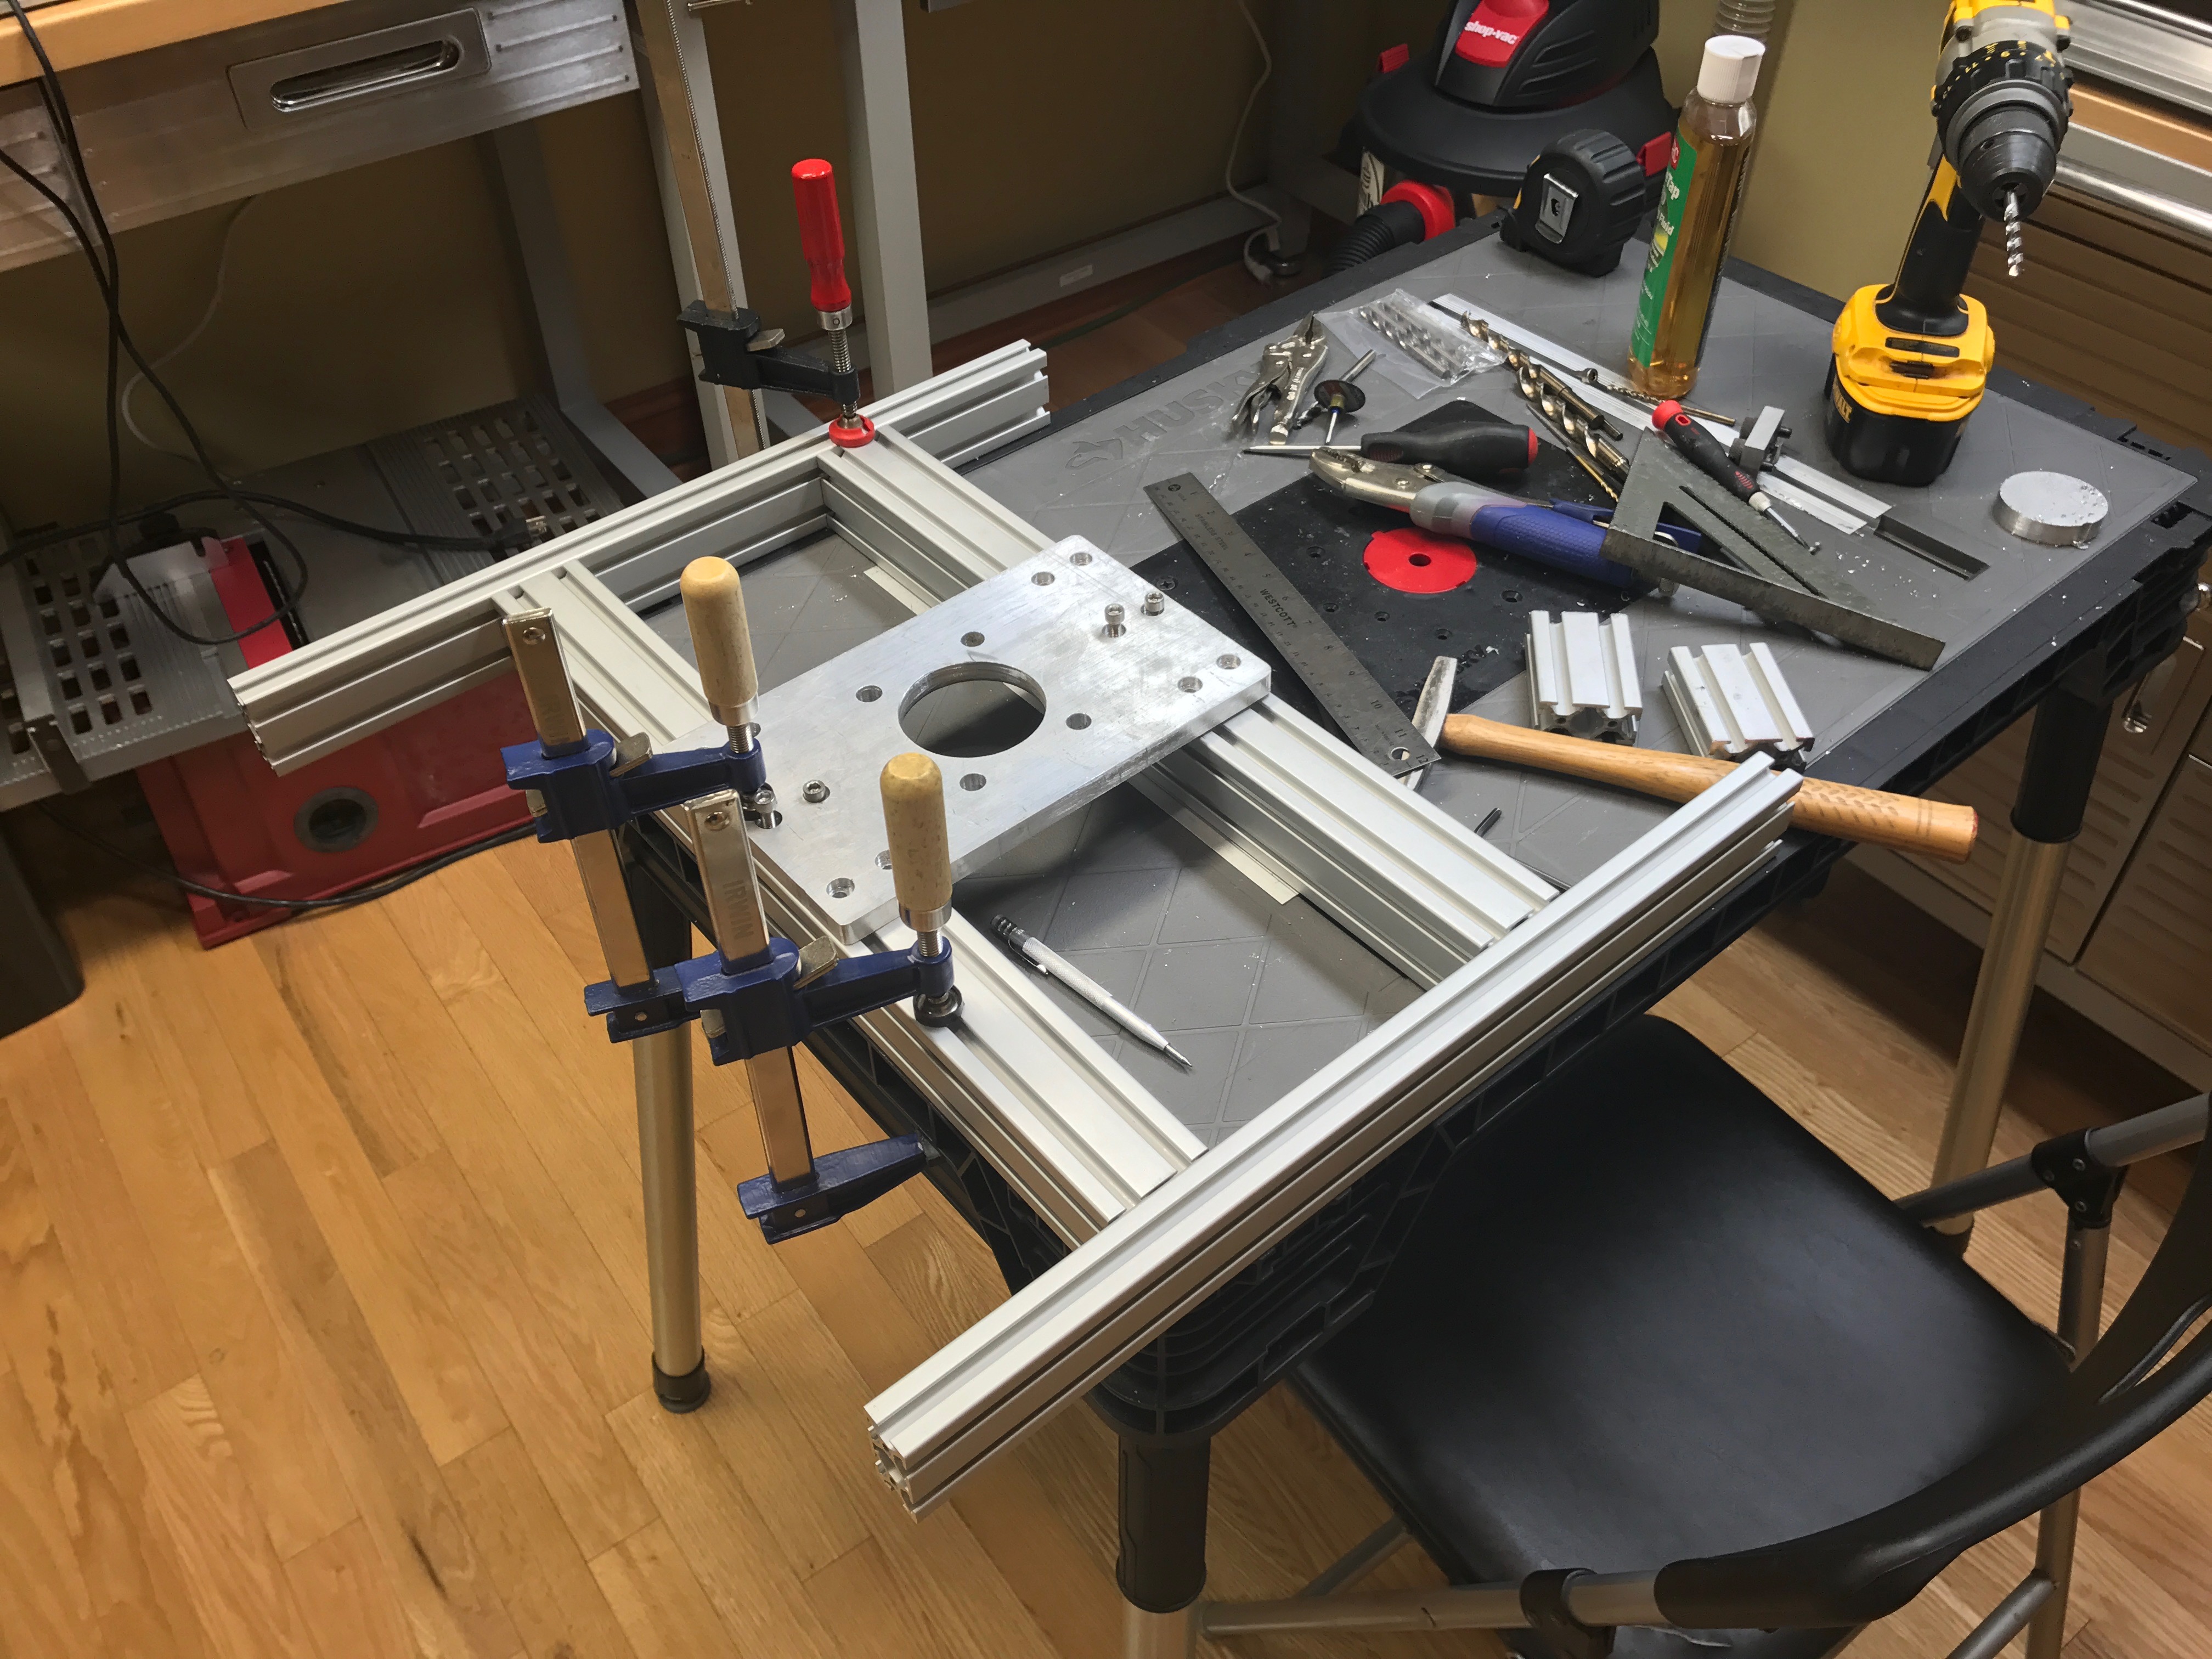\n\nI then attached this section of the mid frame to the lower frame. I used long threaded bolts so that I could adjust the height that the mid frame sat on the lower frame.\n\n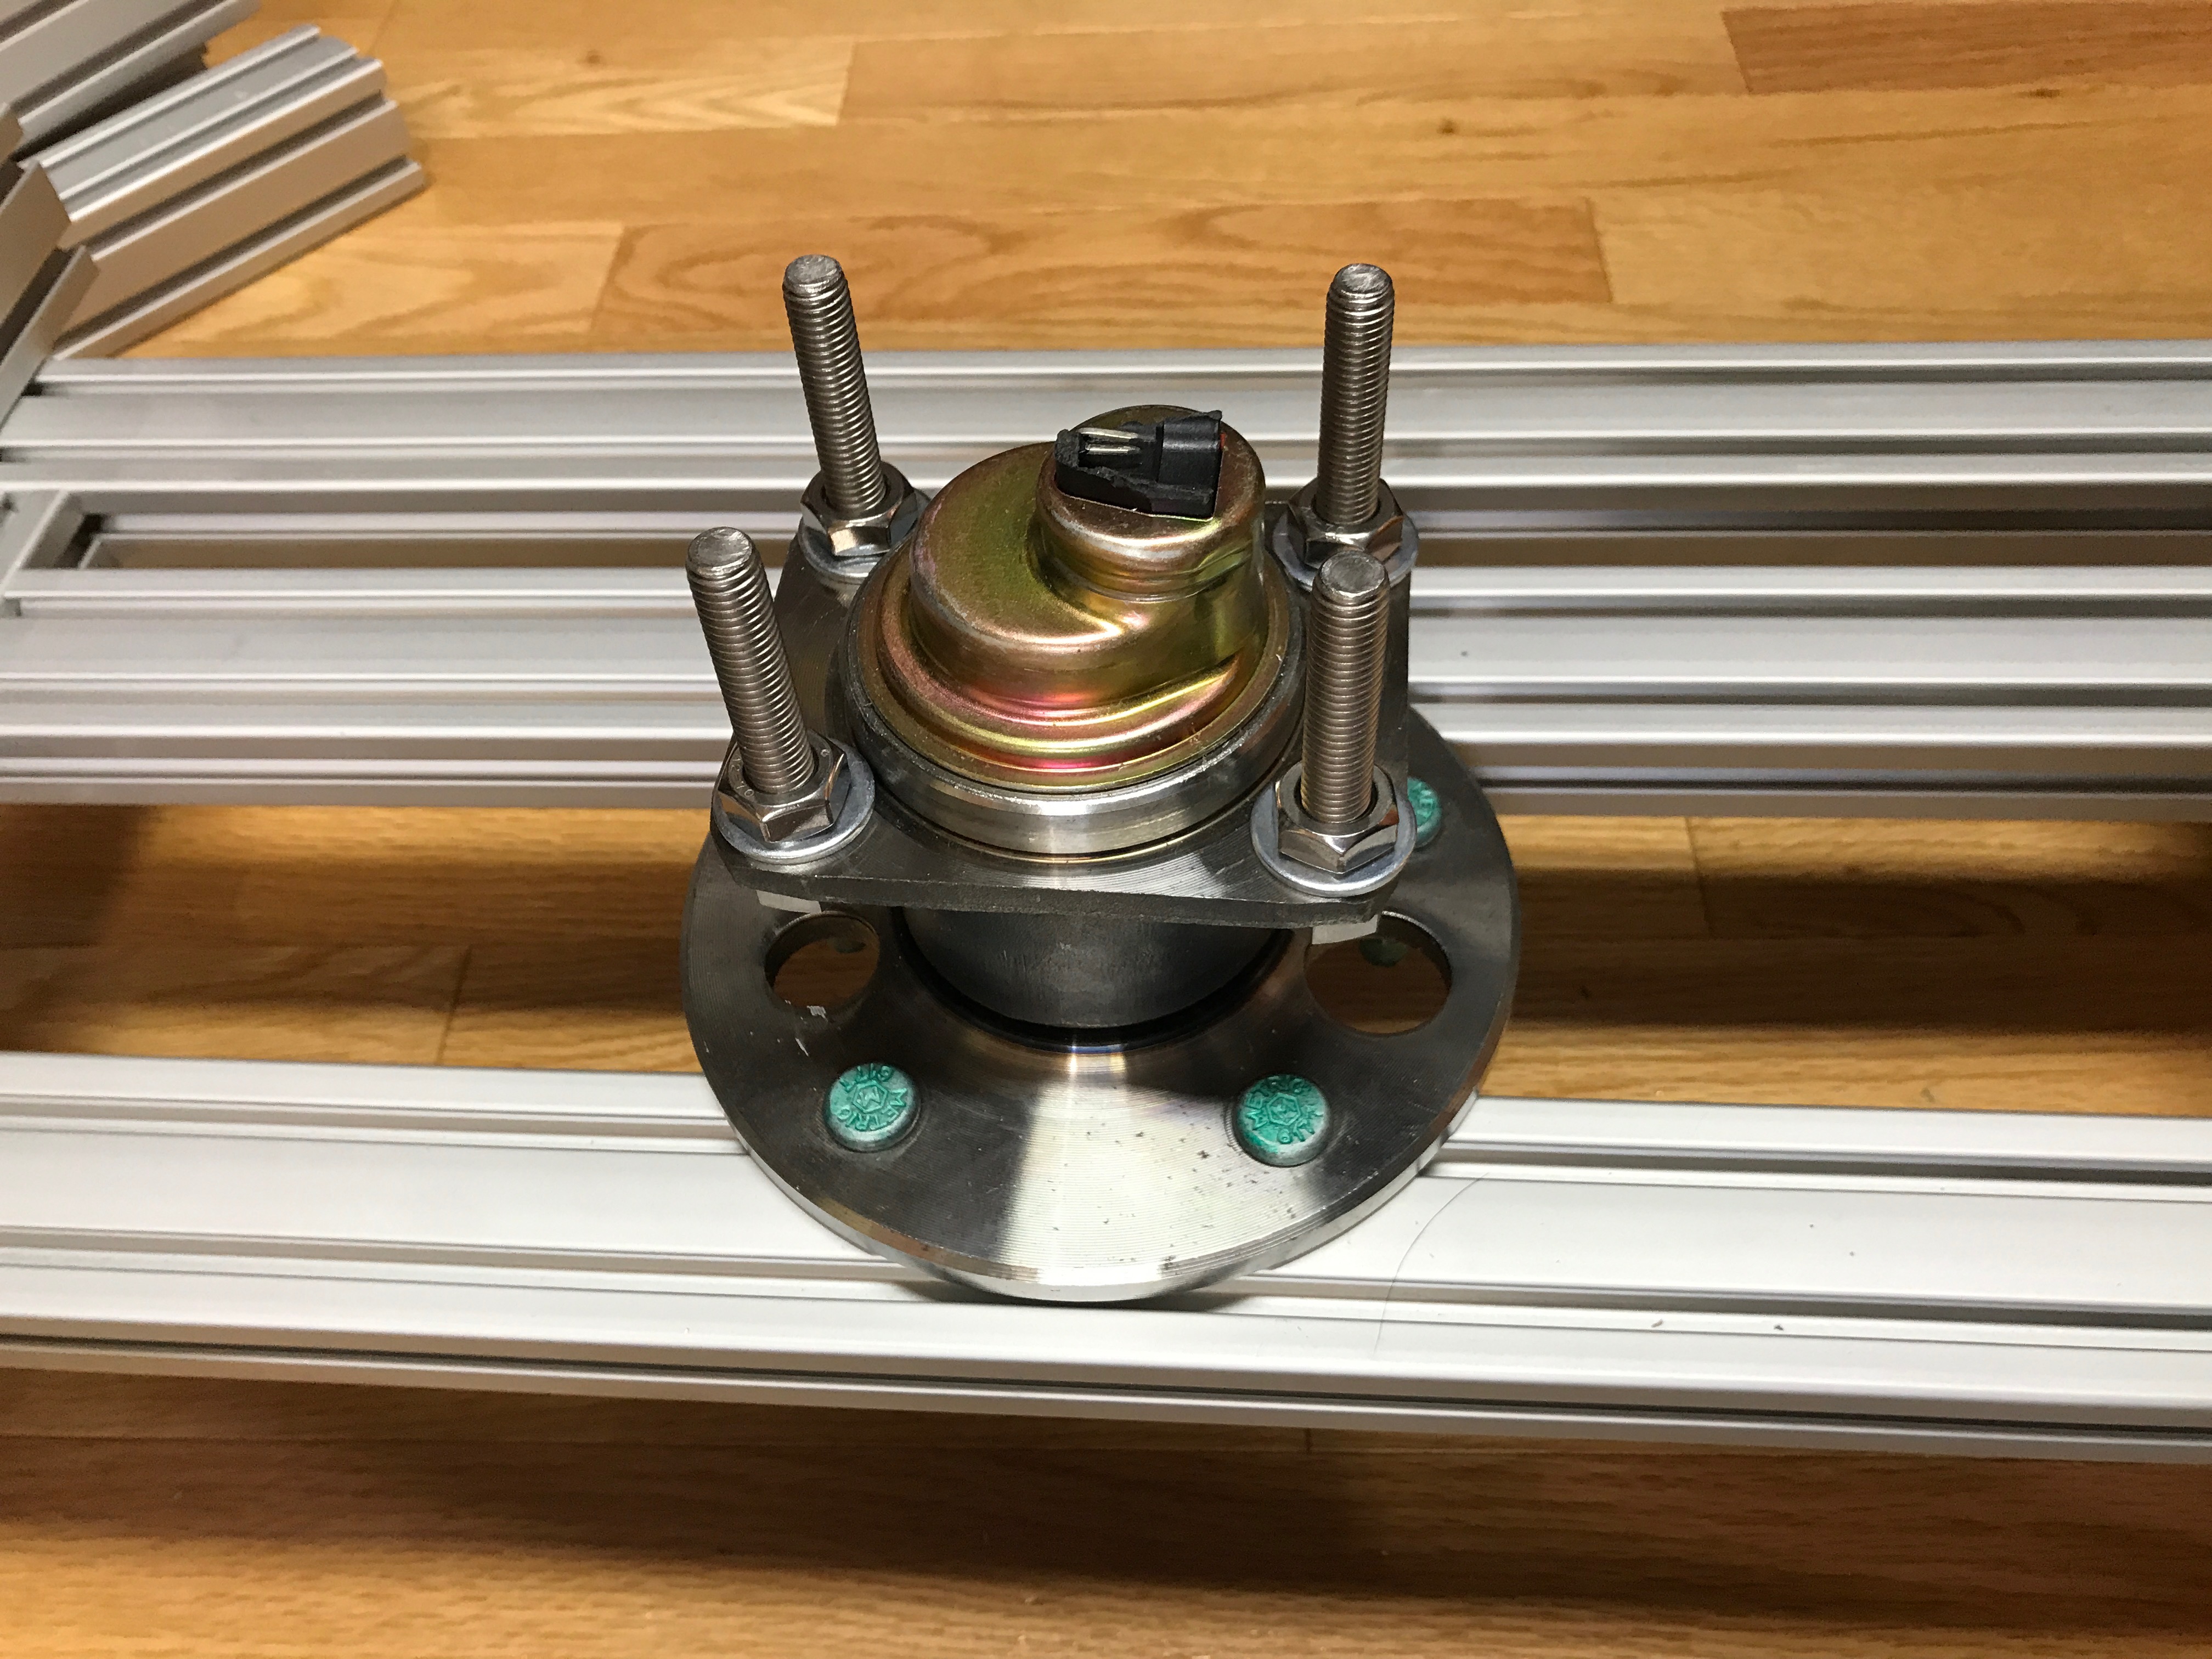\n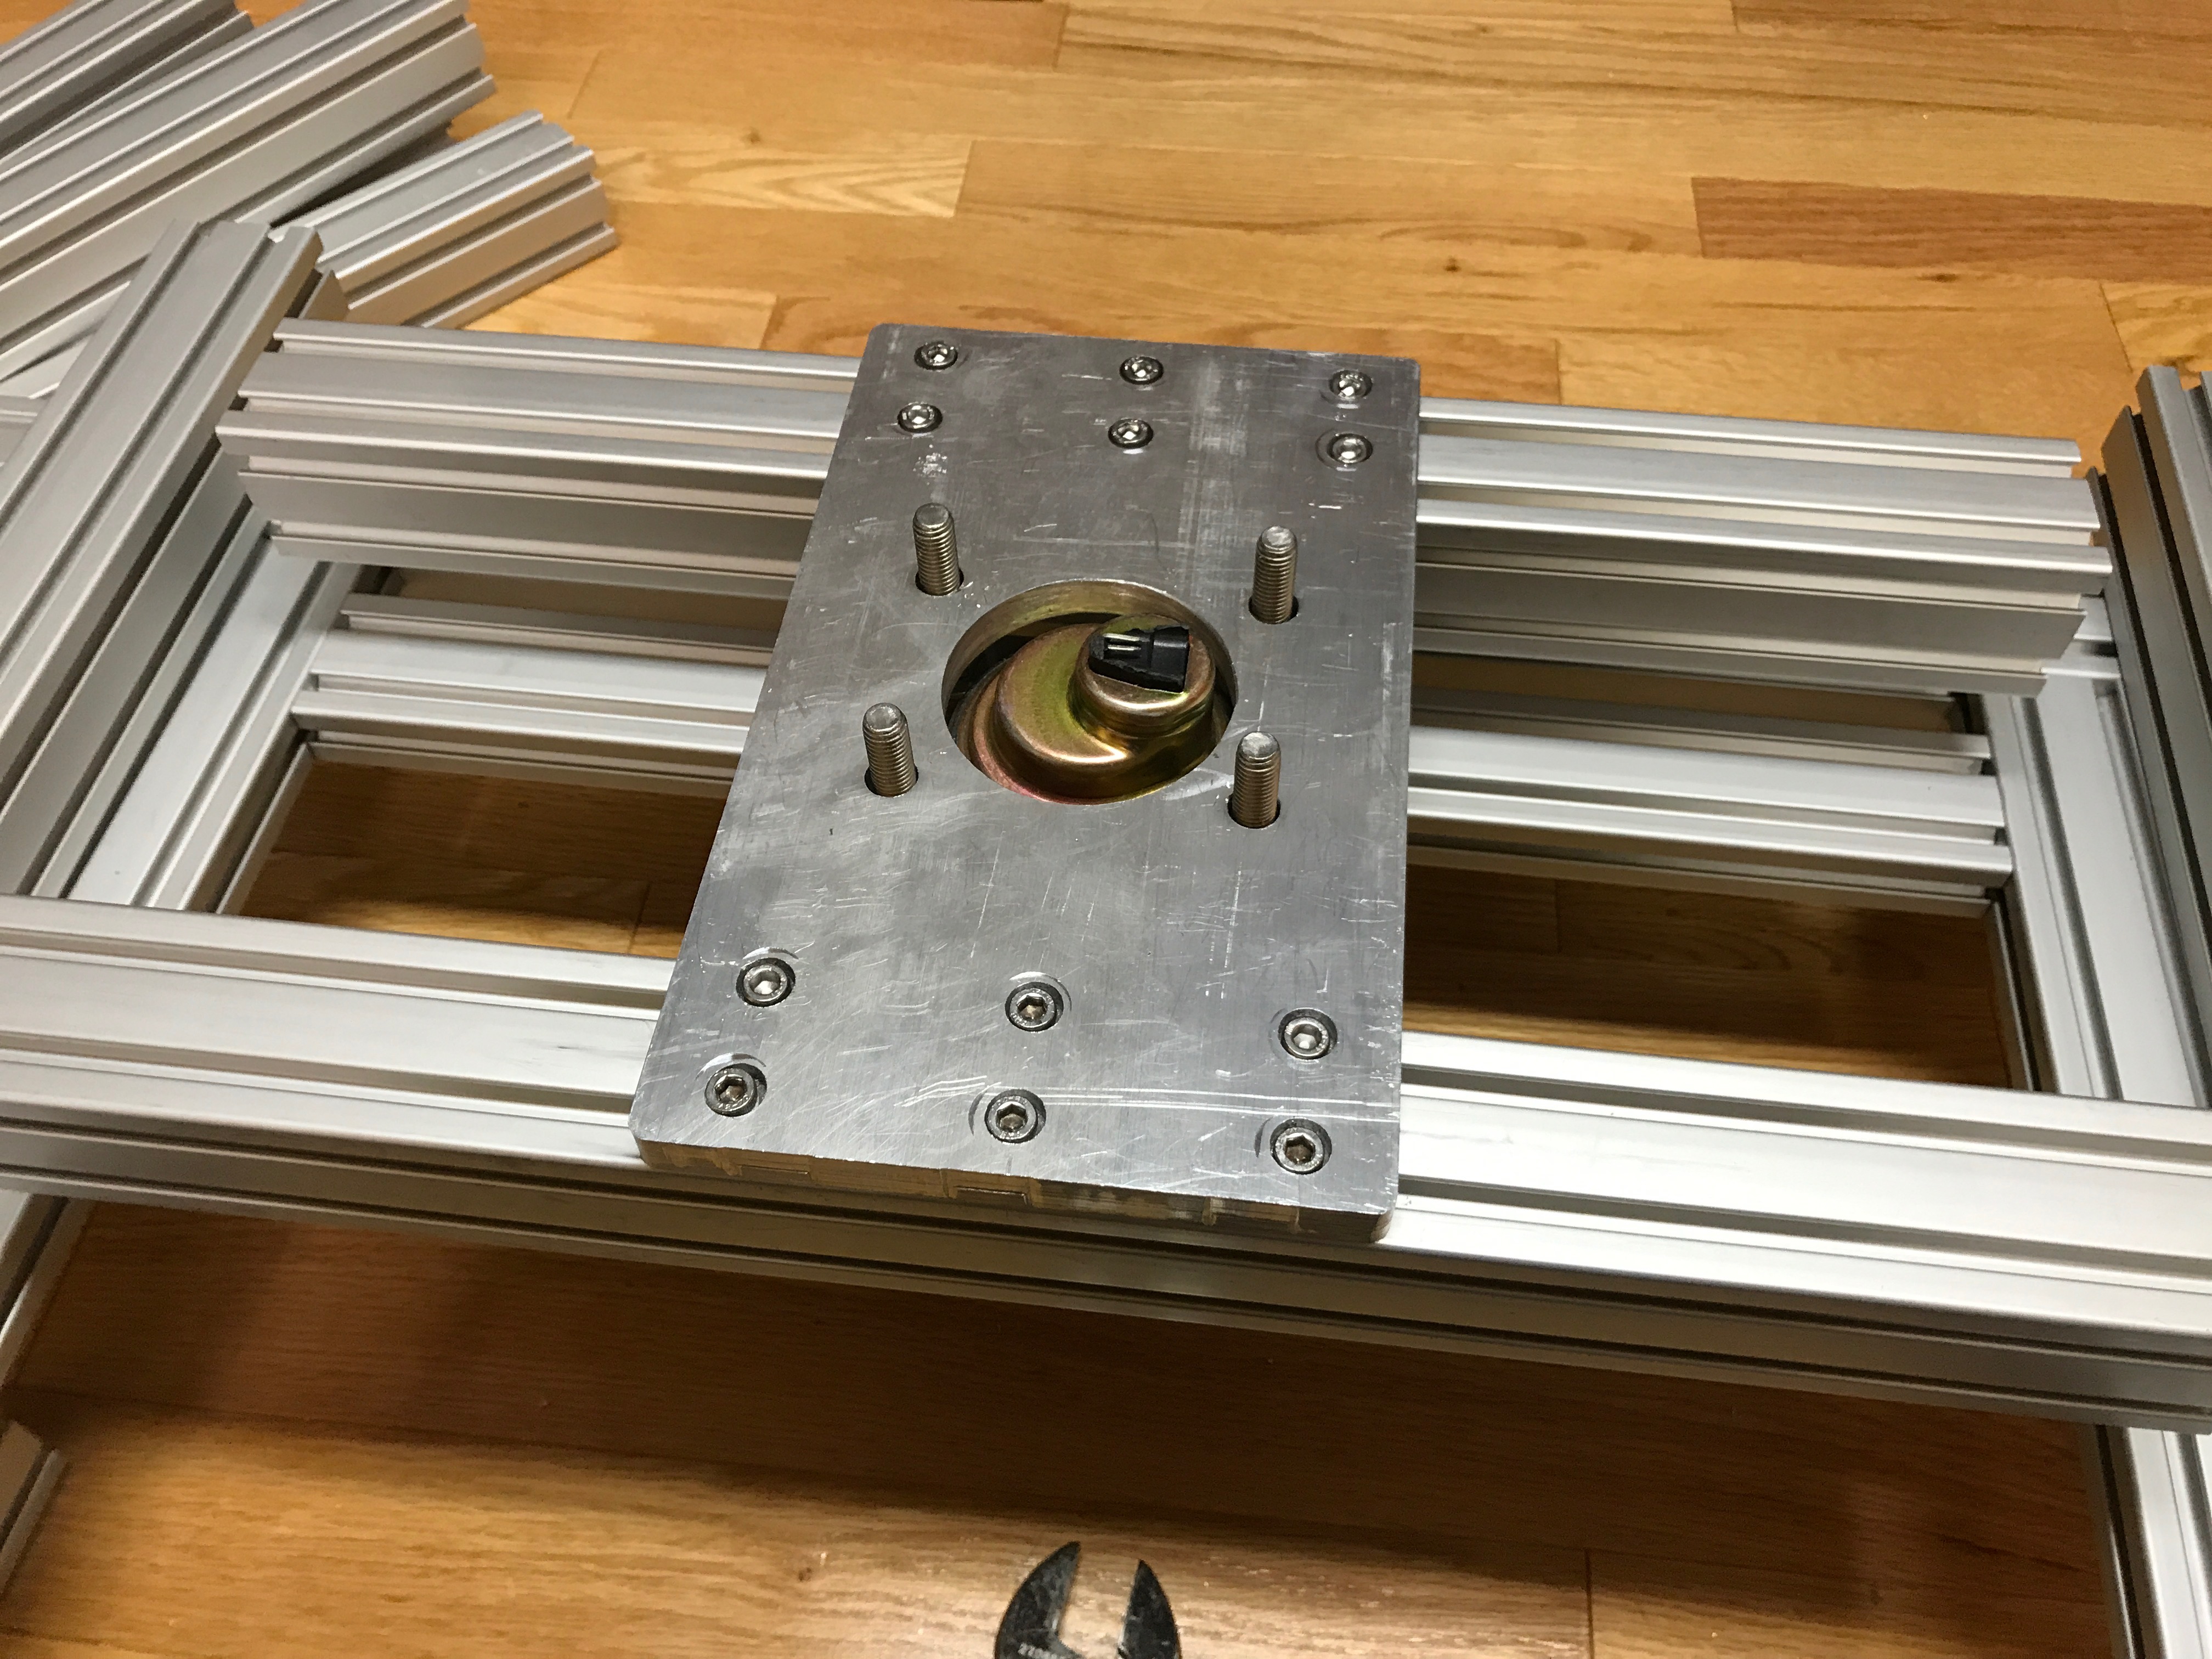\n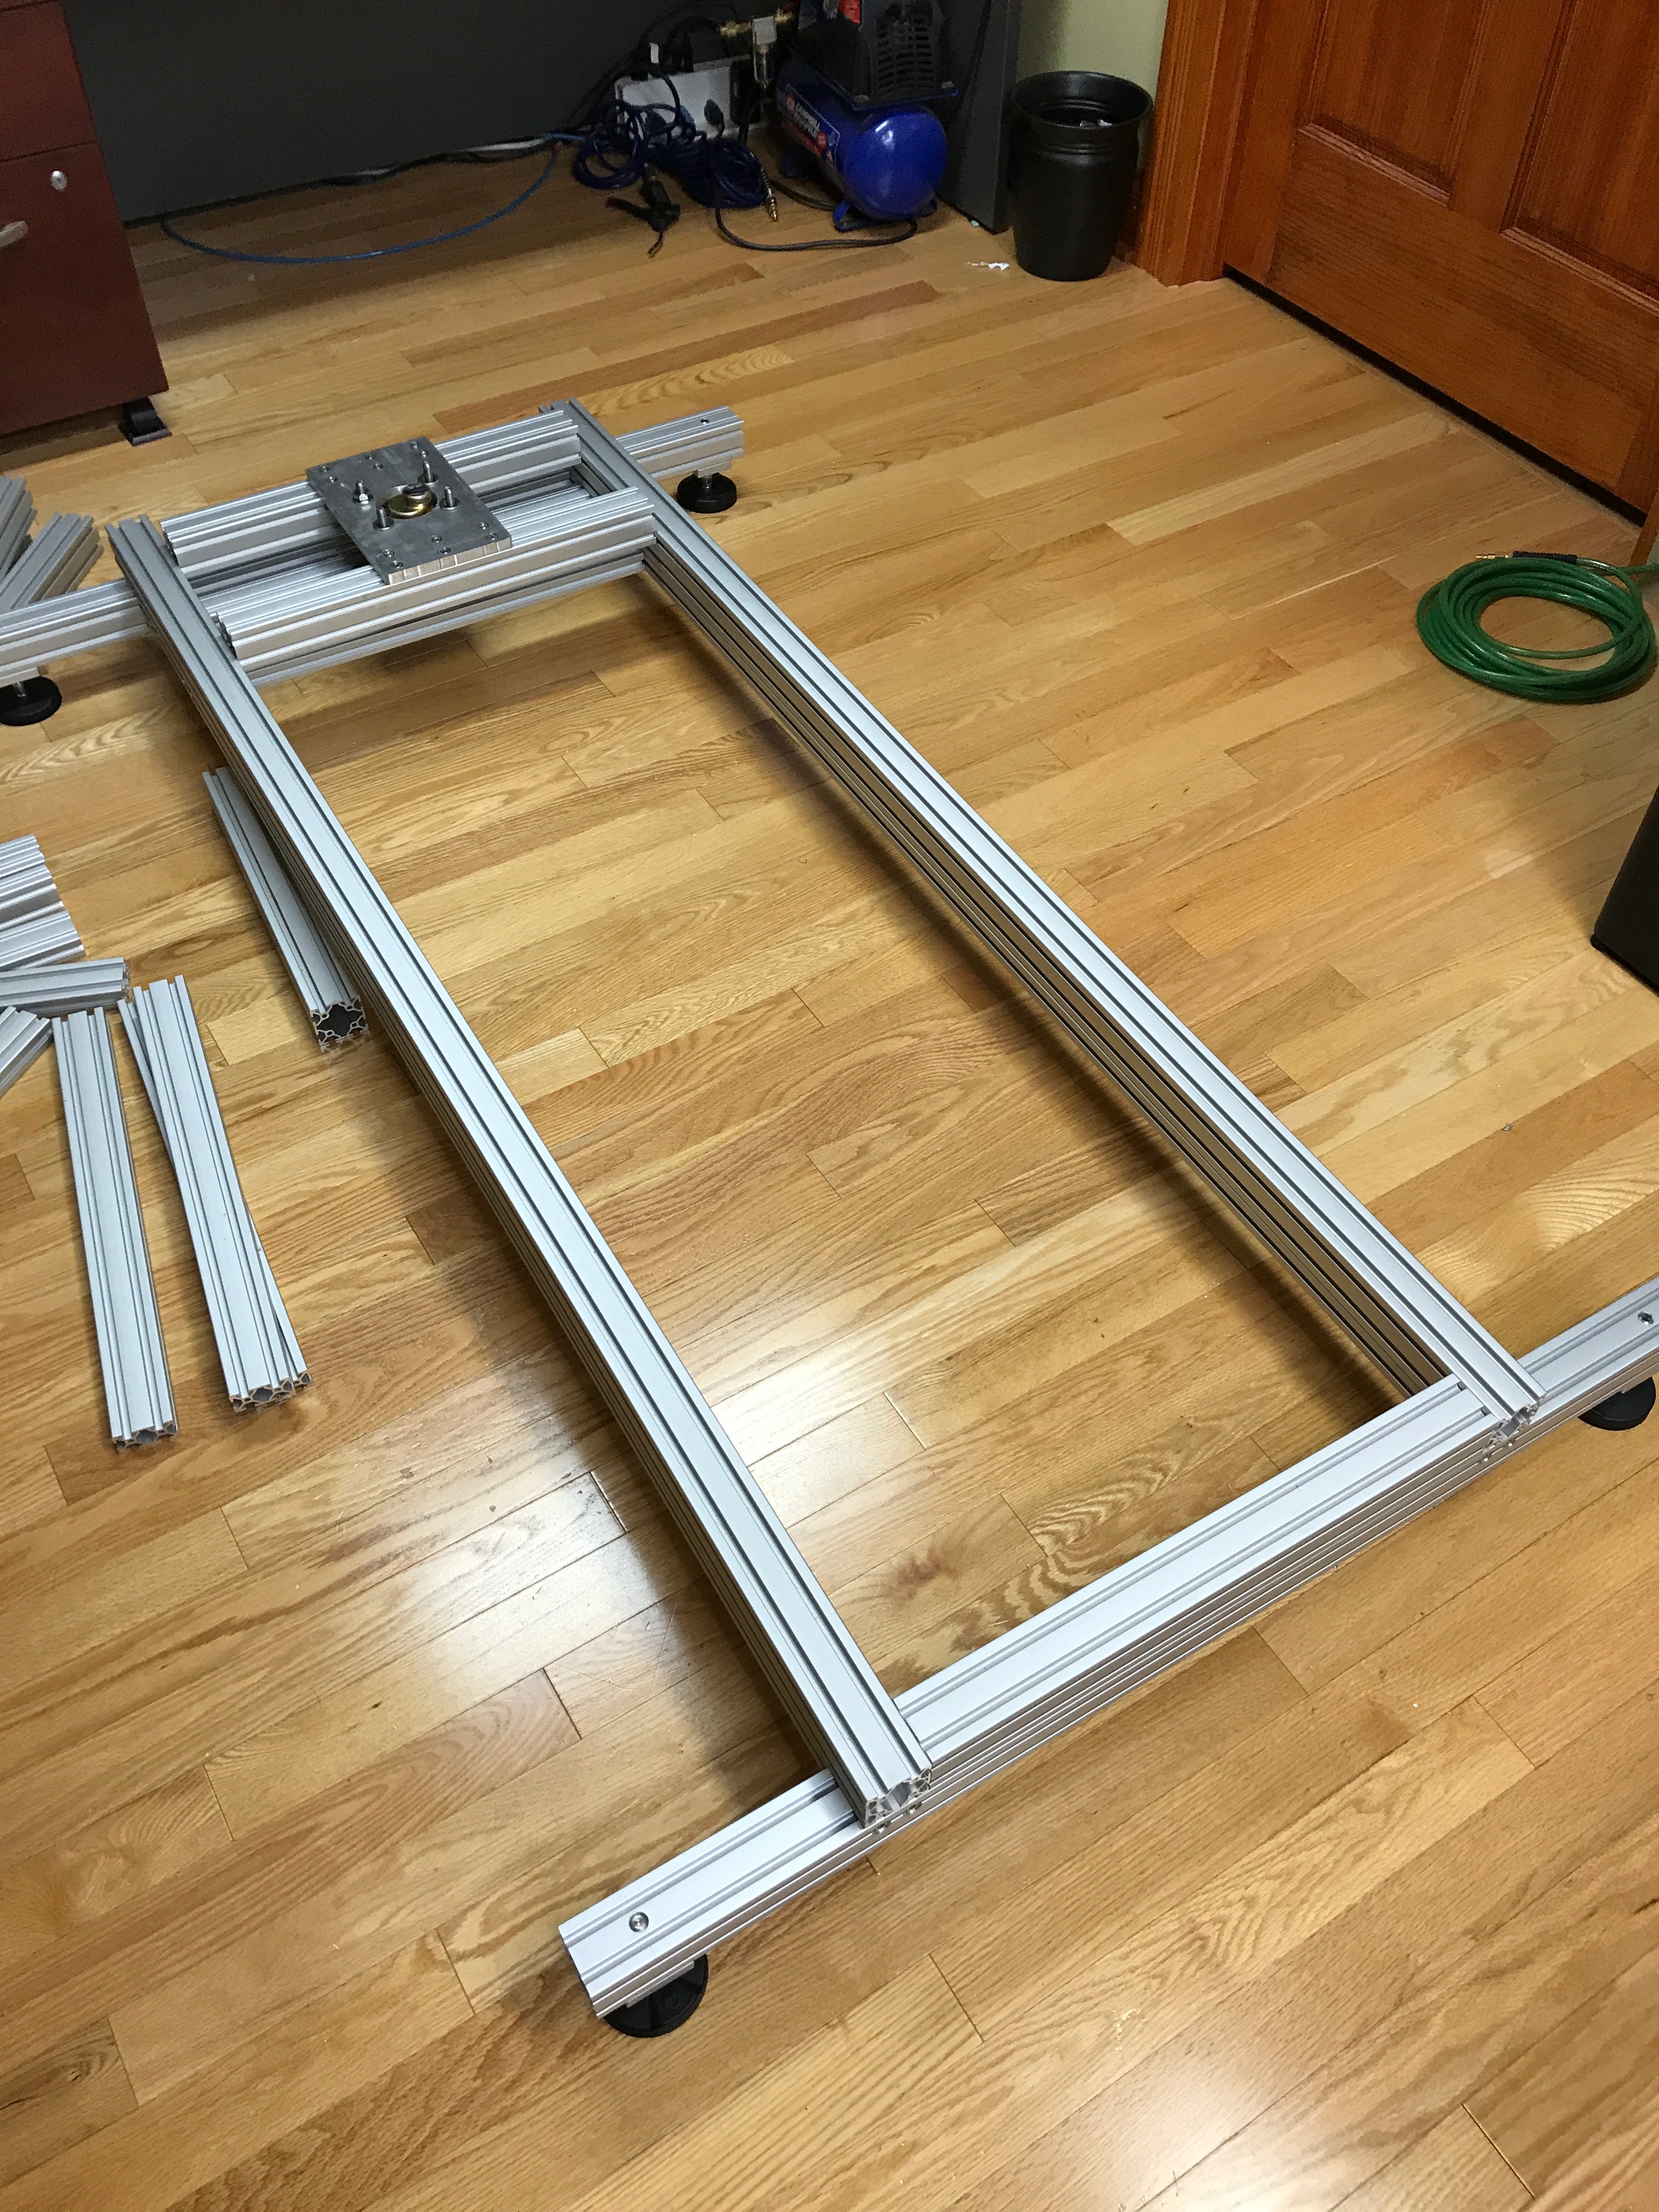\n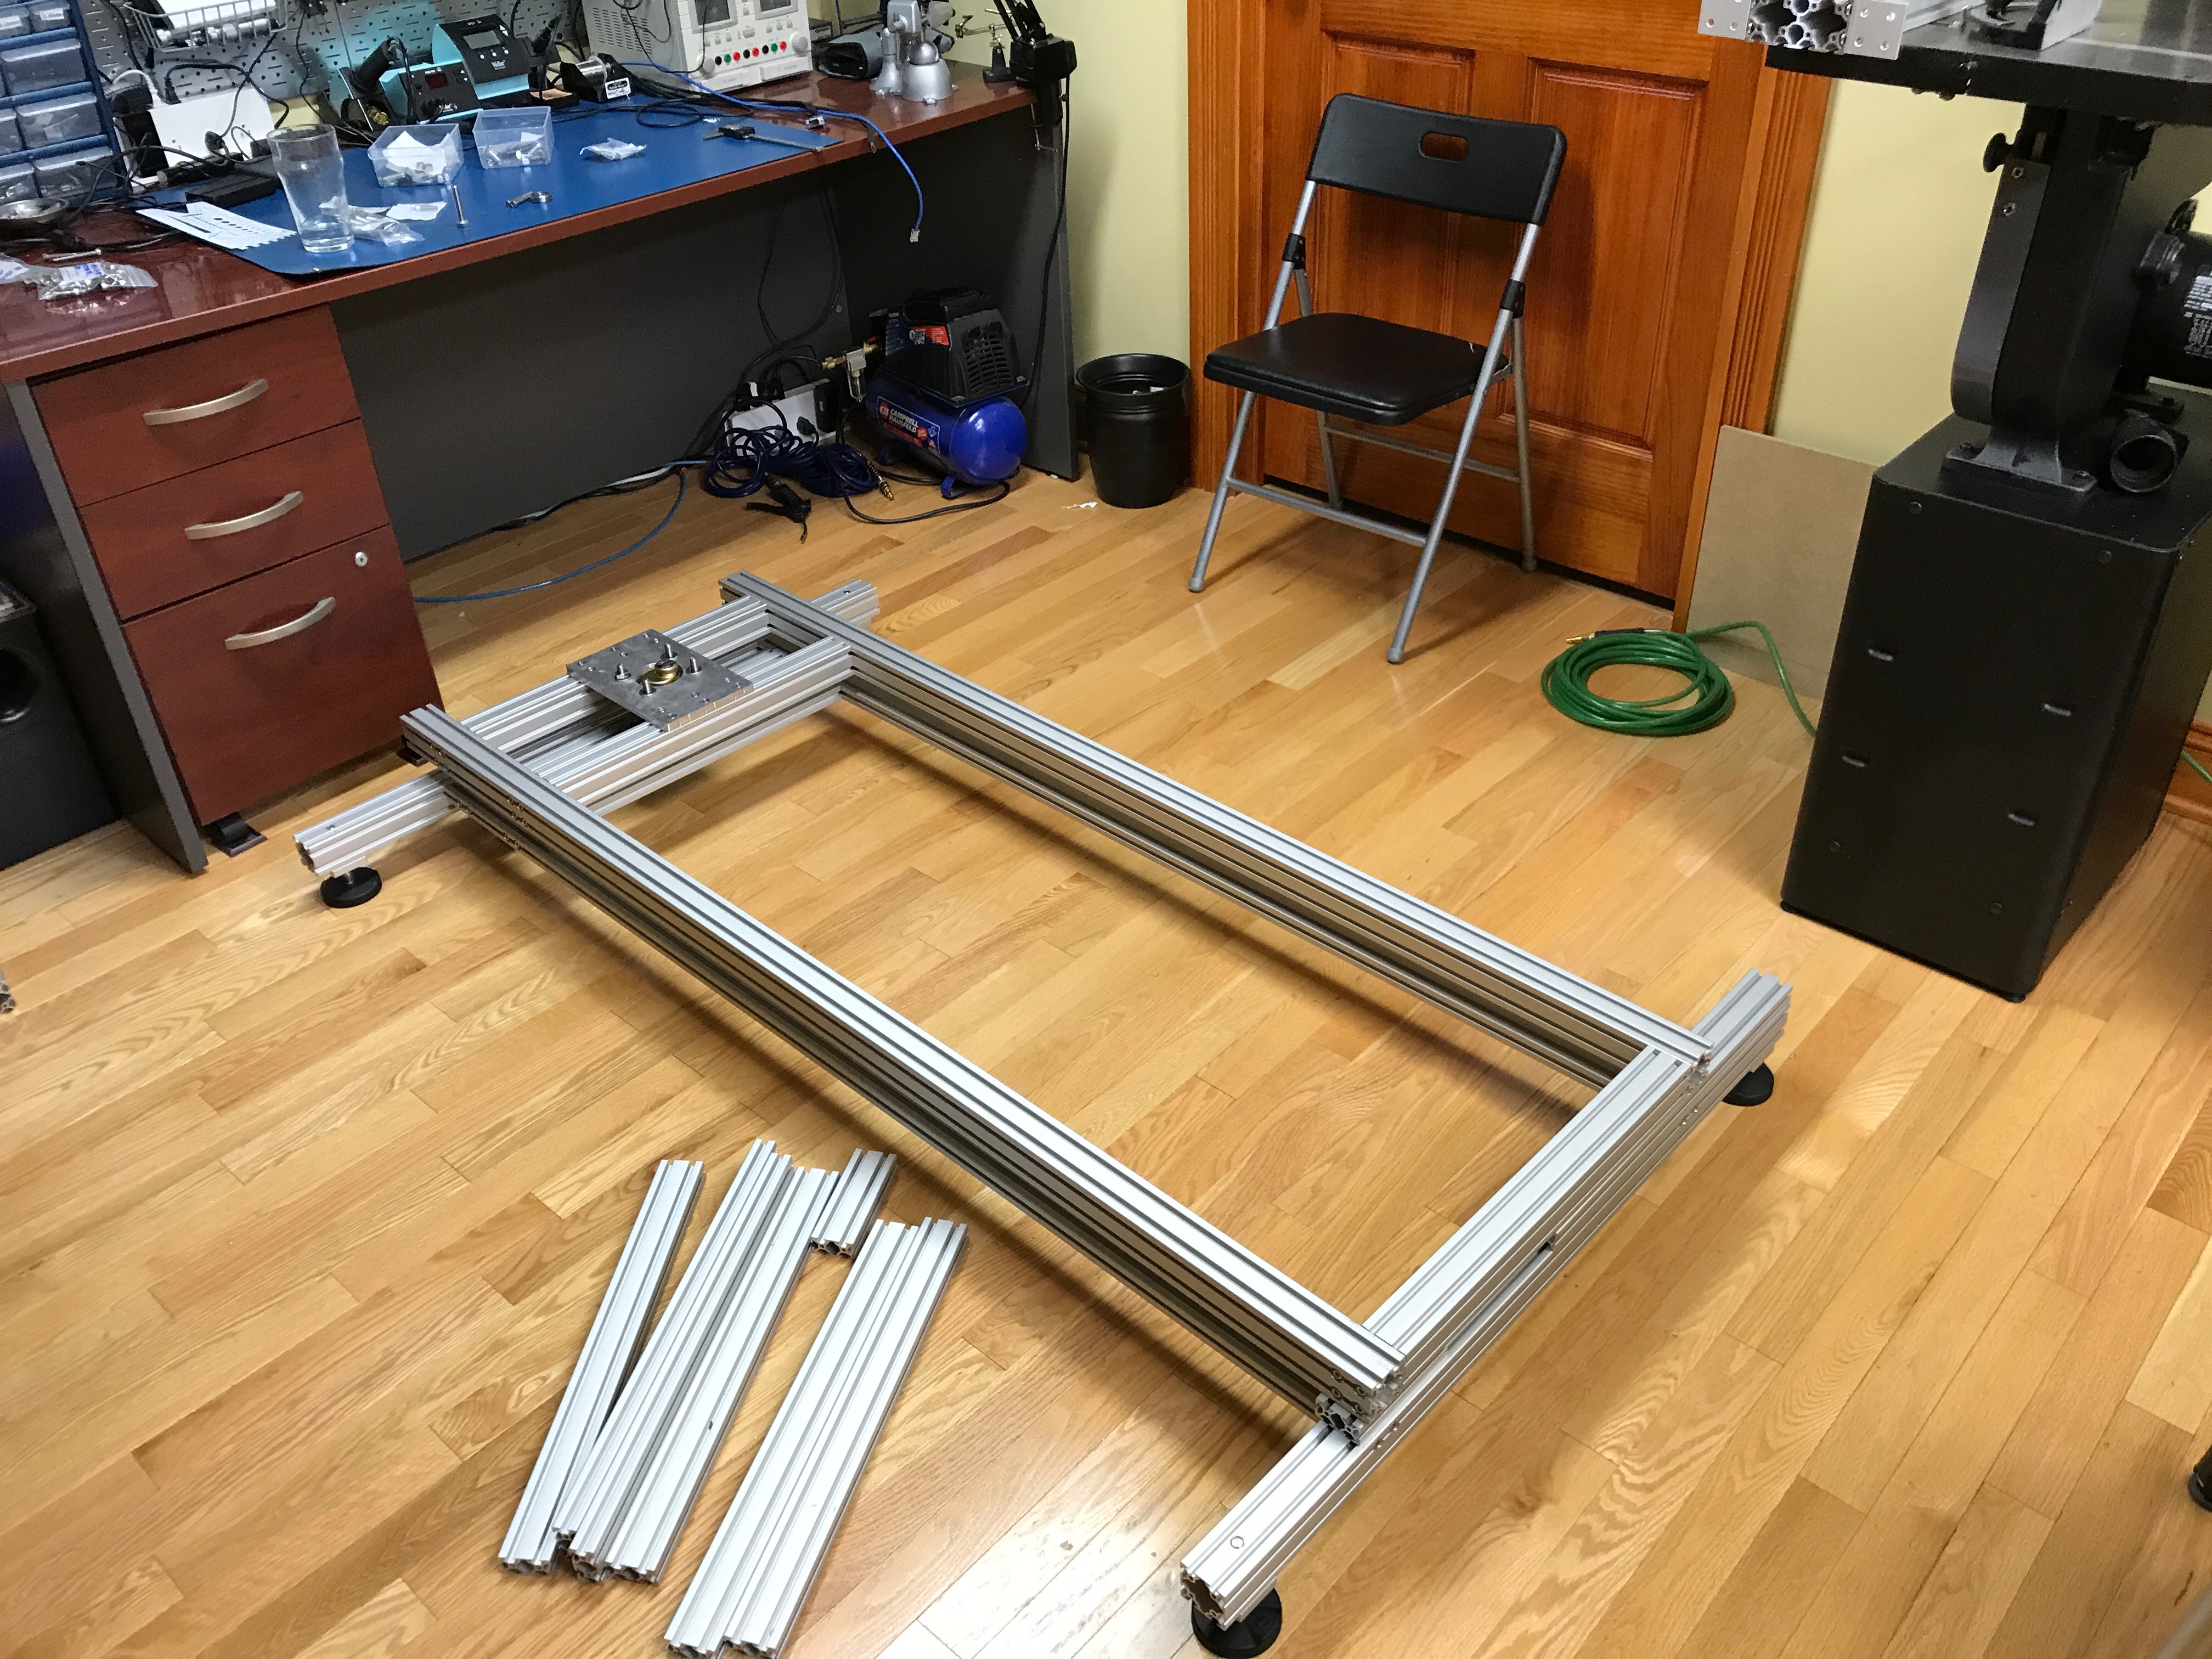\n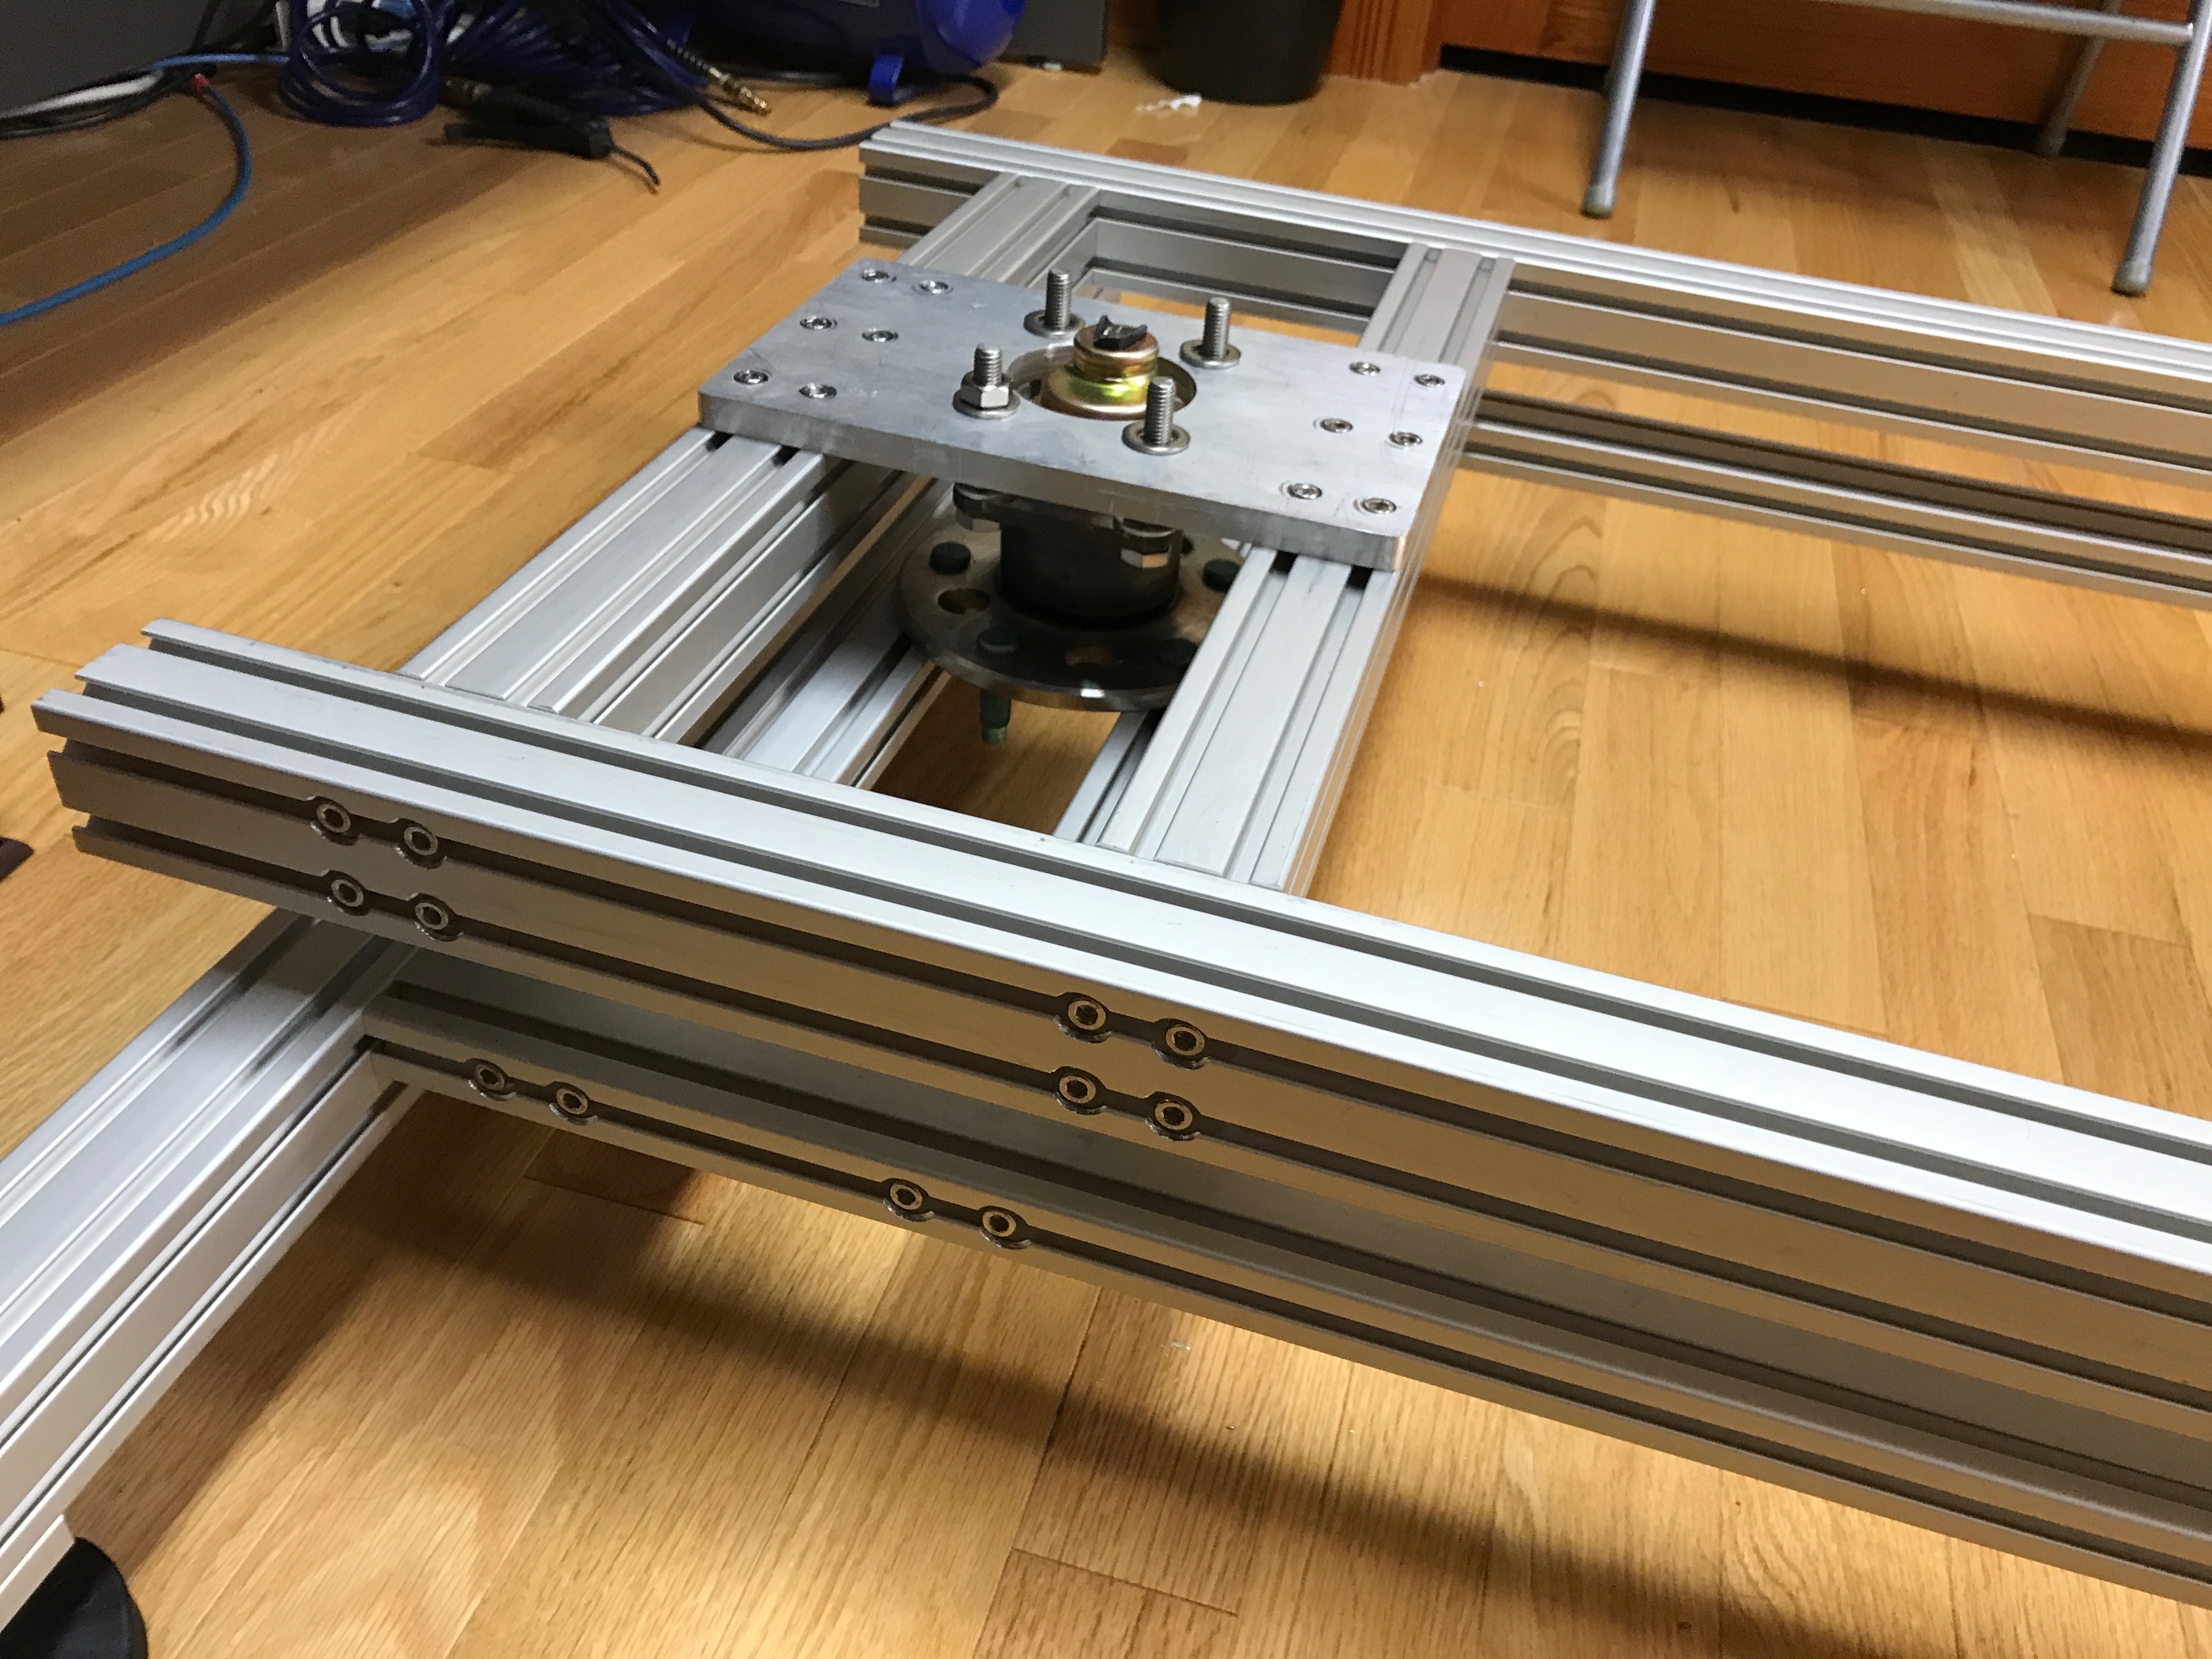\n\nThe top frame was then mocked up. The top frame sits on linear sliders to allow it to slide back and forward. This was the biggest improvement over version 1.\n\n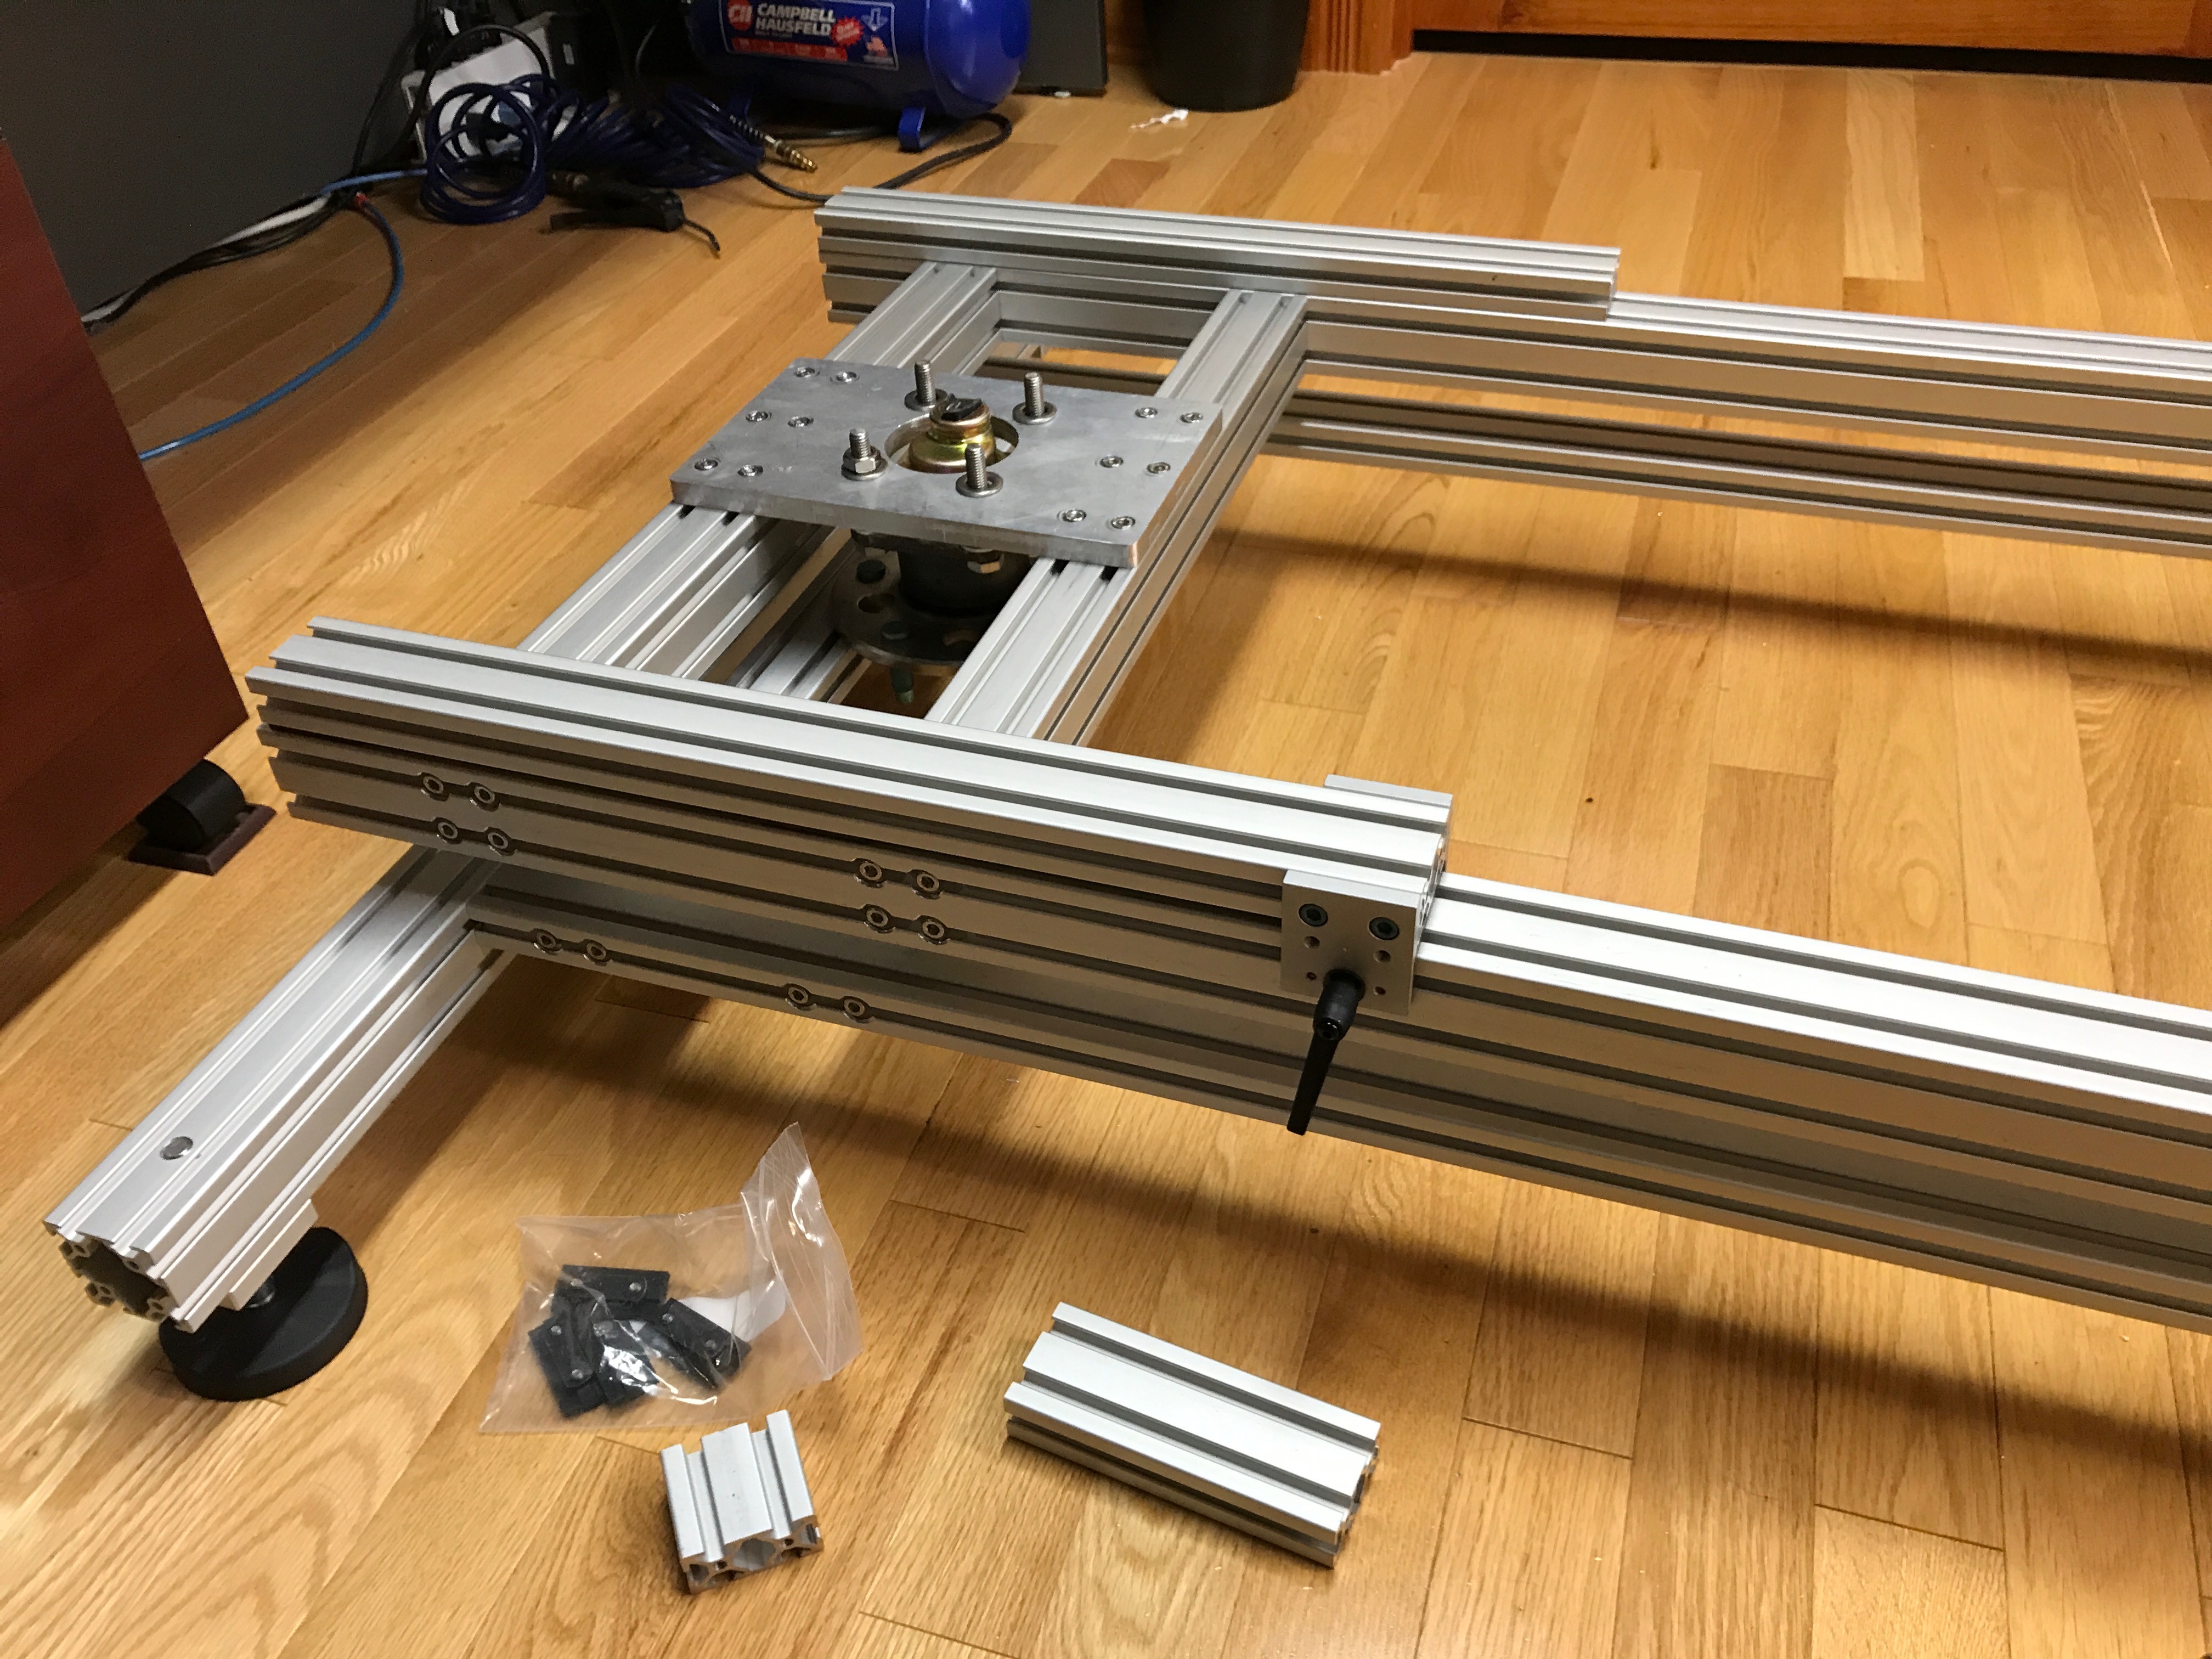\n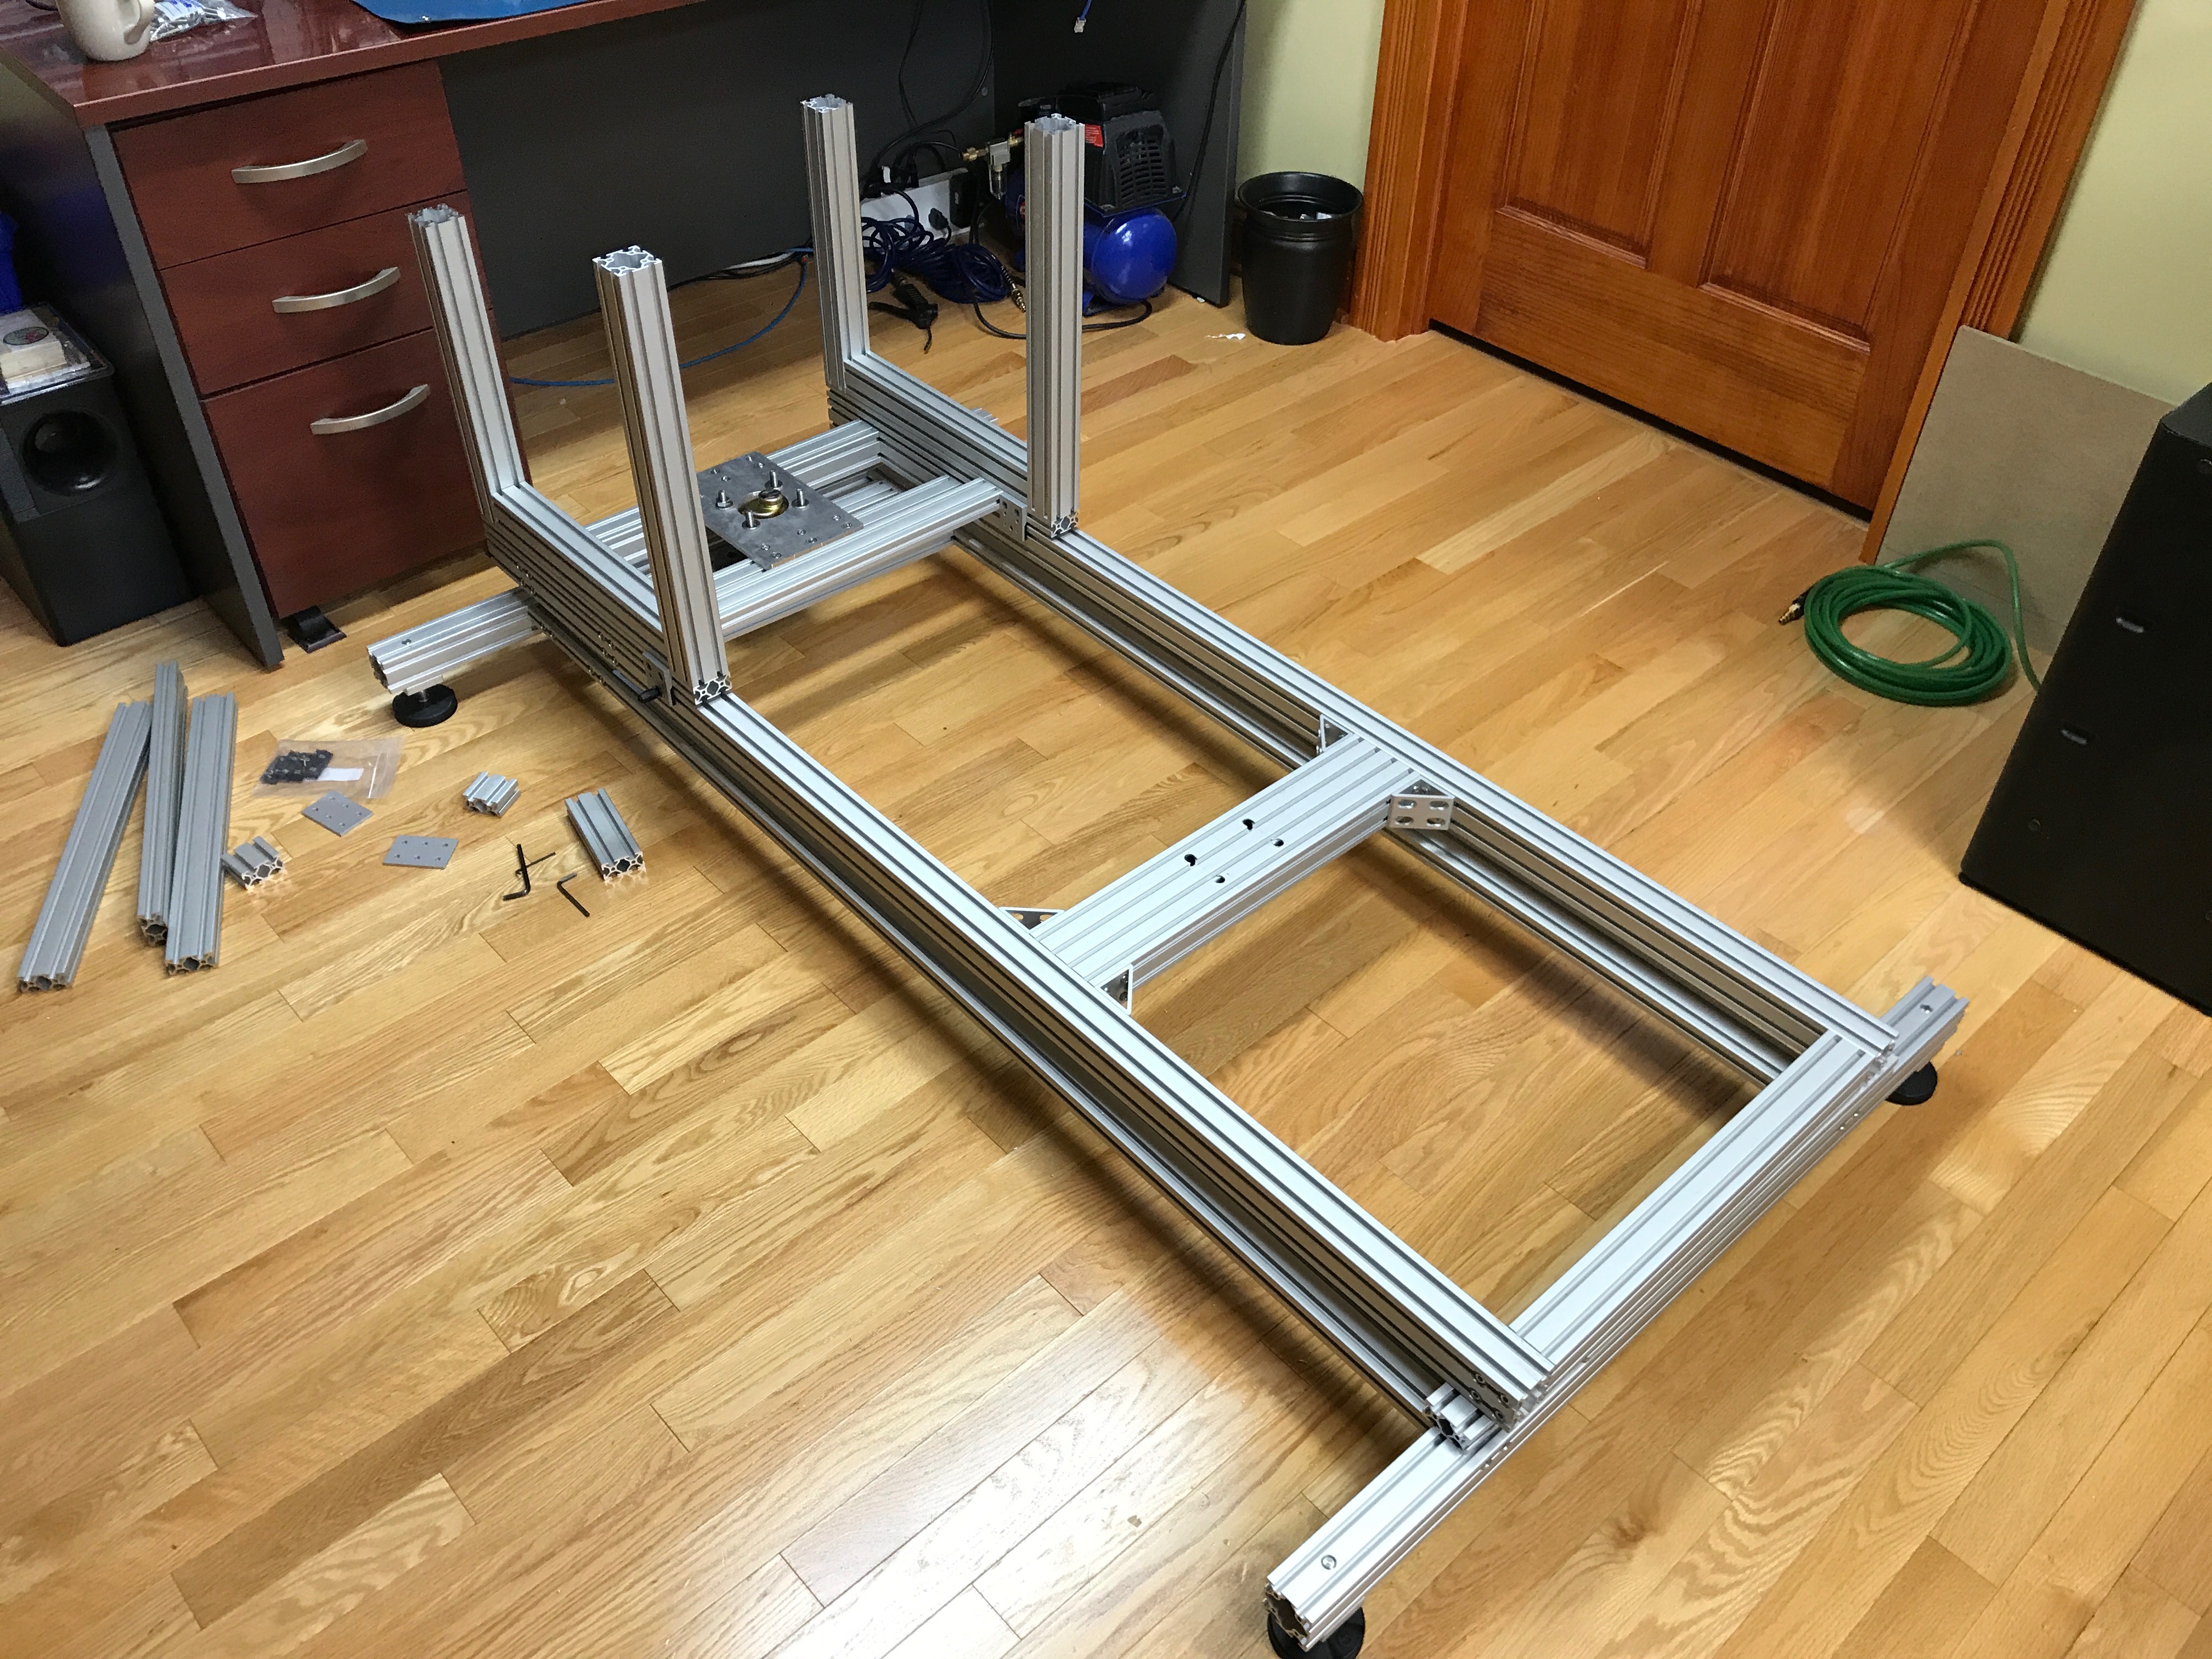\n\nThere was a lot of drilling and thread tapping to get all the pieces of the top frame together.\n\n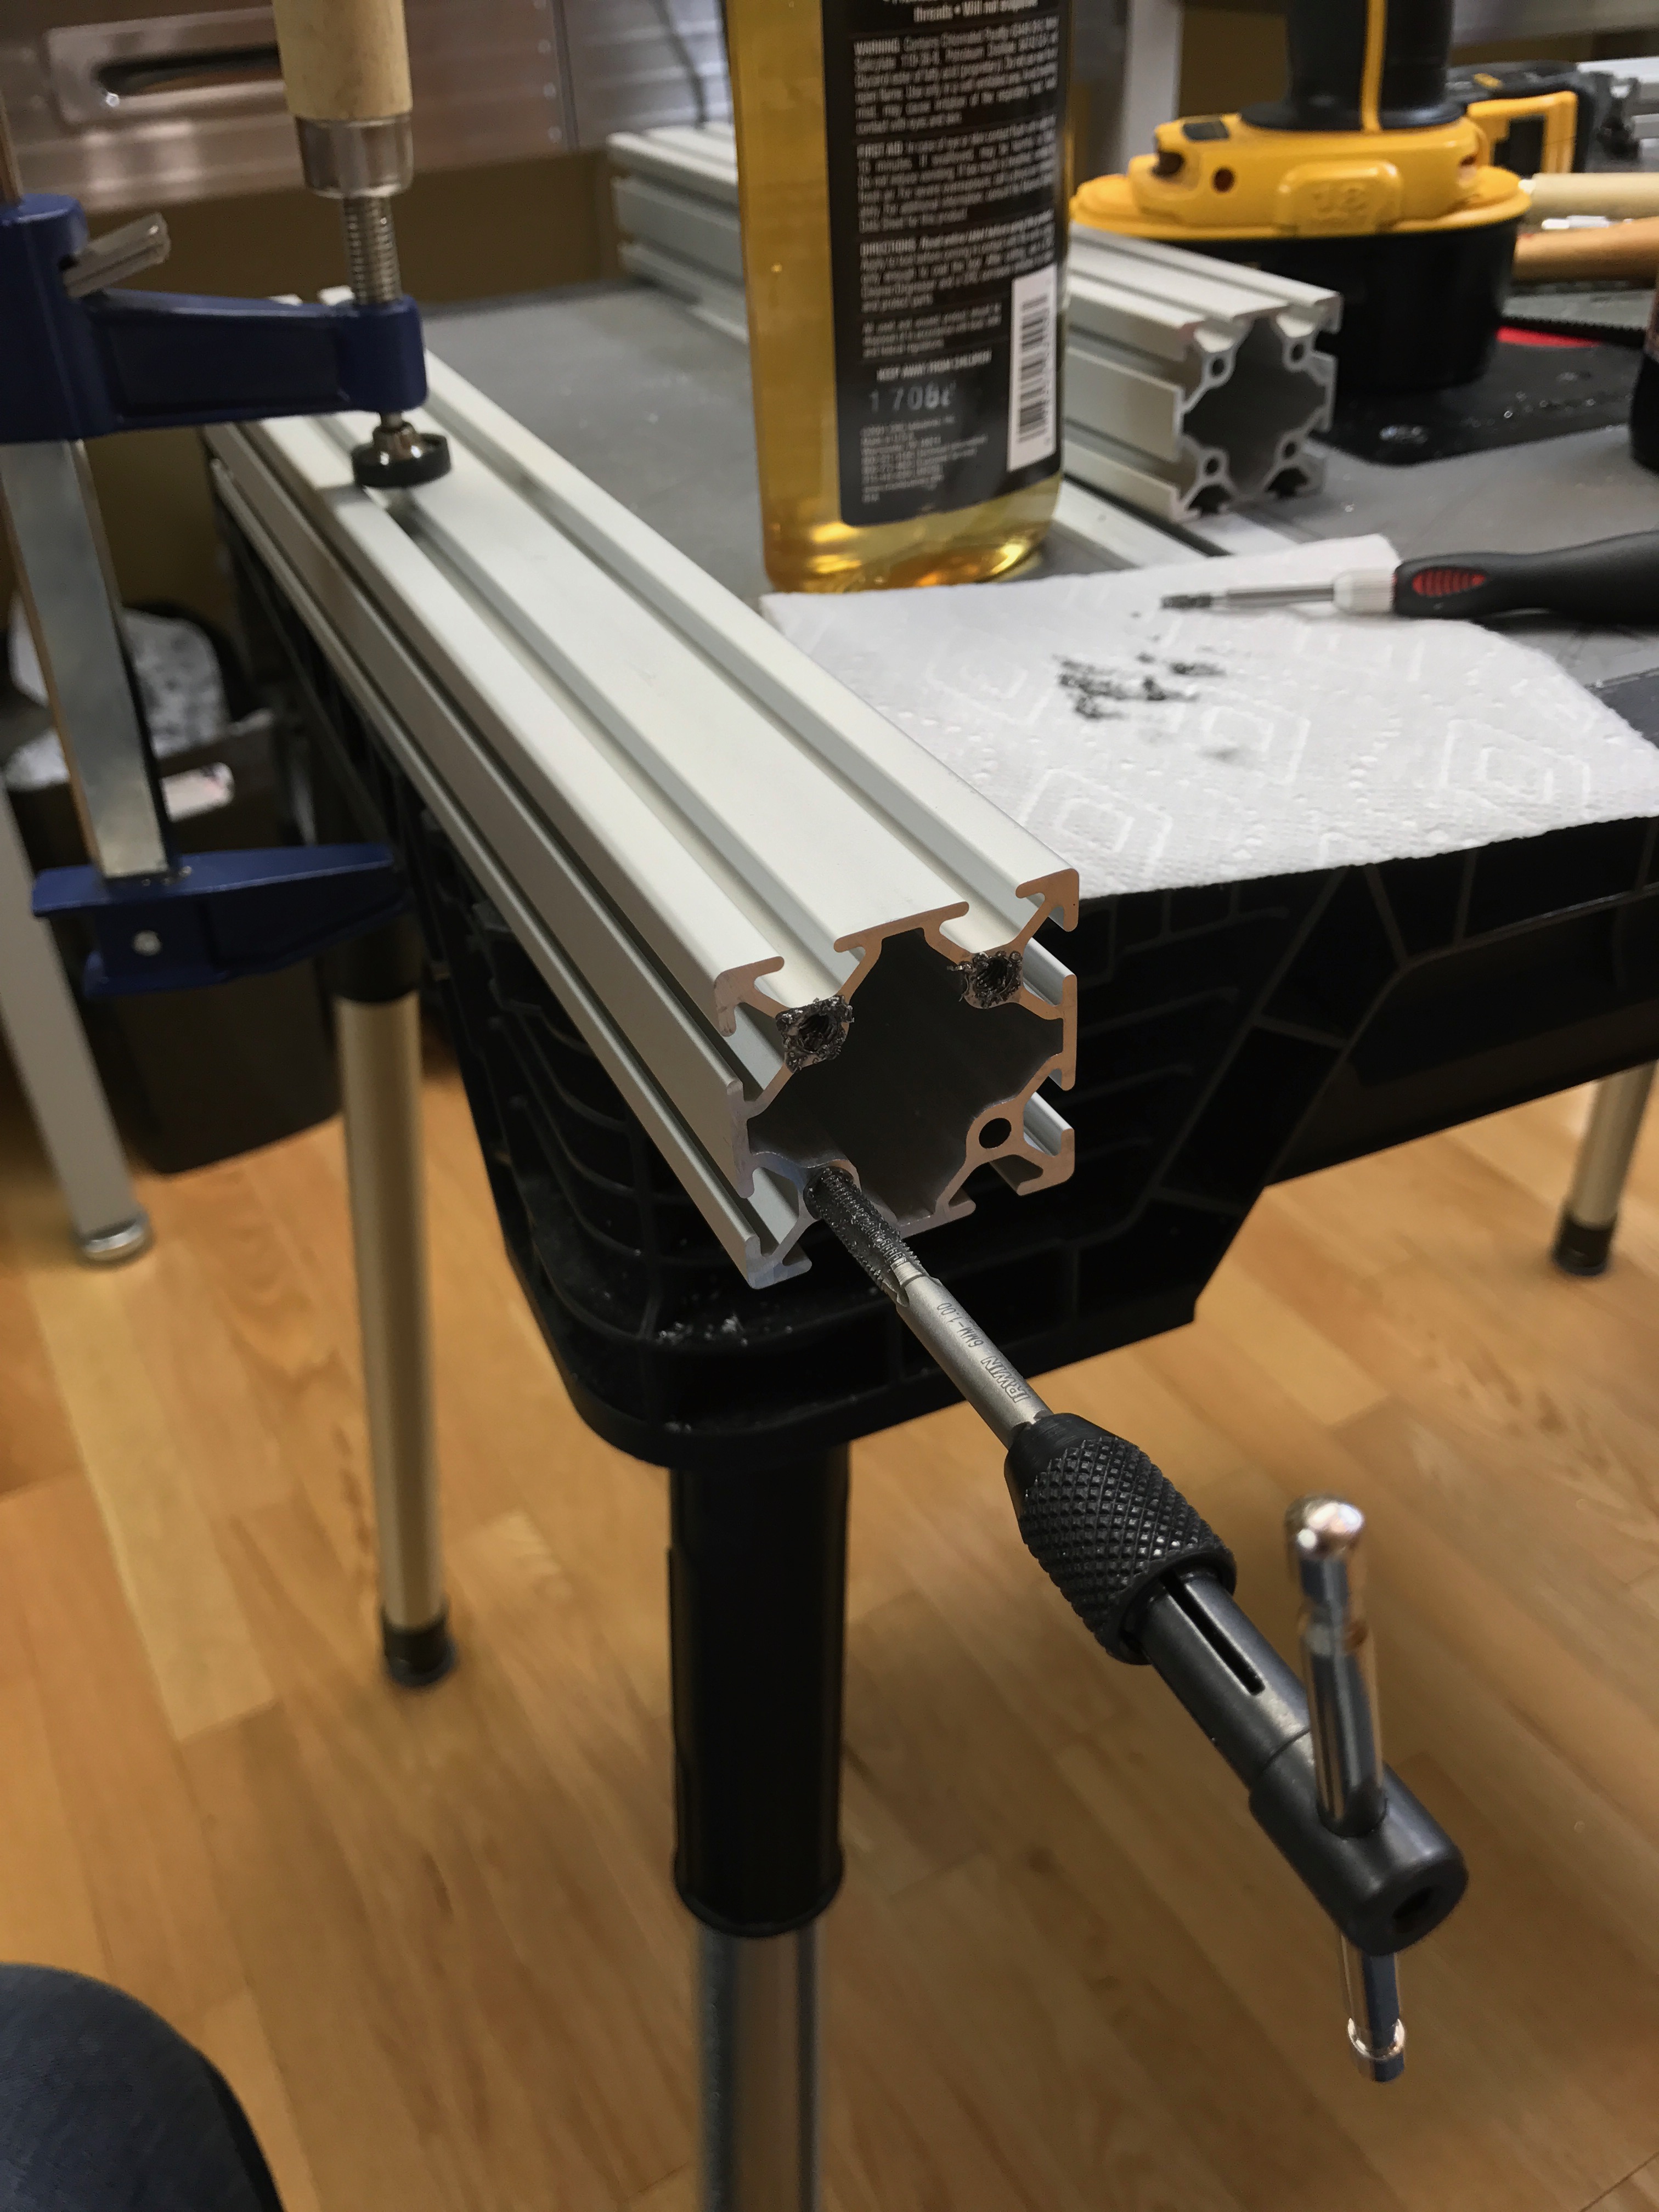\n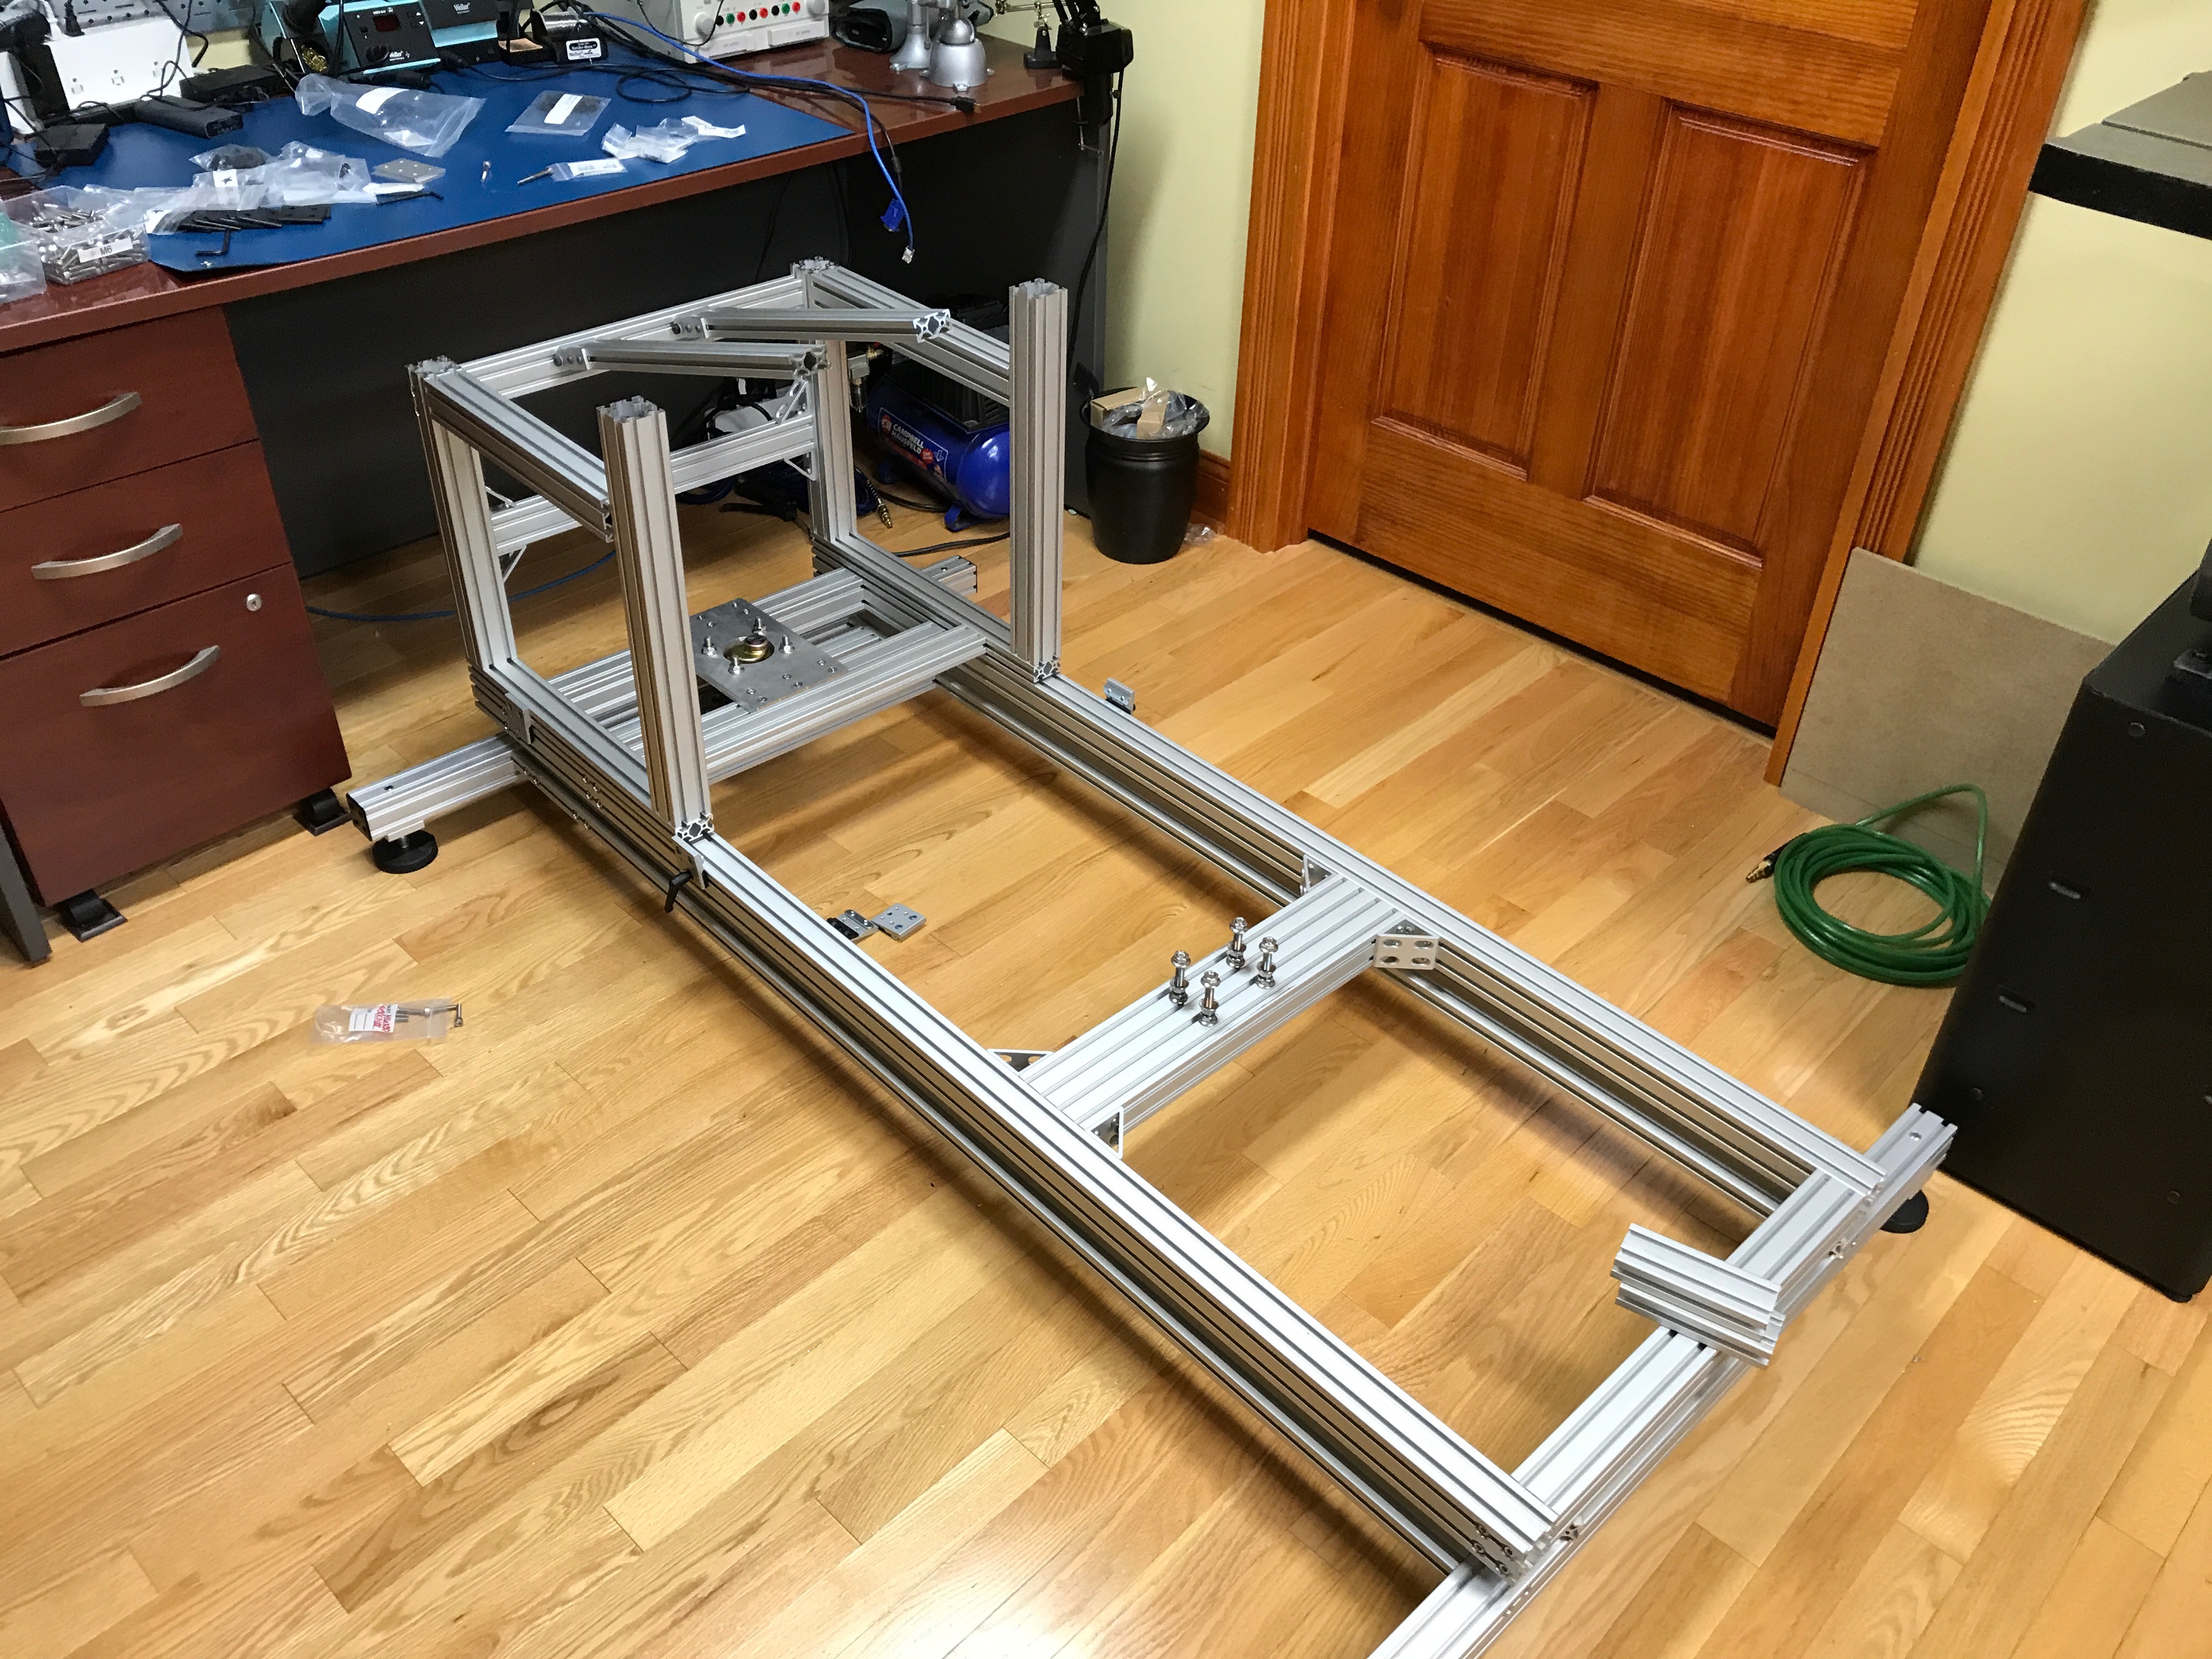\n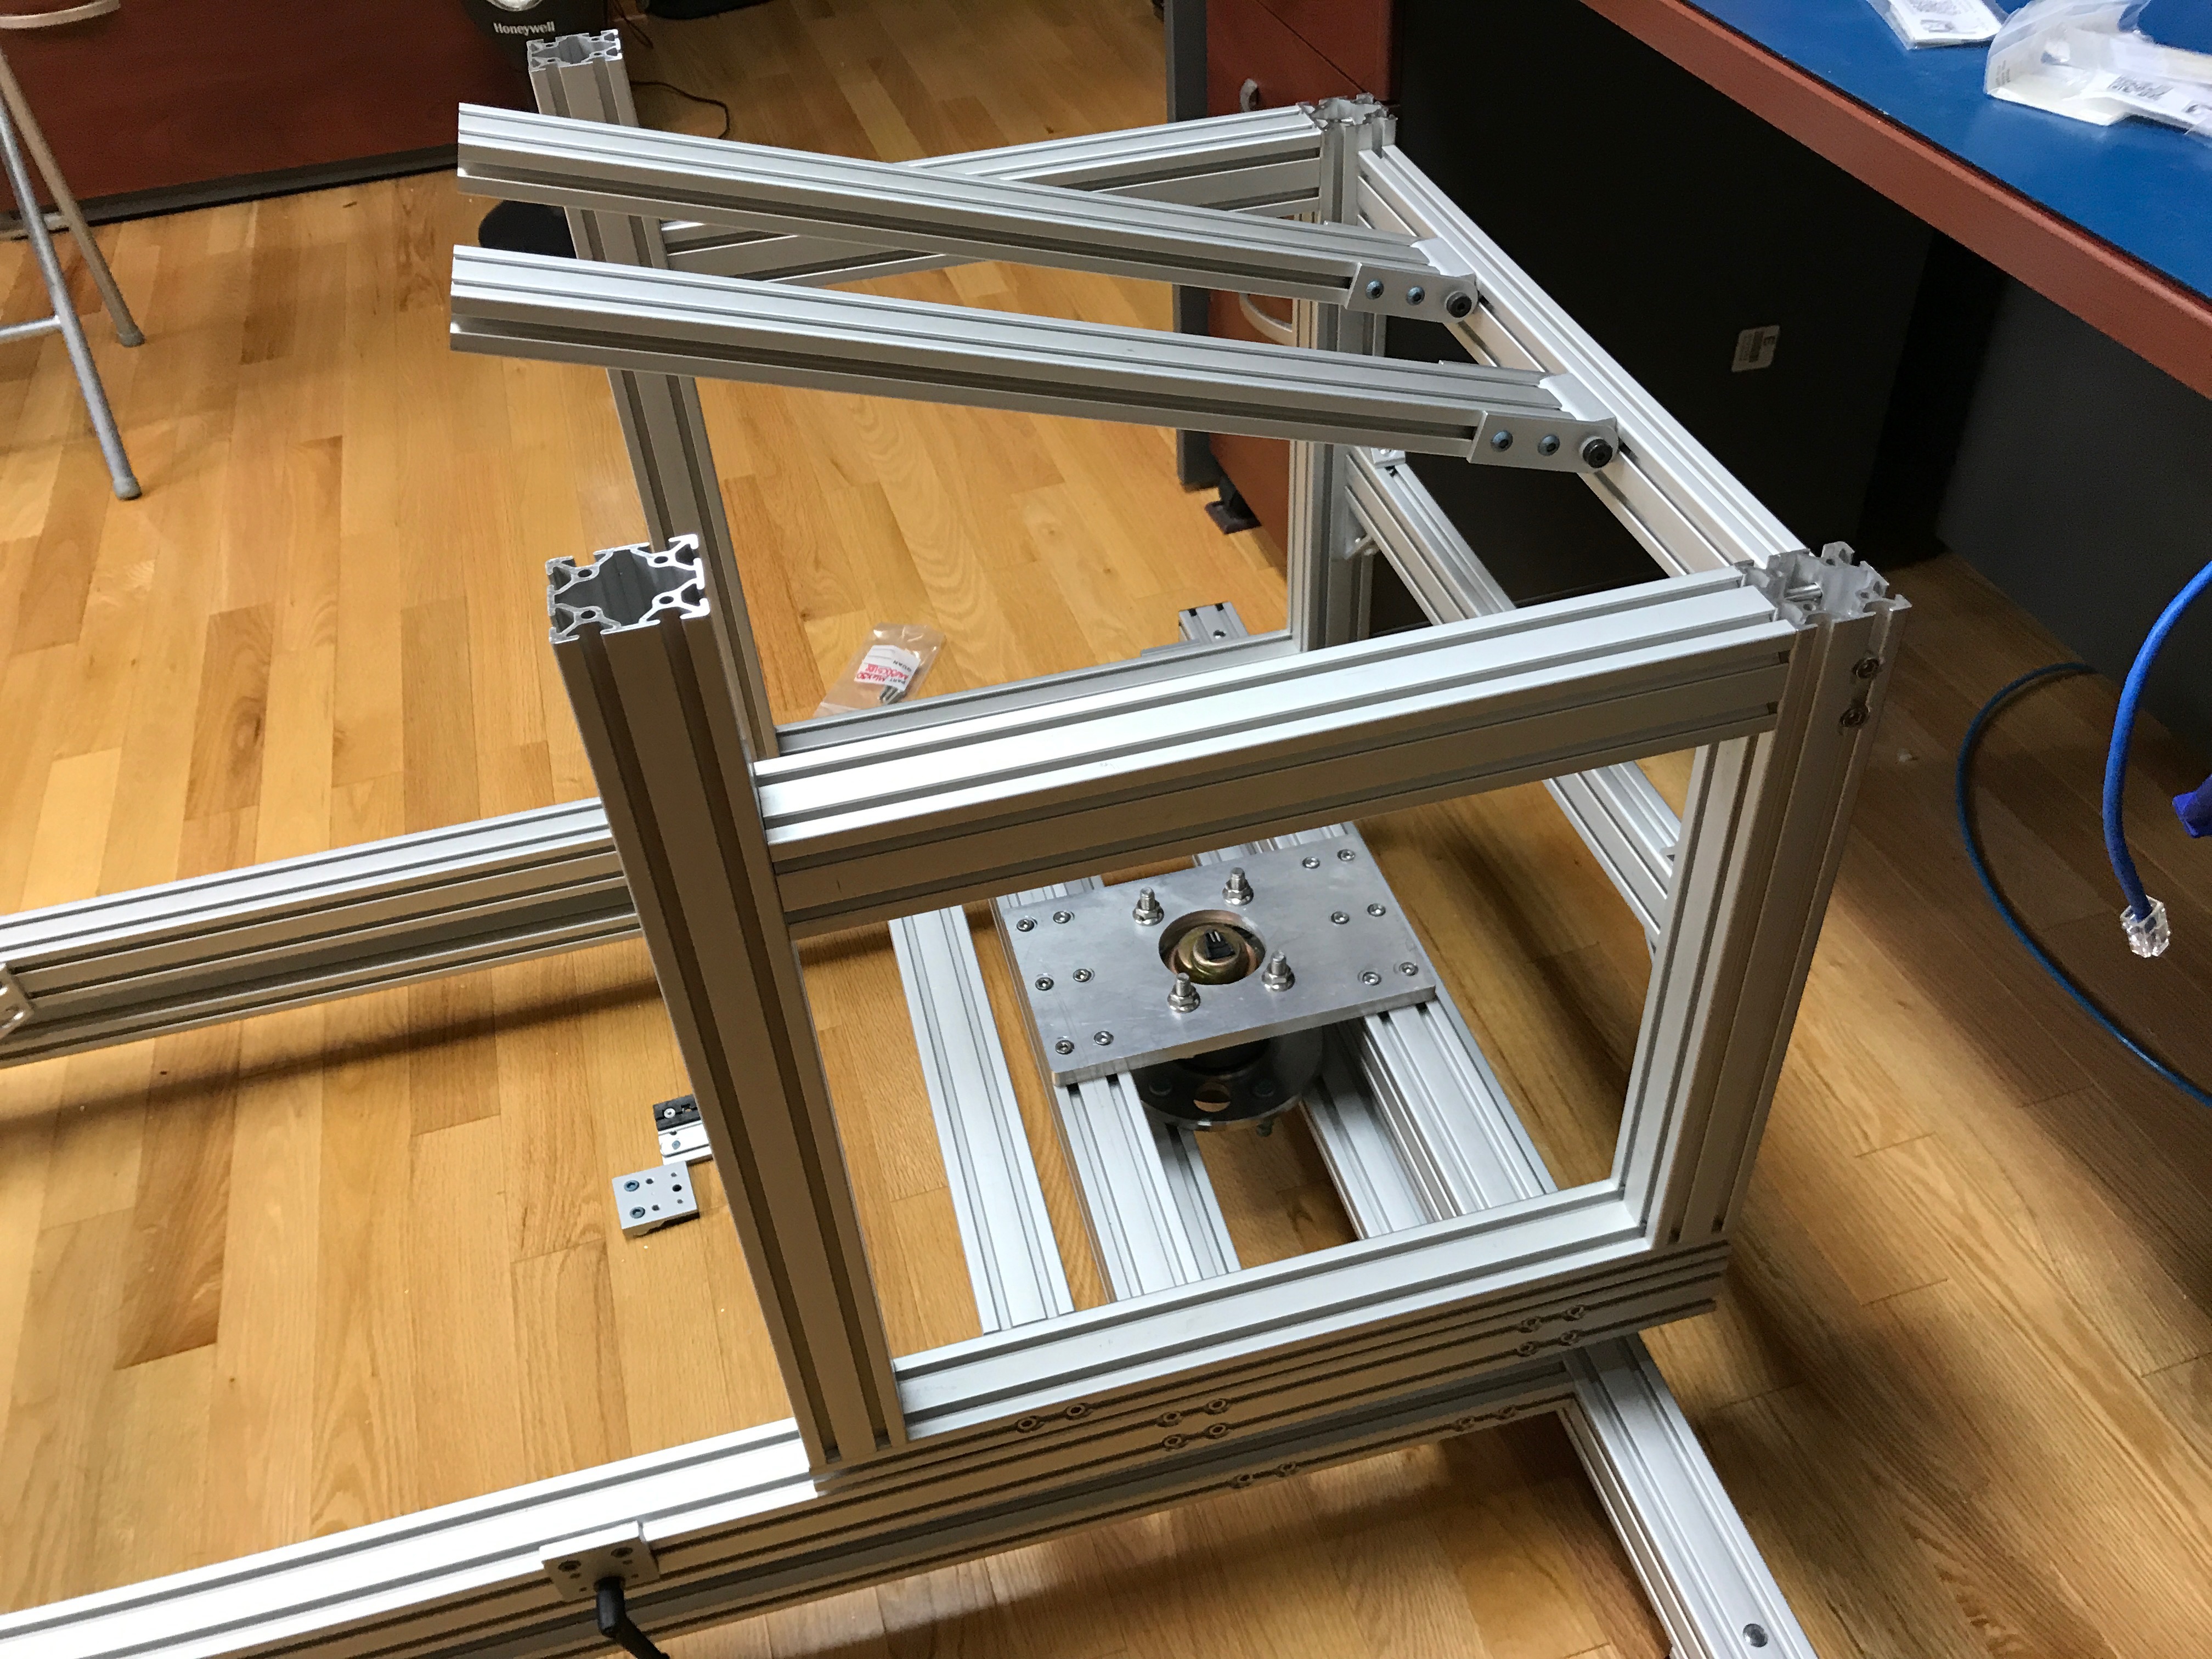\n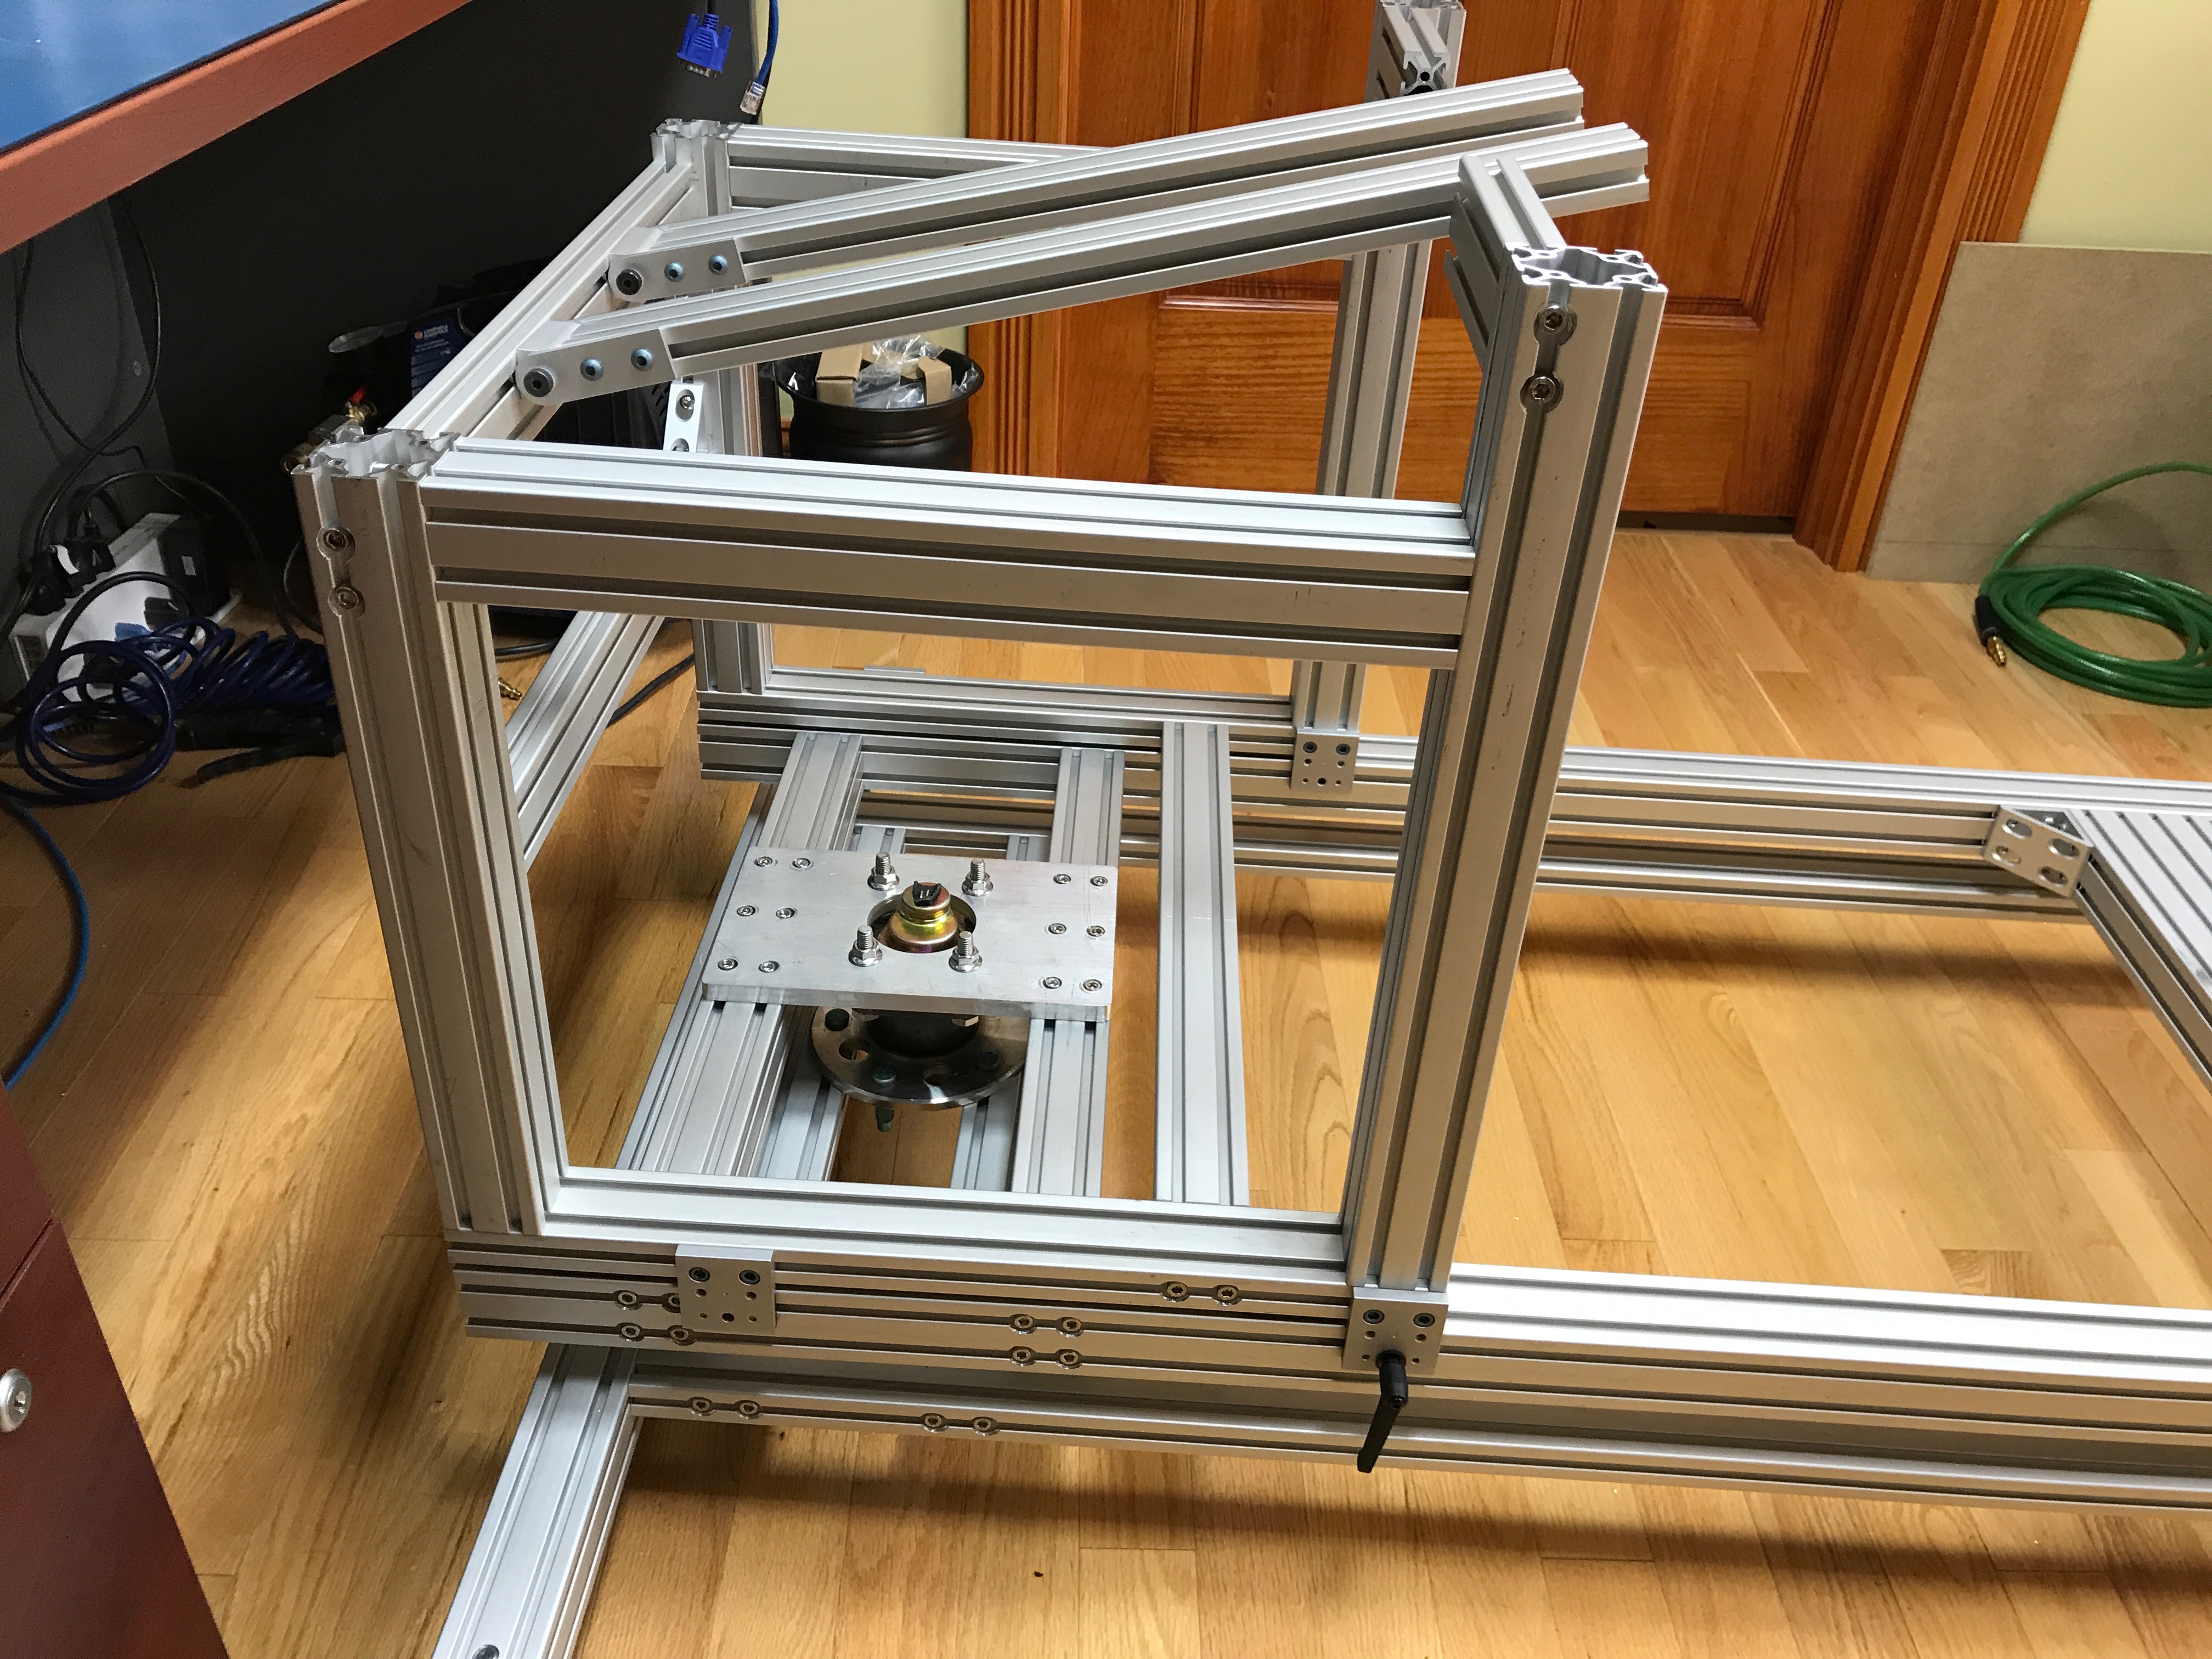\n\nI pieced together a seat mount using 80/20, rather than using the SimXperience DIY seat kit that I had for version 1. I did this so that I could get the seat sitting lower in the frame.\n\n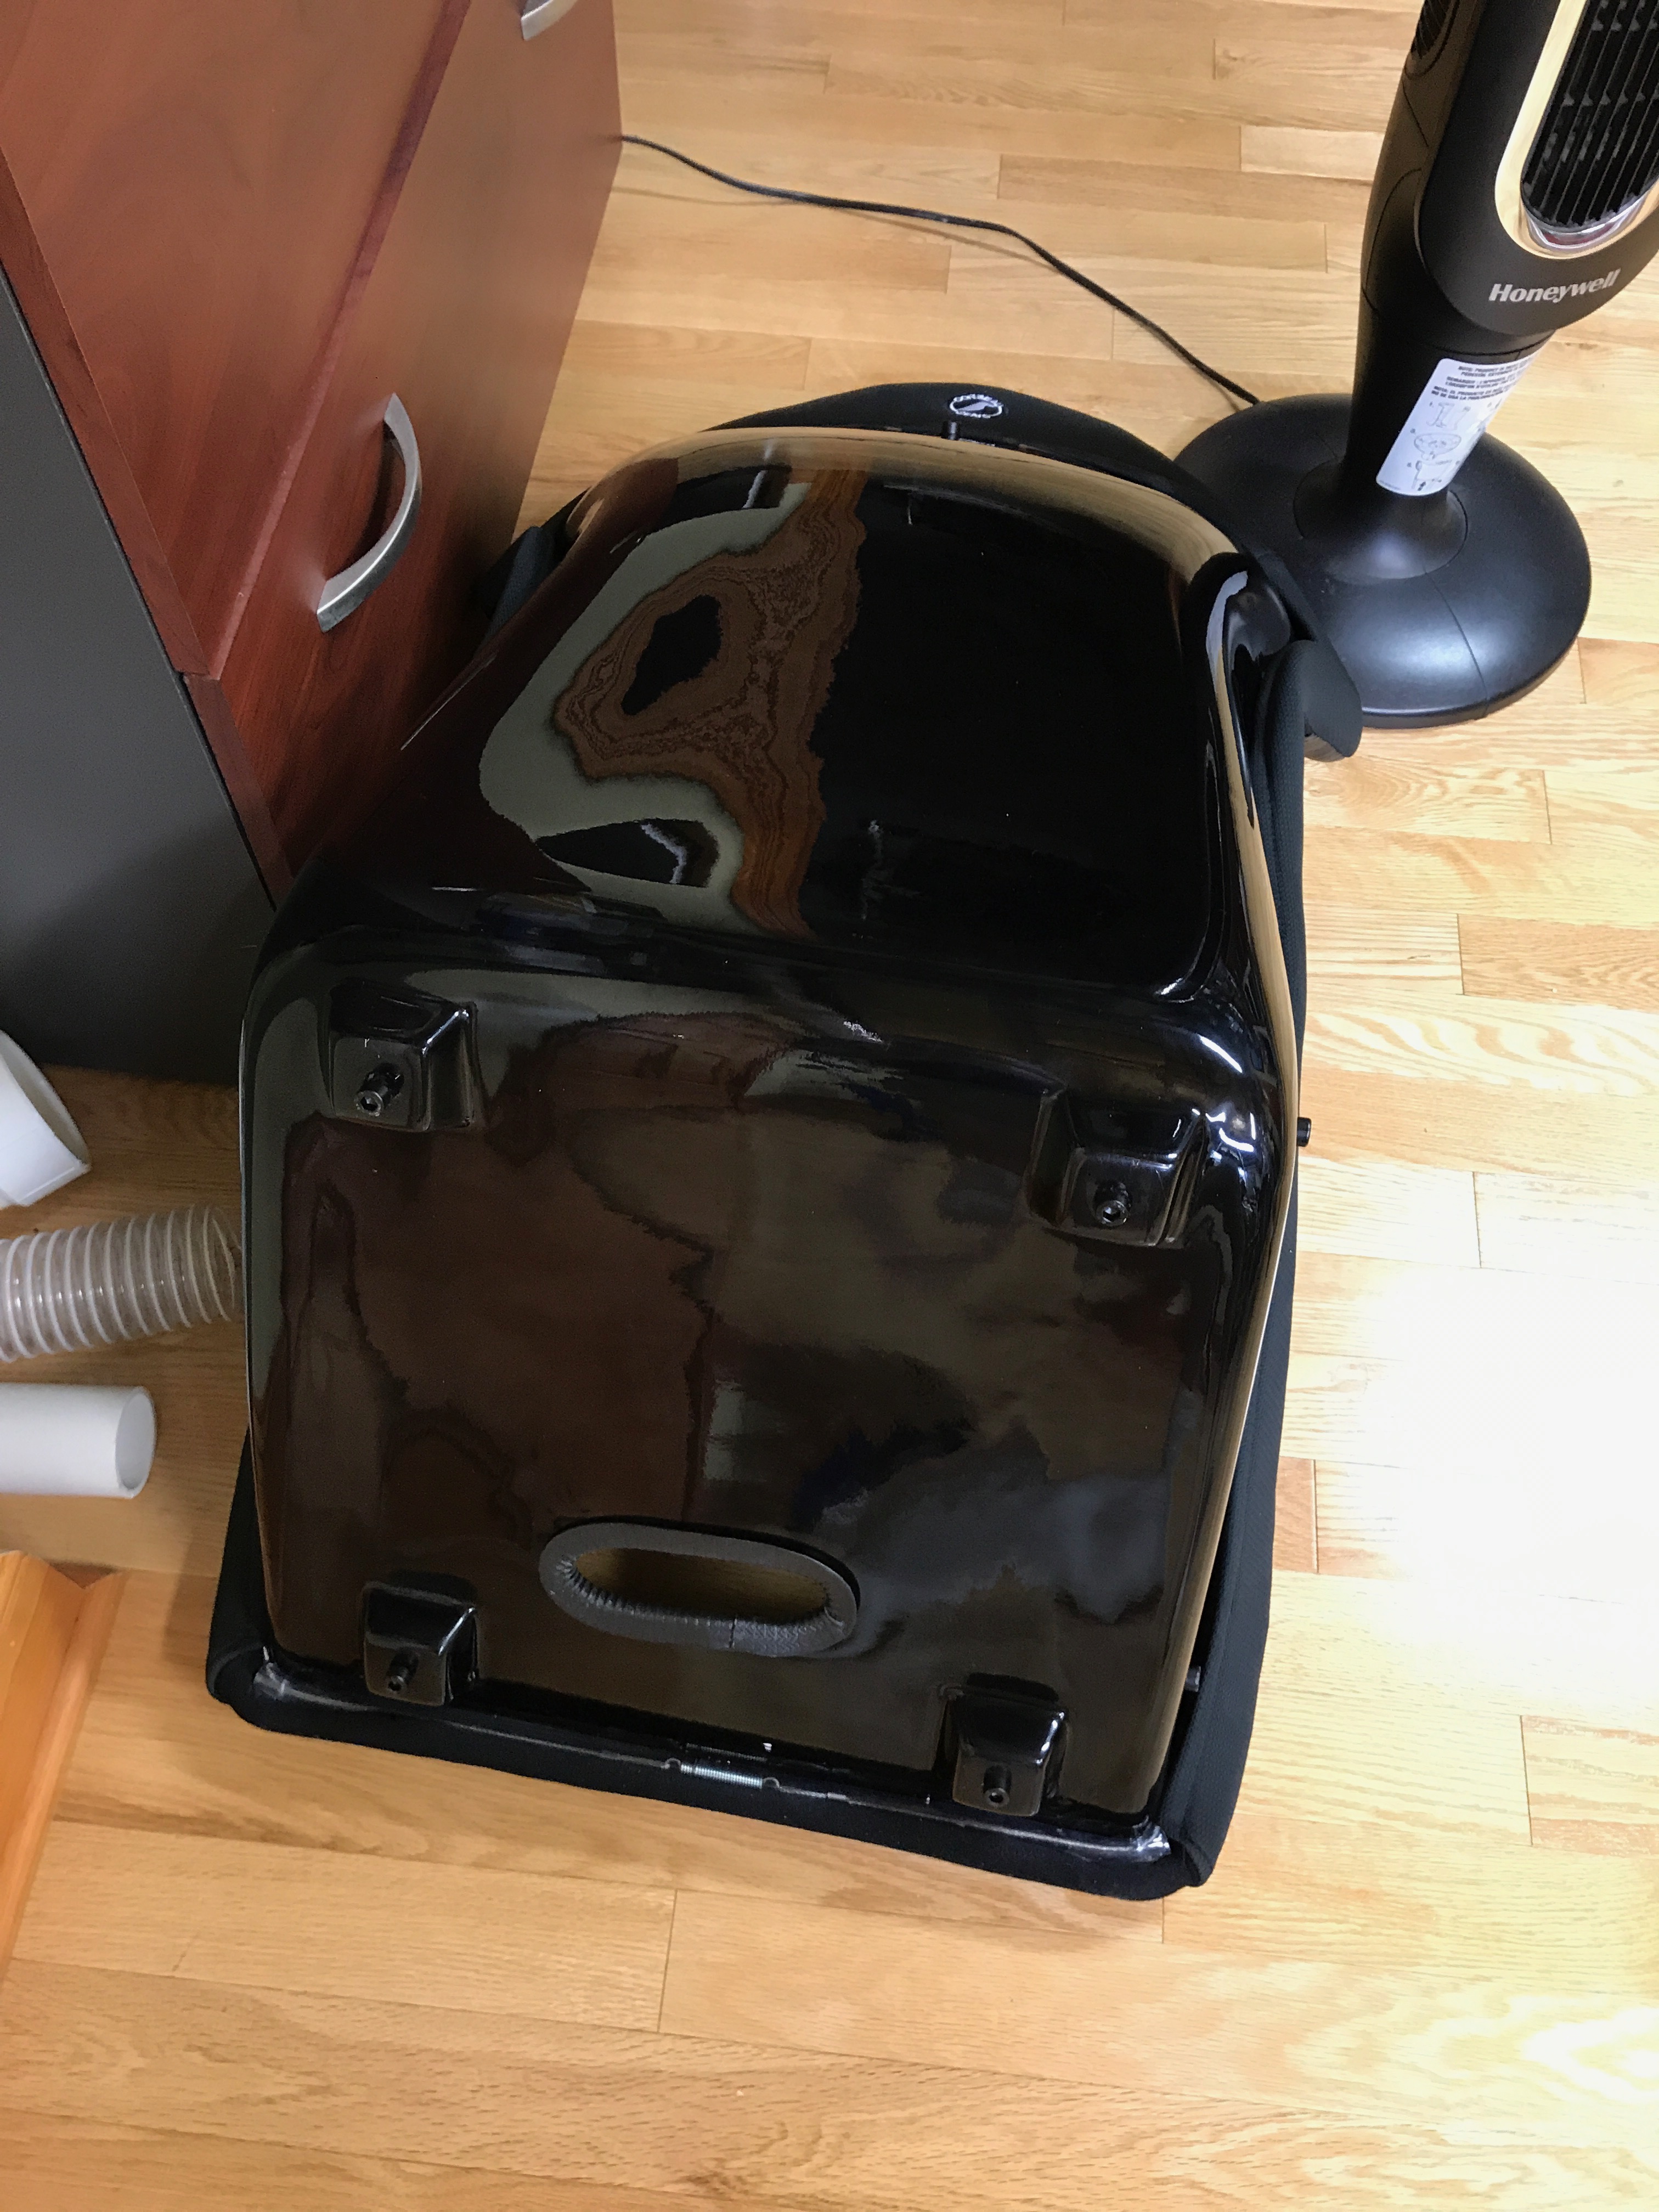\n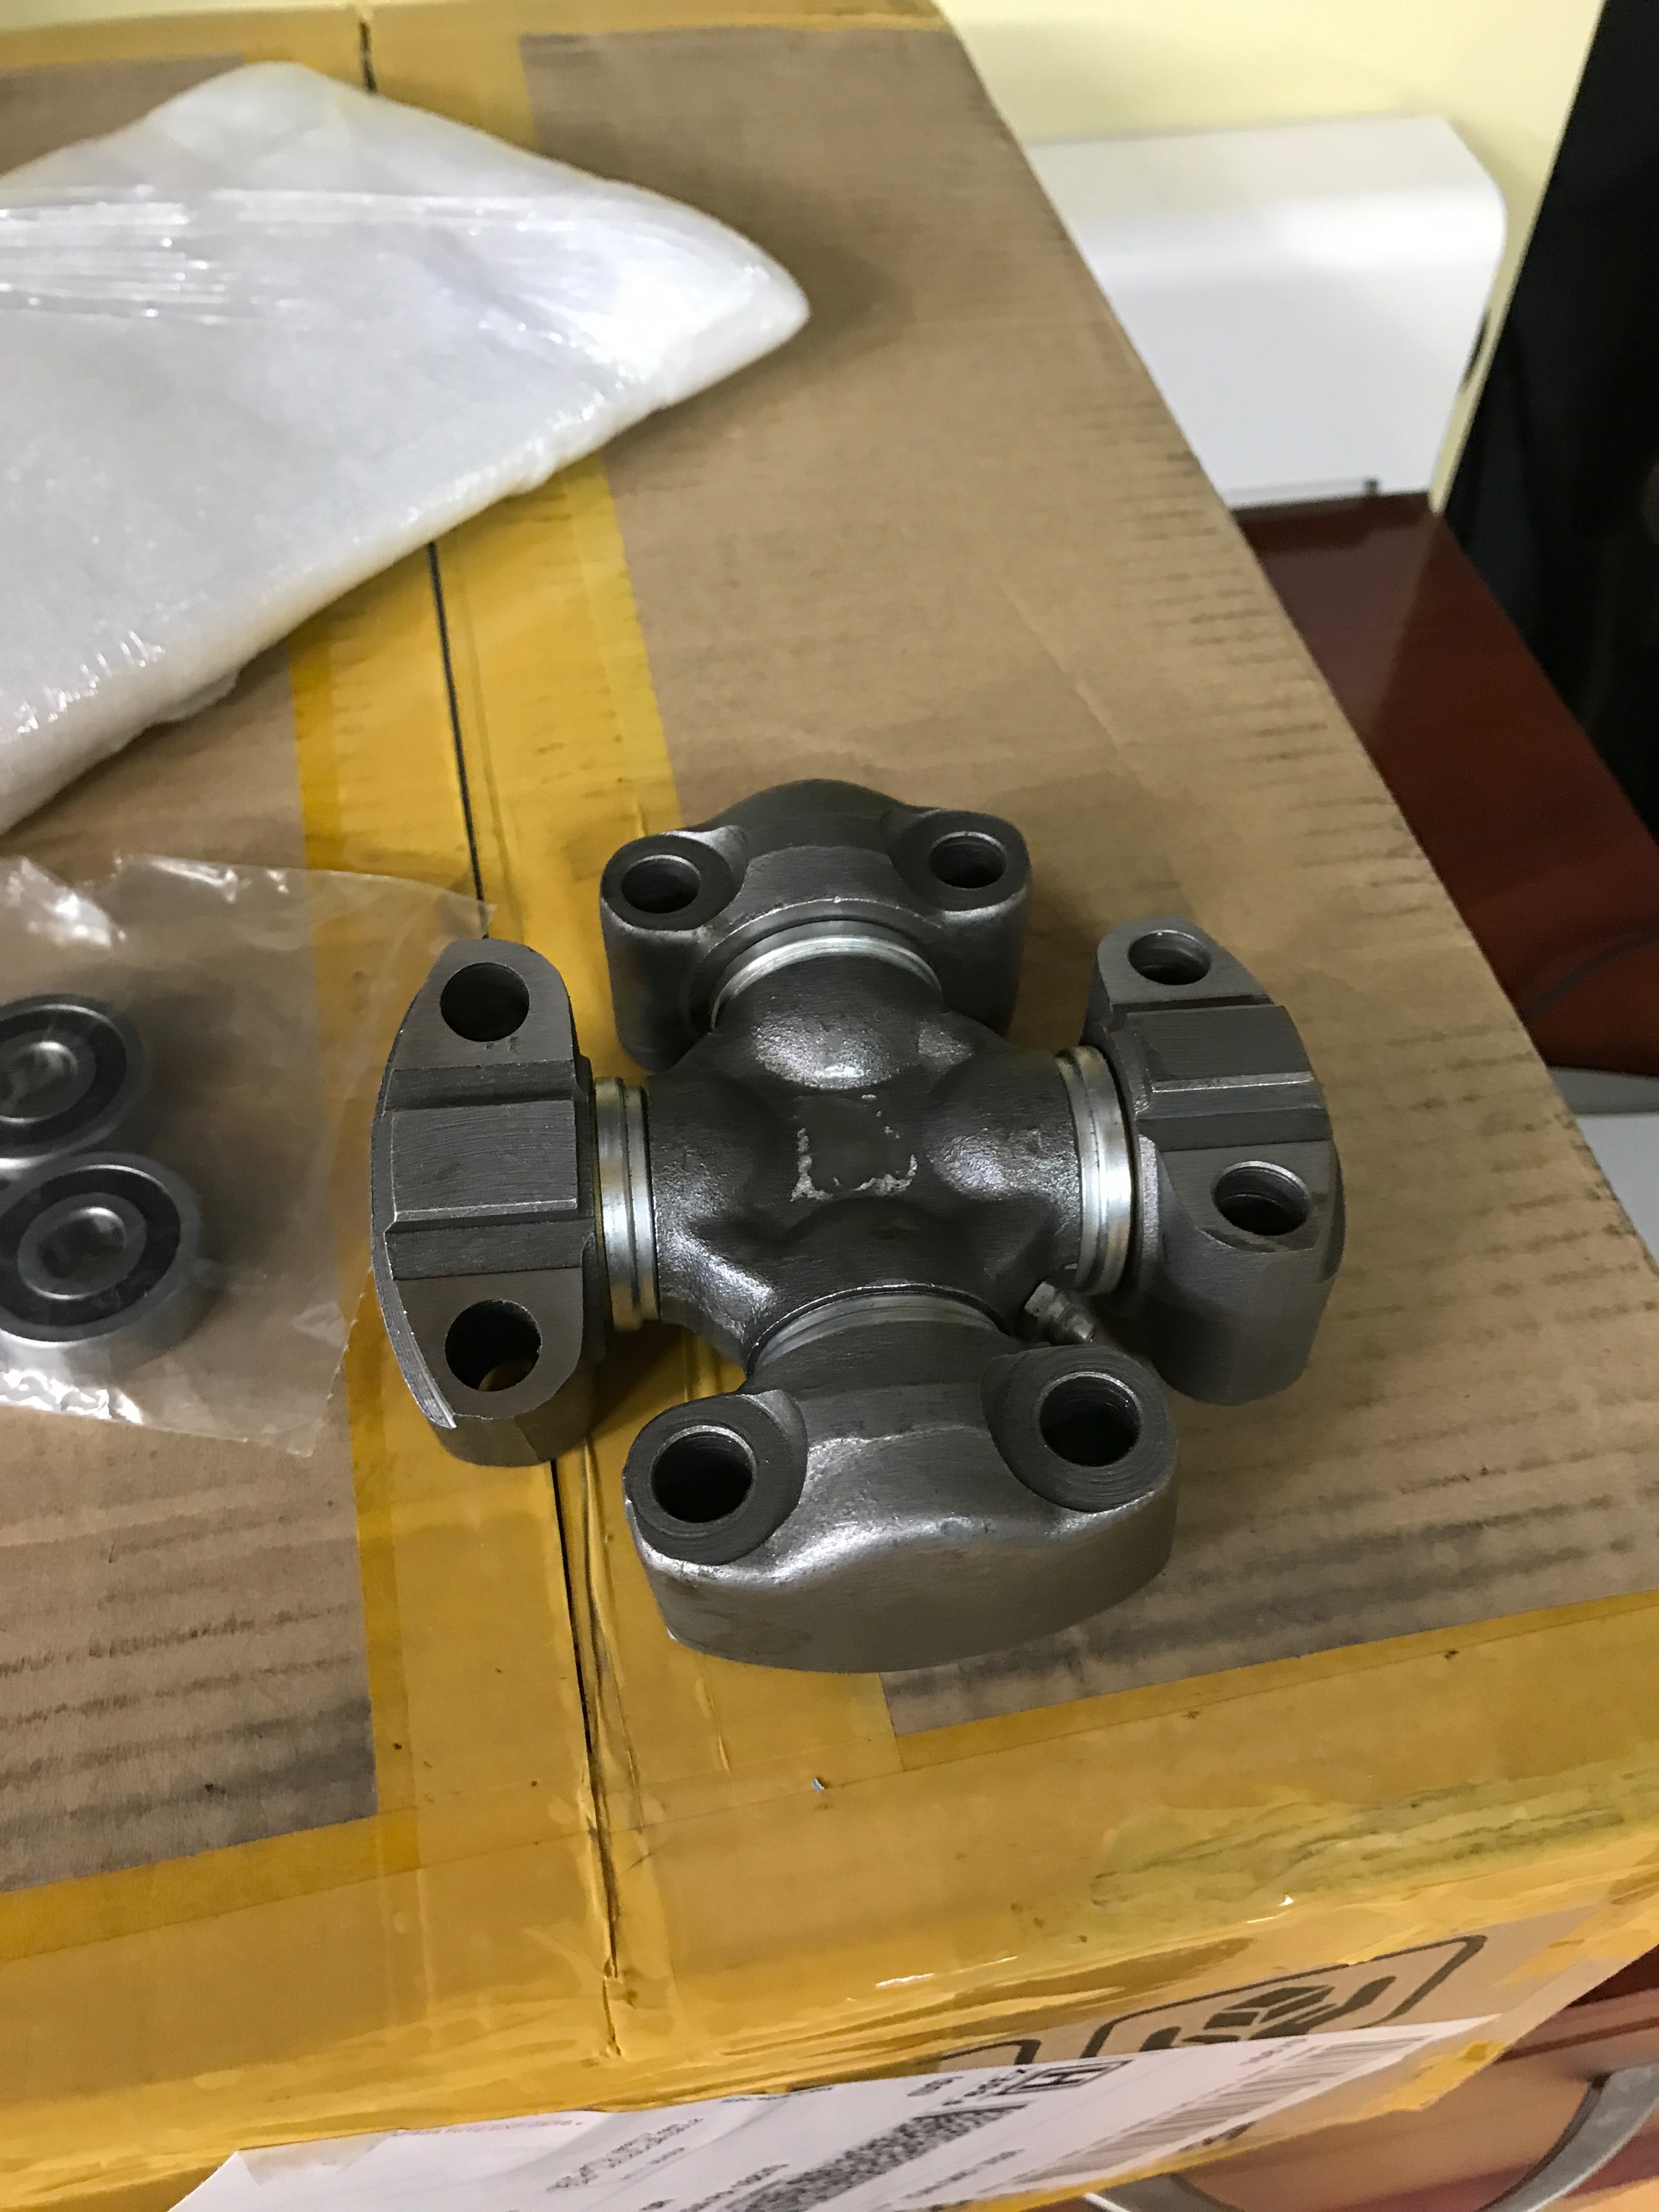\n\nI found a great universal joint on eBay for $30. With this wing style U-Joint, I had a lot more flexibility with how I mounted things. I had to make a quick and dirty jig to get the hole spacing correct as the holes ended up being right along the edge of an extrusion.\n\n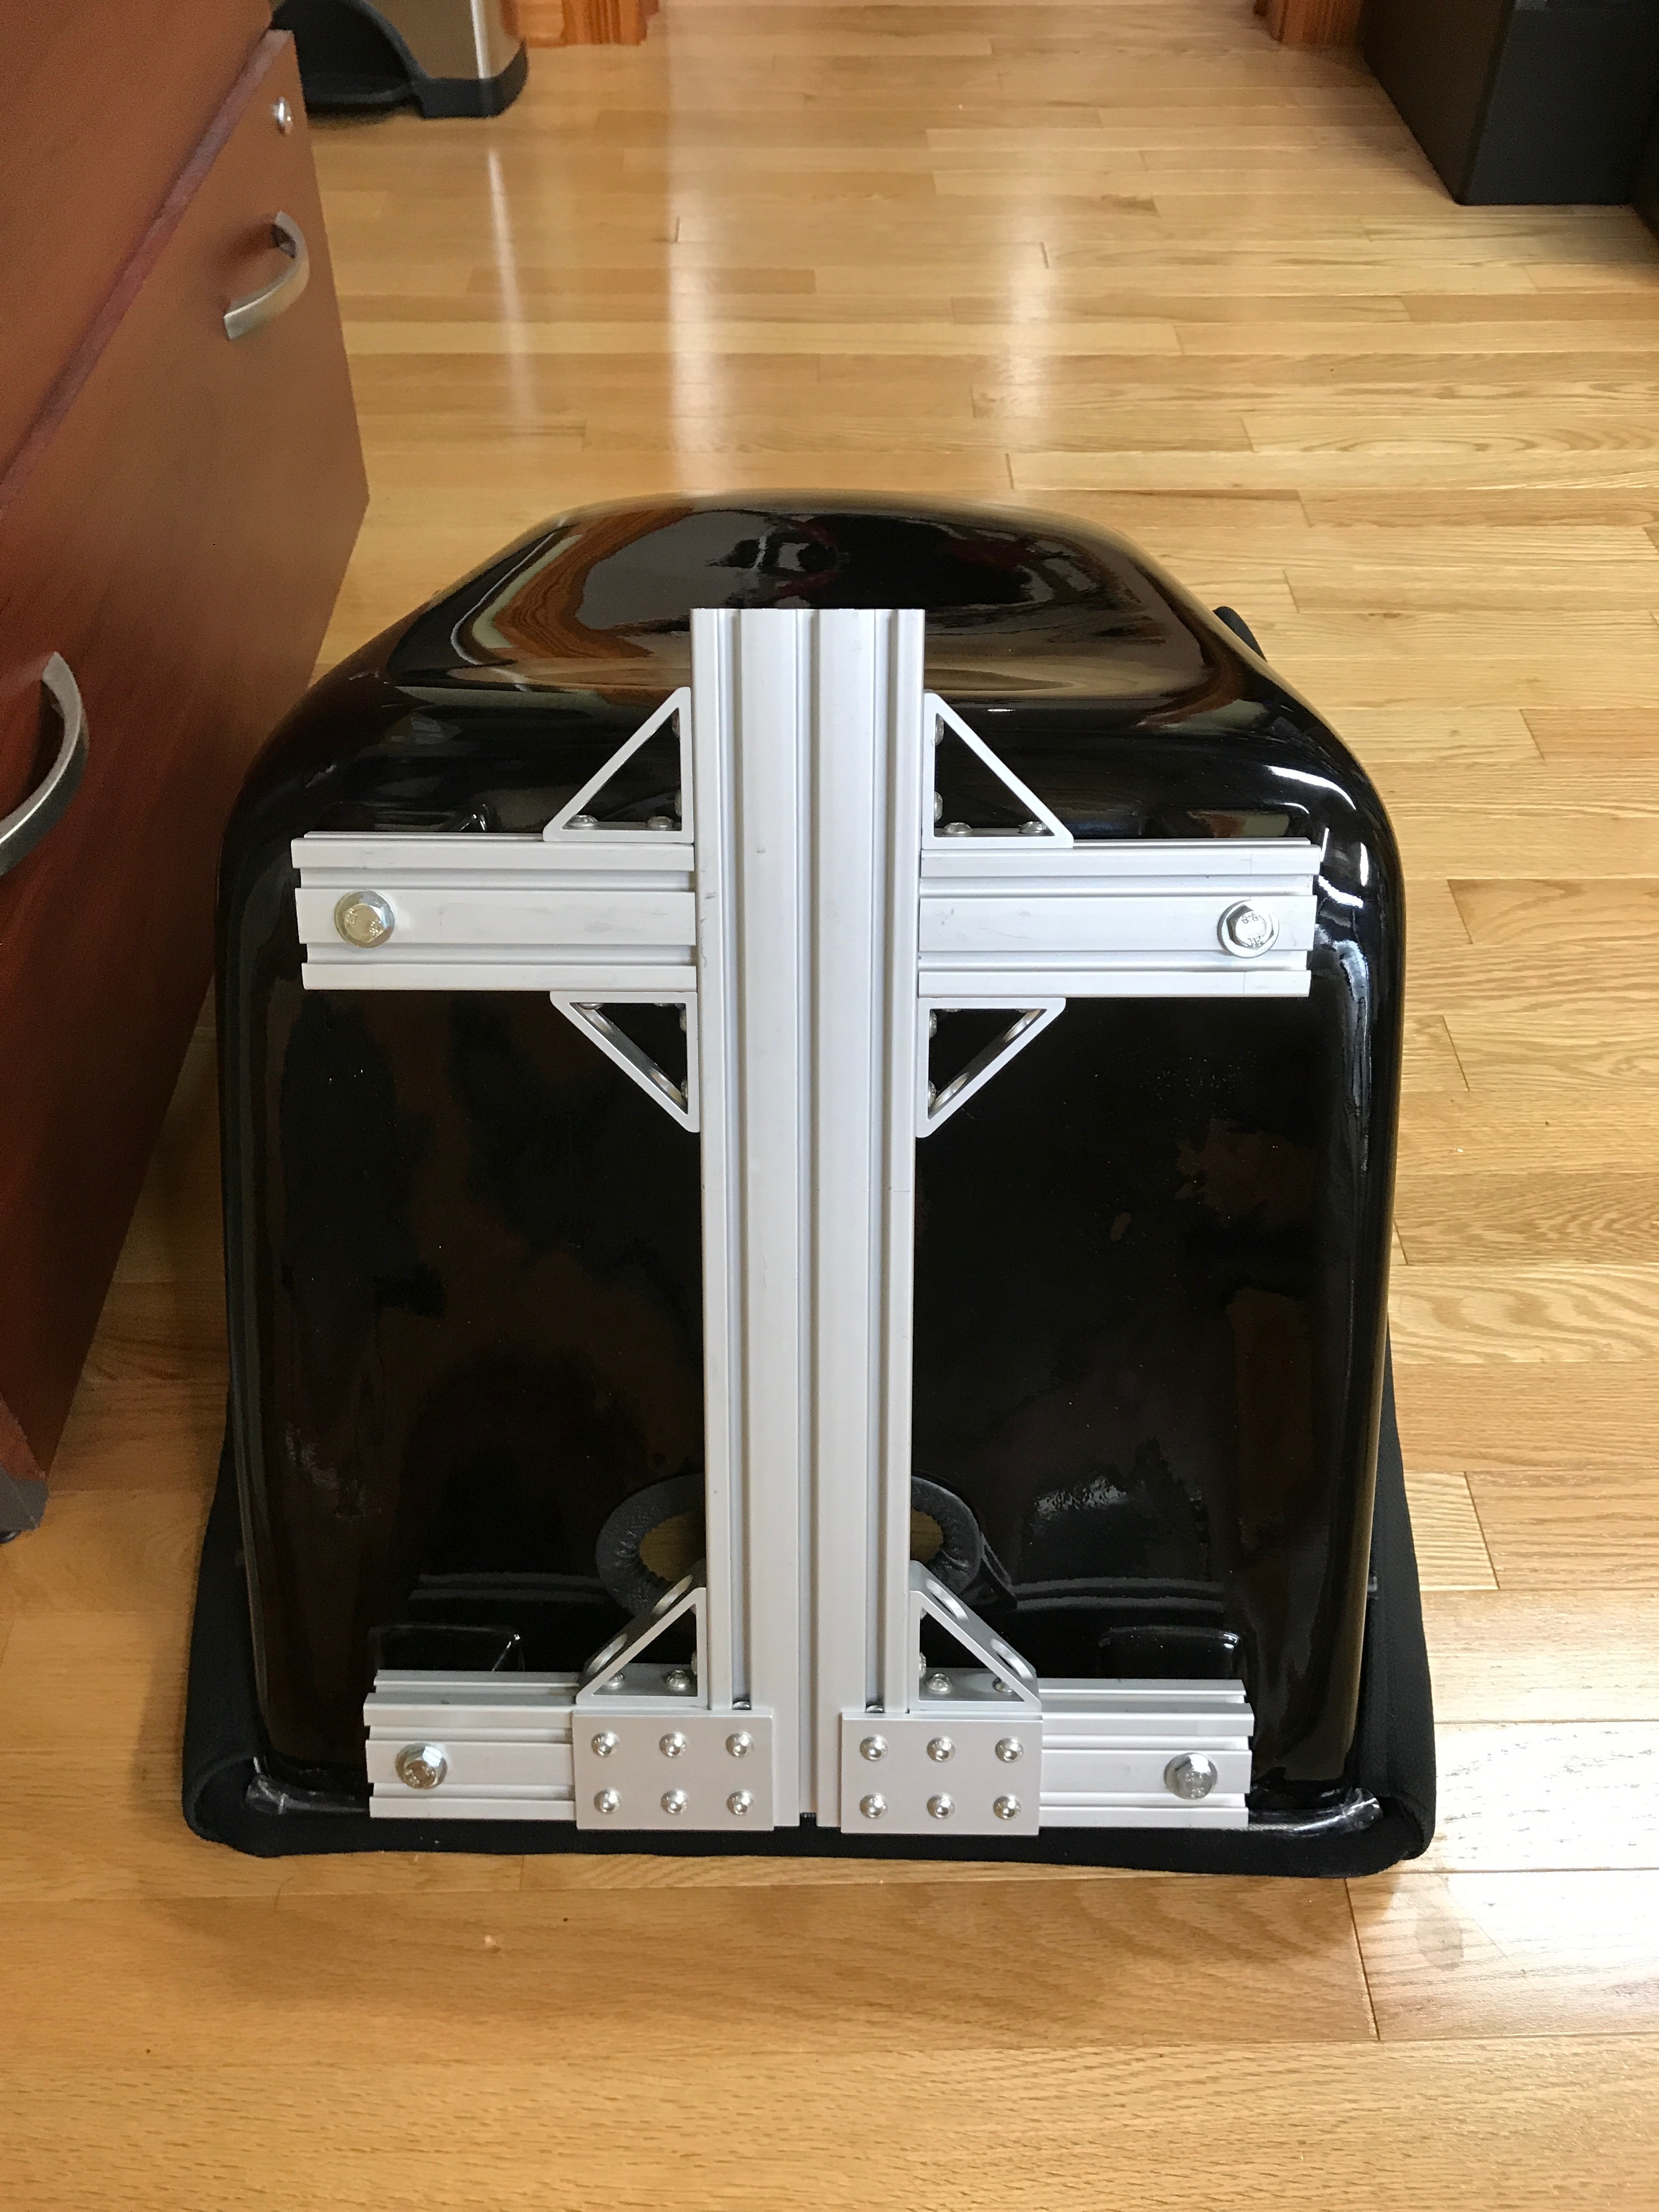\n\n\n\nI also had to notch out part of the extrusion on the mid frame to allow the U-Joint bolts to sit down further at the extreme angles.\n\n\n\n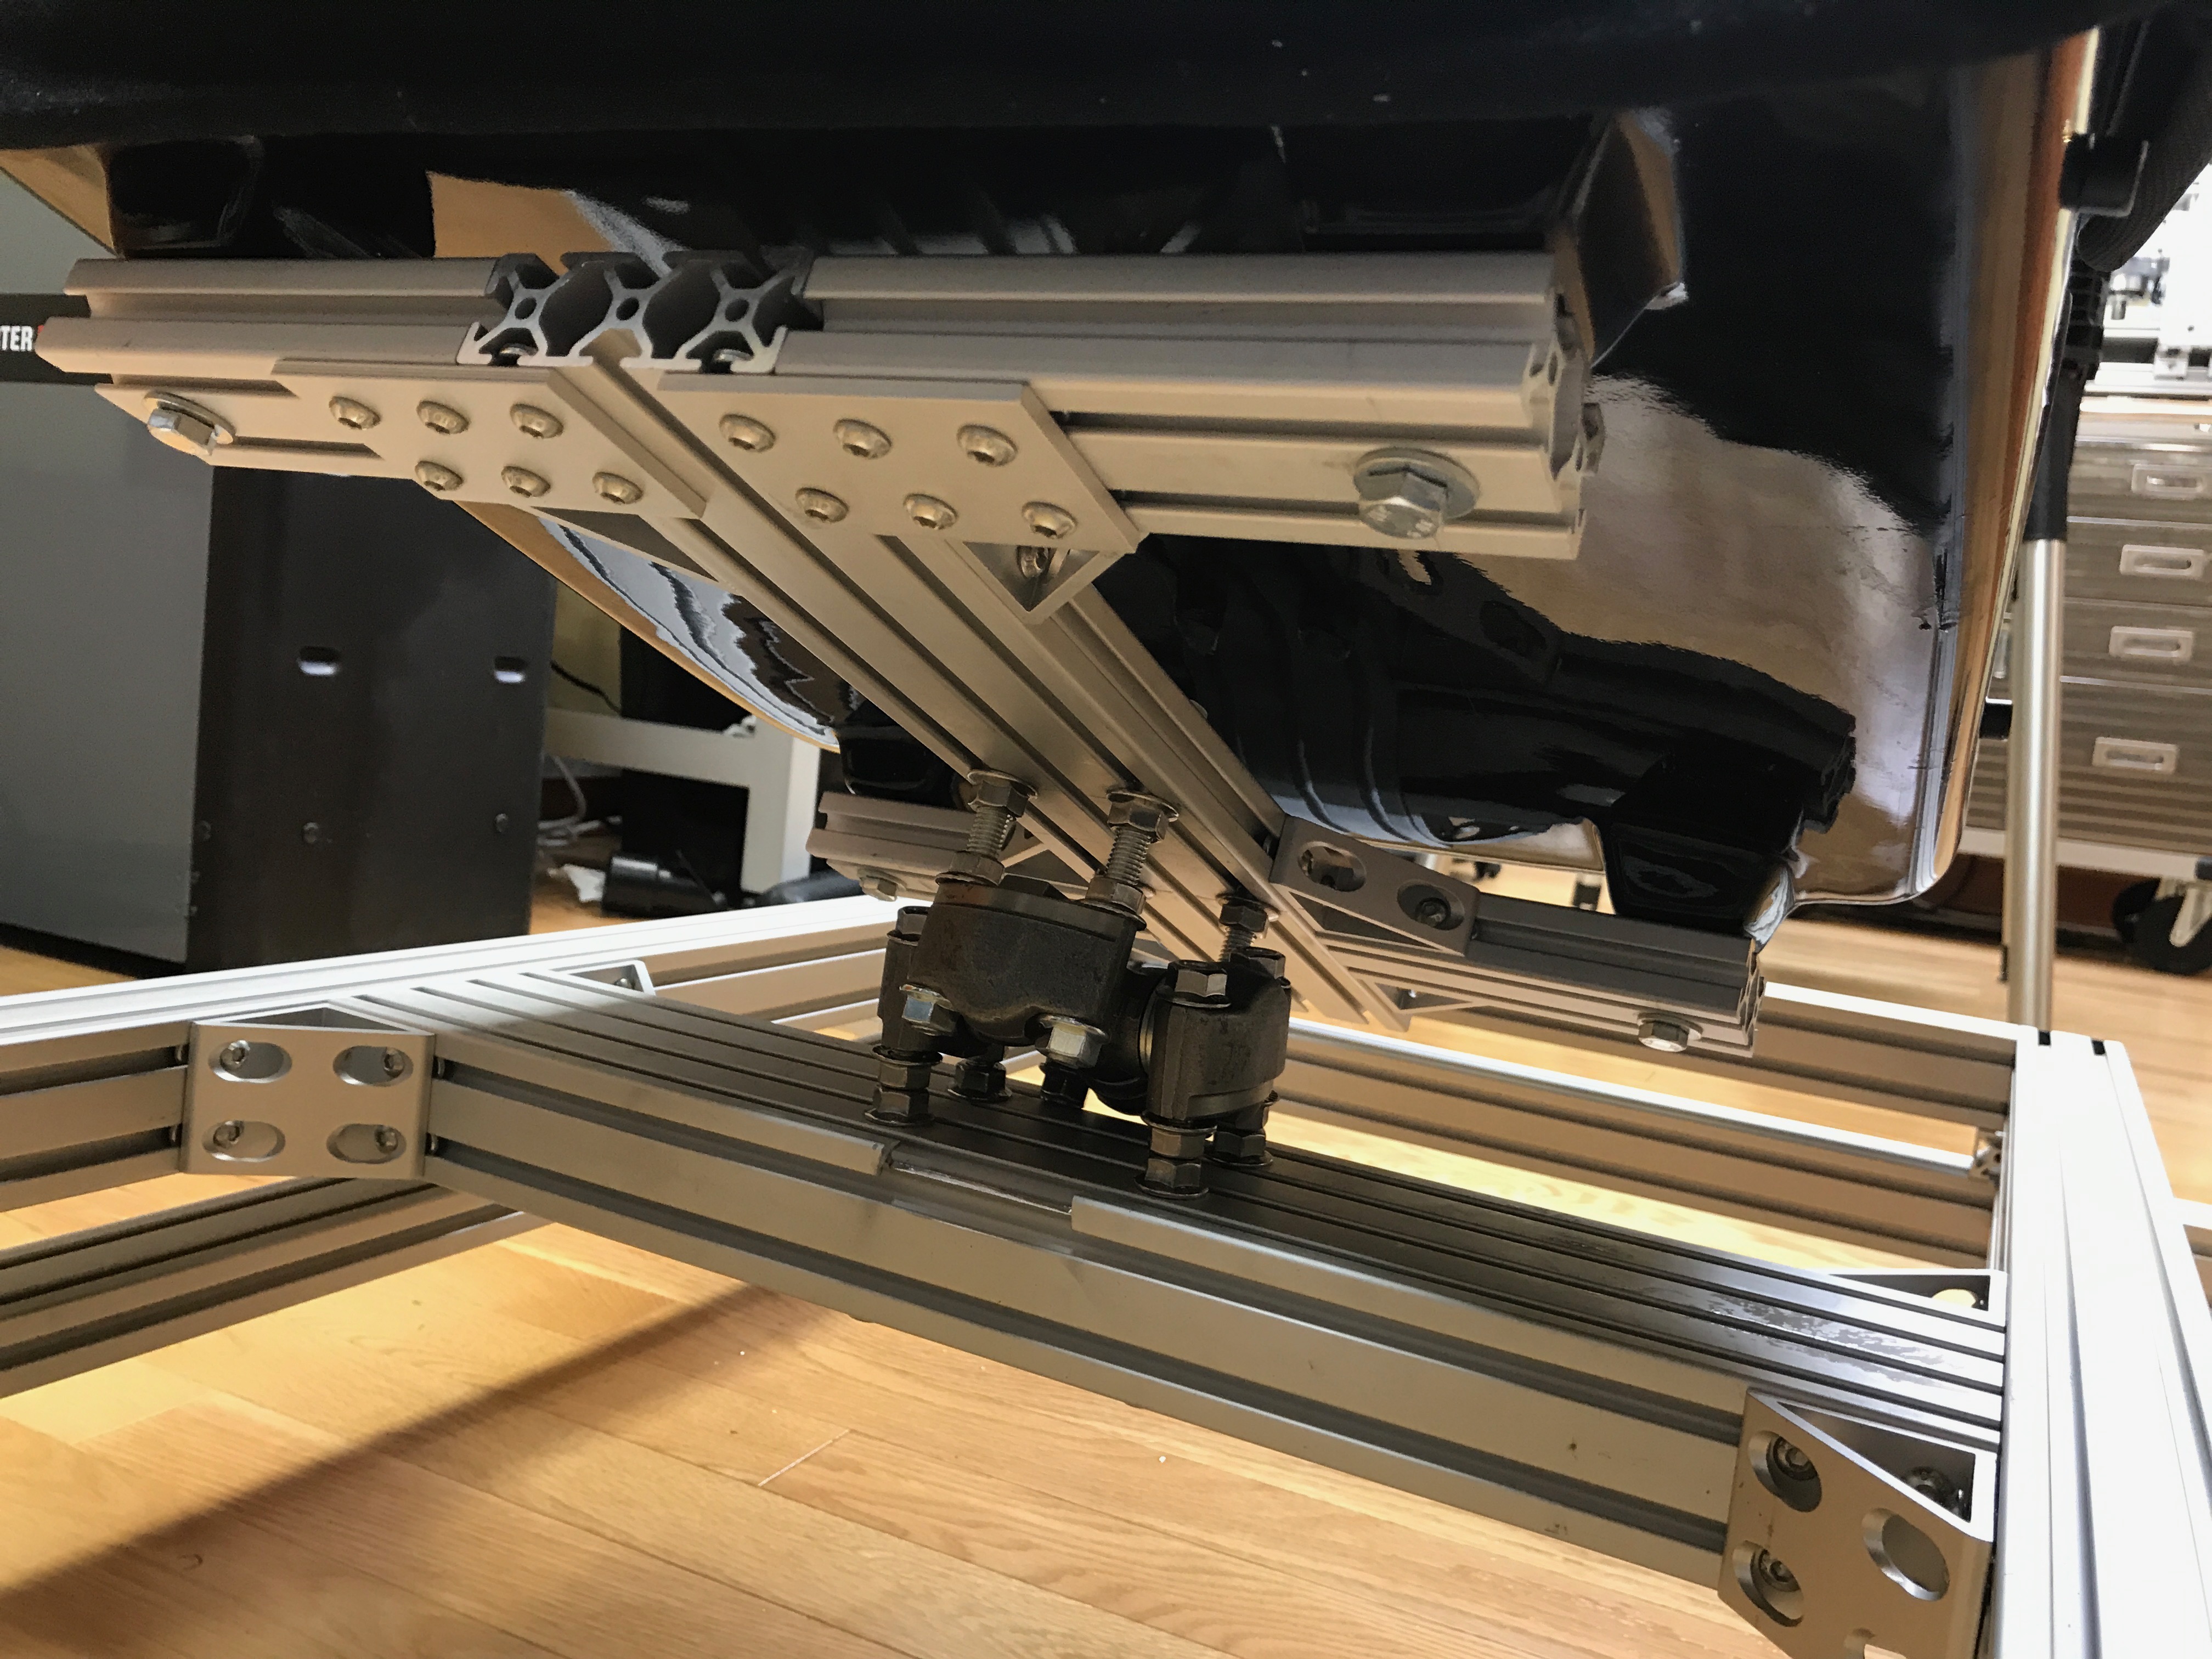\n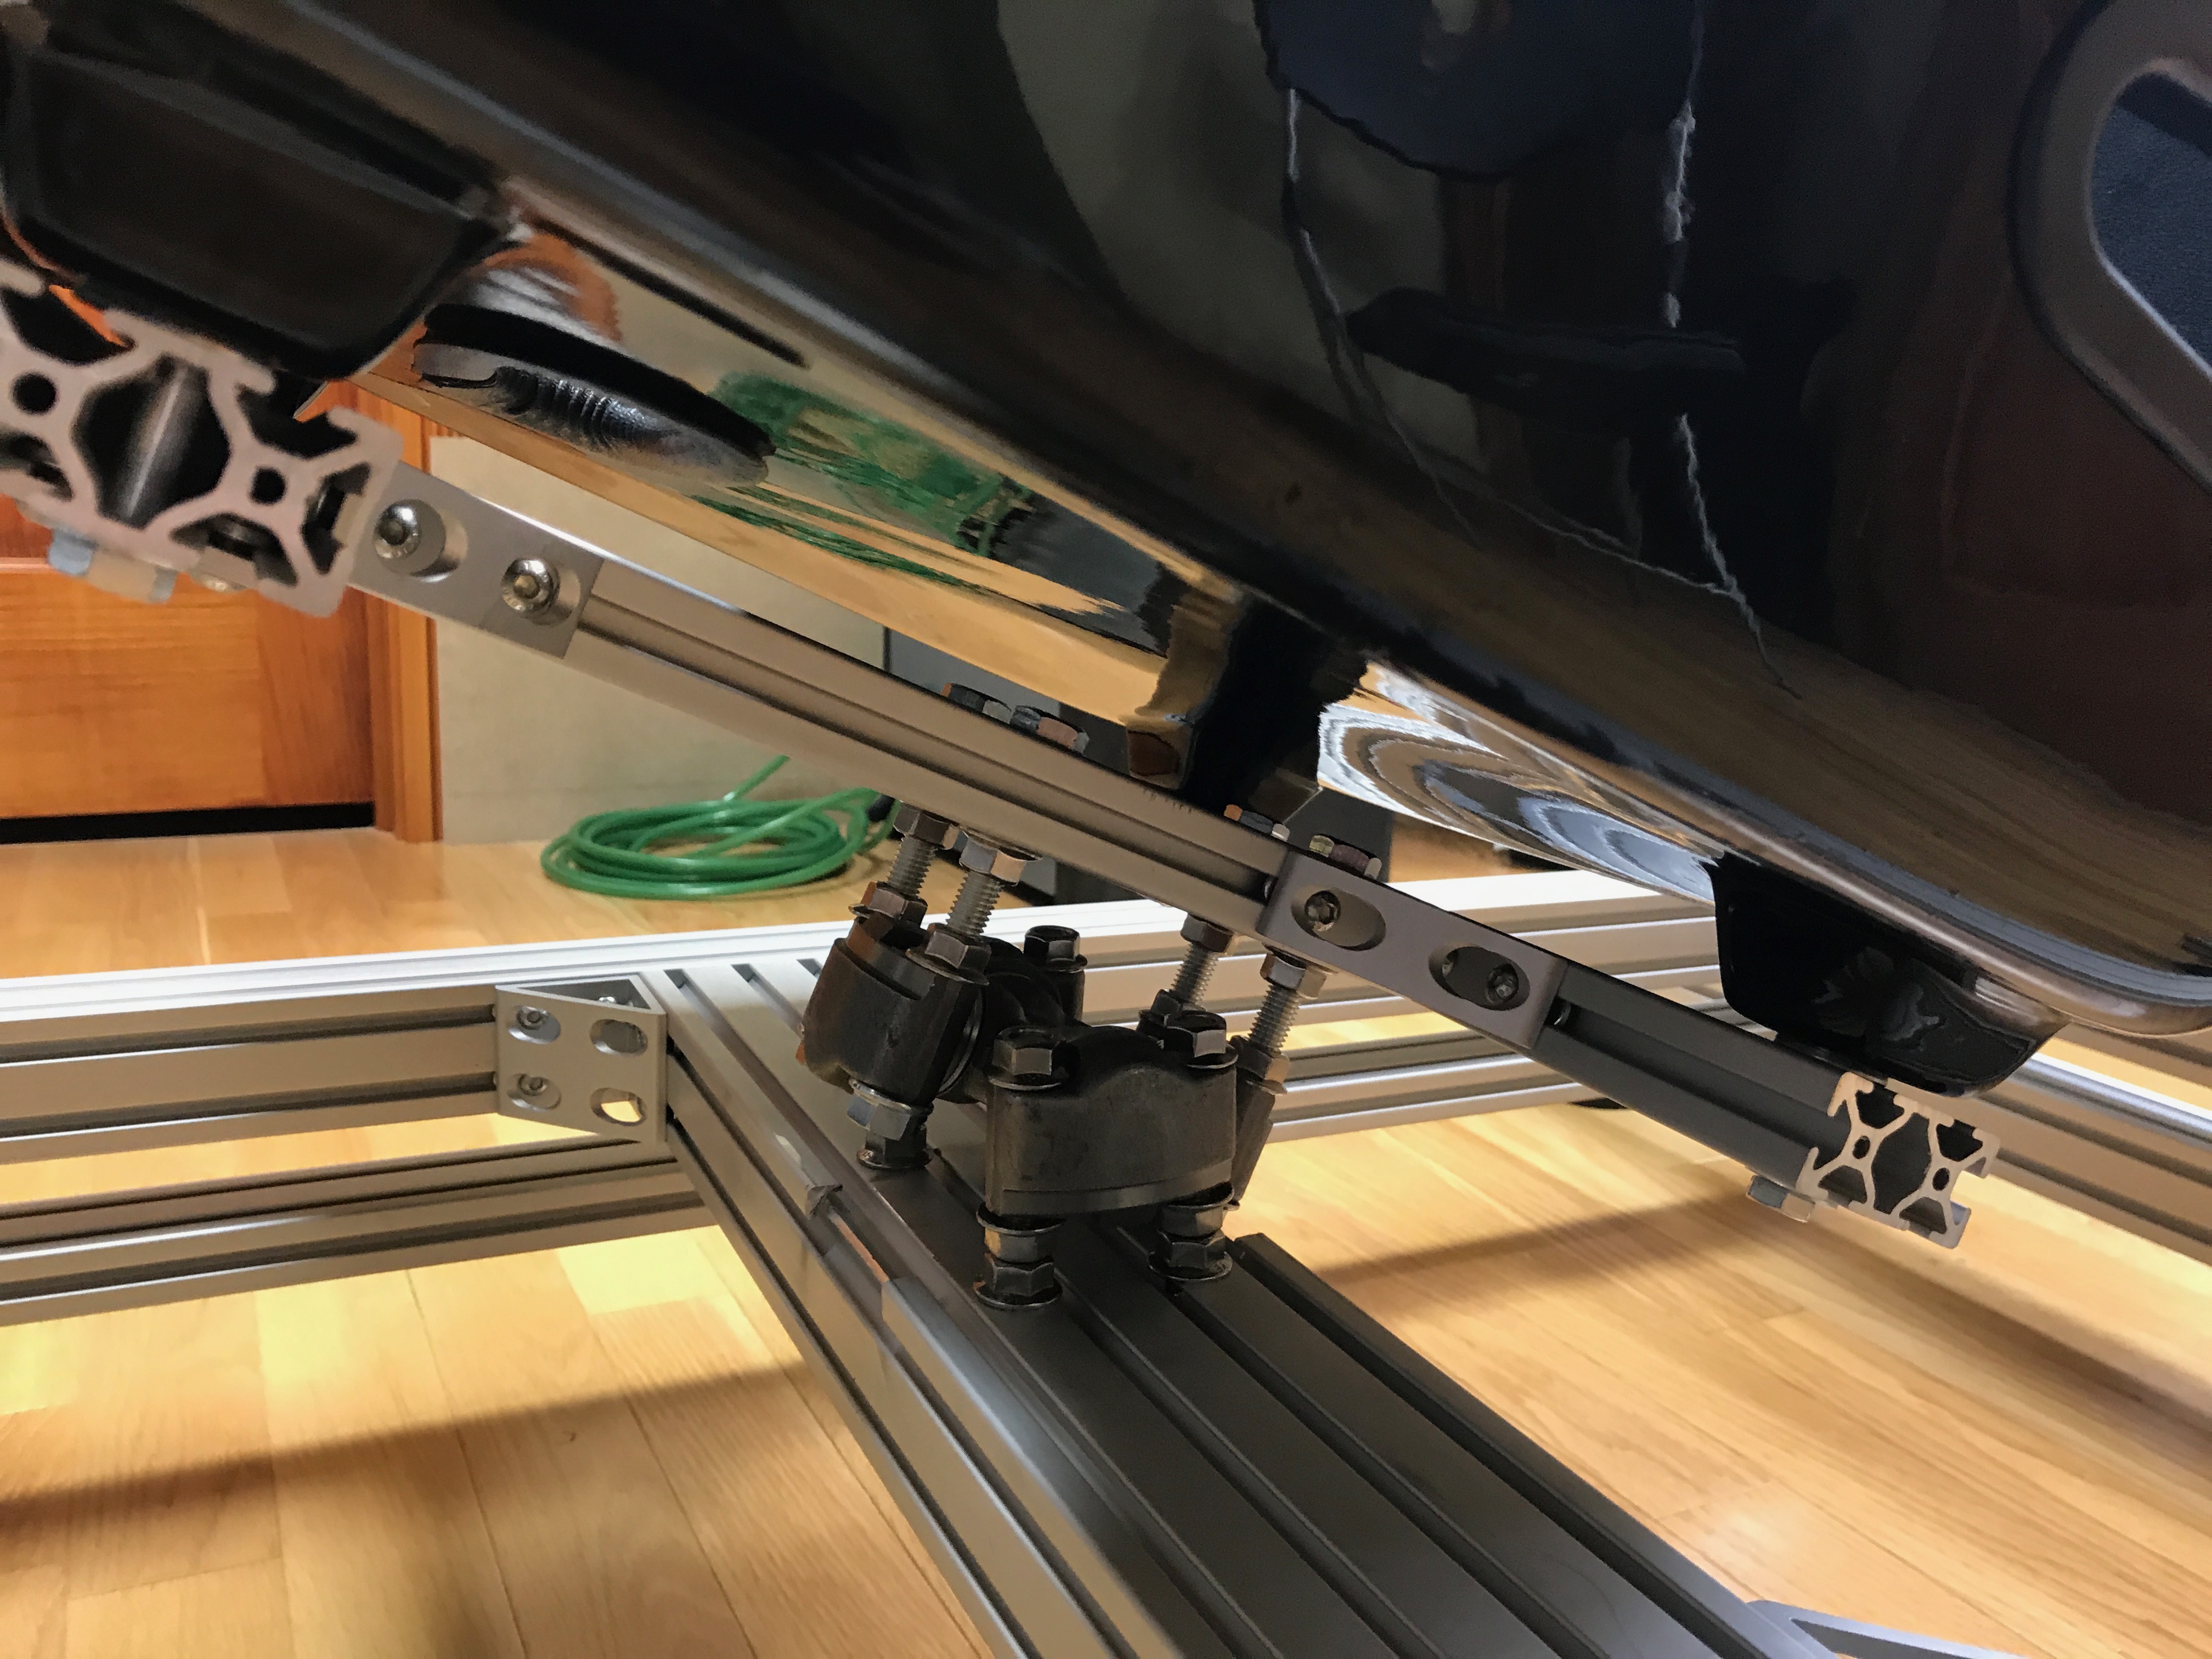\n\nWith the seat mounted, I then focused on the rear rollers for the traction loss mechanism. These rollers ultimately set the height of the mid frame from the lower frame. I designed the brackets in Fusion360 and milled them on my CNC.\n\n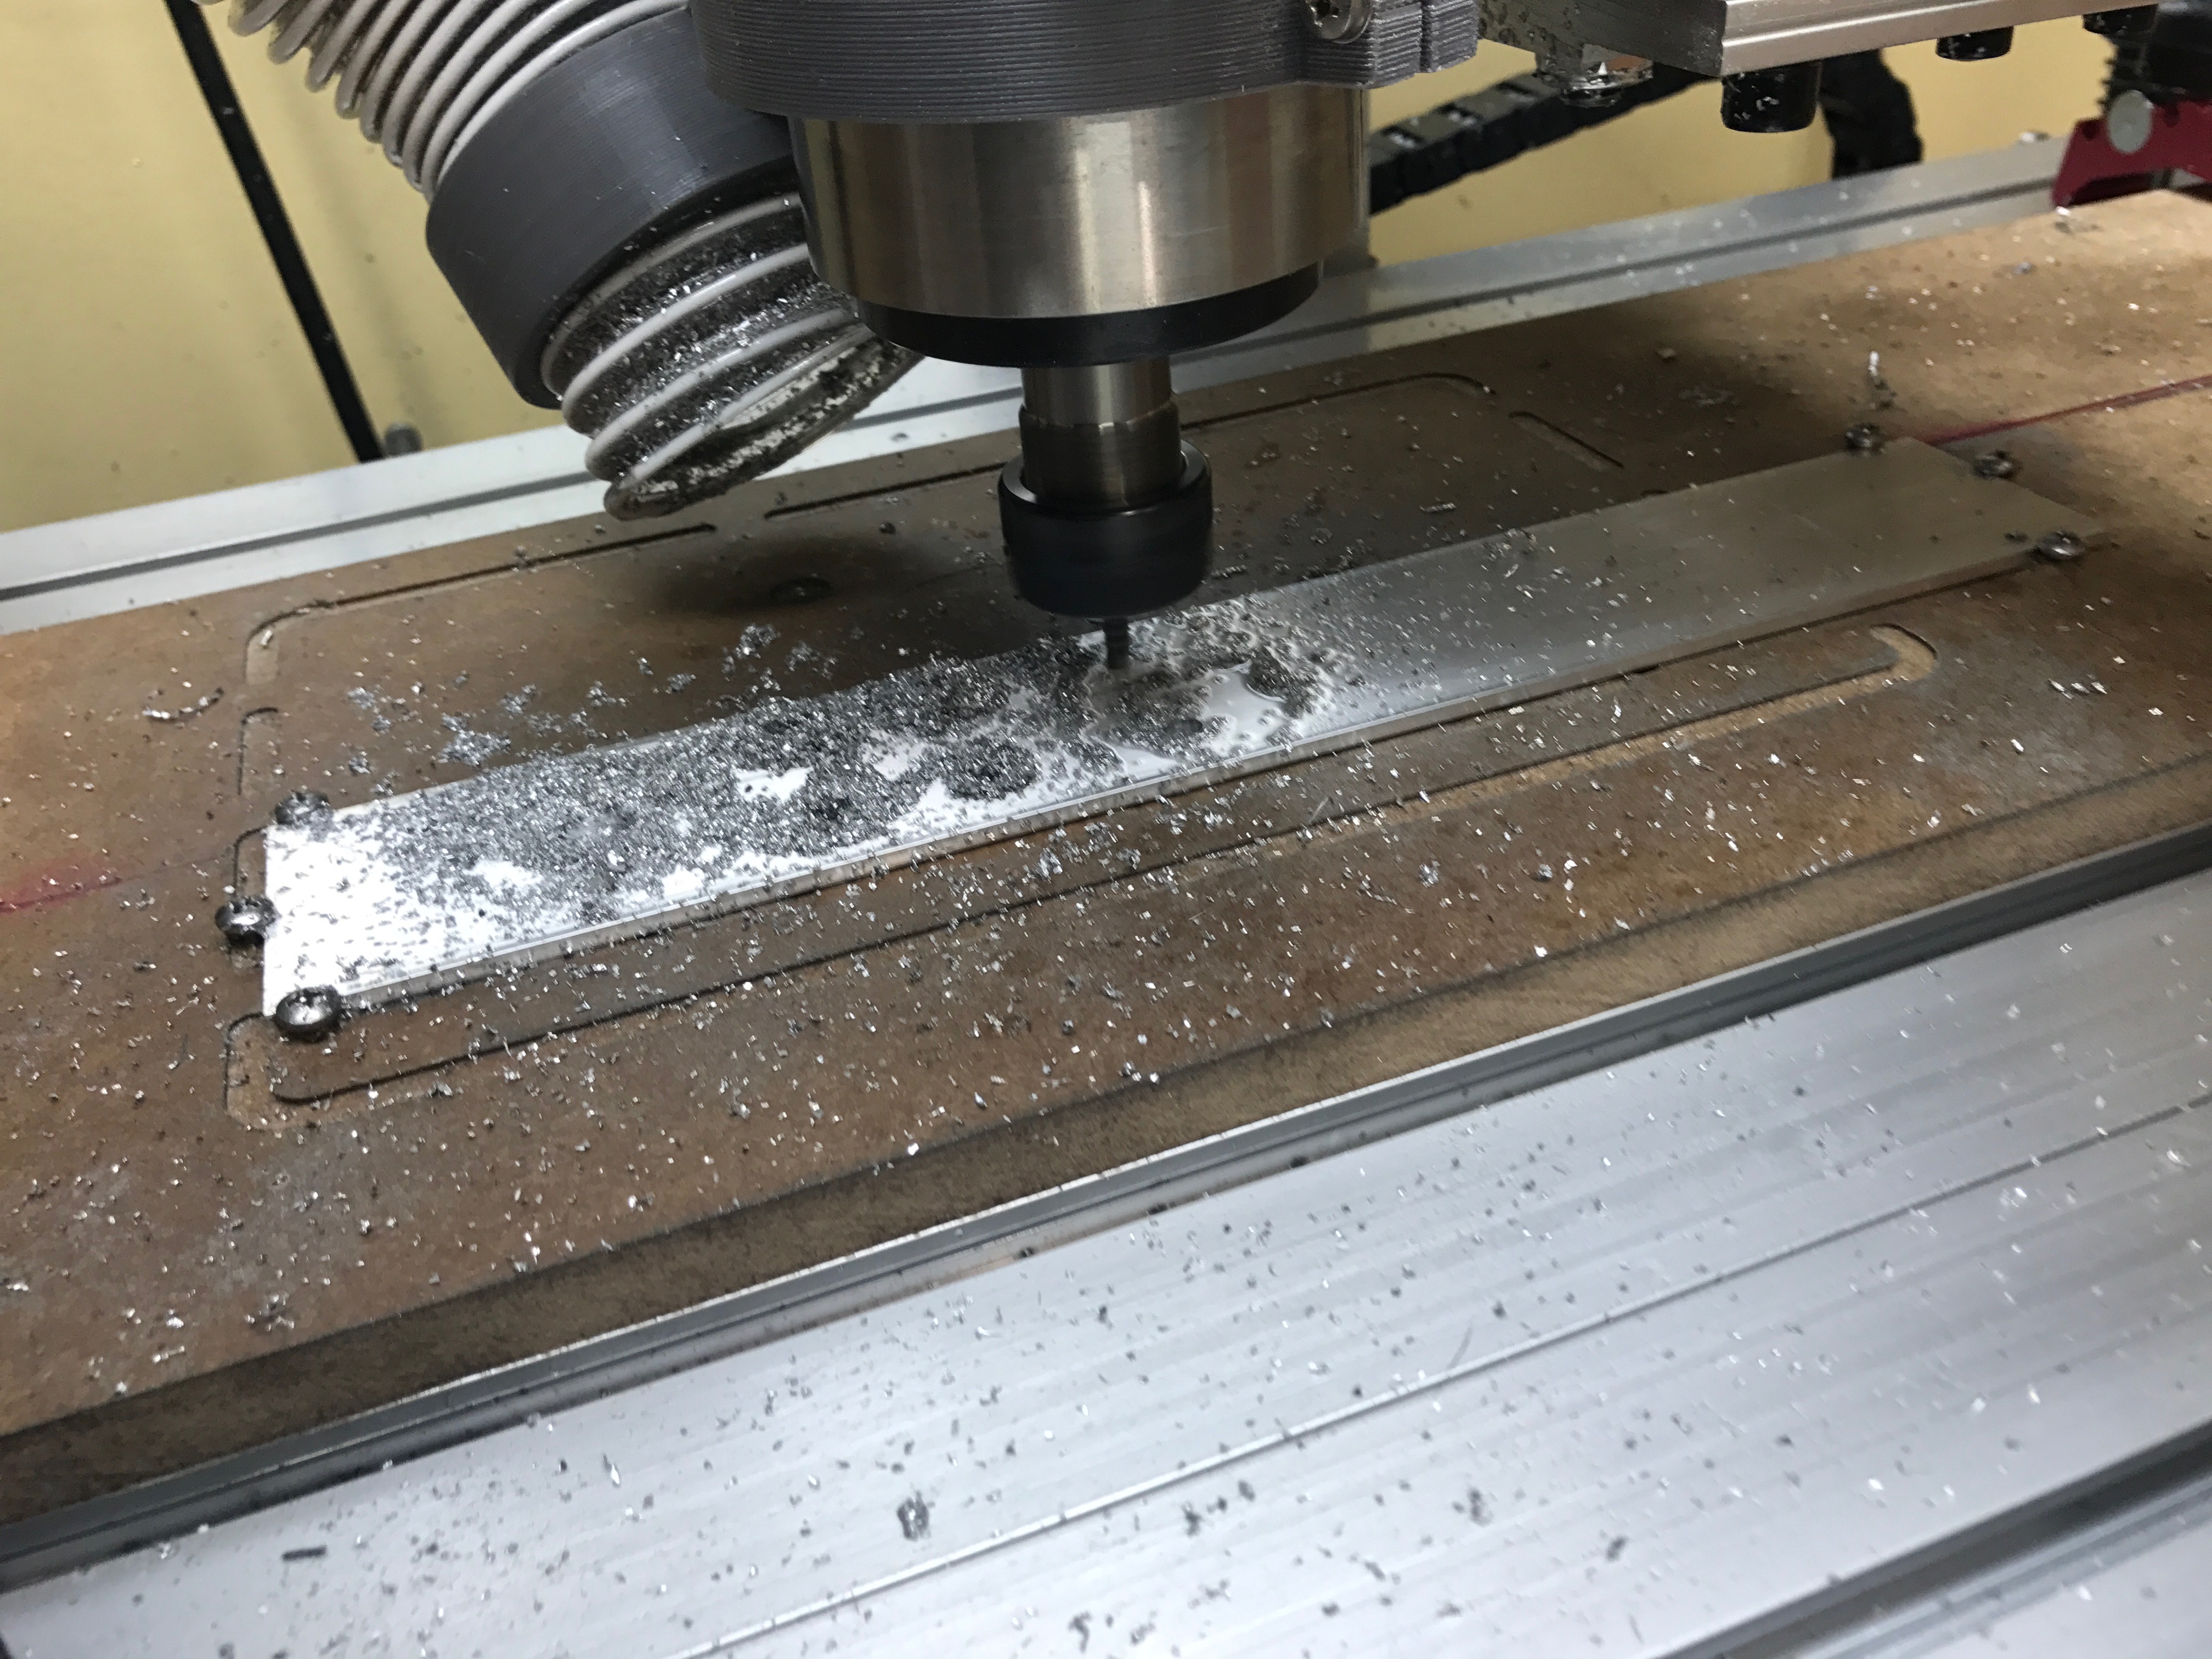\n\nI used track rollers that I found on eBay. They were called LR200NPPU Track Roller Double Row Bearing Sealed 10x32x9 Track Bearings 18165. I got 4 for $20.\n\n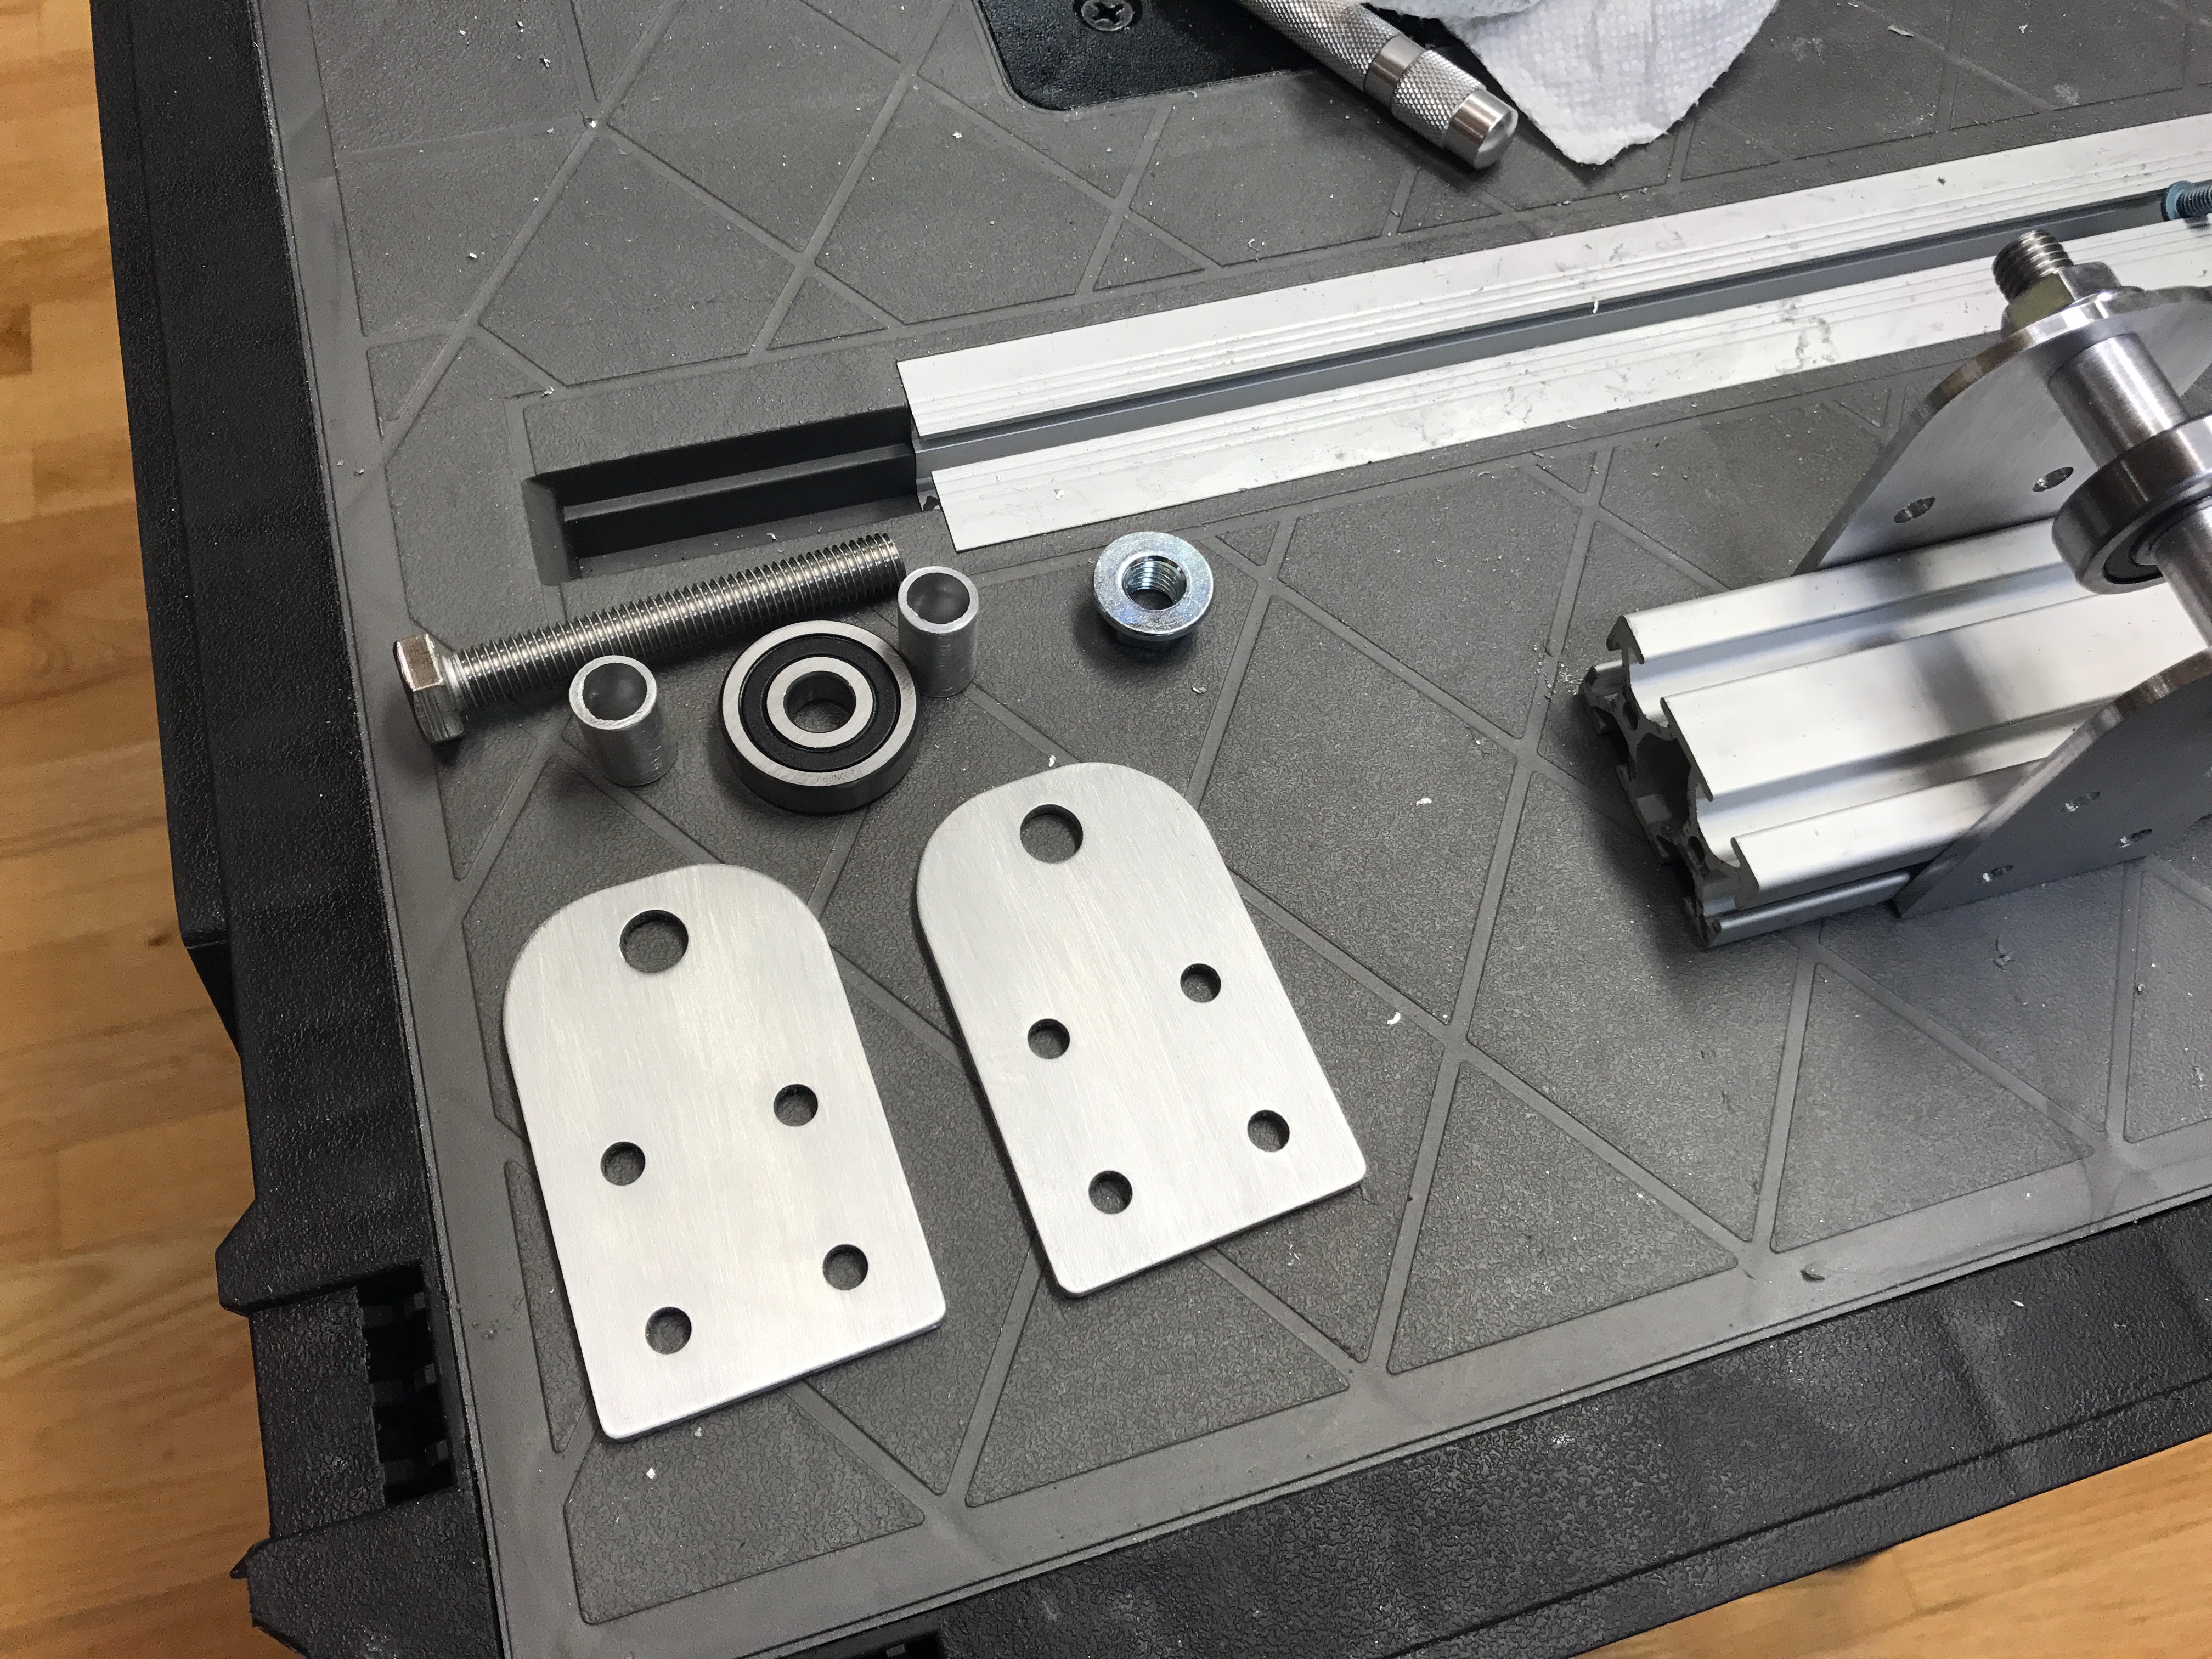\n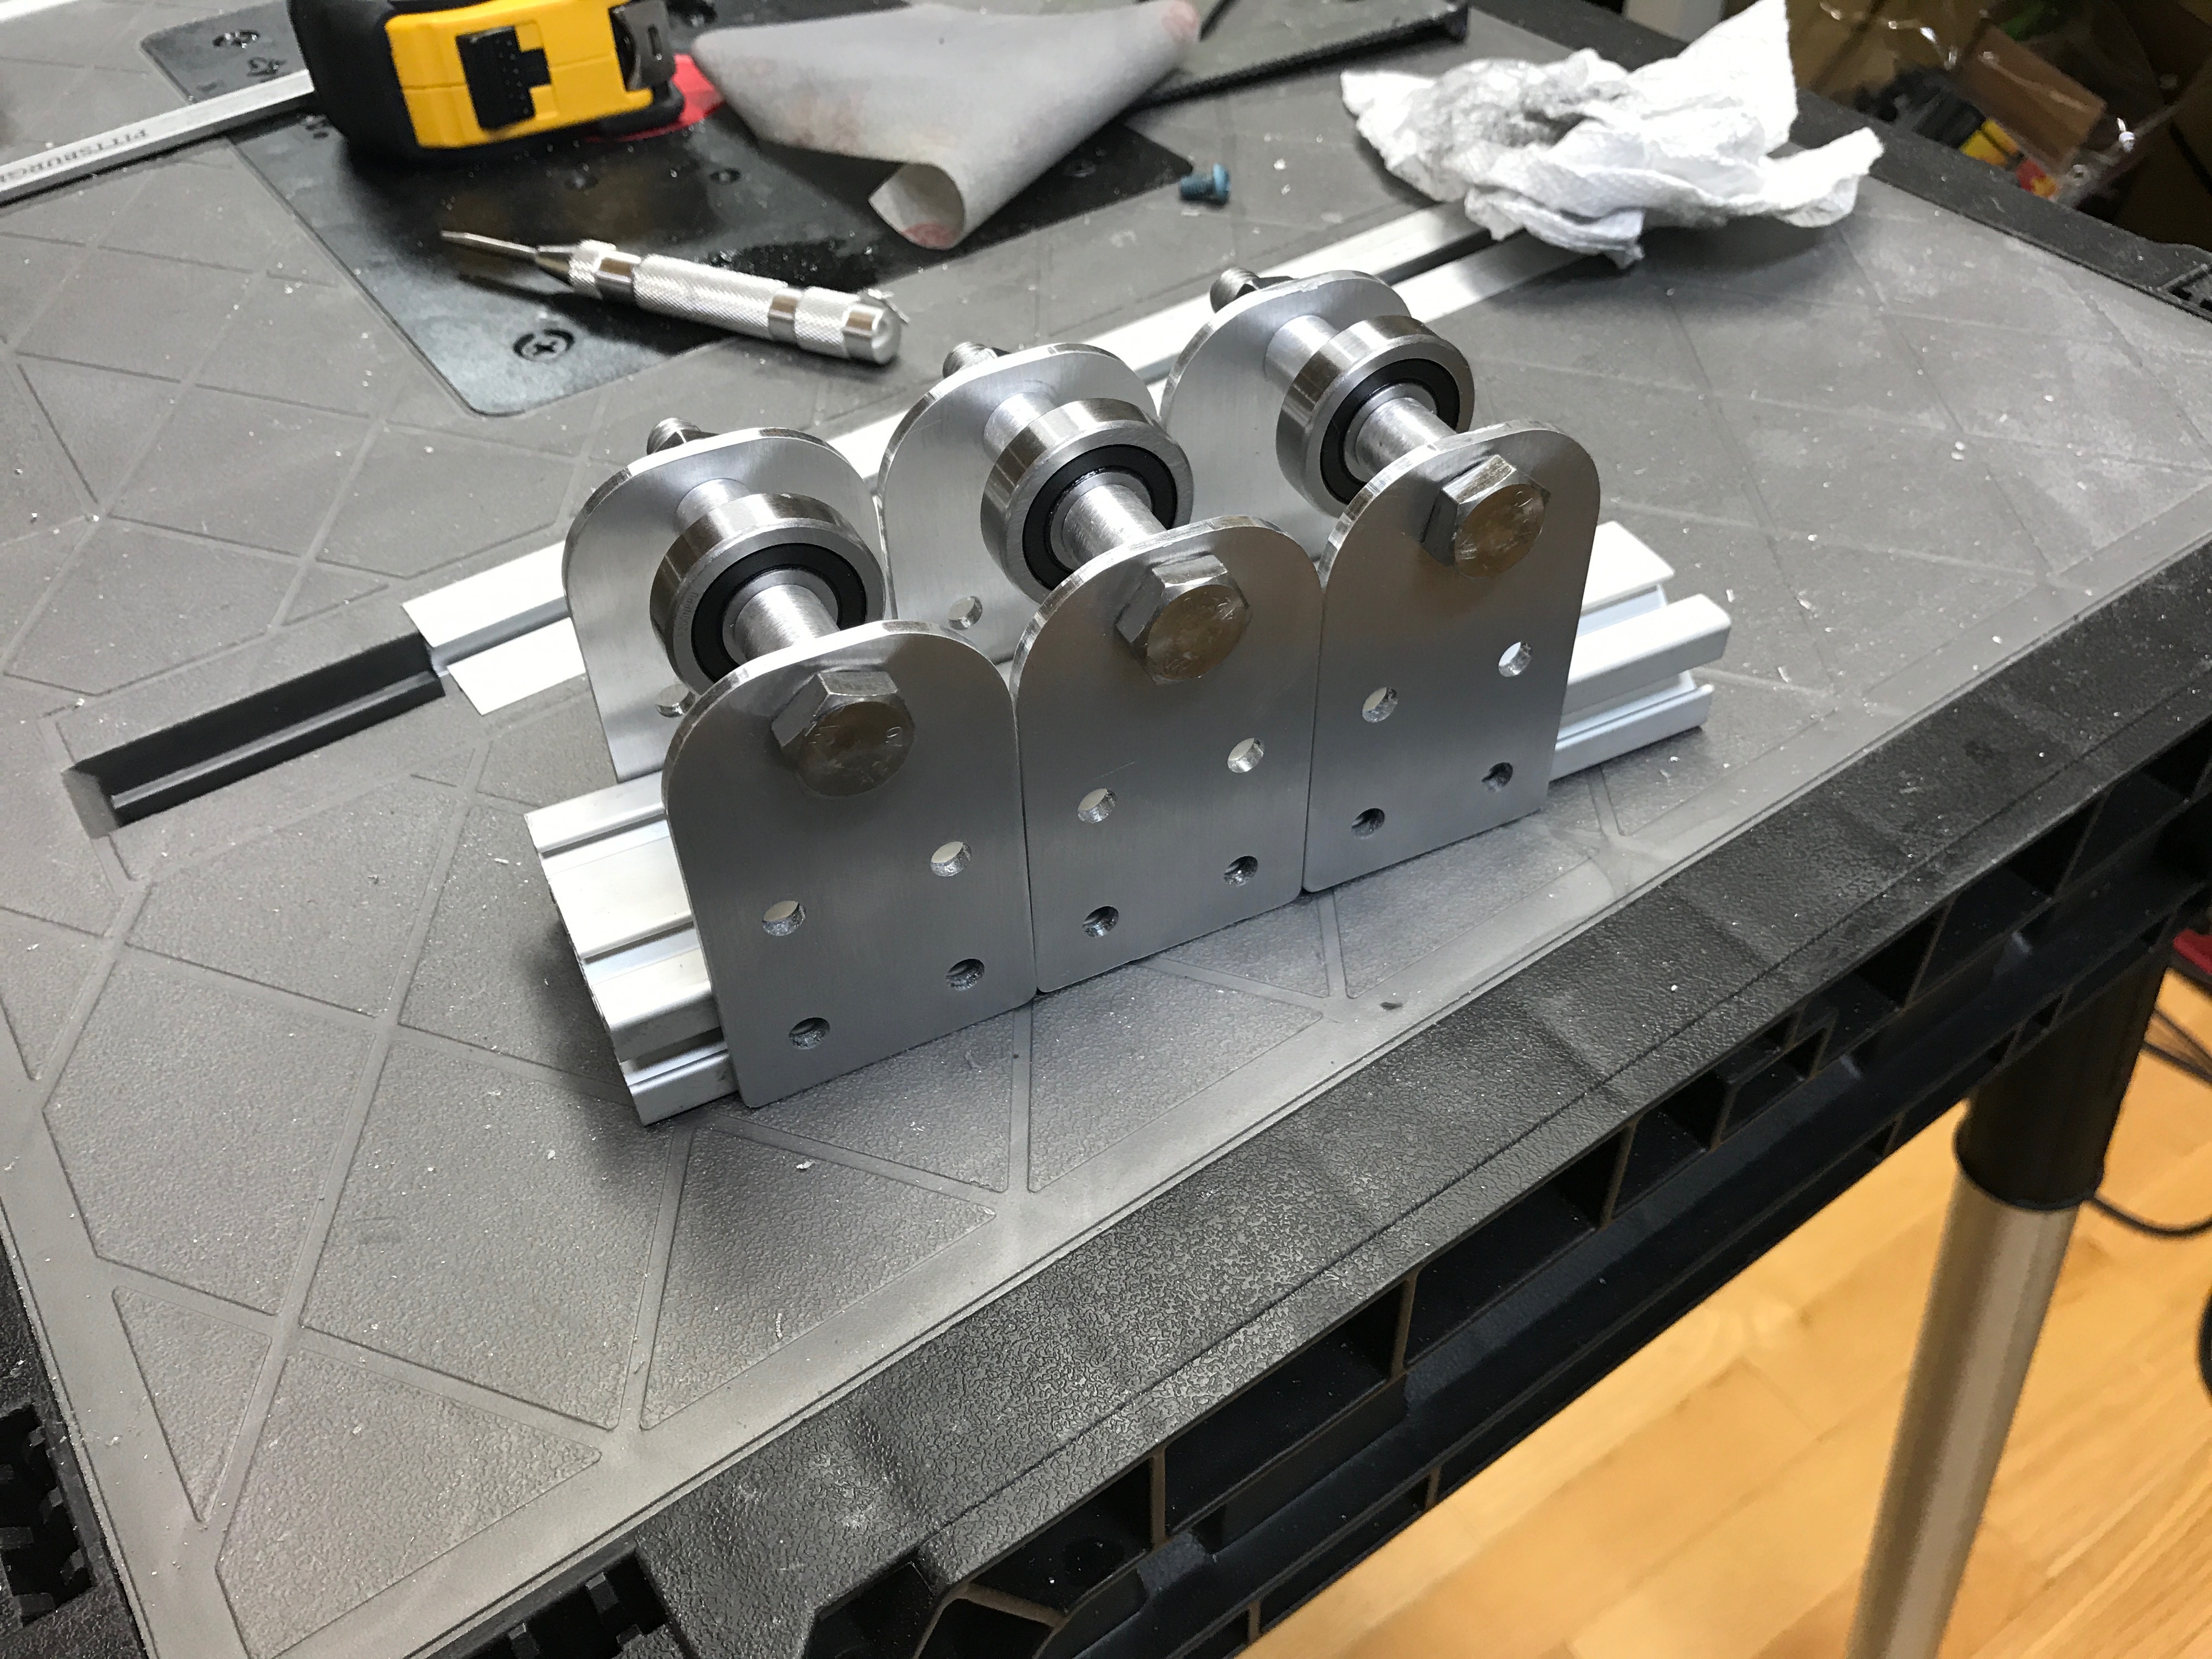\n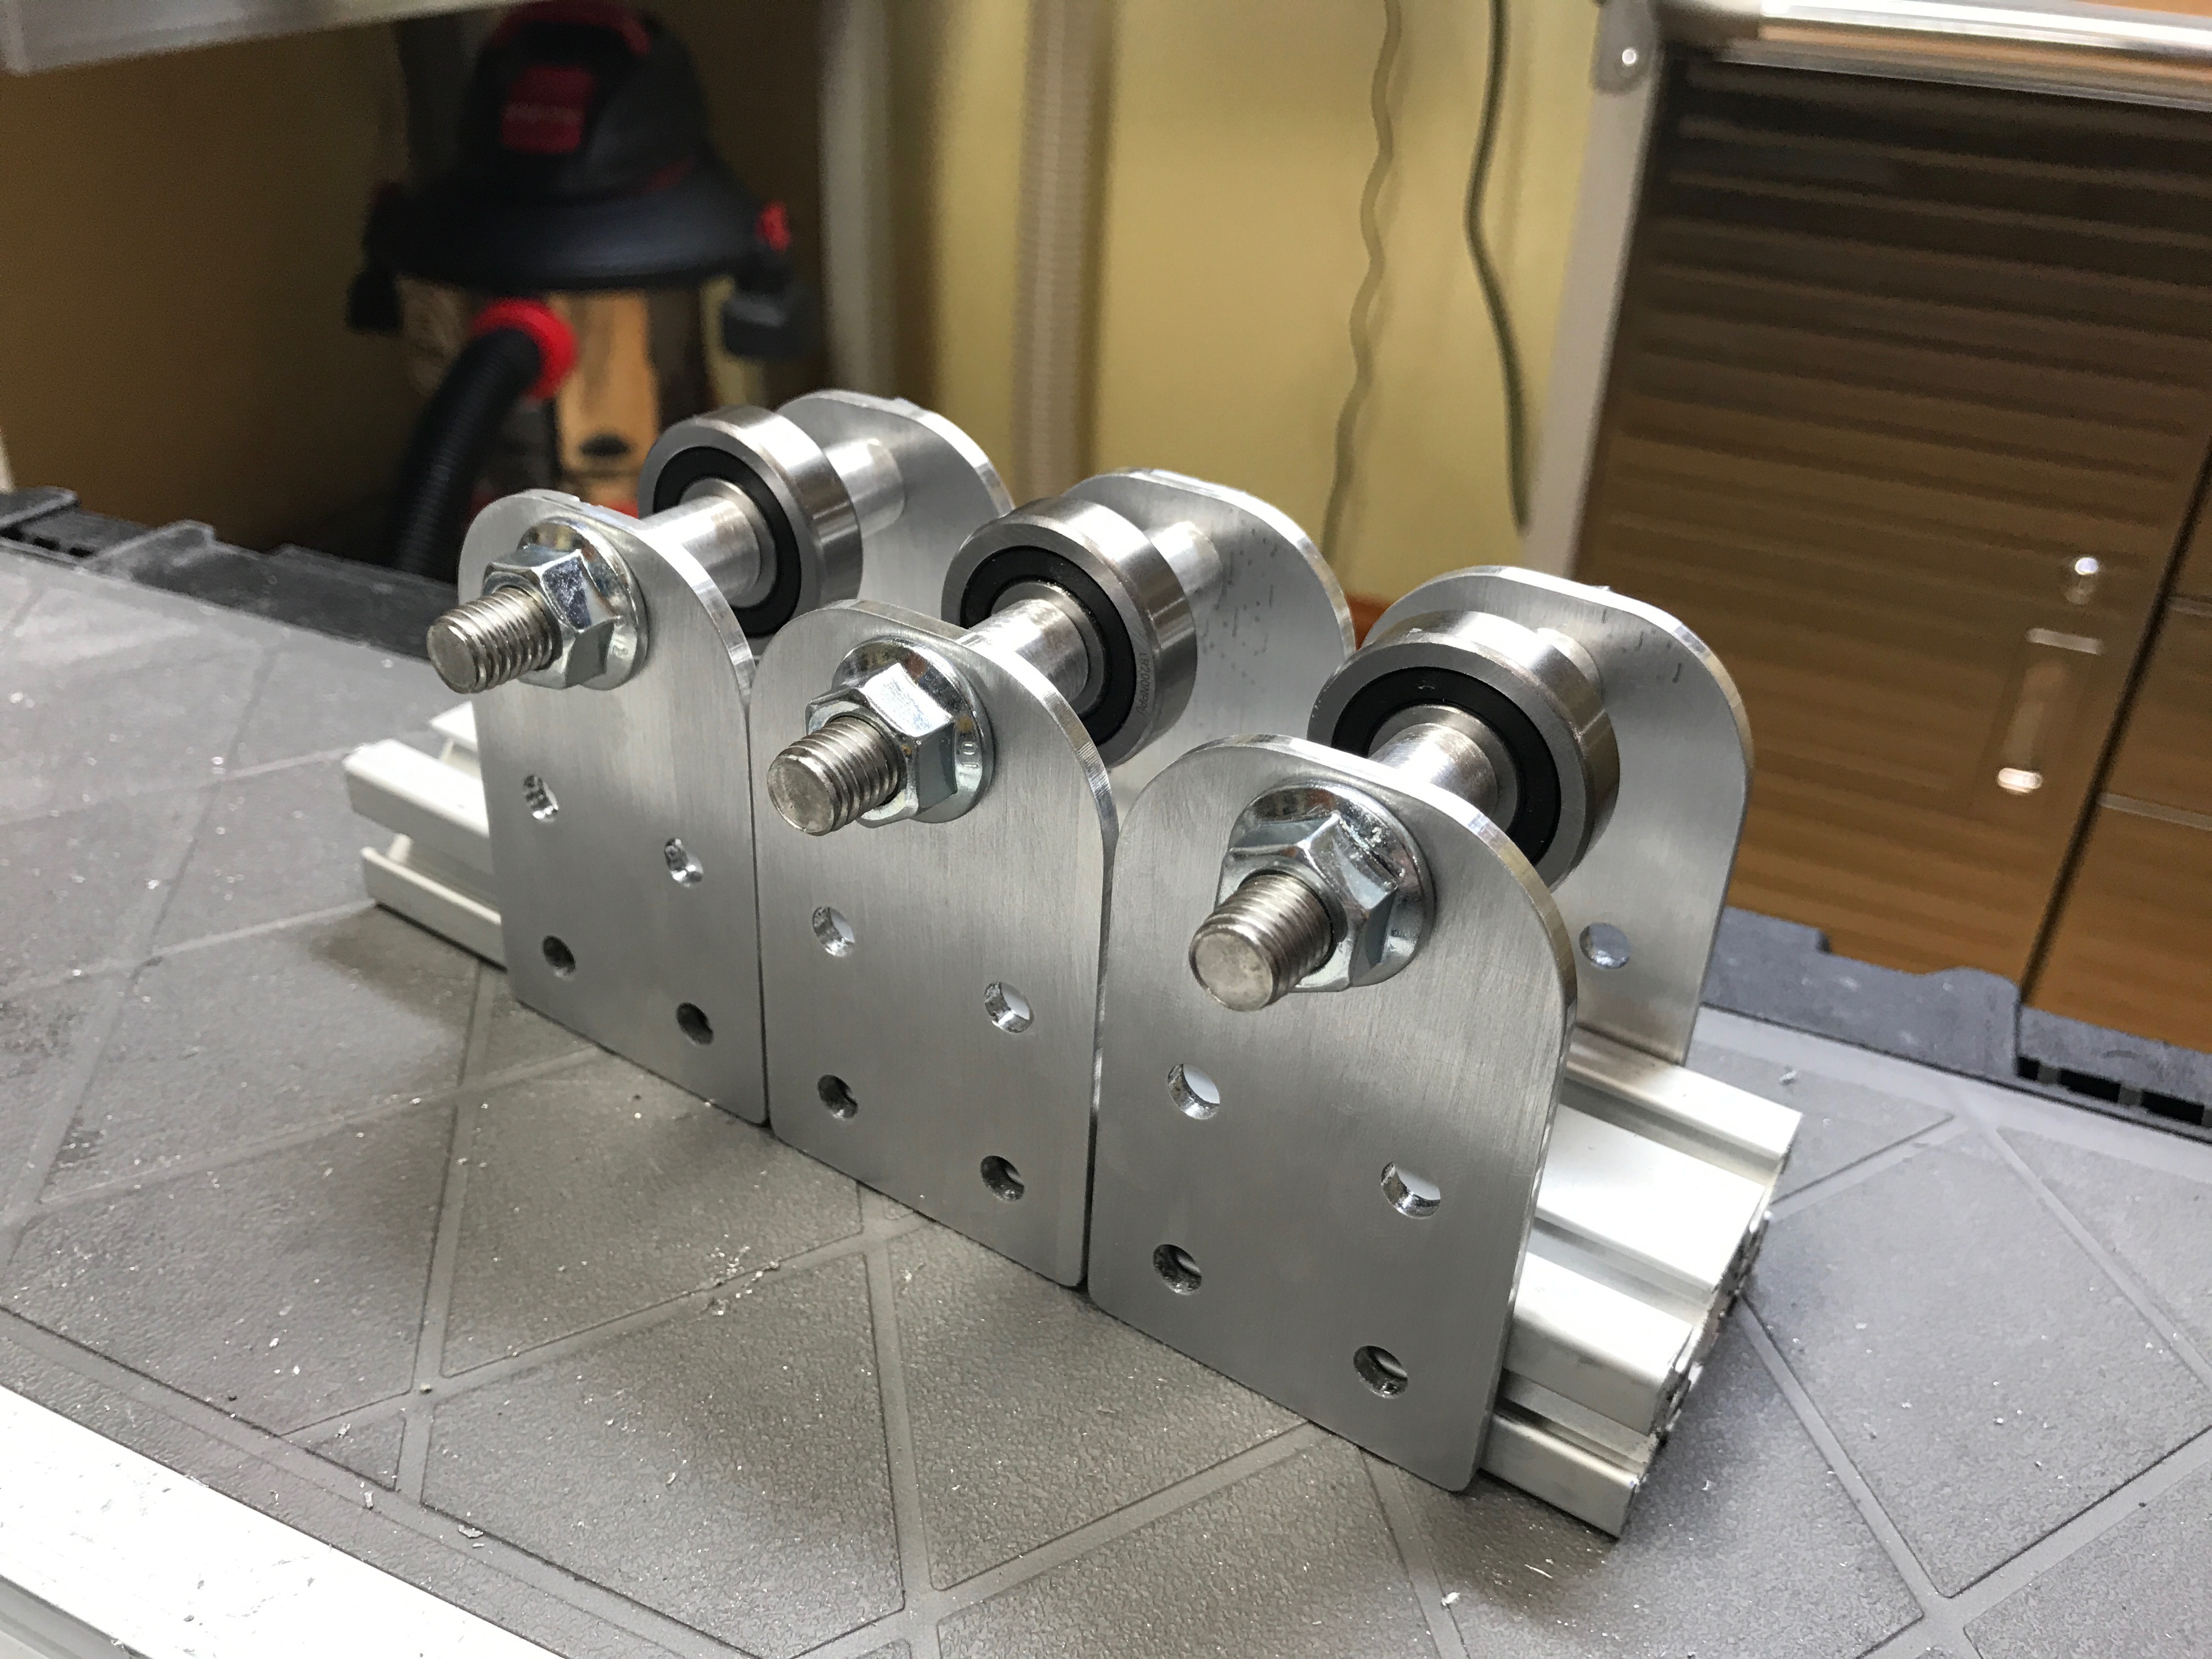\n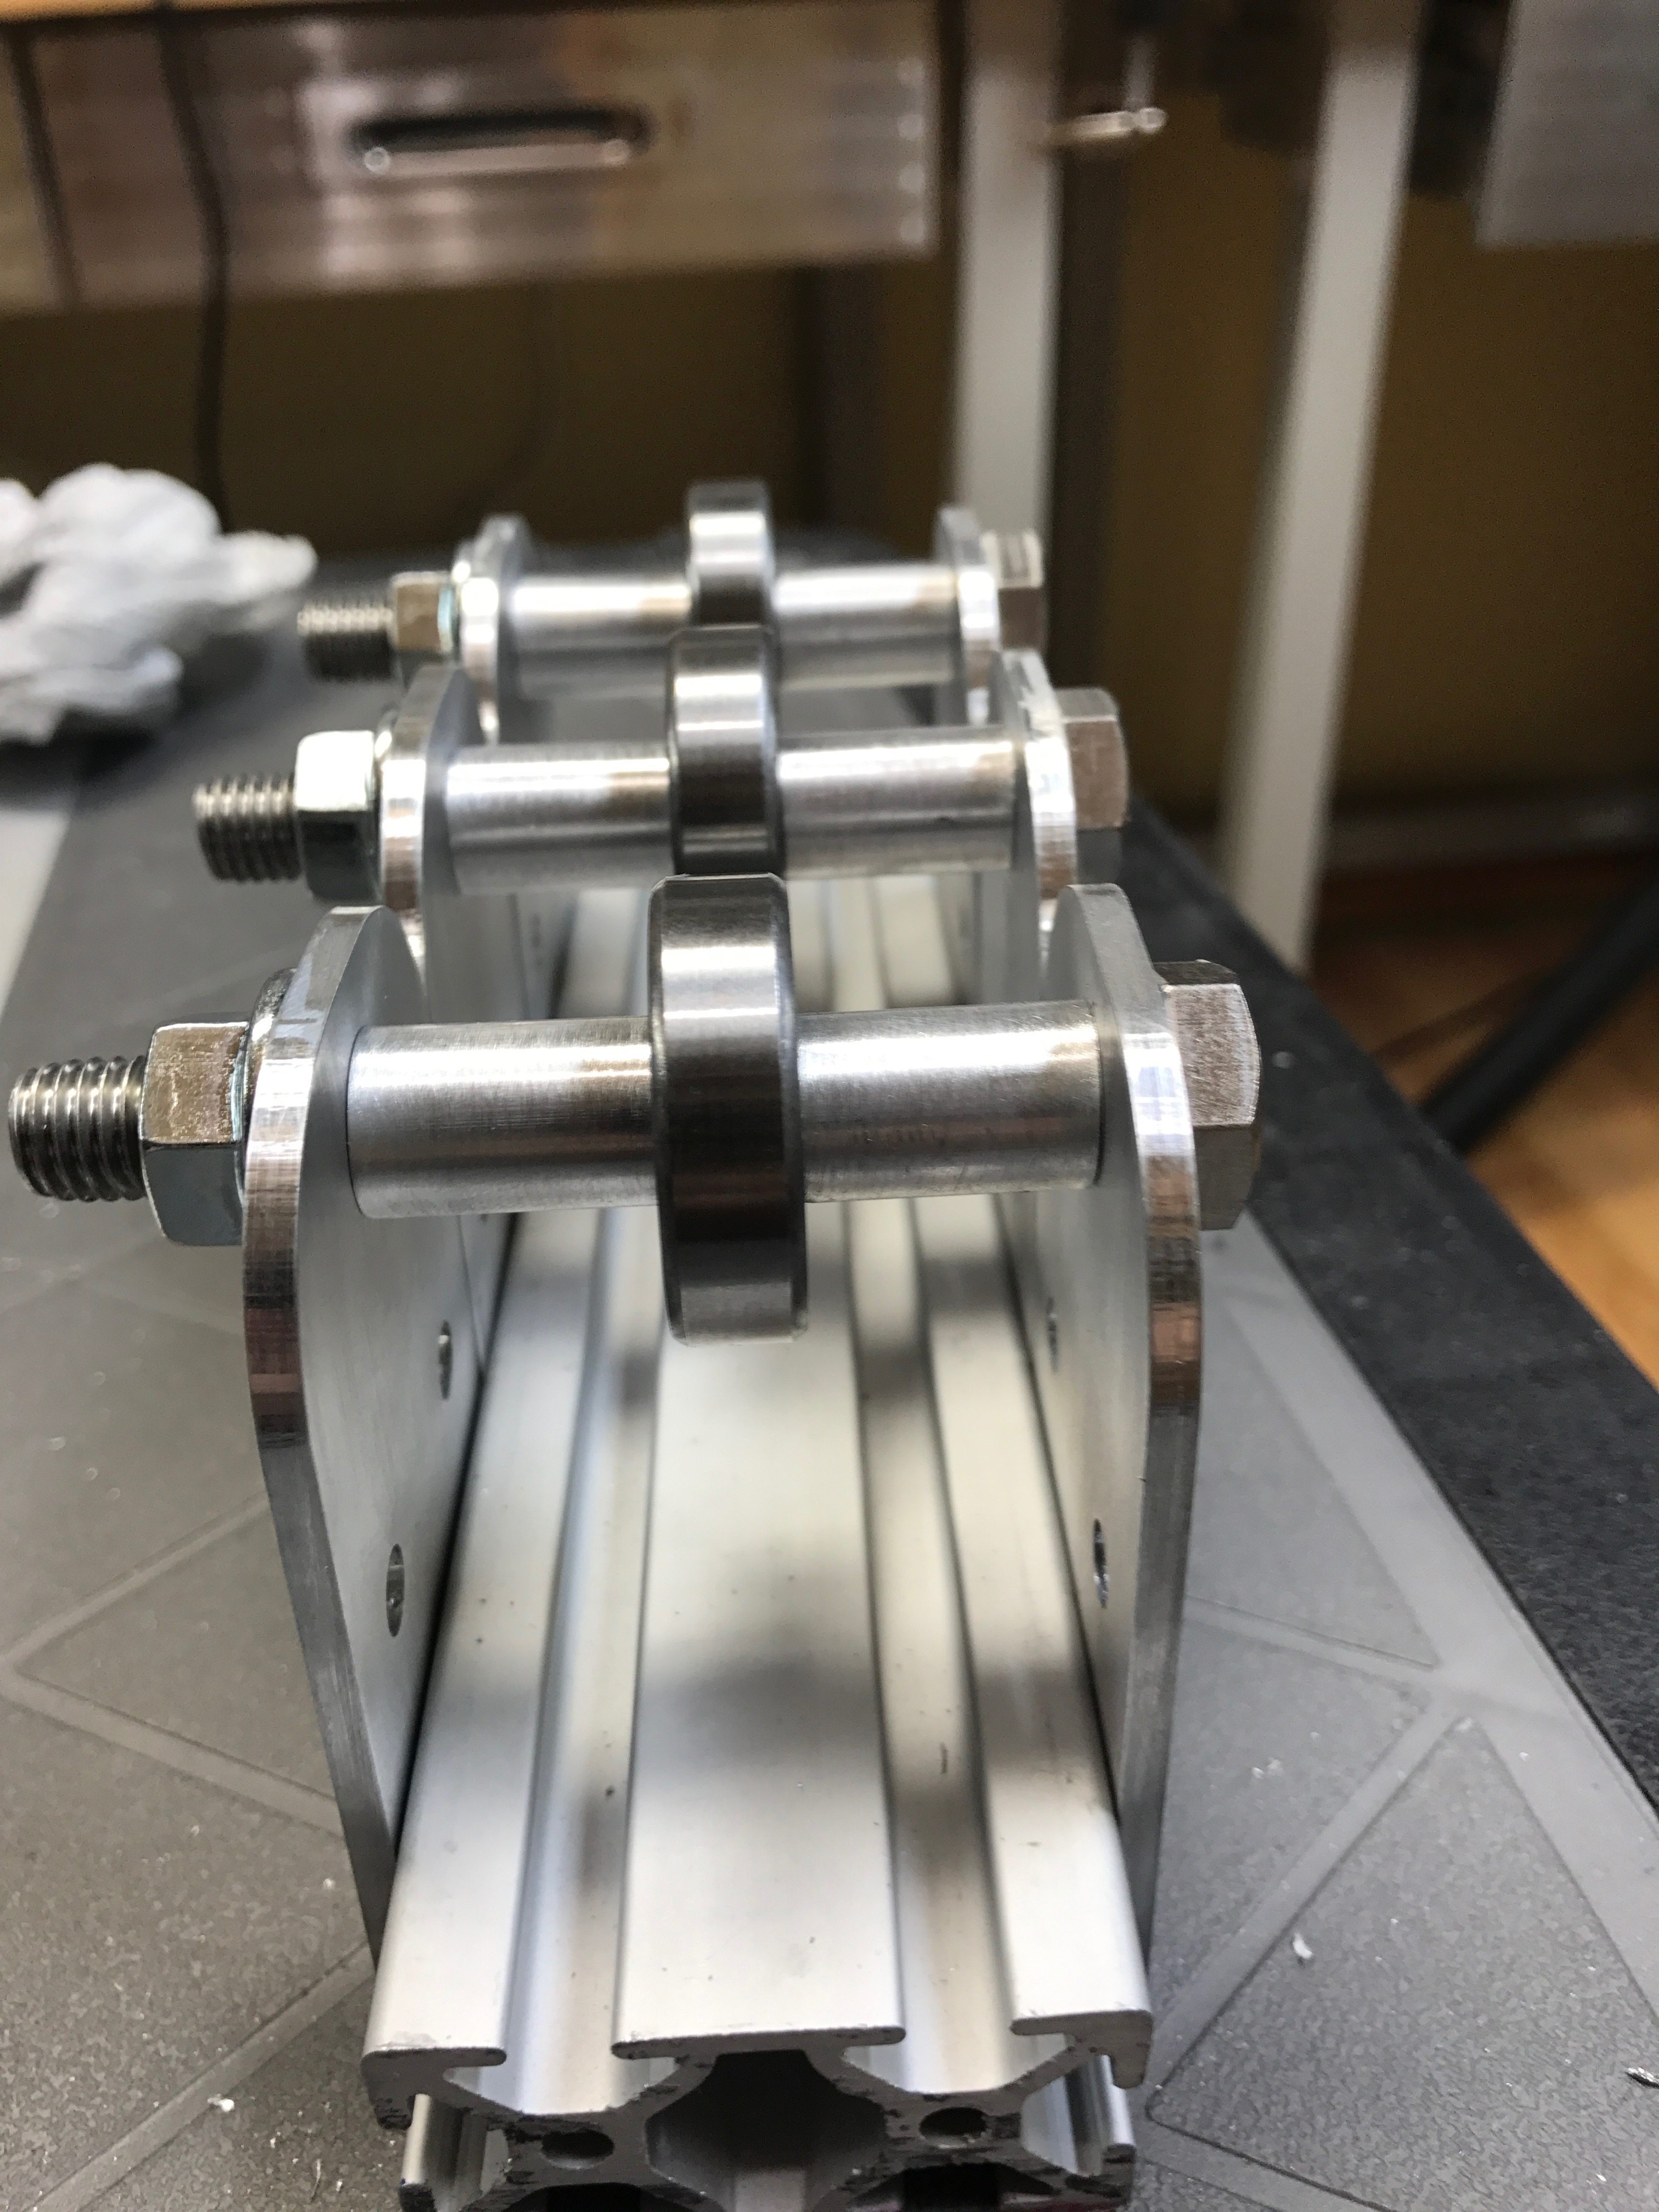\n\nI then mounted them on the cross member of the mid frame.\n\n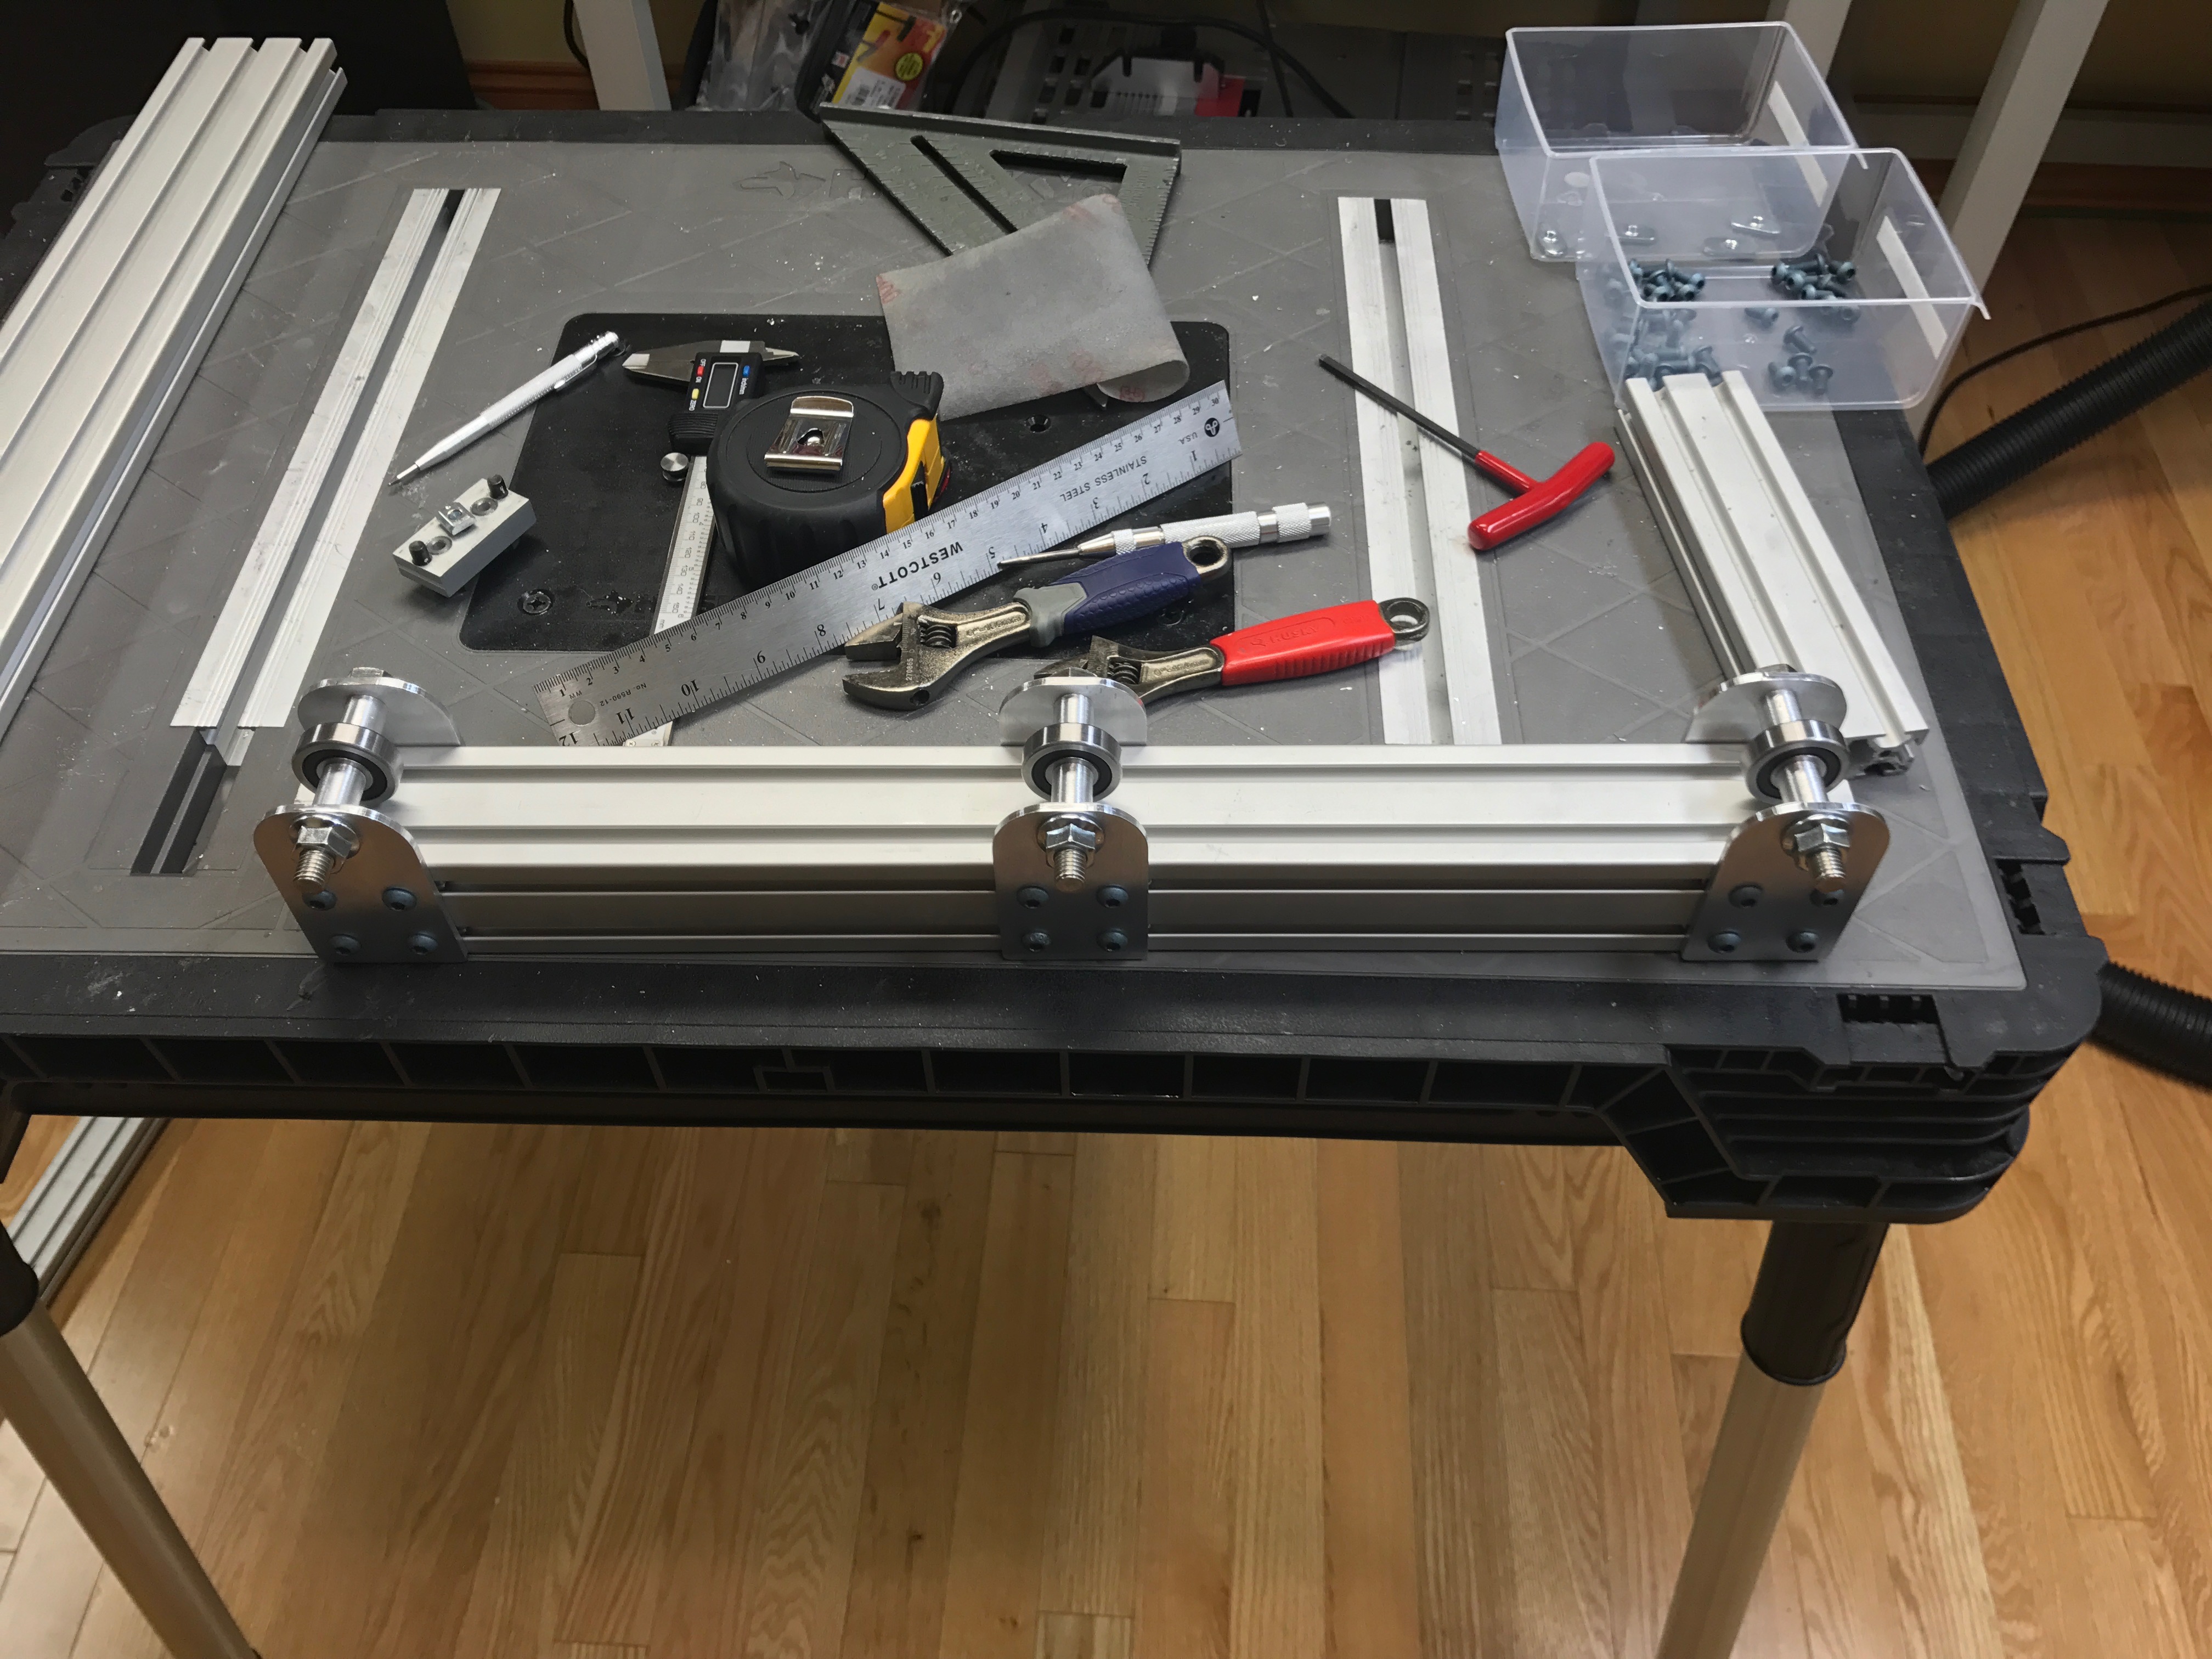\n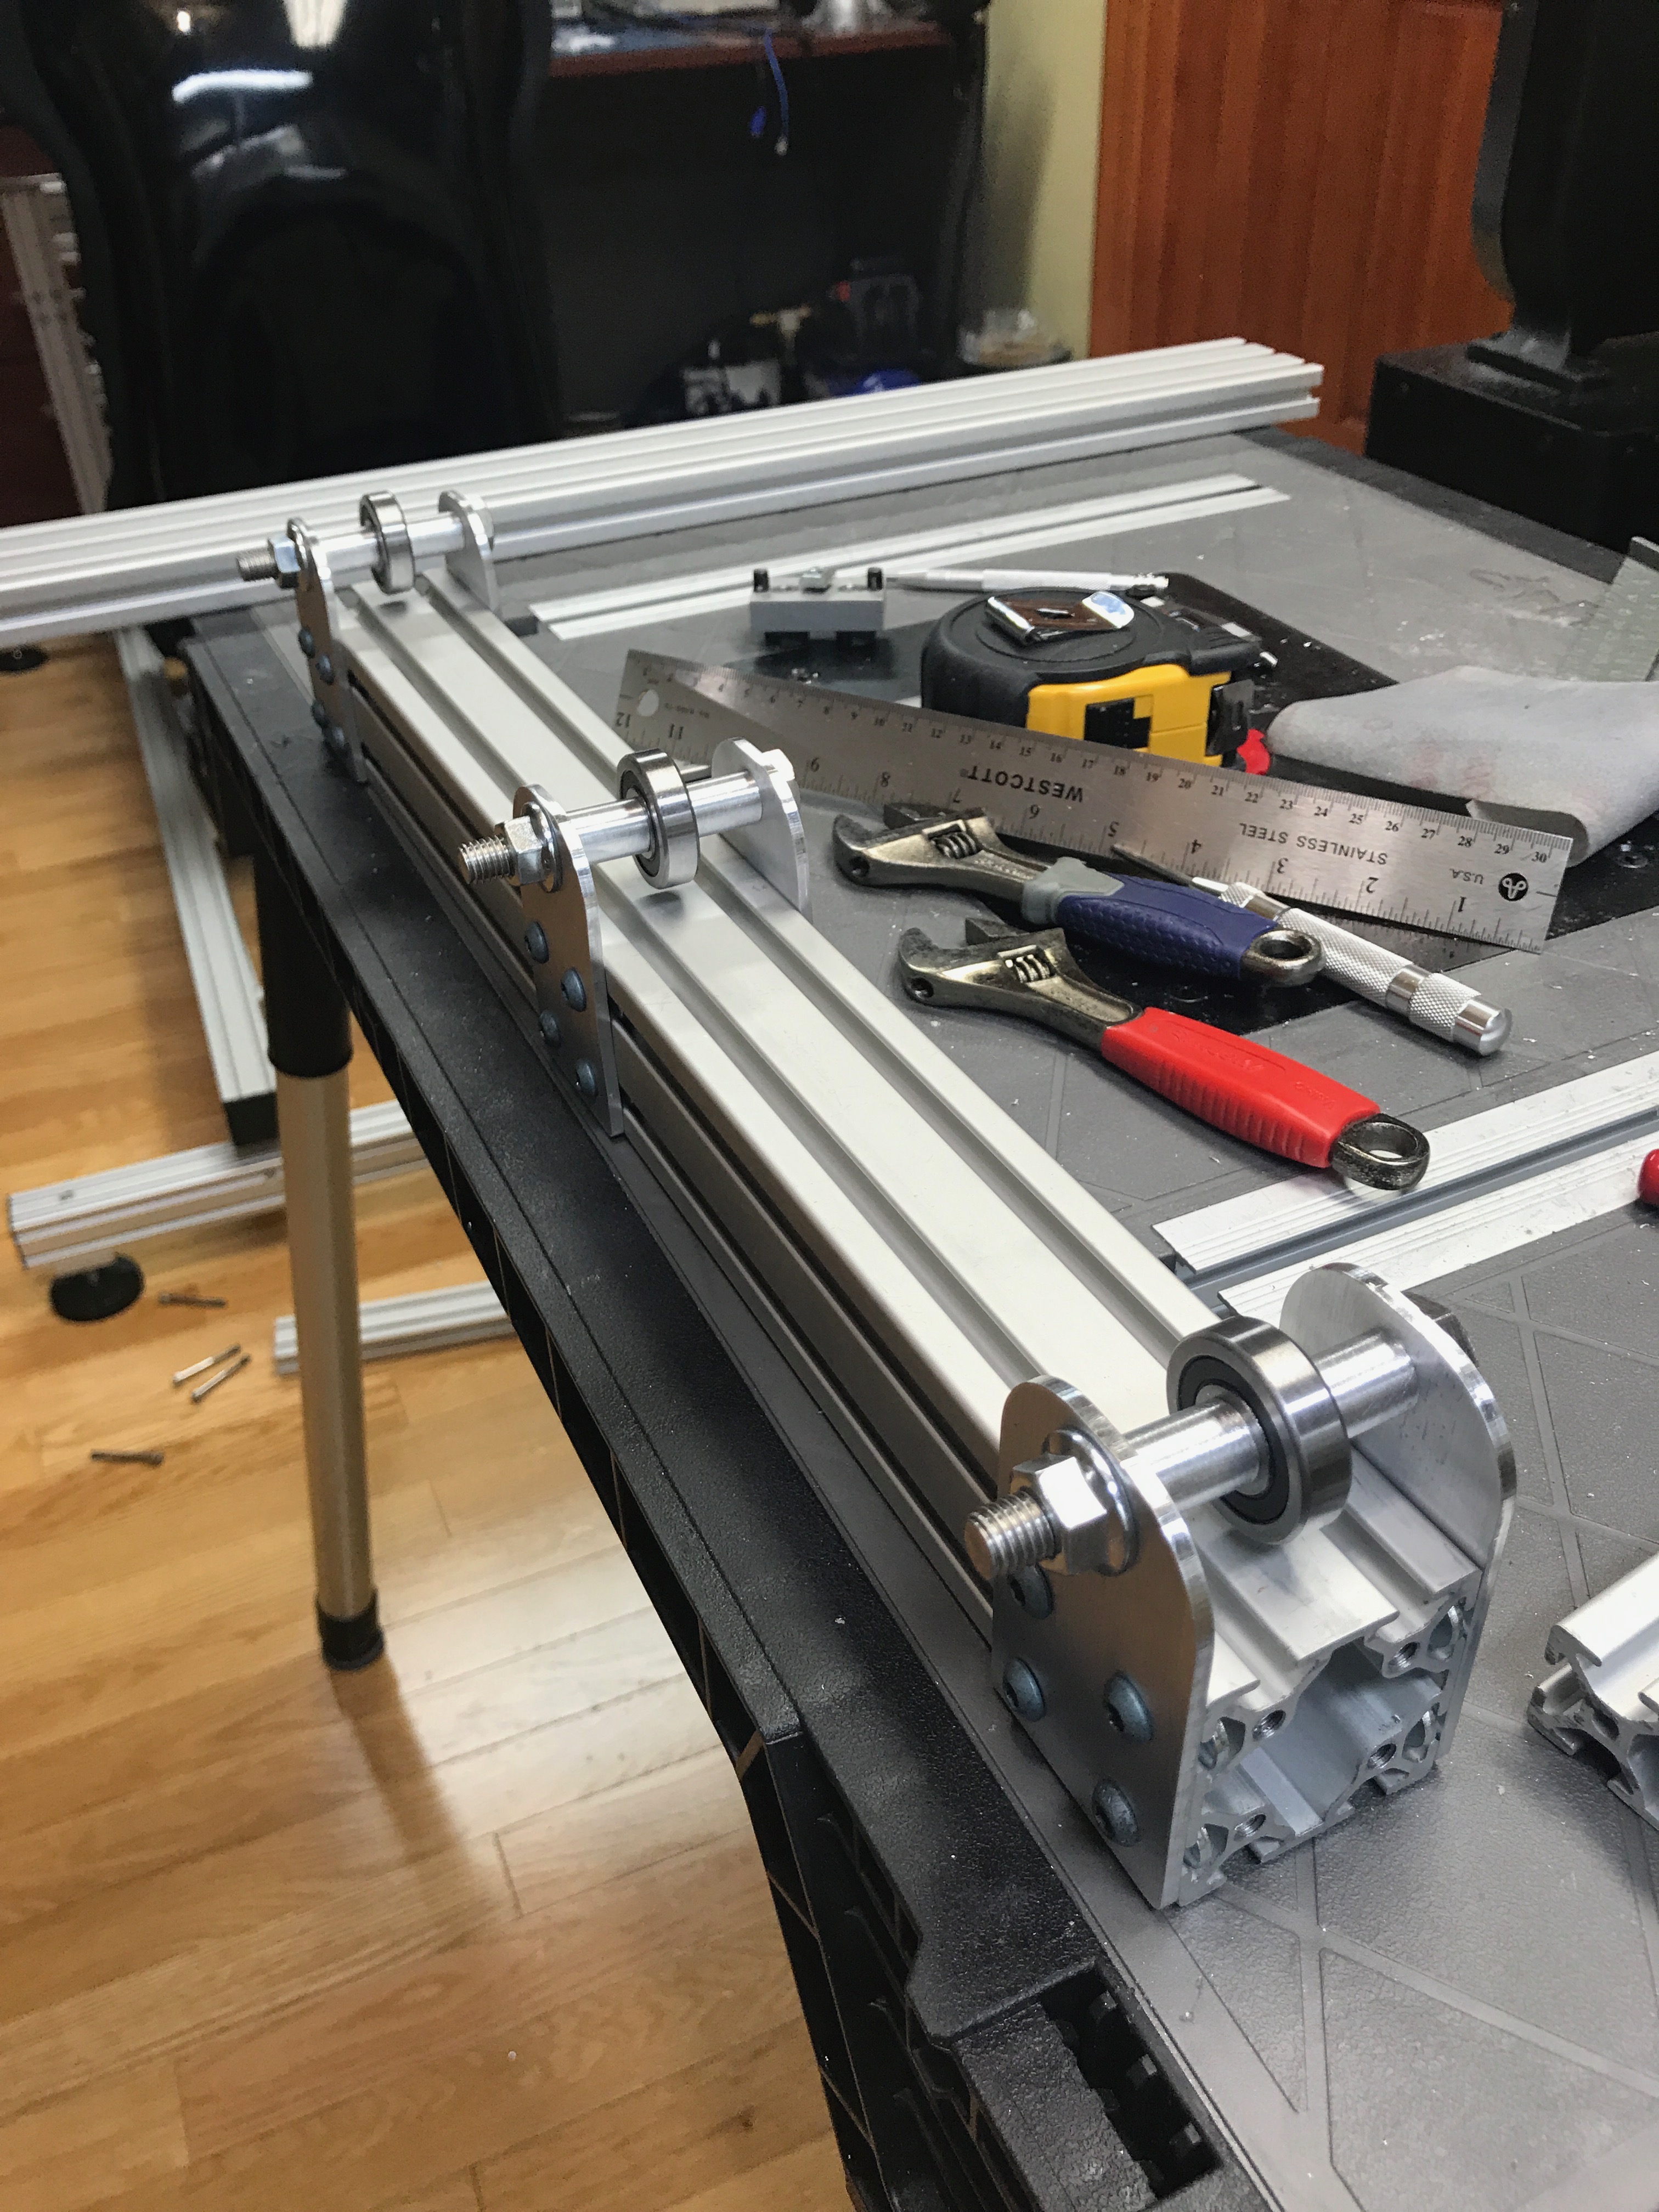\n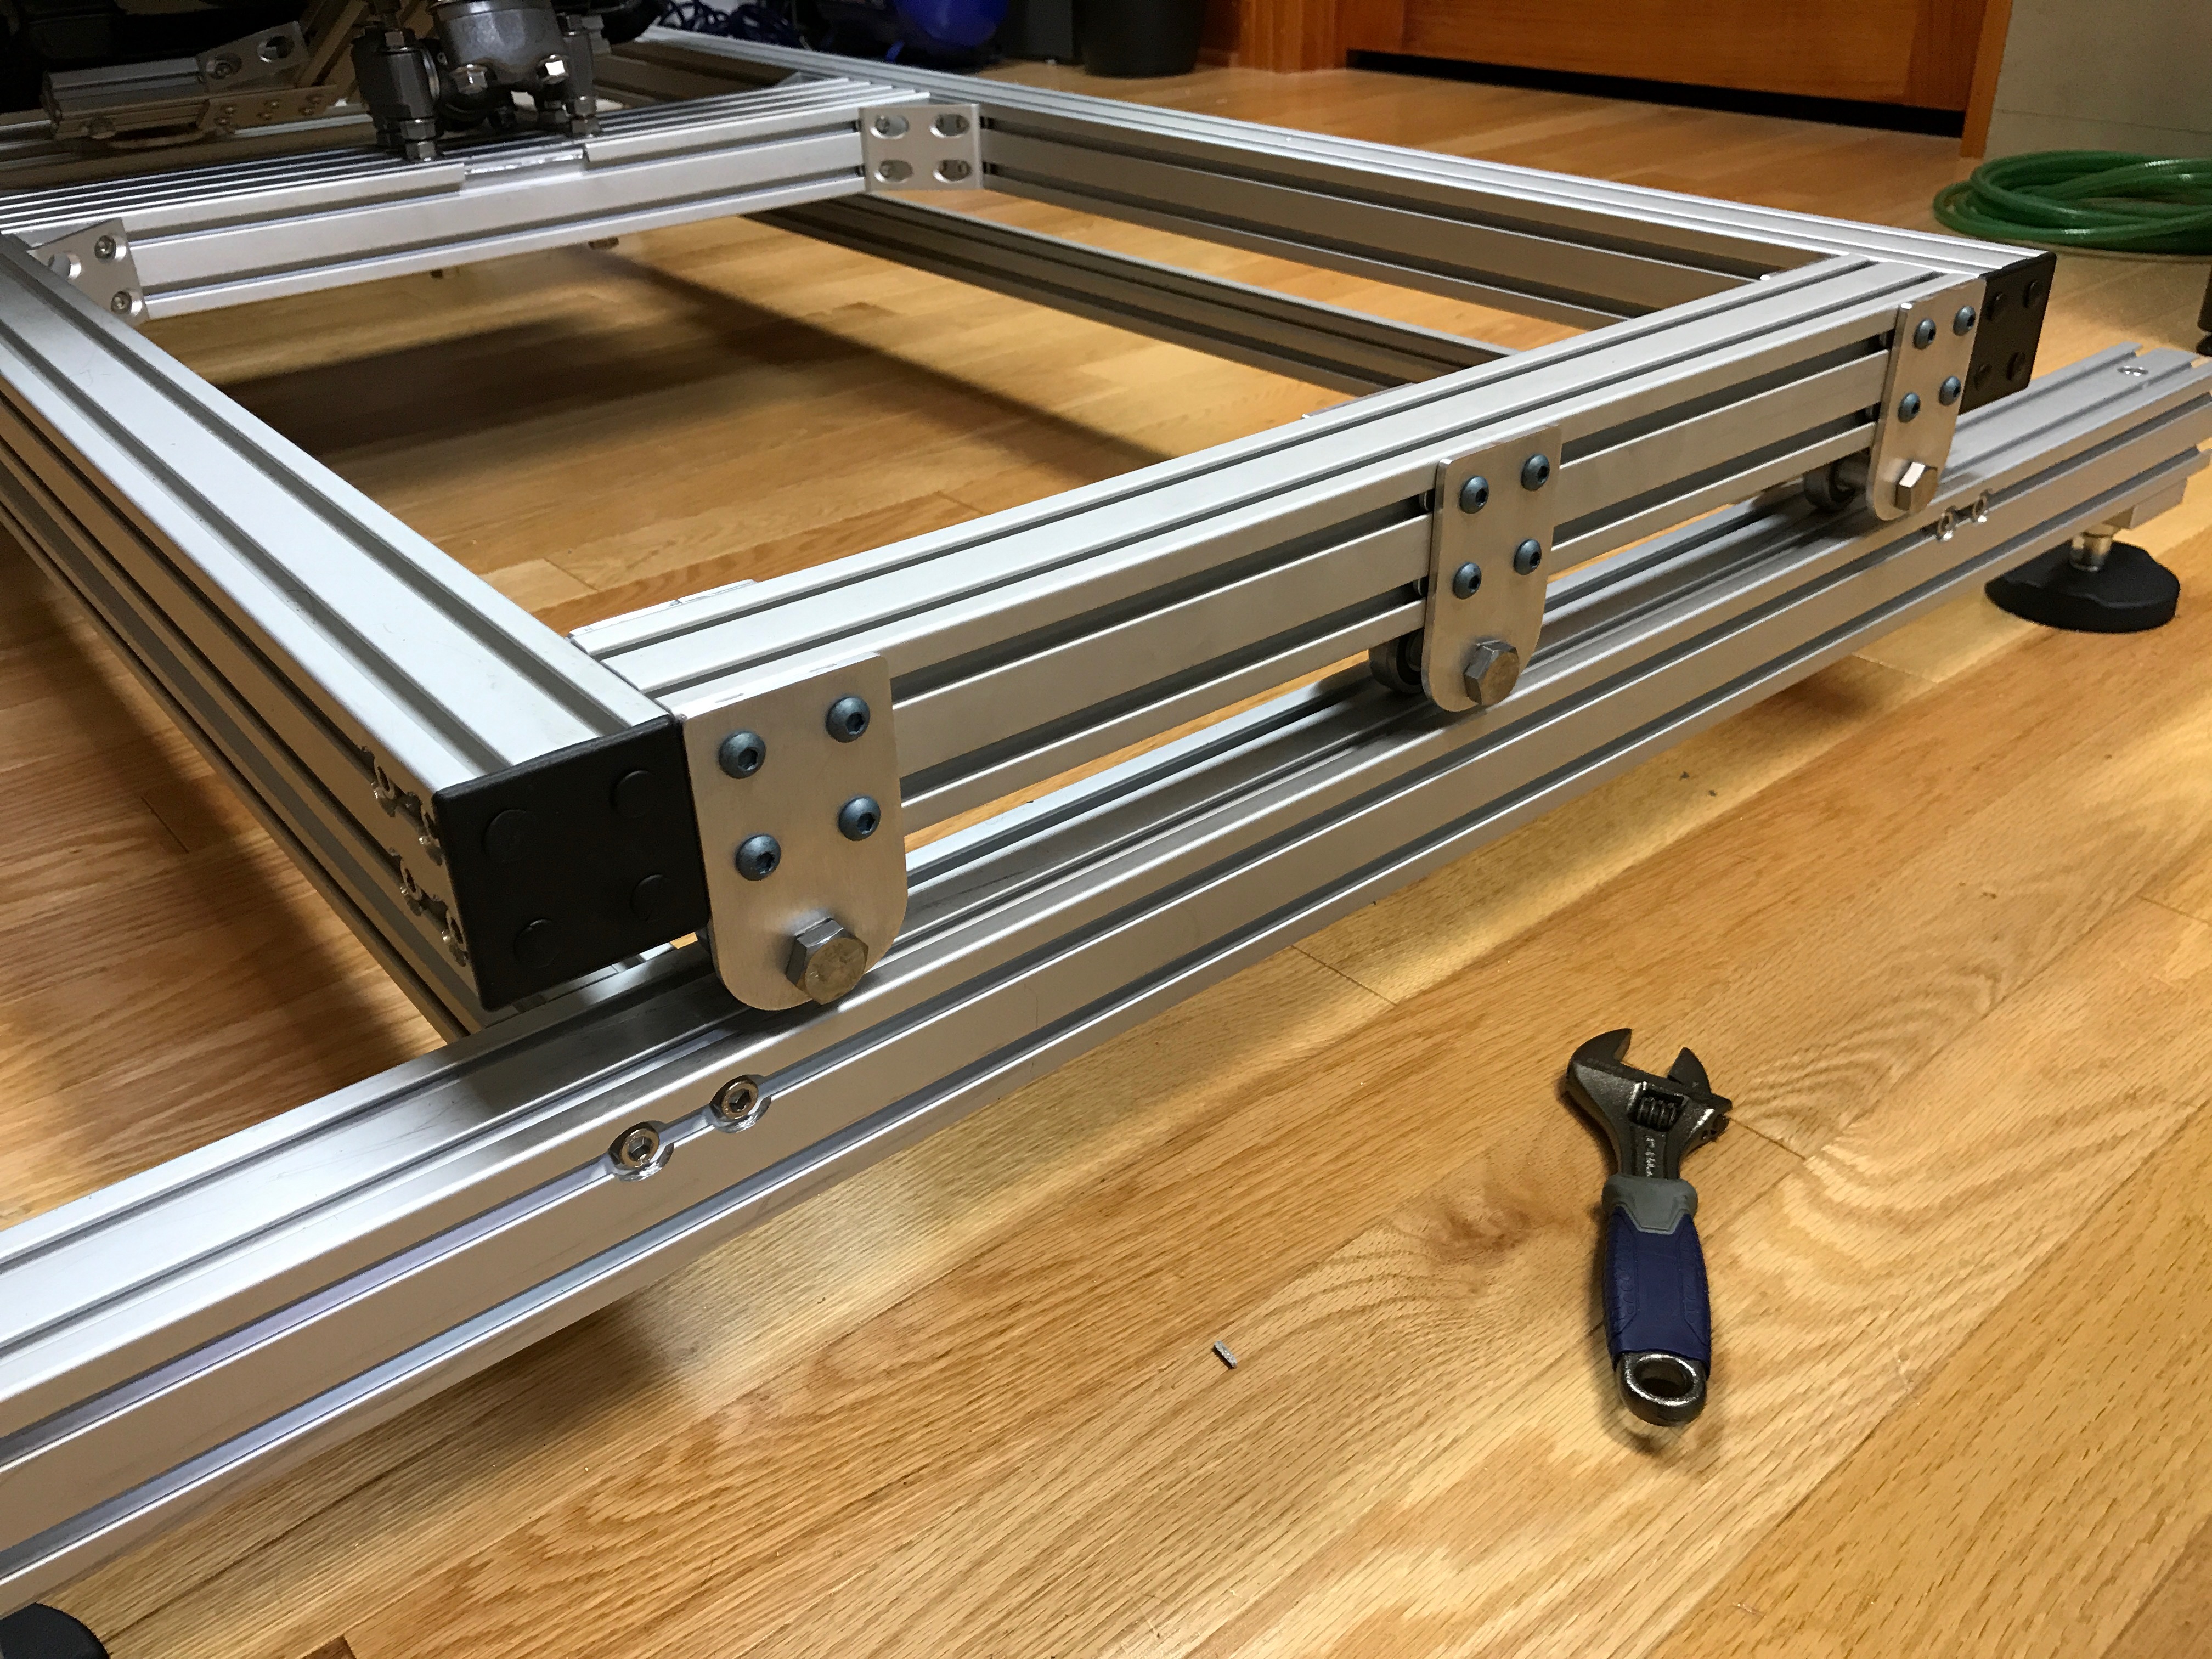\n\nWith the mid frame leveled, I went back to the seat to mount the actuator mount bracket. This was tricky. I had to notch and drill at an angle in the extrusion (98 degrees).\n\n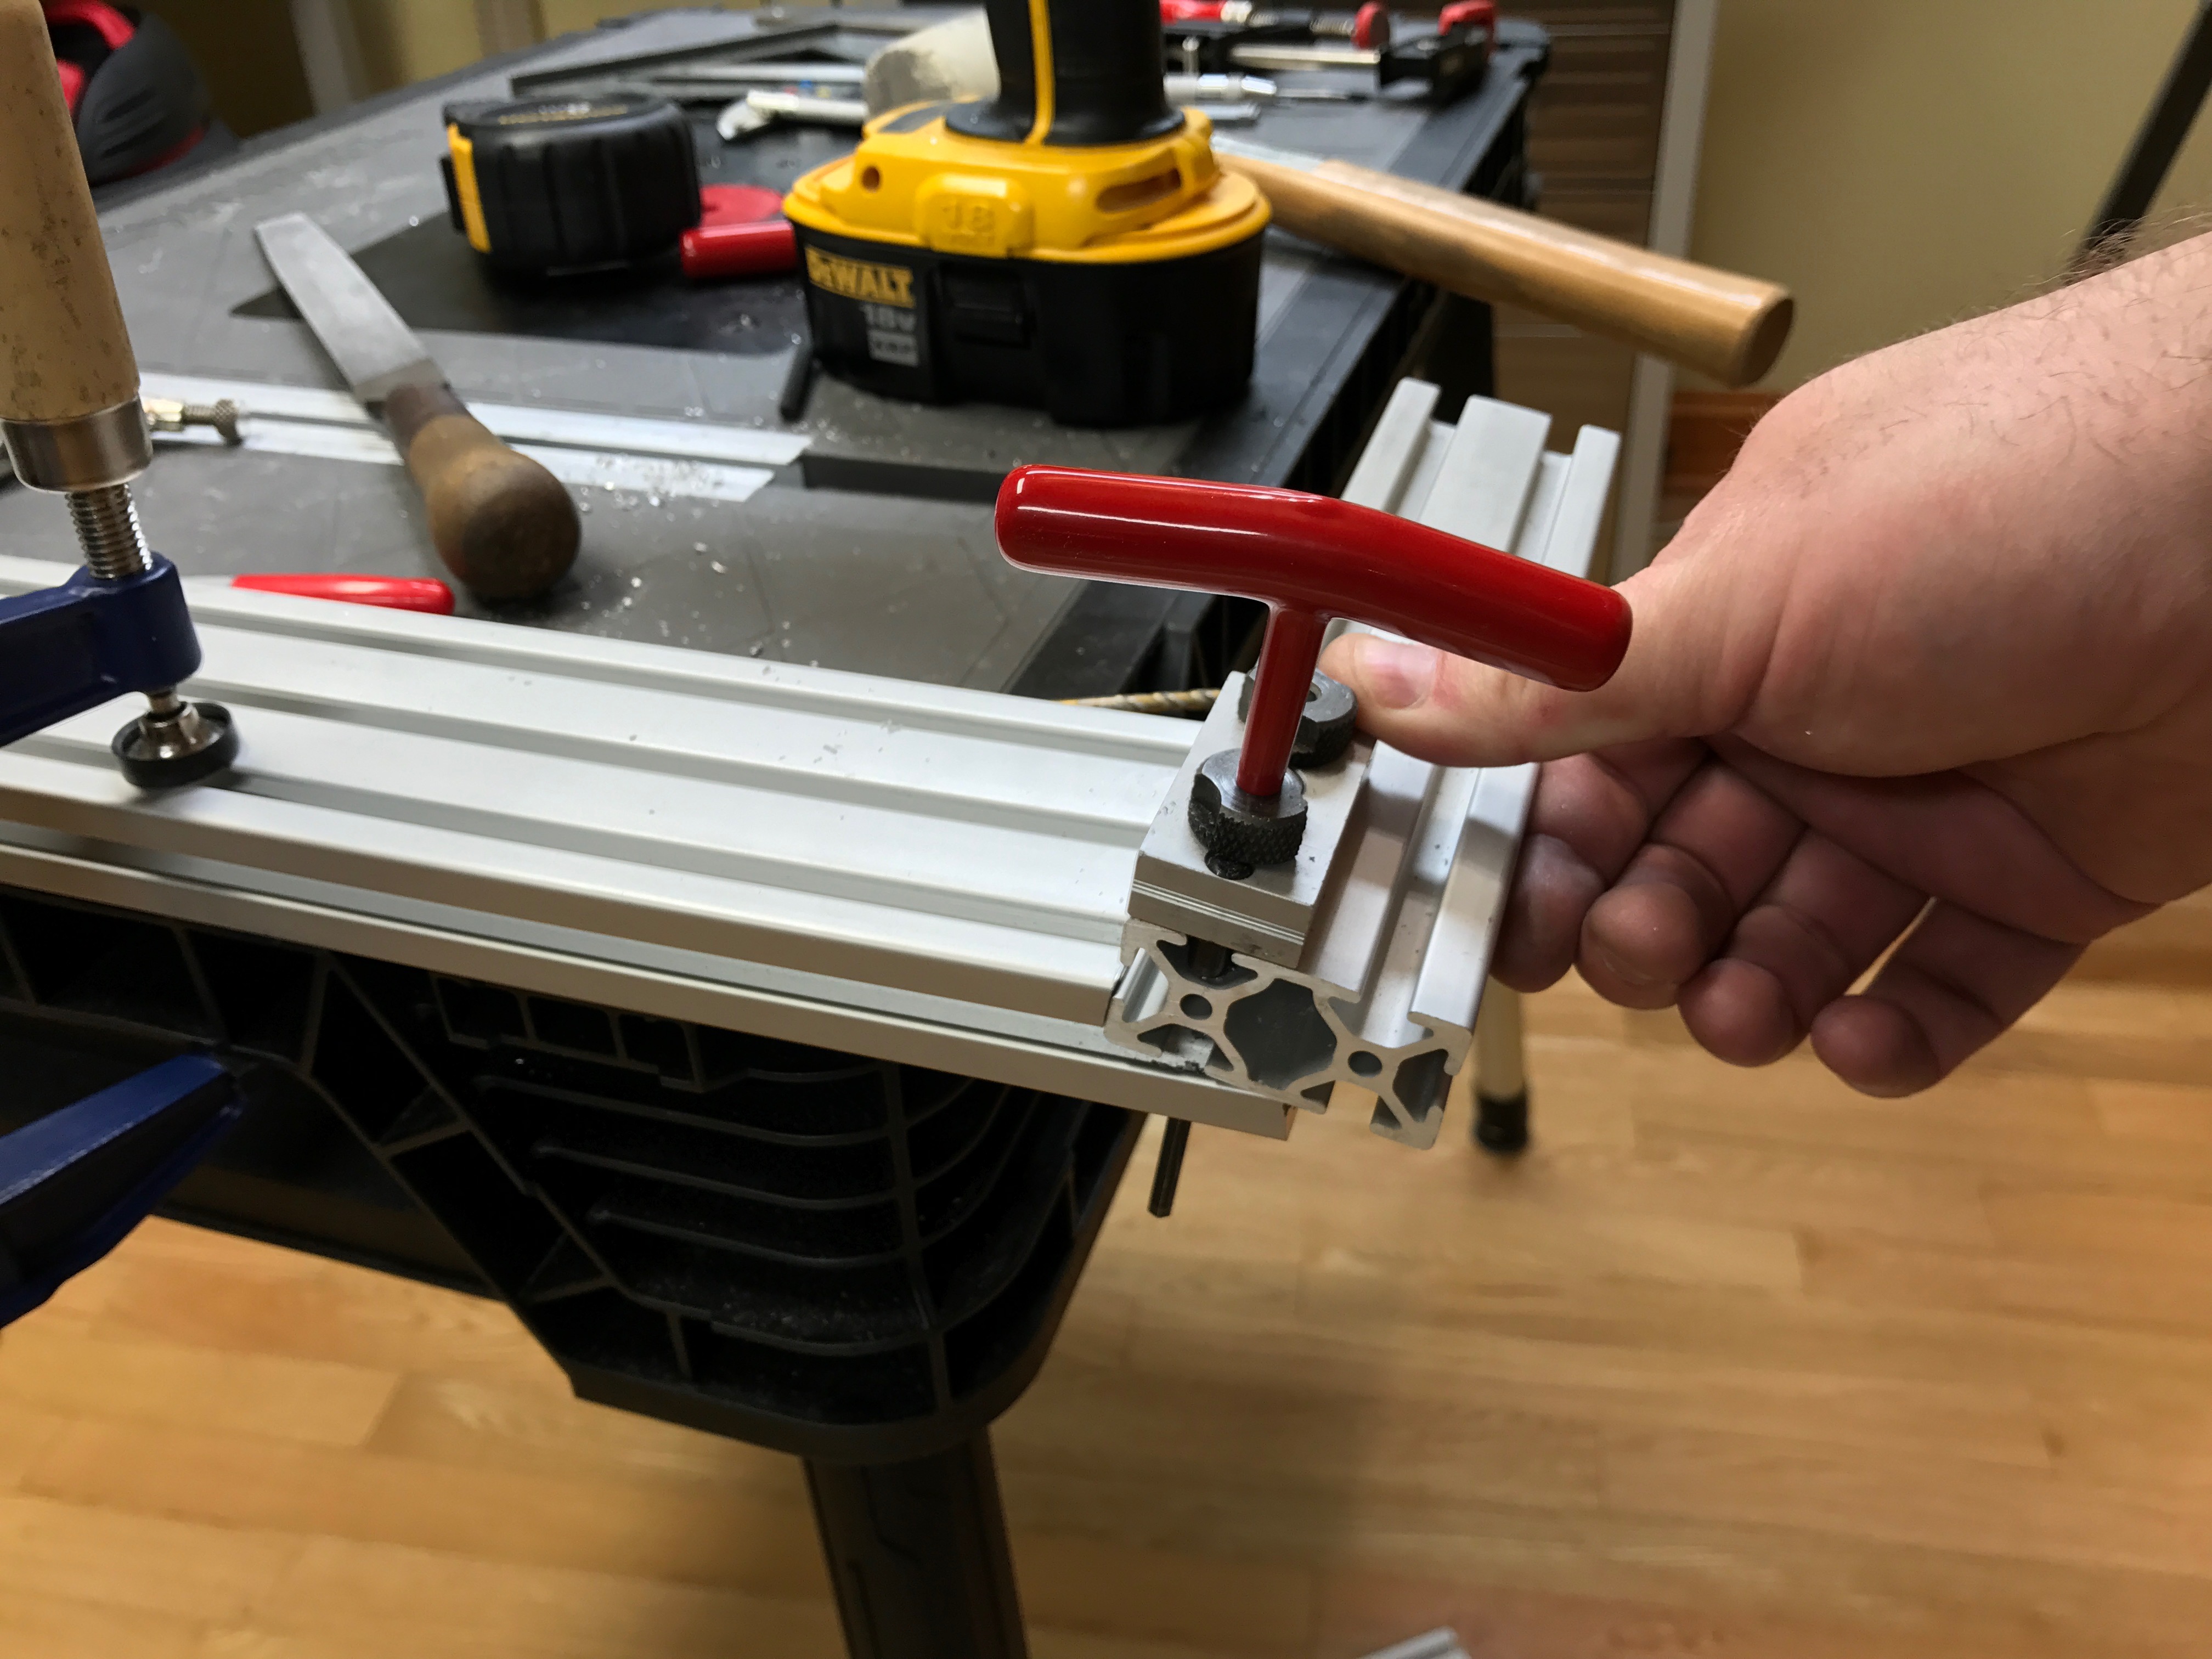\n\nI then designed and fabricated some side support brackets to help relieve the 3 bolts that went into the base extrusion on the seat.\n\n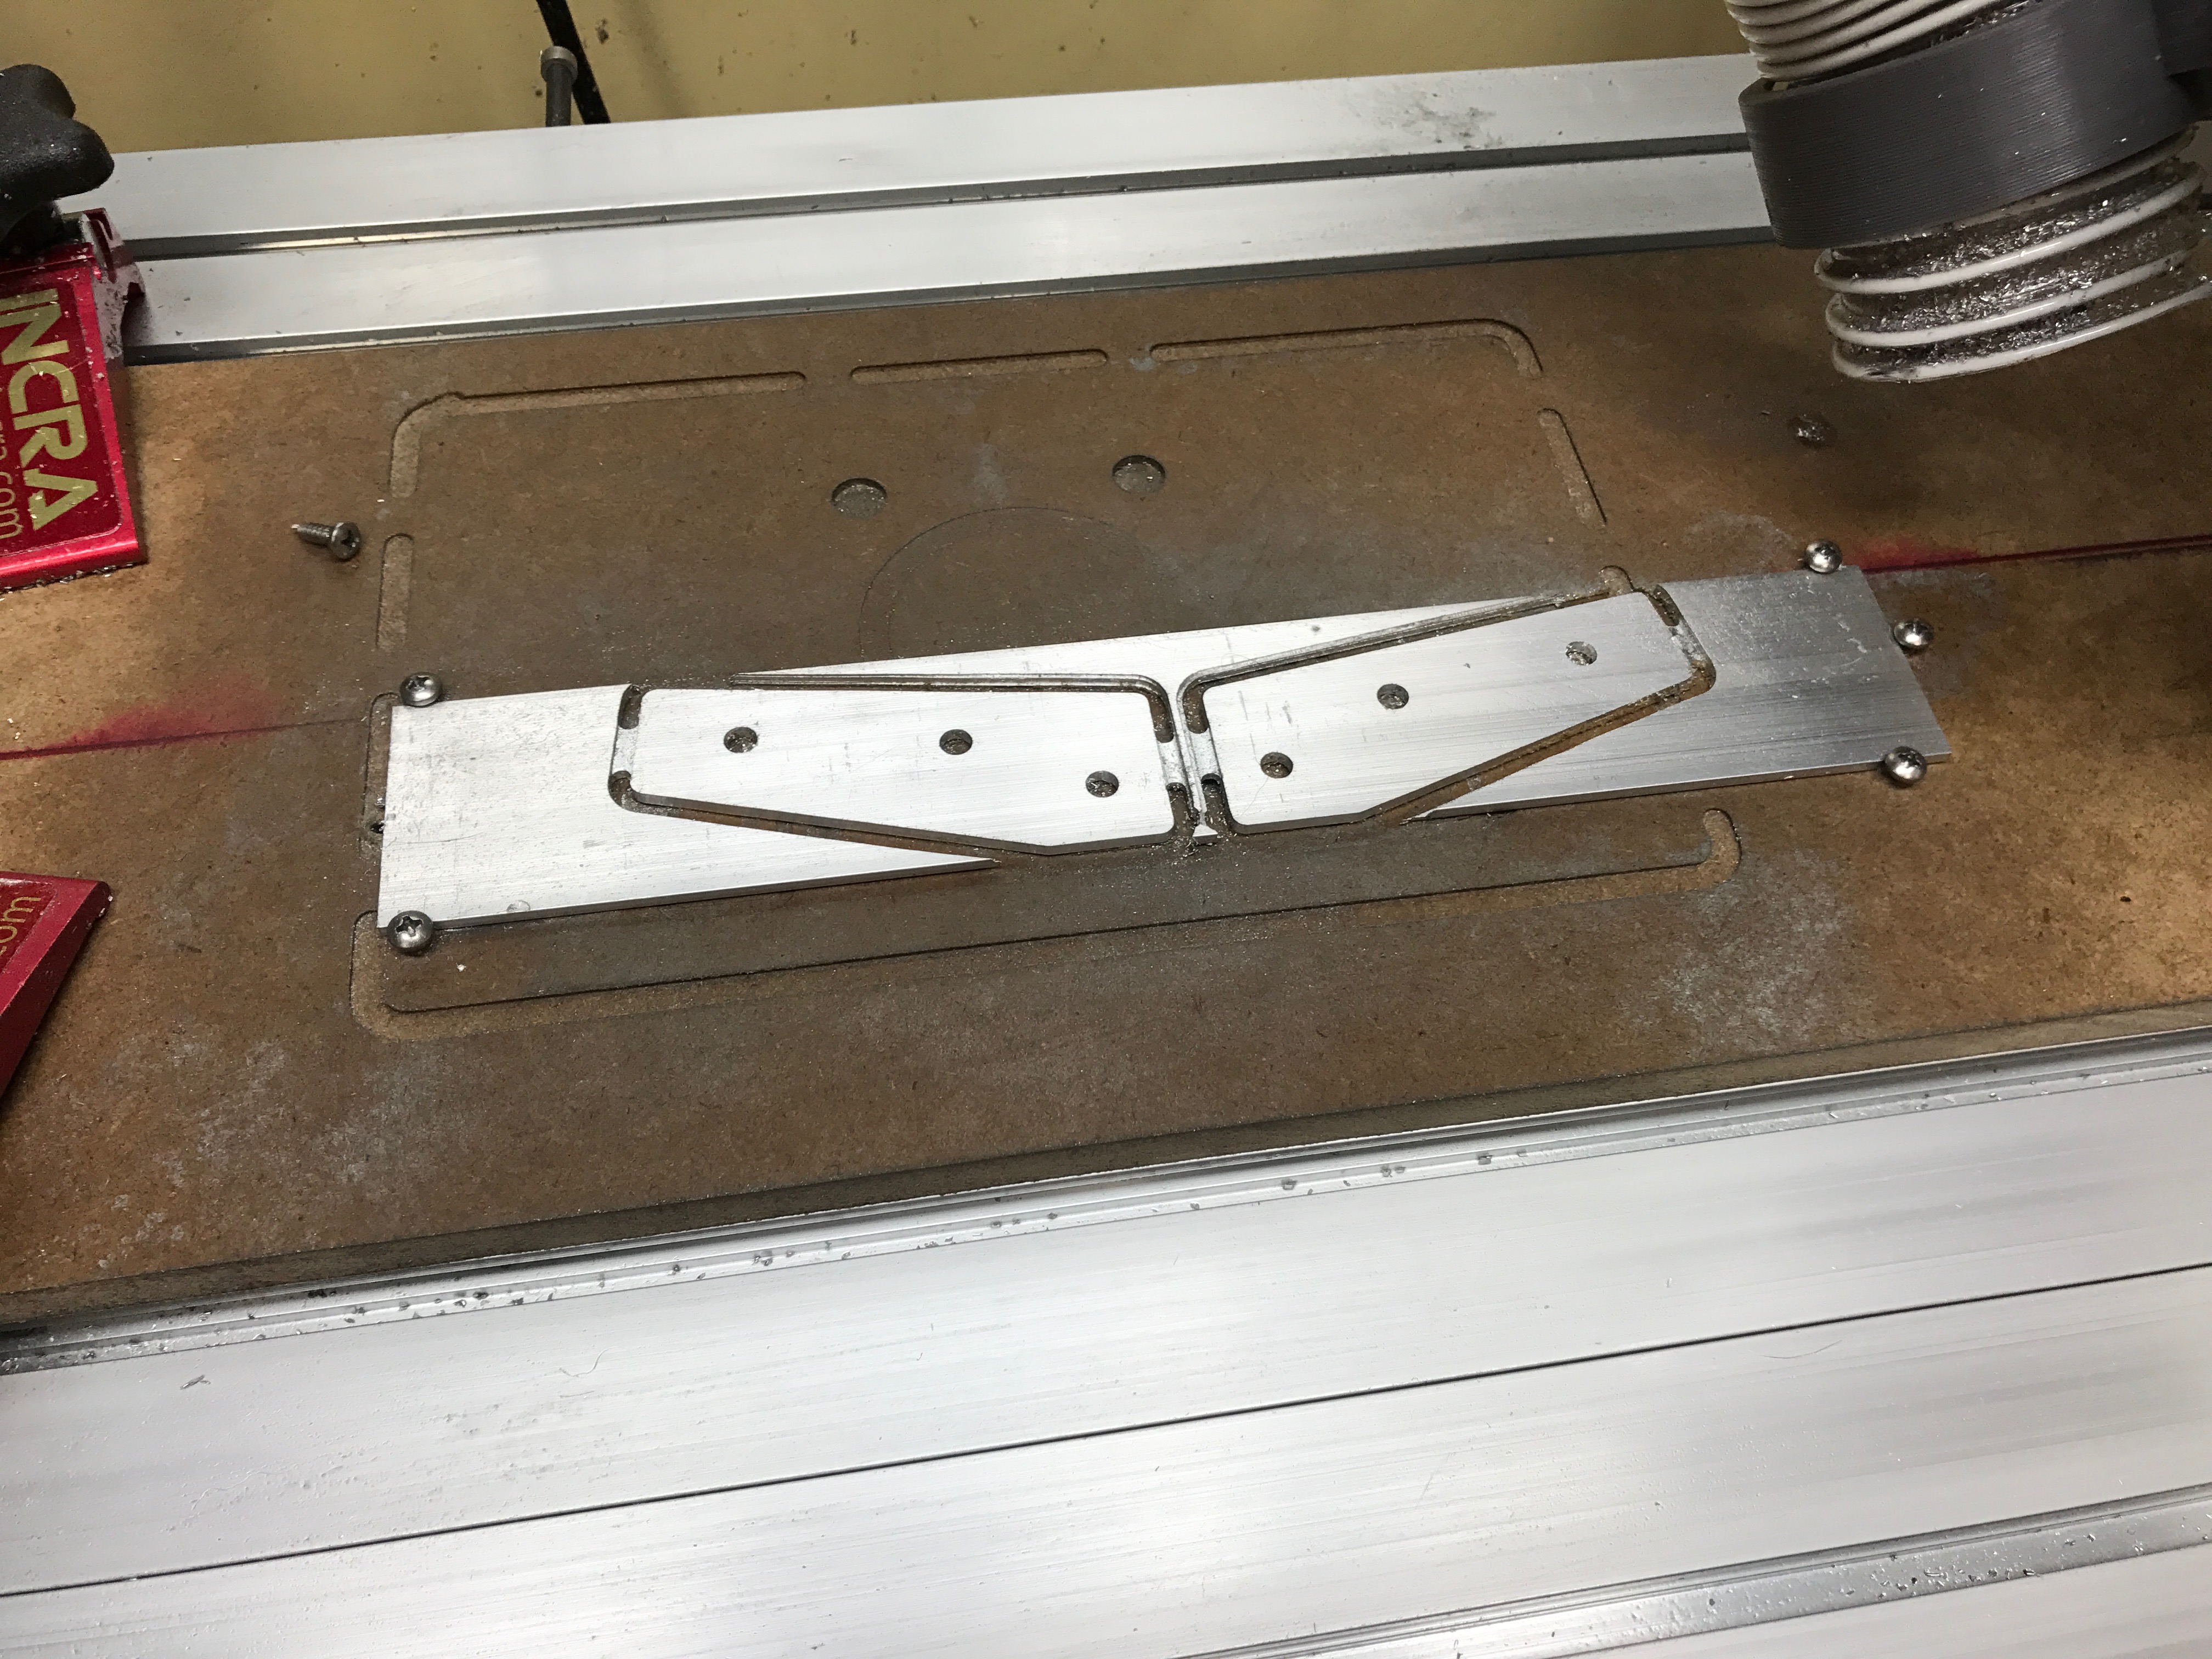\n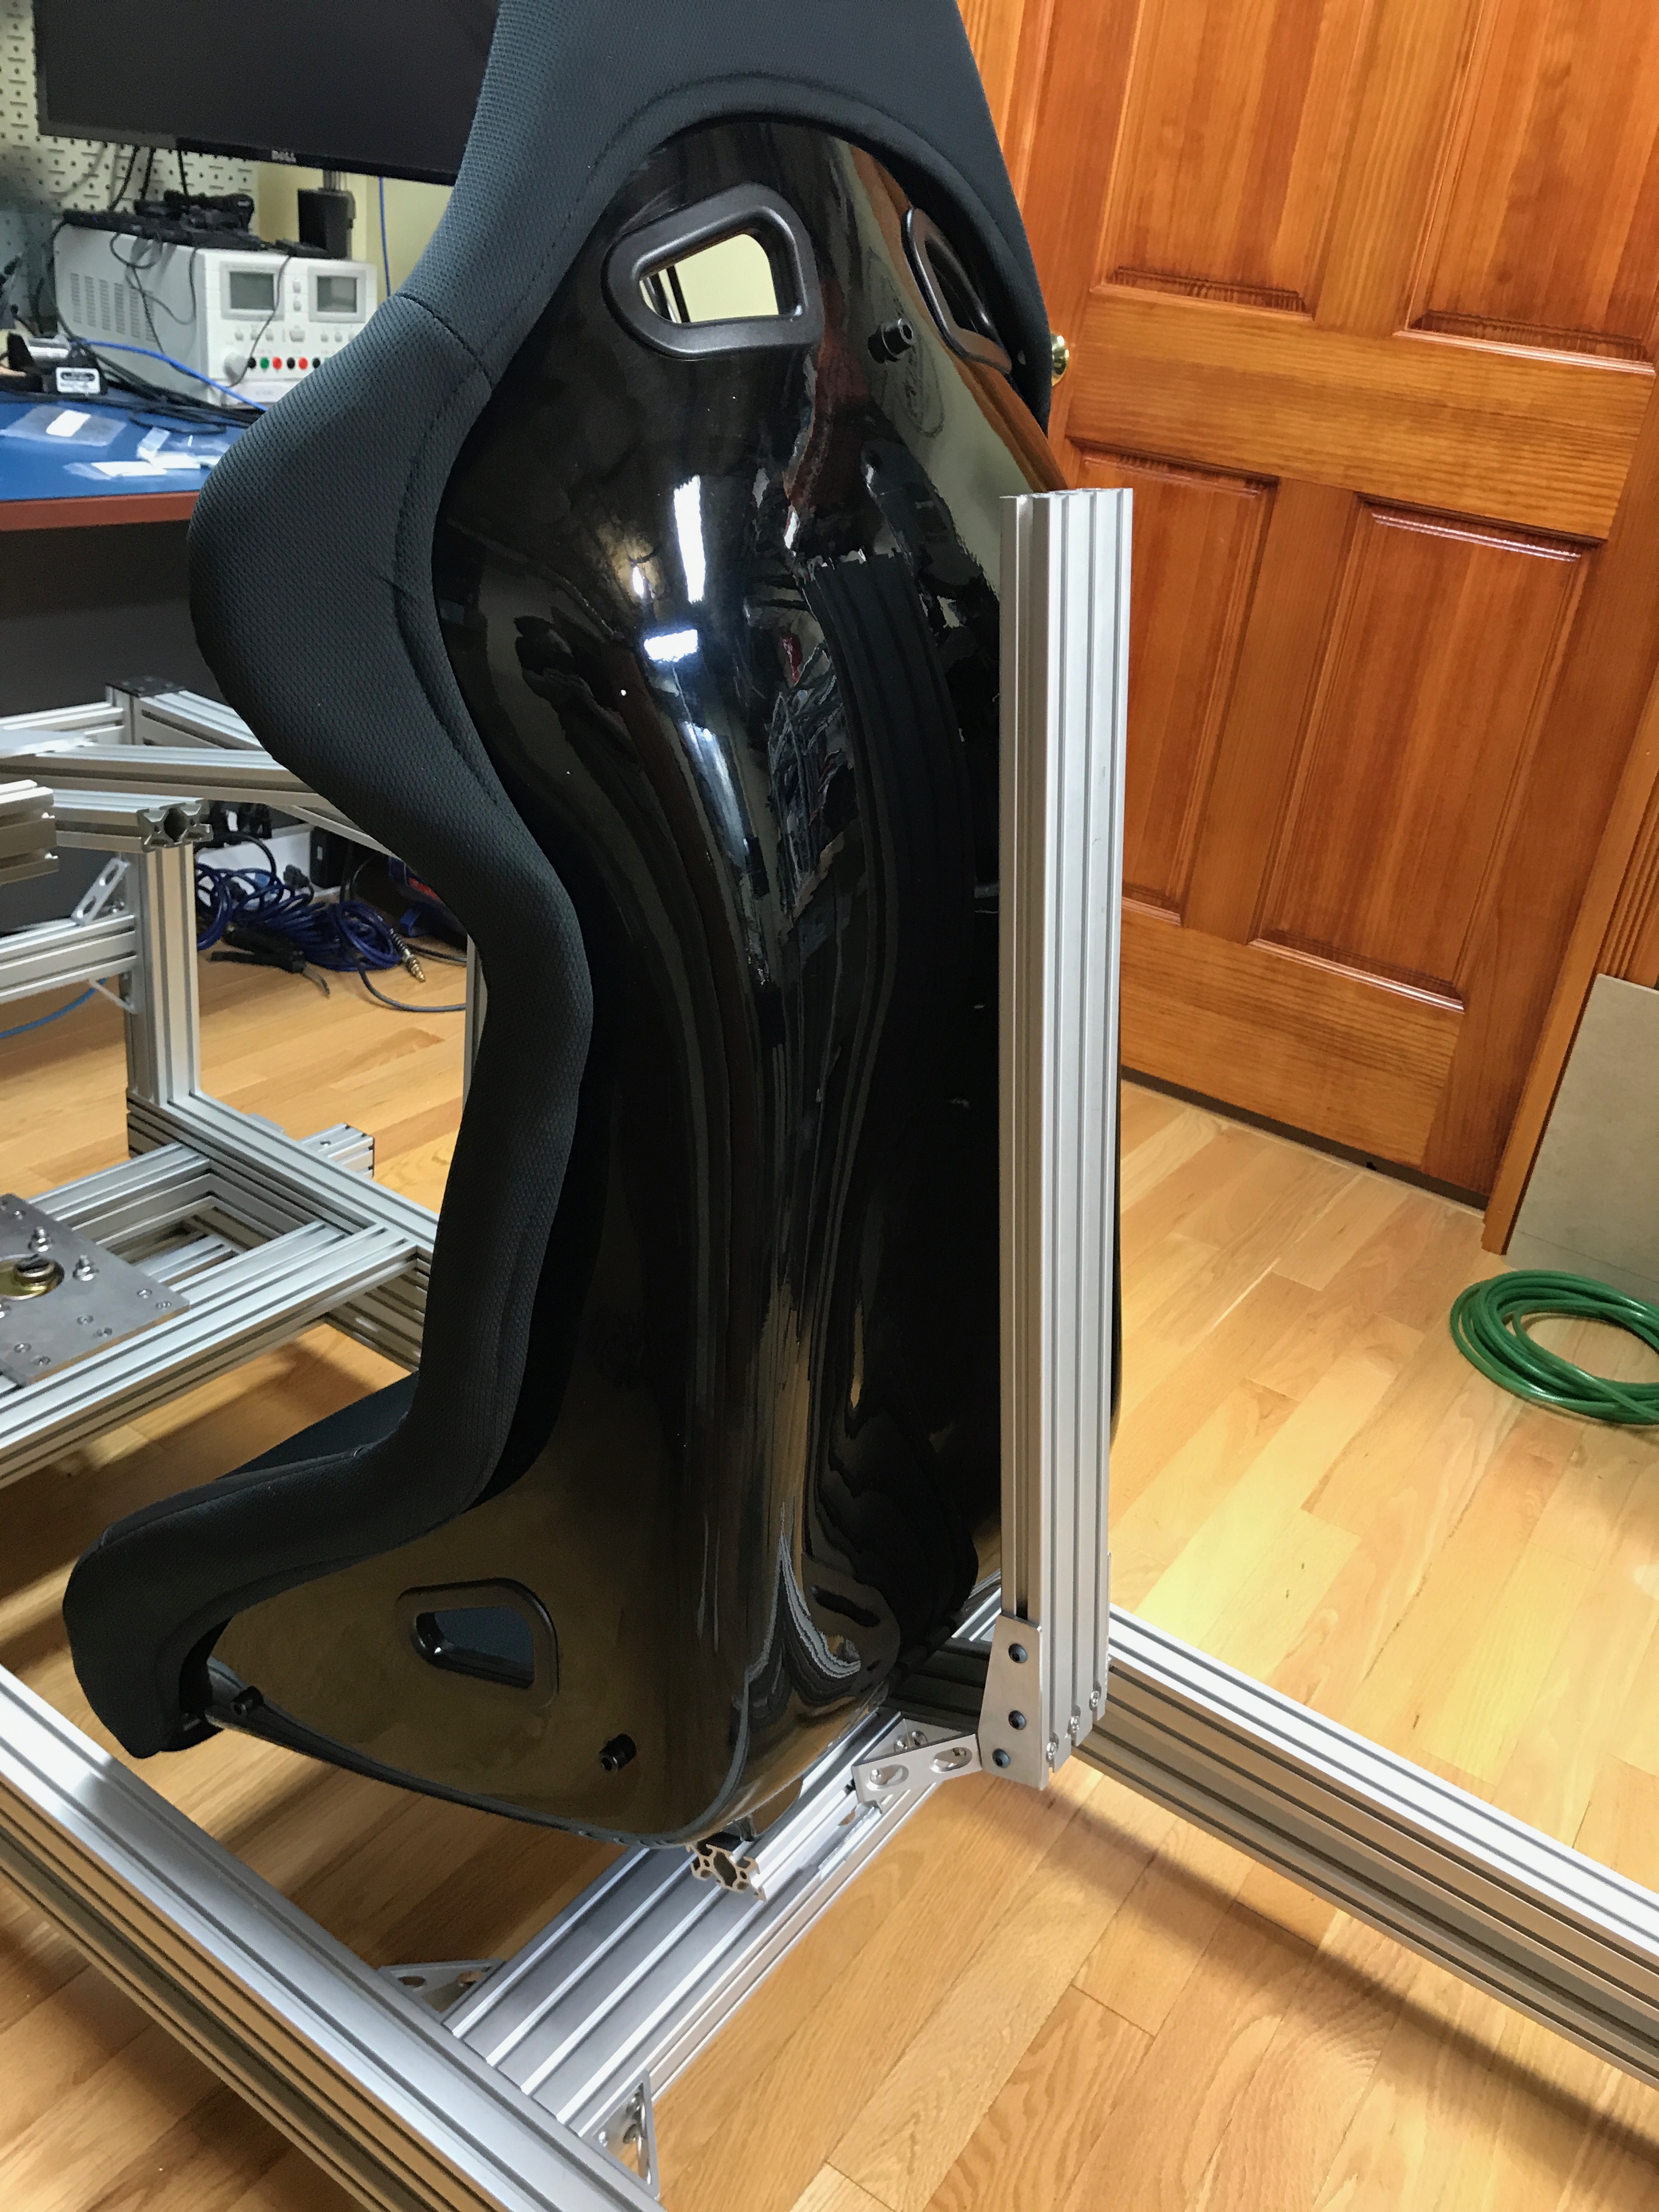\n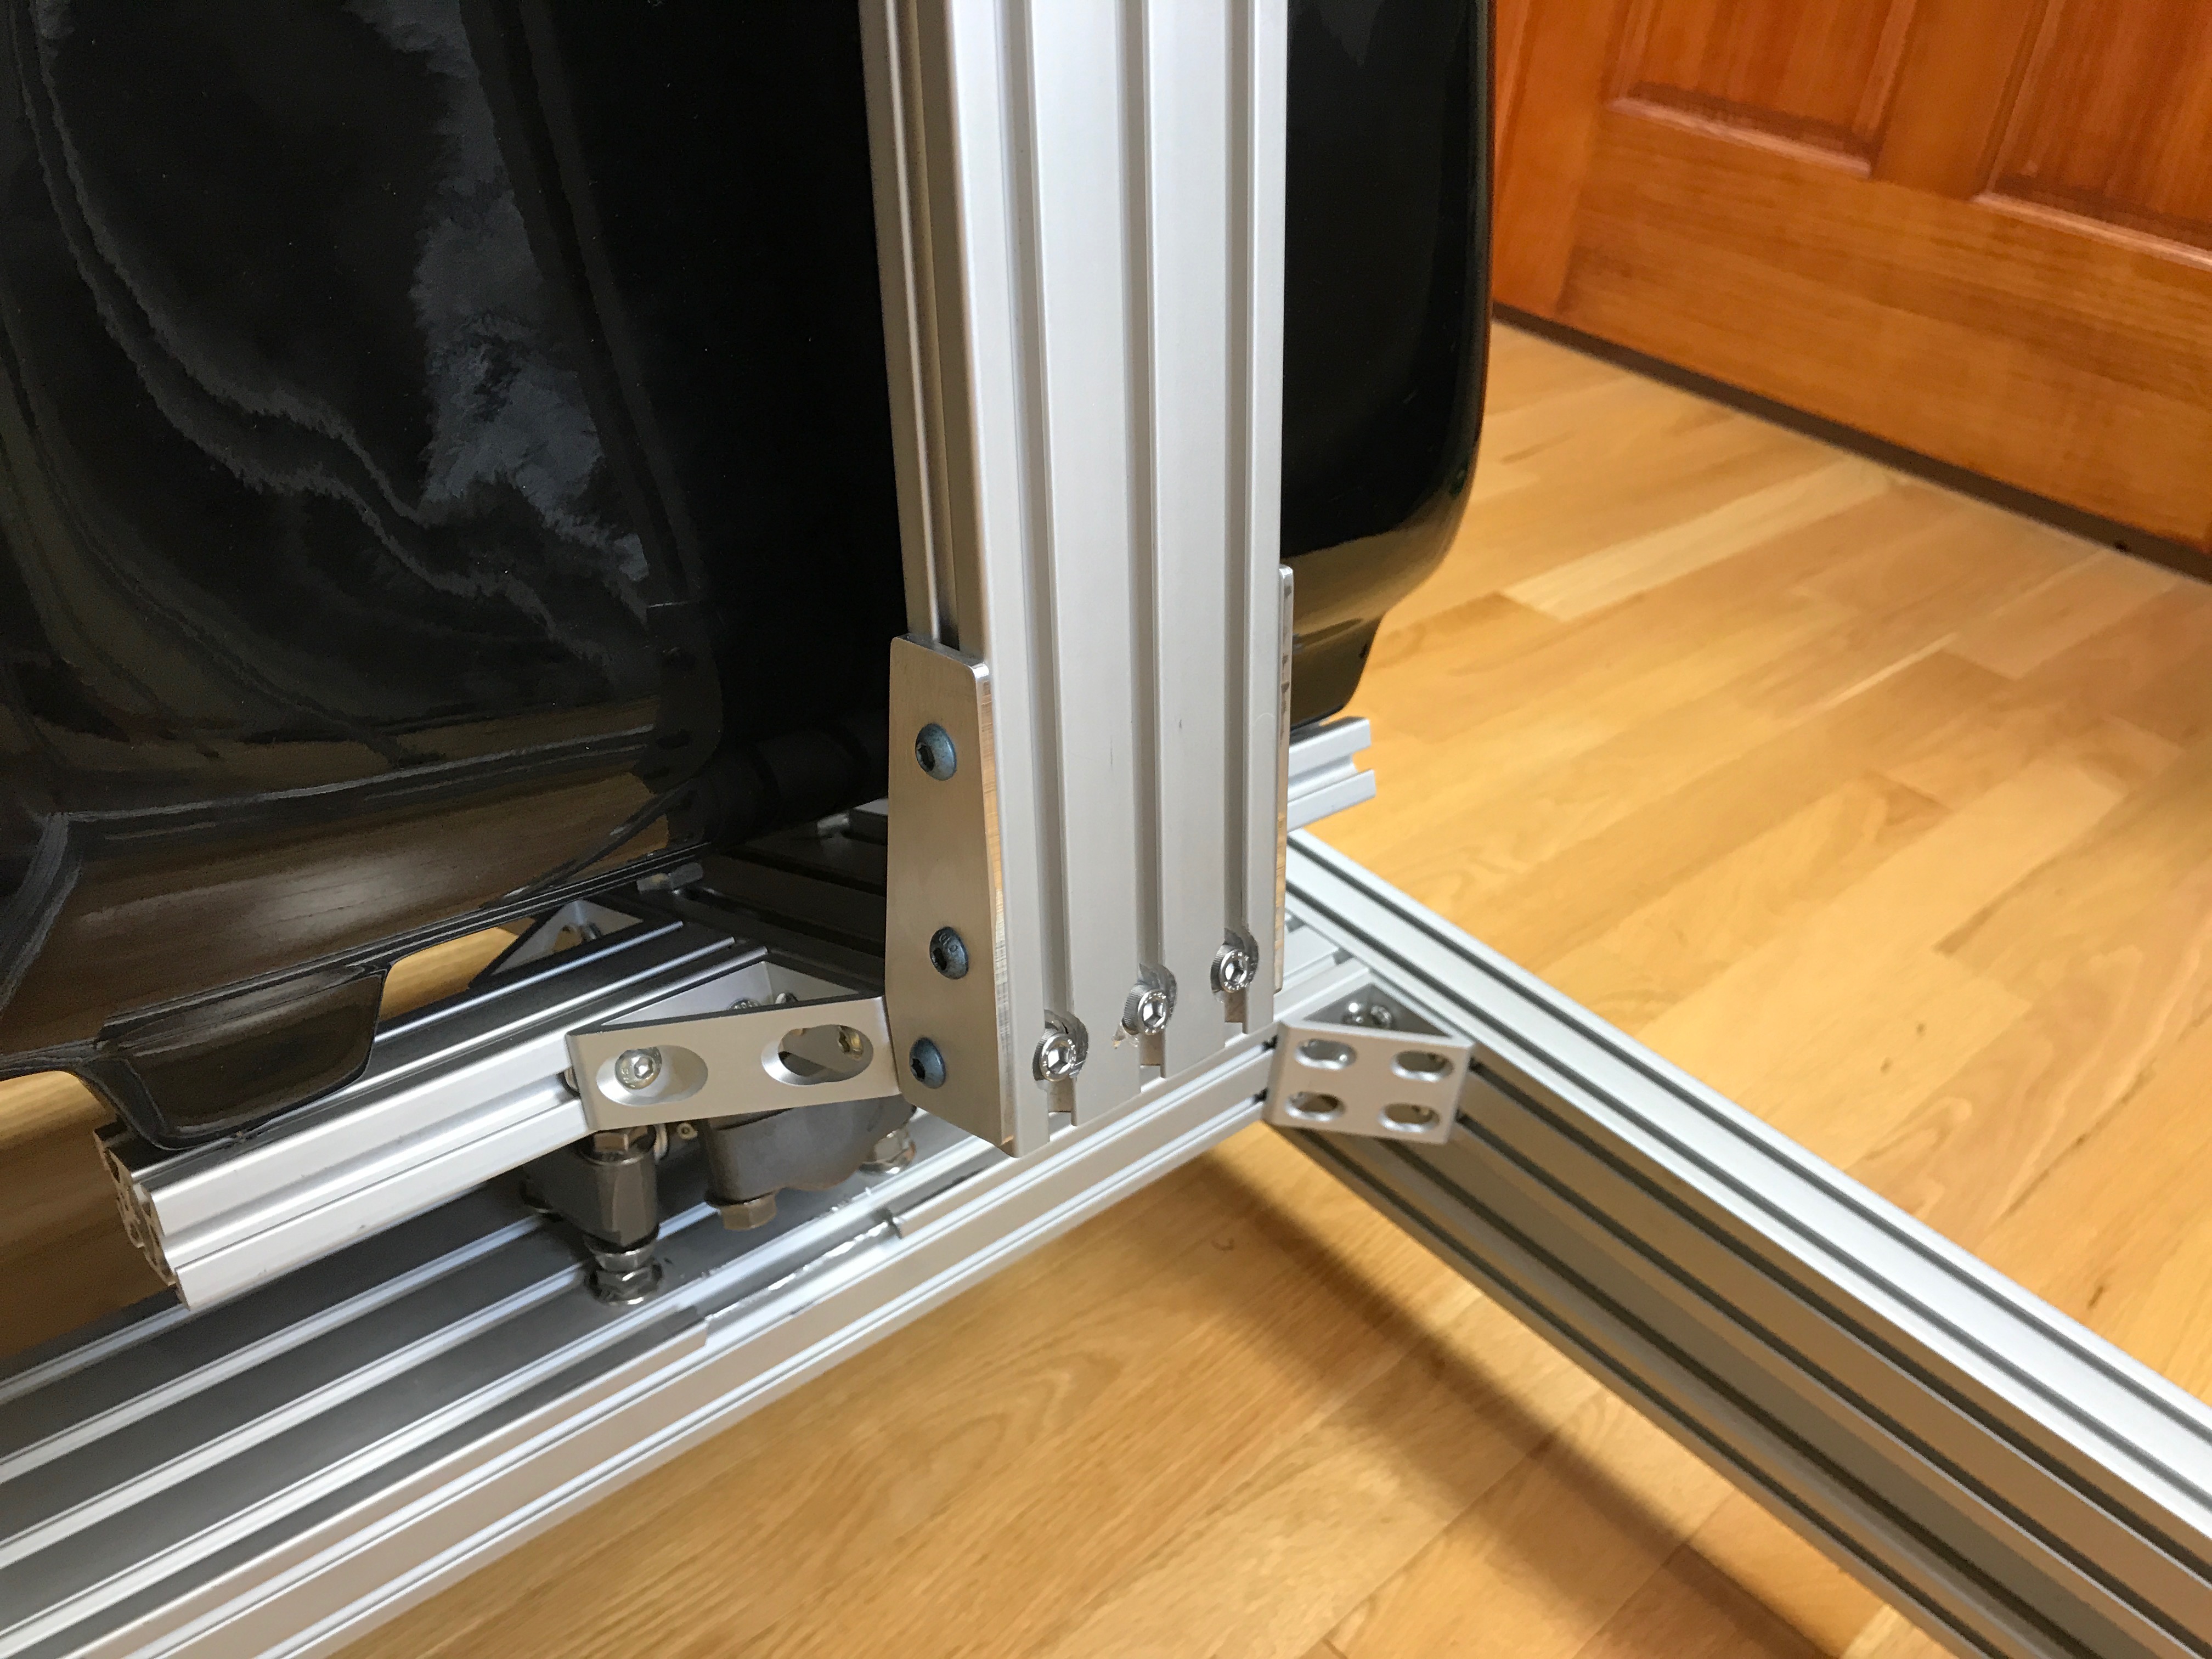\n\nI had to design and fabricate end caps for the extrusion that would allow me to thread tap for the actuators. This was the thickest aluminum stock that I had milled on my CNC at the time. Everything went ok-ish... Mid job the x-axis coupler came loose and the CNC started to dig into the piece. I was able to stop it and recover the job without any major damage.\n\n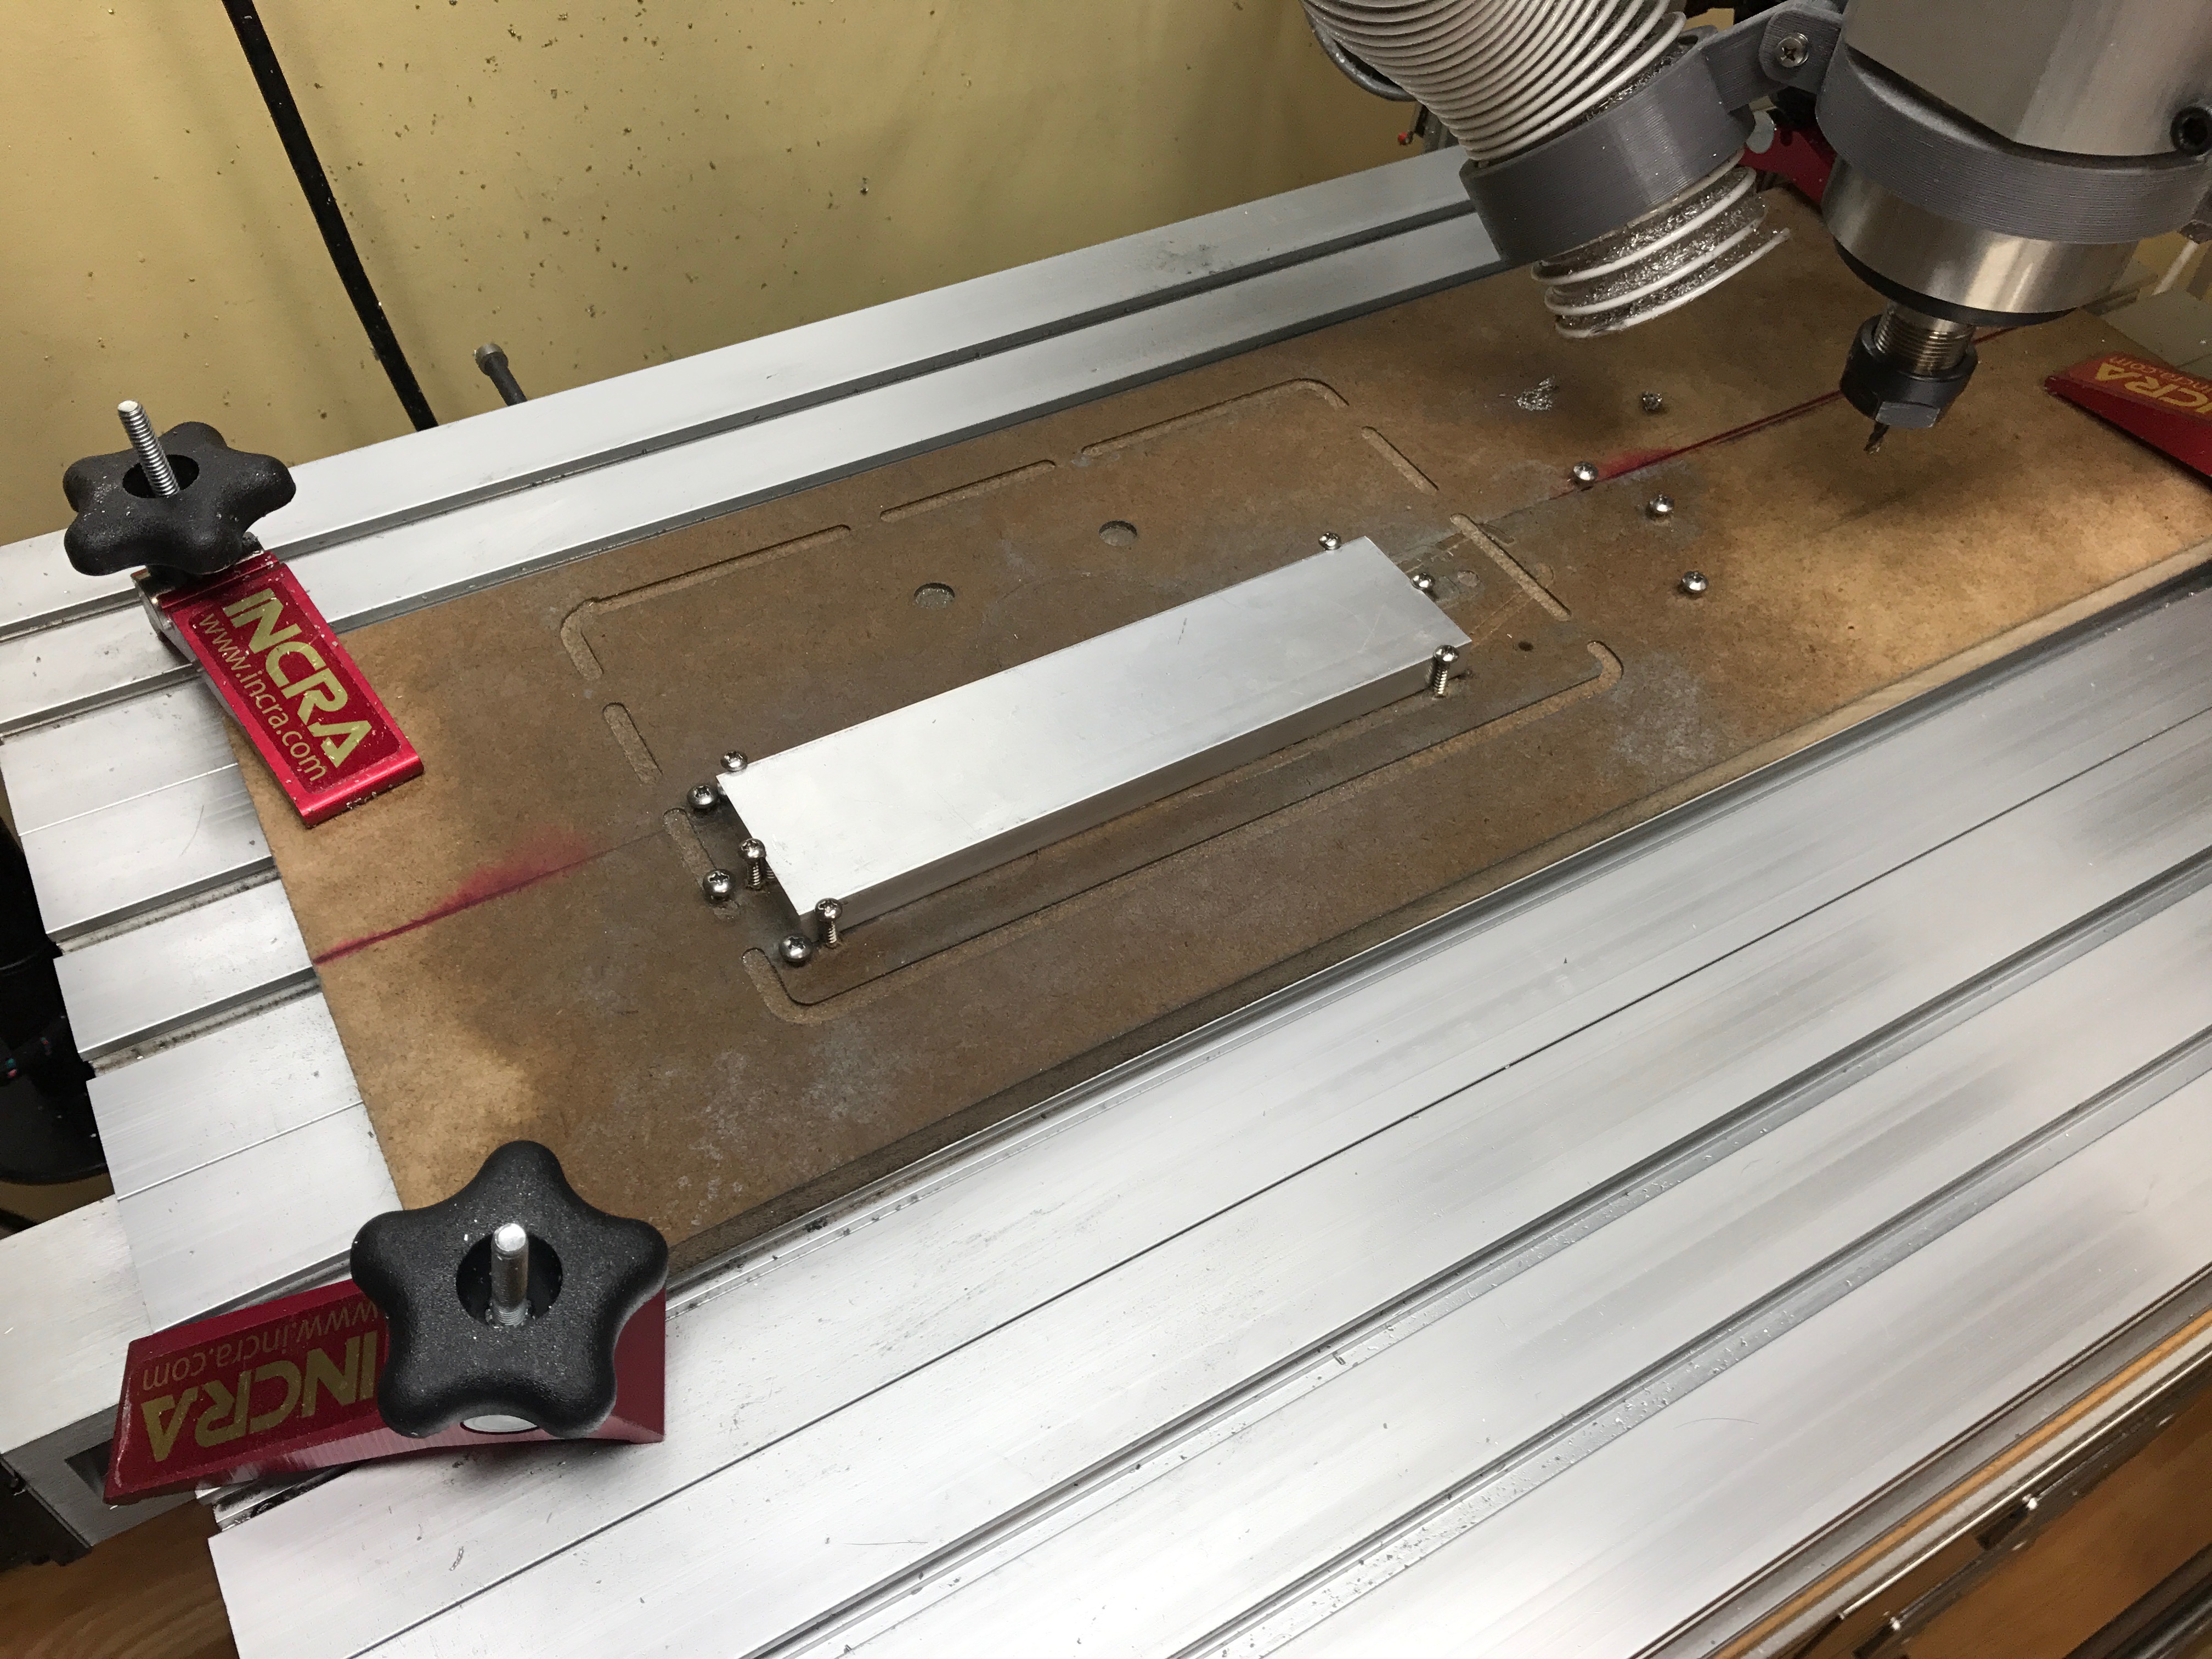\n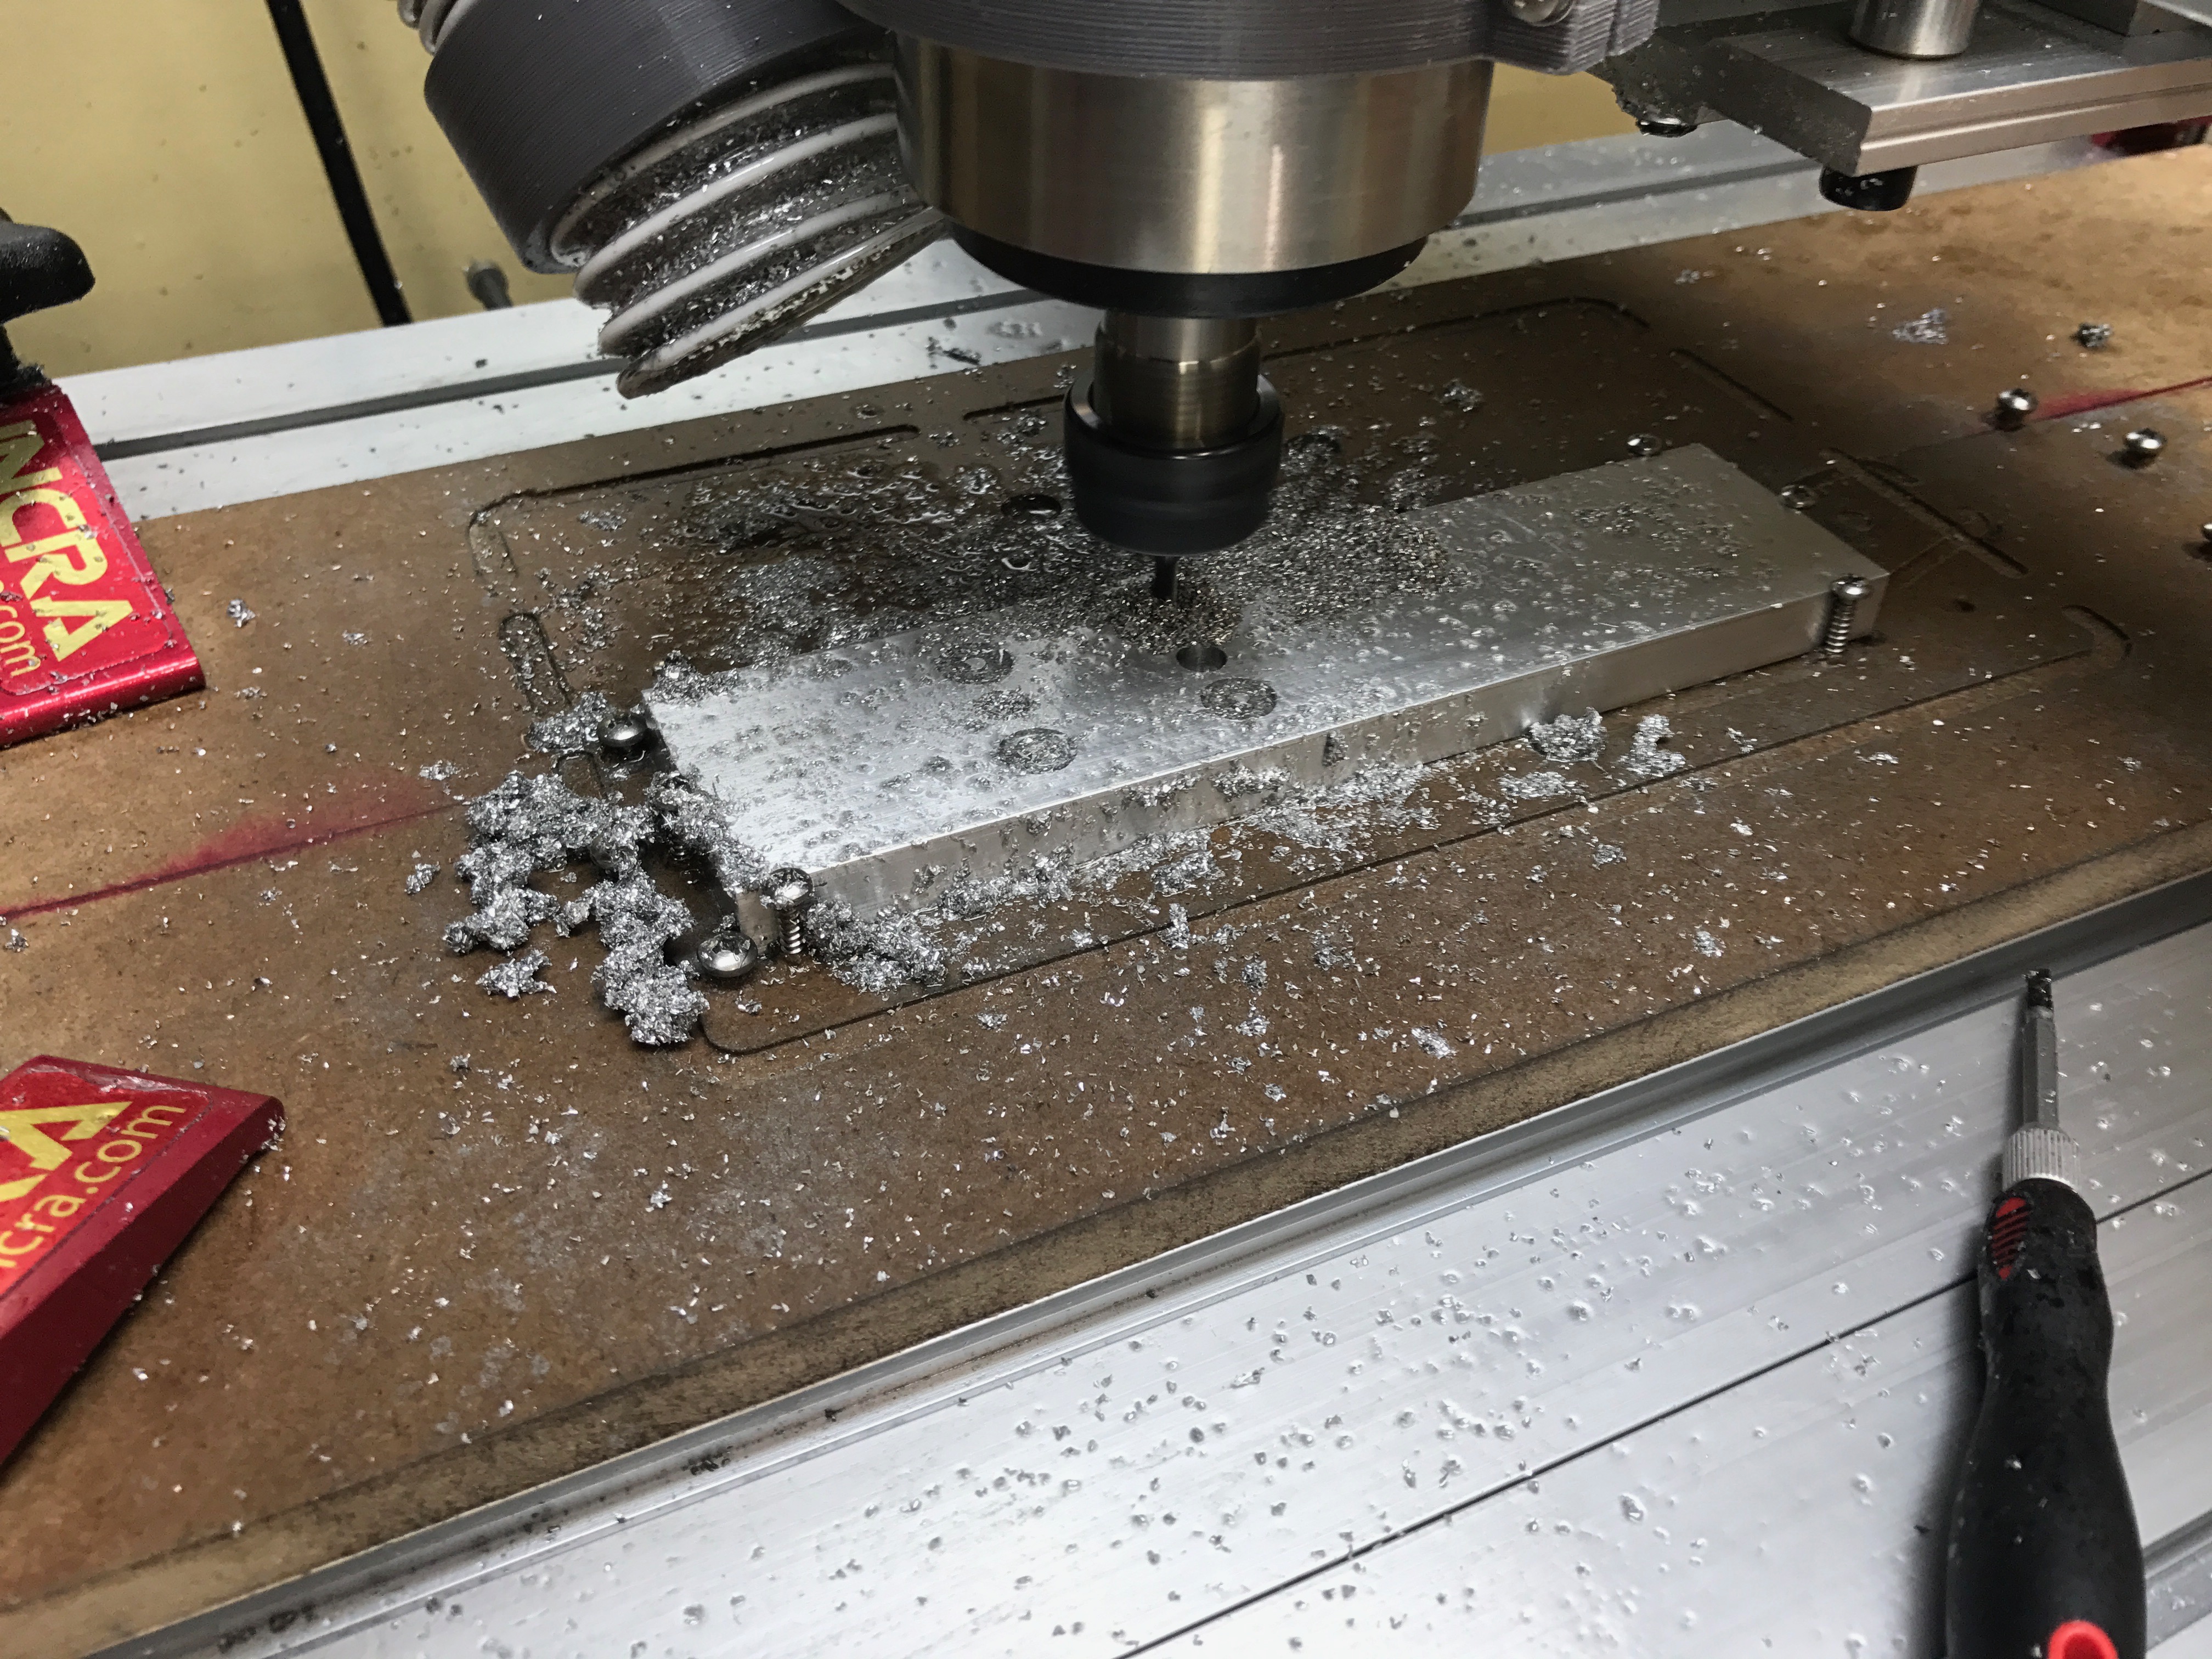\n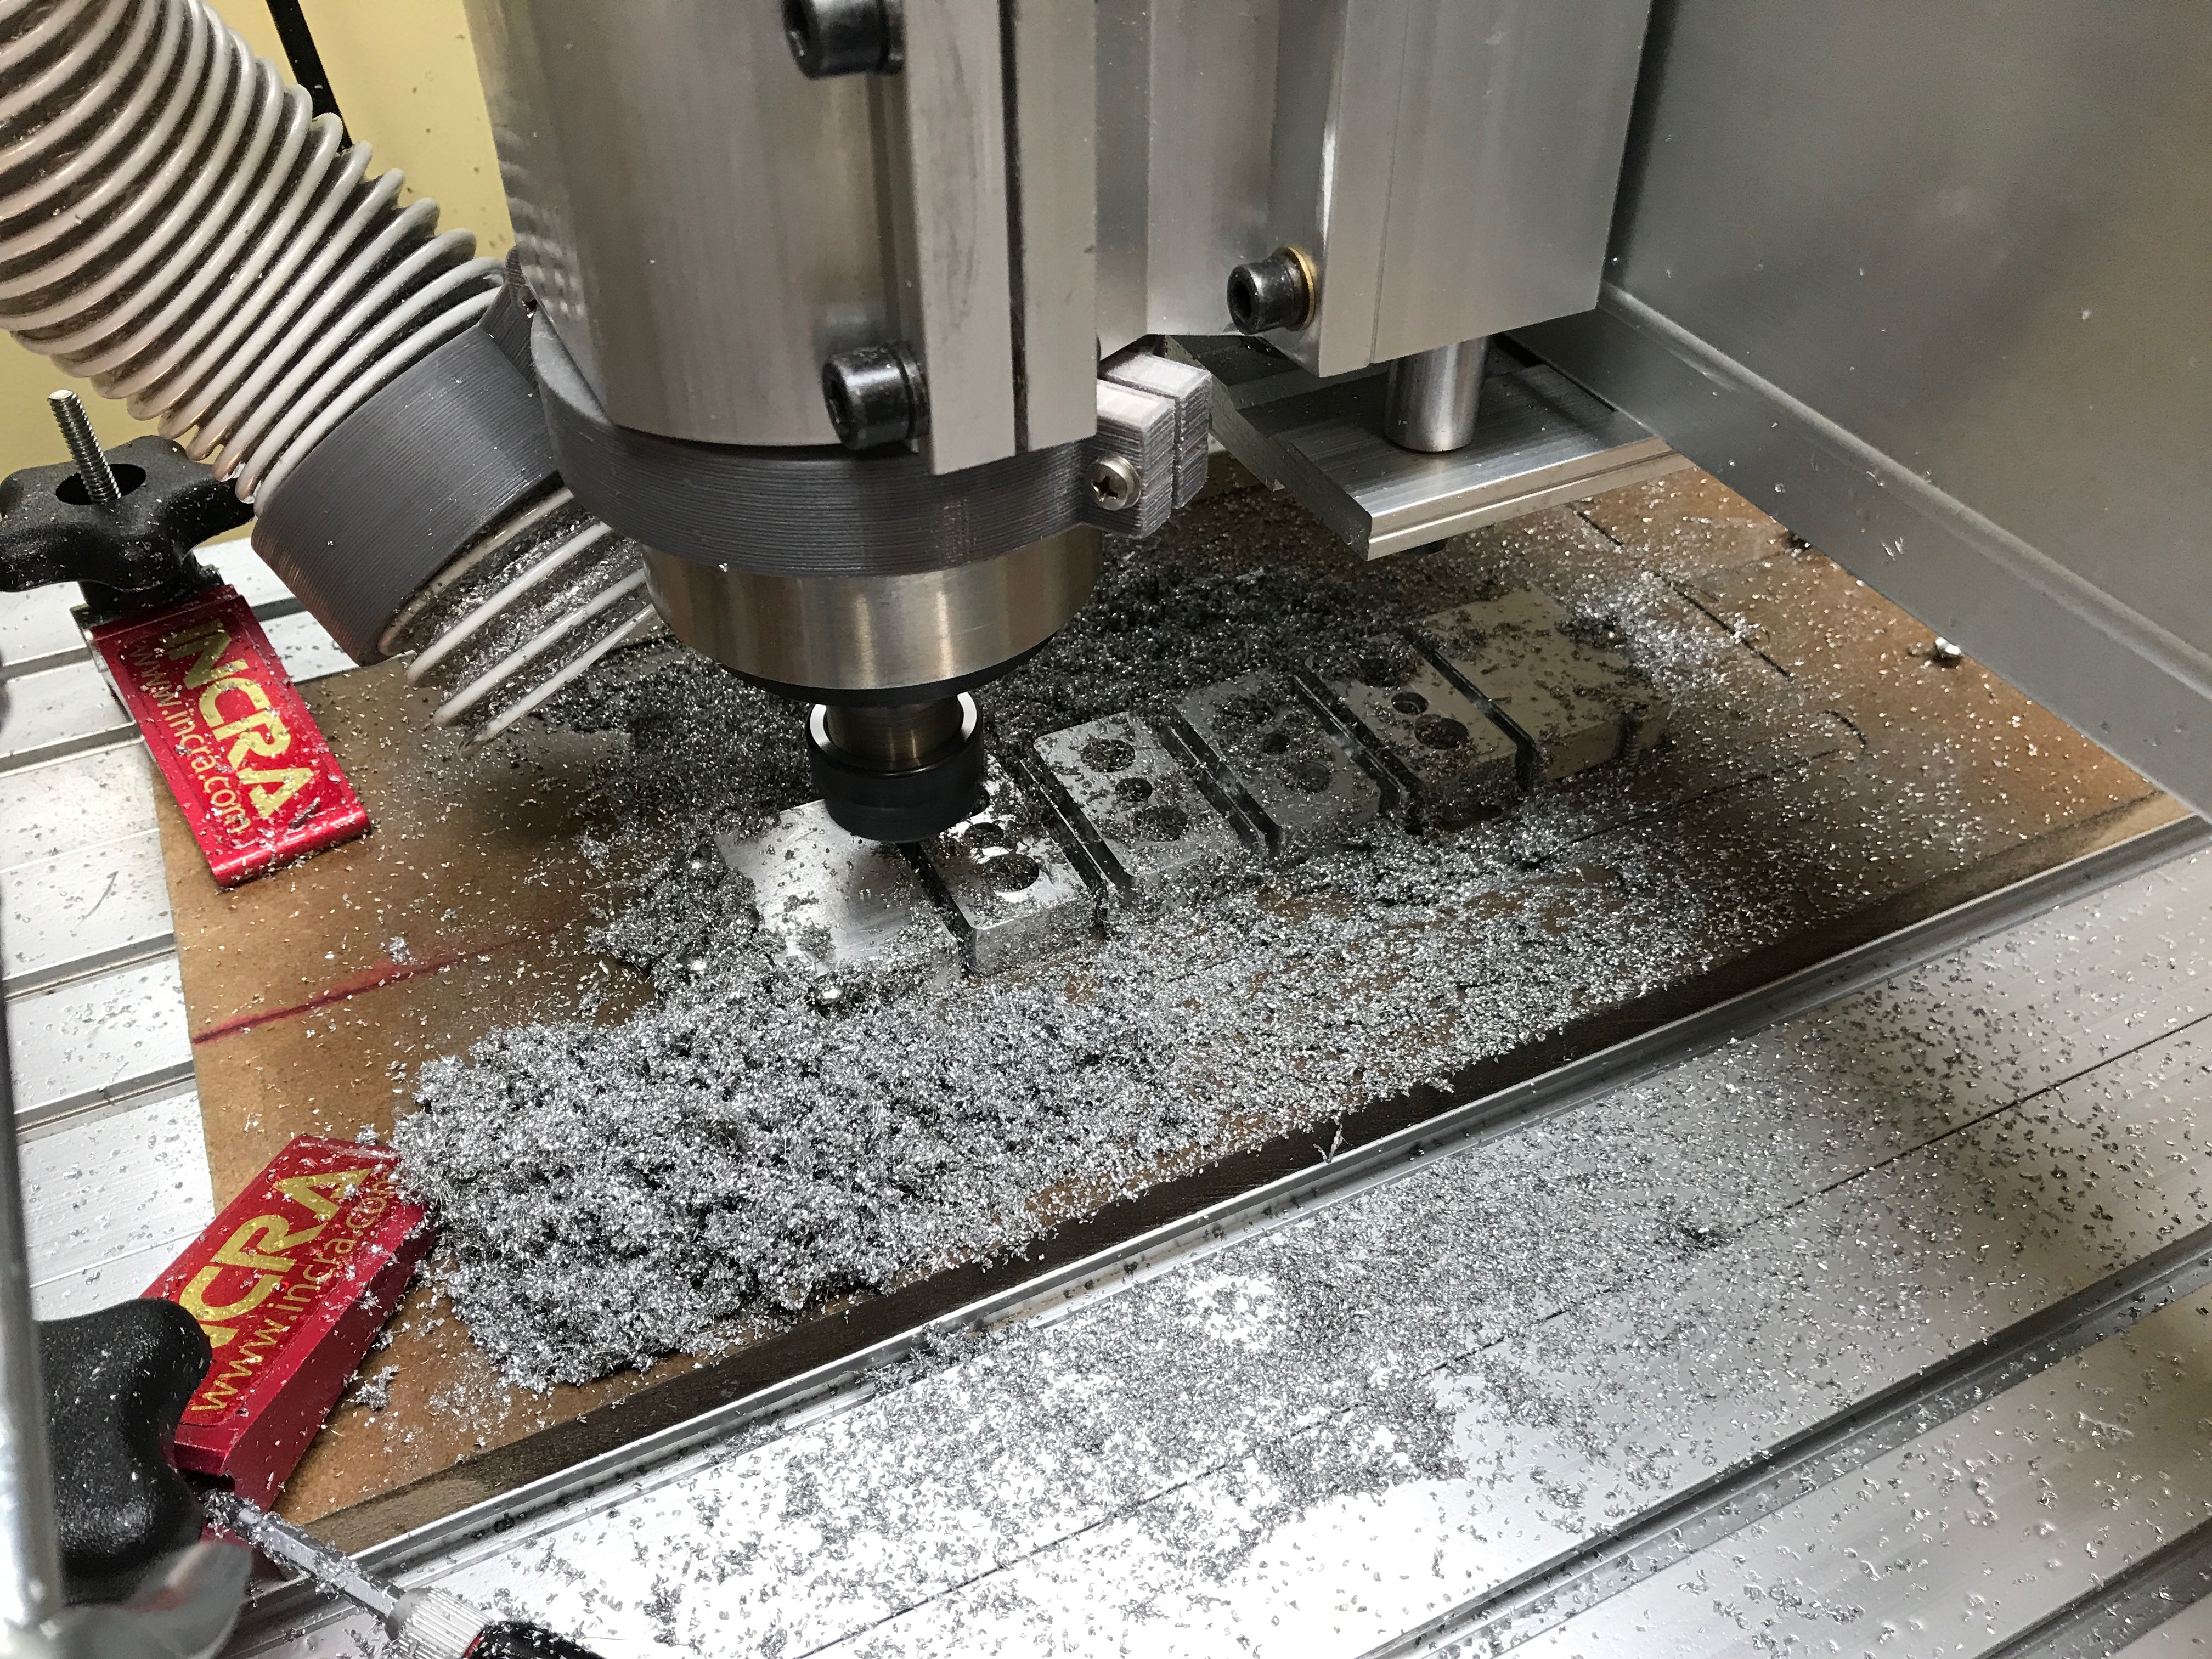\n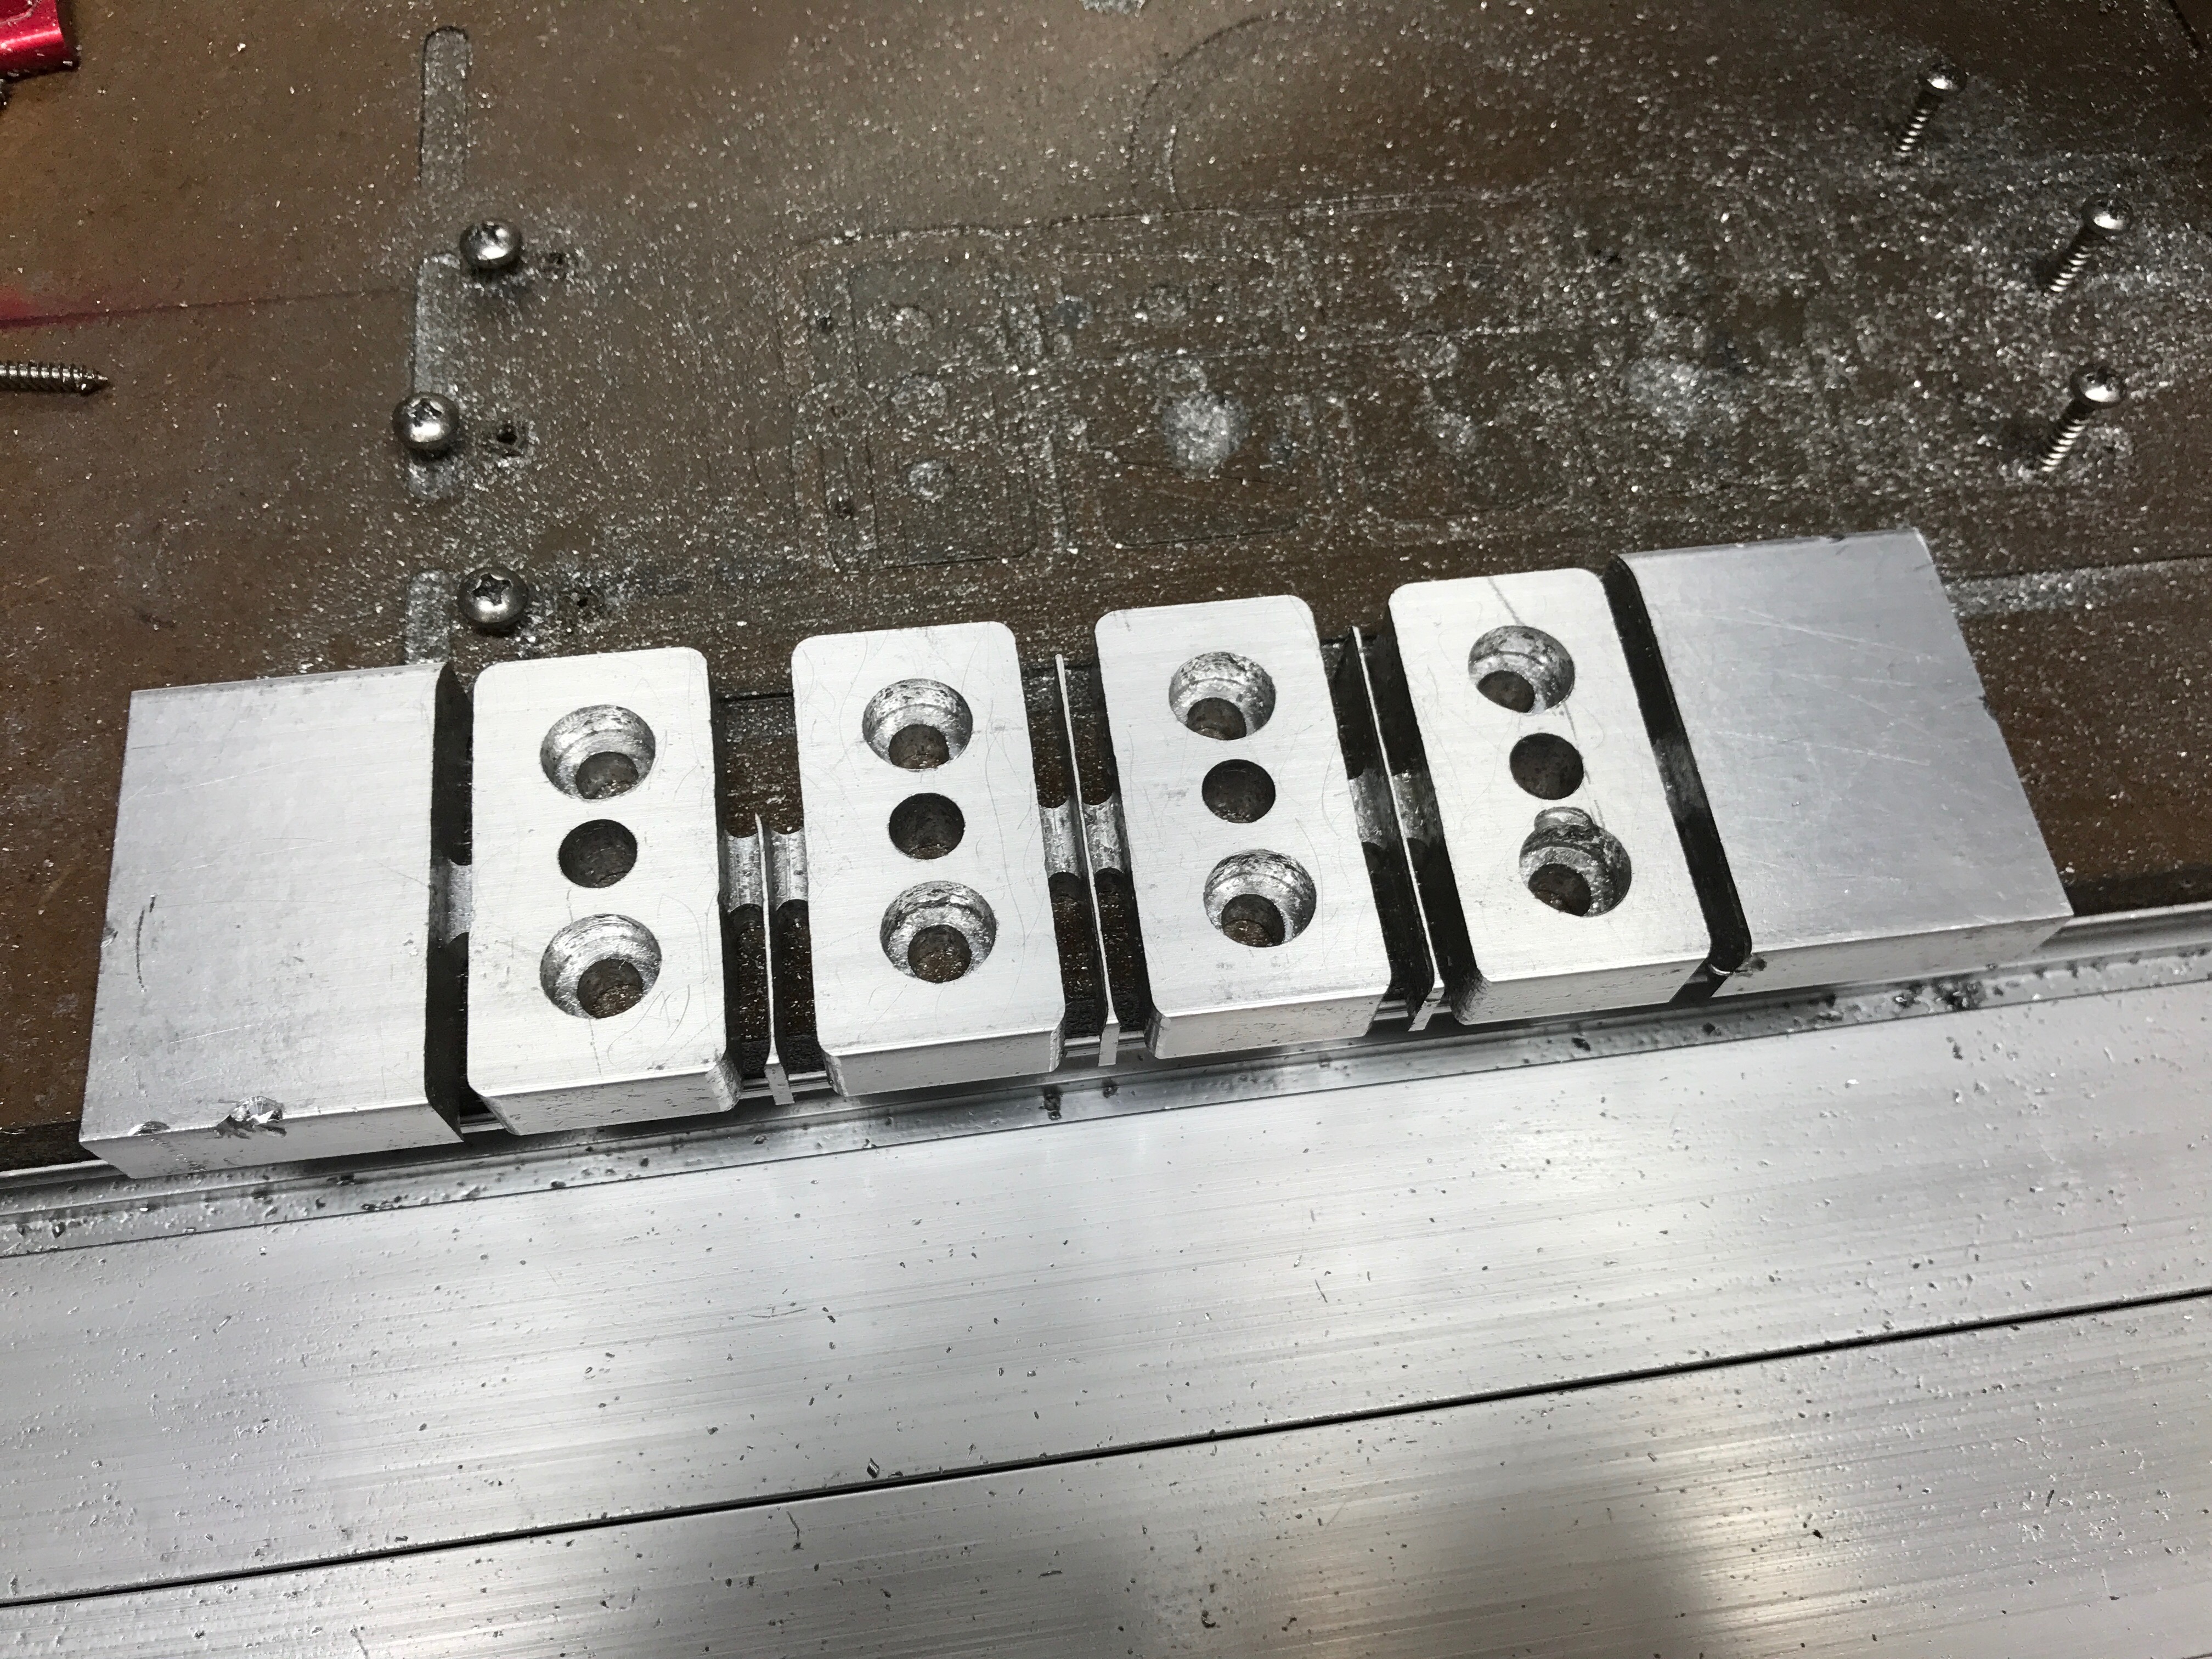\n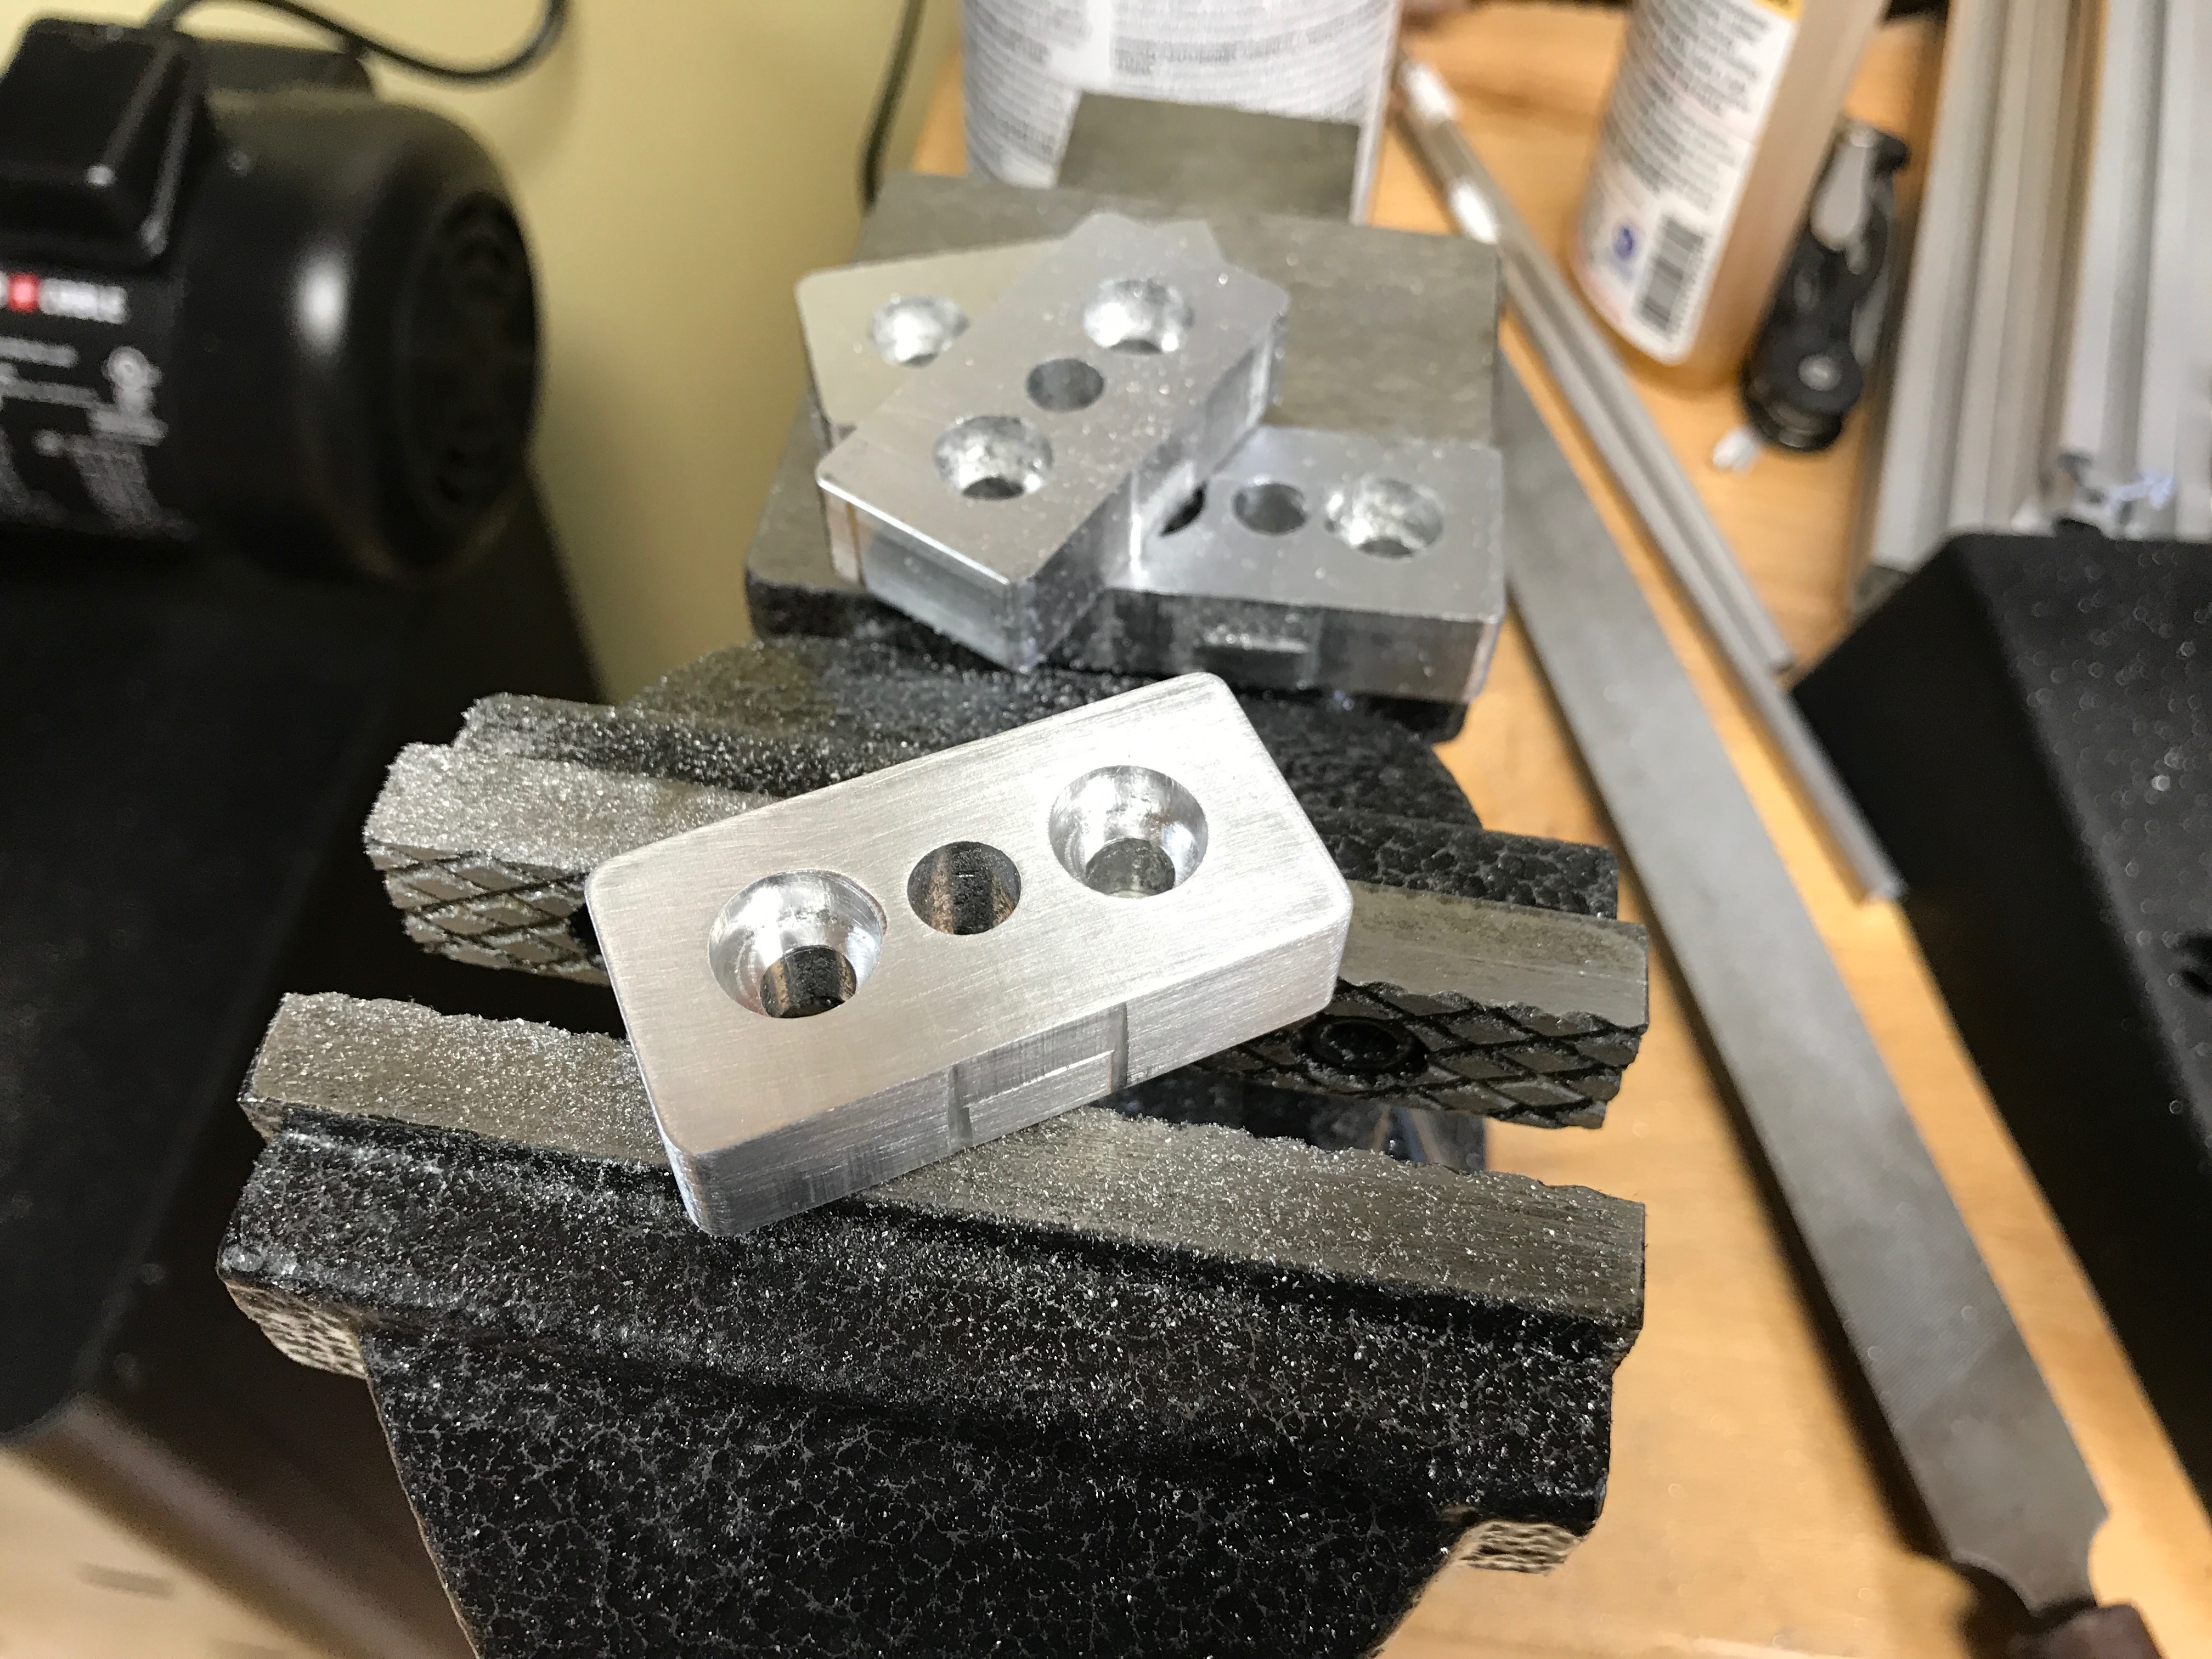\n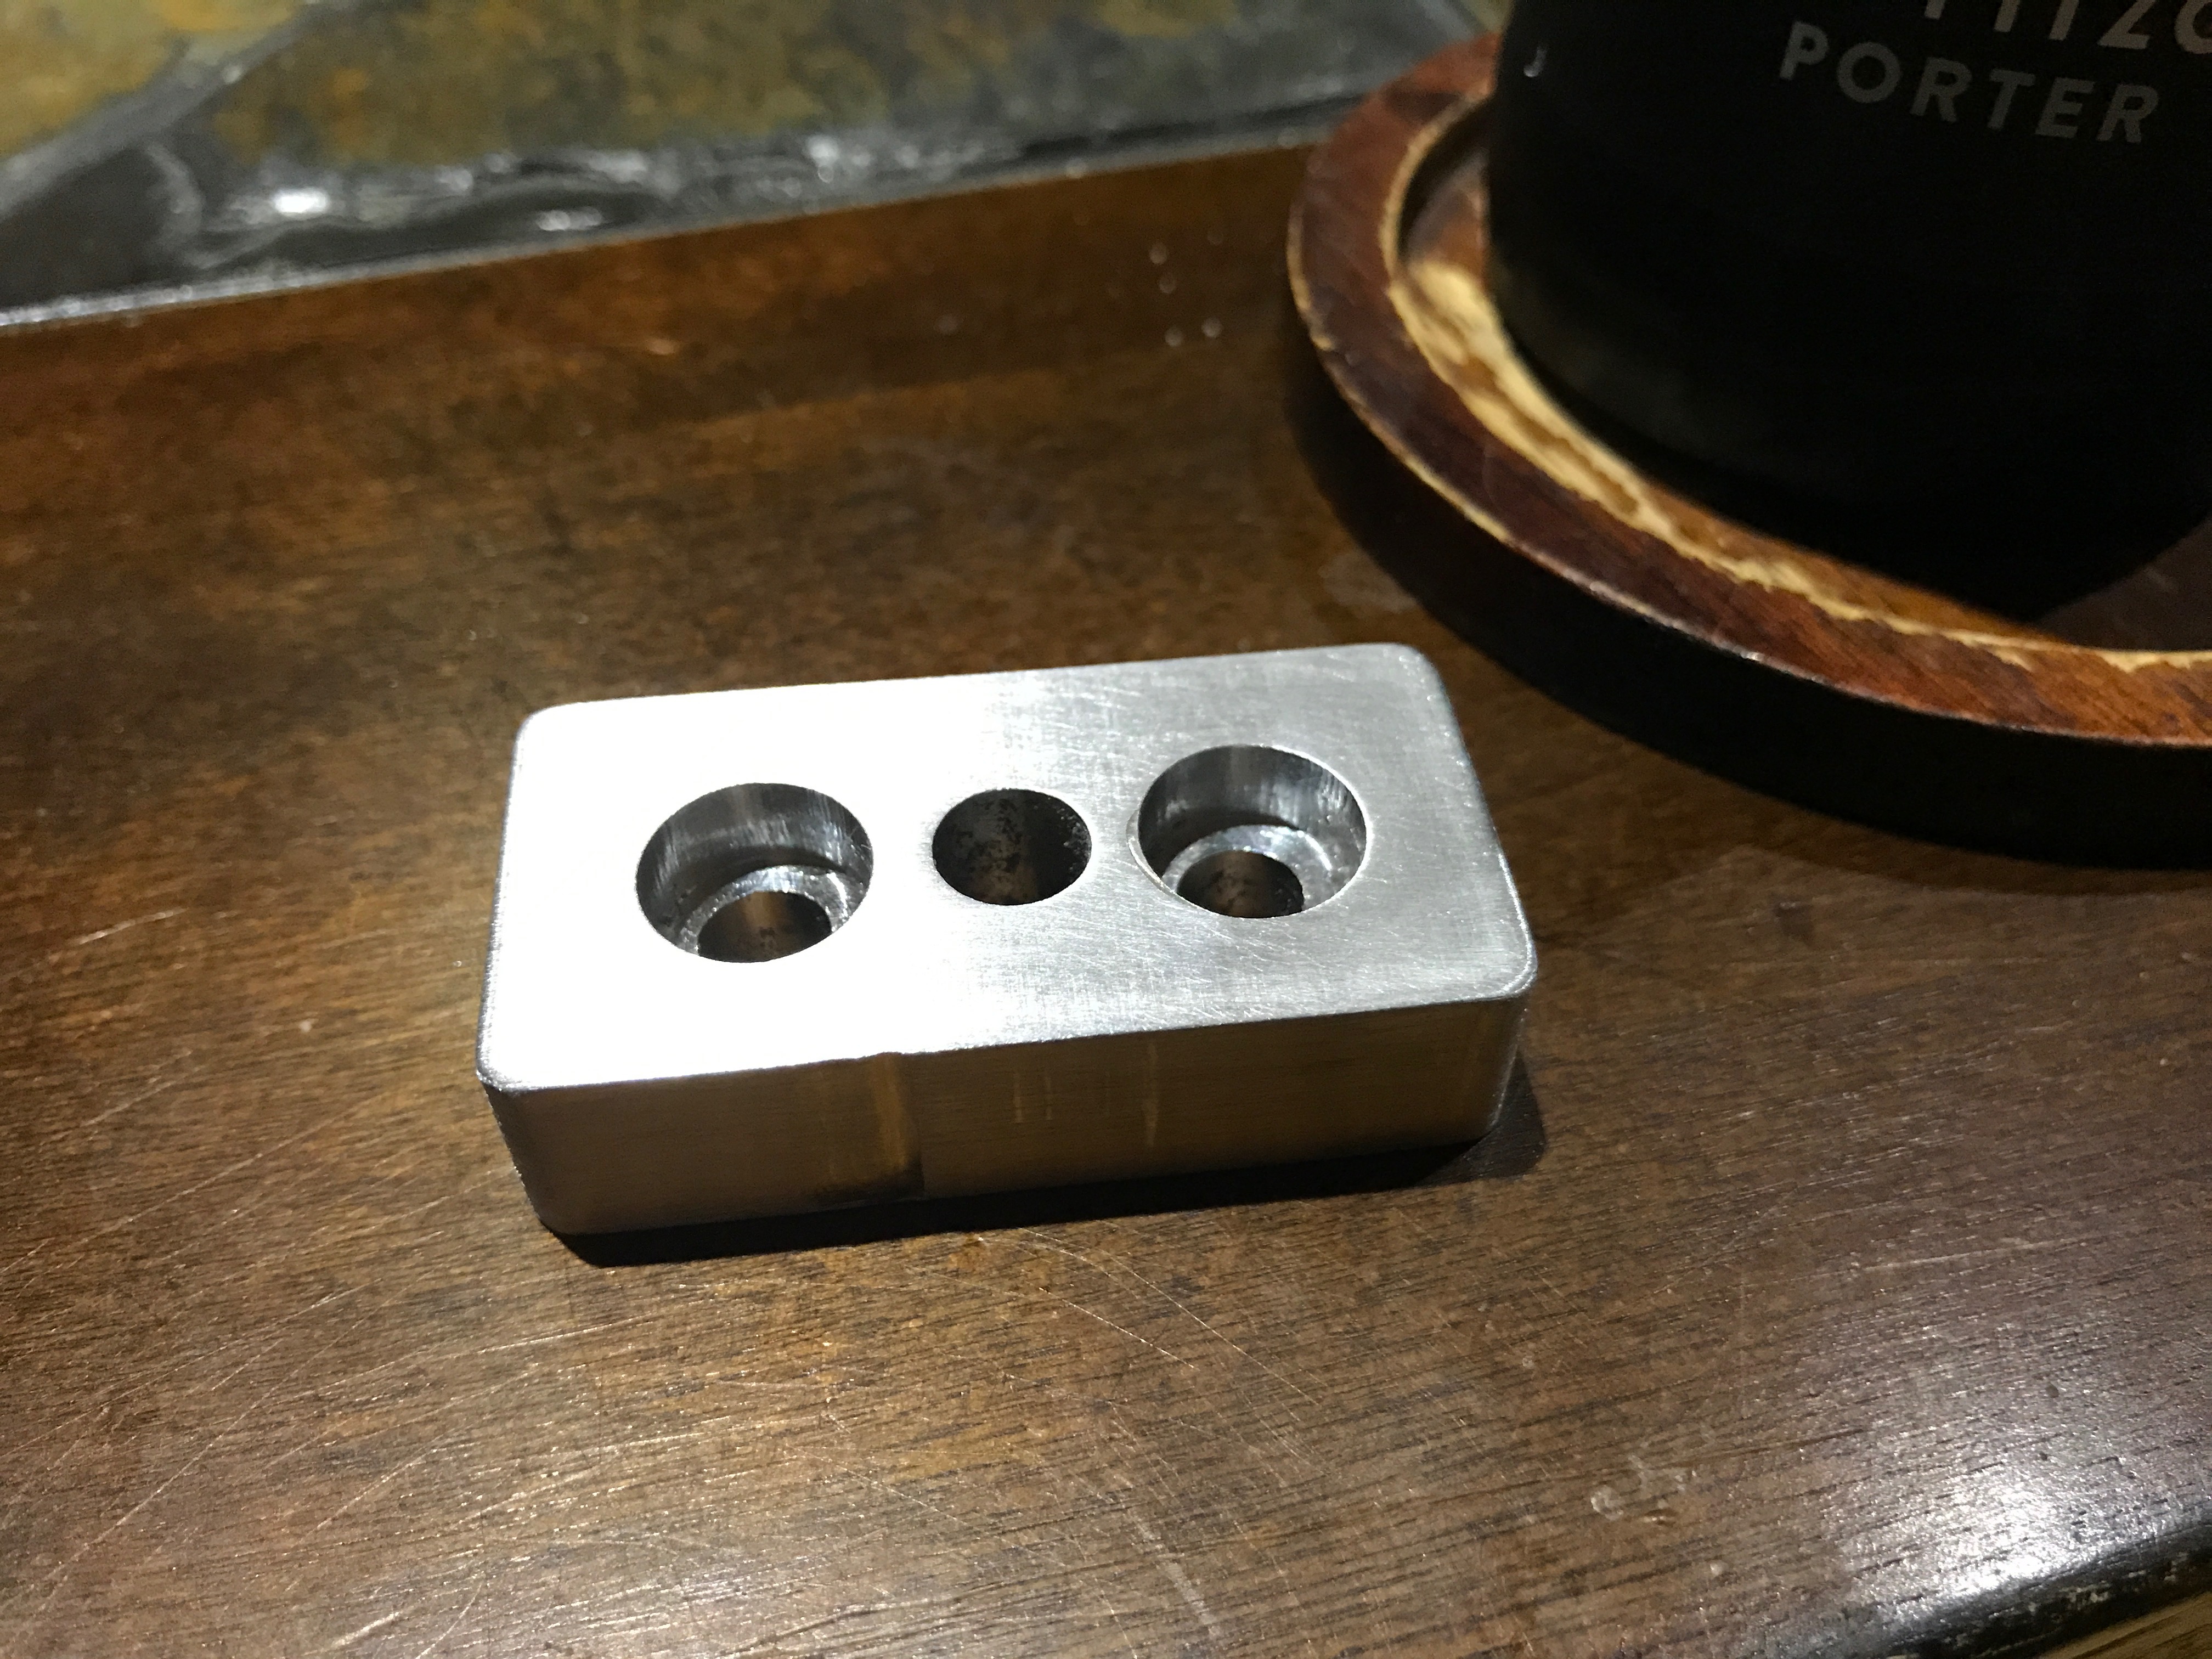\n\n\n\n\n\n\nThe rear traction loss actuator needed a pair of brackets. Again, designed in Fusion360, then milled on my CNC.\n\n\u003cp align=\"center\"\u003e\n\n\u003c/p\u003e\n\n\n\n\n\n\n\nI marked and drilled out the mounting plate for the steering wheel. This was just a piece of stock that I purchased from [80/20 Inc](https://8020.net).\n\n\n\nThen designed and milled the brackets for the steering height adjustment.\n\n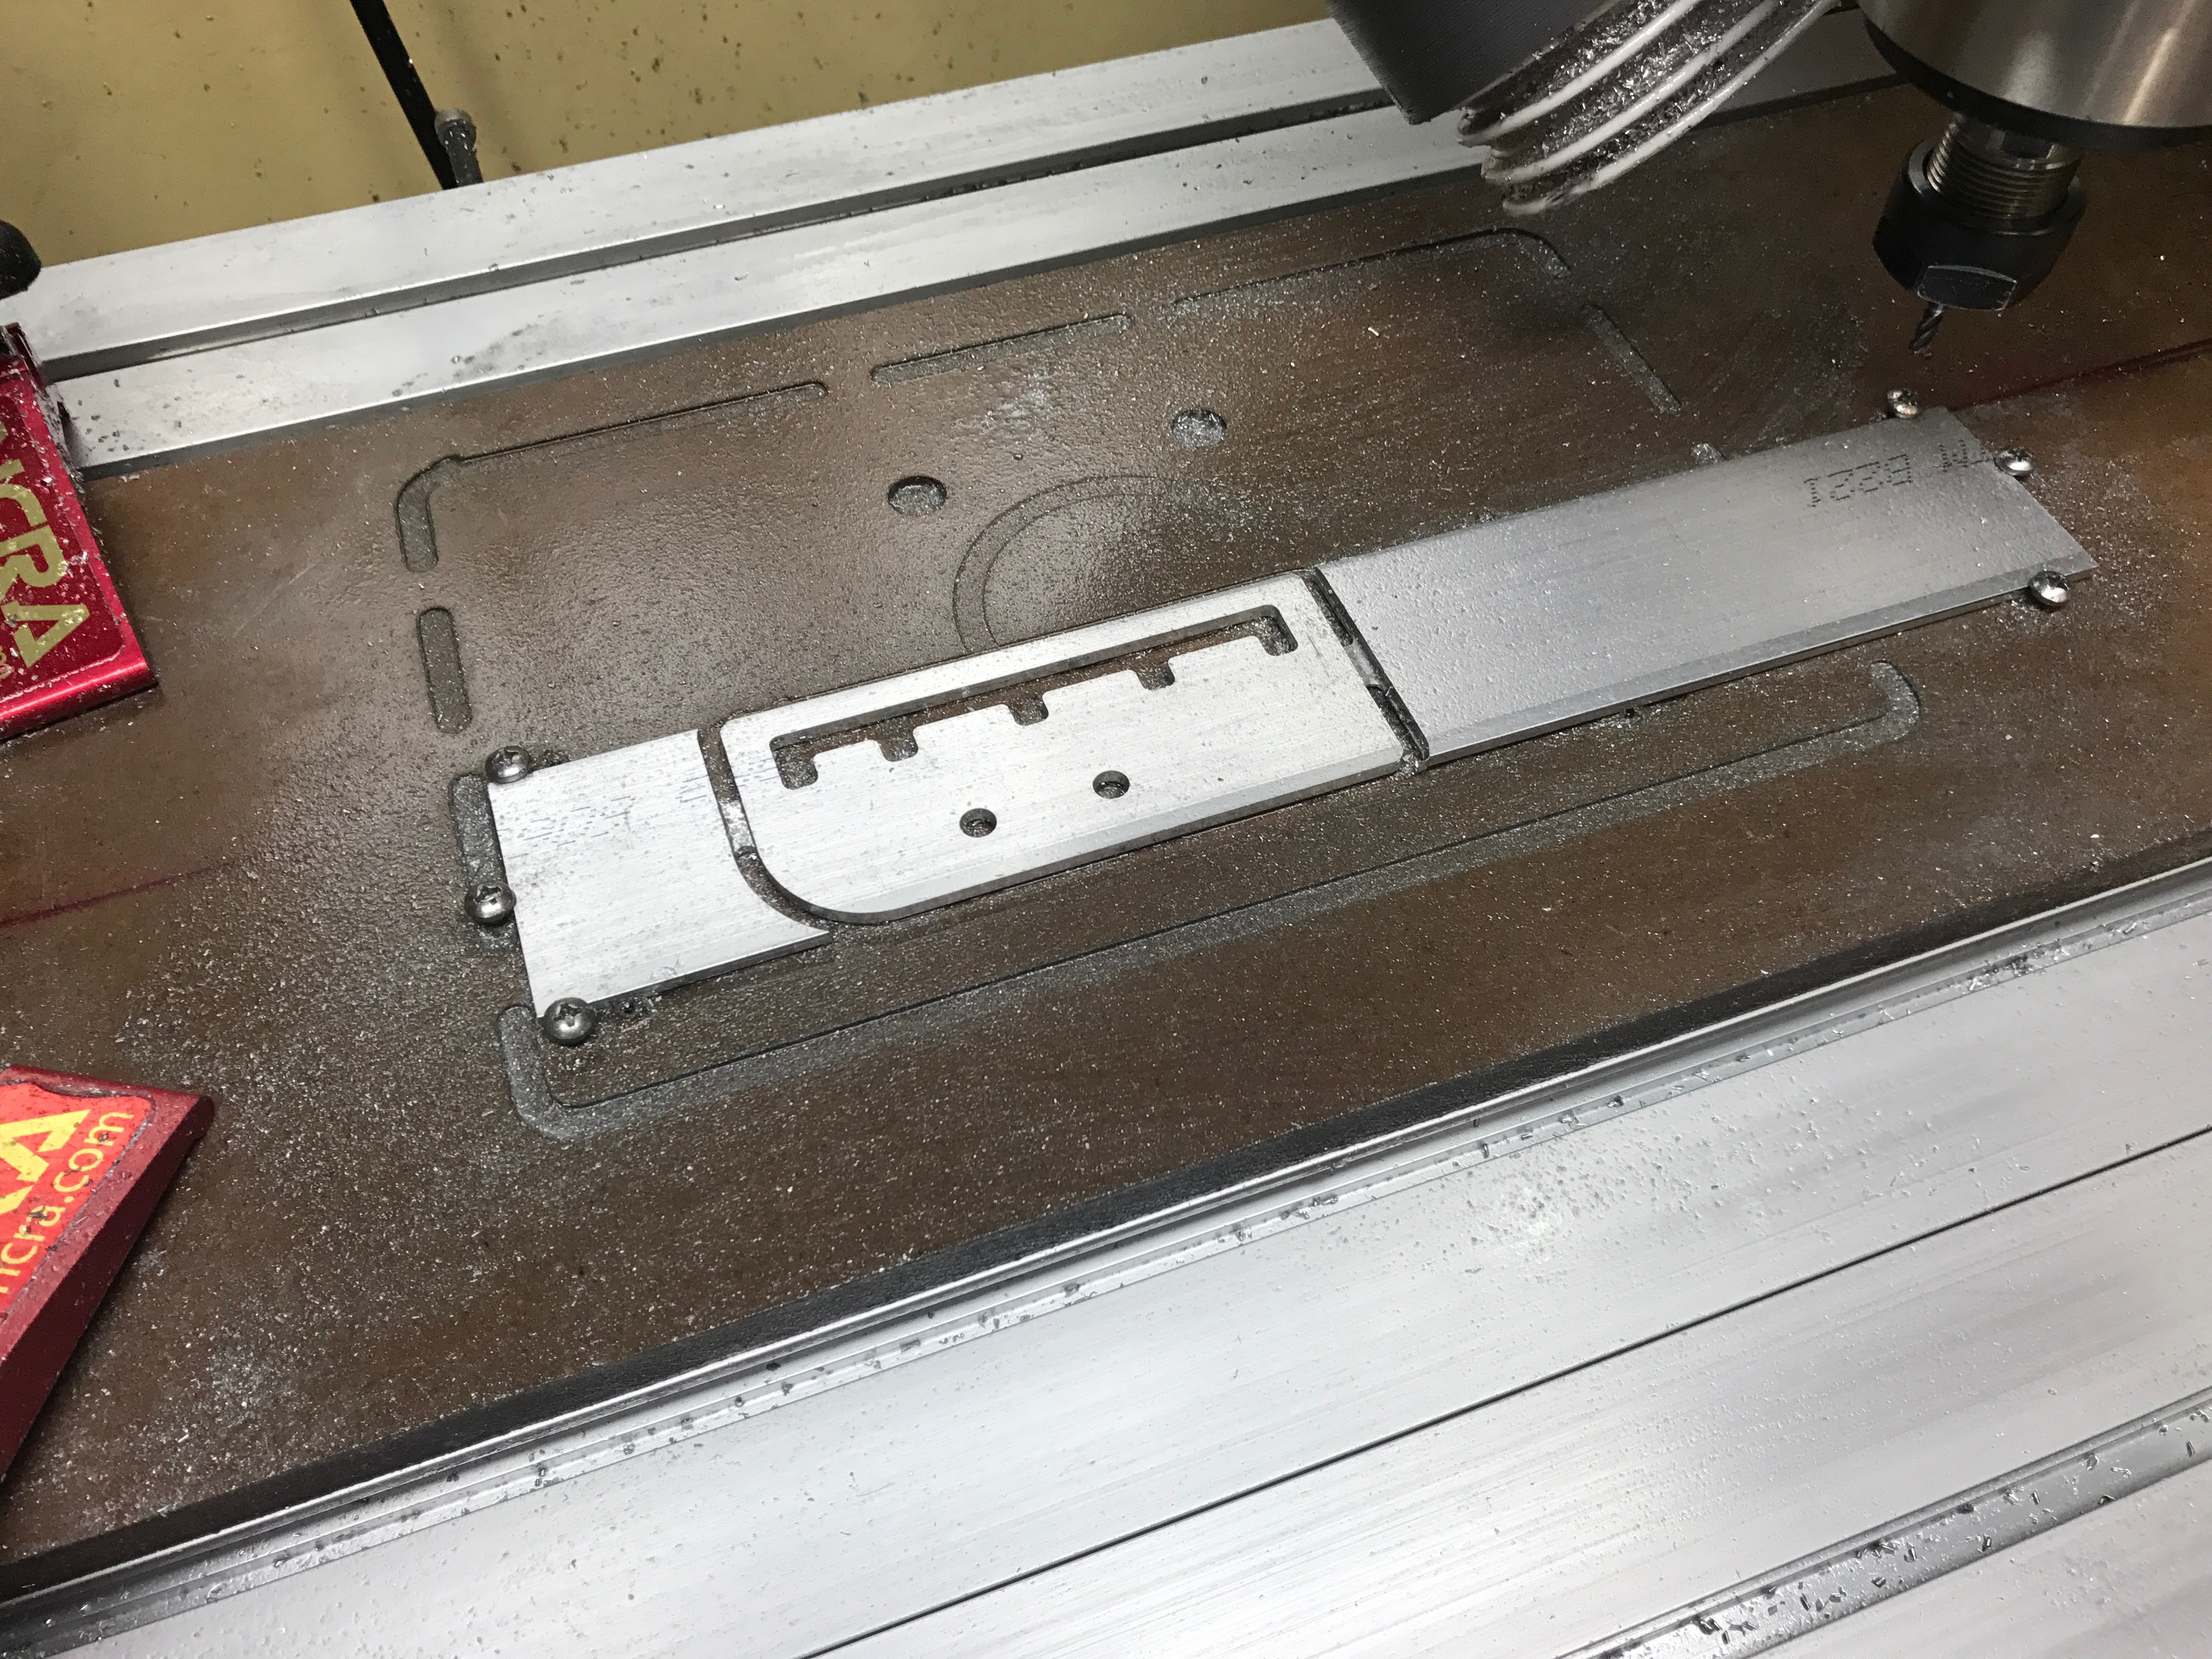\n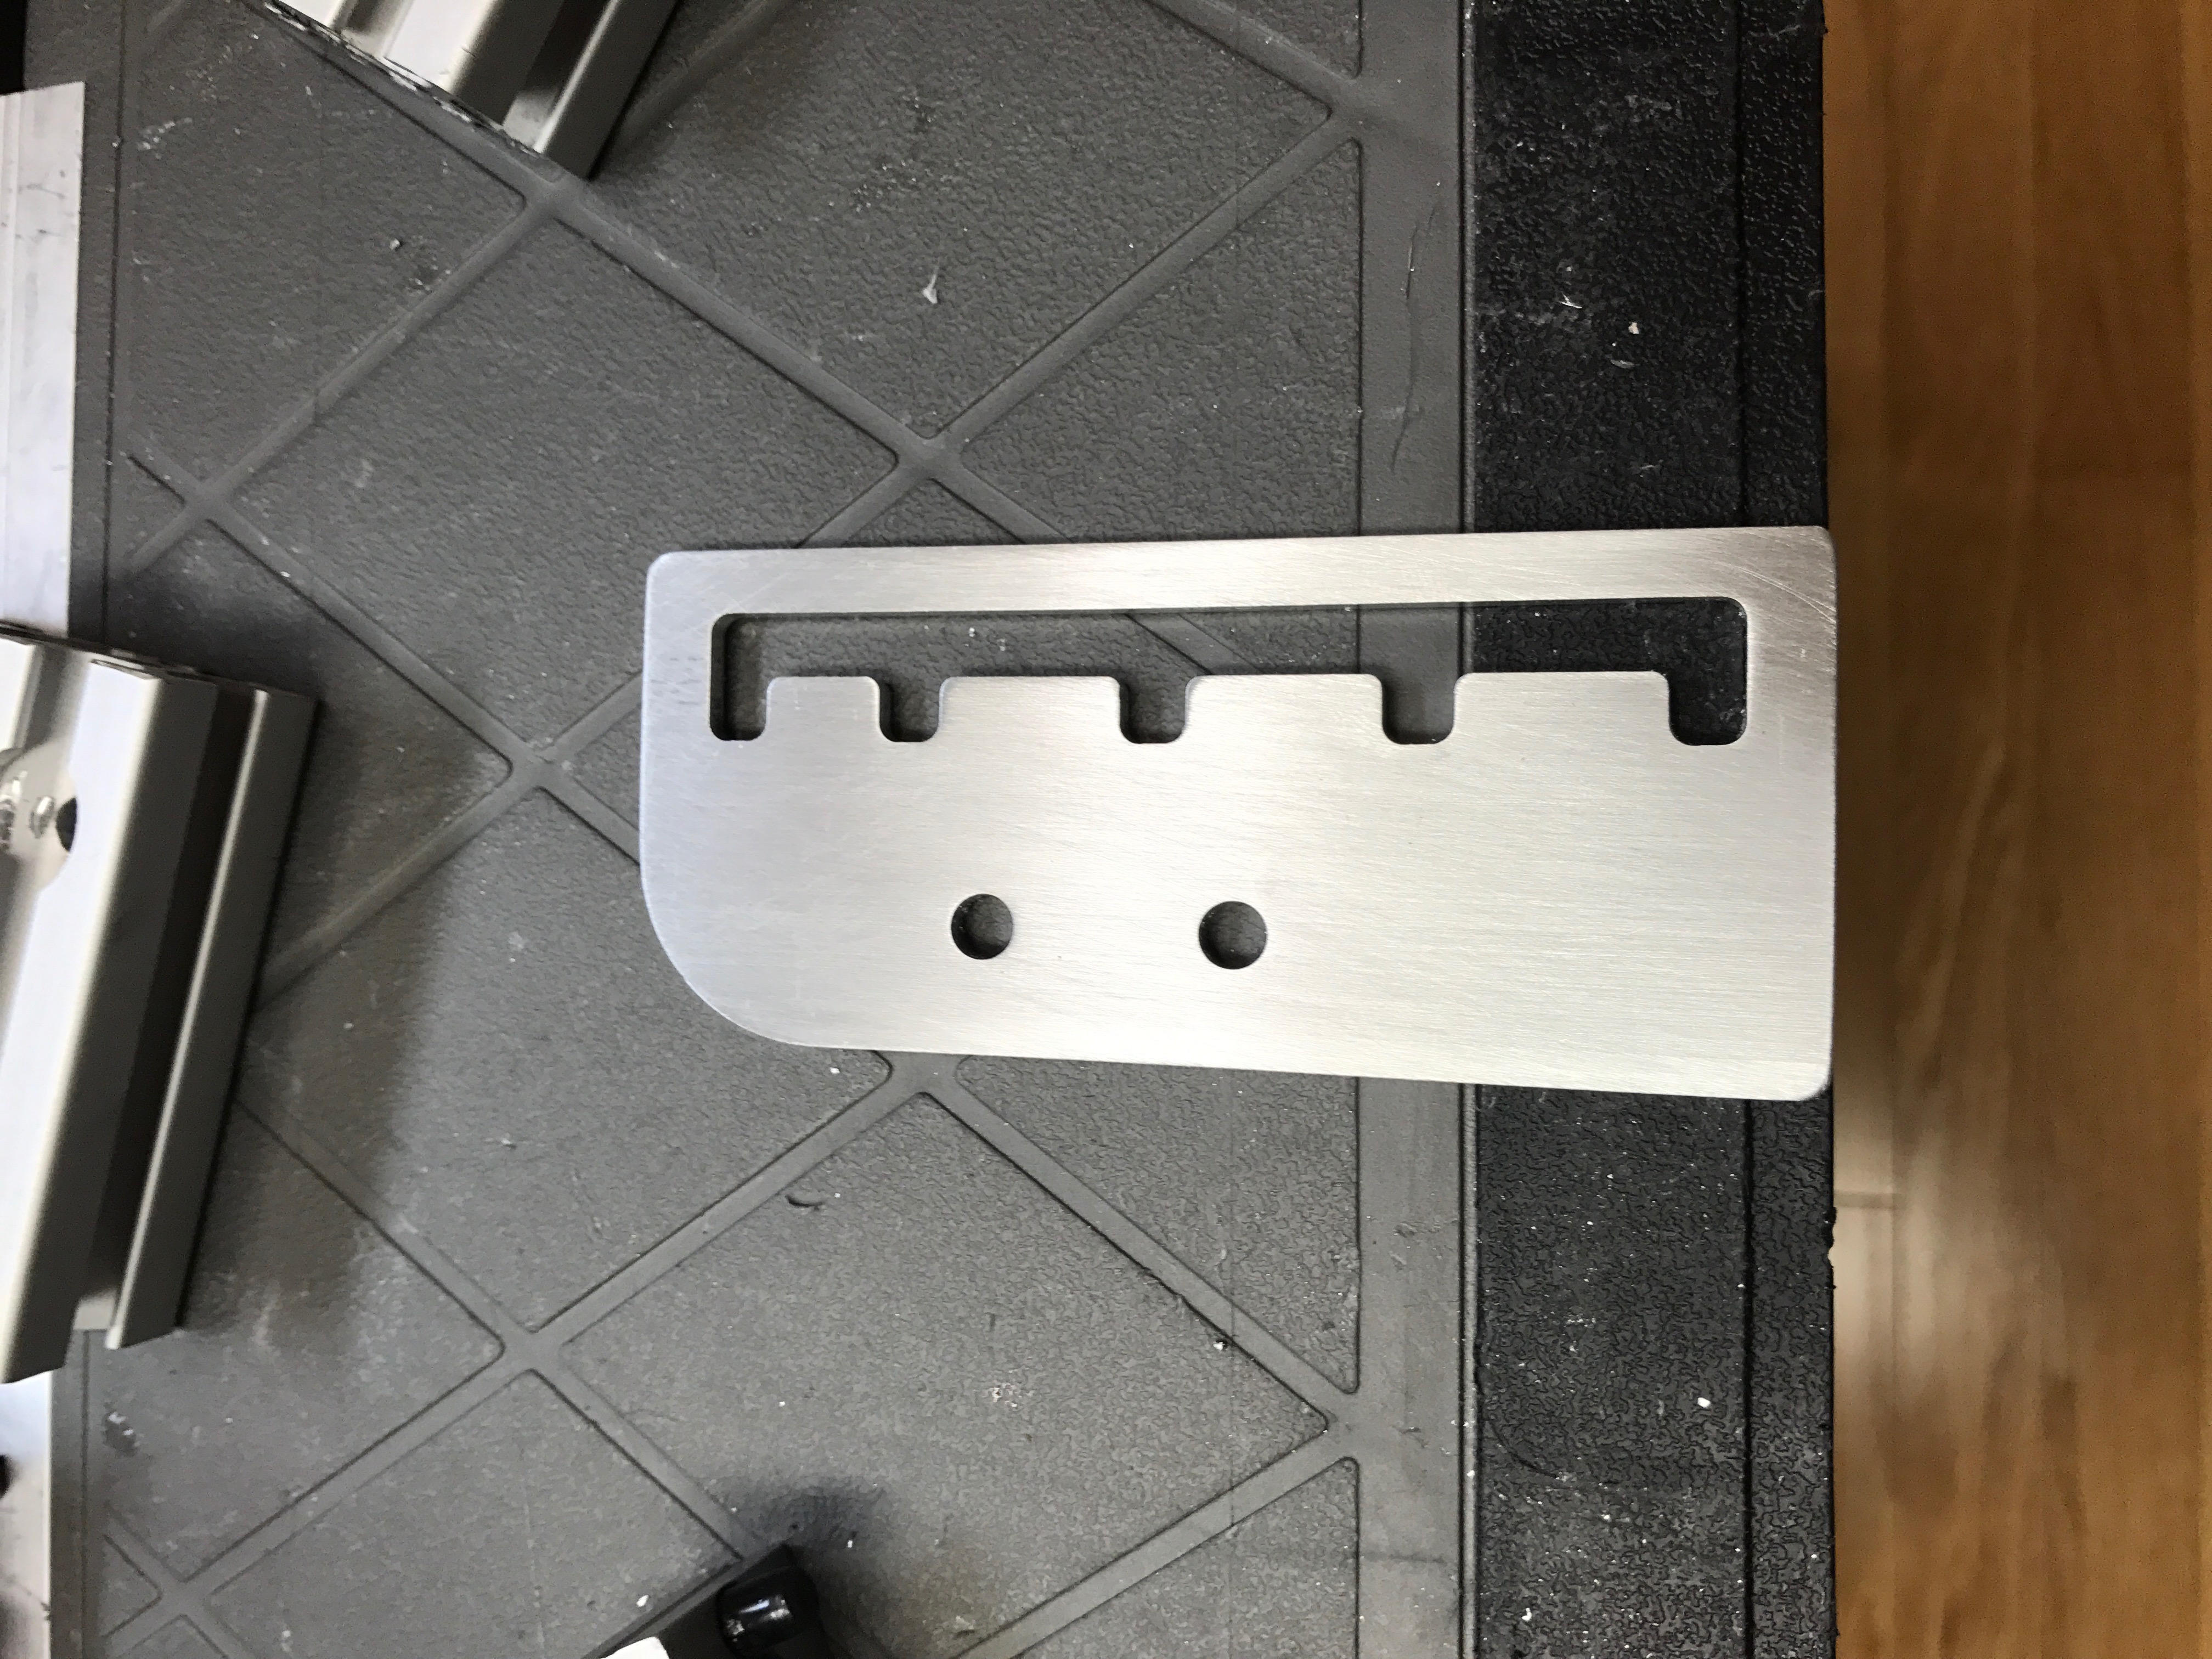\n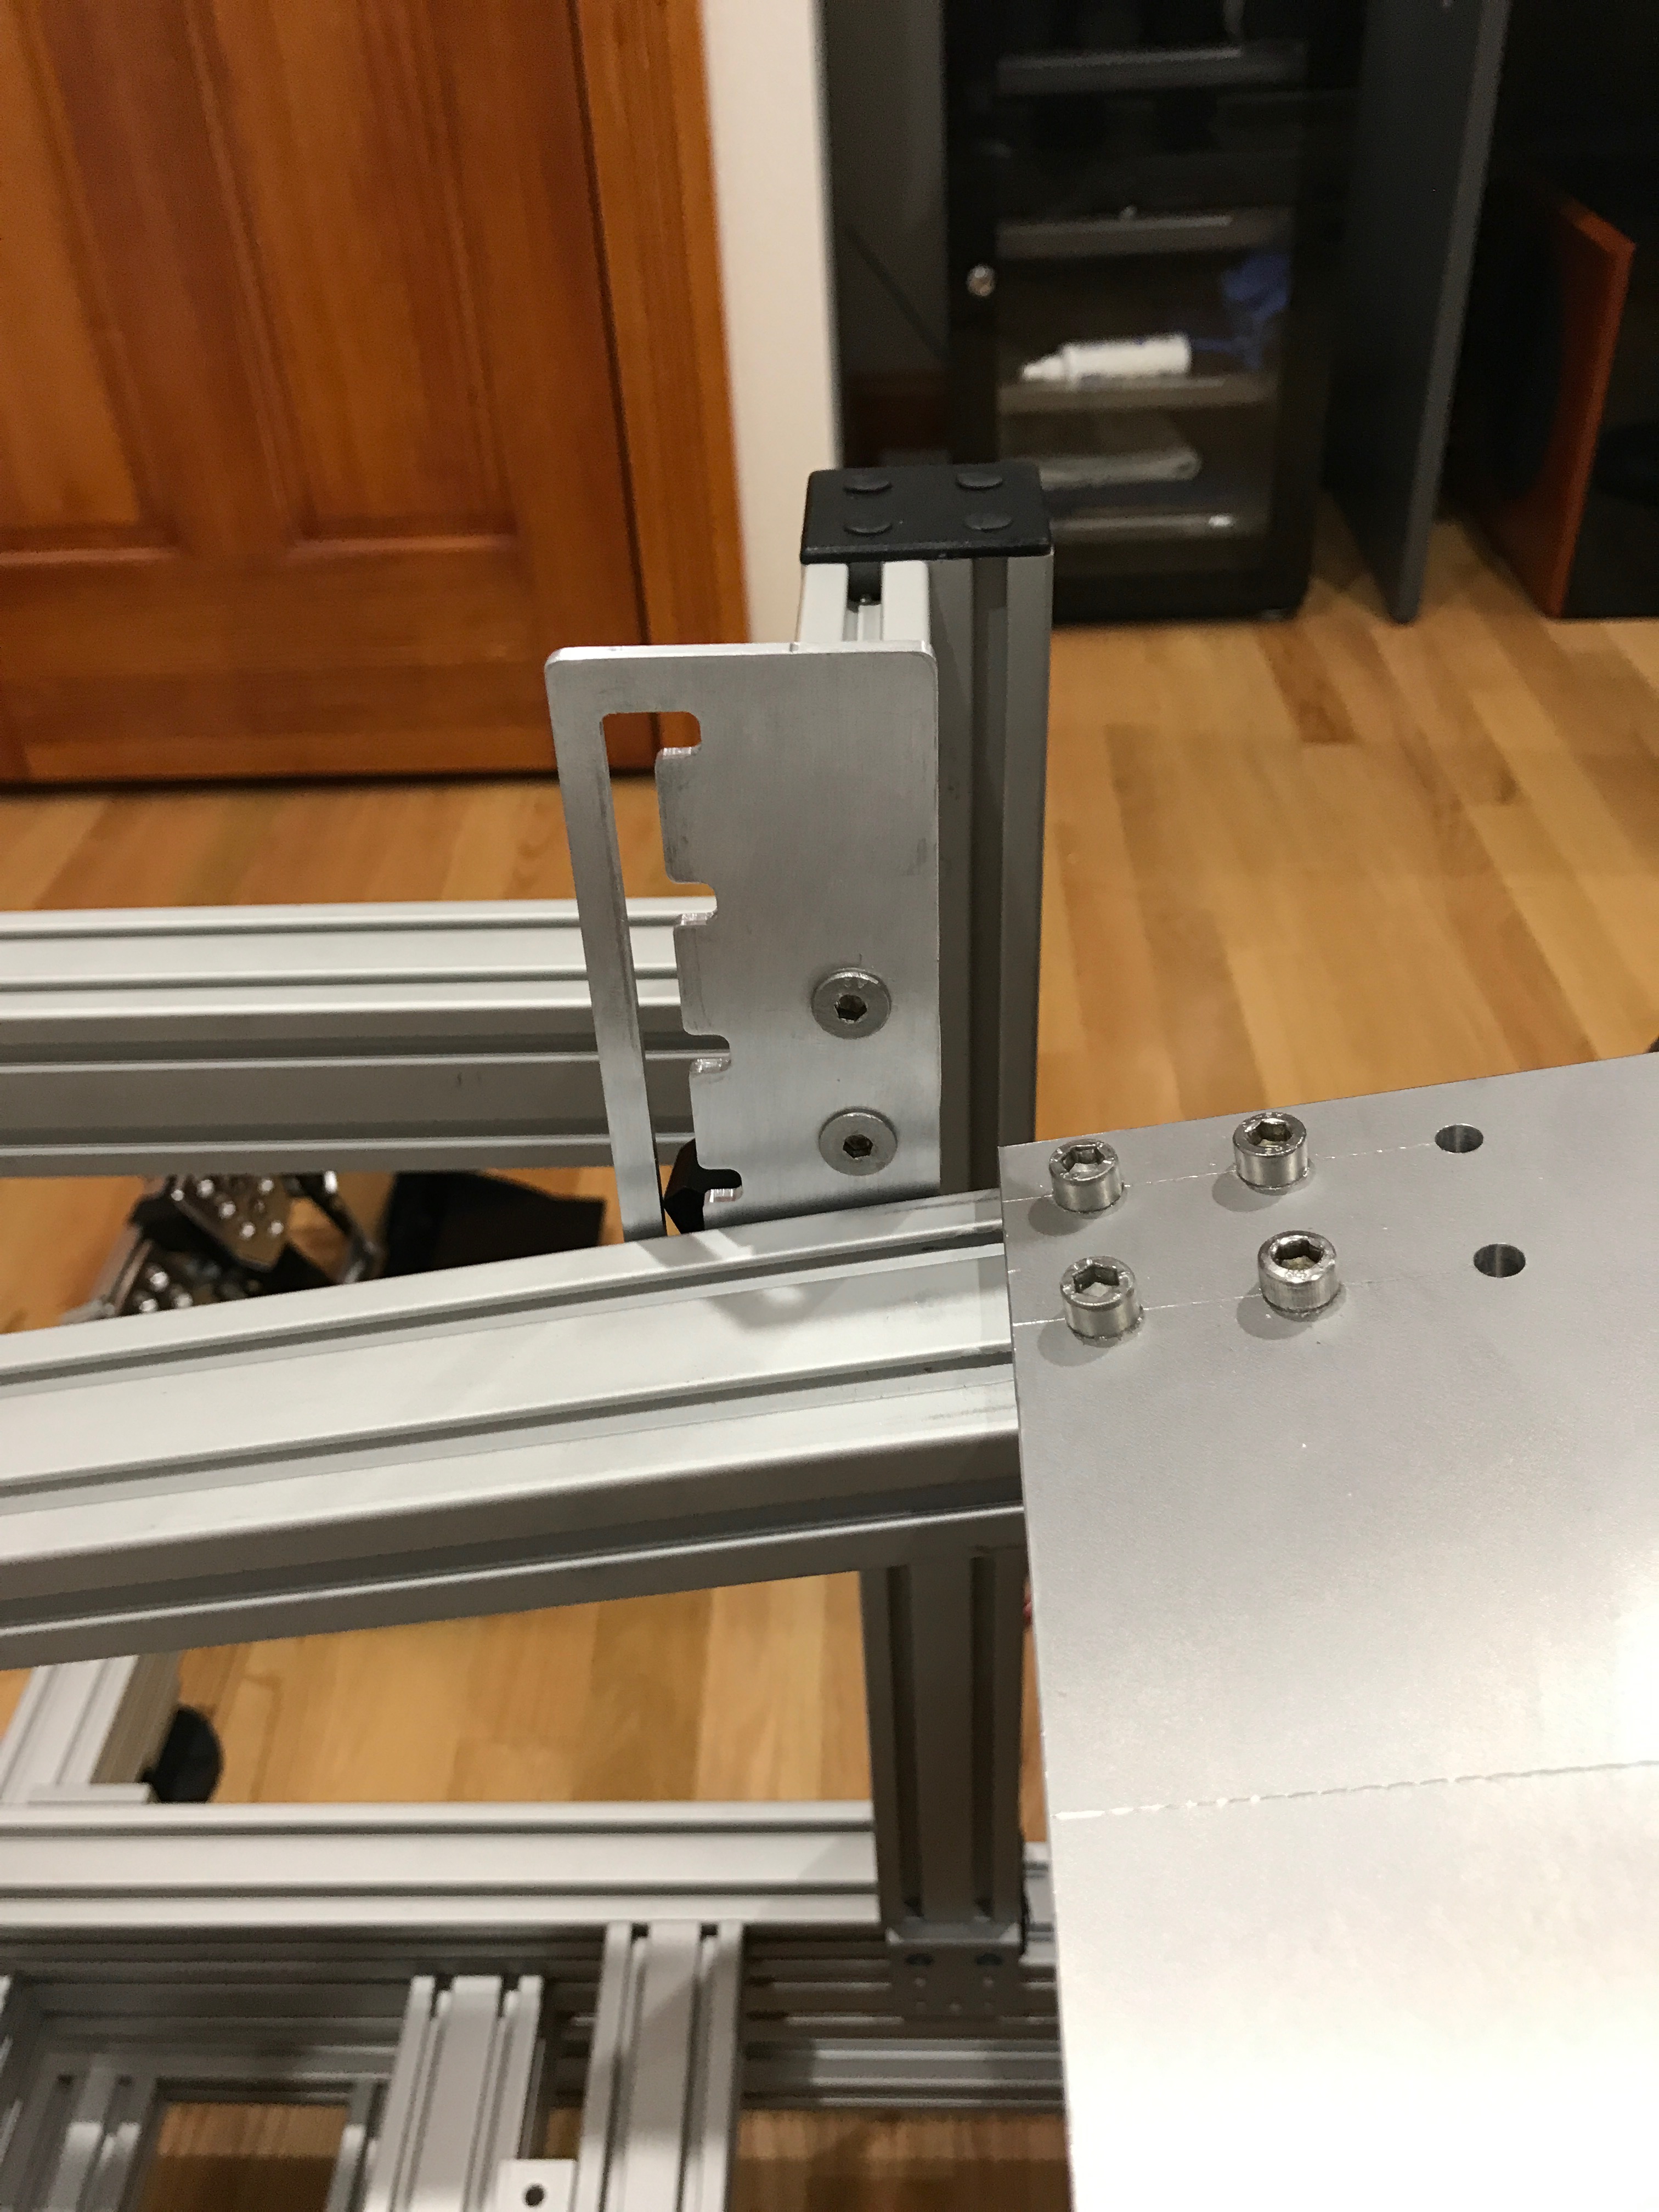\n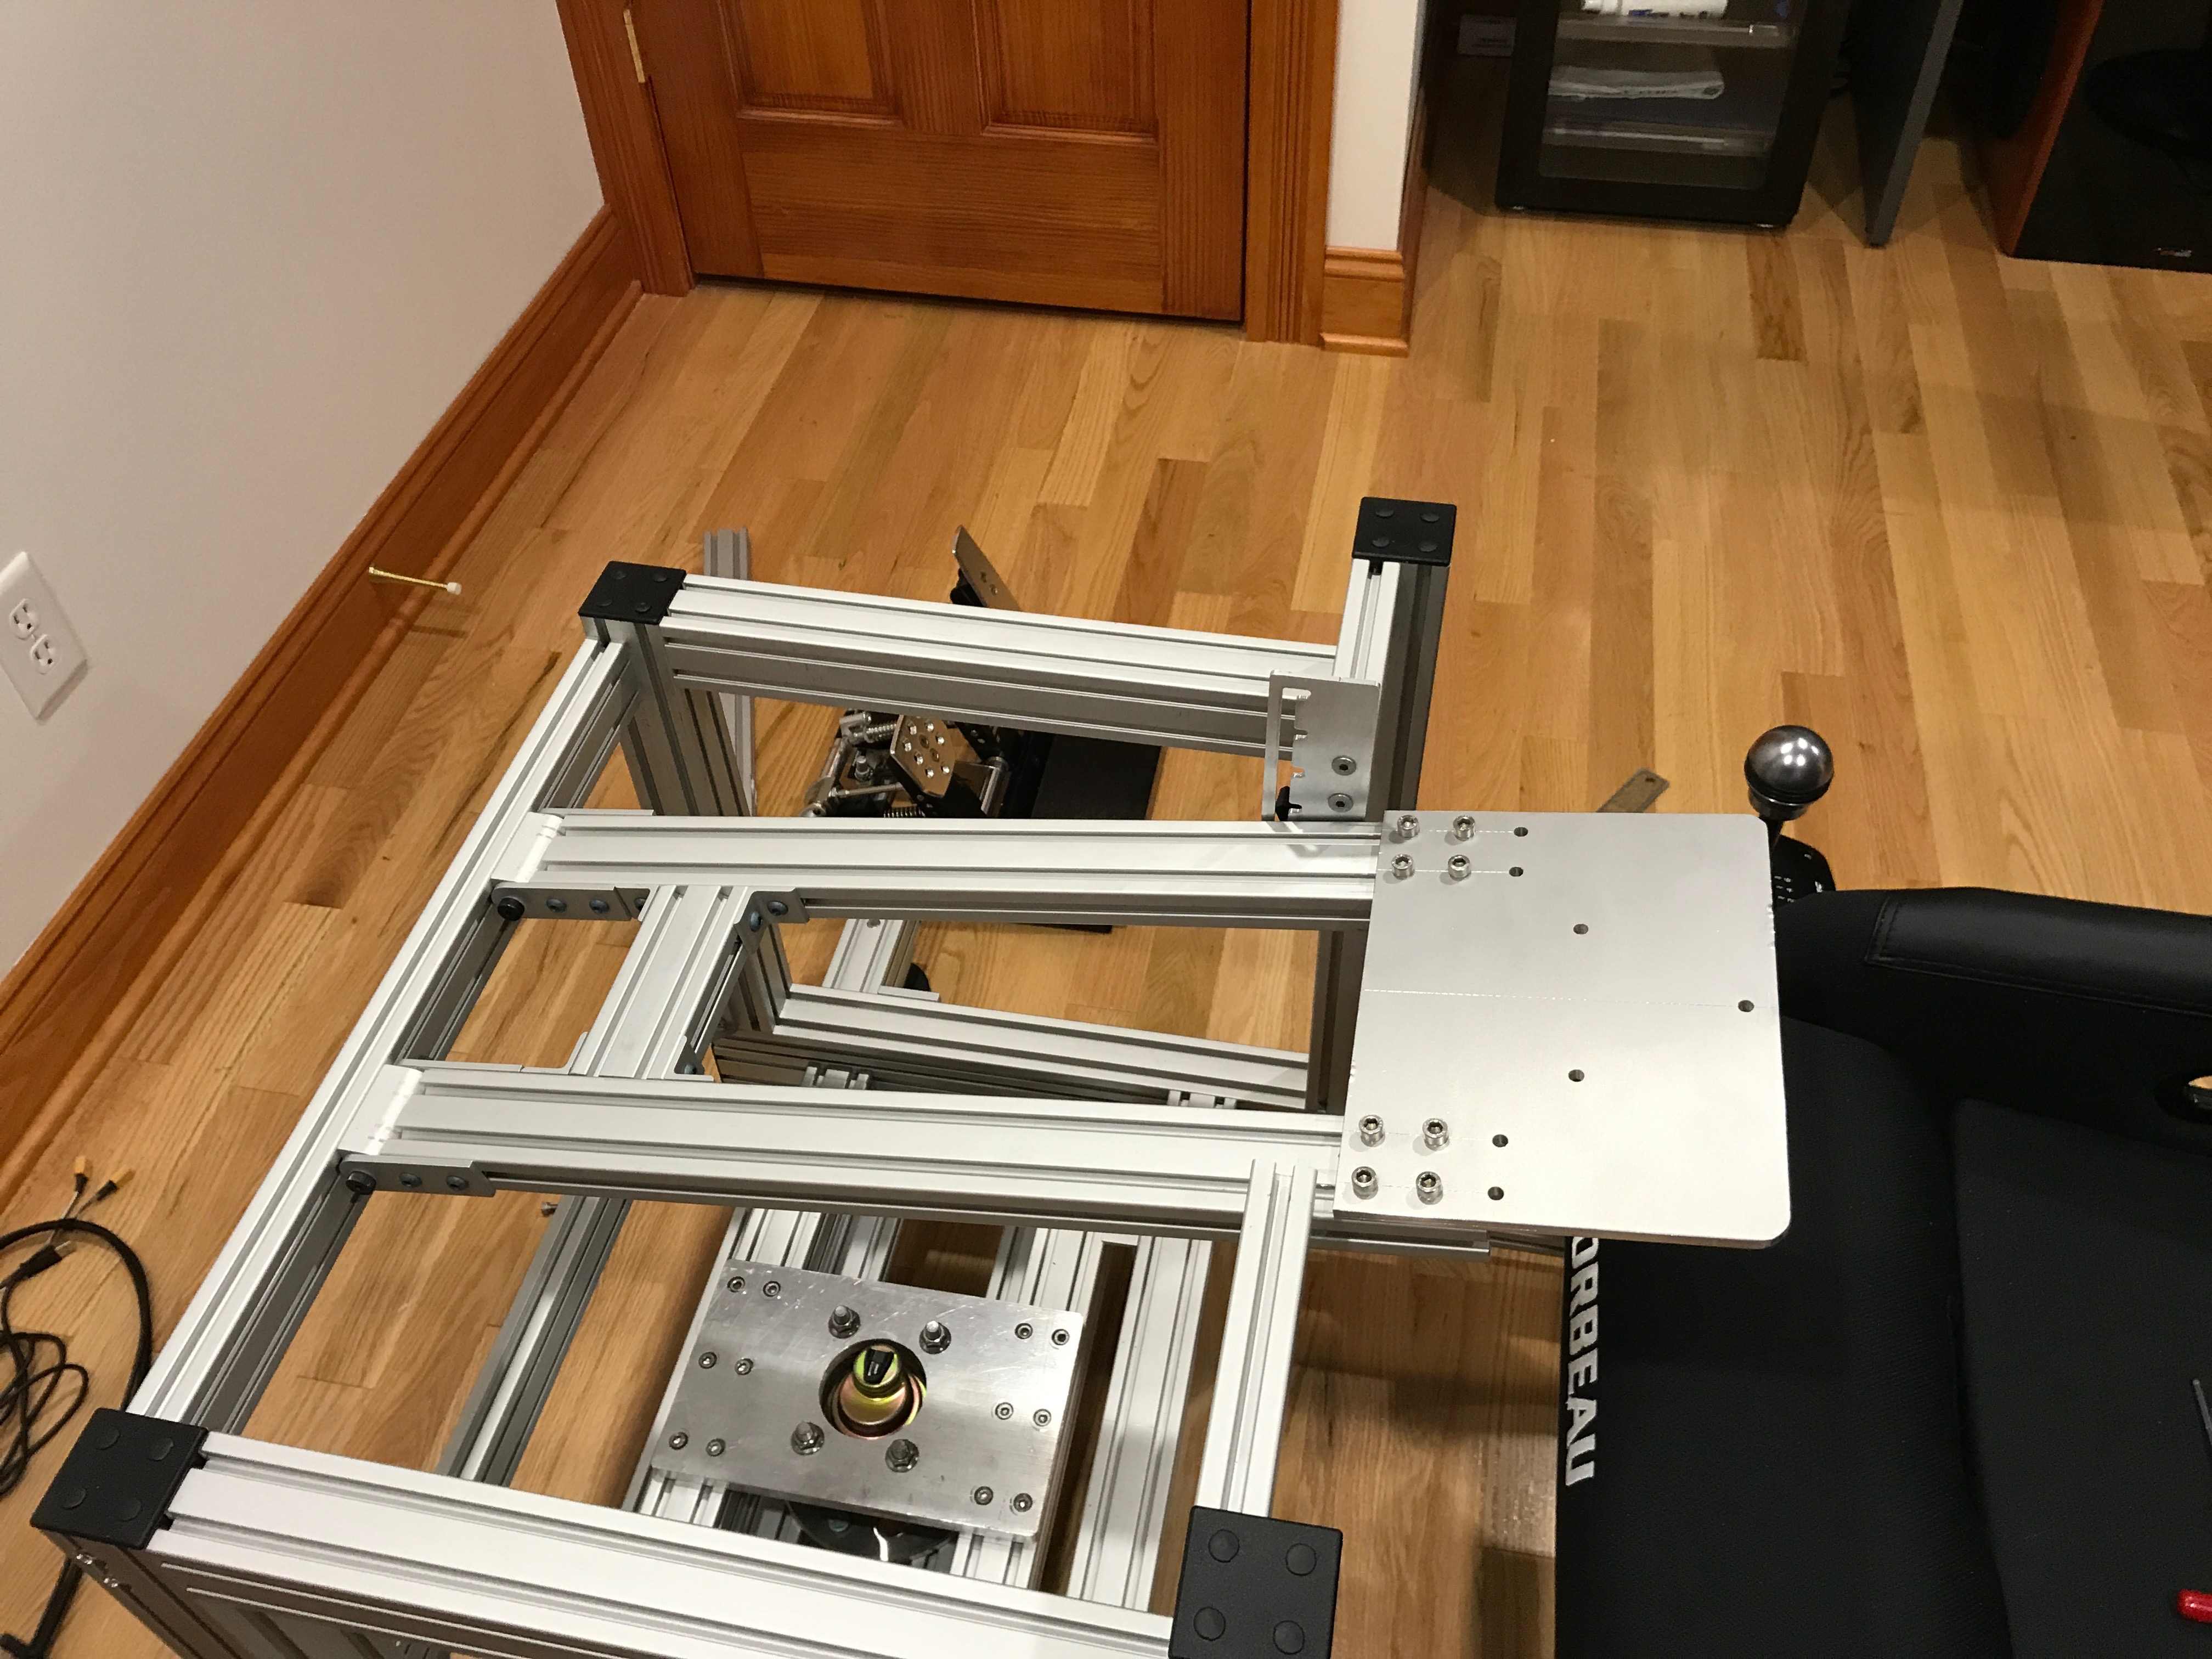\n\nMounting the shifter and handbrake was pretty straight forward. I was able to use 80/20 components for the shifter and I re-used the version 1 handbrake mount with slight modification.\n\n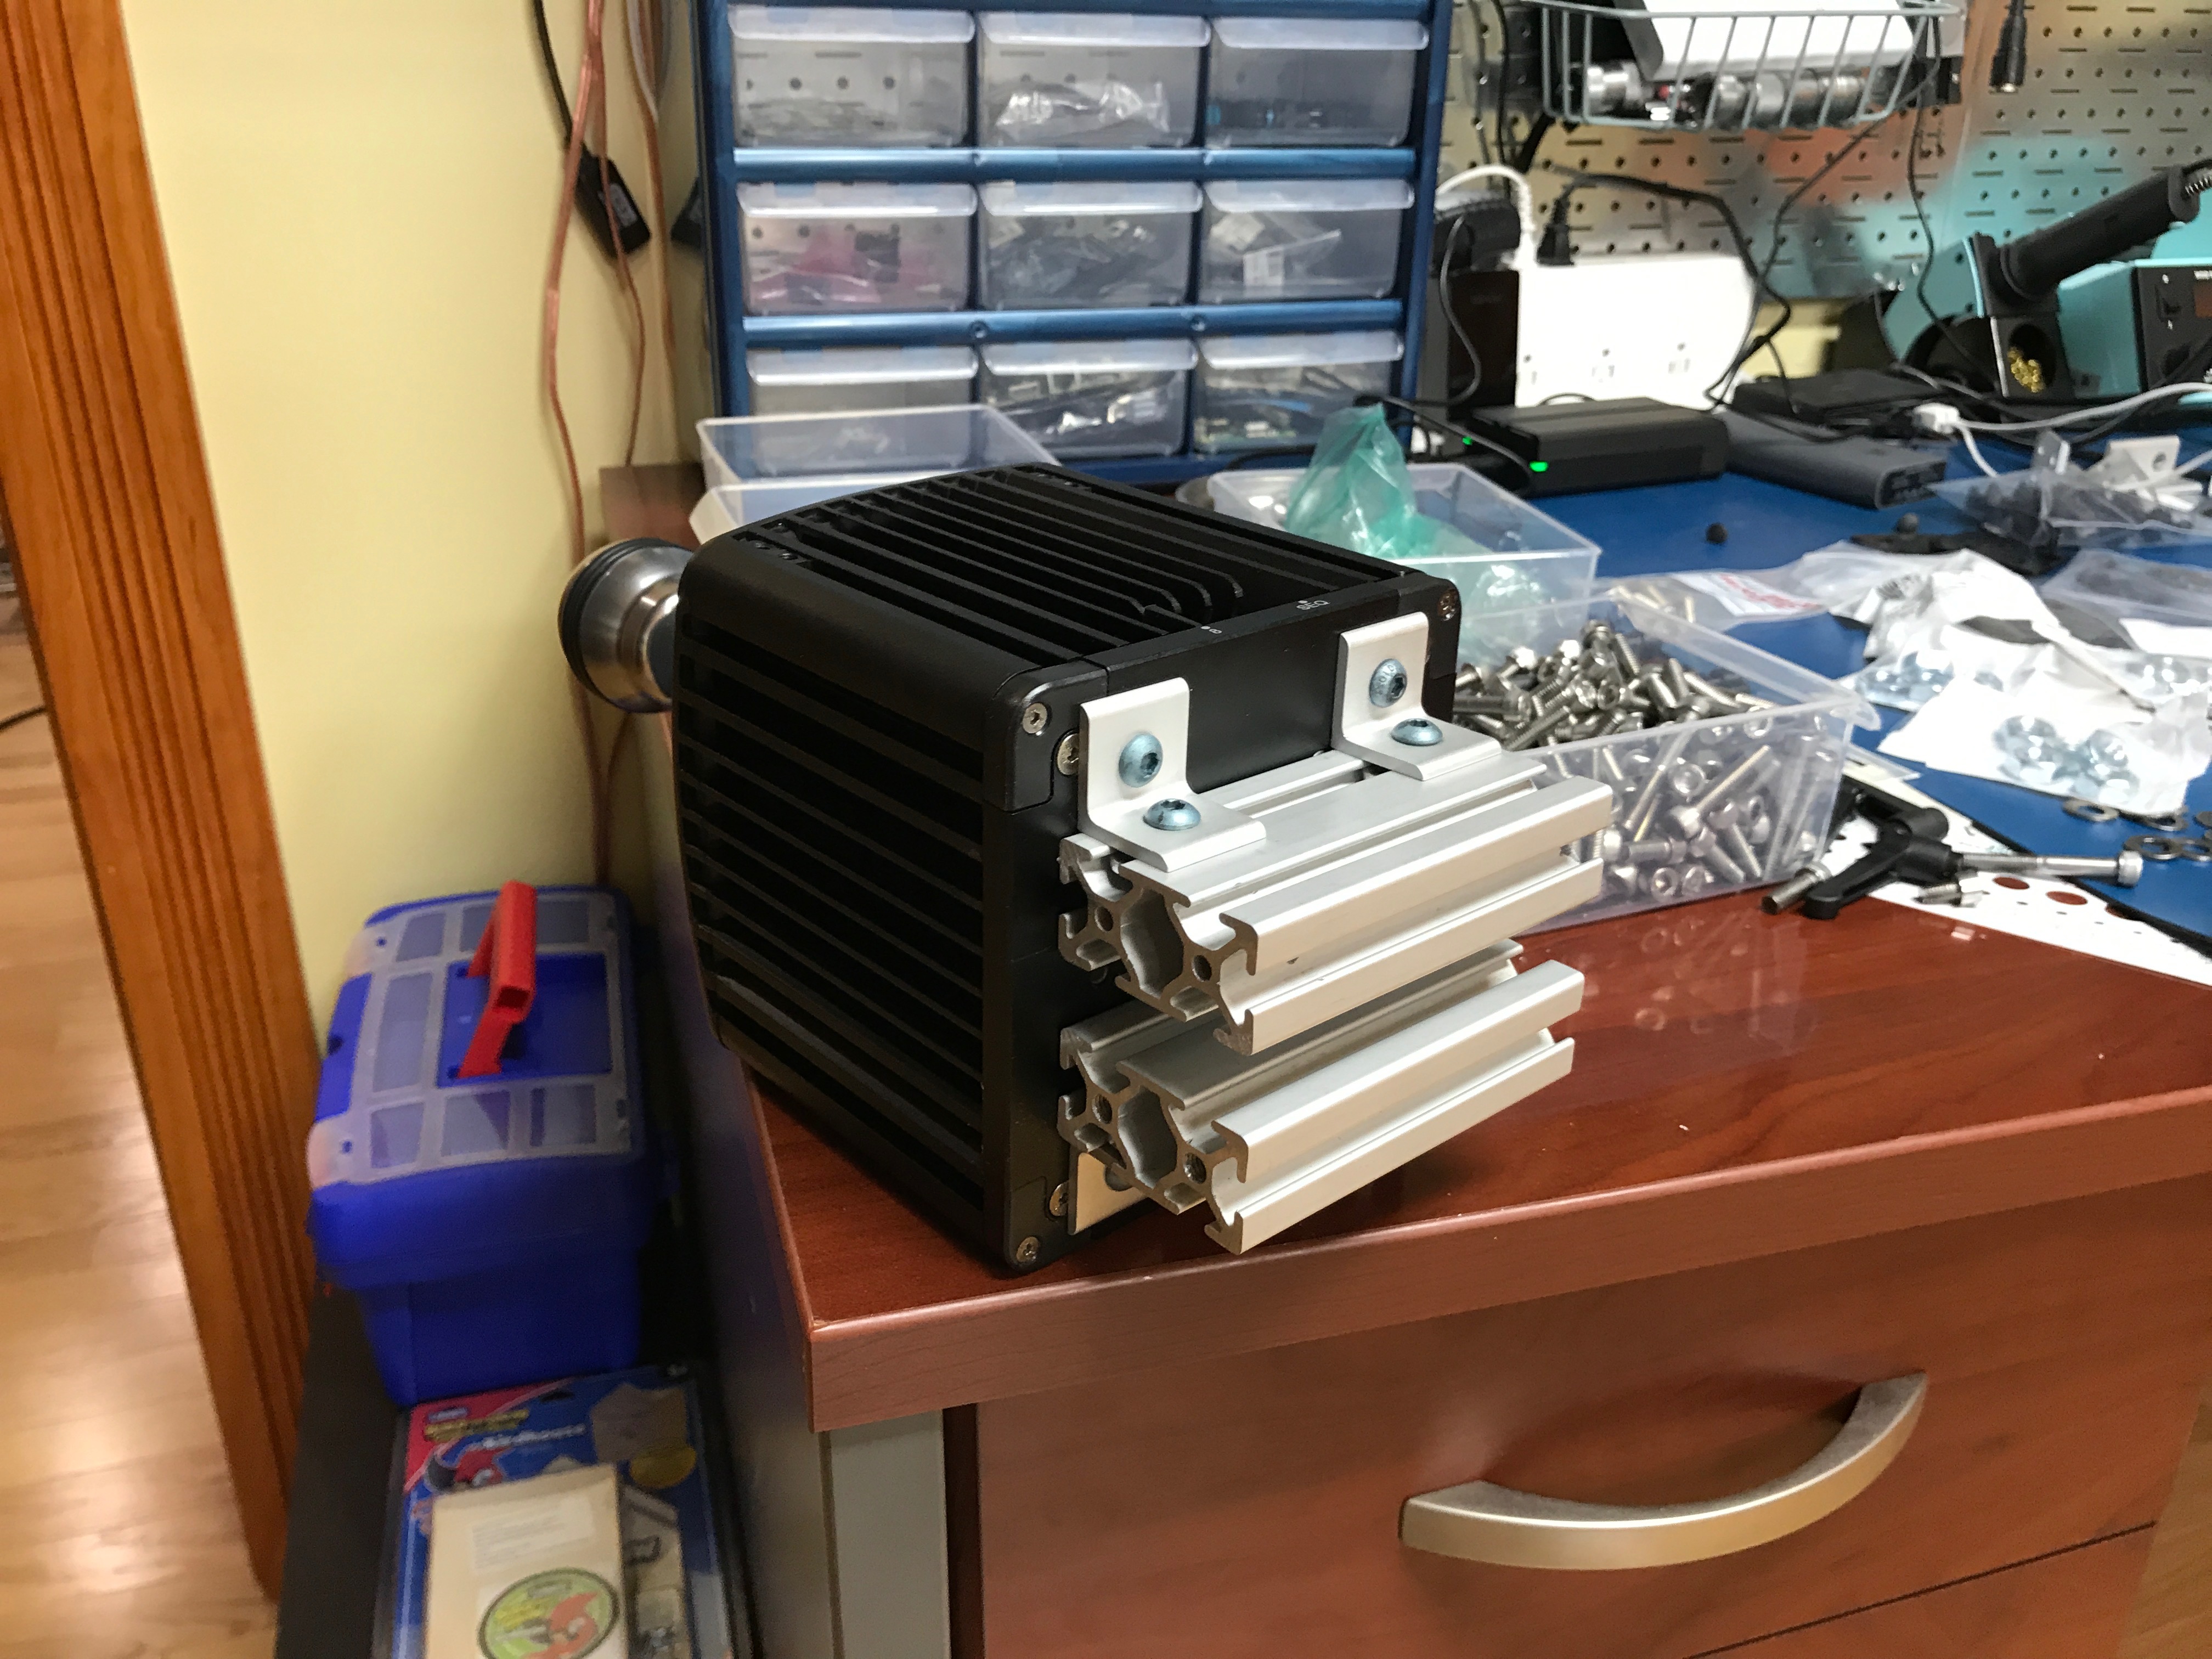\n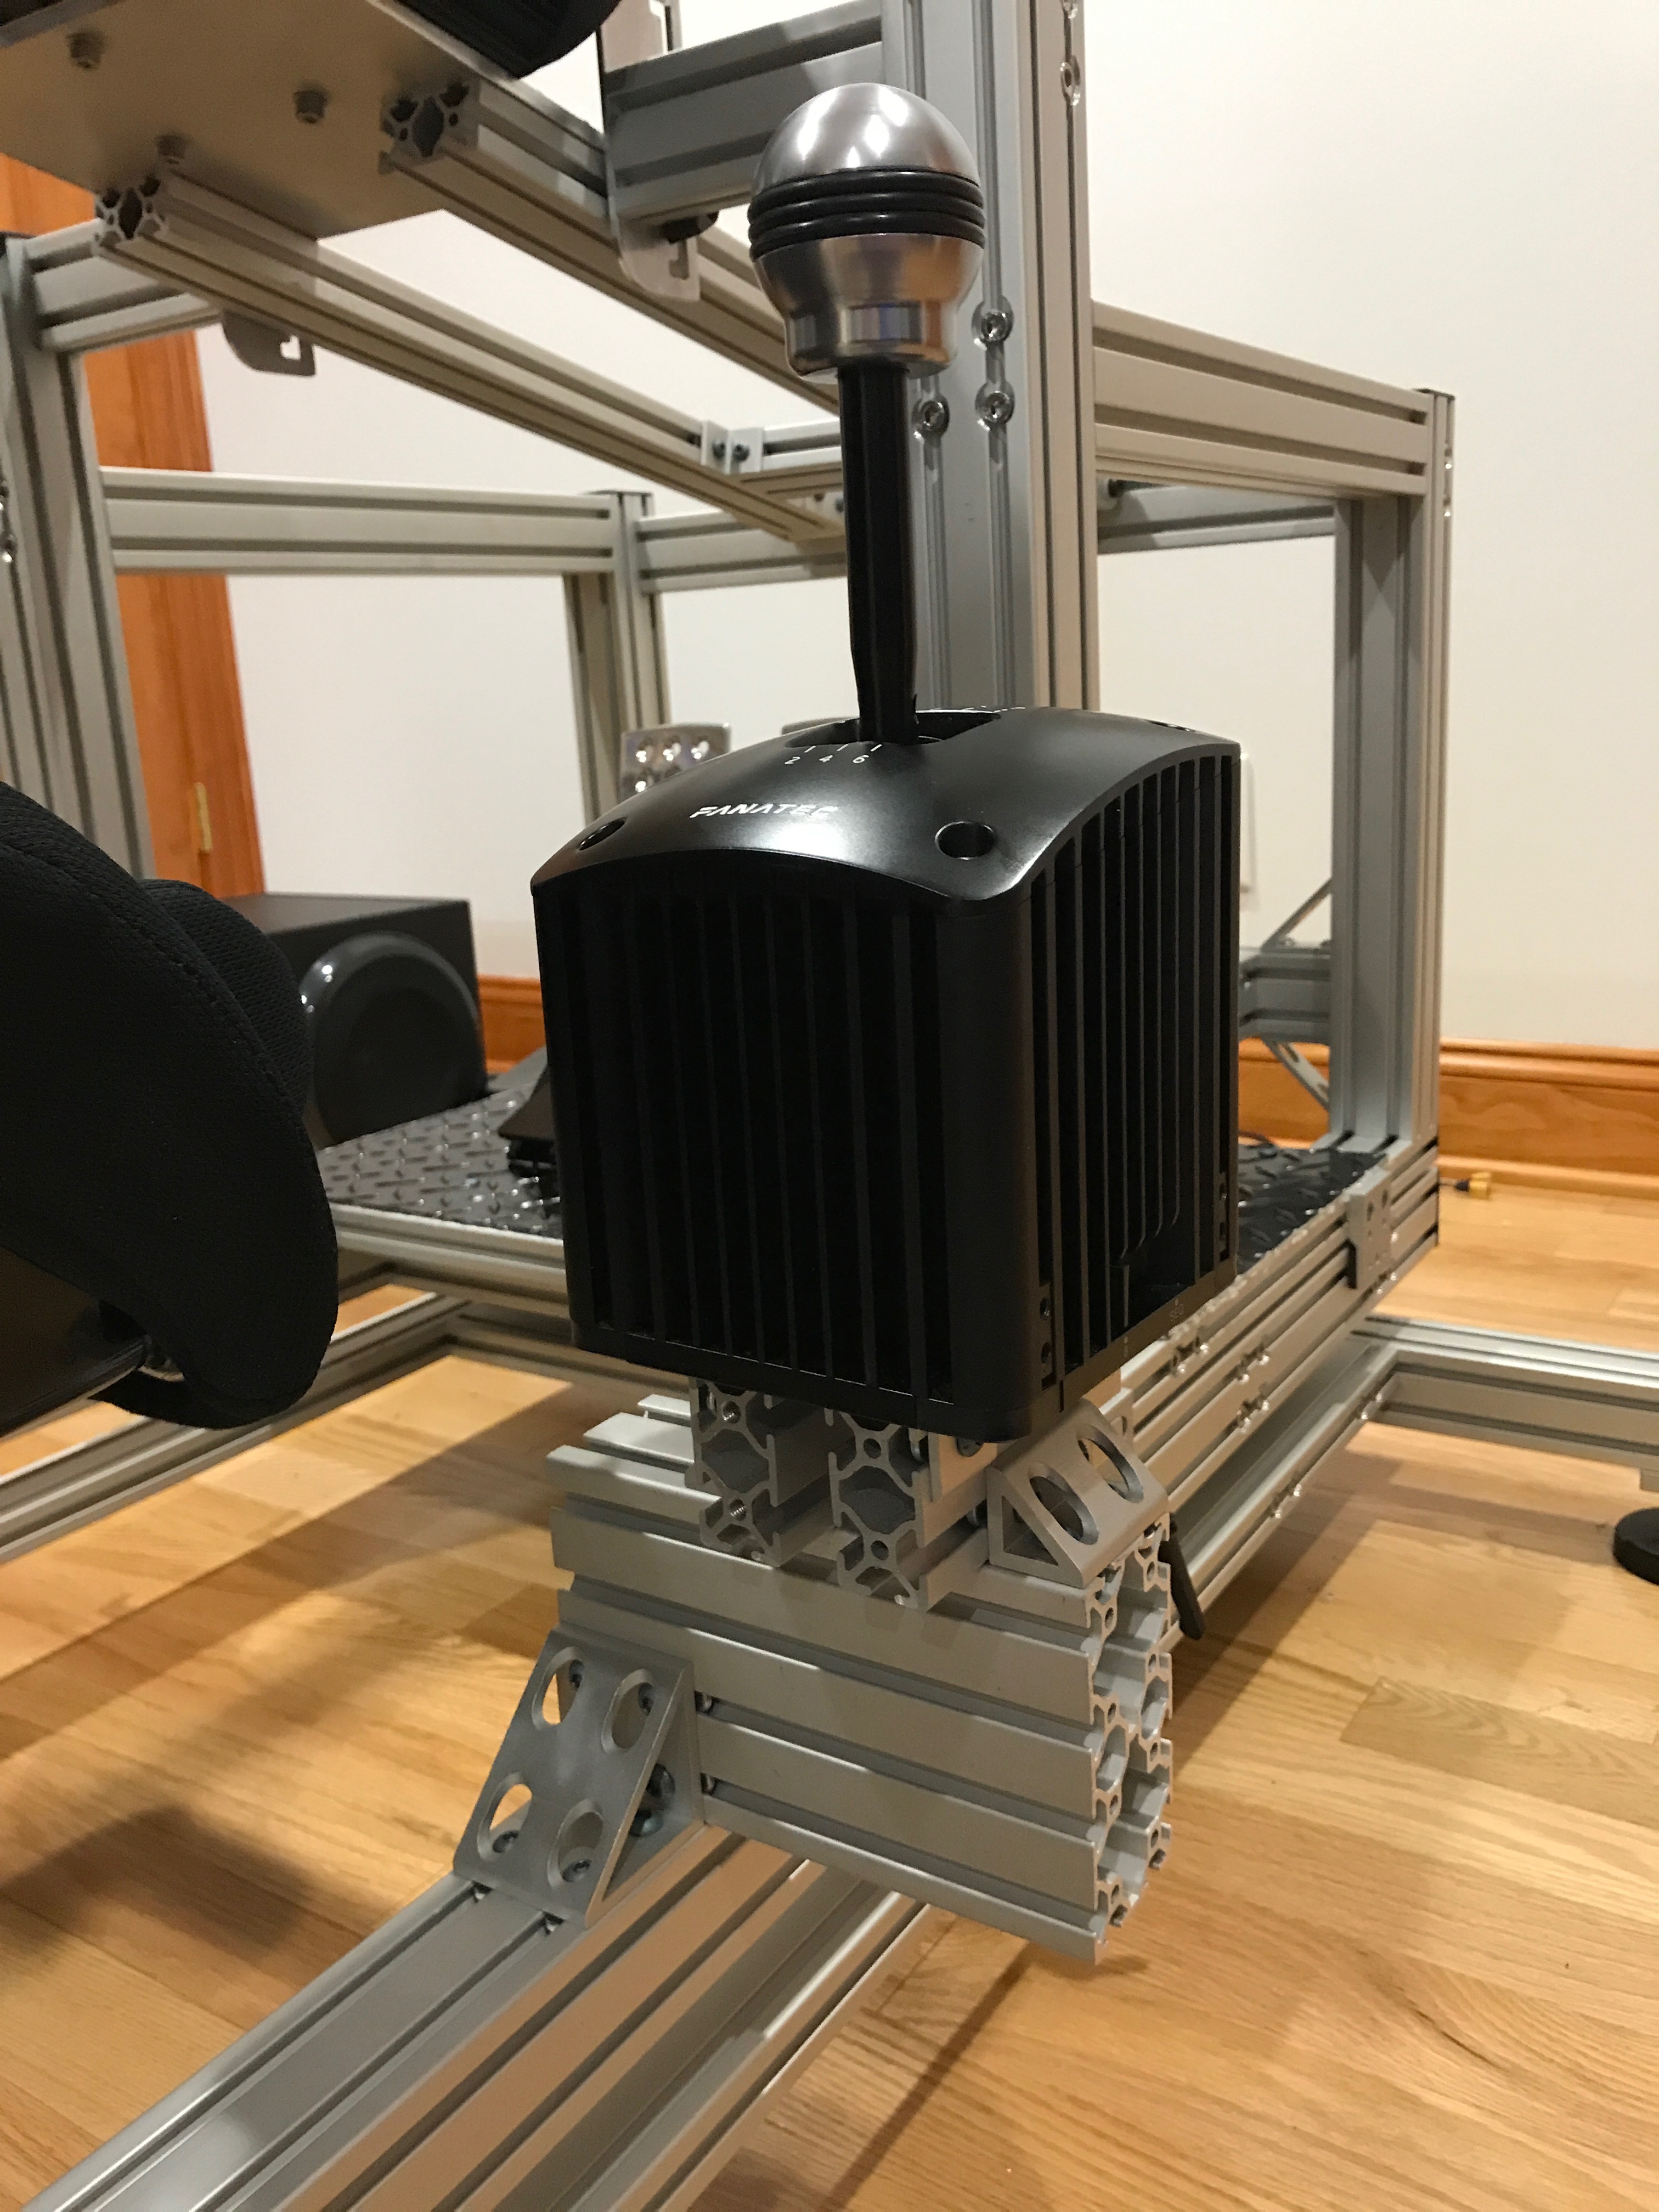\n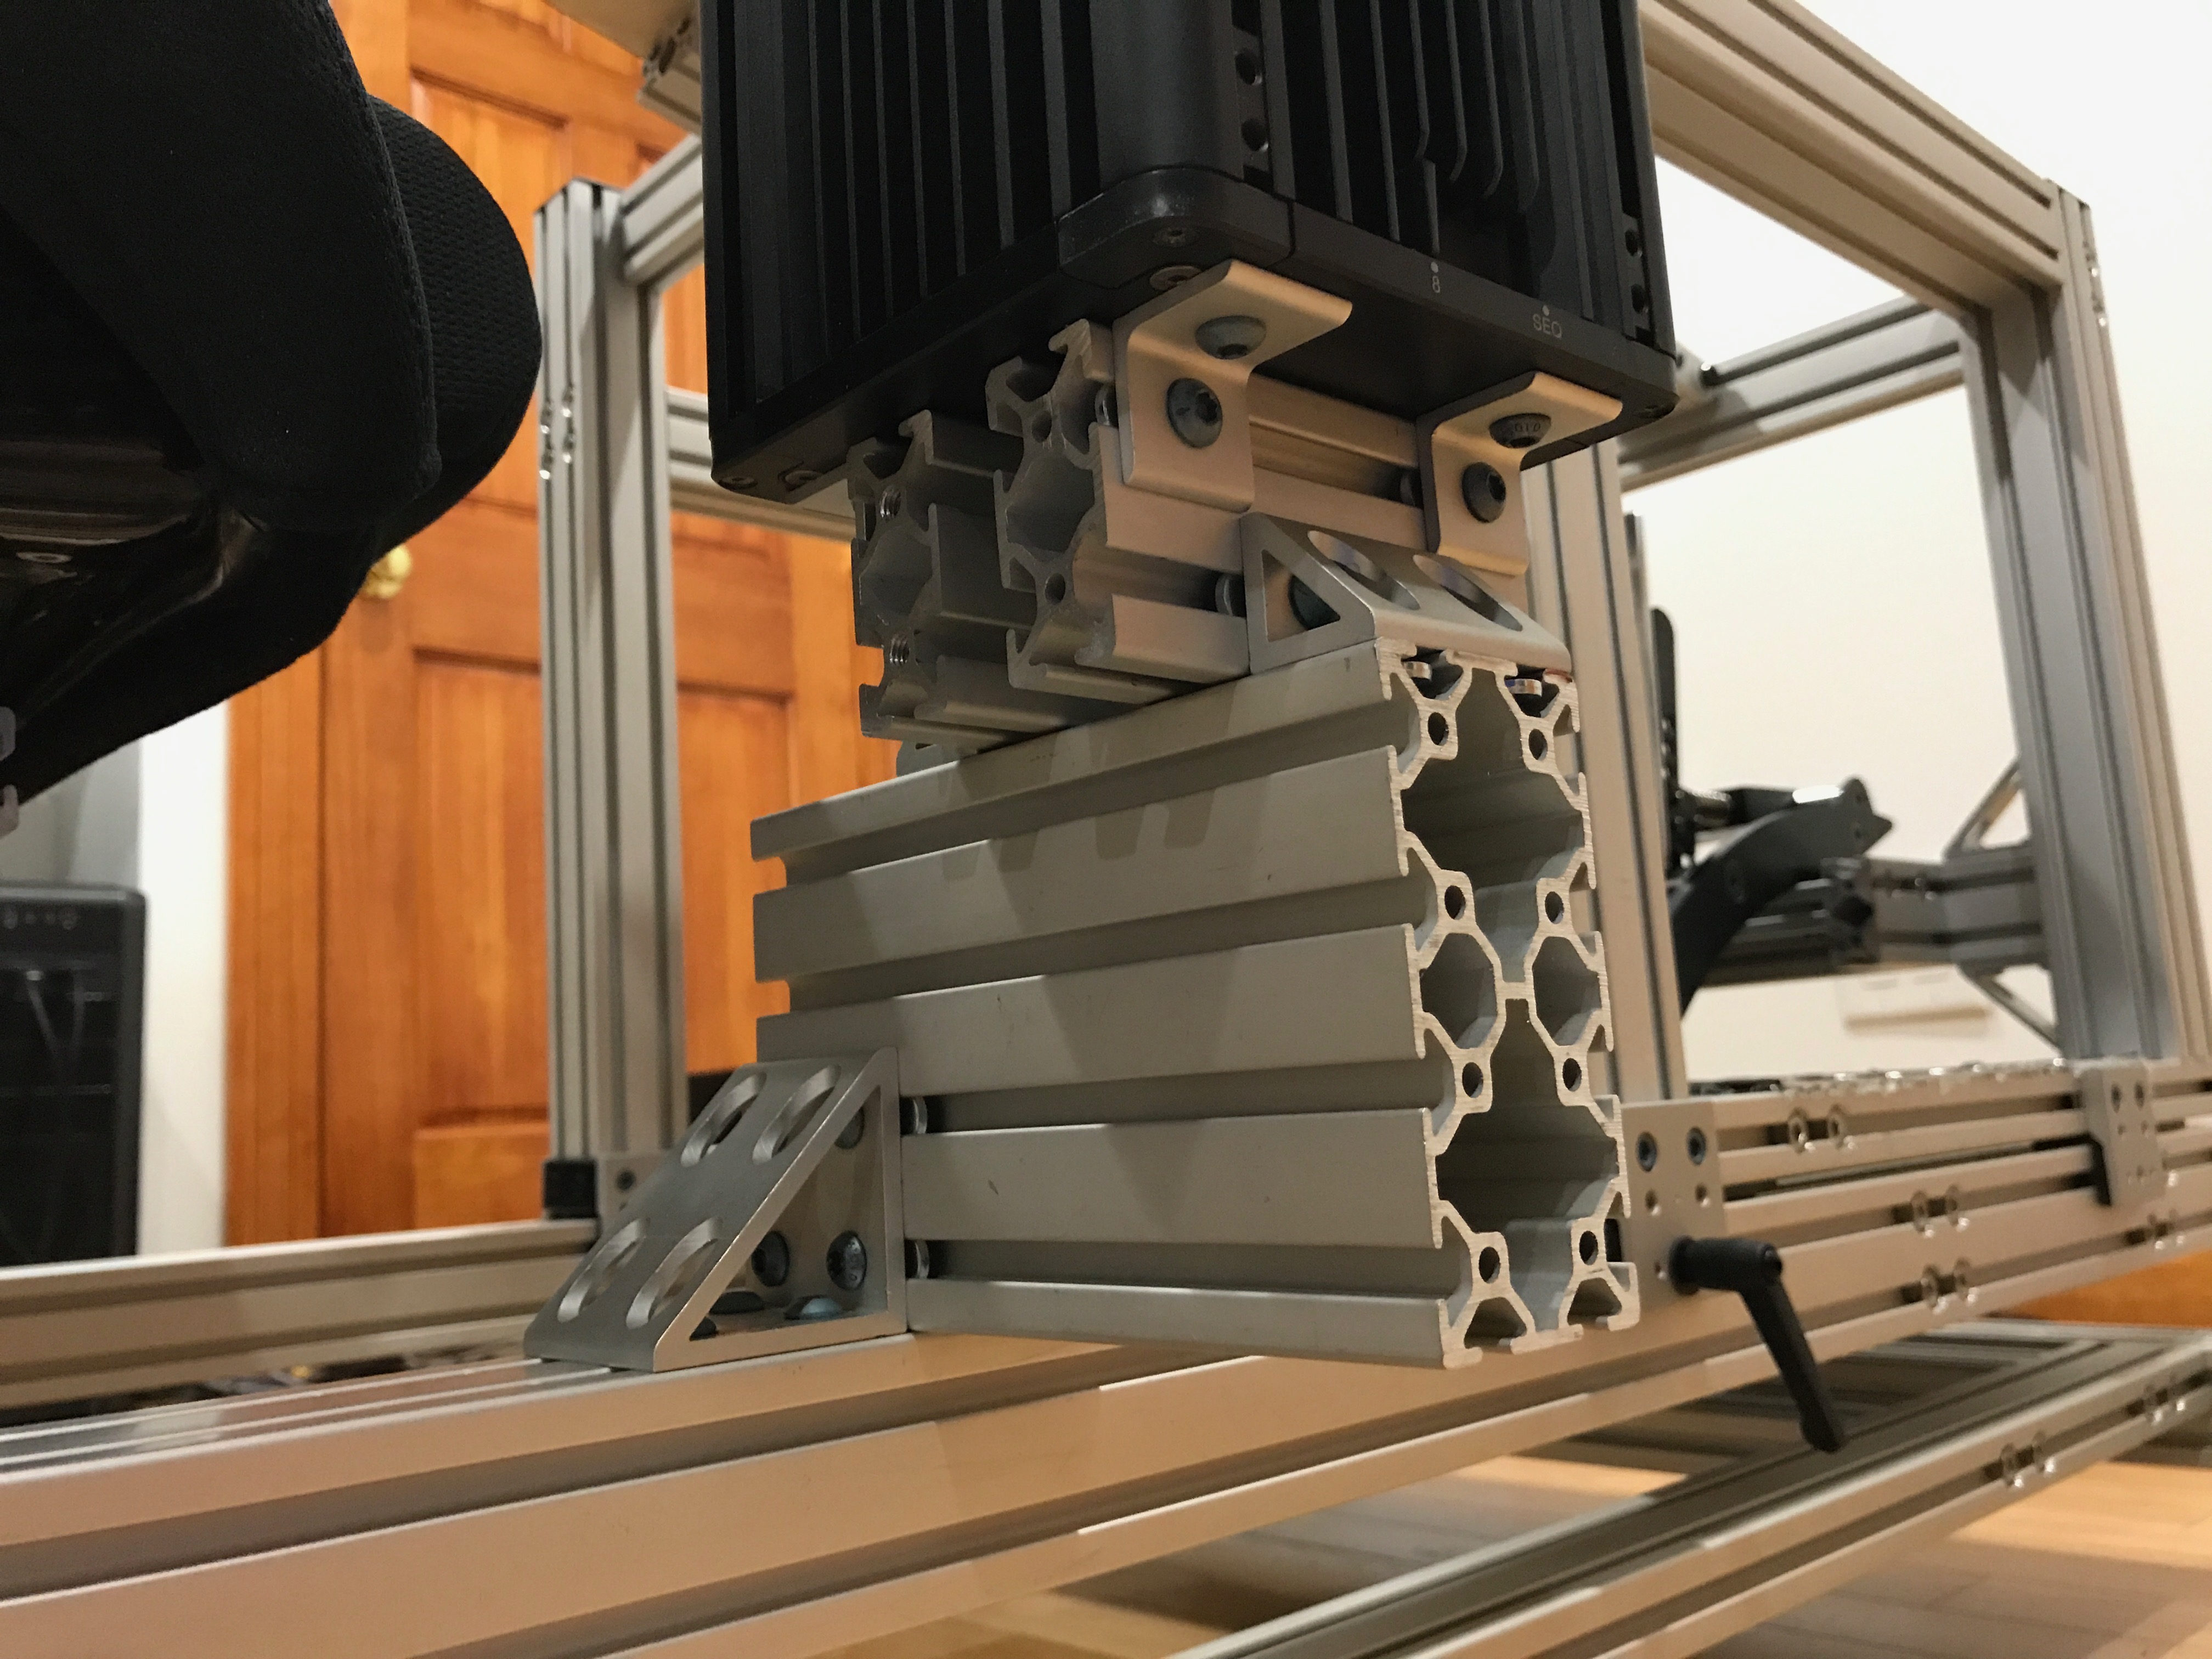\n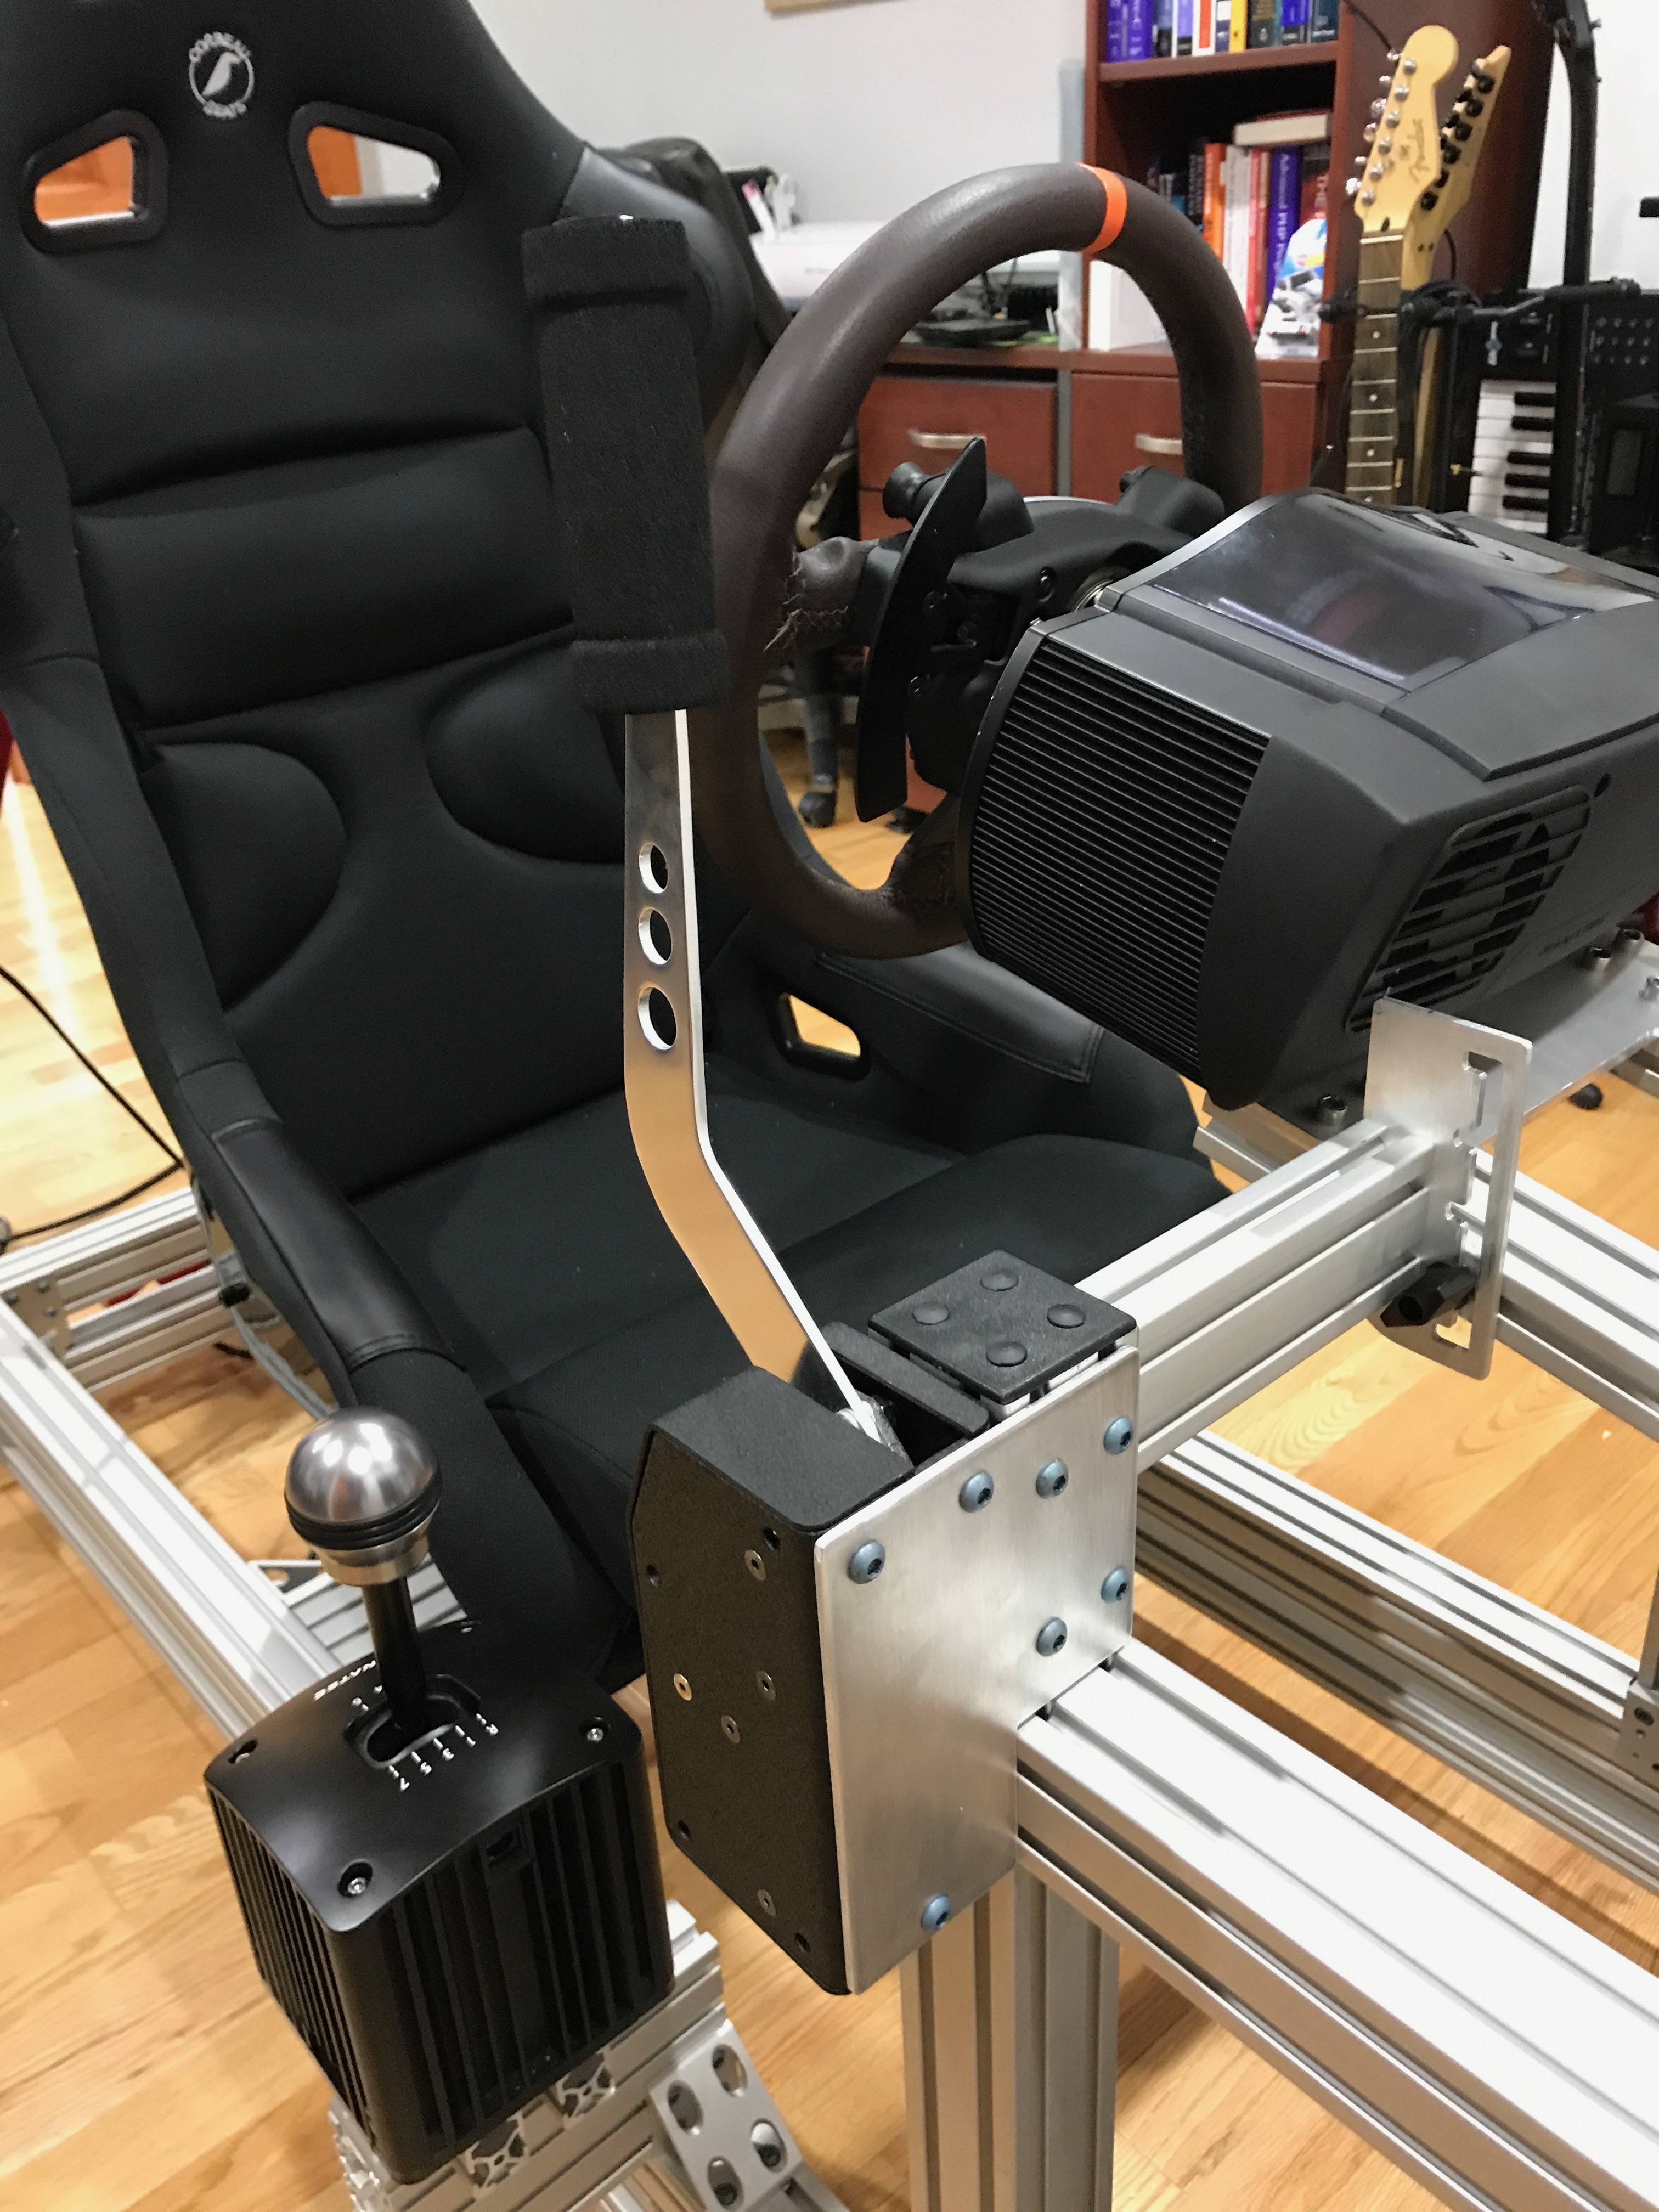\n\nThe transducers mounted directly using 80/20 components.\n\n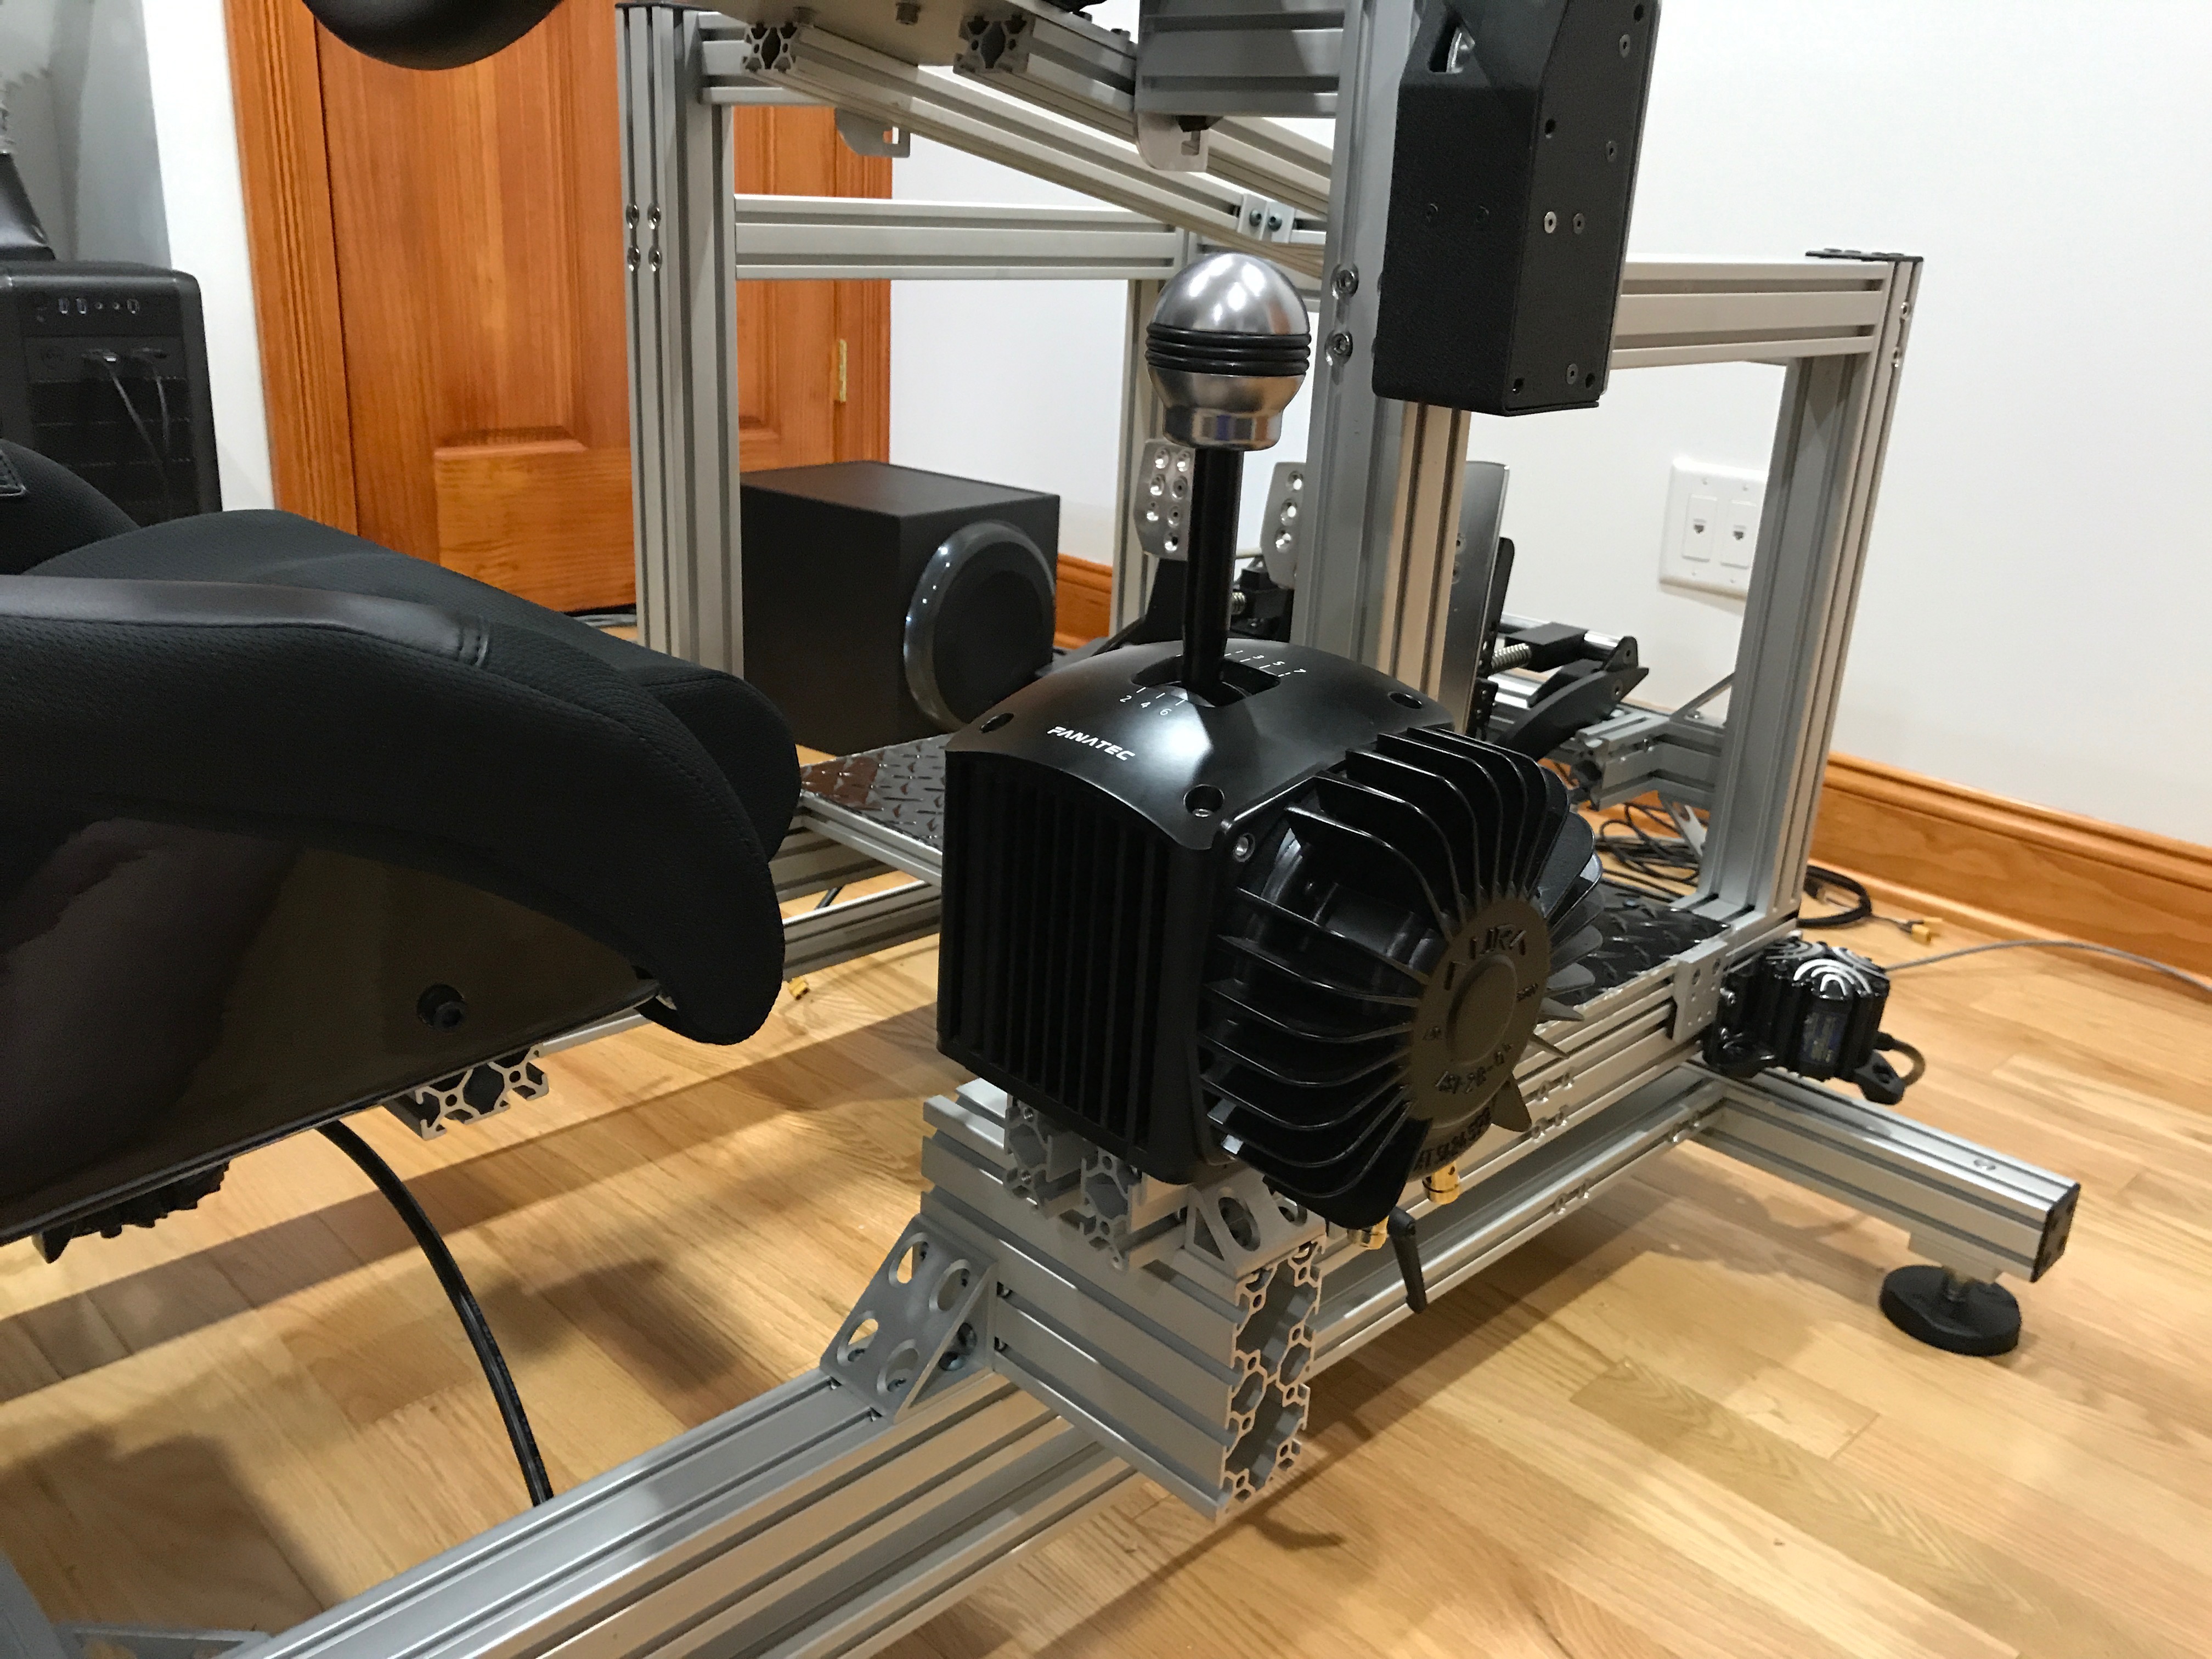\n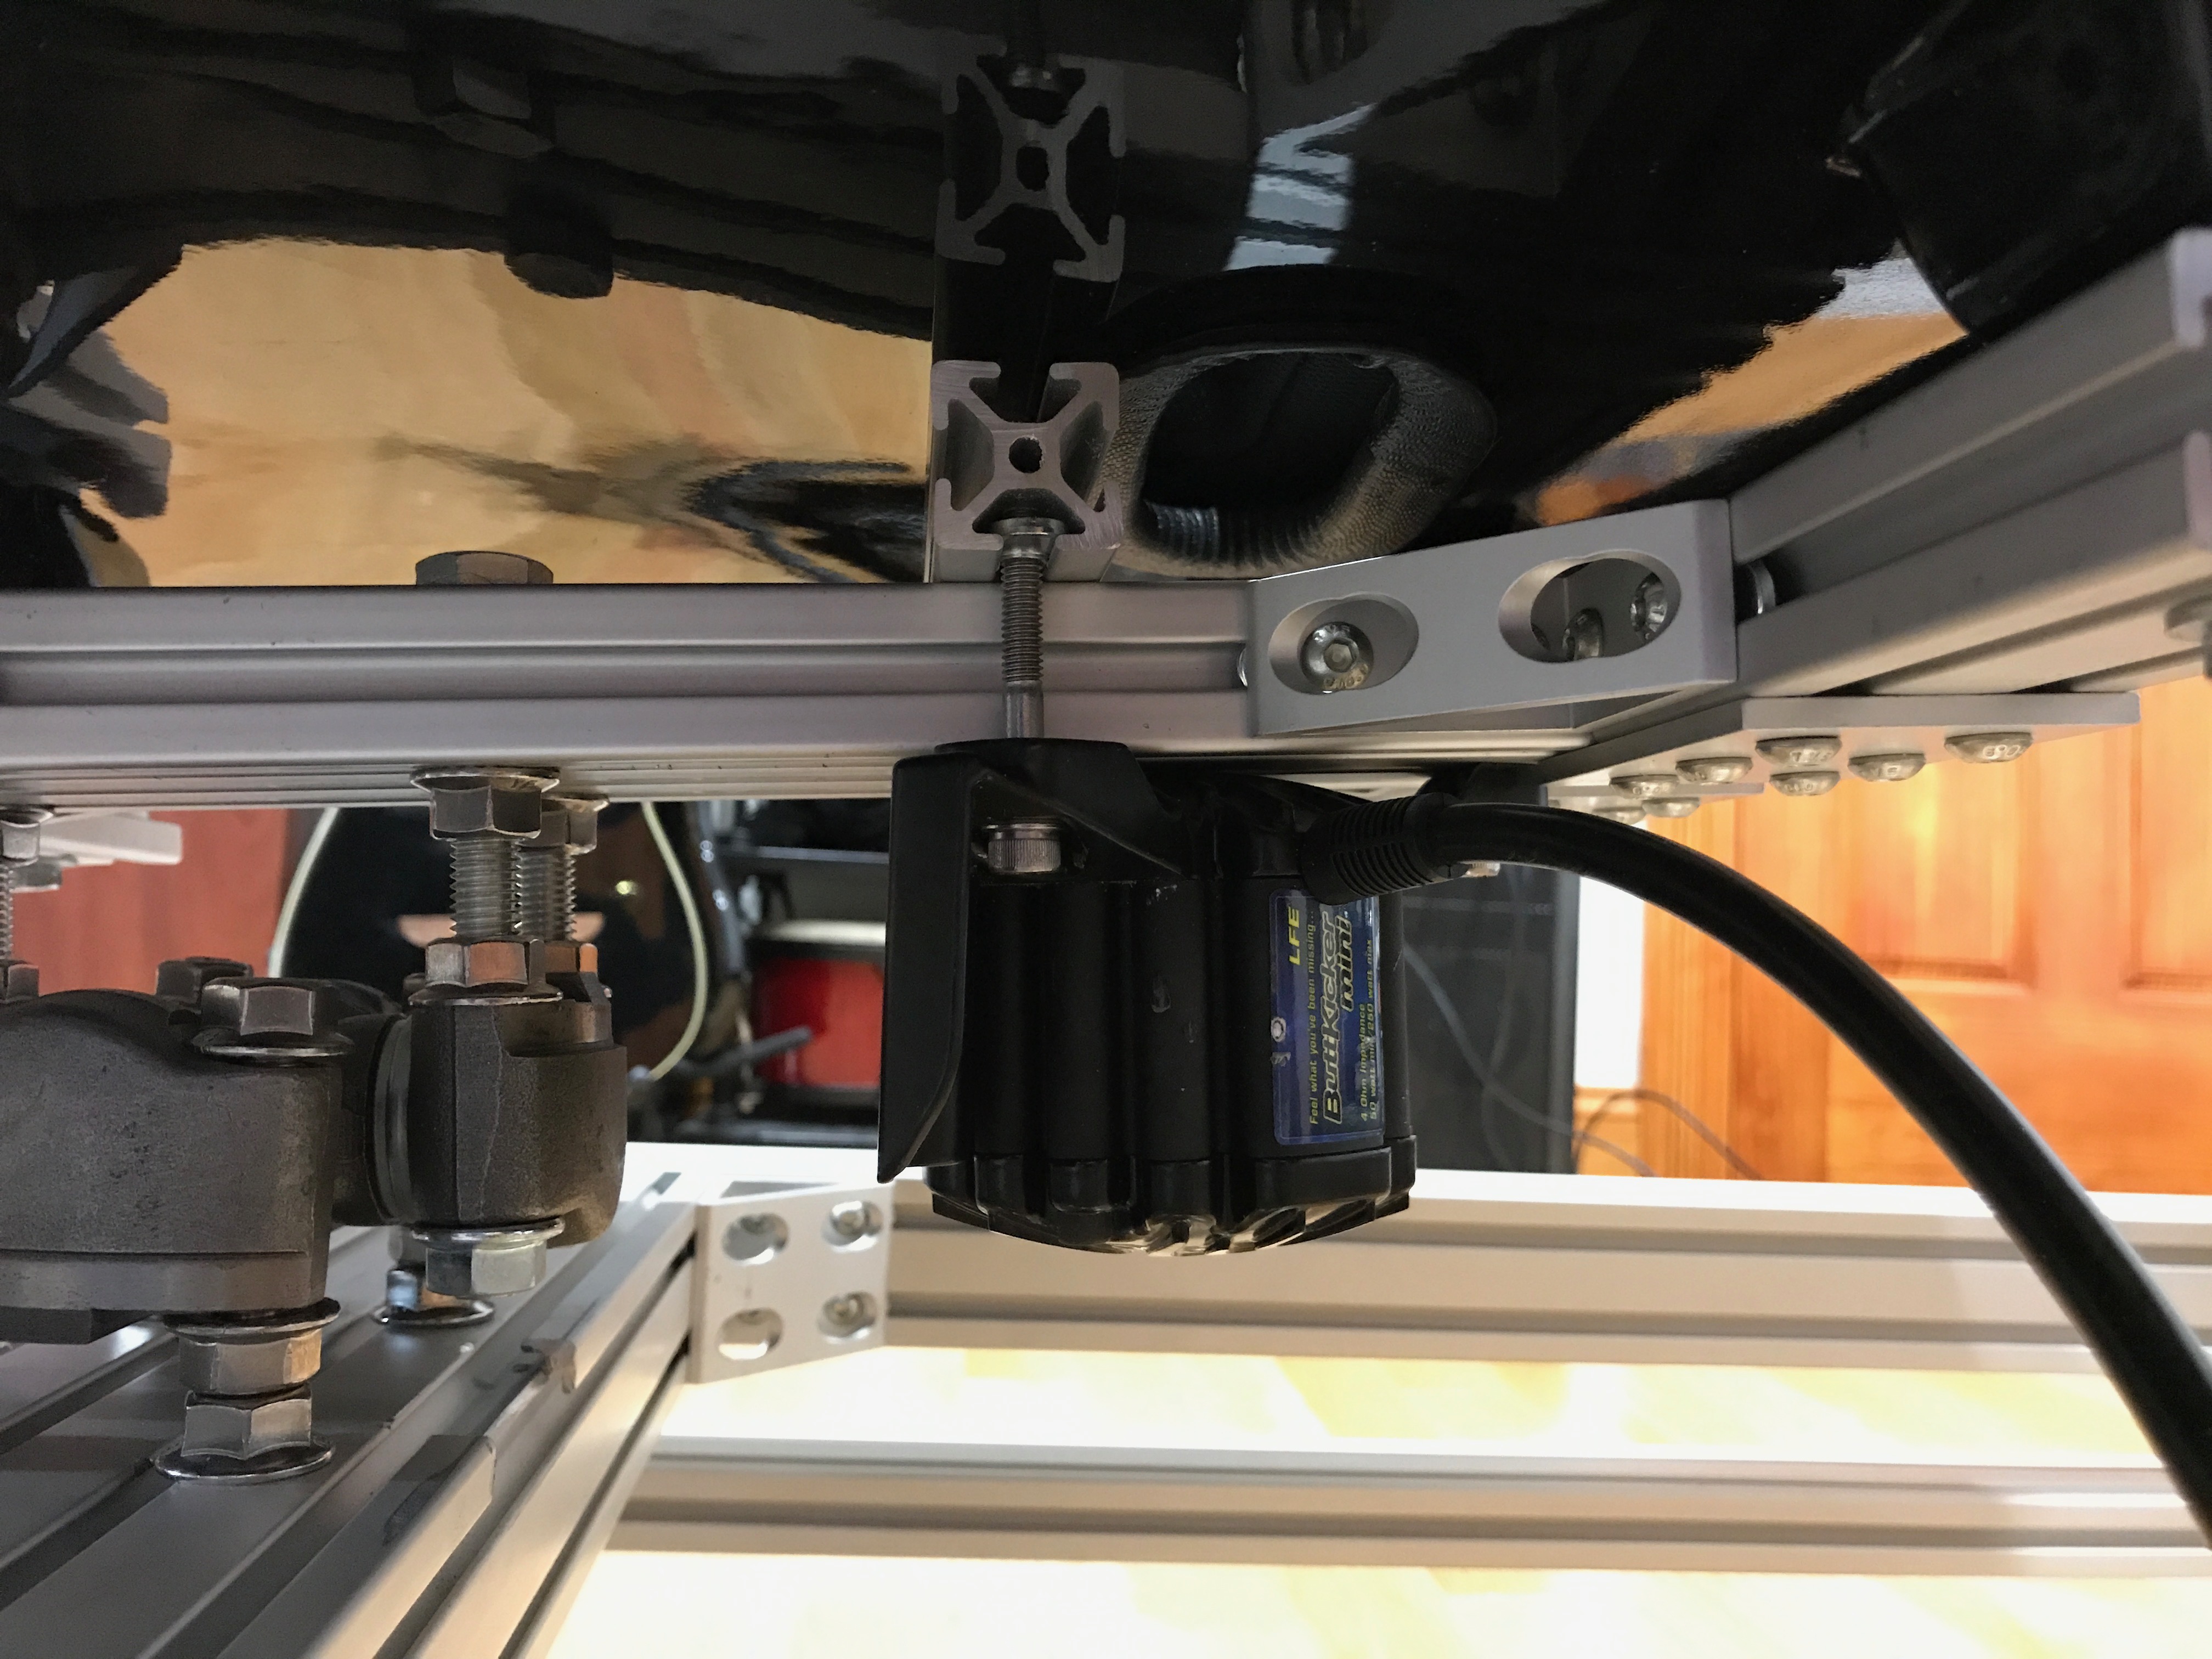\n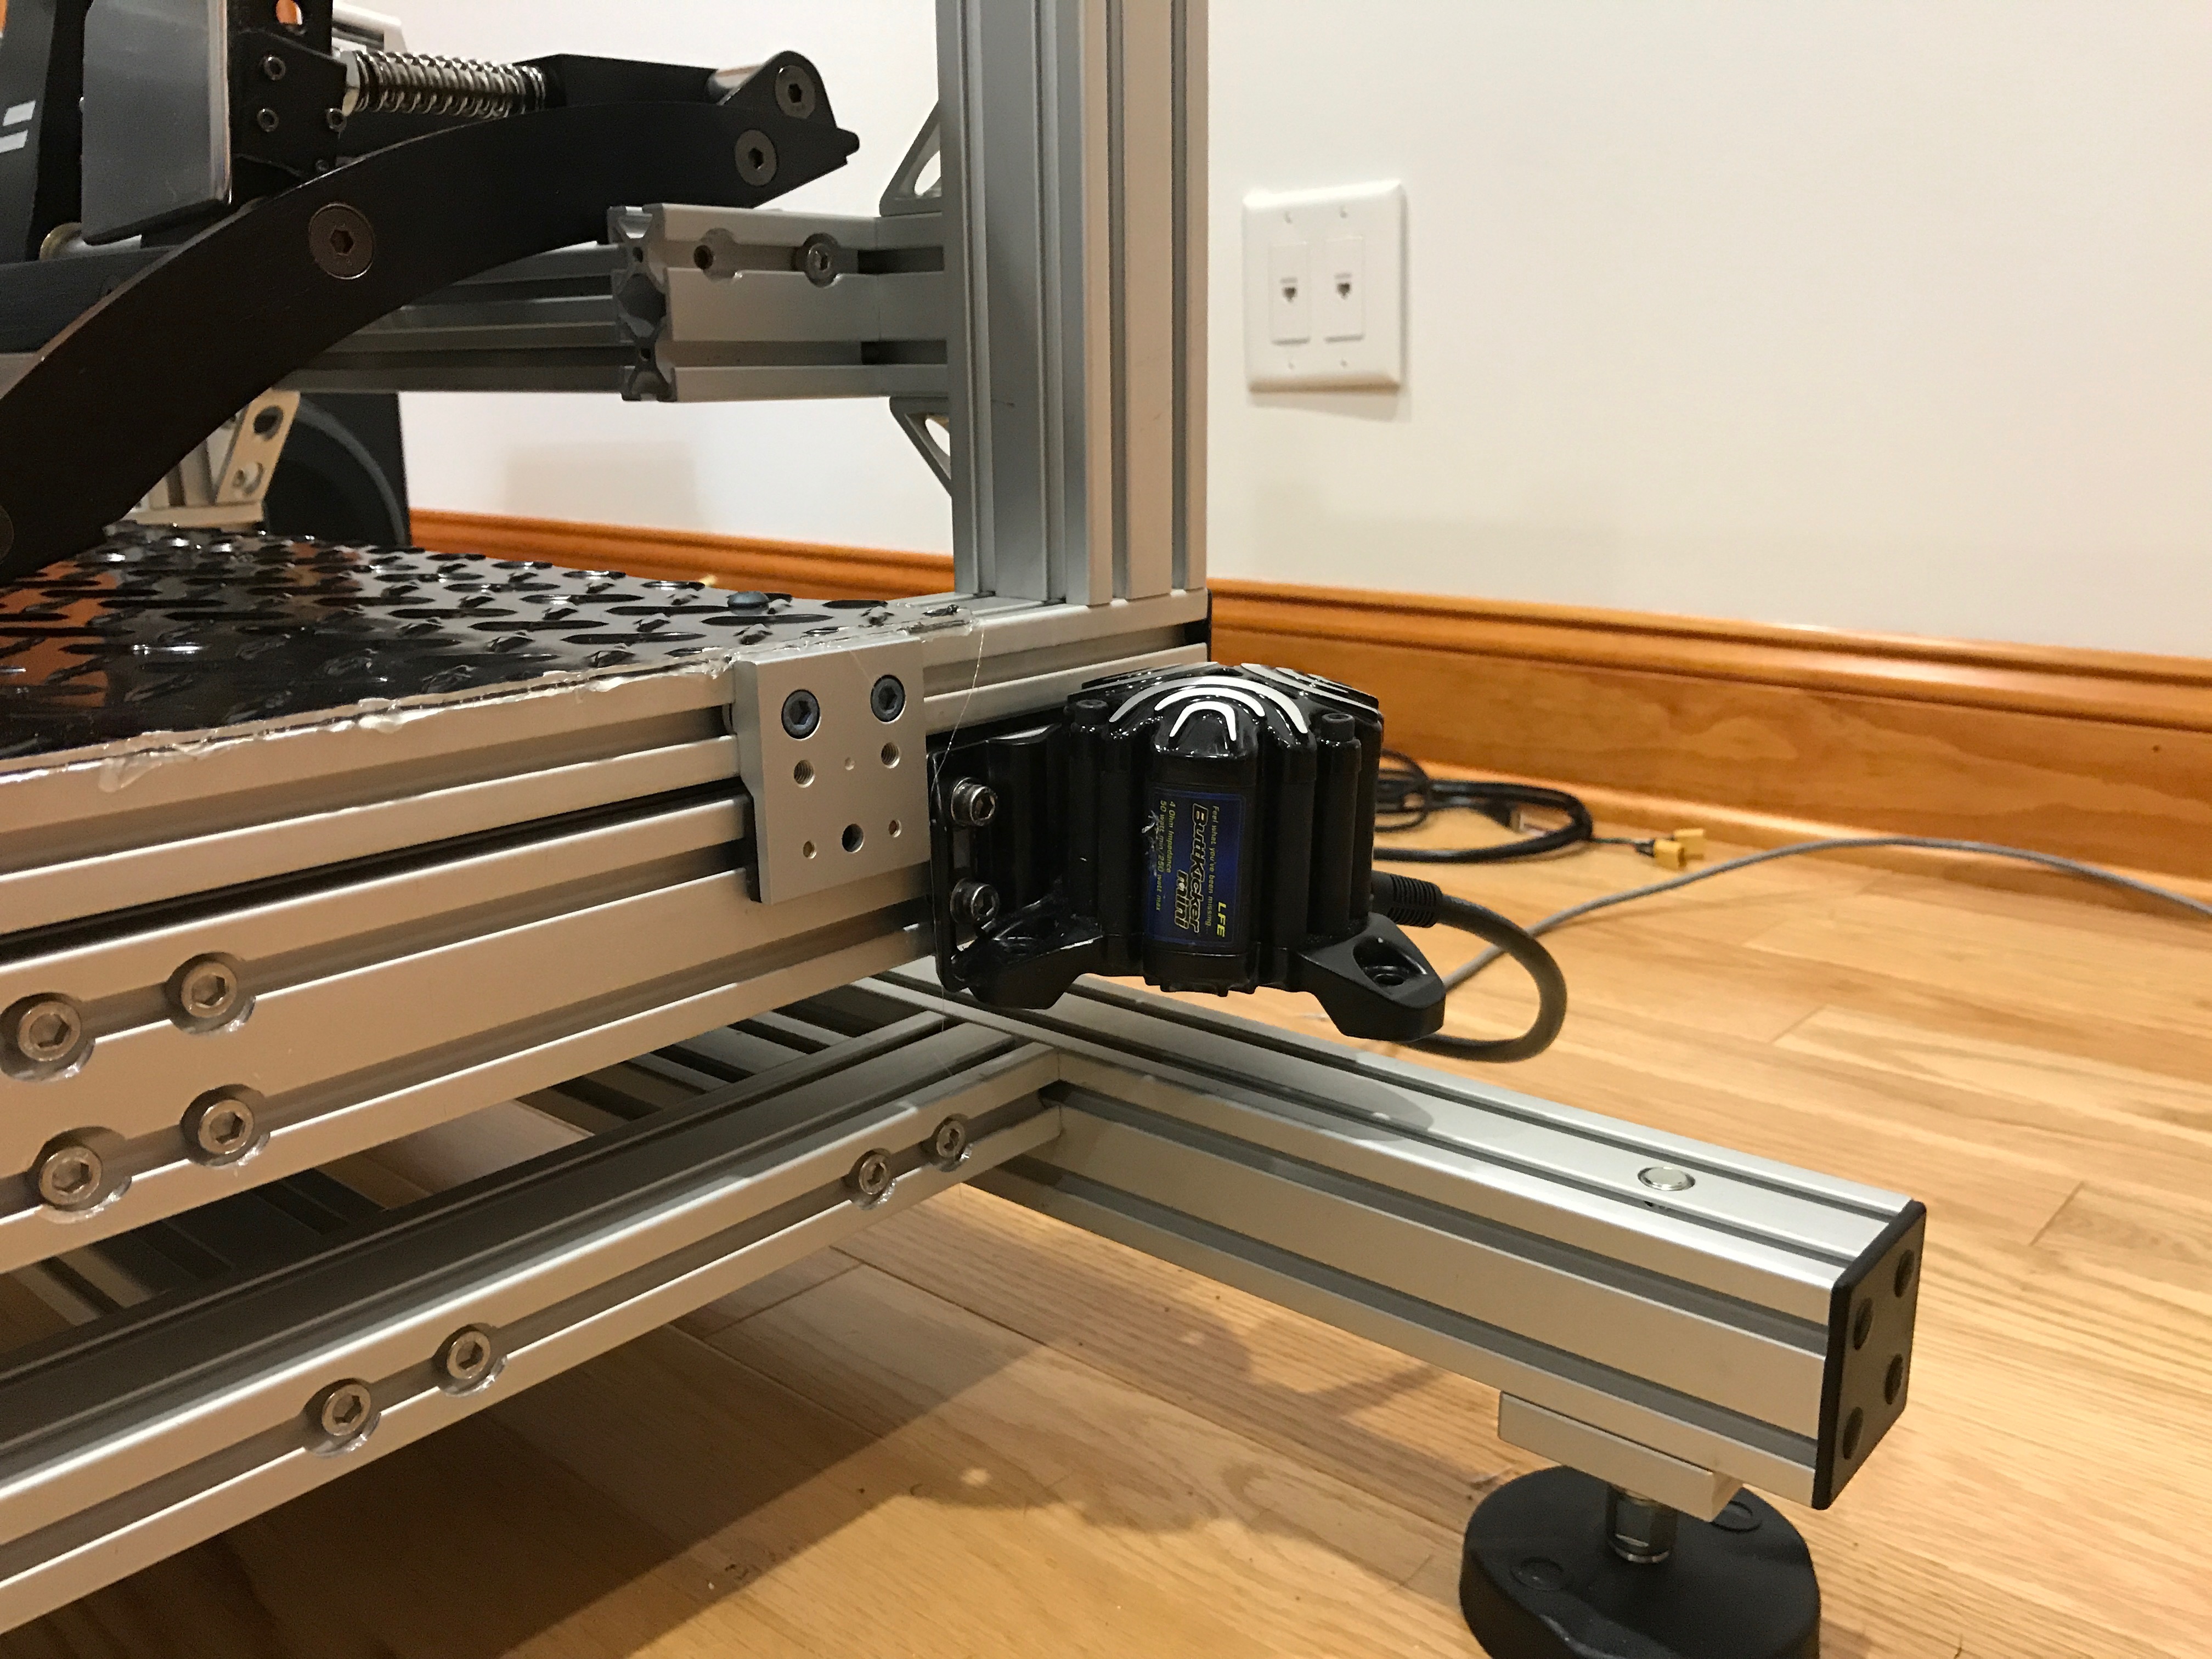\n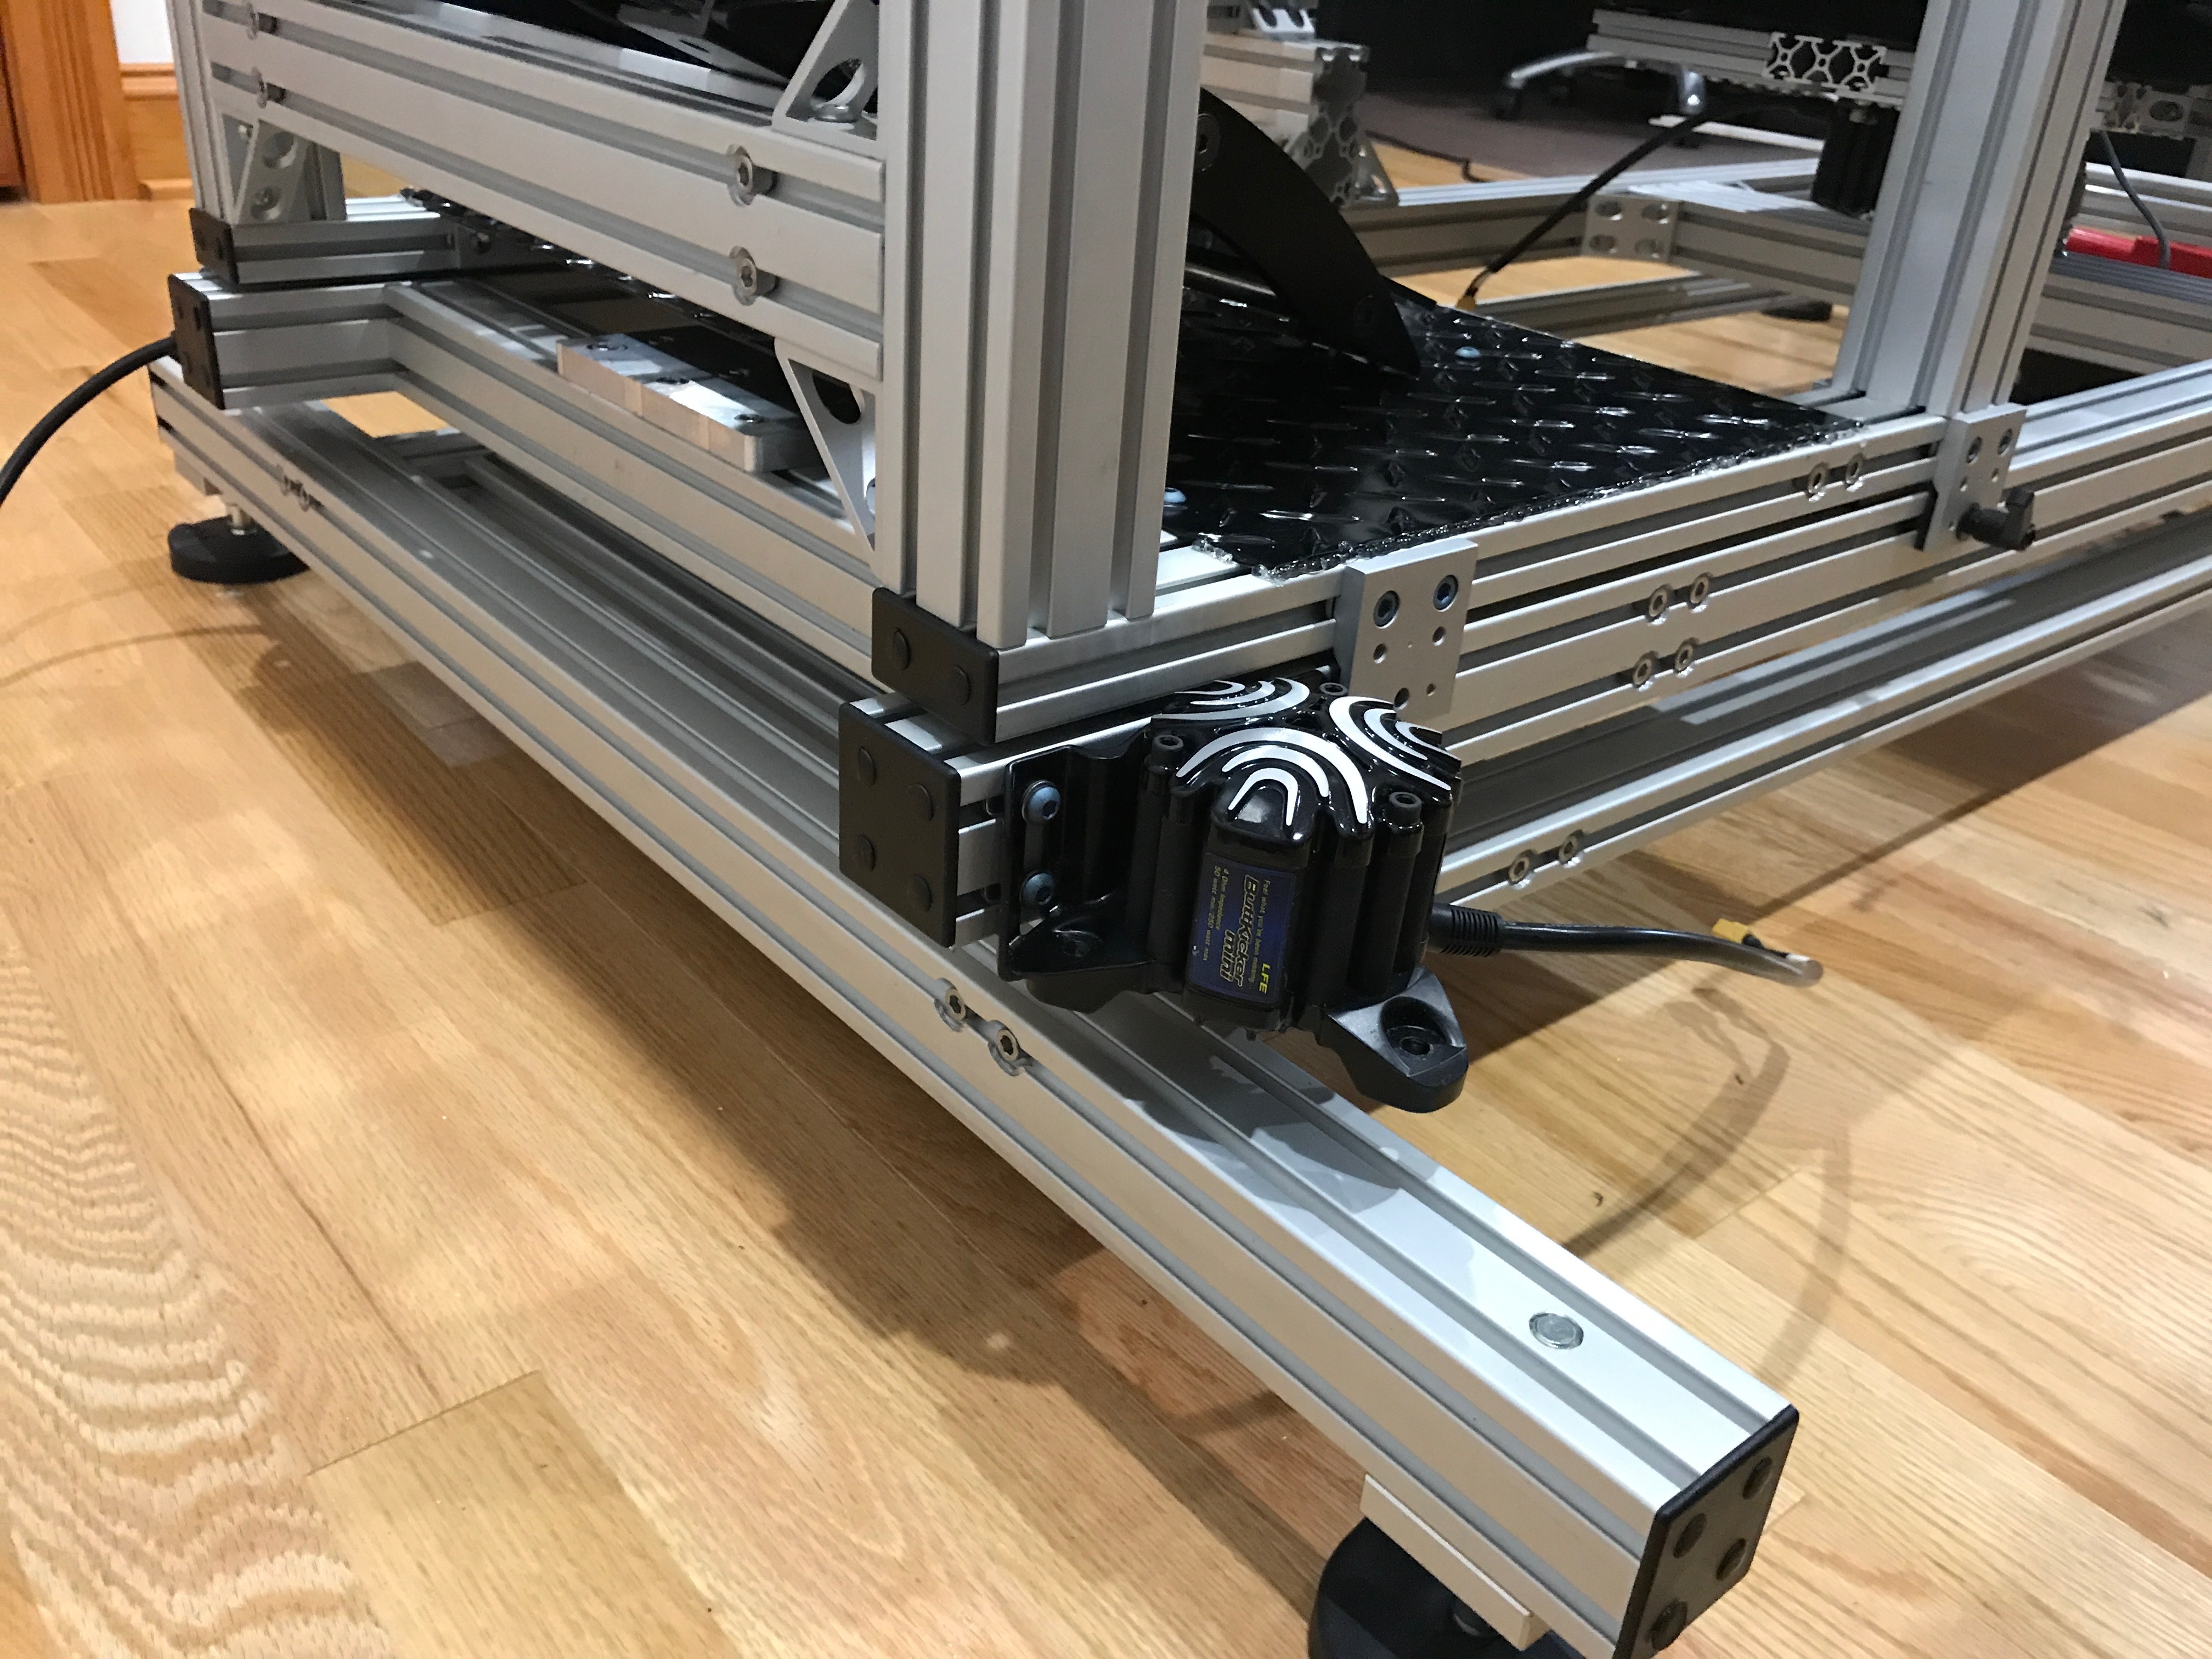\n\nThe final finishing parts came in from [80/20 Inc](https://8020.net): some HDPE for the backend to roll on, plastic end caps, and cable management mounts. I had to make a few minor adjustments to things, but in the end it all came together nicely!\n\n\n\n\n\n\n\nHere is the first video of the new rig in action. This is me playing Assetto Corsa in VR.\n\n\u003ciframe width=\"560\" height=\"315\" src=\"https://www.youtube.com/embed/-HftO5CsJCQ\" frameborder=\"0\" allowfullscreen\u003e\u003c/iframe\u003e\n\n\n----\n\n#### Update 6/25/2017: 4 point racing harness.\n\n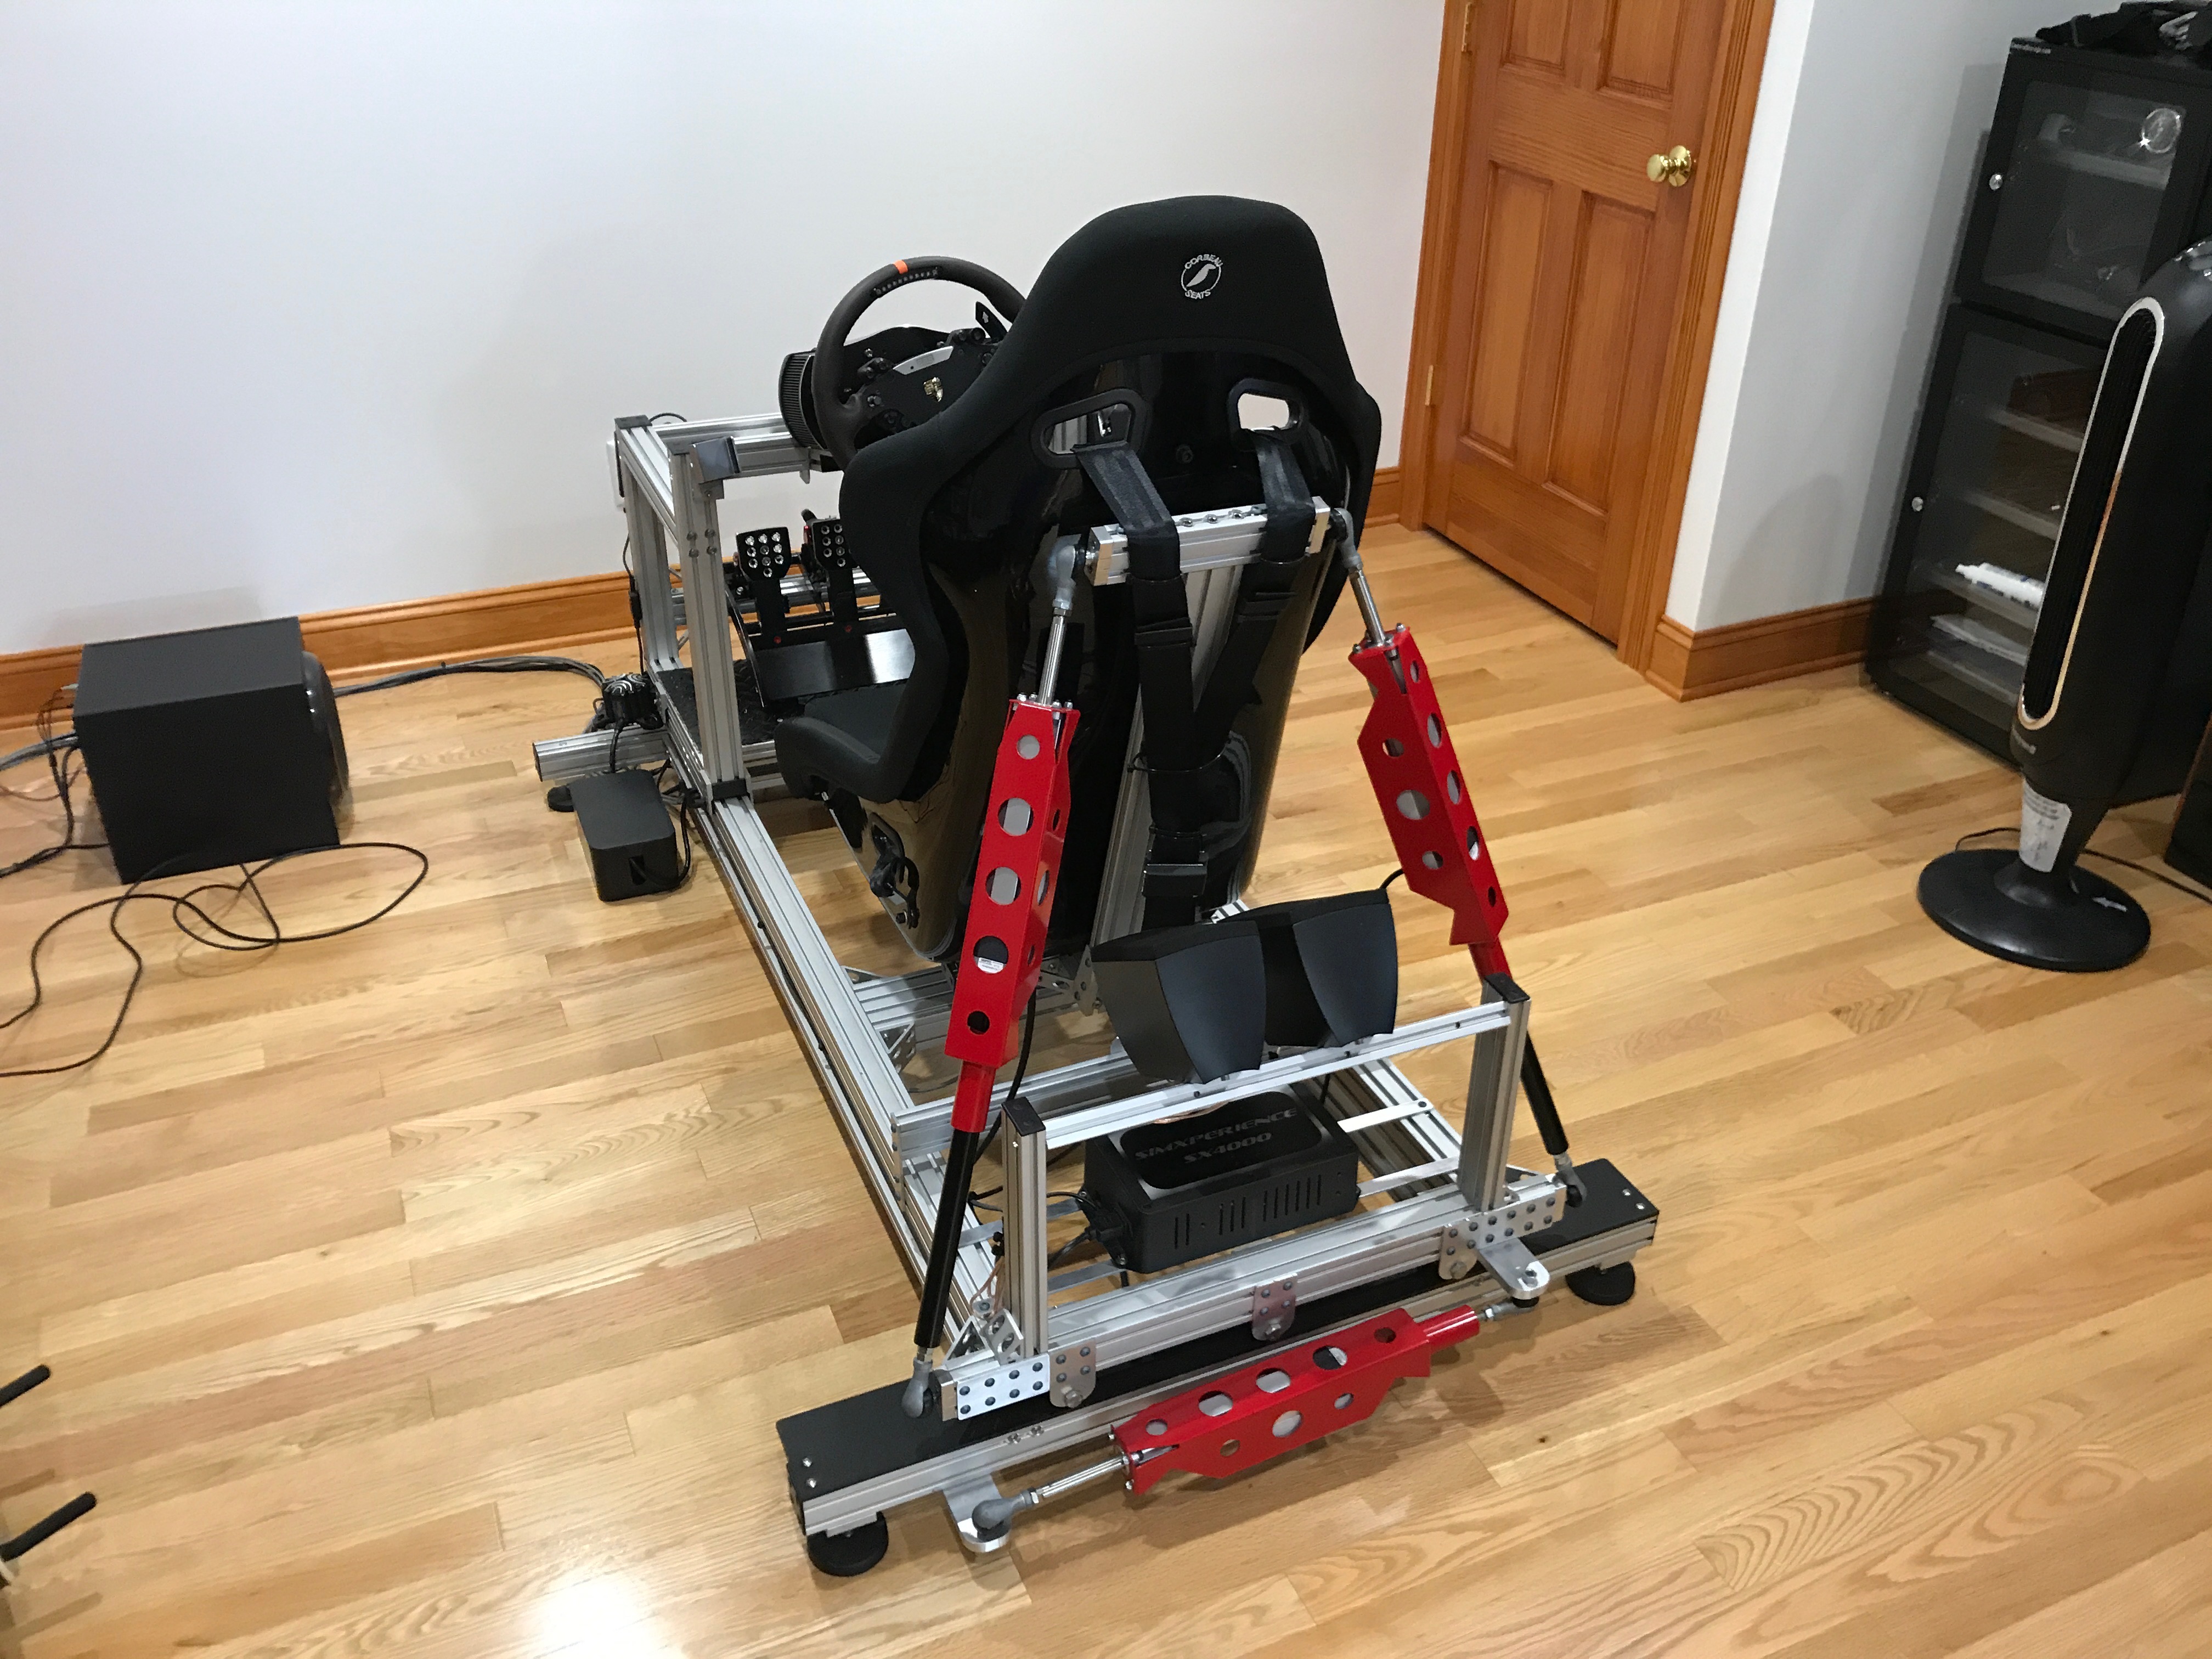\n\nI decided that I needed a racing harness to add to the realism in VR. The harness is mounted to the mid frame with some spring tensioning. When you brake, the seat moves forward, but the harness stays in place, so you feel as if you are being held back by the harness, as you would in a real car. Its a really great experience.\n\n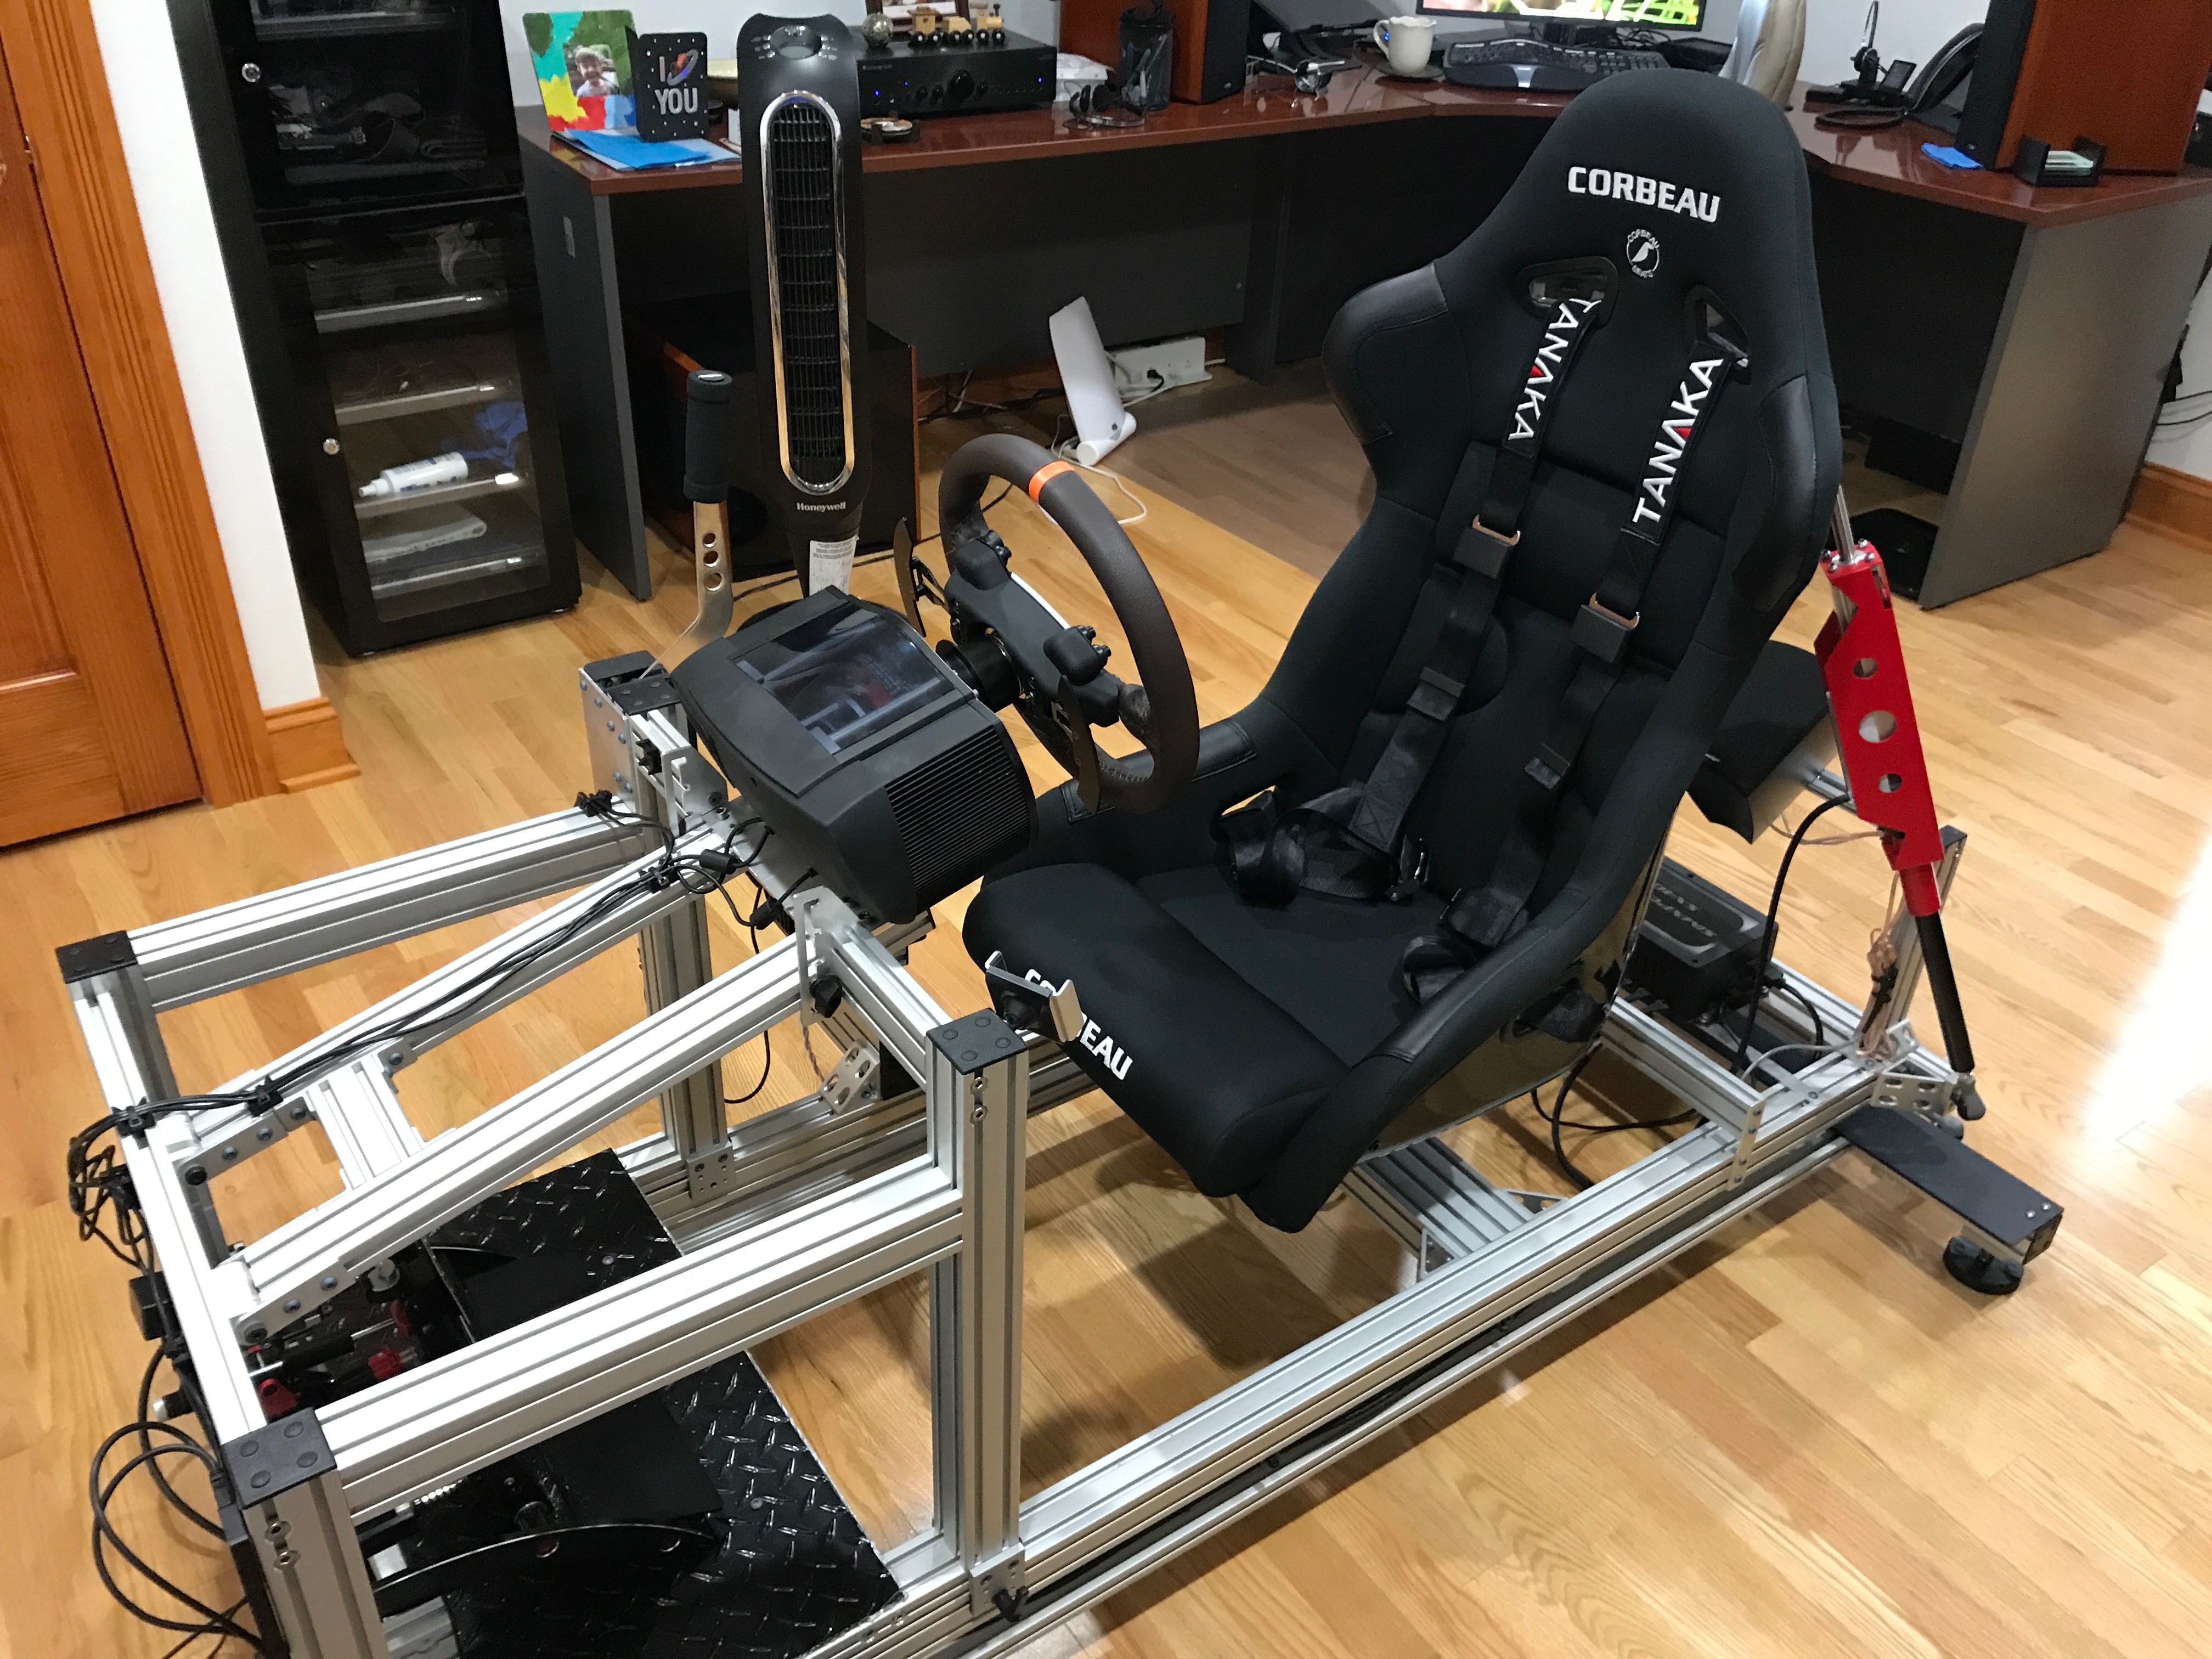\n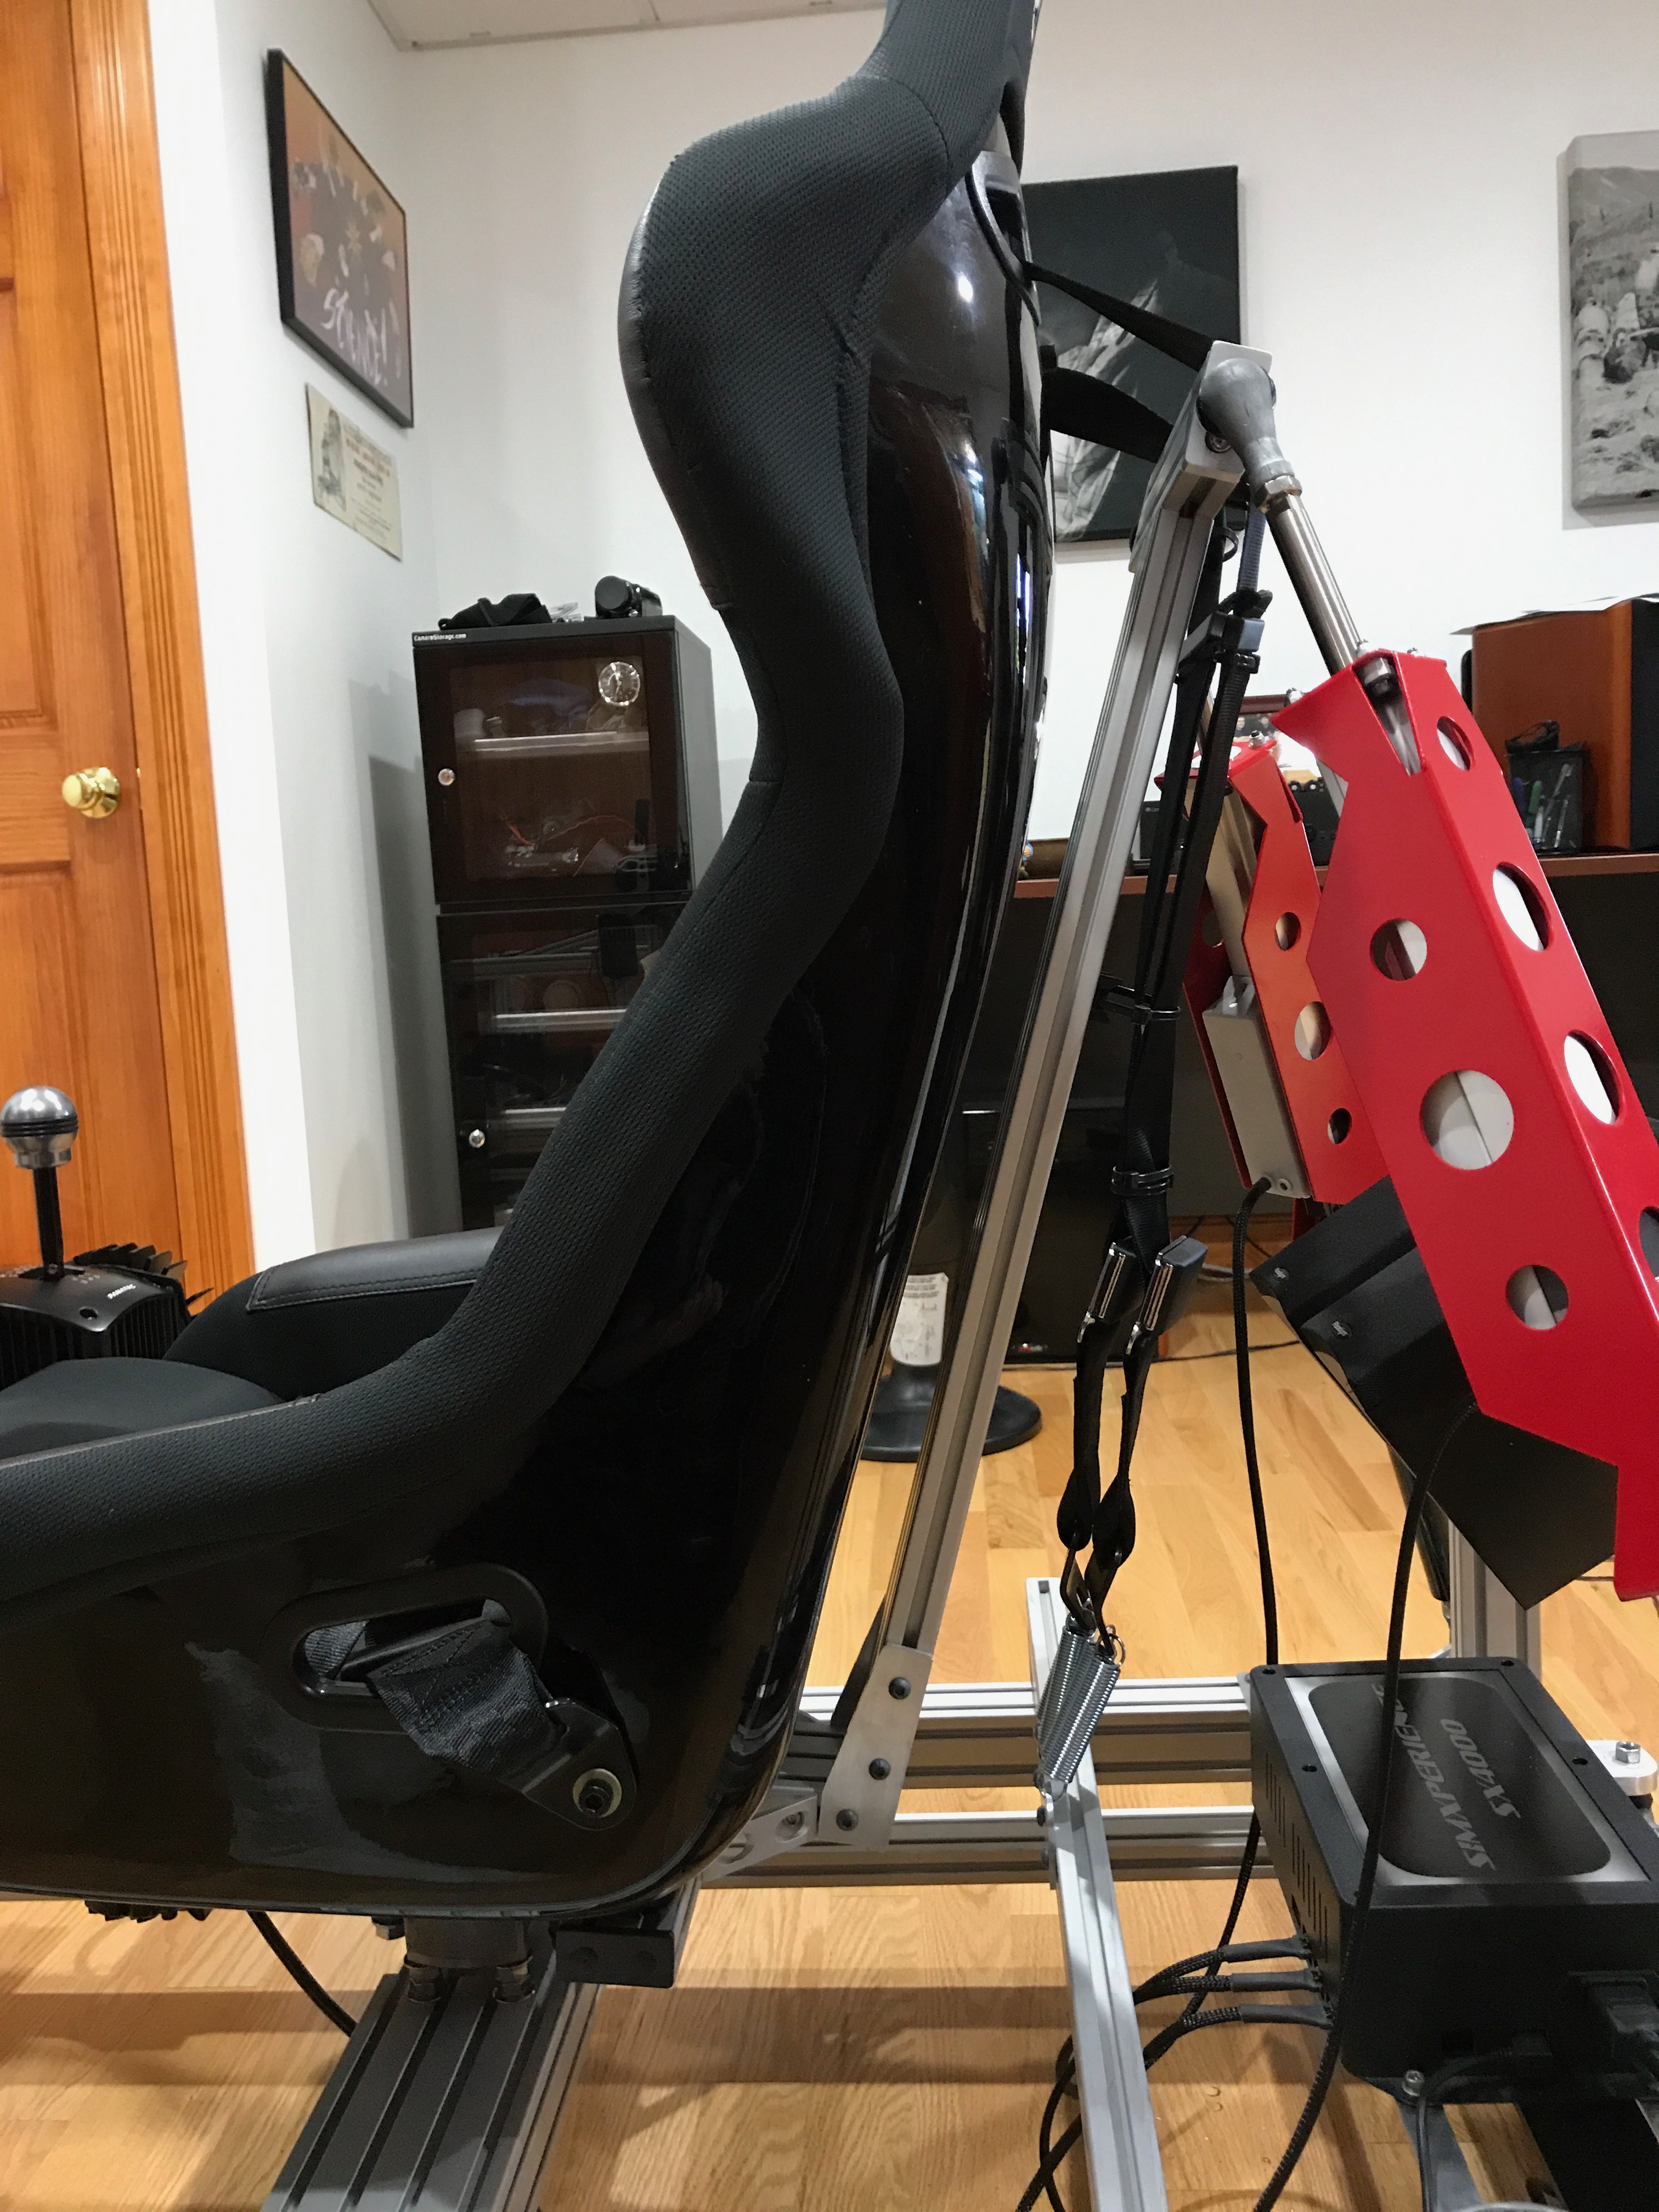\n\nI CNCed a small bracket to mount the springs to the 80/20. The other side of the springs went on to the harness rear mounts, and the harness side mounts went directly on to the seat side brackets.\n\n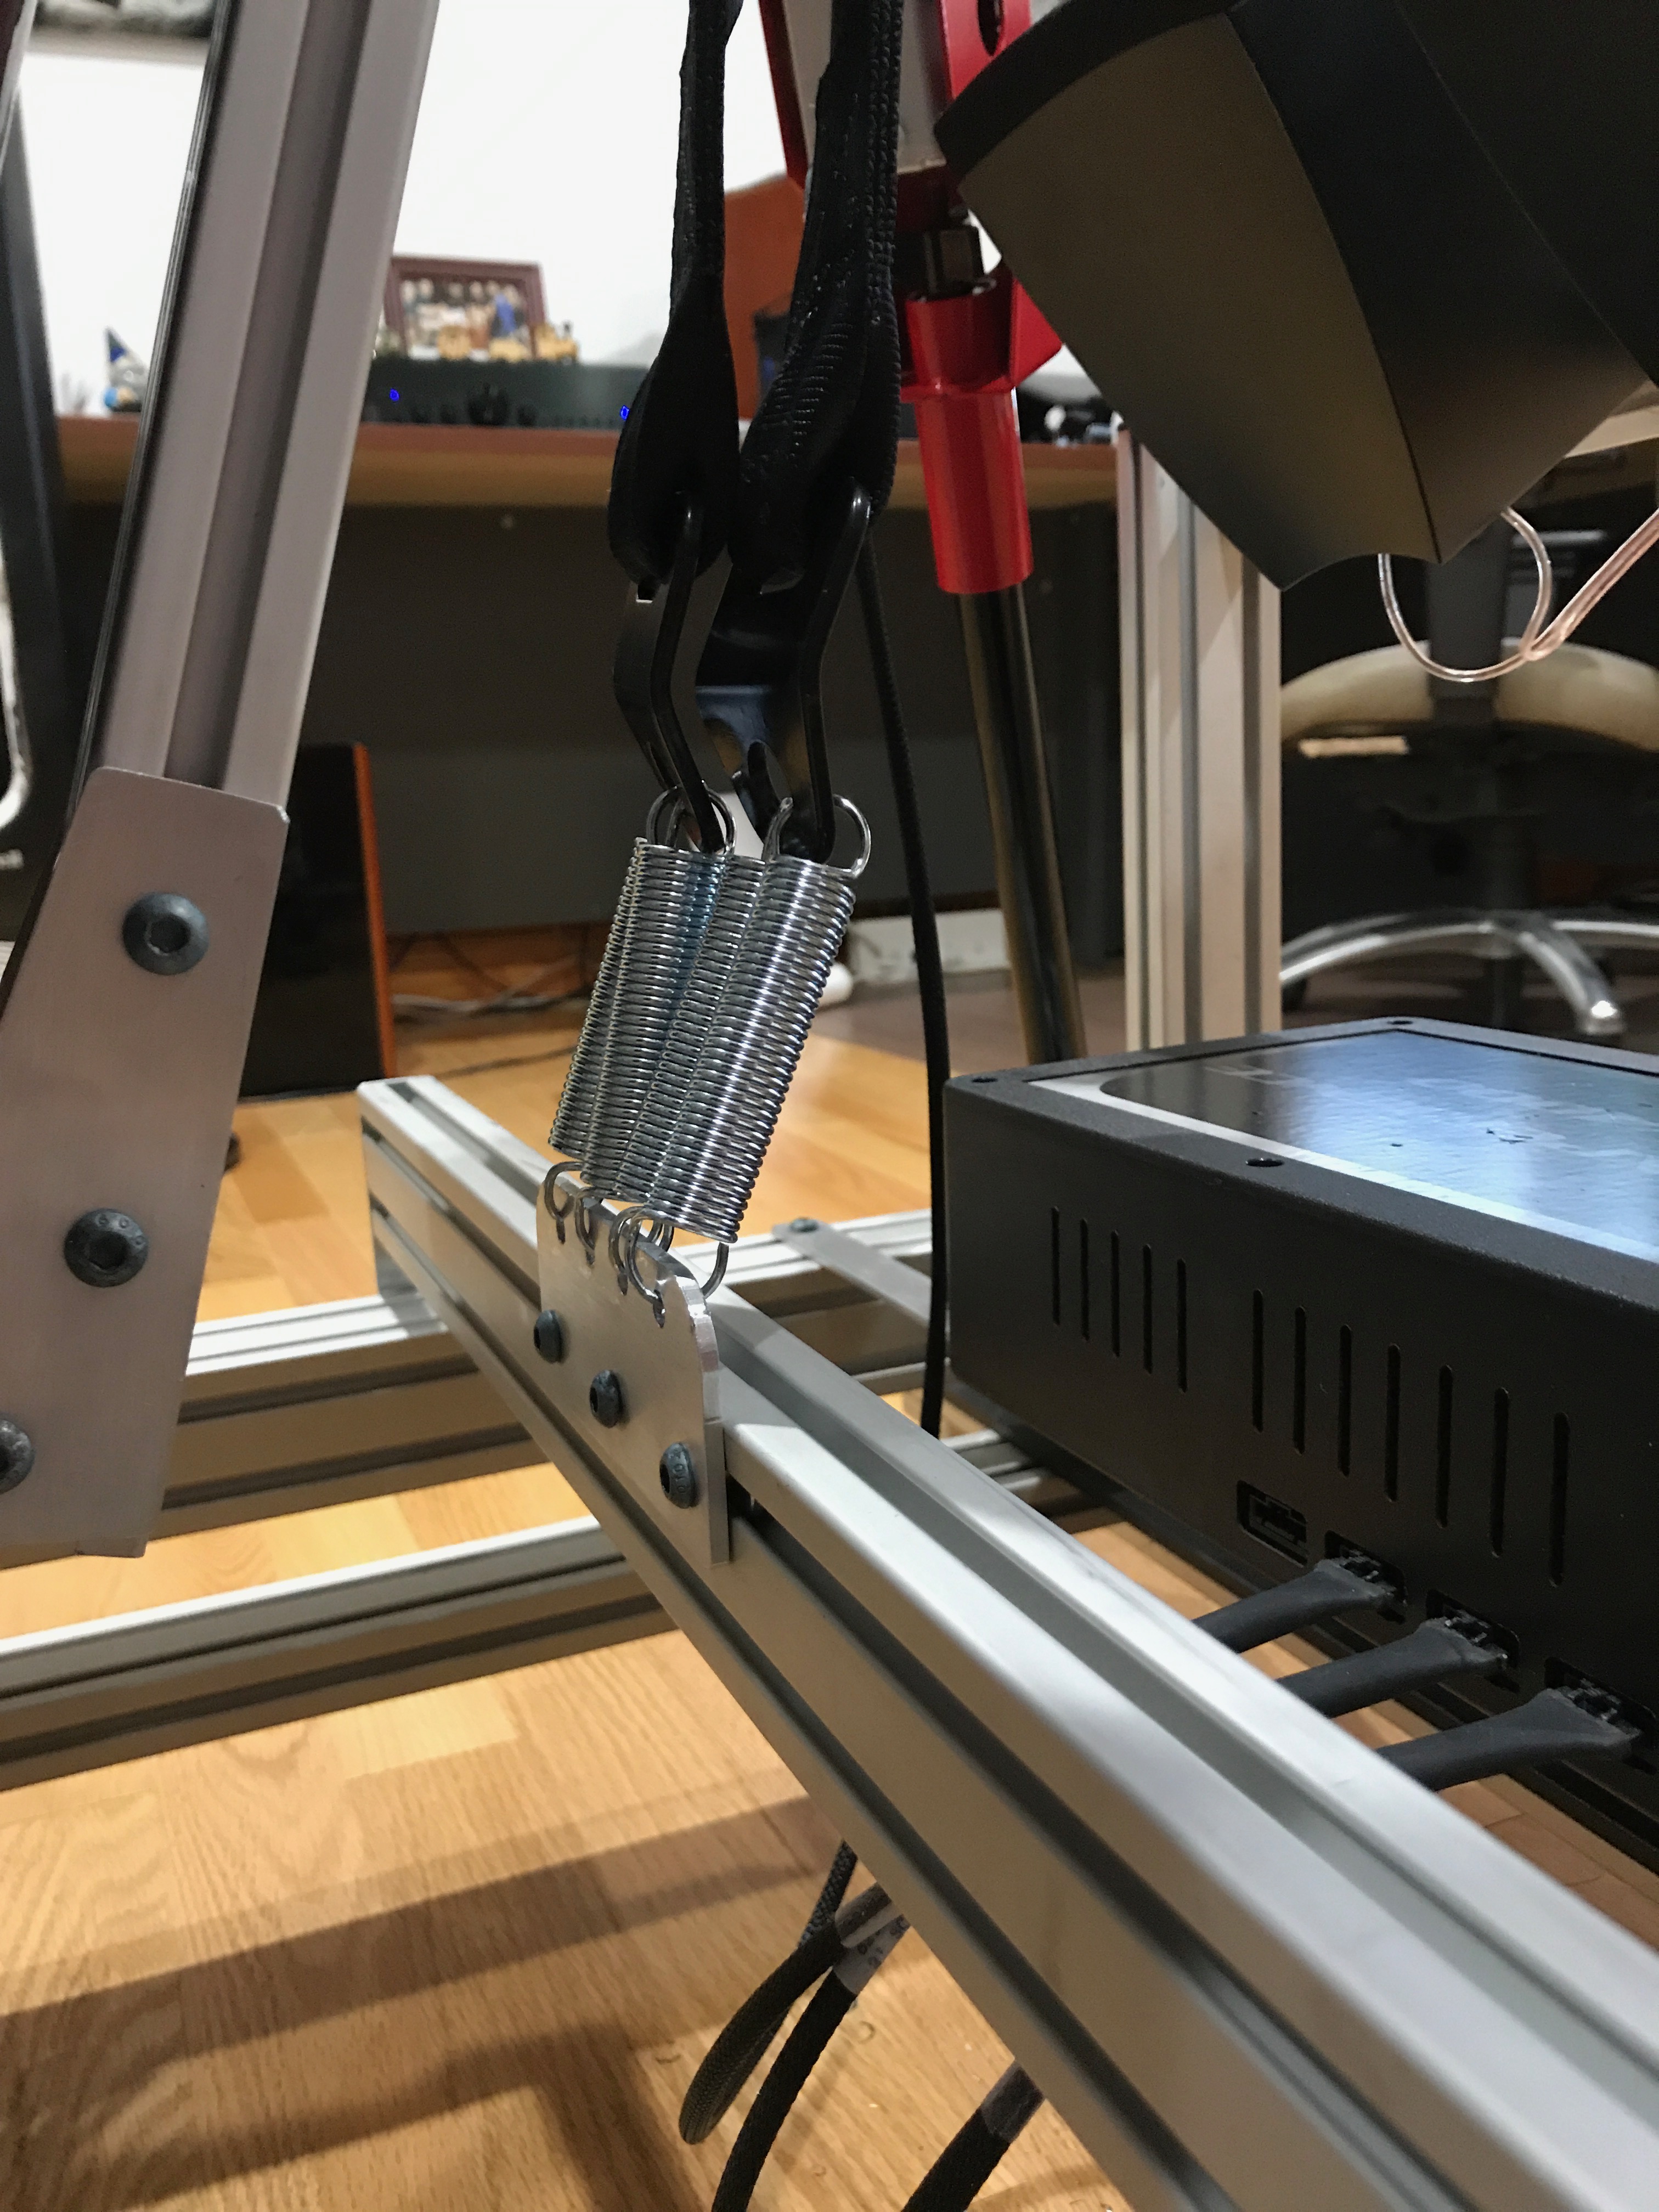","html":"\u003cp\u003eI have really enjoyed having a motion simulator platform for sim racing. It\u0026#39;s fairly close to real world racing, but costs a LOT less money, and there isn\u0026#39;t that risk of serious injury, or death ☠️\u003c/p\u003e\n\u003cp\u003eI started down this path almost 3 years ago, and with the Oculus Rift bringing VR in to the picture, I am truly hooked.\u003c/p\u003e\n\u003cp\u003eVersion 1 of the motion rig was thrown together using 80/20 extrusion that I already had, and it was pieced together without any real planning. One of the biggest drawbacks of version 1 was its inability to easily adjust for other drivers, especially my kids. There were a few other shortcomings: it was uncomfortable, it flexed and squeaked, the rear traction loss wasn\u0026#39;t smooth, the rear speakers flopped around like crazy, and so on...\u003c/p\u003e\n\u003cimg src=\"/content/images/2017/06/IMG_0349.jpg\" alt=\"\"\u003e\n\u003cp\u003eI decided to spend a little while thinking about how to best resolve the big issues, and turned to Fusion360 to design a quick mockup of the main features.\u003c/p\u003e\n\u003cp align=\"center\"\u003e\n\u003cimg src=\"/content/images/2017/06/IMG_0607.JPG\" alt=\"\"\u003e\n\u003c/p\u003e\n\u003cp\u003eThe new design became the basis of what I ordered from \u003ca href=\"https://8020.net\" rel=\"nofollow\"\u003e80/20 Inc\u003c/a\u003e: Extrusion, linear movement components for the sliding top frame, and the hinges for the steering bracket.\u003c/p\u003e\n\u003cp\u003eOnce the extrusion arrived, I quickly mocked up how everything would fit together and came up with an implementation plan.\u003c/p\u003e\n\u003cimg src=\"/content/images/2017/06/IMG_0855.jpg\" alt=\"\"\u003e\n\u003cimg src=\"/content/images/2017/06/IMG_0856.jpg\" alt=\"\"\u003e\n\u003cp\u003eStarting with the lower frame, I came up with a process of thread tapping, drilling, and milling to piece everything together.\u003c/p\u003e\n\u003cimg src=\"/content/images/2017/06/IMG_0876.JPG\" alt=\"\"\u003e\n\u003cimg src=\"/content/images/2017/06/IMG_0877.jpg\" alt=\"\"\u003e\n\u003cp\u003eUsing a mill bit in my drill press, I was able to notch out the recesses so that the bolt heads sat flush to the edge of the extrusion.\u003c/p\u003e\n\u003cimg src=\"/content/images/2017/06/IMG_0881.jpg\" alt=\"\"\u003e\n\u003cimg src=\"/content/images/2017/06/IMG_0880.jpg\" alt=\"\"\u003e\n\u003cp\u003eThis worked out nicely, although my drill press was a little too loose to provide the most accurate cutting. The drill shaft moved all over the place, leaving some of the recesses a little out of alignment.\u003c/p\u003e\n\u003cp\u003eNext was building the mid frame joint. The lower and mid frames were attached together using a GM wheel hub that I picked up on eBay for $20 shipped.\u003c/p\u003e\n\u003cimg src=\"/content/images/2017/06/IMG_0879.jpg\" alt=\"\"\u003e\n\u003cimg src=\"/content/images/2017/06/IMG_0886.jpg\" alt=\"\"\u003e\n\u003cp\u003eI designed this in Fusion360 and milled it using the CNC that I built.\u003c/p\u003e\n\u003cimg src=\"/content/images/2017/06/IMG_0888.JPG\" alt=\"\"\u003e\n\u003cimg src=\"/content/images/2017/06/IMG_0890.jpg\" alt=\"\"\u003e\n\u003cimg src=\"/content/images/2017/06/IMG_0891.JPG\" alt=\"\"\u003e\n\u003cp\u003eOnce that was done, I was able to thread tap the extrusion for the mid frame and pre-assemble it.\u003c/p\u003e\n\u003cimg src=\"/content/images/2017/06/IMG_0892.jpg\" alt=\"\"\u003e\n\u003cimg src=\"/content/images/2017/06/IMG_0894.jpg\" alt=\"\"\u003e\n\u003cp\u003eI then attached this section of the mid frame to the lower frame. I used long threaded bolts so that I could adjust the height that the mid frame sat on the lower frame.\u003c/p\u003e\n\u003cimg src=\"/content/images/2017/06/IMG_0895.jpg\" alt=\"\"\u003e\n\u003cimg src=\"/content/images/2017/06/IMG_0897.jpg\" alt=\"\"\u003e\n\u003cimg src=\"/content/images/2017/06/IMG_0900.jpg\" alt=\"\"\u003e\n\u003cimg src=\"/content/images/2017/06/IMG_0902.jpg\" alt=\"\"\u003e\n\u003cimg src=\"/content/images/2017/06/IMG_0903.jpg\" alt=\"\"\u003e\n\u003cp\u003eThe top frame was then mocked up. The top frame sits on linear sliders to allow it to slide back and forward. This was the biggest improvement over version 1.\u003c/p\u003e\n\u003cimg src=\"/content/images/2017/06/IMG_0912.jpg\" alt=\"\"\u003e\n\u003cimg src=\"/content/images/2017/06/IMG_0917.jpg\" alt=\"\"\u003e\n\u003cp\u003eThere was a lot of drilling and thread tapping to get all the pieces of the top frame together.\u003c/p\u003e\n\u003cimg src=\"/content/images/2017/06/IMG_0920.jpg\" alt=\"\"\u003e\n\u003cimg src=\"/content/images/2017/06/IMG_0930.jpg\" alt=\"\"\u003e\n\u003cimg src=\"/content/images/2017/06/IMG_0931.jpg\" alt=\"\"\u003e\n\u003cimg src=\"/content/images/2017/06/IMG_0936.jpg\" alt=\"\"\u003e\n\u003cp\u003eI pieced together a seat mount using 80/20, rather than using the SimXperience DIY seat kit that I had for version 1. I did this so that I could get the seat sitting lower in the frame.\u003c/p\u003e\n\u003cimg src=\"/content/images/2017/06/IMG_0941.jpg\" alt=\"\"\u003e\n\u003cimg src=\"/content/images/2017/06/IMG_0946.jpg\" alt=\"\"\u003e\n\u003cp\u003eI found a great universal joint on eBay for $30. With this wing style U-Joint, I had a lot more flexibility with how I mounted things. I had to make a quick and dirty jig to get the hole spacing correct as the holes ended up being right along the edge of an extrusion.\u003c/p\u003e\n\u003cimg src=\"/content/images/2017/06/IMG_0944.jpg\" alt=\"\"\u003e\n\u003cimg src=\"/content/images/2017/06/IMG_0947.jpg\" alt=\"\"\u003e\n\u003cimg src=\"/content/images/2017/06/IMG_0949.jpg\" alt=\"\"\u003e\n\u003cp\u003eI also had to notch out part of the extrusion on the mid frame to allow the U-Joint bolts to sit down further at the extreme angles.\u003c/p\u003e\n\u003cimg src=\"/content/images/2017/06/IMG_0950.jpg\" alt=\"\"\u003e\n\u003cimg src=\"/content/images/2017/06/IMG_0951.jpg\" alt=\"\"\u003e\n\u003cimg src=\"/content/images/2017/06/IMG_0952.jpg\" alt=\"\"\u003e\n\u003cimg src=\"/content/images/2017/06/IMG_0953.jpg\" alt=\"\"\u003e\n\u003cp\u003eWith the seat mounted, I then focused on the rear rollers for the traction loss mechanism. These rollers ultimately set the height of the mid frame from the lower frame. I designed the brackets in Fusion360 and milled them on my CNC.\u003c/p\u003e\n\u003cimg src=\"/content/images/2017/06/IMG_0988.jpg\" alt=\"\"\u003e\n\u003cp\u003eI used track rollers that I found on eBay. They were called LR200NPPU Track Roller Double Row Bearing Sealed 10x32x9 Track Bearings 18165. I got 4 for $20.\u003c/p\u003e\n\u003cimg src=\"/content/images/2017/06/IMG_0986.jpg\" alt=\"\"\u003e\n\u003cimg src=\"/content/images/2017/06/IMG_0992.jpg\" alt=\"\"\u003e\n\u003cimg src=\"/content/images/2017/06/IMG_0993.jpg\" alt=\"\"\u003e\n\u003cimg src=\"/content/images/2017/06/IMG_0994.jpg\" alt=\"\"\u003e\n\u003cp\u003eI then mounted them on the cross member of the mid frame.\u003c/p\u003e\n\u003cimg src=\"/content/images/2017/06/IMG_0995.jpg\" alt=\"\"\u003e\n\u003cimg src=\"/content/images/2017/06/IMG_0996.jpg\" alt=\"\"\u003e\n\u003cimg src=\"/content/images/2017/06/IMG_0997.jpg\" alt=\"\"\u003e\n\u003cp\u003eWith the mid frame leveled, I went back to the seat to mount the actuator mount bracket. This was tricky. I had to notch and drill at an angle in the extrusion (98 degrees).\u003c/p\u003e\n\u003cimg src=\"/content/images/2017/06/IMG_1007.jpg\" alt=\"\"\u003e\n\u003cp\u003eI then designed and fabricated some side support brackets to help relieve the 3 bolts that went into the base extrusion on the seat.\u003c/p\u003e\n\u003cimg src=\"/content/images/2017/06/IMG_1011.jpg\" alt=\"\"\u003e\n\u003cimg src=\"/content/images/2017/06/IMG_1012.jpg\" alt=\"\"\u003e\n\u003cimg src=\"/content/images/2017/06/IMG_1013.jpg\" alt=\"\"\u003e\n\u003cp\u003eI had to design and fabricate end caps for the extrusion that would allow me to thread tap for the actuators. This was the thickest aluminum stock that I had milled on my CNC at the time. Everything went ok-ish... Mid job the x-axis coupler came loose and the CNC started to dig into the piece. I was able to stop it and recover the job without any major damage.\u003c/p\u003e\n\u003cimg src=\"/content/images/2017/06/IMG_1015.jpg\" alt=\"\"\u003e\n\u003cimg src=\"/content/images/2017/06/IMG_1016.jpg\" alt=\"\"\u003e\n\u003cimg src=\"/content/images/2017/06/IMG_1020.jpg\" alt=\"\"\u003e\n\u003cimg src=\"/content/images/2017/06/IMG_1023.jpg\" alt=\"\"\u003e\n\u003cimg src=\"/content/images/2017/06/IMG_1027.jpg\" alt=\"\"\u003e\n\u003cimg src=\"/content/images/2017/06/IMG_1028.jpg\" alt=\"\"\u003e\n\u003cimg src=\"/content/images/2017/06/IMG_1029.jpg\" alt=\"\"\u003e\n\u003cimg src=\"/content/images/2017/06/IMG_1032.jpg\" alt=\"\"\u003e\n\u003cimg src=\"/content/images/2017/06/IMG_1033.jpg\" alt=\"\"\u003e\n\u003cimg src=\"/content/images/2017/06/IMG_1034.jpg\" alt=\"\"\u003e\n\u003cimg src=\"/content/images/2017/06/IMG_1035.jpg\" alt=\"\"\u003e\n\u003cp\u003eThe rear traction loss actuator needed a pair of brackets. Again, designed in Fusion360, then milled on my CNC.\u003c/p\u003e\n\u003cp align=\"center\"\u003e\n\u003cimg src=\"/content/images/2017/06/IMG_1044.JPG\" alt=\"\"\u003e\n\u003c/p\u003e\n\u003cimg src=\"/content/images/2017/06/IMG_1049.jpg\" alt=\"\"\u003e\n\u003cimg src=\"/content/images/2017/06/IMG_1046.jpg\" alt=\"\"\u003e\n\u003cimg src=\"/content/images/2017/06/IMG_1051.jpg\" alt=\"\"\u003e\n\u003cimg src=\"/content/images/2017/06/IMG_1052.jpg\" alt=\"\"\u003e\n\u003cimg src=\"/content/images/2017/06/IMG_1053.jpg\" alt=\"\"\u003e\n\u003cp\u003eI marked and drilled out the mounting plate for the steering wheel. This was just a piece of stock that I purchased from \u003ca href=\"https://8020.net\" rel=\"nofollow\"\u003e80/20 Inc\u003c/a\u003e.\u003c/p\u003e\n\u003cimg src=\"/content/images/2017/06/IMG_1037.jpg\" alt=\"\"\u003e\n\u003cp\u003eThen designed and milled the brackets for the steering height adjustment.\u003c/p\u003e\n\u003cimg src=\"/content/images/2017/06/IMG_1055.jpg\" alt=\"\"\u003e\n\u003cimg src=\"/content/images/2017/06/IMG_1056.jpg\" alt=\"\"\u003e\n\u003cimg src=\"/content/images/2017/06/IMG_1060.jpg\" alt=\"\"\u003e\n\u003cimg src=\"/content/images/2017/06/IMG_1061.jpg\" alt=\"\"\u003e\n\u003cp\u003eMounting the shifter and handbrake was pretty straight forward. I was able to use 80/20 components for the shifter and I re-used the version 1 handbrake mount with slight modification.\u003c/p\u003e\n\u003cimg src=\"/content/images/2017/06/IMG_1075.jpg\" alt=\"\"\u003e\n\u003cimg src=\"/content/images/2017/06/IMG_1076.jpg\" alt=\"\"\u003e\n\u003cimg src=\"/content/images/2017/06/IMG_1077.jpg\" alt=\"\"\u003e\n\u003cimg src=\"/content/images/2017/06/IMG_1079.jpg\" alt=\"\"\u003e\n\u003cp\u003eThe transducers mounted directly using 80/20 components.\u003c/p\u003e\n\u003cimg src=\"/content/images/2017/06/IMG_1080.jpg\" alt=\"\"\u003e\n\u003cimg src=\"/content/images/2017/06/IMG_1081.jpg\" alt=\"\"\u003e\n\u003cimg src=\"/content/images/2017/06/IMG_1082.jpg\" alt=\"\"\u003e\n\u003cimg src=\"/content/images/2017/06/IMG_1083.jpg\" alt=\"\"\u003e\n\u003cp\u003eThe final finishing parts came in from \u003ca href=\"https://8020.net\" rel=\"nofollow\"\u003e80/20 Inc\u003c/a\u003e: some HDPE for the backend to roll on, plastic end caps, and cable management mounts. I had to make a few minor adjustments to things, but in the end it all came together nicely!\u003c/p\u003e\n\u003cimg src=\"/content/images/2017/06/IMG_1135.jpg\" alt=\"\"\u003e\n\u003cimg src=\"/content/images/2017/06/IMG_1136-1.jpg\" alt=\"\"\u003e\n\u003cimg src=\"/content/images/2017/06/IMG_1137.jpg\" alt=\"\"\u003e\n\u003cimg src=\"/content/images/2017/06/IMG_1138.jpg\" alt=\"\"\u003e\n\u003cp\u003eHere is the first video of the new rig in action. This is me playing Assetto Corsa in VR.\u003c/p\u003e\n\u003ciframe width=\"560\" height=\"315\" src=\"https://www.youtube.com/embed/-HftO5CsJCQ\" frameborder=\"0\" allowfullscreen=\"\"\u003e\u003c/iframe\u003e\n\u003chr\u003e\n\u003ch4\u003eUpdate 6/25/2017: 4 point racing harness.\u003c/h4\u003e\n\u003cimg src=\"/content/images/2017/06/IMG_1243.jpg\" alt=\"\"\u003e\n\u003cp\u003eI decided that I needed a racing harness to add to the realism in VR. The harness is mounted to the mid frame with some spring tensioning. When you brake, the seat moves forward, but the harness stays in place, so you feel as if you are being held back by the harness, as you would in a real car. Its a really great experience.\u003c/p\u003e\n\u003cimg src=\"/content/images/2017/06/IMG_1244.jpg\" alt=\"\"\u003e\n\u003cimg src=\"/content/images/2017/06/IMG_1247.jpg\" alt=\"\"\u003e\n\u003cp\u003eI CNCed a small bracket to mount the springs to the 80/20. The other side of the springs went on to the harness rear mounts, and the harness side mounts went directly on to the seat side brackets.\u003c/p\u003e\n\u003cimg src=\"/content/images/2017/06/IMG_1246.jpg\" alt=\"\"\u003e","excerpt":"","metaTitle":"","metaDescription":"","status":"published","featured":false,"publishedAt":"2017-06-19T17:18:00Z","authorId":"190160de54f2192bd5b8734ec8808086","authorName":"Daniel Chote","authorSlug":"daniel","heroMediaId":"11d29d0c27b5c5d2beab0028e2225574","projectId":"","tags":[{"id":"ecaaace3f367d1a9865ae0933d53d715","name":"Sim Racing","slug":"sim-racing"},{"id":"9c4230a56ffd914aade79798824d9d23","name":"SimXperience","slug":"simxperience"},{"id":"ab4bc19e35909615ae7bc6a344a2b50a","name":"Motion Simulator","slug":"motion-simulator"},{"id":"2a3f03a7e12b72da604fe14c788b2d6a","name":"Oculus Rift","slug":"oculus-rift"},{"id":"928d2c45771da339c0d53b265eb1000f","name":"Assetto Corsa","slug":"assetto-corsa"},{"id":"6c984eeb13d39eab0477f9c4ac9ae137","name":"Fanatec","slug":"fanatec"},{"id":"6c42680dd910bc849c96e14d4af5b659","name":"Transducer","slug":"transducer"}],"createdAt":"2026-10-18T13:16:27Z","updatedAt":"2026-10-18T13:16:27Z"},{"id":"3acdd82a1141d1b5d59605b33fc27712","siteId":"projectable","slug":"im-selling-my-crazy-limited-edition-16-million-scoville-hot-sauce","title":"I'm selling my crazy limited edition 16 million scoville \"hot sauce\"","markdown":"### The History\nBack in the day we were all obsessed with hot sauces. We used to make everything super spicy. Chicken pot die (pie), blazing steak tips, hot ice cream, etc. Family life has tamed that expression, but I still enjoy hot sauces.\nI collected hot sauces to use in cooking. Right when we were really getting in to collecting hot sauces Blair's released the [16M Reserve](https://www.hotsauce.com/Blair-s-16-Million-Reserve-Crystals-p/misc-blairs-16-million.htm), a limited edition run of 999 bottles of pure capsaicin. We ended up getting a LOT of bottles of it and it wasn't cheap. We opened a couple but most of them were kept for the story, more than the purpose. The Blair's 16M Reserve got recognized by the [Guinness Book of Records](https://en.wikipedia.org/wiki/Blair%27s_Sauces_and_Snacks#16_Million_Reserve) which made the story even better!\n\n### About my bottle\nMy bottle has sat on my shelf in my office for all these years (more than 10) and I have finally decided to test the water and see if I can sell it for with a good return. I did a lot of googling to see if anyone actually has it listed for sale but come up blank. Lots of lore, not much in the way of recent activity.\n\n\n\n\nAs you can see the bottle is signed and numbered. Mine is **746**/999. Overall it is in great condition, the only issues it has are in the outer plastic box which has a few age cracks in it.\n\n\n\nThis is an amazing piece of hot sauce history, there is a lot of lore about it on the internet. Sure, there are plenty of 16M capsaicin products out on the market now, but this was the **FIRST** one sold as a hot sauce product.\n\n\n\n\n### Hot sauce lore and history\nThis particular item has a lot of internet lore, a lot of people did crazy challenges with it when it first came out. As it was the first of its kind, it was recognized in the Guinness Book of Records. There are a lot of funny reviews posted on the sites that used to sell it.\n\n* https://www.hotsauce.com/Blair-s-16-Million-Reserve-Crystals-p/misc-blairs-16-million.htm\n* http://uncrate.com/article/blairs-16-million-reserve/\n\n\nAnd a ton of reviews on hot sauce review sites:\n\n* http://www.thegreenhead.com/2007/07/blairs-16-million-reserve-worlds-hottest-hot-sauce.php\n* http://www.hotsauceblog.com/hotsaucearchives/blairs-16-million-product-review/\n* http://didntyouhear.com/blairs-16-million-is-hot/\n* http://www.craveonline.com/mandatory/1067530-these-hottest-hot-sauces-will-burn-your-life-down\n\nIt still sits at the top of hot sauce heat lists:\n\n* http://www.scottrobertsweb.com/scoville-scale/\n* http://www.chez-williams.com/Hot%20Sauce/hothome.htm\n* http://www.complex.com/pop-culture/2013/04/25-awesome-hot-sauces-that-every-man-needs-to-try/\n\nAnd it even has news articles writen about it! \n\n* http://www.telegraph.co.uk/news/worldnews/northamerica/usa/1489595/This-chilli-is-so-hot-youd-have-to-drink-250000-gallons-of-water-just-to-put-out-the-fire.html\n\n### YouTube\n\u003ciframe width=\"560\" height=\"315\" src=\"https://www.youtube.com/embed/tHZ5TwcGcyQ\" frameborder=\"0\" allowfullscreen\u003e\u003c/iframe\u003e\n\n\n### Wrapping up\nAs you can see, Blair's 16M Reserve Crystals are a piece of Hot Sauce history.\n\n#AND I SOLD IT!\n","html":"\u003ch3\u003eThe History\u003c/h3\u003e\n\u003cp\u003eBack in the day we were all obsessed with hot sauces. We used to make everything super spicy. Chicken pot die (pie), blazing steak tips, hot ice cream, etc. Family life has tamed that expression, but I still enjoy hot sauces.\nI collected hot sauces to use in cooking. Right when we were really getting in to collecting hot sauces Blair\u0026#39;s released the \u003ca href=\"https://www.hotsauce.com/Blair-s-16-Million-Reserve-Crystals-p/misc-blairs-16-million.htm\" rel=\"nofollow\"\u003e16M Reserve\u003c/a\u003e, a limited edition run of 999 bottles of pure capsaicin. We ended up getting a LOT of bottles of it and it wasn\u0026#39;t cheap. We opened a couple but most of them were kept for the story, more than the purpose. The Blair\u0026#39;s 16M Reserve got recognized by the \u003ca href=\"https://en.wikipedia.org/wiki/Blair%27s_Sauces_and_Snacks#16_Million_Reserve\" rel=\"nofollow\"\u003eGuinness Book of Records\u003c/a\u003e which made the story even better!\u003c/p\u003e\n\u003ch3\u003eAbout my bottle\u003c/h3\u003e\n\u003cp\u003eMy bottle has sat on my shelf in my office for all these years (more than 10) and I have finally decided to test the water and see if I can sell it for with a good return. I did a lot of googling to see if anyone actually has it listed for sale but come up blank. Lots of lore, not much in the way of recent activity.\u003c/p\u003e\n\u003cimg src=\"/content/images/2017/04/IMG_0542.JPG\" alt=\"\"\u003e\n\u003cimg src=\"/content/images/2017/04/IMG_0543.JPG\" alt=\"\"\u003e\n\u003cp\u003eAs you can see the bottle is signed and numbered. Mine is \u003cstrong\u003e746\u003c/strong\u003e/999. Overall it is in great condition, the only issues it has are in the outer plastic box which has a few age cracks in it.\u003c/p\u003e\n\u003cimg src=\"/content/images/2017/04/IMG_0550.JPG\" alt=\"\"\u003e\n\u003cp\u003eThis is an amazing piece of hot sauce history, there is a lot of lore about it on the internet. Sure, there are plenty of 16M capsaicin products out on the market now, but this was the \u003cstrong\u003eFIRST\u003c/strong\u003e one sold as a hot sauce product.\u003c/p\u003e\n\u003cimg src=\"/content/images/2017/04/IMG_0546.JPG\" alt=\"\"\u003e\n\u003cimg src=\"/content/images/2017/04/IMG_0547.JPG\" alt=\"\"\u003e\n\u003ch3\u003eHot sauce lore and history\u003c/h3\u003e\n\u003cp\u003eThis particular item has a lot of internet lore, a lot of people did crazy challenges with it when it first came out. As it was the first of its kind, it was recognized in the Guinness Book of Records. There are a lot of funny reviews posted on the sites that used to sell it.\u003c/p\u003e\n\u003cul\u003e\n\u003cli\u003e\u003ca href=\"https://www.hotsauce.com/Blair-s-16-Million-Reserve-Crystals-p/misc-blairs-16-million.htm\" rel=\"nofollow\"\u003ehttps://www.hotsauce.com/Blair-s-16-Million-Reserve-Crystals-p/misc-blairs-16-million.htm\u003c/a\u003e\u003c/li\u003e\n\u003cli\u003e\u003ca href=\"http://uncrate.com/article/blairs-16-million-reserve/\" rel=\"nofollow\"\u003ehttp://uncrate.com/article/blairs-16-million-reserve/\u003c/a\u003e\u003c/li\u003e\n\u003c/ul\u003e\n\u003cp\u003eAnd a ton of reviews on hot sauce review sites:\u003c/p\u003e\n\u003cul\u003e\n\u003cli\u003e\u003ca href=\"http://www.thegreenhead.com/2007/07/blairs-16-million-reserve-worlds-hottest-hot-sauce.php\" rel=\"nofollow\"\u003ehttp://www.thegreenhead.com/2007/07/blairs-16-million-reserve-worlds-hottest-hot-sauce.php\u003c/a\u003e\u003c/li\u003e\n\u003cli\u003e\u003ca href=\"http://www.hotsauceblog.com/hotsaucearchives/blairs-16-million-product-review/\" rel=\"nofollow\"\u003ehttp://www.hotsauceblog.com/hotsaucearchives/blairs-16-million-product-review/\u003c/a\u003e\u003c/li\u003e\n\u003cli\u003e\u003ca href=\"http://didntyouhear.com/blairs-16-million-is-hot/\" rel=\"nofollow\"\u003ehttp://didntyouhear.com/blairs-16-million-is-hot/\u003c/a\u003e\u003c/li\u003e\n\u003cli\u003e\u003ca href=\"http://www.craveonline.com/mandatory/1067530-these-hottest-hot-sauces-will-burn-your-life-down\" rel=\"nofollow\"\u003ehttp://www.craveonline.com/mandatory/1067530-these-hottest-hot-sauces-will-burn-your-life-down\u003c/a\u003e\u003c/li\u003e\n\u003c/ul\u003e\n\u003cp\u003eIt still sits at the top of hot sauce heat lists:\u003c/p\u003e\n\u003cul\u003e\n\u003cli\u003e\u003ca href=\"http://www.scottrobertsweb.com/scoville-scale/\" rel=\"nofollow\"\u003ehttp://www.scottrobertsweb.com/scoville-scale/\u003c/a\u003e\u003c/li\u003e\n\u003cli\u003e\u003ca href=\"http://www.chez-williams.com/Hot%20Sauce/hothome.htm\" rel=\"nofollow\"\u003ehttp://www.chez-williams.com/Hot%20Sauce/hothome.htm\u003c/a\u003e\u003c/li\u003e\n\u003cli\u003e\u003ca href=\"http://www.complex.com/pop-culture/2013/04/25-awesome-hot-sauces-that-every-man-needs-to-try/\" rel=\"nofollow\"\u003ehttp://www.complex.com/pop-culture/2013/04/25-awesome-hot-sauces-that-every-man-needs-to-try/\u003c/a\u003e\u003c/li\u003e\n\u003c/ul\u003e\n\u003cp\u003eAnd it even has news articles writen about it!\u003c/p\u003e\n\u003cul\u003e\n\u003cli\u003e\u003ca href=\"http://www.telegraph.co.uk/news/worldnews/northamerica/usa/1489595/This-chilli-is-so-hot-youd-have-to-drink-250000-gallons-of-water-just-to-put-out-the-fire.html\" rel=\"nofollow\"\u003ehttp://www.telegraph.co.uk/news/worldnews/northamerica/usa/1489595/This-chilli-is-so-hot-youd-have-to-drink-250000-gallons-of-water-just-to-put-out-the-fire.html\u003c/a\u003e\u003c/li\u003e\n\u003c/ul\u003e\n\u003ch3\u003eYouTube\u003c/h3\u003e\n\u003ciframe width=\"560\" height=\"315\" src=\"https://www.youtube.com/embed/tHZ5TwcGcyQ\" frameborder=\"0\" allowfullscreen=\"\"\u003e\u003c/iframe\u003e\n\u003ch3\u003eWrapping up\u003c/h3\u003e\n\u003cp\u003eAs you can see, Blair\u0026#39;s 16M Reserve Crystals are a piece of Hot Sauce history.\u003c/p\u003e\n\u003ch1\u003eAND I SOLD IT!\u003c/h1\u003e\n","excerpt":"","metaTitle":"","metaDescription":"","status":"published","featured":false,"publishedAt":"2017-04-08T13:29:39Z","authorId":"190160de54f2192bd5b8734ec8808086","authorName":"Daniel Chote","authorSlug":"daniel","heroMediaId":"1cc1320edb76e37d8c73f89e953723b2","projectId":"","tags":[{"id":"7ef3cdcf8e47cee737f388c91b8d31c2","name":"hot sauce","slug":"hot-sauce"},{"id":"563992072f5e0afa71d5088802e94aab","name":"blair's","slug":"blairs"}],"createdAt":"2026-10-18T13:16:27Z","updatedAt":"2026-10-18T13:16:27Z"},{"id":"39b4d054f7e0bce8c6537f8d80a0a2e3","siteId":"projectable","slug":"msi-gtx-1050ti-4g-oc-the-poor-mans-1u-inference-gpu","title":"MSI GTX 1050Ti 4G OC - The poor man's 1u inference GPU","markdown":"At [BrandYourself](http://brandyourself.com), we are diving deep in to Machine Learning to enhance some of our upcoming features. The issue I have with the current ML battlefield is that cloud based GPU instances are still relatively new and very expensive. When you start adding high availability requirements, as well as potential concurrent load, it gets prohibitively expensive quickly.\n\n### The Solution\n\nI set out with the goal to build my own 1u low power server with an NVIDIA GPU. I found a good low power server candidate from [Supermicro](https://www.supermicro.com), the [5018D-FN4T](https://www.supermicro.com/products/system/1u/5018/sys-5018d-fn4t.cfm) 8 core D-1541 Intel® Xeon® processor. It has a 200W power supply and PCI-E 3.0 x16. It's not the cheapest platform option, but it has great performance: m.2 for storage and a full x16 PCI-E 3.0 slot.\n\nFor the GPU it took a lot of looking at photos to determine a card that could be easily modified to fit in a 1u chassis and still maintain an adequate cooling solution. With the launch of the GTX 1050Ti from NVIDIA, I was excited to see MSI launch a product that seemed like it may be my perfect fit. The [GEFORCE® GTX 1050 TI 4G OC](https://www.msi.com/Graphics-card/GeForce-GTX-1050-Ti-4G-OC.html) is a bus powered (75W) 4G 10 series GPU with a stock cooler that has the heatsink fins running end to end on the card. \n4G of ram means we can run 4 workers on the card (our inference model footprint for image processing right now is ~850Mb) and still have a small buffer incase something grows. \nThe 75W power consumption over the PCI bus means no extra power cables required and a lower expected running temperature. \nThe stock heatsink on the card already has end to end fins, so we have the ability to place a 1u high RPM fan at the end of the card and maintain a decent level of airflow over the heatsink.\n\n\n\n### Making it fit\n**WARNING: This WILL void your GPU's warranty...** \n\u003cp align=\"center\"\u003e\n\n\u003c/p\u003e\nAs you can see, the card is already pretty small and the DVI port is in the first row. This means that we can easily cut the bracket and not make any physical modifications to the card itself (such as desoldering or brute force cutting of the DVI port).\n\nDisassembling is very straight forward.\n\n\n \nThe 4 heatsink screws on the back of the card need to be removed.\n\n\n\nCarefully disconnect the fan power connector and split apart. Avoid disturbing the heat transfer compound.\n\n\n\nThere are 4 screws holding the fan shroud to the heatsink. Remove those.\n\n\n\nPlace the heatsink back on (keeping the same orientation as before) and fasten in place with the original screws (the ones with the springs).\n\n\n\n\nNext, locate and remove the screws holding the mounting plate.\n\n\n\n\nAs you can see, this card is very slim.\n\n\n\n\nWith a pair of pliers, carefully straighten the board mounting support so that the plate will sit flush on a surface.\n\n\n\n\nApply some masking tape and draw your cutting line. Single slot plates are typically 18mm wide.\n\n\n\nWhile using appropriate safety equipment, cut along your line using a bandsaw (a hacksaw would probably work, too).\n\n\n\nFile off the sharp edges.\n\n\n\nHooray, we have a single slot mounting plate!\n\n\n\nBend back the board mounting support.\n\n\n\n\nNow we have a low profile GPU, without heavy modification or destruction of the PCB/components!\n\n\n\n\n\nAs you can see, it mounts nicely inside this 1u chassis, and a 1u high RPM fan can be placed behind it. I mount the fan in place with some high strength double sided tape.\n\n\n\nThe GPU runs perfectly on ubuntu with the latest NVIDIA linux drivers and latest CUDA and CUDNN libraries. If you have any questions, drop me a comment below or tweet at me on twitter [@dchote](https://twitter.com/dchote).","html":"\u003cp\u003eAt \u003ca href=\"http://brandyourself.com\" rel=\"nofollow\"\u003eBrandYourself\u003c/a\u003e, we are diving deep in to Machine Learning to enhance some of our upcoming features. The issue I have with the current ML battlefield is that cloud based GPU instances are still relatively new and very expensive. When you start adding high availability requirements, as well as potential concurrent load, it gets prohibitively expensive quickly.\u003c/p\u003e\n\u003ch3\u003eThe Solution\u003c/h3\u003e\n\u003cp\u003eI set out with the goal to build my own 1u low power server with an NVIDIA GPU. I found a good low power server candidate from \u003ca href=\"https://www.supermicro.com\" rel=\"nofollow\"\u003eSupermicro\u003c/a\u003e, the \u003ca href=\"https://www.supermicro.com/products/system/1u/5018/sys-5018d-fn4t.cfm\" rel=\"nofollow\"\u003e5018D-FN4T\u003c/a\u003e 8 core D-1541 Intel® Xeon® processor. It has a 200W power supply and PCI-E 3.0 x16. It\u0026#39;s not the cheapest platform option, but it has great performance: m.2 for storage and a full x16 PCI-E 3.0 slot.\u003c/p\u003e\n\u003cp\u003eFor the GPU it took a lot of looking at photos to determine a card that could be easily modified to fit in a 1u chassis and still maintain an adequate cooling solution. With the launch of the GTX 1050Ti from NVIDIA, I was excited to see MSI launch a product that seemed like it may be my perfect fit. The \u003ca href=\"https://www.msi.com/Graphics-card/GeForce-GTX-1050-Ti-4G-OC.html\" rel=\"nofollow\"\u003eGEFORCE® GTX 1050 TI 4G OC\u003c/a\u003e is a bus powered (75W) 4G 10 series GPU with a stock cooler that has the heatsink fins running end to end on the card.\n4G of ram means we can run 4 workers on the card (our inference model footprint for image processing right now is ~850Mb) and still have a small buffer incase something grows.\nThe 75W power consumption over the PCI bus means no extra power cables required and a lower expected running temperature.\nThe stock heatsink on the card already has end to end fins, so we have the ability to place a 1u high RPM fan at the end of the card and maintain a decent level of airflow over the heatsink.\u003c/p\u003e\n\u003ch3\u003eMaking it fit\u003c/h3\u003e\n\u003cp\u003e\u003cstrong\u003eWARNING: This WILL void your GPU\u0026#39;s warranty...\u003c/strong\u003e\u003c/p\u003e\n\u003cp align=\"center\"\u003e\n\u003cimg src=\"/content/images/2017/04/IMG_0530.JPG\" alt=\"\"\u003e\n\u003c/p\u003e\nAs you can see, the card is already pretty small and the DVI port is in the first row. This means that we can easily cut the bracket and not make any physical modifications to the card itself (such as desoldering or brute force cutting of the DVI port).\n\u003cp\u003eDisassembling is very straight forward.\u003c/p\u003e\n\u003cimg src=\"/content/images/2017/04/IMG_0505-1.JPG\" alt=\"\"\u003e\n\u003cp\u003eThe 4 heatsink screws on the back of the card need to be removed.\u003c/p\u003e\n\u003cimg src=\"/content/images/2017/04/IMG_0506.JPG\" alt=\"\"\u003e\n\u003cp\u003eCarefully disconnect the fan power connector and split apart. Avoid disturbing the heat transfer compound.\u003c/p\u003e\n\u003cimg src=\"/content/images/2017/04/IMG_0507.JPG\" alt=\"\"\u003e\n\u003cp\u003eThere are 4 screws holding the fan shroud to the heatsink. Remove those.\u003c/p\u003e\n\u003cimg src=\"/content/images/2017/04/IMG_0508.JPG\" alt=\"\"\u003e\n\u003cp\u003ePlace the heatsink back on (keeping the same orientation as before) and fasten in place with the original screws (the ones with the springs).\u003c/p\u003e\n\u003cimg src=\"/content/images/2017/04/IMG_0509.JPG\" alt=\"\"\u003e\n\u003cimg src=\"/content/images/2017/04/IMG_0510.JPG\" alt=\"\"\u003e\n\u003cp\u003eNext, locate and remove the screws holding the mounting plate.\u003c/p\u003e\n\u003cimg src=\"/content/images/2017/04/IMG_0511.JPG\" alt=\"\"\u003e\n\u003cimg src=\"/content/images/2017/04/IMG_0512.JPG\" alt=\"\"\u003e\n\u003cp\u003eAs you can see, this card is very slim.\u003c/p\u003e\n\u003cimg src=\"/content/images/2017/04/IMG_0513.JPG\" alt=\"\"\u003e\n\u003cimg src=\"/content/images/2017/04/IMG_0515.JPG\" alt=\"\"\u003e\n\u003cp\u003eWith a pair of pliers, carefully straighten the board mounting support so that the plate will sit flush on a surface.\u003c/p\u003e\n\u003cimg src=\"/content/images/2017/04/IMG_0516.JPG\" alt=\"\"\u003e\n\u003cimg src=\"/content/images/2017/04/IMG_0517.JPG\" alt=\"\"\u003e\n\u003cp\u003eApply some masking tape and draw your cutting line. Single slot plates are typically 18mm wide.\u003c/p\u003e\n\u003cimg src=\"/content/images/2017/04/IMG_0518.JPG\" alt=\"\"\u003e\n\u003cp\u003eWhile using appropriate safety equipment, cut along your line using a bandsaw (a hacksaw would probably work, too).\u003c/p\u003e\n\u003cimg src=\"/content/images/2017/04/IMG_0519.JPG\" alt=\"\"\u003e\n\u003cp\u003eFile off the sharp edges.\u003c/p\u003e\n\u003cimg src=\"/content/images/2017/04/IMG_0520.JPG\" alt=\"\"\u003e\n\u003cp\u003eHooray, we have a single slot mounting plate!\u003c/p\u003e\n\u003cimg src=\"/content/images/2017/04/IMG_0521.JPG\" alt=\"\"\u003e\n\u003cp\u003eBend back the board mounting support.\u003c/p\u003e\n\u003cimg src=\"/content/images/2017/04/IMG_0522.JPG\" alt=\"\"\u003e\n\u003cimg src=\"/content/images/2017/04/IMG_0523.JPG\" alt=\"\"\u003e\n\u003cp\u003eNow we have a low profile GPU, without heavy modification or destruction of the PCB/components!\u003c/p\u003e\n\u003cimg src=\"/content/images/2017/04/IMG_0525.JPG\" alt=\"\"\u003e\n\u003cimg src=\"/content/images/2017/04/IMG_0526.JPG\" alt=\"\"\u003e\n\u003cimg src=\"/content/images/2017/04/IMG_0527.JPG\" alt=\"\"\u003e\n\u003cp\u003eAs you can see, it mounts nicely inside this 1u chassis, and a 1u high RPM fan can be placed behind it. I mount the fan in place with some high strength double sided tape.\u003c/p\u003e\n\u003cimg src=\"/content/images/2017/04/Screen-Shot-2017-03-08-at-2-27-00-PM.png\" alt=\"\"\u003e\n\u003cp\u003eThe GPU runs perfectly on ubuntu with the latest NVIDIA linux drivers and latest CUDA and CUDNN libraries. If you have any questions, drop me a comment below or tweet at me on twitter \u003ca href=\"https://twitter.com/dchote\" rel=\"nofollow\"\u003e@dchote\u003c/a\u003e.\u003c/p\u003e\n","excerpt":"","metaTitle":"","metaDescription":"","status":"published","featured":false,"publishedAt":"2017-04-06T14:51:54Z","authorId":"190160de54f2192bd5b8734ec8808086","authorName":"Daniel Chote","authorSlug":"daniel","heroMediaId":"90d32feb088156ee2cd4008f16ec17a7","projectId":"","tags":[{"id":"60103f47eb65b46c6138b9d6fc7b17d0","name":"Machine Learning","slug":"machine-learning"},{"id":"ea8ba22edf4d47c7325d88a051118500","name":"GPU","slug":"gpu"},{"id":"9b3625f33e46c5576a2ffb4c6ff5304c","name":"Supermicro","slug":"supermicro"},{"id":"614e3fef27b2bf48aec6759cb2c26bfb","name":"Low Power Server","slug":"low-power-server"},{"id":"39509342d1486390e4356778e40bda83","name":"BrandYourself","slug":"brandyourself"}],"createdAt":"2026-10-18T13:16:27Z","updatedAt":"2026-10-18T13:16:27Z"},{"id":"8060d348c89d6a36c962a8c289b54bab","siteId":"projectable","slug":"entry-in-to-vr-sim-racing","title":"Entry in to VR Sim Racing","markdown":"I am now starting to explore VR Sim Racing with an Oculus Rift! I went with the Rift over the HTC Vive purely out of native support in the games I play.\n\nAfter much headache in upgrading from Windows 7 to Windows 10, getting the Rift working on my system took quite a lot of messing with the sensors on different USB ports. This was a rather frustrating experience, as one of the two sensors would keep going in to error state, but it wasn't obvious as to which sensor that was, so I kept having to unplug both. \n\n\n\nI mounted the sensors above my speakers on the front wall, and ran 15ft active USB extensions for each sensor. \n\n\n\n\nEach sensor is connected to a different USB port group directly on the motherboard. I found that the ASMedia 3.0 ports did not work at all for any of the Rift components.\n\nI eventually got it fairly stable, one of the sensors will occasionally error out with a very unhelpful error message. But it is not a frequent thing.\n\n\n\nSo far I have only played Assetto Corsa in VR. Its amazingly immersive. Wearing the Rift headset kinda feels like wearing a helmet, and the limited FOV plays in to that helmet feel, making it feel really natural. Being seated also helps with the immersion, you don't have weird room scale issues to deal with.\n\nMy wife attempted driving in VR, she tapped out in less than 2 minutes... She got really nauseous really quickly. I on the other-hand, having the DK1 back in the day, could easily wear the CV1 all day long without any problems.\n\n\u003ciframe width=\"560\" height=\"315\" src=\"https://www.youtube.com/embed/qby0-3SSgtc\" frameborder=\"0\" allowfullscreen\u003e\u003c/iframe\u003e","html":"\u003cp\u003eI am now starting to explore VR Sim Racing with an Oculus Rift! I went with the Rift over the HTC Vive purely out of native support in the games I play.\u003c/p\u003e\n\u003cp\u003eAfter much headache in upgrading from Windows 7 to Windows 10, getting the Rift working on my system took quite a lot of messing with the sensors on different USB ports. This was a rather frustrating experience, as one of the two sensors would keep going in to error state, but it wasn\u0026#39;t obvious as to which sensor that was, so I kept having to unplug both.\u003c/p\u003e\n\u003cimg src=\"/content/images/2017/03/IMG_0374.JPG\" alt=\"\"\u003e\n\u003cp\u003eI mounted the sensors above my speakers on the front wall, and ran 15ft active USB extensions for each sensor.\u003c/p\u003e\n\u003cimg src=\"/content/images/2017/03/IMG_0375-1.JPG\" alt=\"\"\u003e\n\u003cimg src=\"/content/images/2017/03/IMG_0376.JPG\" alt=\"\"\u003e\n\u003cp\u003eEach sensor is connected to a different USB port group directly on the motherboard. I found that the ASMedia 3.0 ports did not work at all for any of the Rift components.\u003c/p\u003e\n\u003cp\u003eI eventually got it fairly stable, one of the sensors will occasionally error out with a very unhelpful error message. But it is not a frequent thing.\u003c/p\u003e\n\u003cimg src=\"/content/images/2017/03/IMG_0377-1.JPG\" alt=\"\"\u003e\n\u003cp\u003eSo far I have only played Assetto Corsa in VR. Its amazingly immersive. Wearing the Rift headset kinda feels like wearing a helmet, and the limited FOV plays in to that helmet feel, making it feel really natural. Being seated also helps with the immersion, you don\u0026#39;t have weird room scale issues to deal with.\u003c/p\u003e\n\u003cp\u003eMy wife attempted driving in VR, she tapped out in less than 2 minutes... She got really nauseous really quickly. I on the other-hand, having the DK1 back in the day, could easily wear the CV1 all day long without any problems.\u003c/p\u003e\n\u003ciframe width=\"560\" height=\"315\" src=\"https://www.youtube.com/embed/qby0-3SSgtc\" frameborder=\"0\" allowfullscreen=\"\"\u003e\u003c/iframe\u003e","excerpt":"","metaTitle":"","metaDescription":"","status":"published","featured":false,"publishedAt":"2017-03-31T14:24:39Z","authorId":"190160de54f2192bd5b8734ec8808086","authorName":"Daniel Chote","authorSlug":"daniel","heroMediaId":"613df49fc3666008f399f82be61dc91c","projectId":"","tags":[{"id":"ecaaace3f367d1a9865ae0933d53d715","name":"Sim Racing","slug":"sim-racing"},{"id":"9c4230a56ffd914aade79798824d9d23","name":"SimXperience","slug":"simxperience"},{"id":"ab4bc19e35909615ae7bc6a344a2b50a","name":"Motion Simulator","slug":"motion-simulator"},{"id":"2a3f03a7e12b72da604fe14c788b2d6a","name":"Oculus Rift","slug":"oculus-rift"},{"id":"928d2c45771da339c0d53b265eb1000f","name":"Assetto Corsa","slug":"assetto-corsa"}],"createdAt":"2026-10-18T13:16:27Z","updatedAt":"2026-10-18T13:16:27Z"}],"site":{"id":"projectable","theme":"projectable","title":"Daniel Chote's Project Blog","description":"Software Development, Hardware Hacking, Sim Racing, Multirotors and Robots!","timezone":"America/New_York","postsPerPage":10,"logoMediaId":"21557257b3f2ecc4b3fa875b808097a7","coverMediaId":"25f1417193daeb2af73861aaa0dd17fd","copyright":"© Daniel Chote","twitterUrl":"https://twitter.com/dchote","linkedinUrl":"https://www.linkedin.com/in/dchote","googleTagId":"G-07GJBQVM38","hosts":[{"host":"new.projectable.me","canonical":false},{"host":"projectable.me","canonical":true},{"host":"www.projectable.me","canonical":false}]},"tagId":"","total":151}