{"authorId":"","cover":"/content/images/2016/08/IMG_7487.jpg","heroes":{"94b2de371382ec793a64ed49343c14c6":"/content/images/2017/11/IMG_3194.JPG"},"kind":"tag","logo":"/content/images/2016/08/projectable-me-4.png","nav":[{"id":"62e854d471683dea63488bcbca5c6188","label":"Home","url":"/","sortOrder":0},{"id":"1bc84fb15620acd635df7735a0b8ddd8","label":"Raspberry Pi","url":"/tag/raspberry-pi/","sortOrder":1},{"id":"3207e2fec51d66d2a5b3d8d04feb9dd8","label":"Sim Racing","url":"/tag/sim-racing/","sortOrder":2},{"id":"59115afd52e59a74faa4b386e00ae3fa","label":"About","url":"/about-me/","sortOrder":3}],"page":1,"perPage":10,"posts":[{"id":"94b2de371382ec793a64ed49343c14c6","siteId":"projectable","slug":"talkiepi-nov2017-updates","title":"talkiepi Updates (November 2017)","markdown":"##Introducing [talkiepi](https://github.com/dchote/talkiepi)\n\n[talkiepi](https://github.com/dchote/talkiepi) is a wifi \"walkie\" talkie for your kids and their friends. It provides a very simple \"push to talk\" interface. When you push the button and talk, all the other talkiepis in the channel will hear what is being said.\n\n##November 2017 Updates\n[talkiepi](https://github.com/dchote/talkiepi) has been out in the world for a little over a year now and it has been quite a successful project! I have seen 4+ different magazine articles (read some: [here](https://www.raspberrypi.org/magpi-issues/MagPi62.pdf), [here](https://issuu.com/futurepublishing/docs/piu02.issuu/2?ff=true), and [here](https://magazinesubscriptionsdigital.zinio.com/browse/issues/index.jsp;jsessionid=FCDE8D752BEF8FE767D9CF82D567CB65.prd-main-news2?skuId=416414901\u0026prnt=\u0026categoryId=cat1960026)), and I have even seen it included in school course curriculum!!\n\nI am getting back in to [Go](https://golang.org) development for work, and the process of working in [Go](https://golang.org) again gave me the hankering to update [talkiepi](https://github.com/dchote/talkiepi) and try and work out some of its kinks. I'll be working on enhancements to talkiepi over the next few weeks when I get the time. My goal is to get talkiepi working flawlessly on a [Raspberry Pi Zero W](https://www.adafruit.com/product/3400).\n\n**Talkiepi can be found over on github: https://github.com/dchote/talkiepi**","html":"\u003ch2\u003eIntroducing \u003ca href=\"https://github.com/dchote/talkiepi\" rel=\"nofollow\"\u003etalkiepi\u003c/a\u003e\u003c/h2\u003e\n\u003cp\u003e\u003ca href=\"https://github.com/dchote/talkiepi\" rel=\"nofollow\"\u003etalkiepi\u003c/a\u003e is a wifi \u0026#34;walkie\u0026#34; talkie for your kids and their friends. It provides a very simple \u0026#34;push to talk\u0026#34; interface. When you push the button and talk, all the other talkiepis in the channel will hear what is being said.\u003c/p\u003e\n\u003ch2\u003eNovember 2017 Updates\u003c/h2\u003e\n\u003cp\u003e\u003ca href=\"https://github.com/dchote/talkiepi\" rel=\"nofollow\"\u003etalkiepi\u003c/a\u003e has been out in the world for a little over a year now and it has been quite a successful project! I have seen 4+ different magazine articles (read some: \u003ca href=\"https://www.raspberrypi.org/magpi-issues/MagPi62.pdf\" rel=\"nofollow\"\u003ehere\u003c/a\u003e, \u003ca href=\"https://issuu.com/futurepublishing/docs/piu02.issuu/2?ff=true\" rel=\"nofollow\"\u003ehere\u003c/a\u003e, and \u003ca href=\"https://magazinesubscriptionsdigital.zinio.com/browse/issues/index.jsp;jsessionid=FCDE8D752BEF8FE767D9CF82D567CB65.prd-main-news2?skuId=416414901\u0026amp;prnt=\u0026amp;categoryId=cat1960026\" rel=\"nofollow\"\u003ehere\u003c/a\u003e), and I have even seen it included in school course curriculum!!\u003c/p\u003e\n\u003cp\u003eI am getting back in to \u003ca href=\"https://golang.org\" rel=\"nofollow\"\u003eGo\u003c/a\u003e development for work, and the process of working in \u003ca href=\"https://golang.org\" rel=\"nofollow\"\u003eGo\u003c/a\u003e again gave me the hankering to update \u003ca href=\"https://github.com/dchote/talkiepi\" rel=\"nofollow\"\u003etalkiepi\u003c/a\u003e and try and work out some of its kinks. I\u0026#39;ll be working on enhancements to talkiepi over the next few weeks when I get the time. My goal is to get talkiepi working flawlessly on a \u003ca href=\"https://www.adafruit.com/product/3400\" rel=\"nofollow\"\u003eRaspberry Pi Zero W\u003c/a\u003e.\u003c/p\u003e\n\u003cp\u003e\u003cstrong\u003eTalkiepi can be found over on github: \u003ca href=\"https://github.com/dchote/talkiepi\" rel=\"nofollow\"\u003ehttps://github.com/dchote/talkiepi\u003c/a\u003e\u003c/strong\u003e\u003c/p\u003e\n","excerpt":"","metaTitle":"","metaDescription":"","status":"published","featured":false,"publishedAt":"2017-11-17T15:15:46Z","authorId":"190160de54f2192bd5b8734ec8808086","authorName":"Daniel Chote","authorSlug":"daniel","heroMediaId":"f1b2883a1a2e99060f5e4a6a2f8ccebd","projectId":"","tags":[{"id":"b223b3e2ba0e78e7e6a6a8ff4349517d","name":"talkiepi","slug":"talkiepi"},{"id":"b529314e428273696b02c474dcf56132","name":"Raspberry Pi","slug":"raspberry-pi"},{"id":"88aab2a2ba262f200b248f0074011445","name":"WIFI","slug":"wifi"},{"id":"e2e48067ff28749272dbdc37a0f2023d","name":"golang","slug":"golang"},{"id":"8600a98484e169ed96ea6fbe2a034ccc","name":"VOIP","slug":"voip"}],"createdAt":"2026-10-18T13:16:27Z","updatedAt":"2026-10-18T13:16:27Z"},{"id":"d6c33a30789f842c8aae5fbfdd9ee5e4","siteId":"projectable","slug":"i-built-a-wifi-walkie-talkie-for-my-kids-now-you-can-too","title":"I built a wifi \"walkie\" talkie for my kids; now you can too!","markdown":"##Introducing [talkiepi](https://github.com/dchote/talkiepi)\n\n[talkiepi](https://github.com/dchote/talkiepi) is a wifi \"walkie\" talkie for your kids and their friends. It provides a very simple \"push to talk\" interface. When you push the button and talk, all the other talkiepis in the channel will hear what is being said. \n\ntalkiepi uses [Mumble](http://mumble.info) for its voice communication protocol. Mumble is an open source, lightweight, high quality voice chat system designed for use by PC gamers. Mumble lent itself perfectly for this use case. There are already software clients for all platforms (Mac, Win, Linux, IOS, Android), meaning you can talk with your talkiepi using your phone or computer, and you're not limited to just talkiepi devices! By utilizing Mumble channels, user registration, and access control lists, you can configure different groups of talkiepis, just like using different channels on a traditional walkie talkie.\n\n[talkiepi](https://github.com/dchote/talkiepi) is built utilizing a [Raspberry Pi](https://www.raspberrypi.org/products/raspberry-pi-3-model-b/), [USB speakerphone](https://www.amazon.com/USRobotics-USB-Internet-Speakerphone-USR9610/dp/B000E6IL10), some basic electronic components, and a 3D printed enclosure. [talkiepi](https://github.com/dchote/talkiepi) runs a [mumble](http://mumble.info) [client](https://github.com/dchote/talkiepi) that has been designed specifically for push to talk via the push button interface. After it is setup on your wifi network and the software is configured, talkiepi will require little to no maintenance to use.\n\n---\n### talkiepi software on your Raspberry Pi\n\nI have written an overview of the software and hardware interface at the [github repository for talkiepi](https://github.com/dchote/talkiepi). An install guide can be found at [https://github.com/dchote/talkiepi/blob/master/doc/README.md](https://github.com/dchote/talkiepi/blob/master/doc/README.md), which will step you through installing talkiepi on your Raspberry Pi. \n\n*On September 10th there was a pull request against the go-openal library that broke things on Raspbian Jessie, I have since forked the library and reverted the changes. talkiepi now uses my fork of the library and should now build again*\n\nI have added some notes regarding my wifi trouble on the rpi3 [here](http://projectable.me/optimize-my-pi-wi-fi/).\n\n---\n### Building a talkiepi\n\n##### Build without an enclosure:\nYou can assemble a talkiepi with or without the 3D printed enclosure. I initially prototyped the GPIO stuff on a breadboard, and that would be more than sufficient to play with if you didn't want to commit to a full build.\n\n\n\n##### Print an enclosure:\nIf you want to do a full build of talkiepi you can download the 3D models from the [github repository](https://github.com/dchote/talkiepi/tree/master/stl). I printed my parts on my [Monoprice Select Mini 3D Printer](http://www.monoprice.com/product?p_id=15365). I printed in PLA with 100% infill. You *will* need to rotate the models to print, but if you already have a 3D printer, you probably know what you need to do. If you don't own a 3D printer yet, there are many services that will print and mail you your parts! \n\nI designed the talkiepi enclosure in Autodesk's [Fusion360](http://www.autodesk.com/products/fusion-360/overview). If anyone would like to tweak the Fusion360 assembly, drop me a tweet [@dchote](https://http://twitter.com/dchote/) #talkiepi.\n\n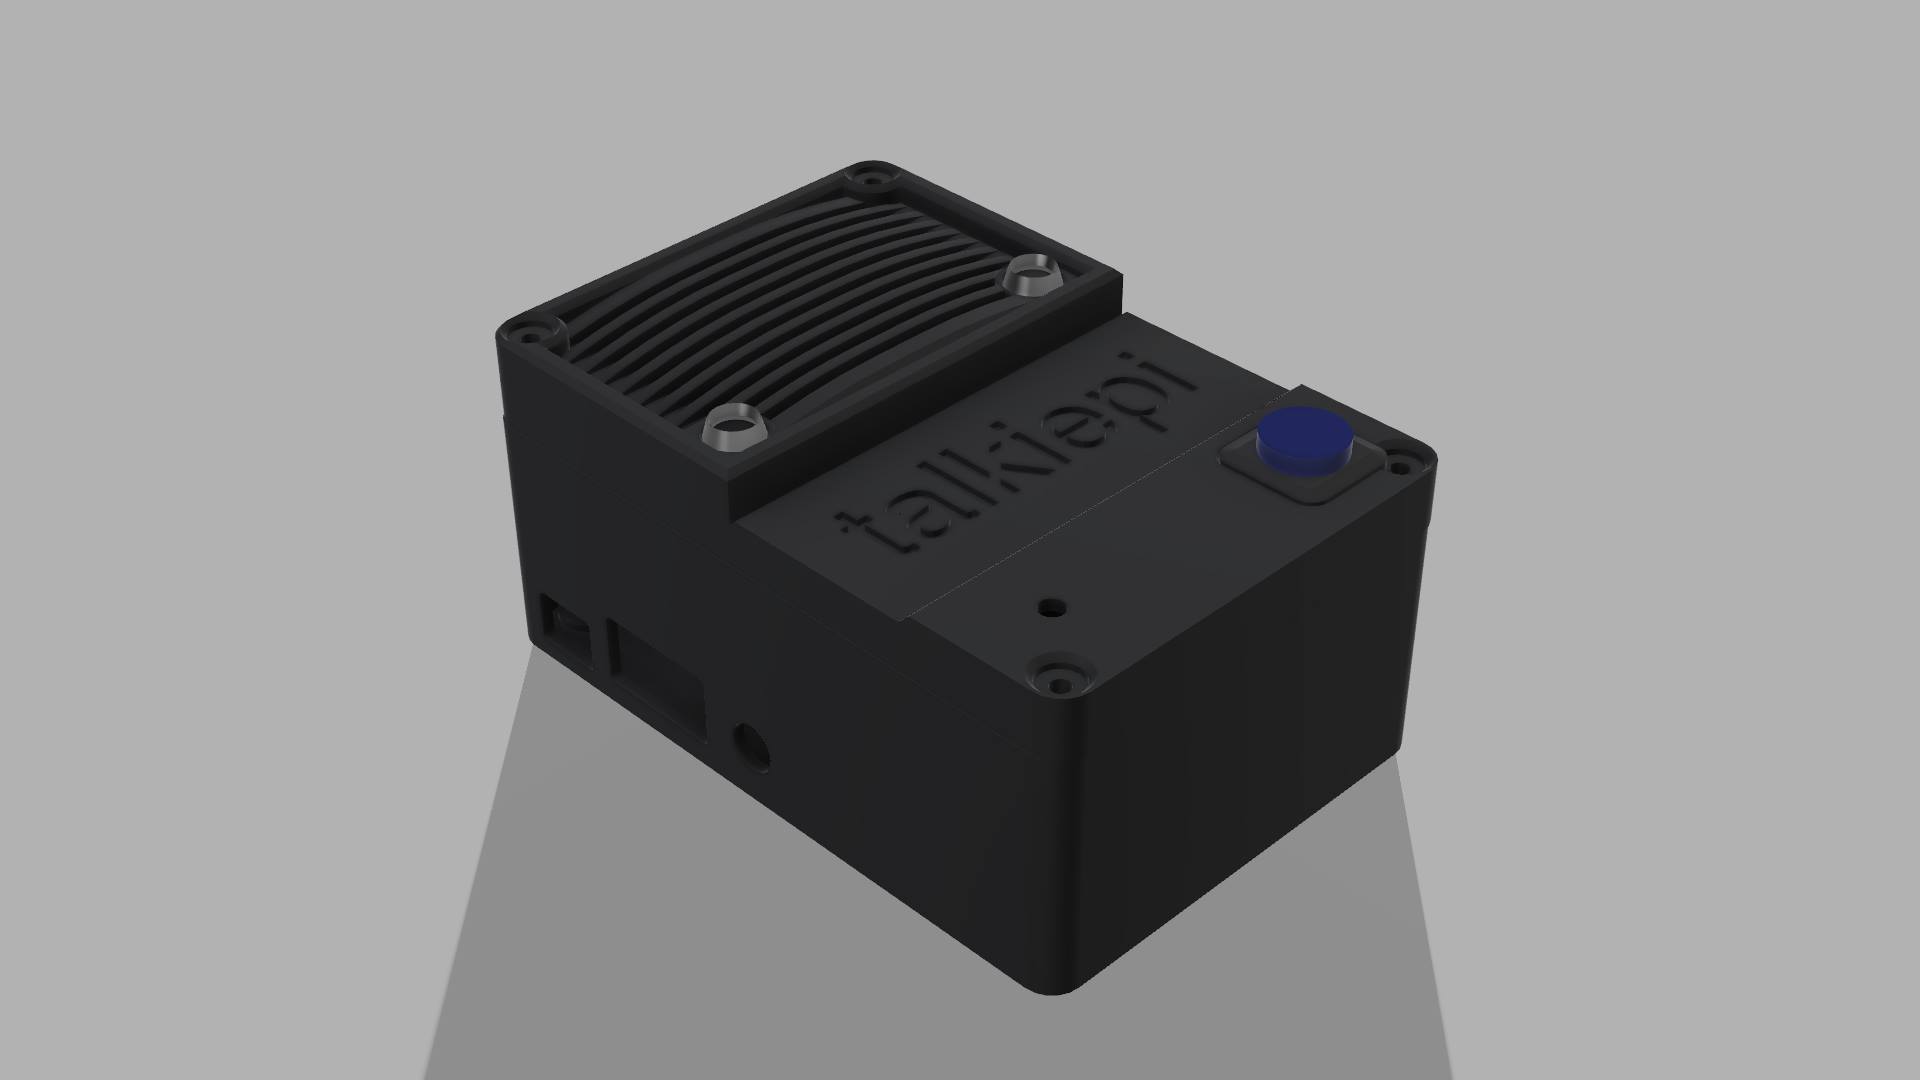\n\n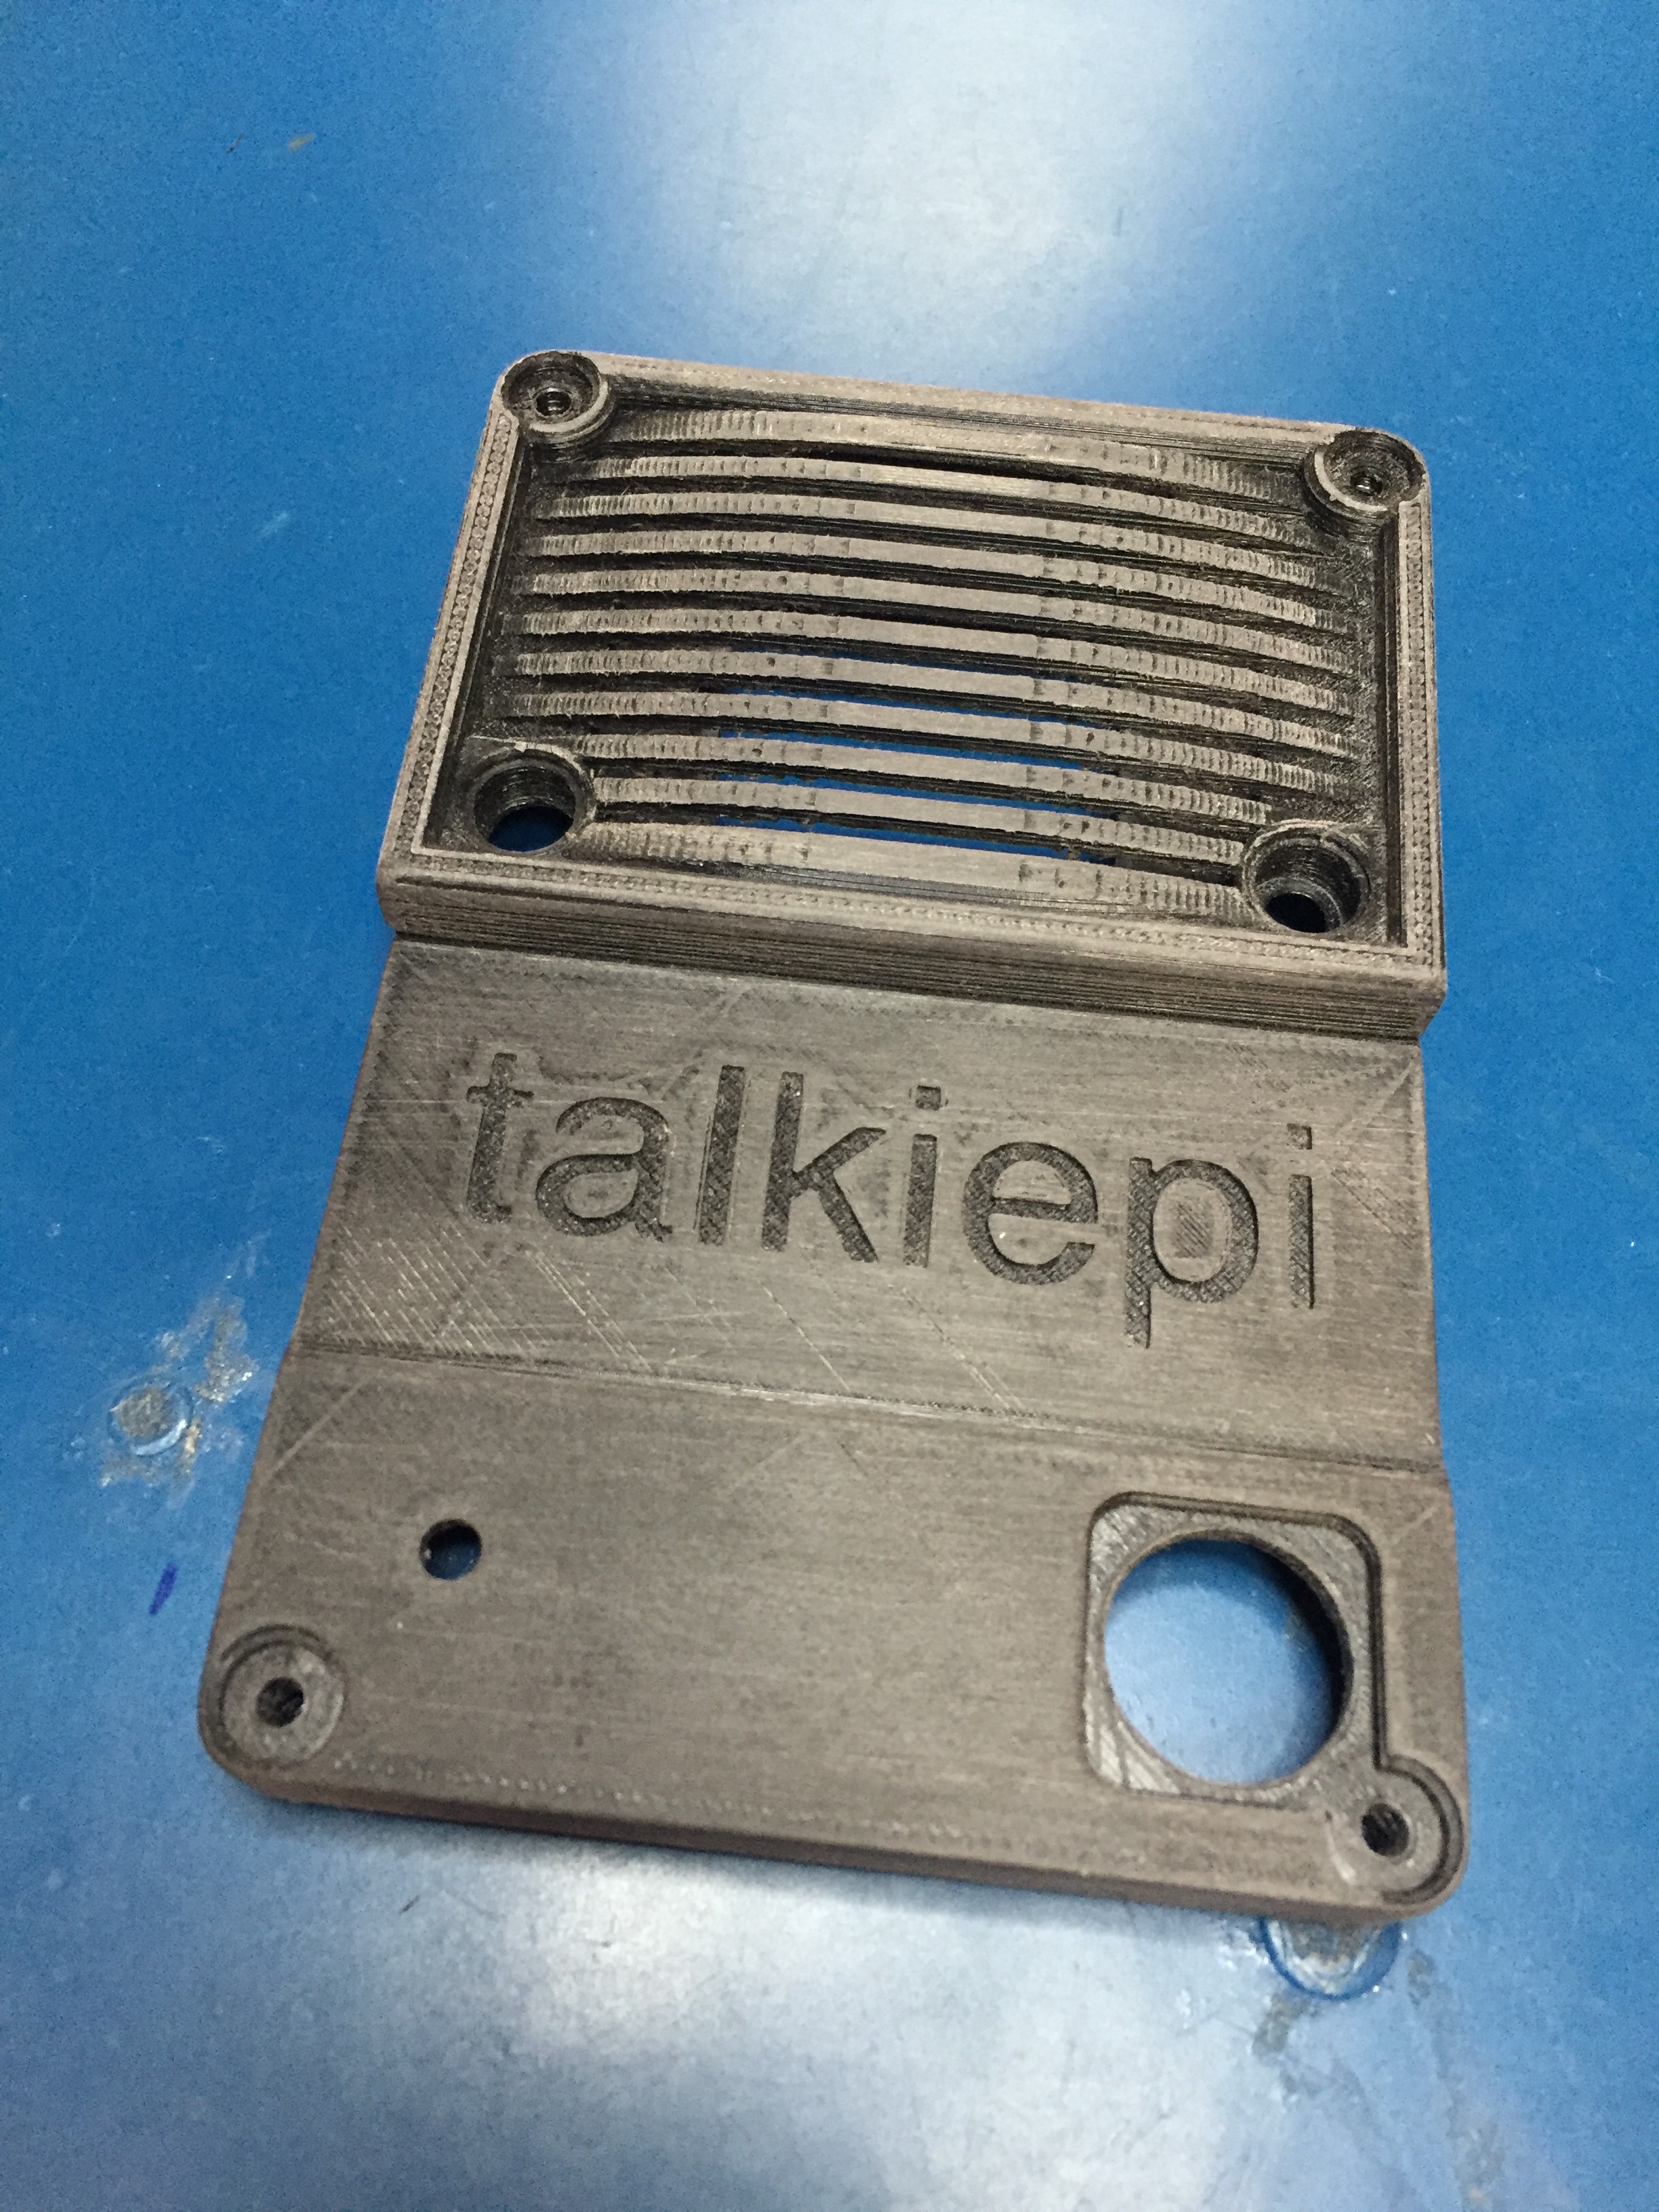\n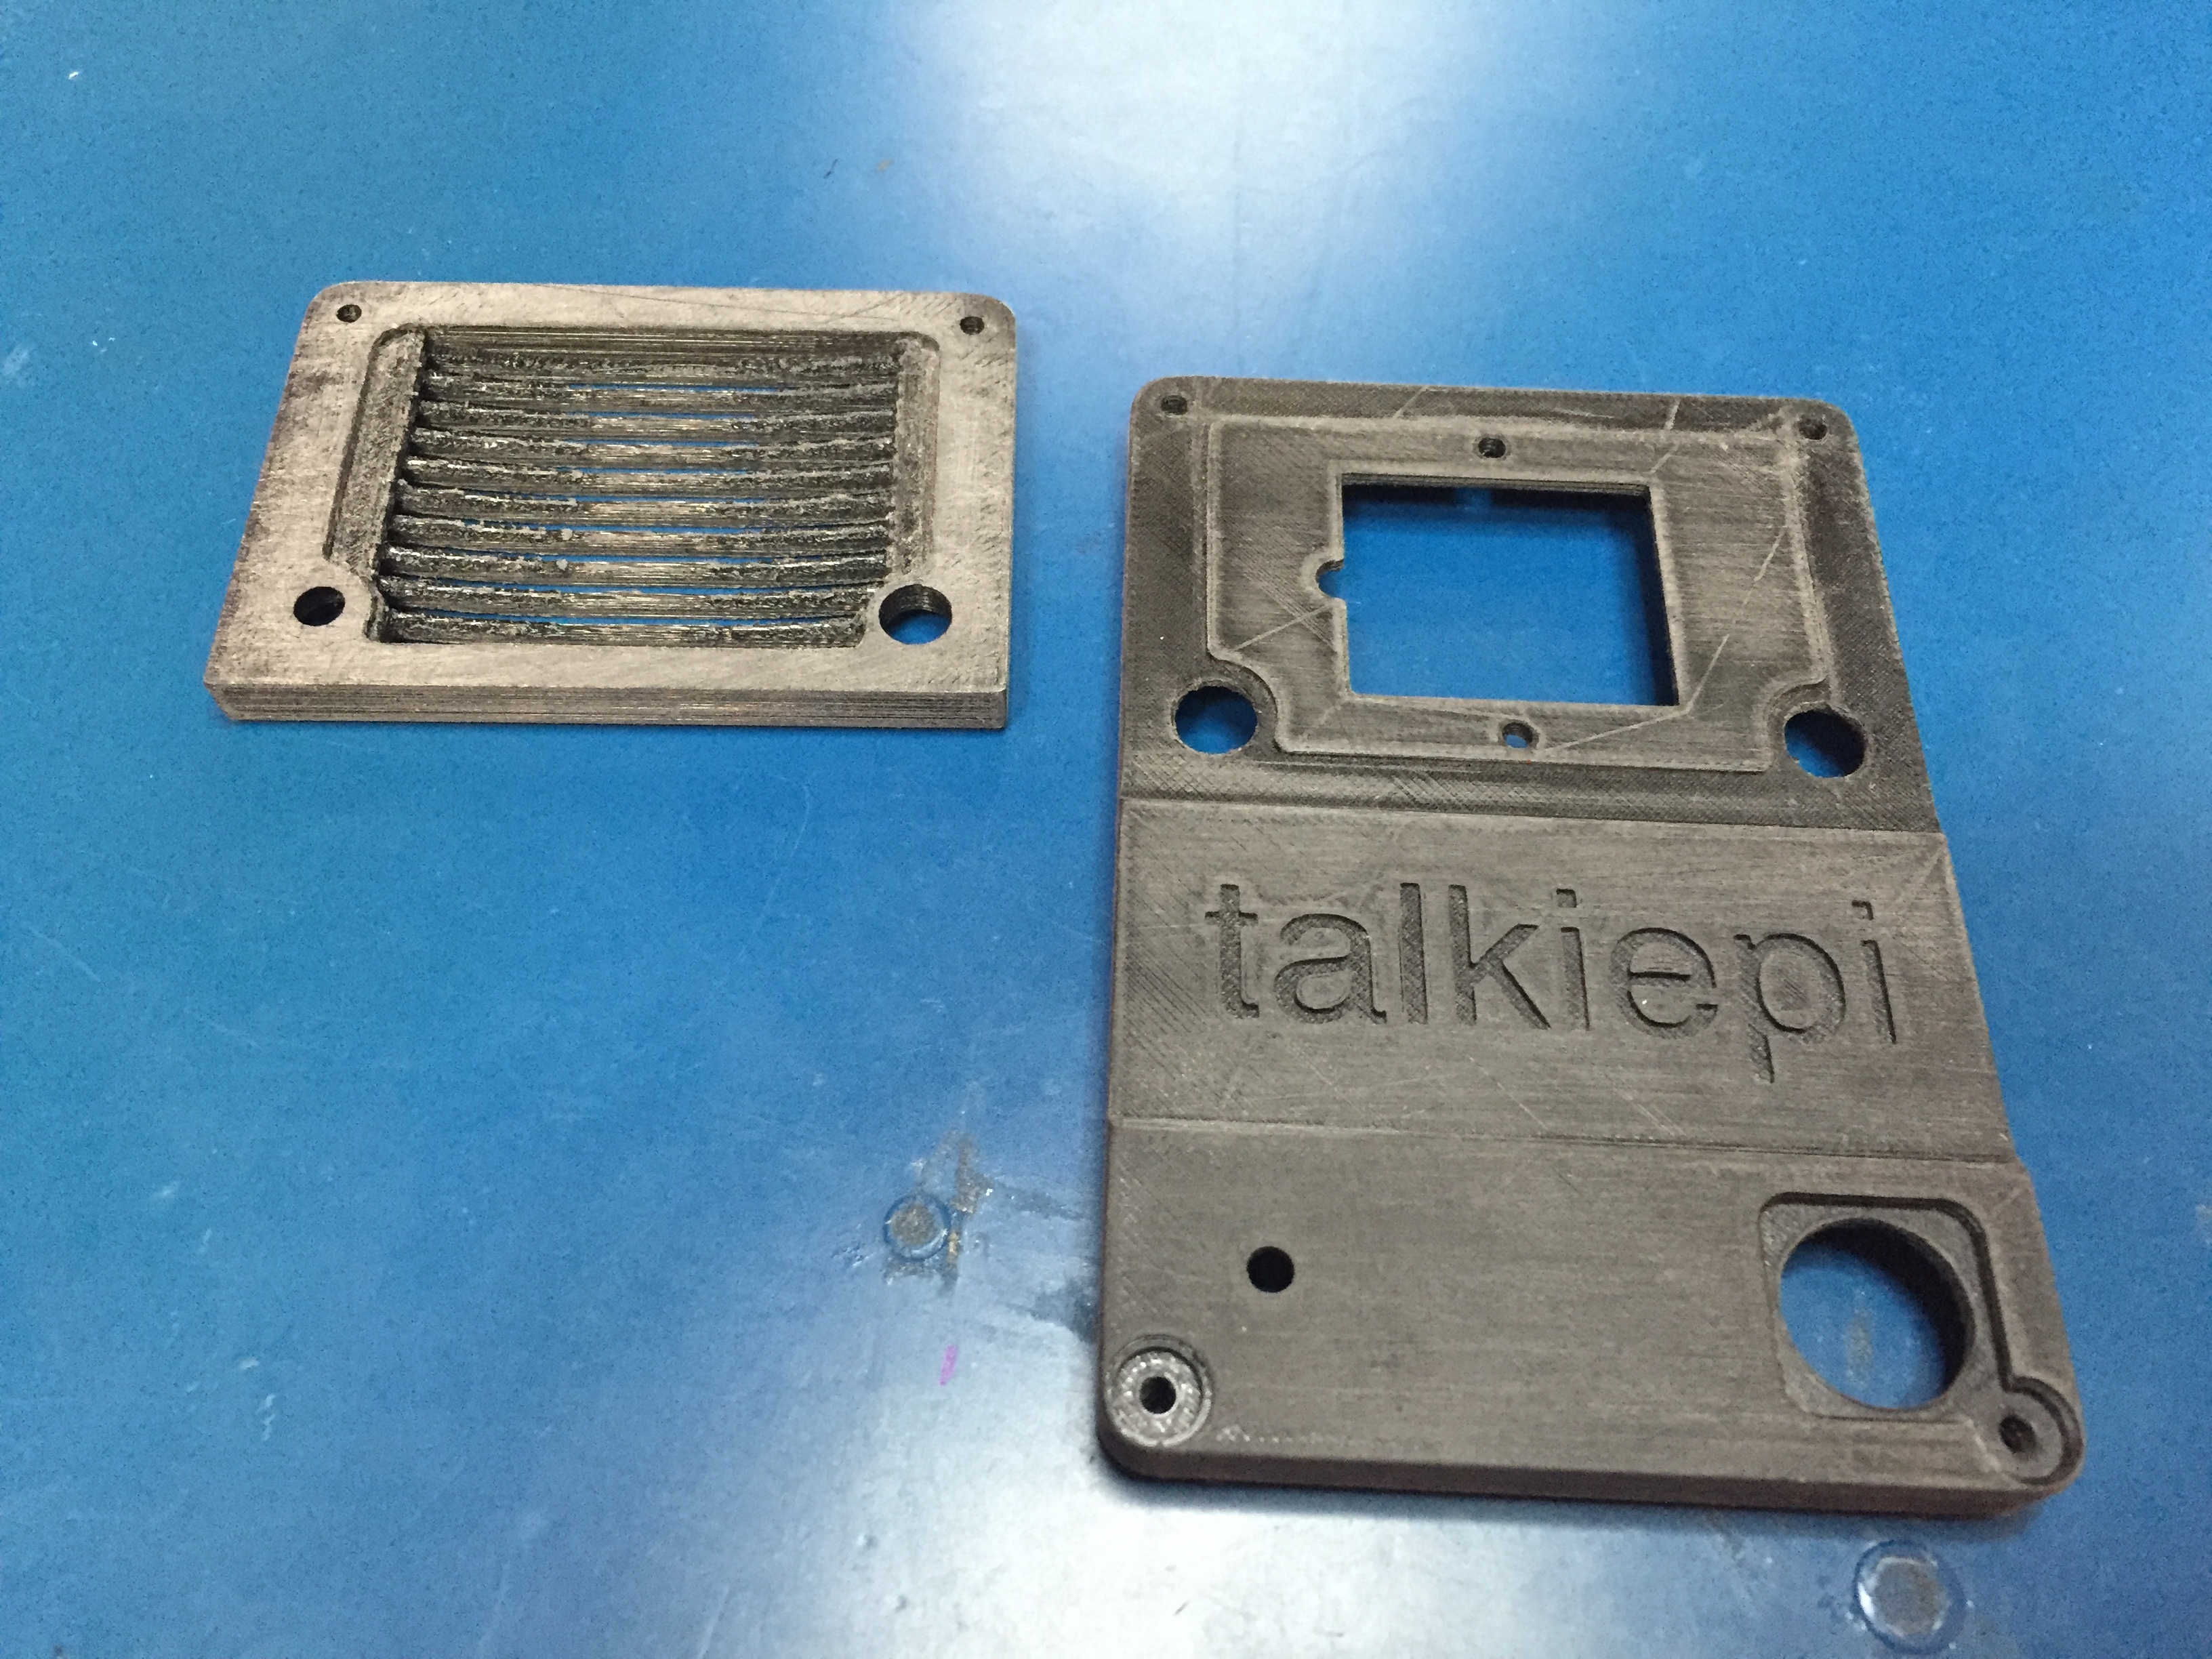\n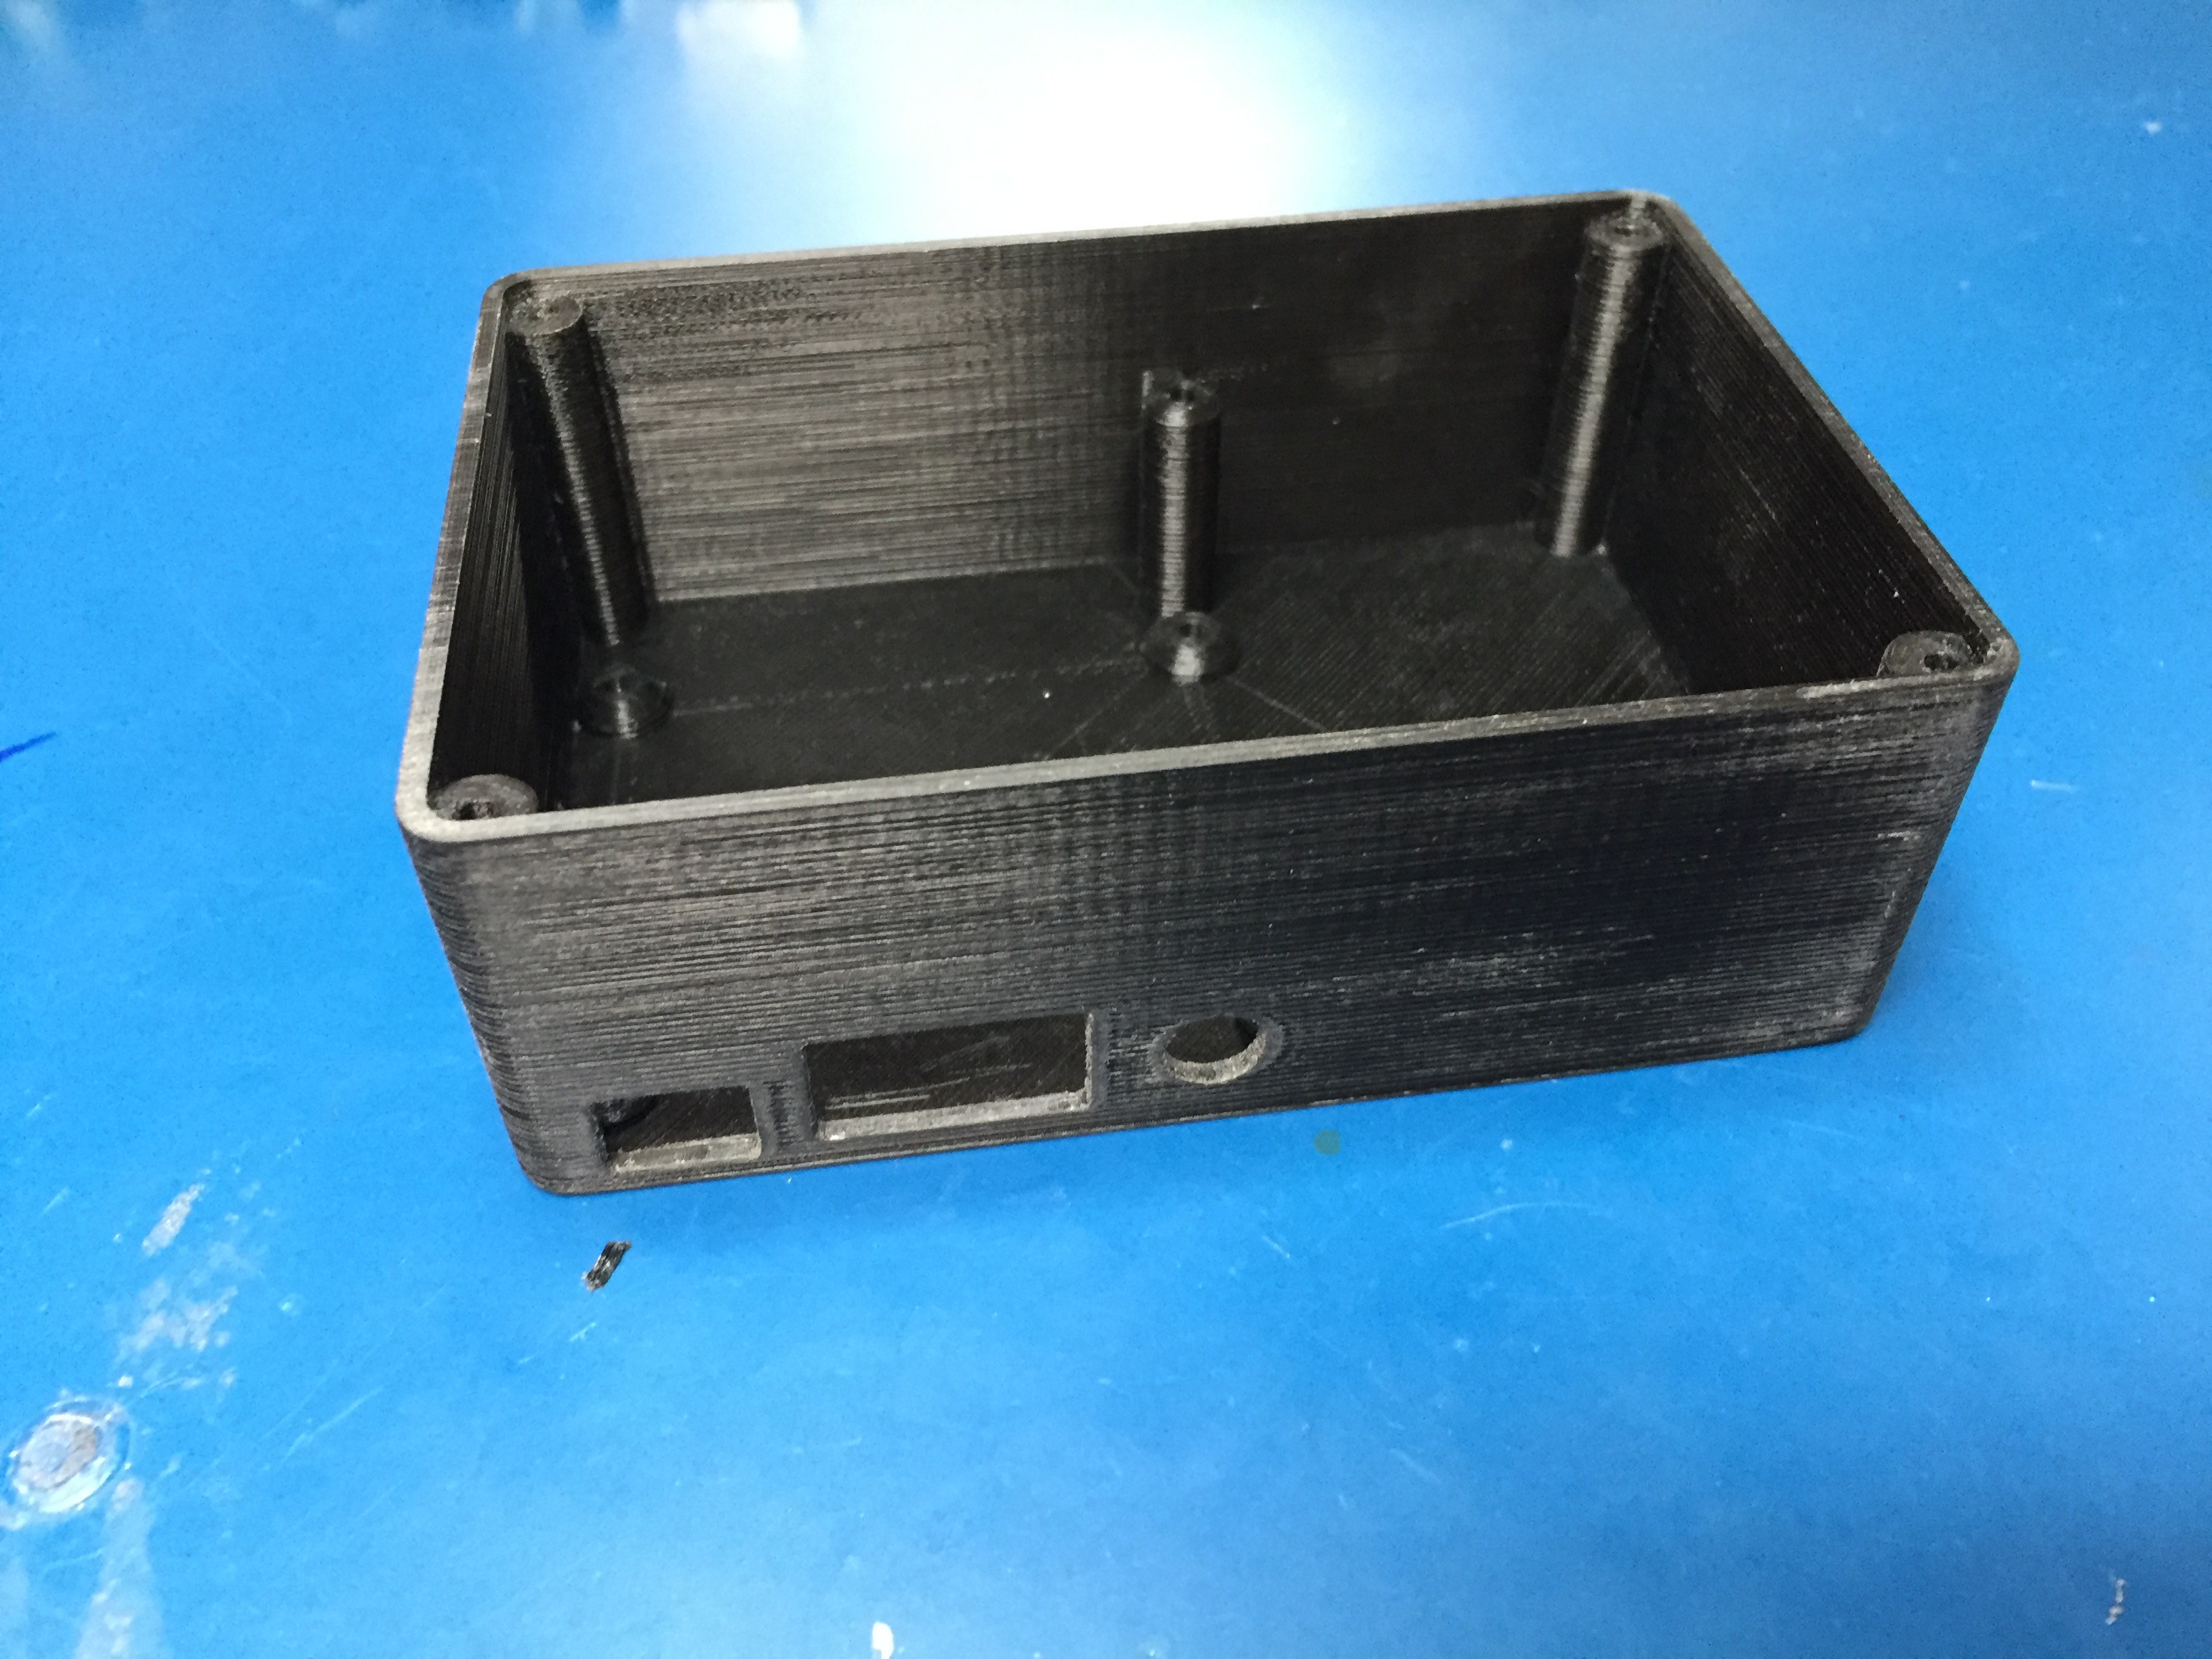\n\n---\n\n### talkiepi parts\n\nI ordered most of these components from [Adafruit](https://www.adafruit.com), and a couple of parts from [Amazon.com](https://www.amazon.com). I already had the hookup wire, heat-shrink and resistors.\n\n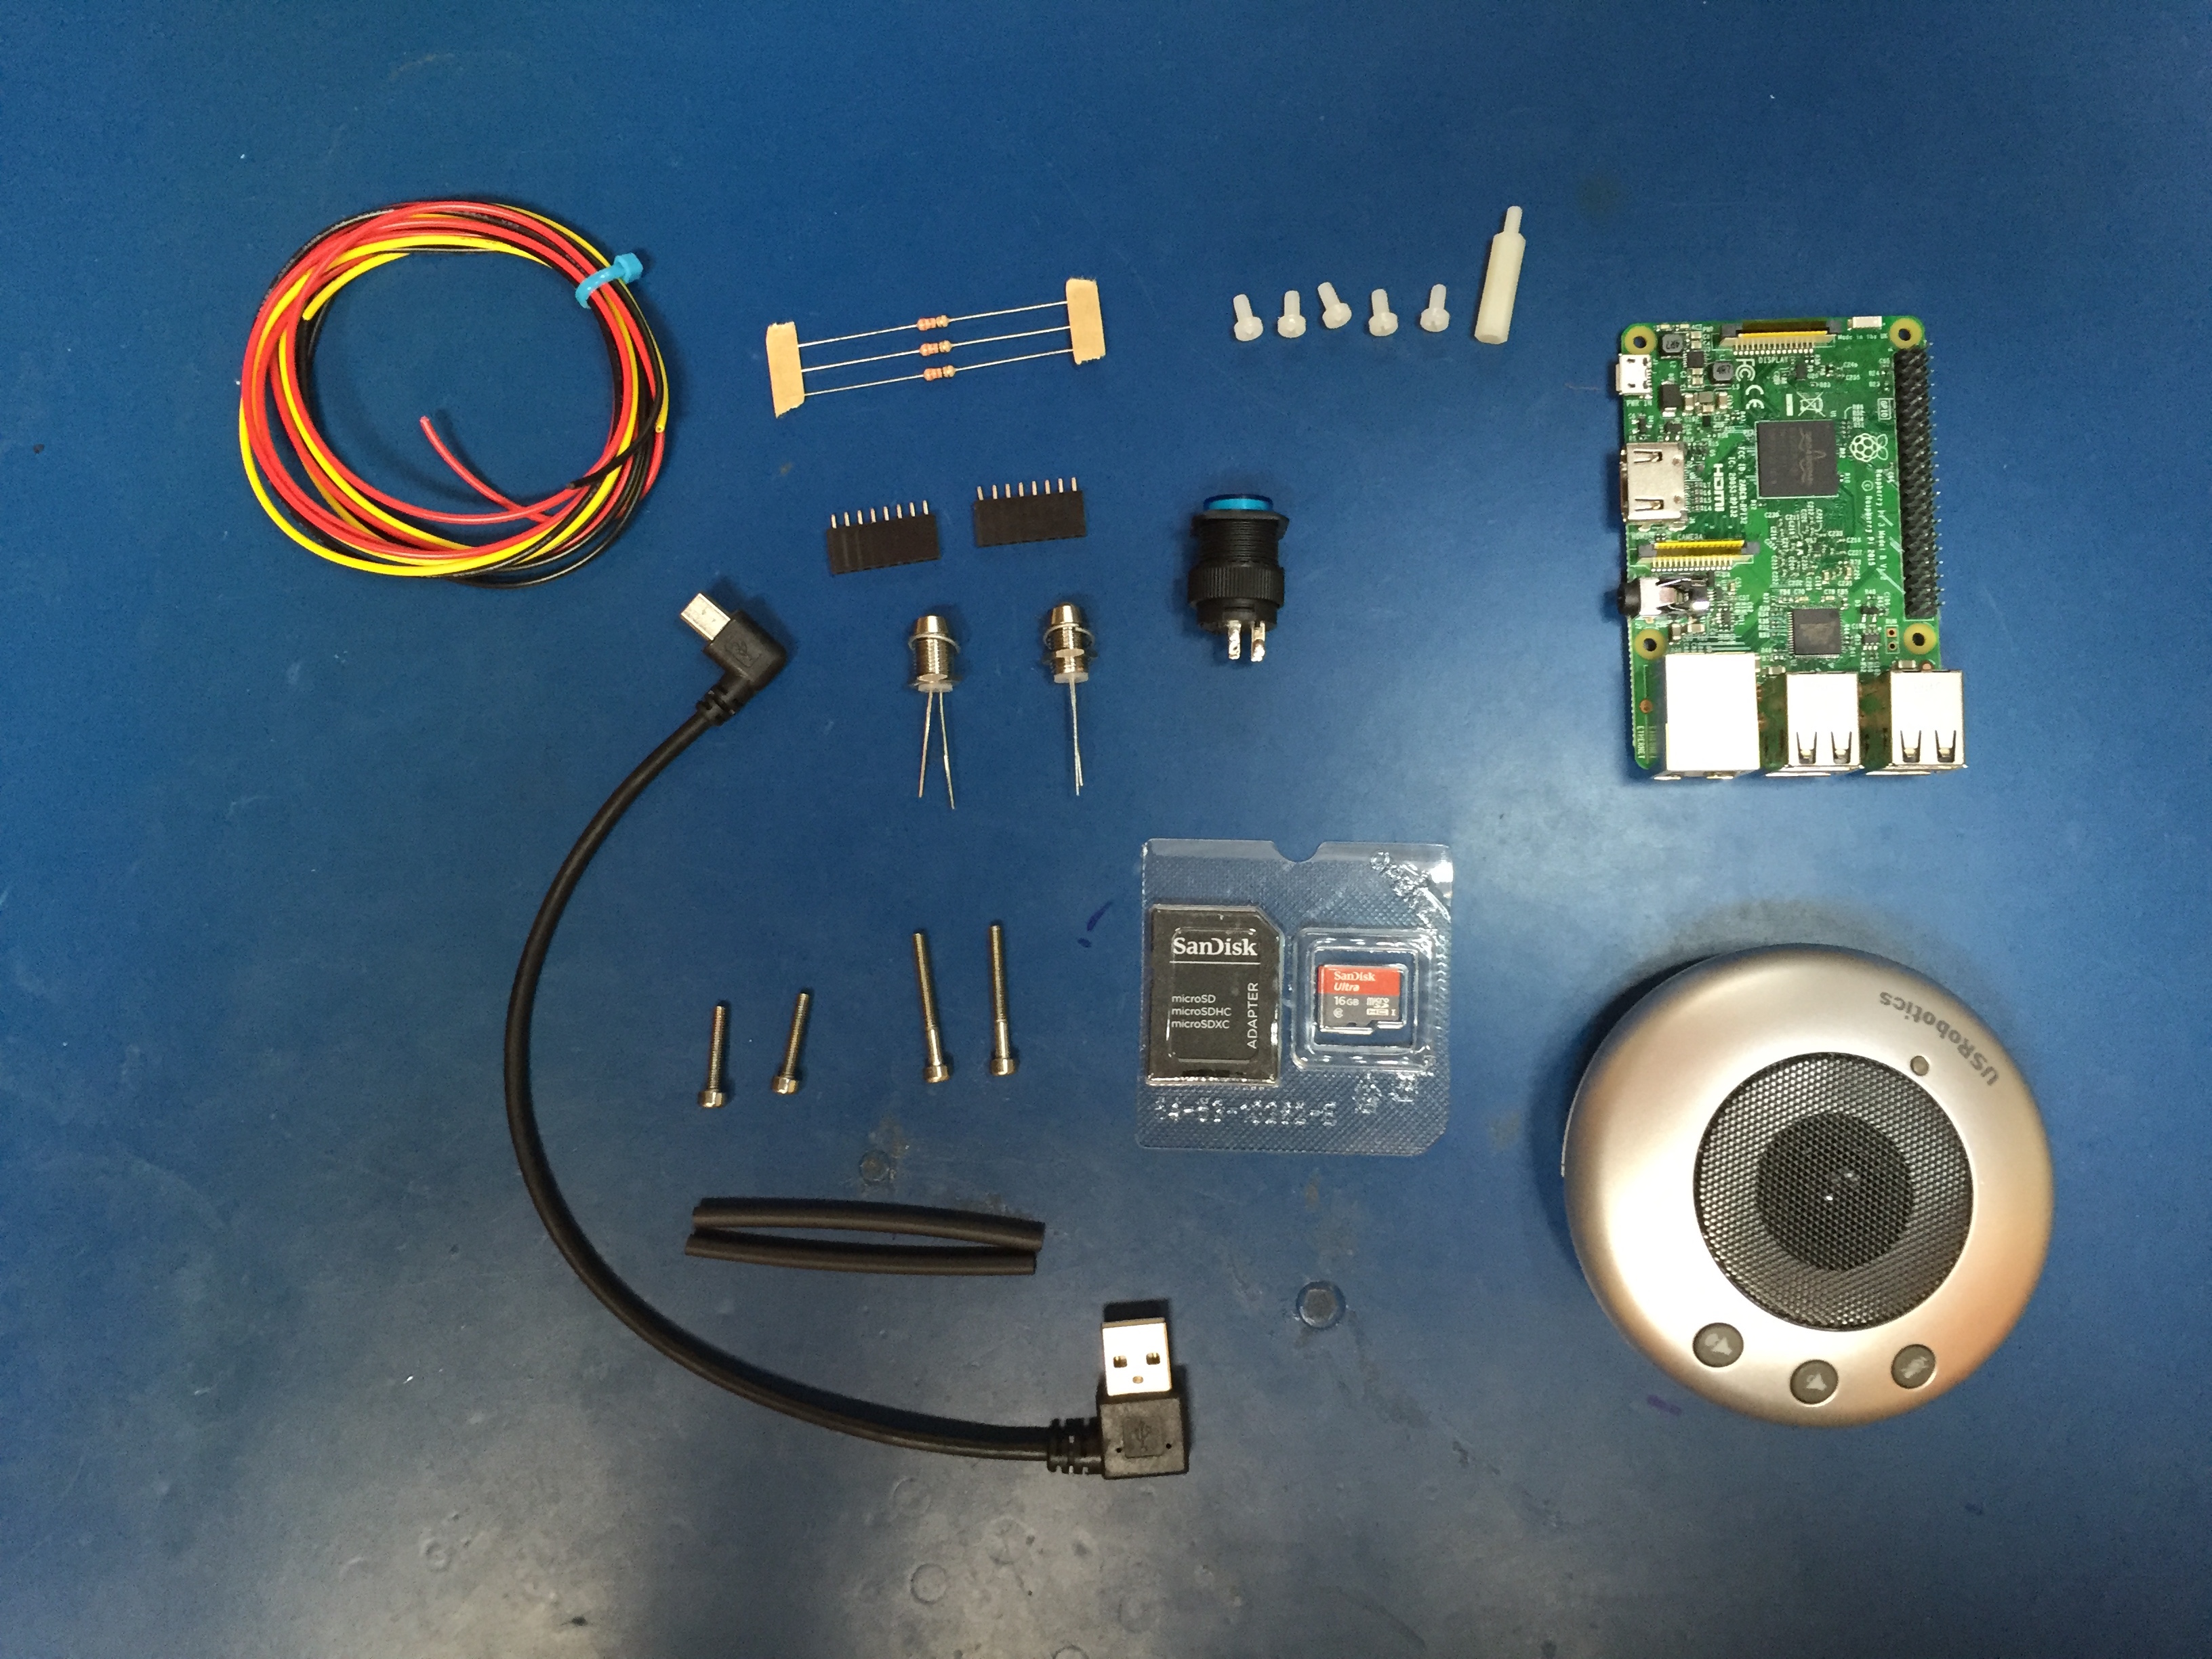\n\n* [Raspberry Pi 3 Model B ~$35](https://www.adafruit.com/products/3055)\n* [Micro SD Card](https://www.amazon.com/SanDisk-Ultra-Micro-Adapter-SDSQUNC-016G-GN6MA/dp/B010Q57SEE/ref=sr_1_3?ie=UTF8\u0026qid=1472828023\u0026sr=8-3\u0026keywords=16G+micro+sd+card)\n* [US Robotics USB Speakerphone (USR9610) between $4 and $12 (really cheap)](https://www.amazon.com/USRobotics-USB-Internet-Speakerphone-USR9610/dp/B000E6IL10/ref=sr_1_2?ie=UTF8\u0026qid=1472828042\u0026sr=8-2\u0026keywords=US+Robotics+usb+speakerphone)\n* [Short right angle / left angle mini USB cable](https://www.amazon.com/gp/product/B01CXT43MQ/ref=oh_aui_detailpage_o02_s00?ie=UTF8\u0026psc=1)\n* 5 x M3 nylon screws + 1 M3x20 nylon standoff\n* GPIO header connector (there are many options for this)\n* 2 x 5mm LEDs with [5mm LED holders](https://www.adafruit.com/products/2176)\n* [Pushbutton with LED](https://www.adafruit.com/product/1477)\n* 3 x 330ohm resistors\n* 2 x M3x15 + 2 x M3x25 stainless bolts (for the case)\n* 2 x M3x10 stainless bolts + nuts (for the speaker)\n* Hookup wire + heat-shrink\n\n---\n\n### The GPIO stuff\n\nThe GPIO interface usage is actually very simple. It is a push button with 2 separate LEDs for status indication and 1 LED within the push button that illuminates when it is transmitting.\n\n\n\nYou can use any type of header connector. I initially used [one of these](https://www.adafruit.com/product/2222), but using smaller connectors (such as a 8 pin for the LEDs and a 2 pin for the button) makes it easier to fit and assemble.\n\n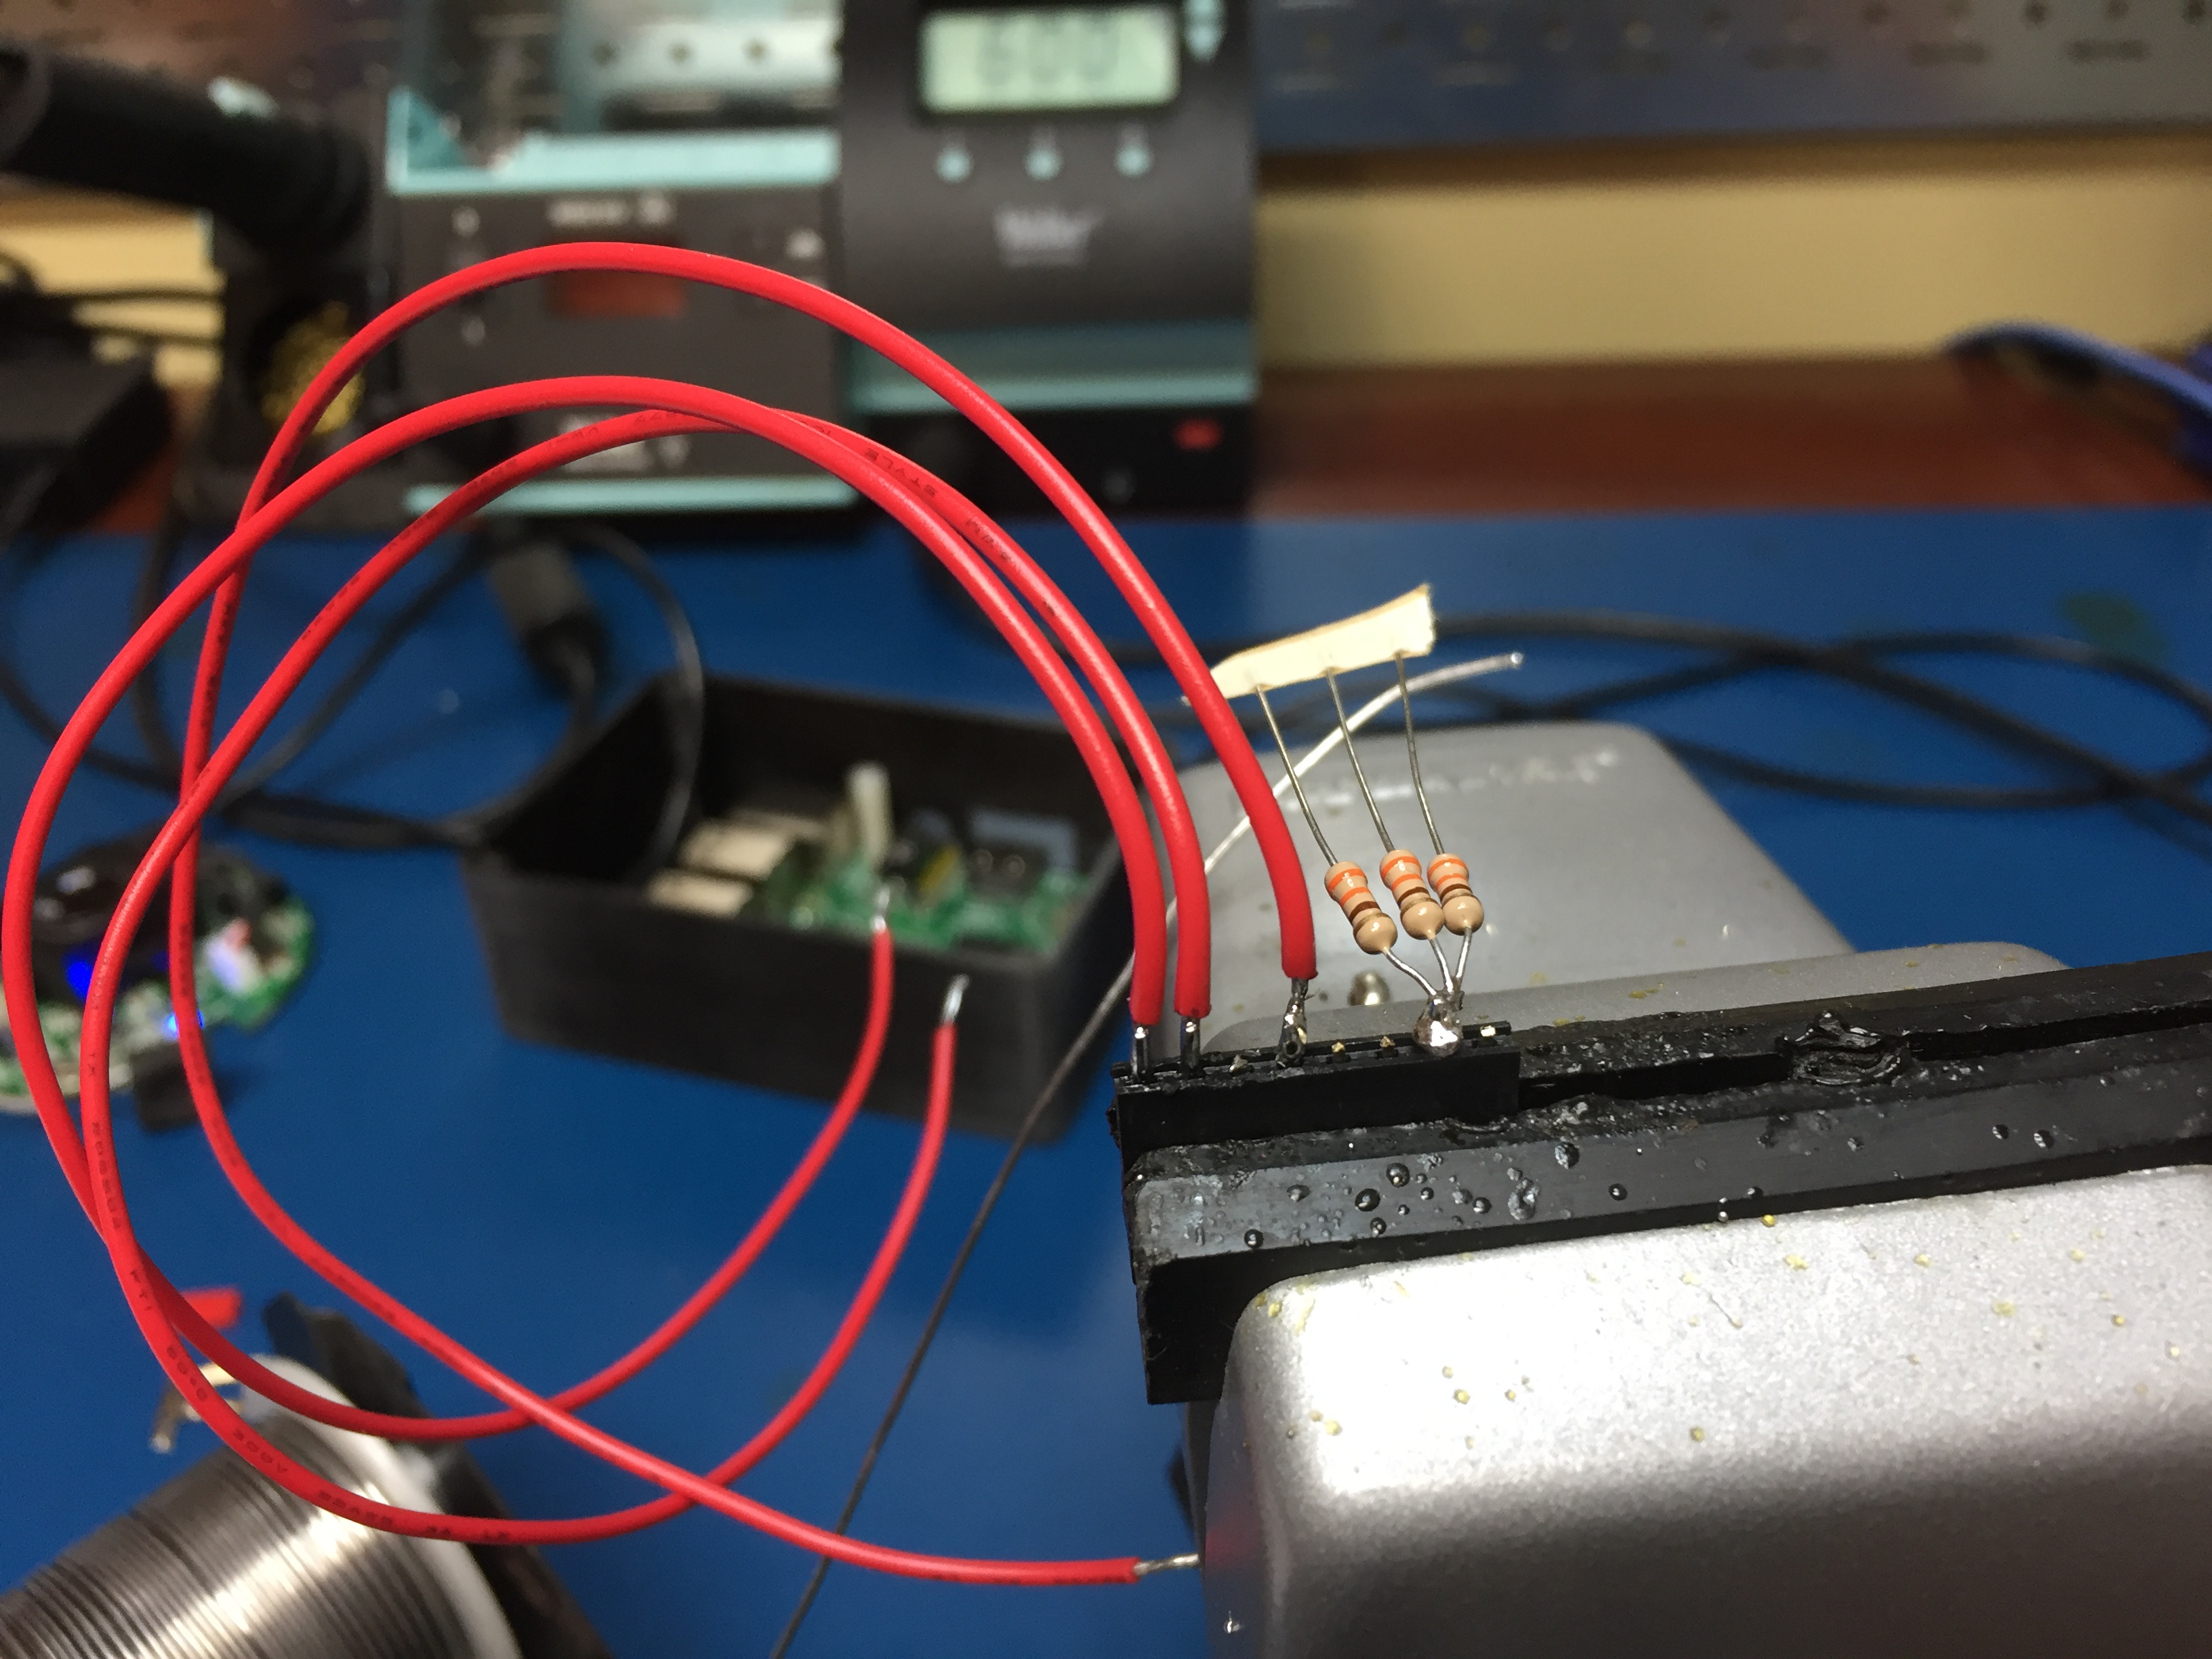\n\nSolder the 3 resistors to the ground pin, and solder your positive LED wires to the other pins.\n\n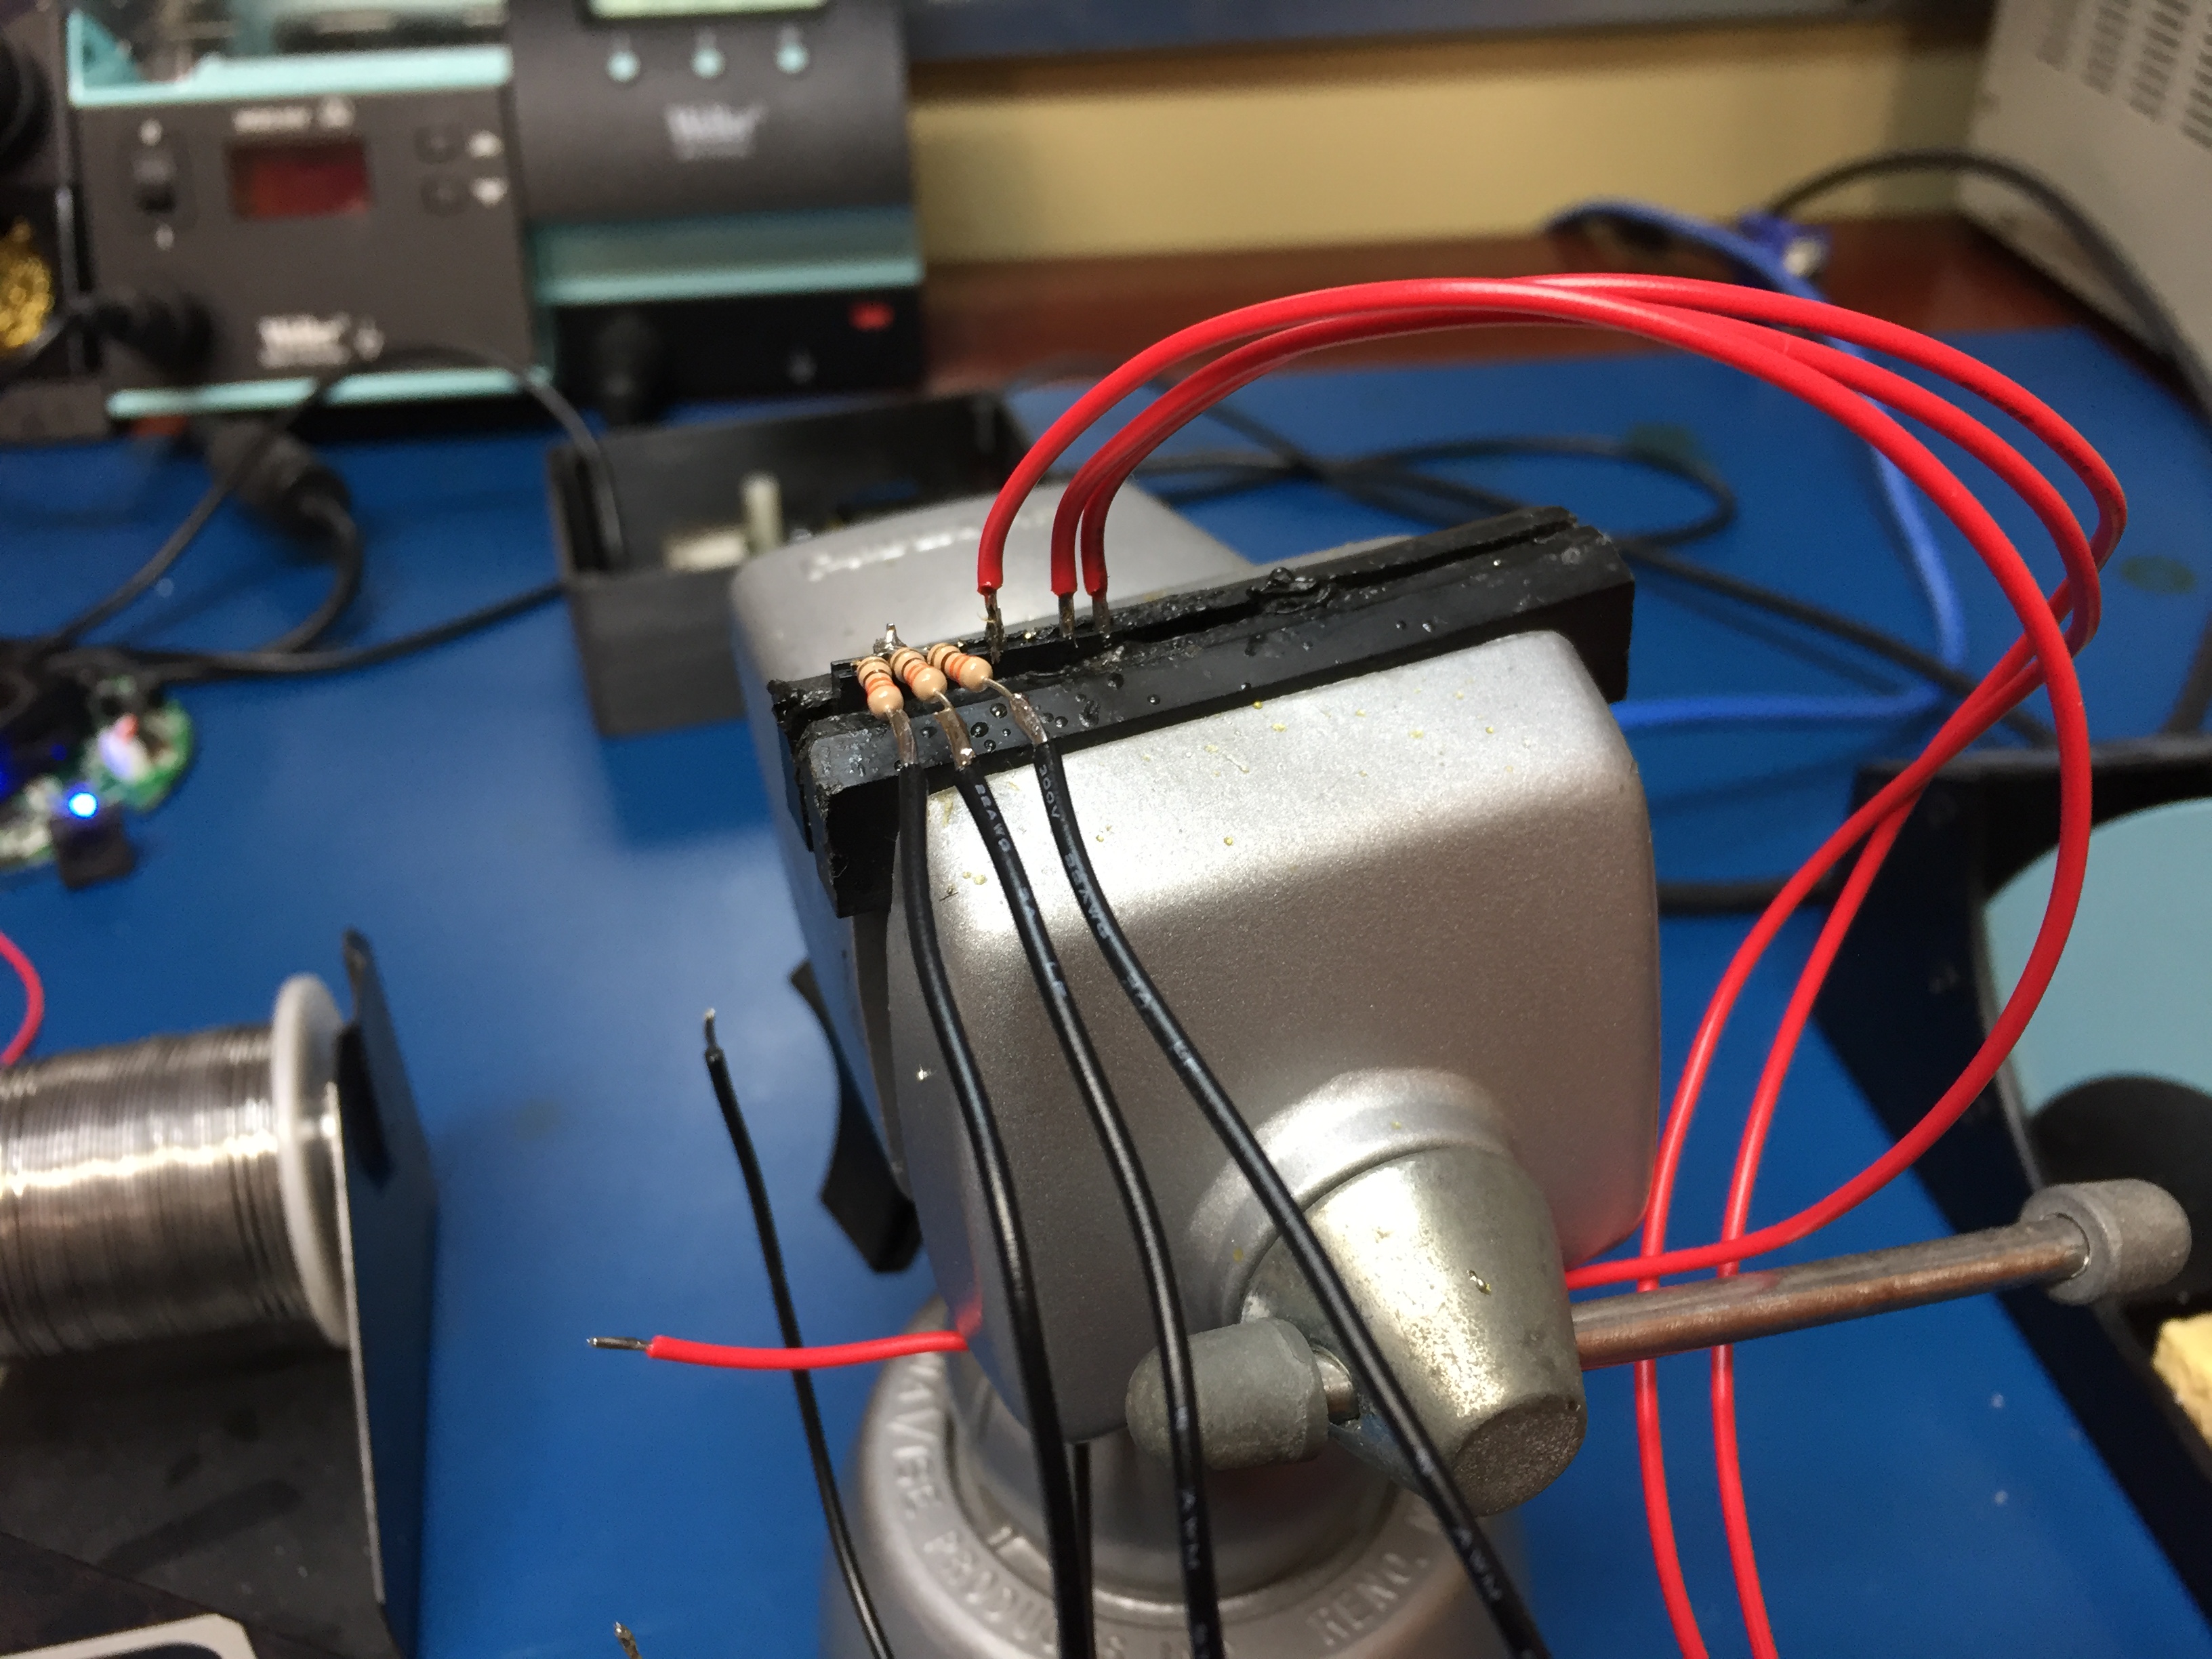\n\nSolder your negative LED wires to each of the resistors.\n\n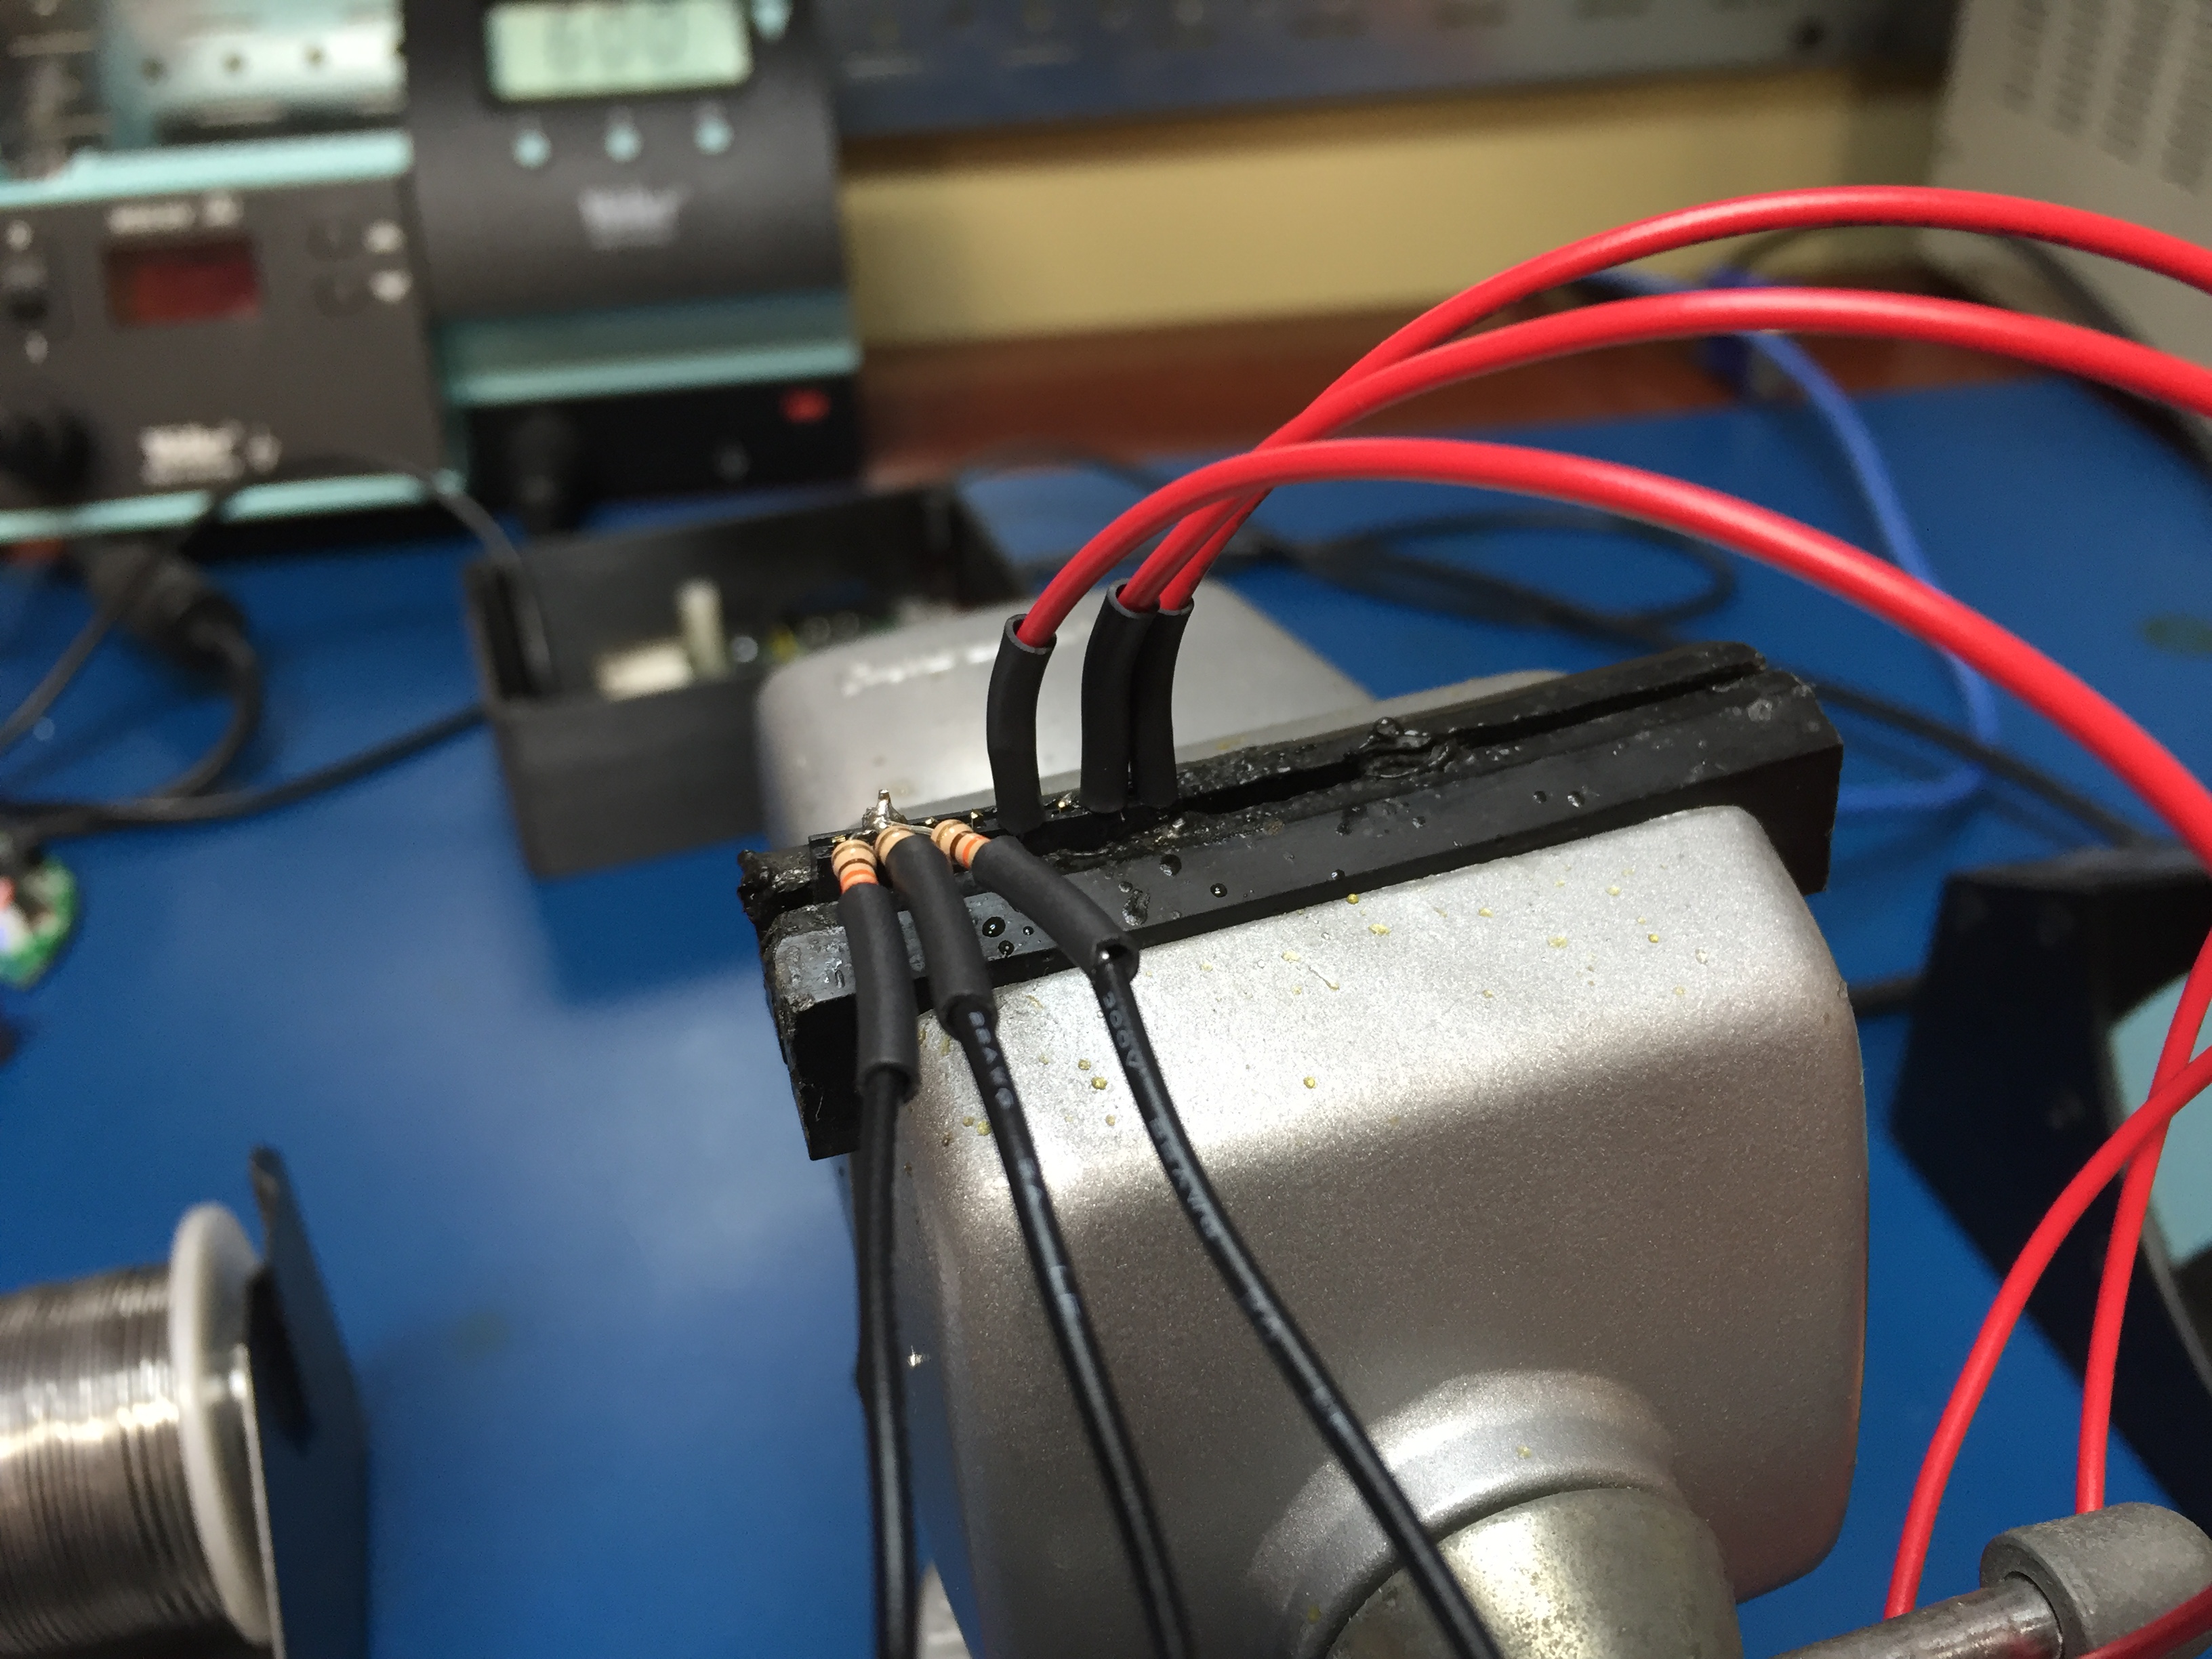\n\nSlip on heat-shrink to protect from shorting. I put a larger piece of heat-shrink around all the resistors to keep them in a nice solid bundle.\n\nNext up put together the button GPIO connector, you can either solder this on to your larger header, or like me, use a smaller 2 pin connector on pins 20 and 22.\n\nSolder the 2 status LEDs on to their respective leads. Don't forget to slip on the LED holder boots and the heat-shrink before you solder!\n\n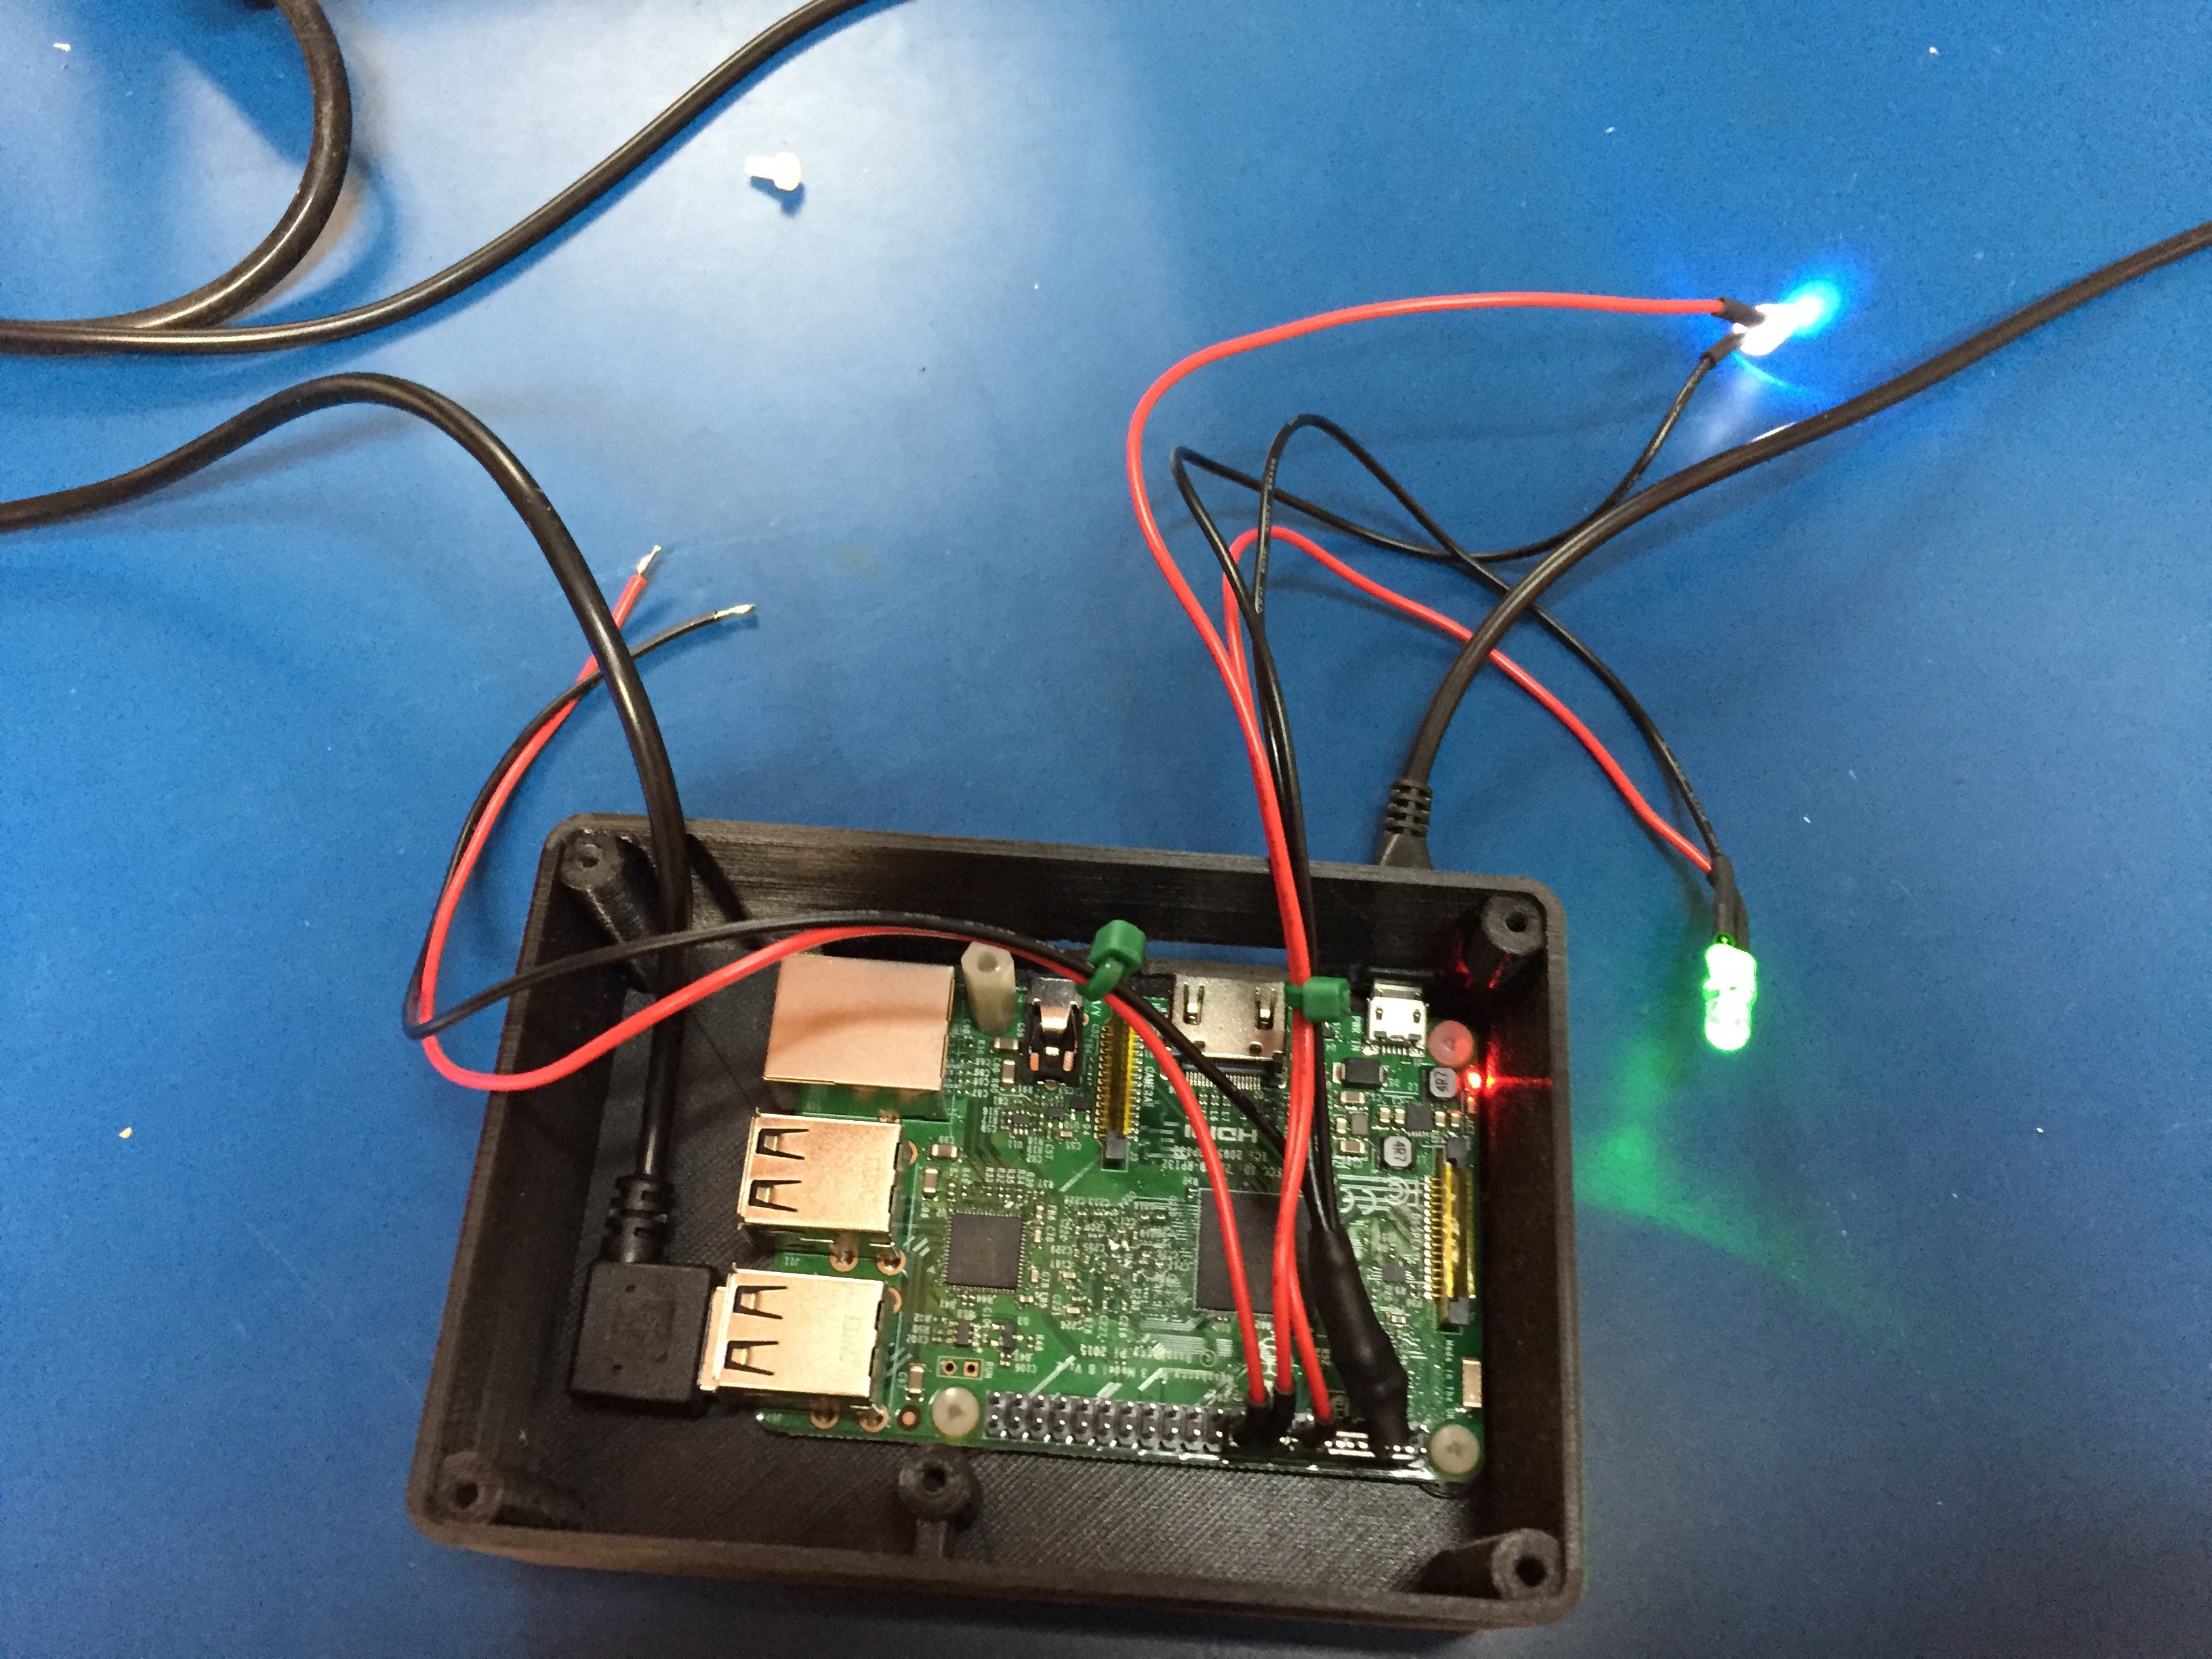\n\n---\n\n### The USB speakerphone\n\nTaking the speakerphone apart is really simple. There are two screws hiding under the rubber feet and two more screws holding the speaker in place.\n\n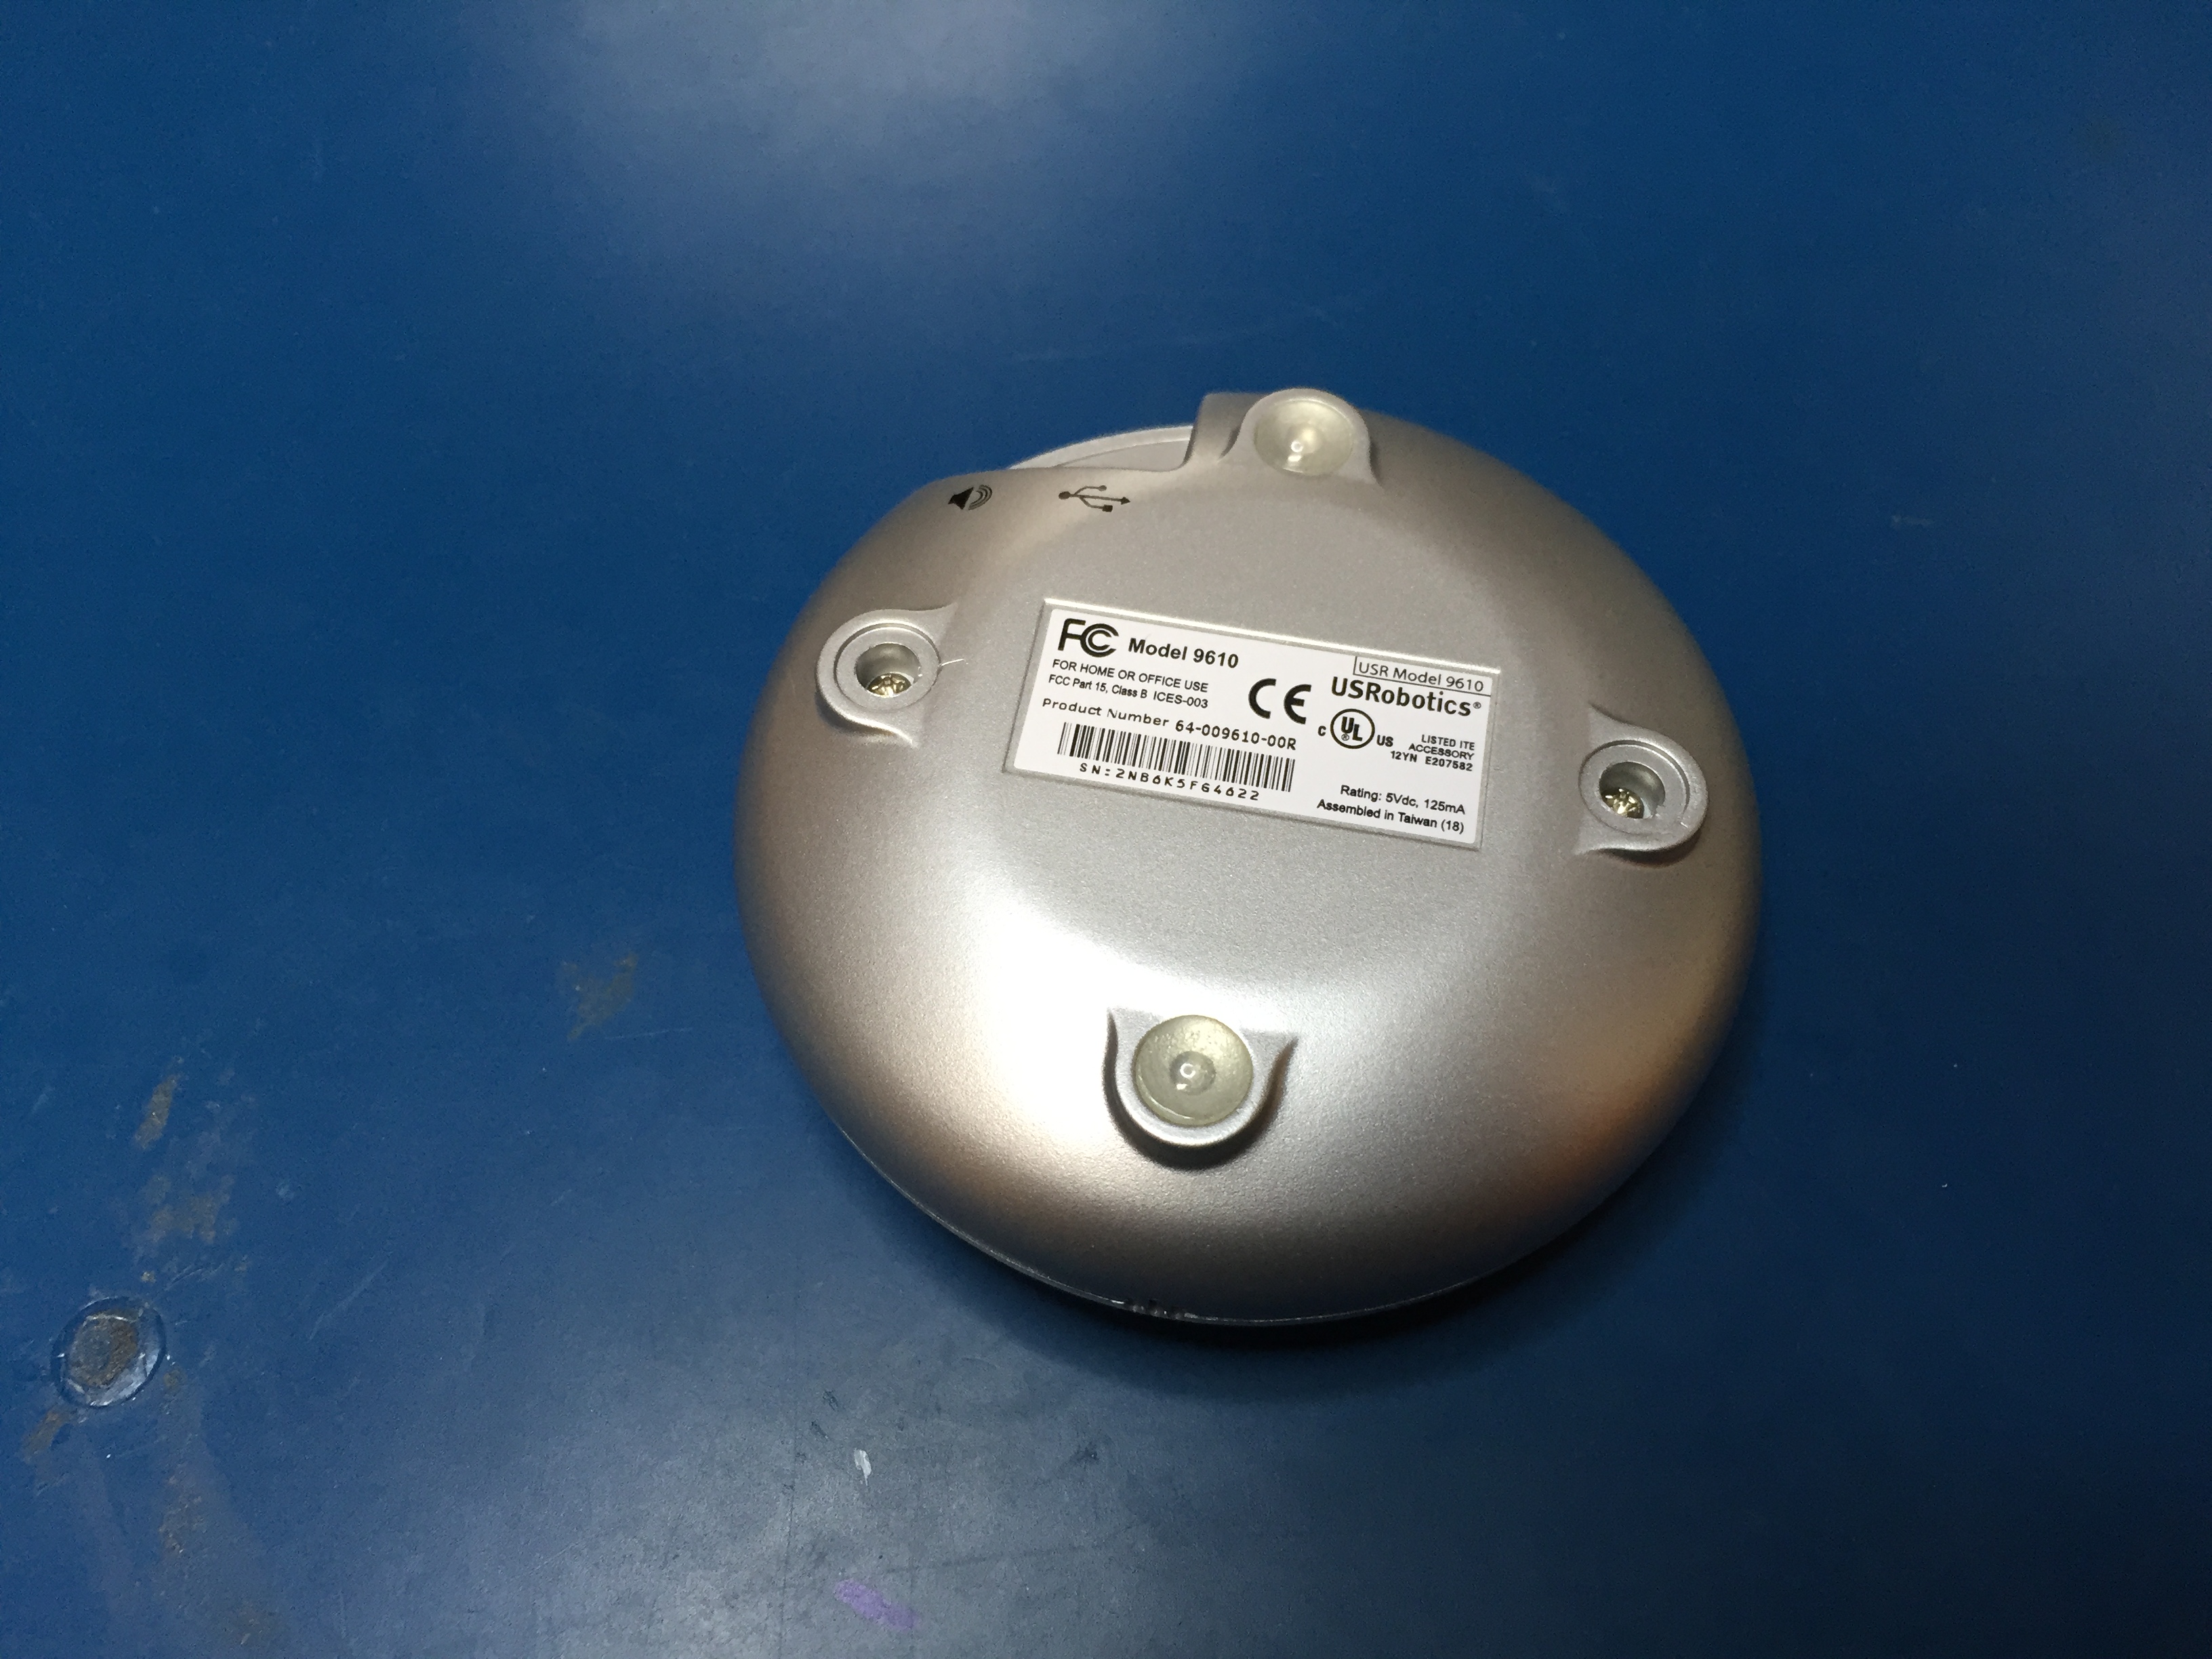\n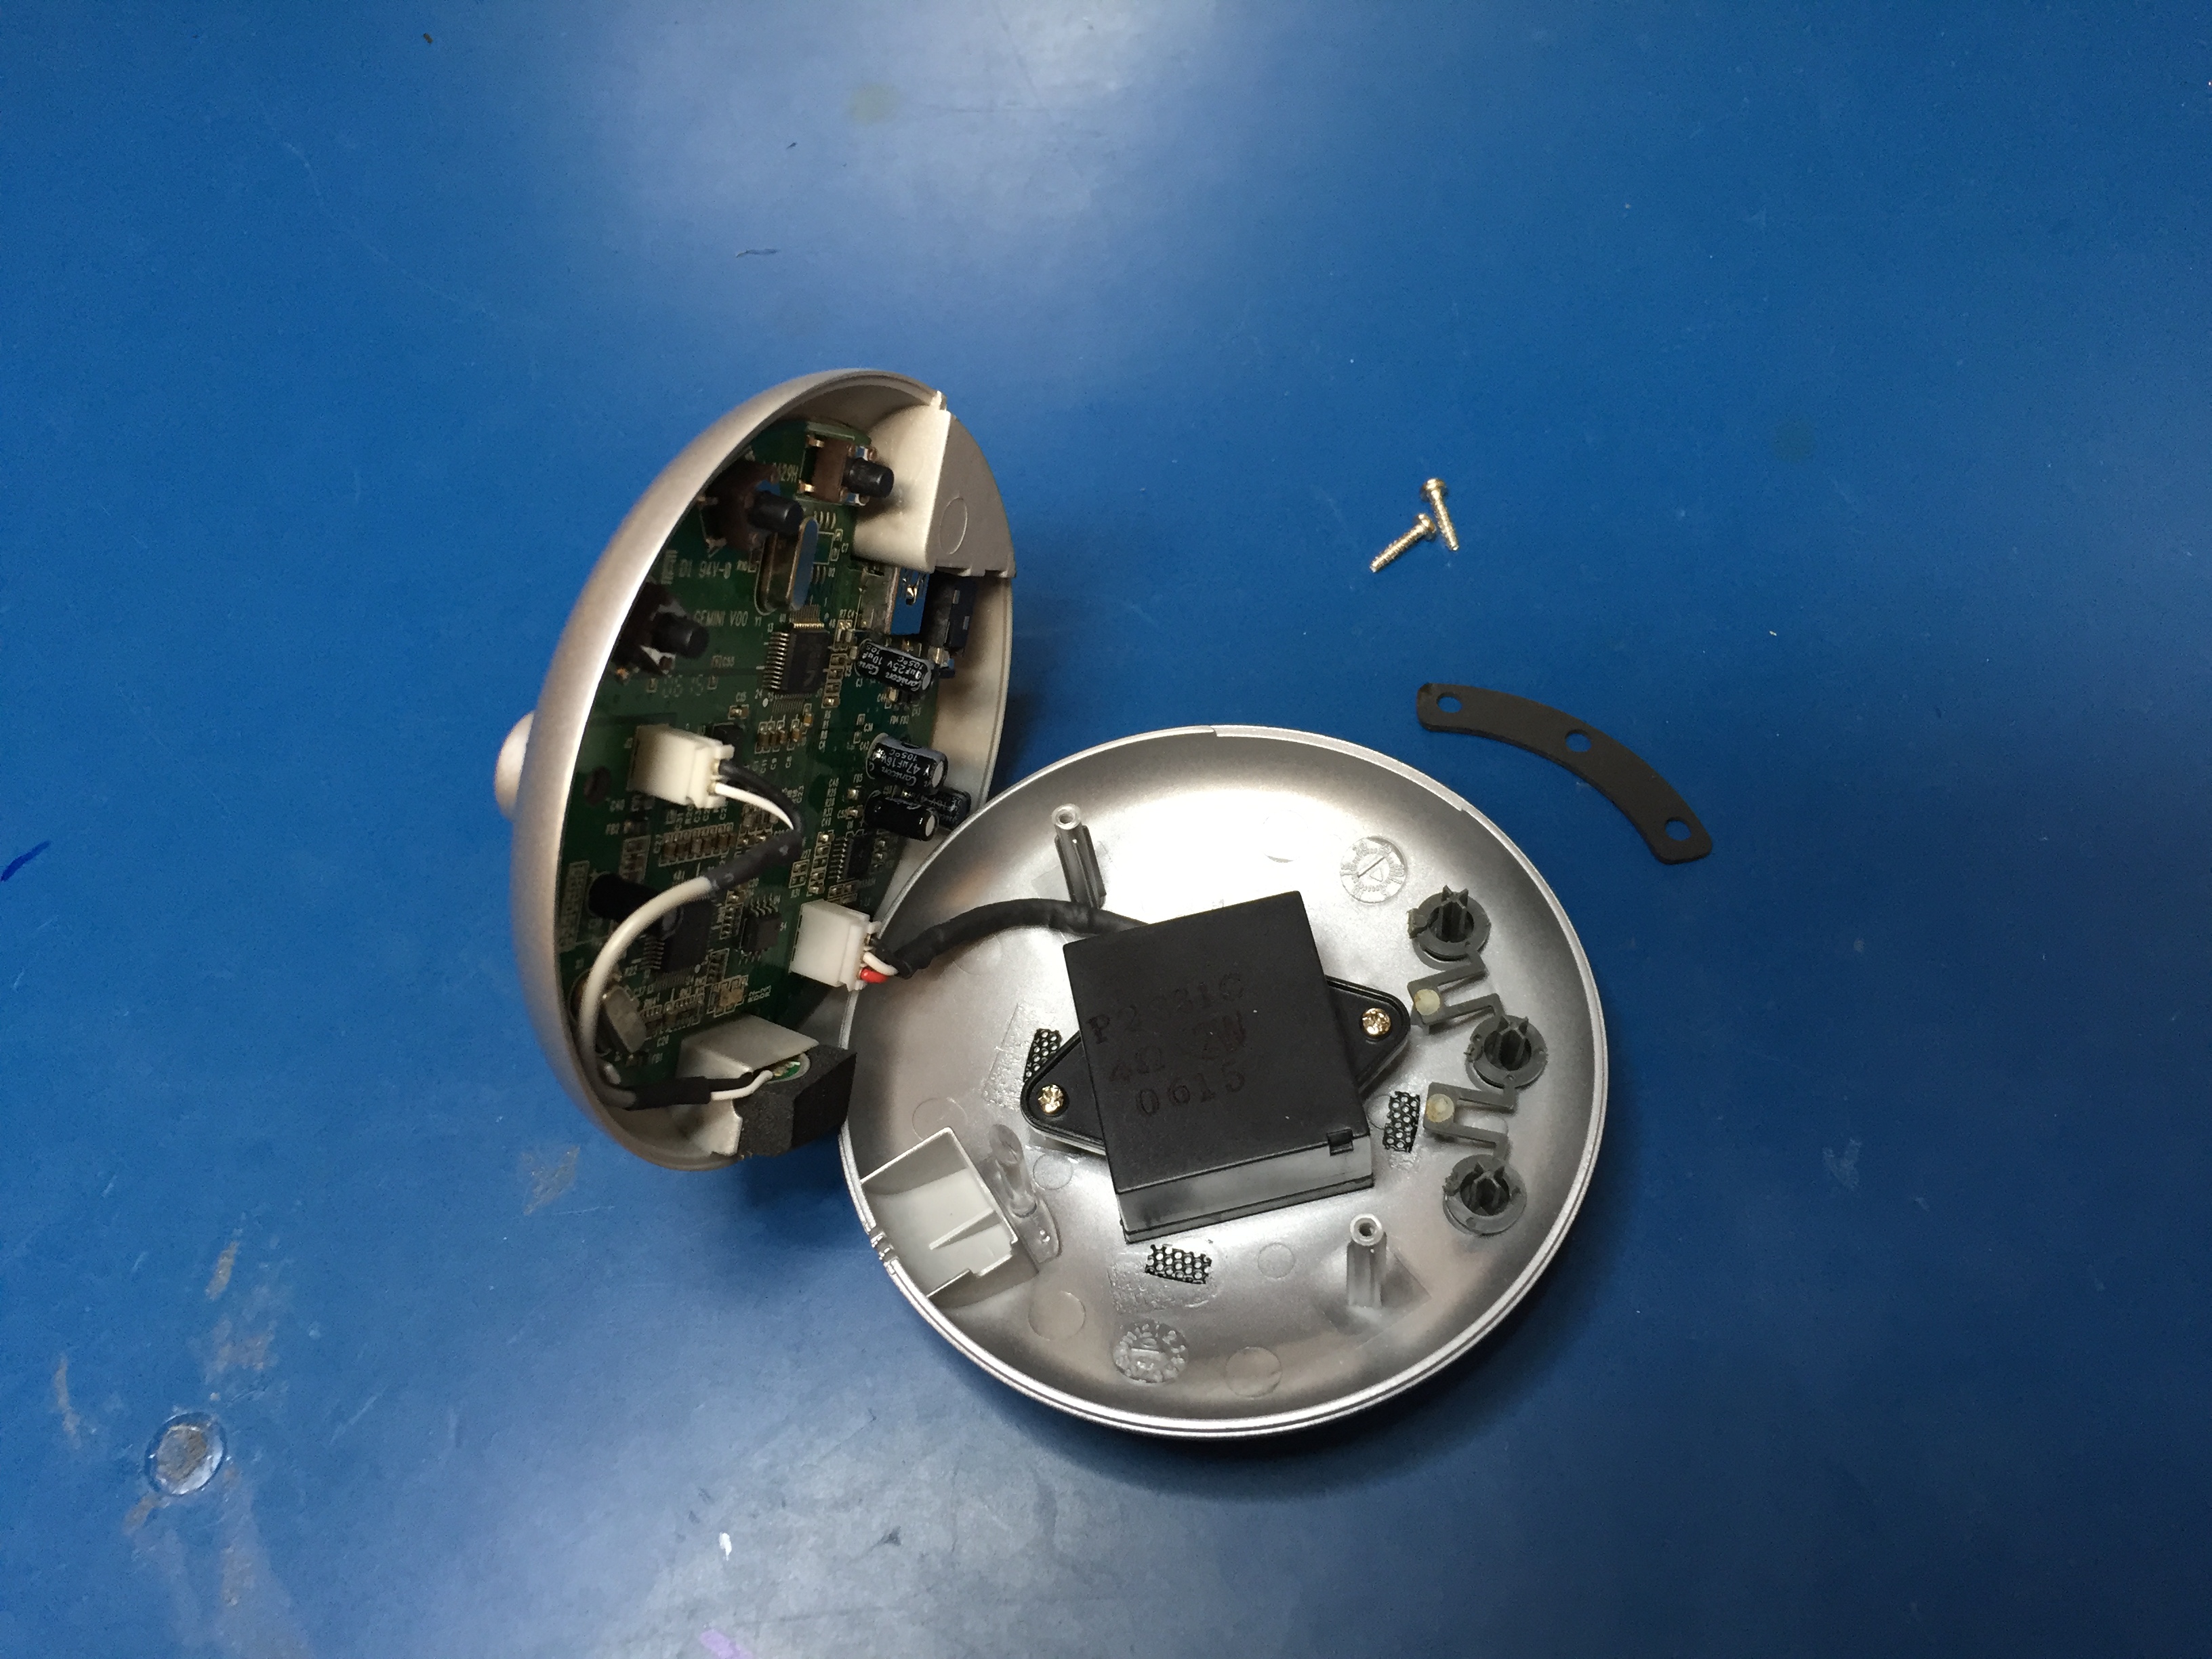\n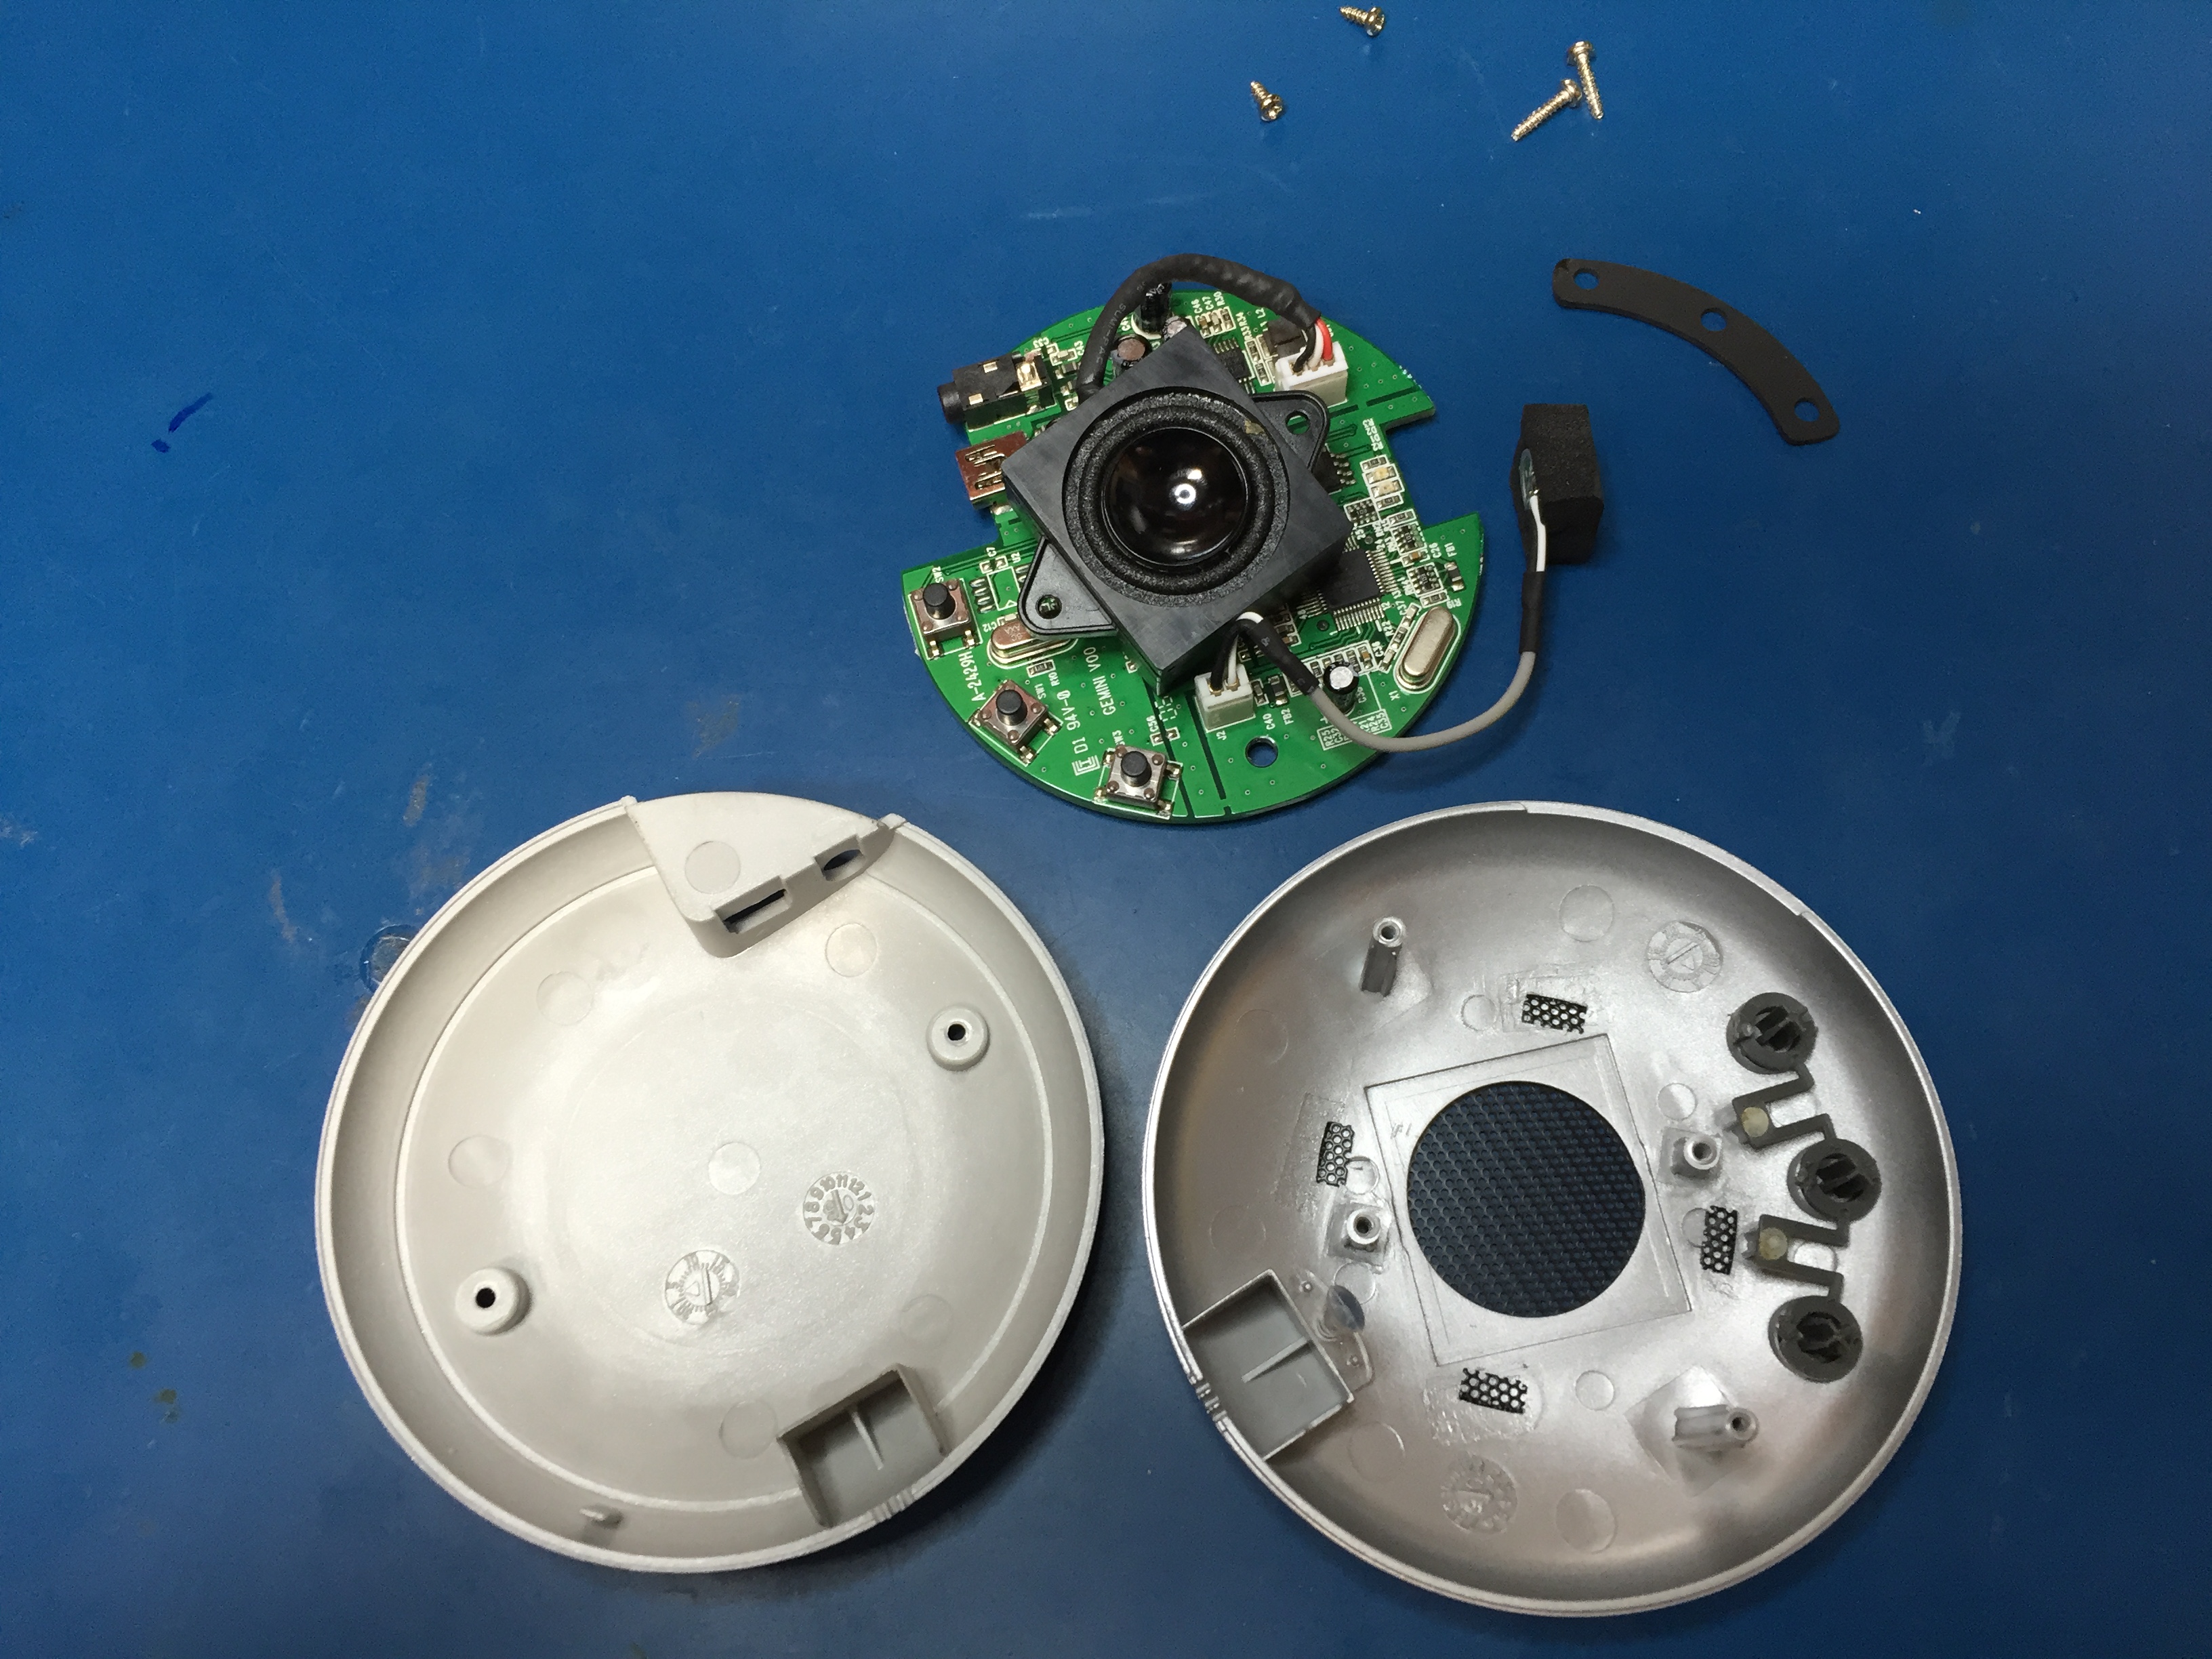\n\nLeave the foam on the microphone; the talkiepi case actually utilizes that to hold the microphone in place.\n\n\n### Assembling talkiepi\n\nI designed the enclosure to accommodate the Pi3 and the US Robotics speakerphone PCB specifically. Once you have printed the enclosure parts, I recommend you get a 3mm tap and tap the holes. If you don't have a tap, you can use one of your stainless bolts (carefully avoiding stripping out the holes).\n\n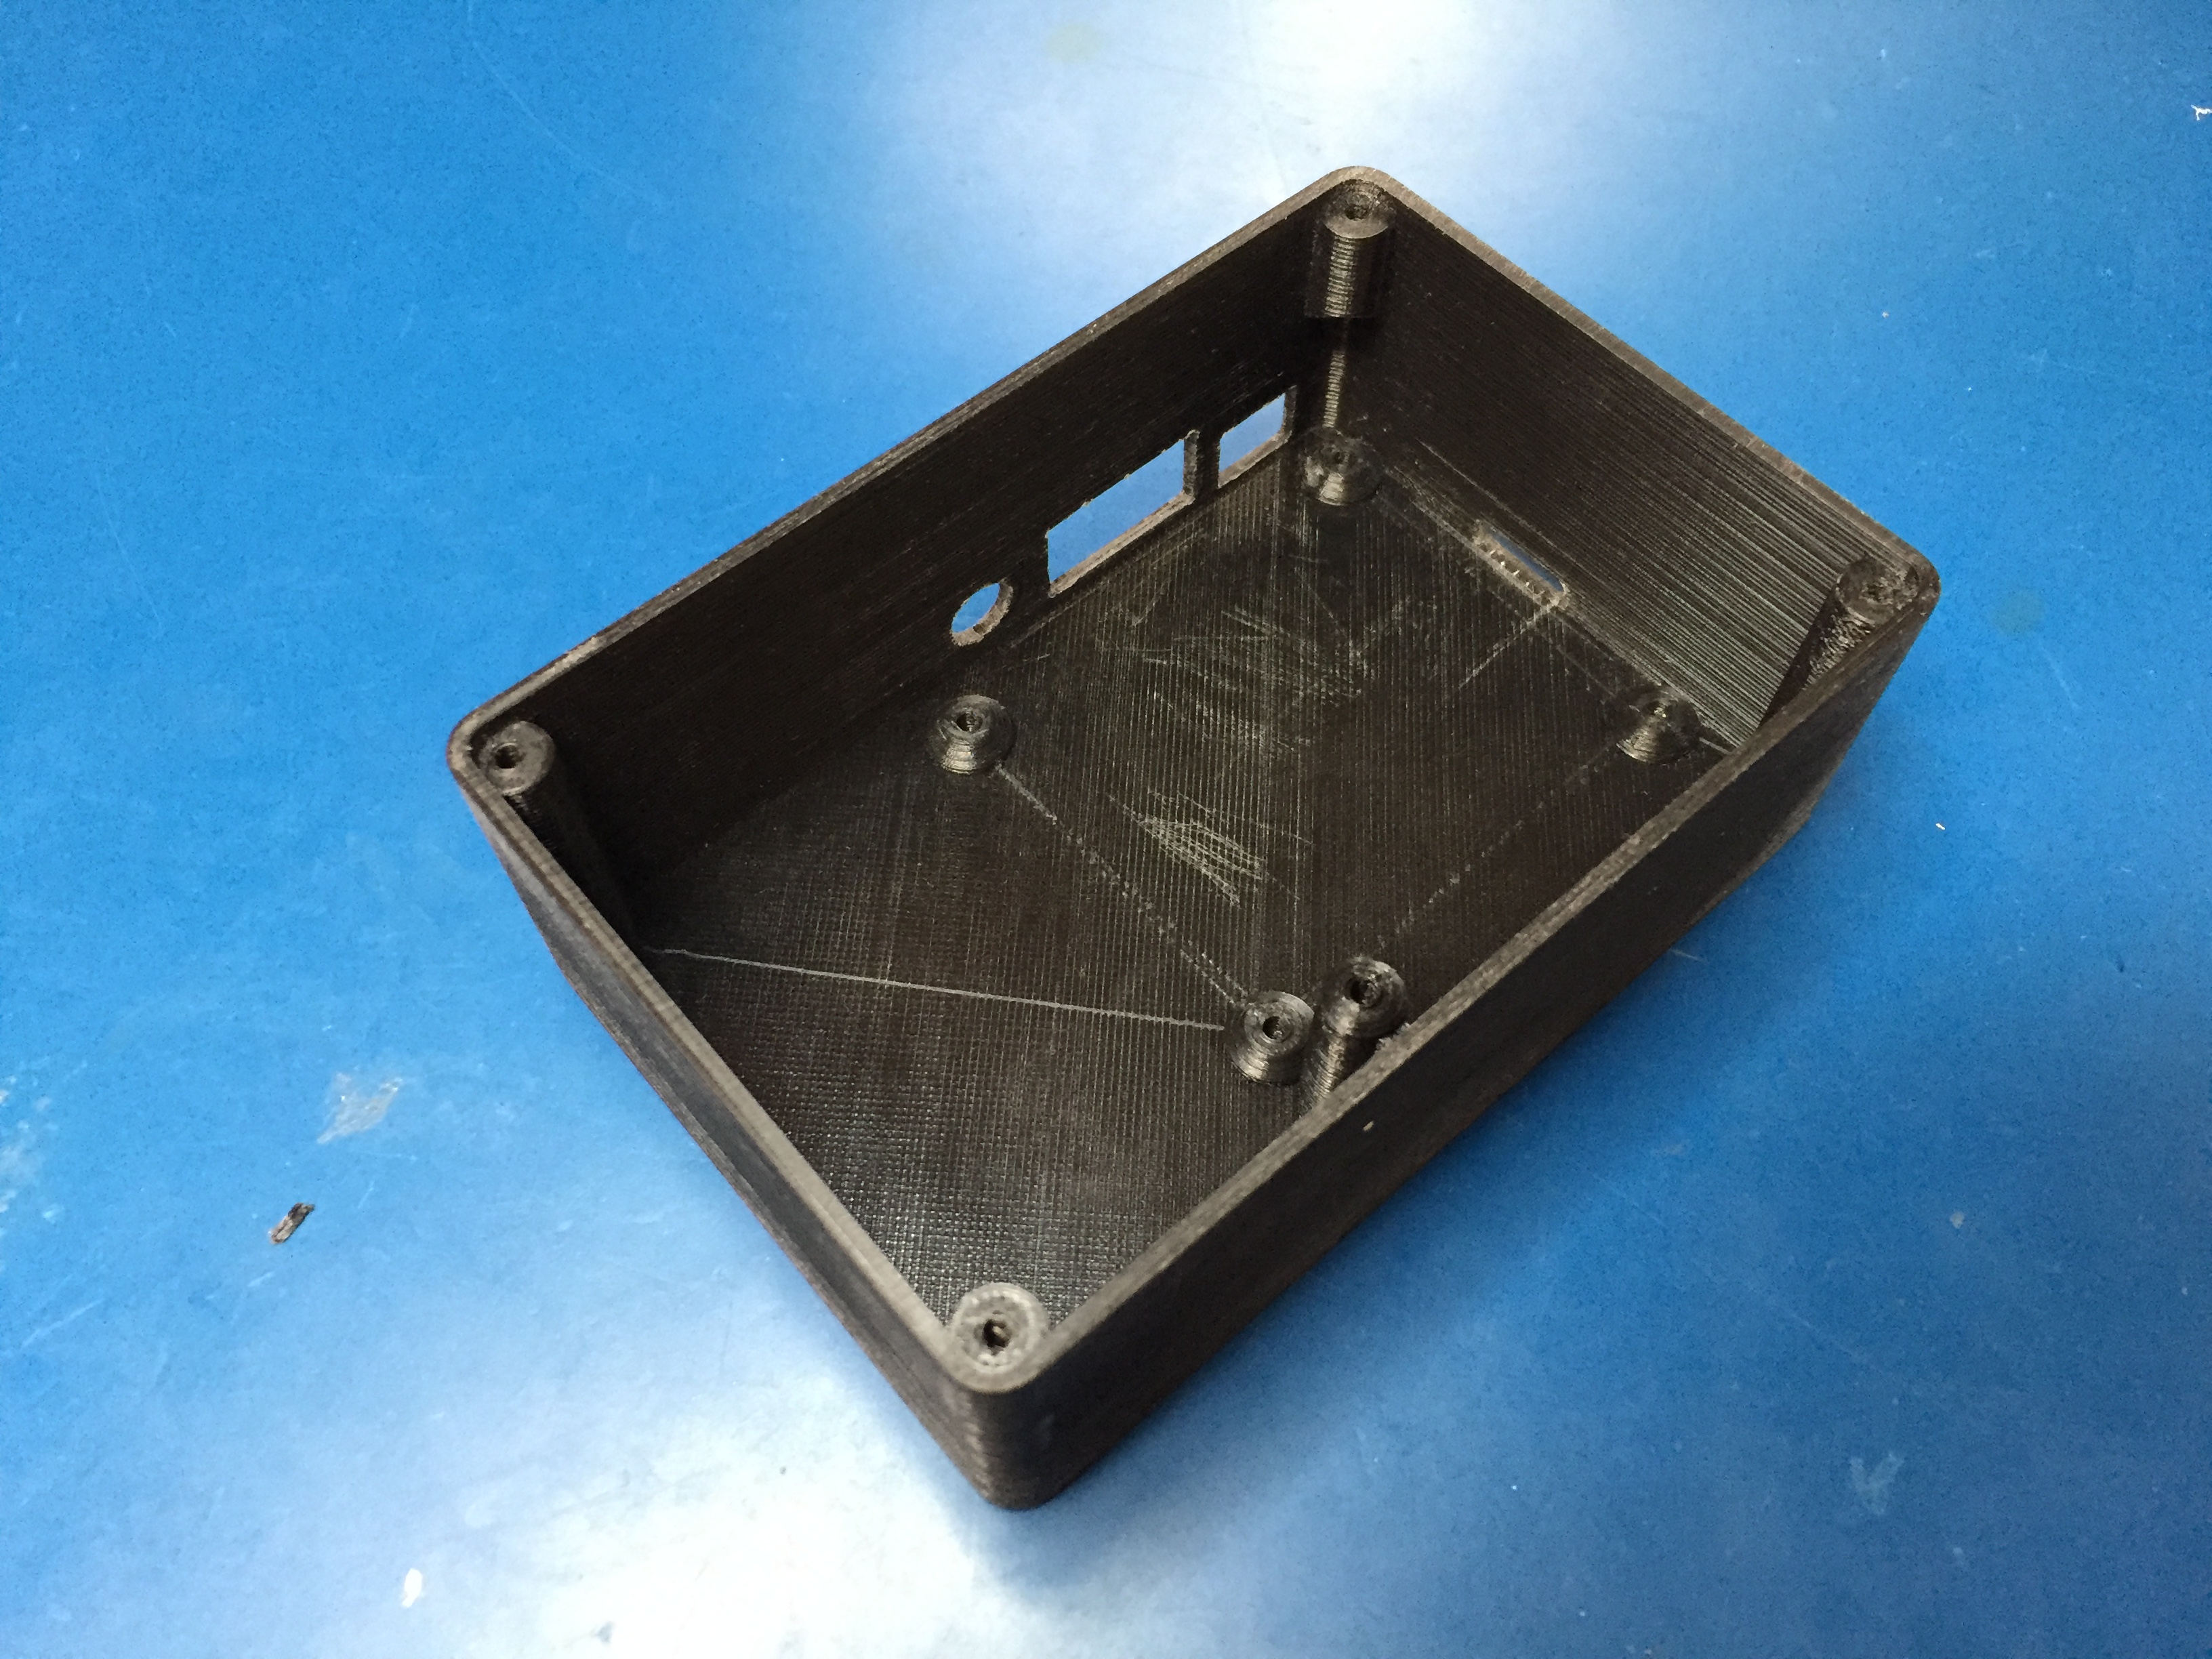\n\nAttach the right/left angle USB cable to the bottom right USB port of your Raspberry Pi. Mount the Raspberry Pi using the nylon screws. Use the standoff in the hole next to the 3.5mm audio jack.\n\n\n\nCarefully unclip and disconnect the speaker from the speakerphone PCB and mount the speaker on the front panel using your M3x10 bolts+nuts. You will likely need to drill out the holes on the speaker to 3mm. Connect your GPIO harness to the Raspberry Pi.\n\n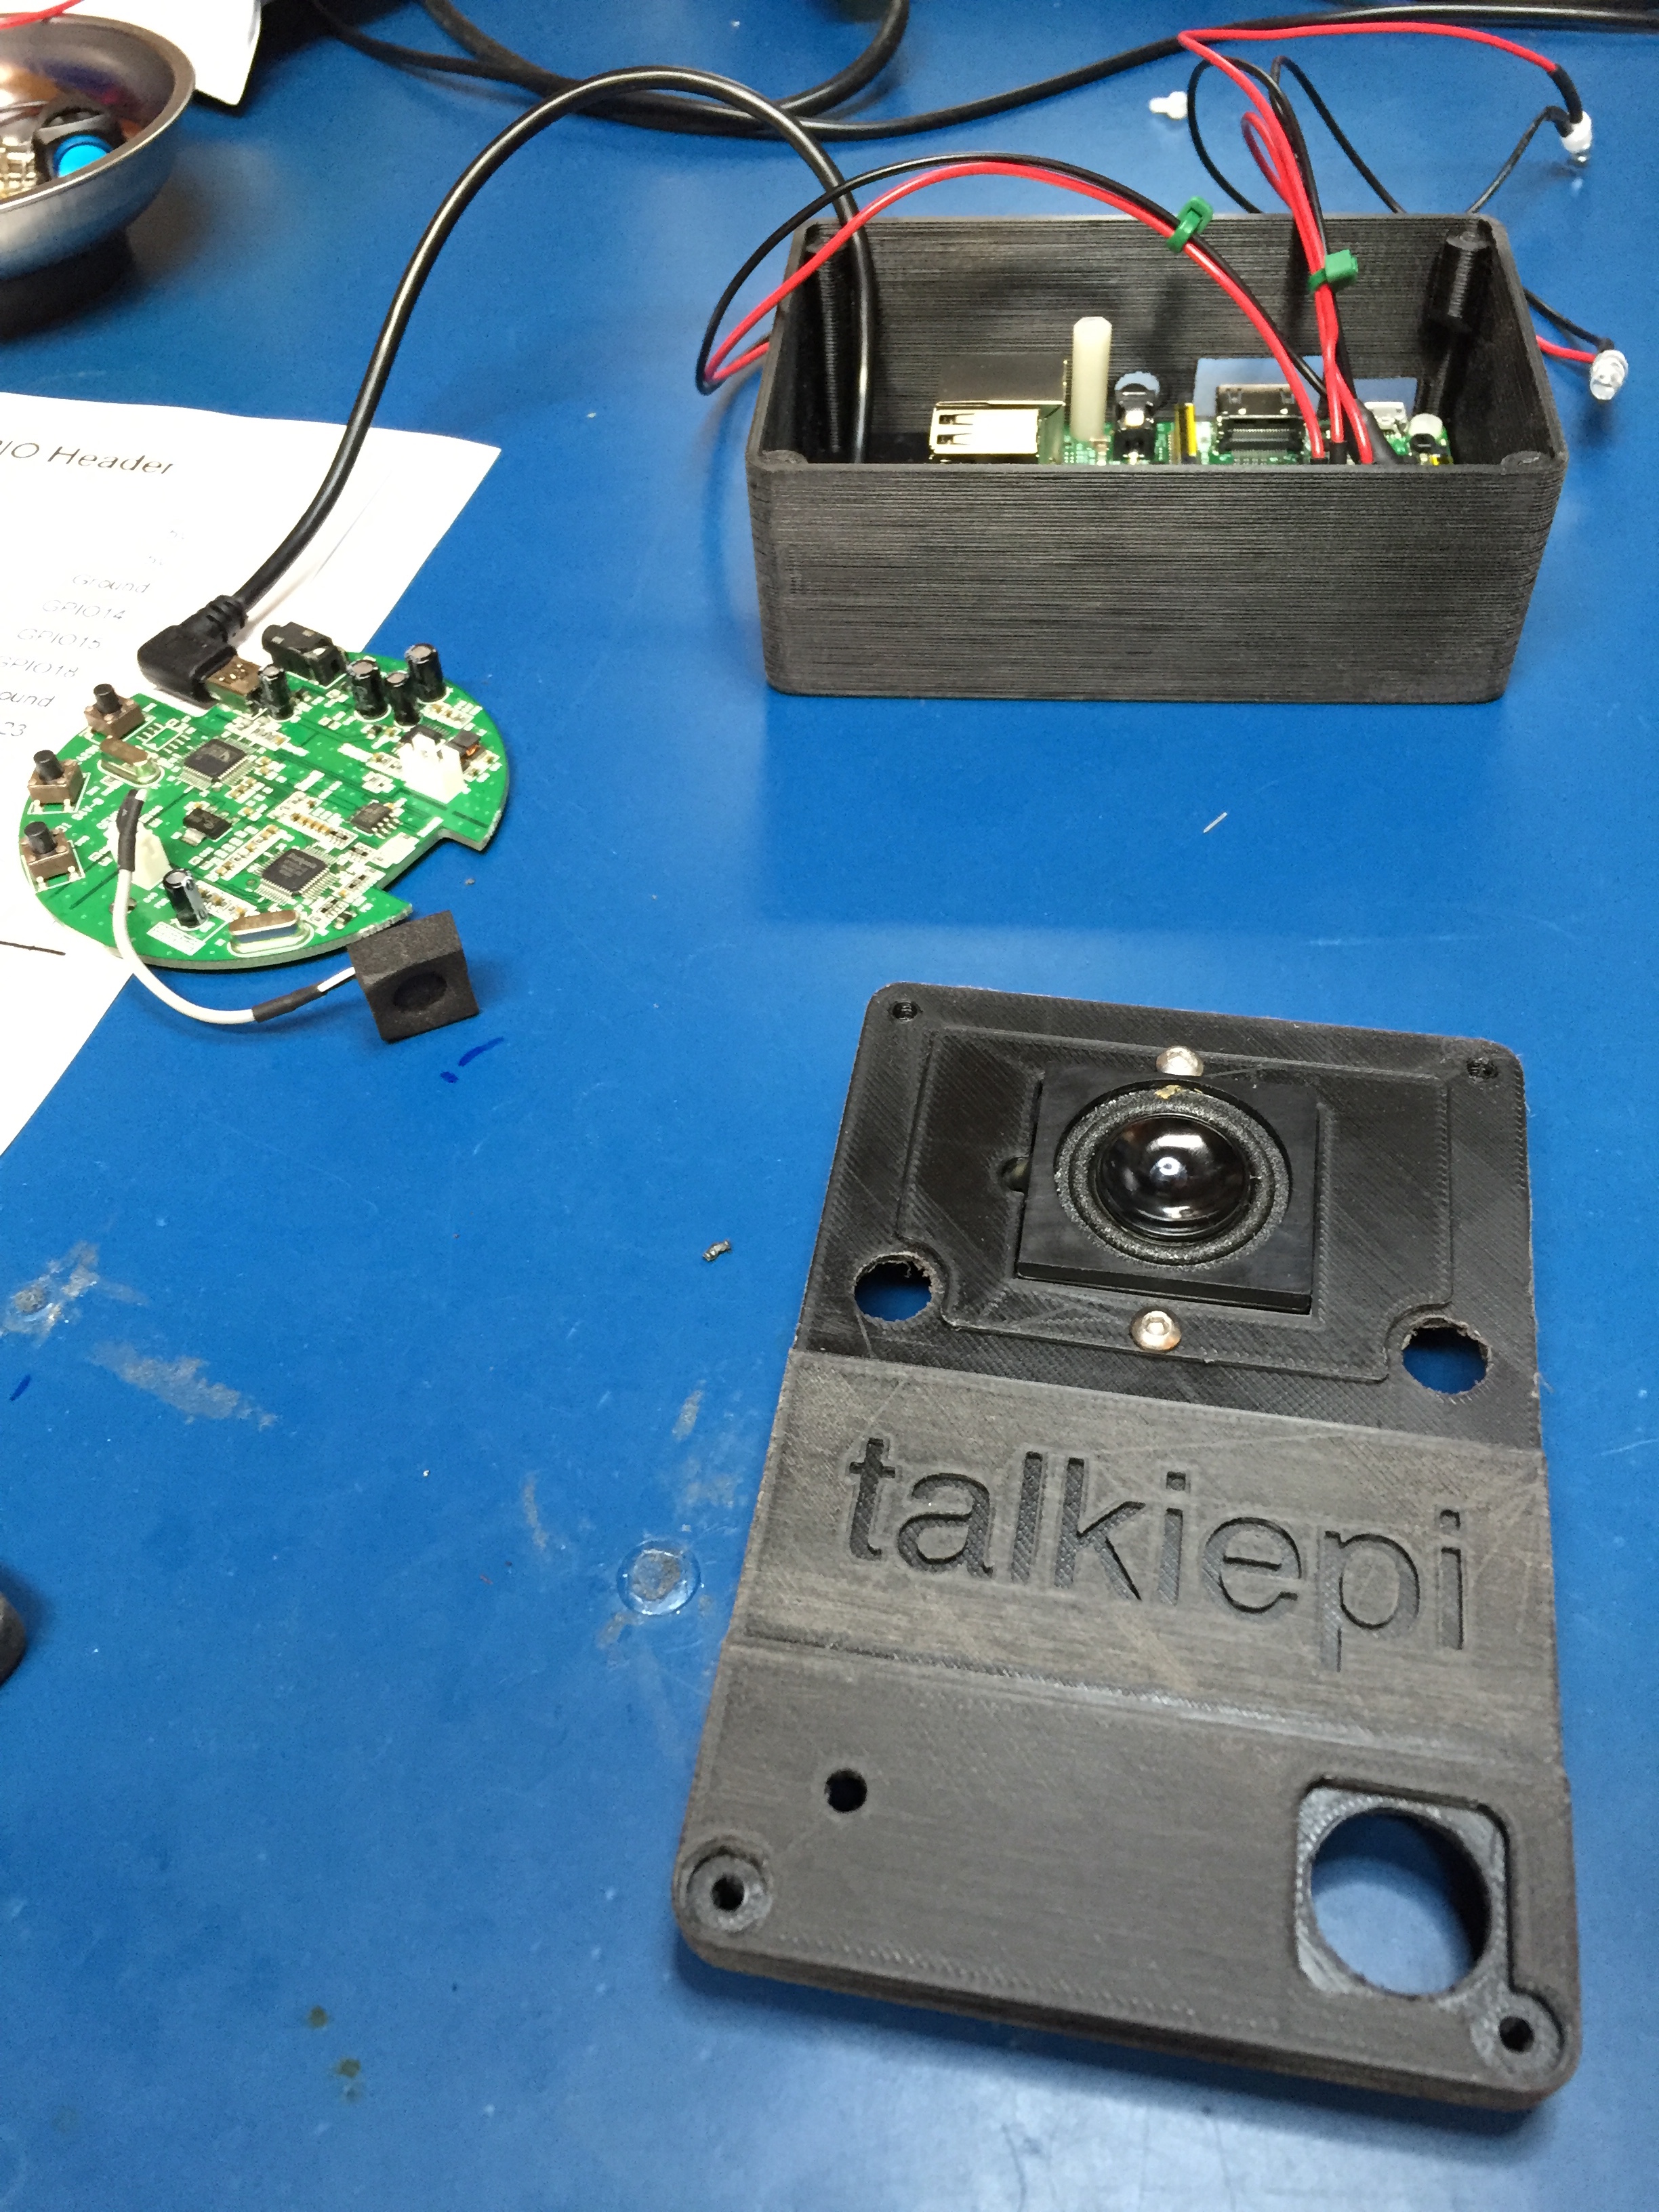\n\nPlace the LED holders through the speaker cover and place the speaker cover and LED holders through the top panel, fastening the LED holders in place with their washers and nuts. Secure the LED push button in place. \n\n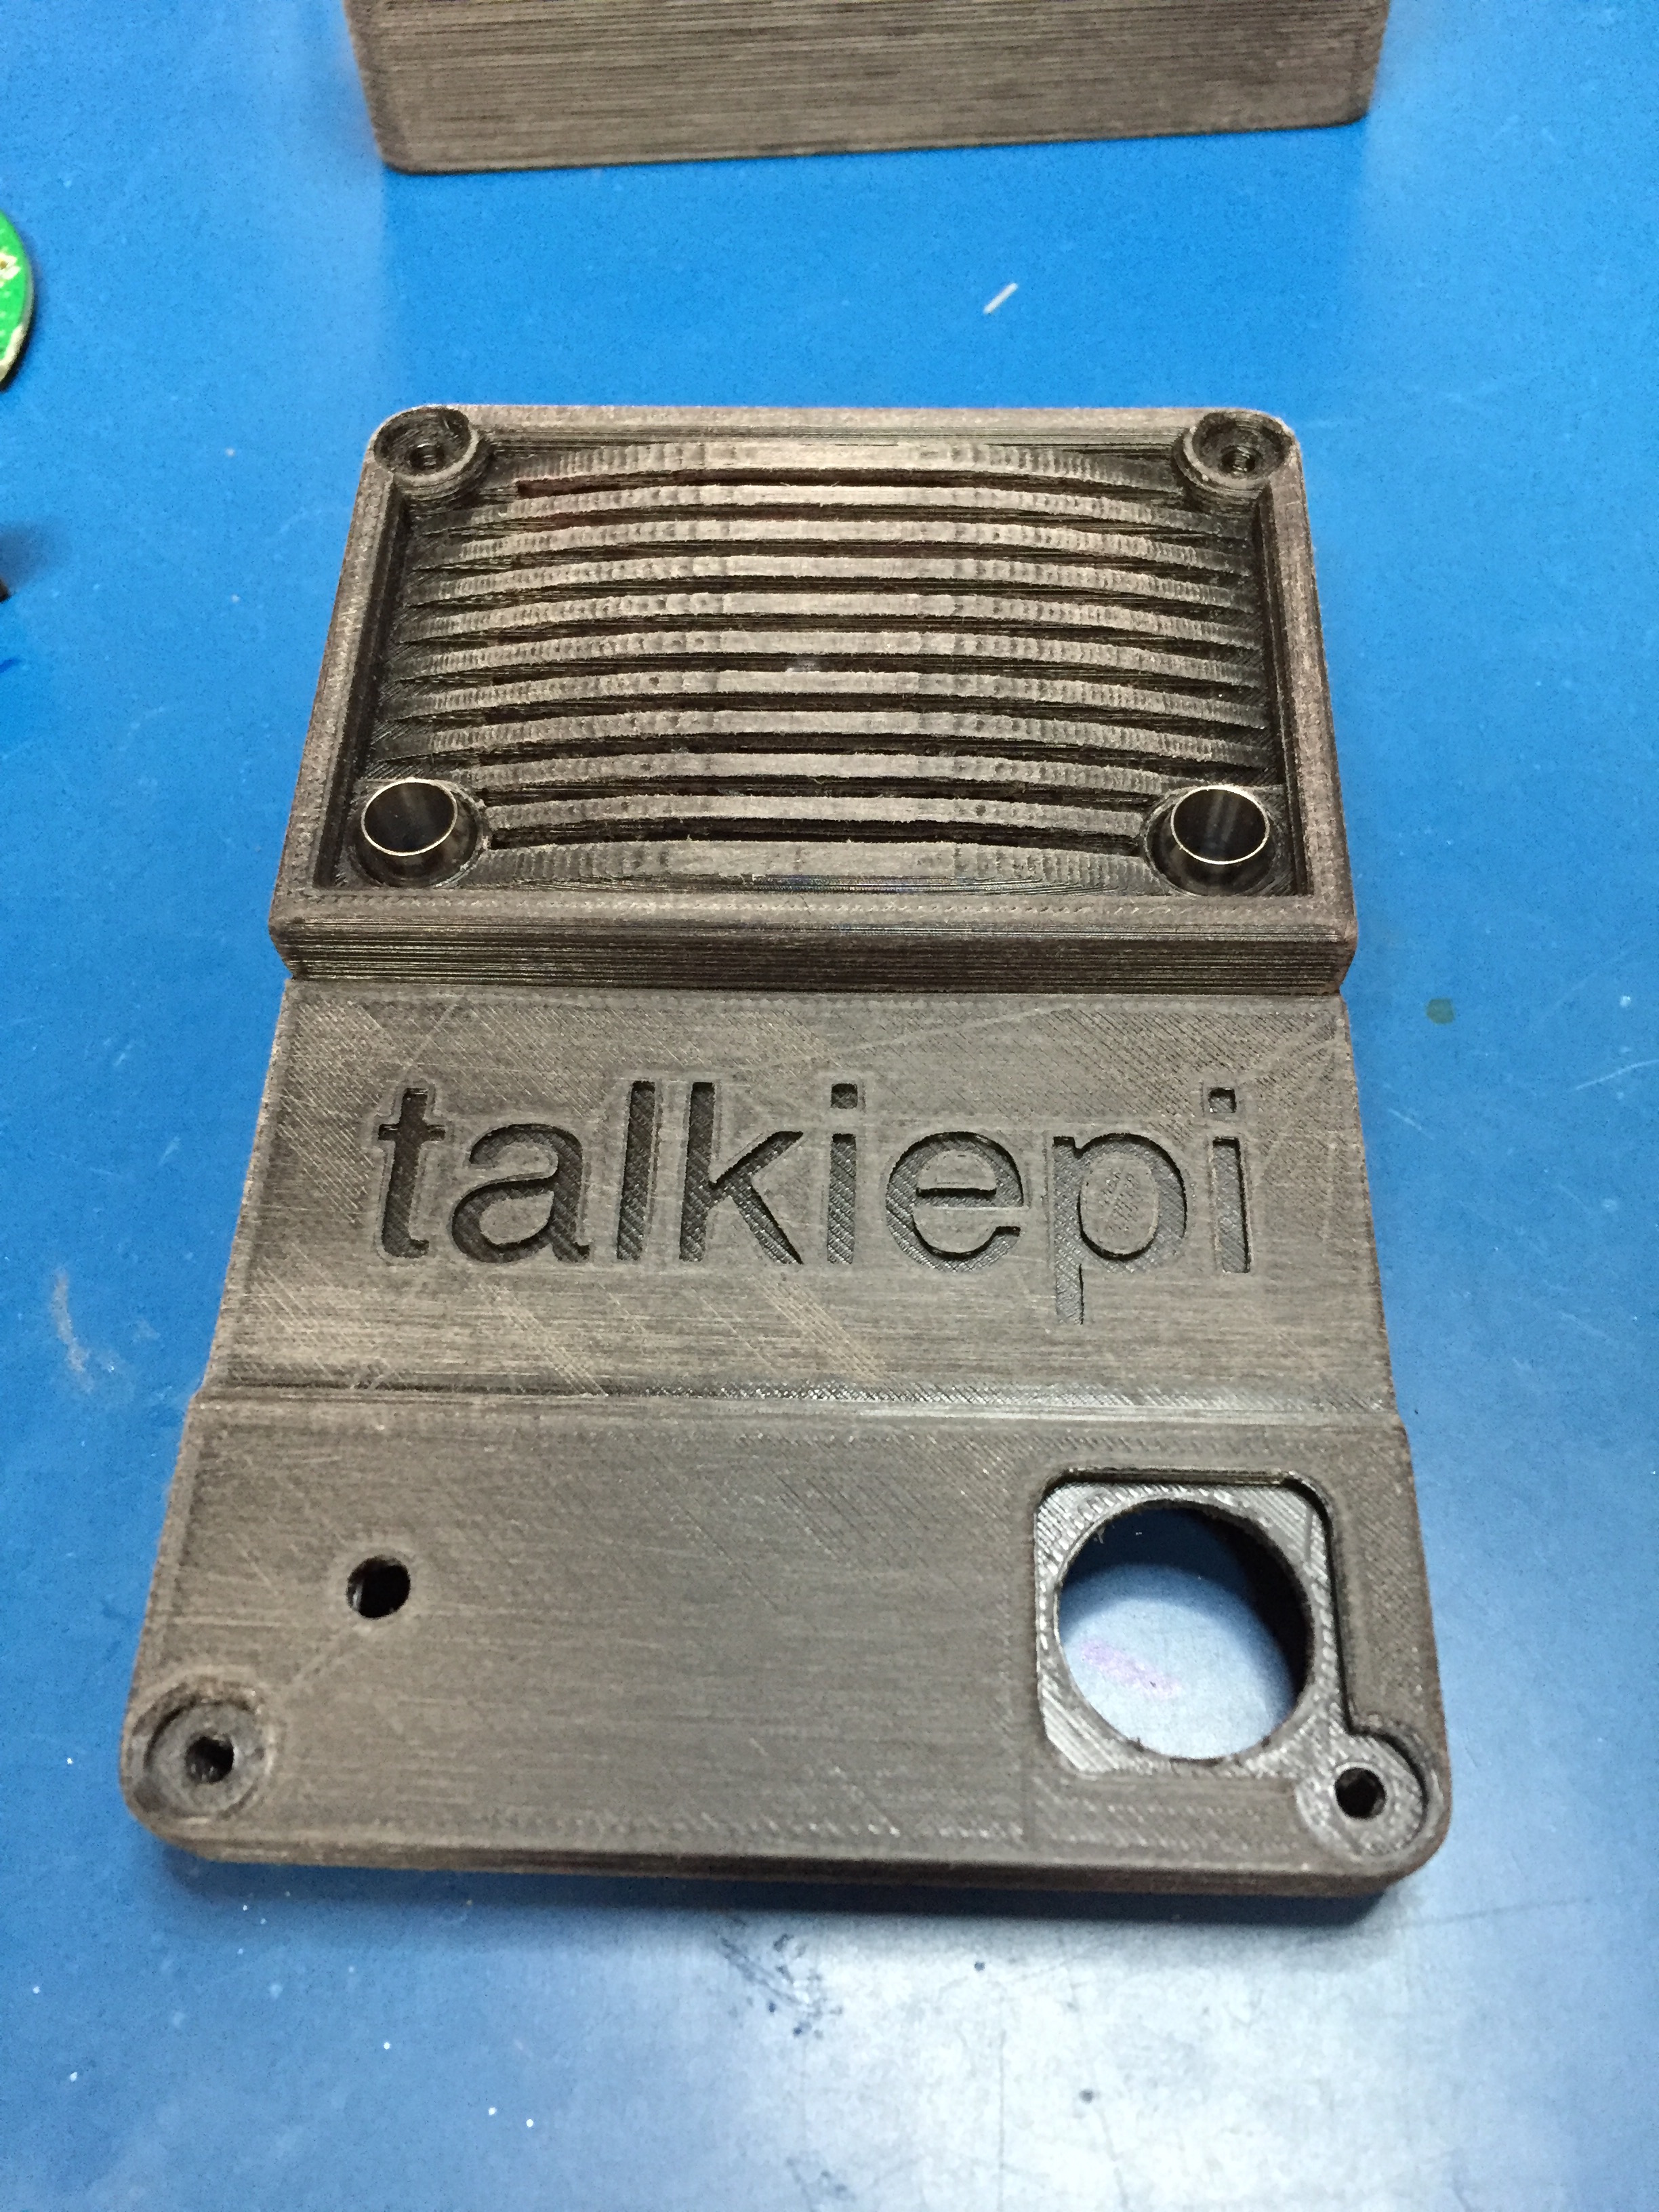\n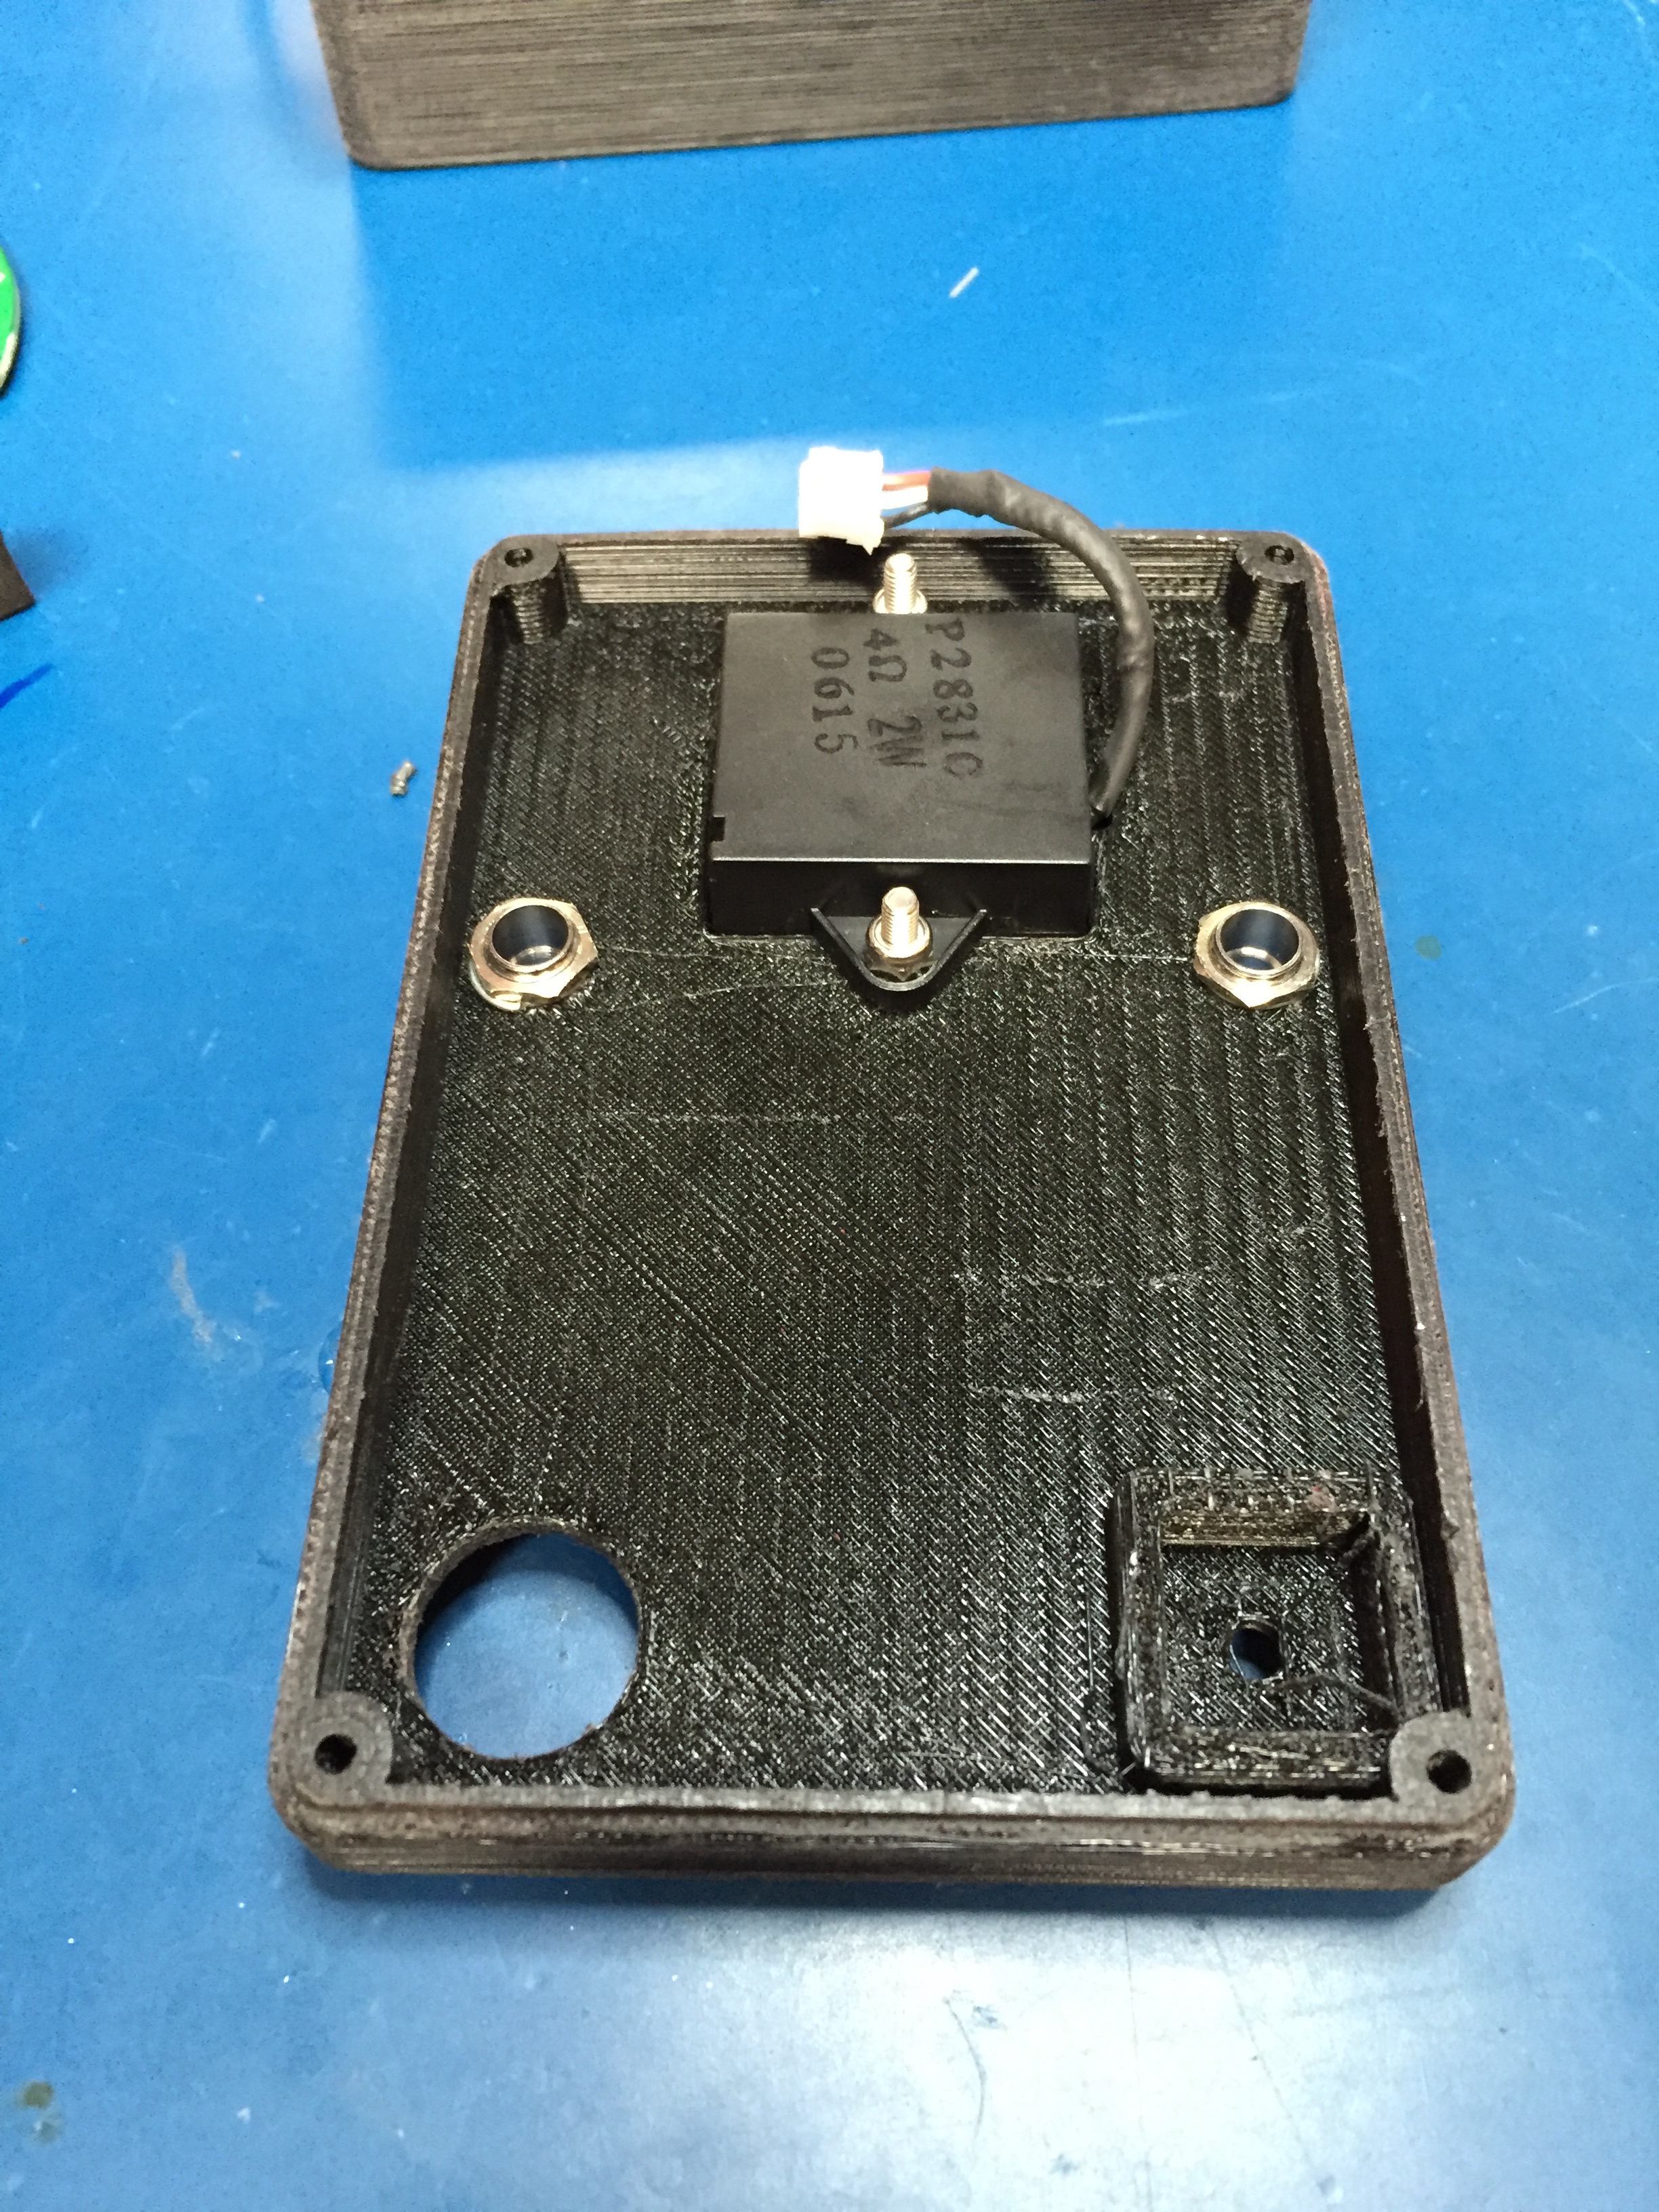\n\nNow slide the LEDs with boots into the LED holders (*I used a little bit of silicone sealant to ensure they dont push out*).\n\n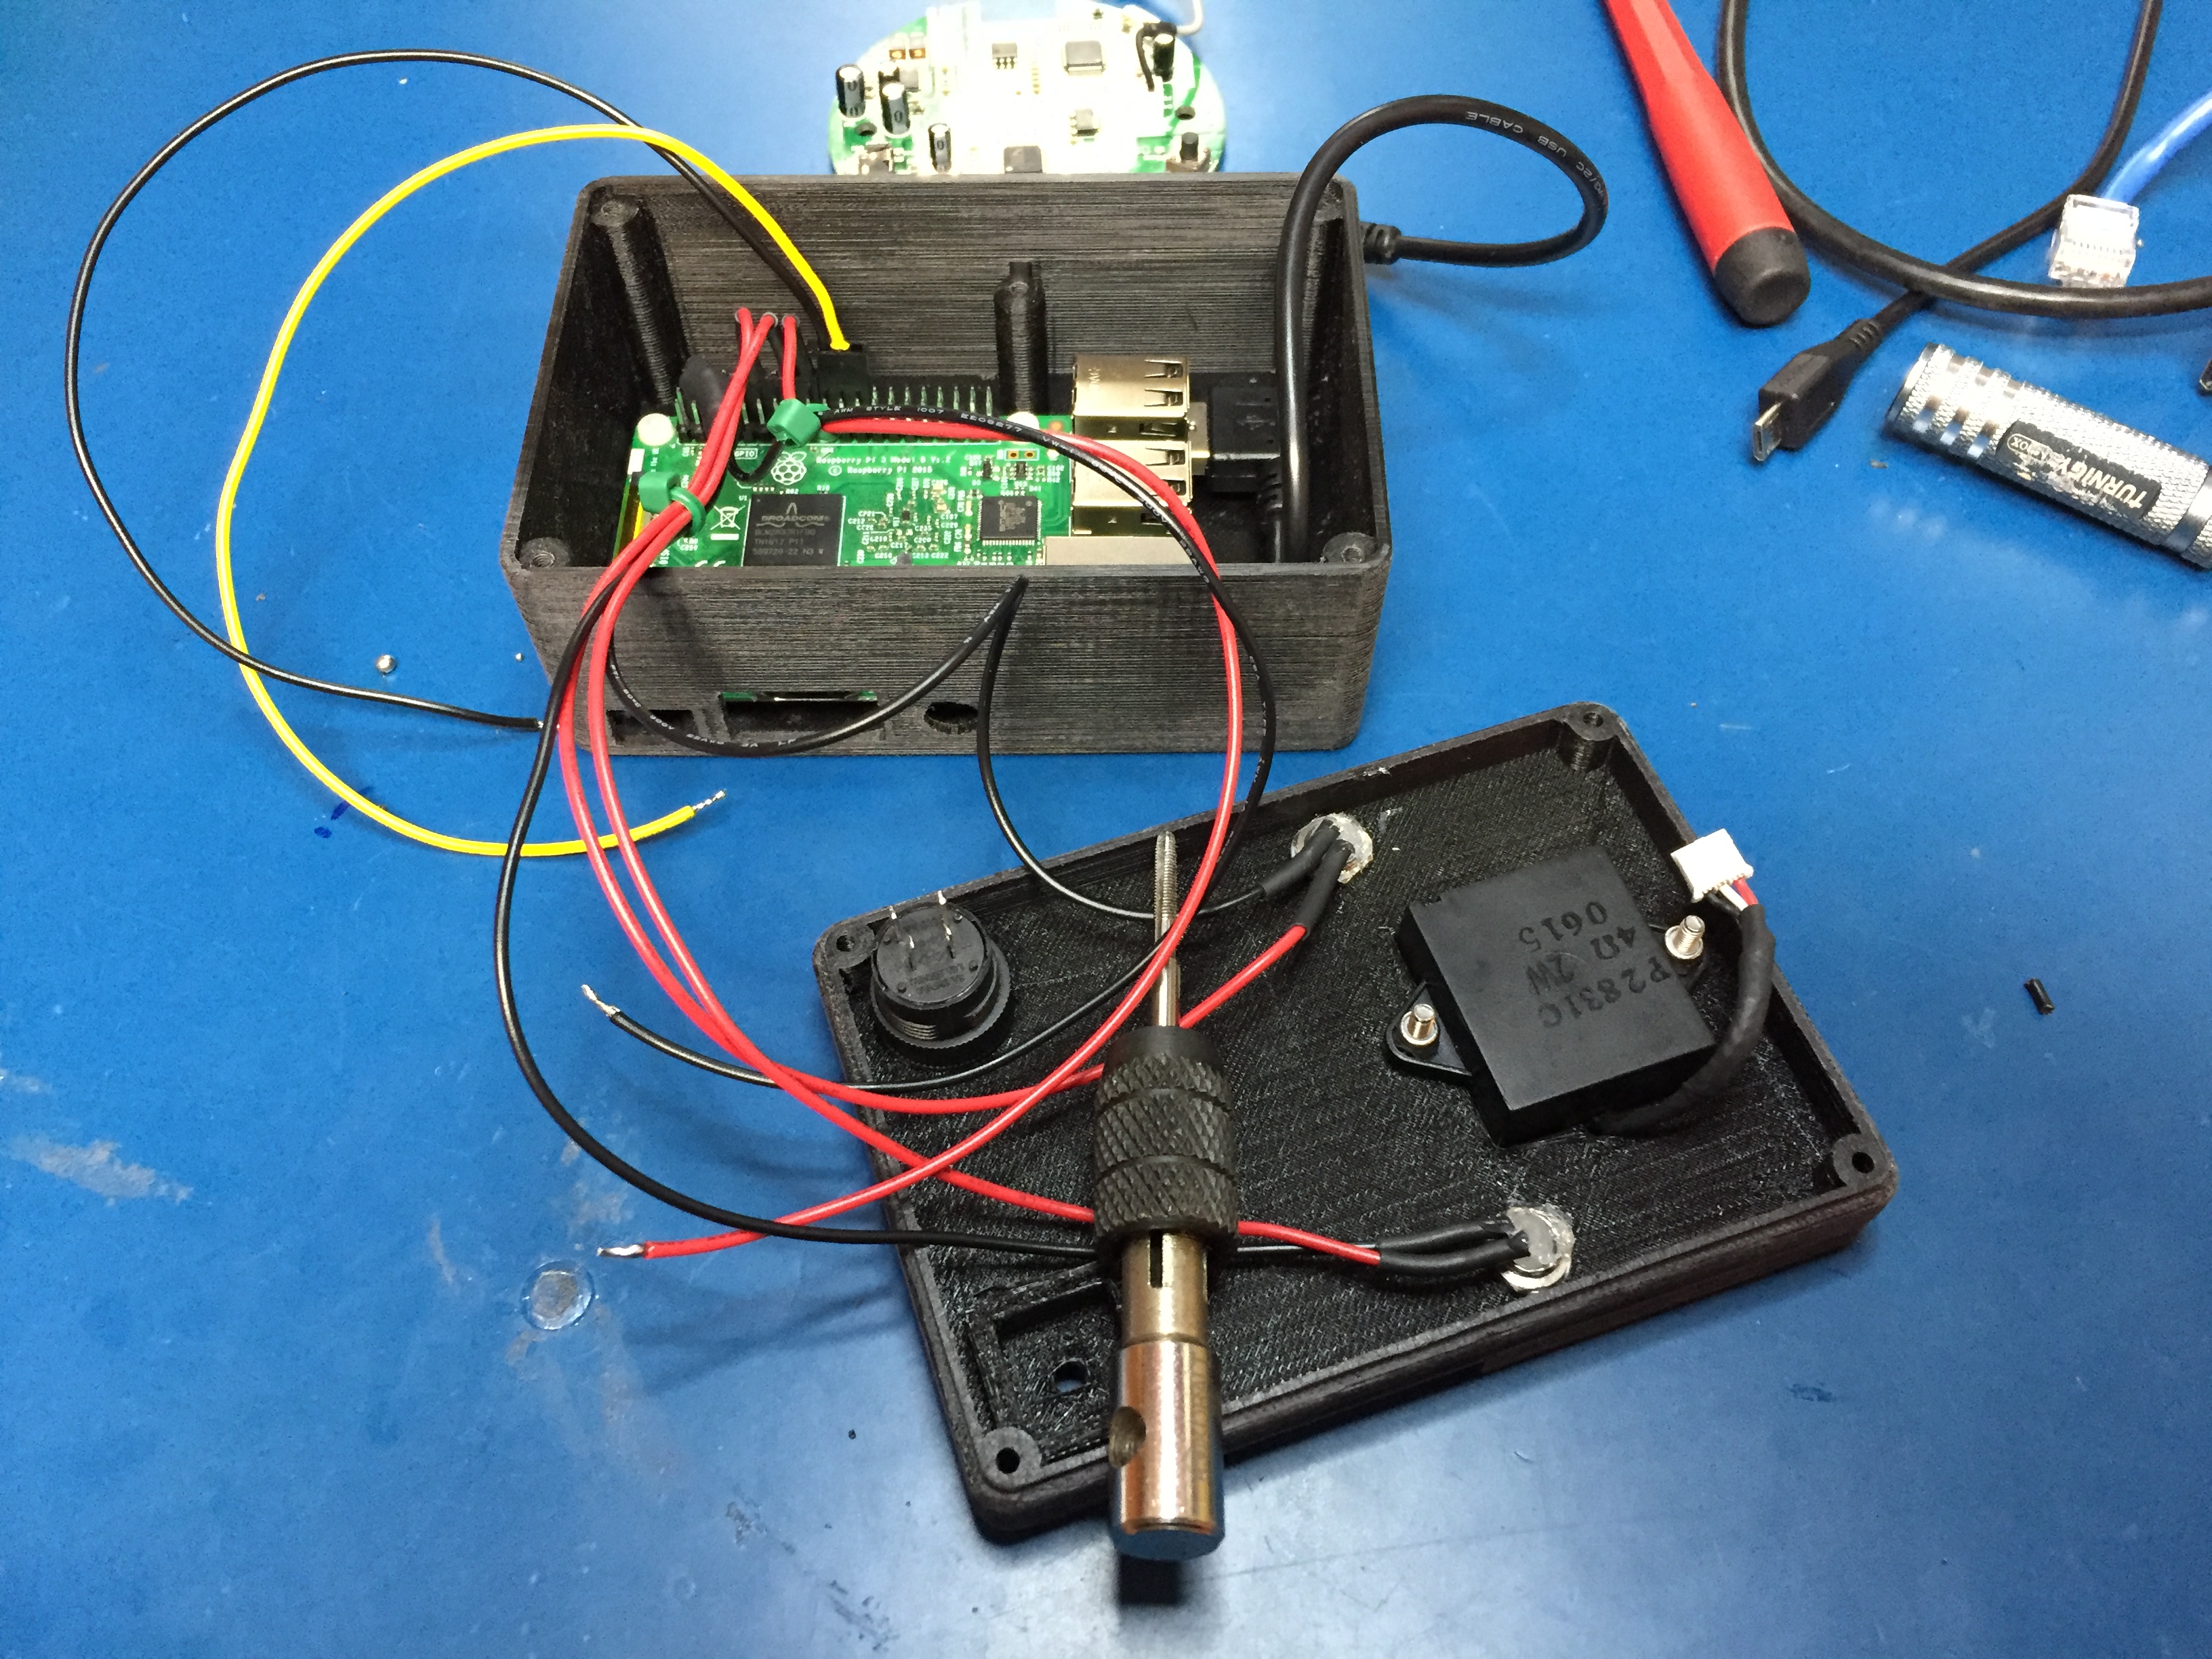\n\nNow mount the speakerphone PCB with the USB port facing towards the rear of the case (same direction as the Pi USB ports). Use the other two nylon screws to secure (one into the case and one into the standoff). Connect the USB cable to the speakerphone connector, folding/tucking the excess cable in the space behind the USB ports. Ensure your GPIO leads are routed cleanly around the speakerphone PCB, and that nothing could be shorting.\n\n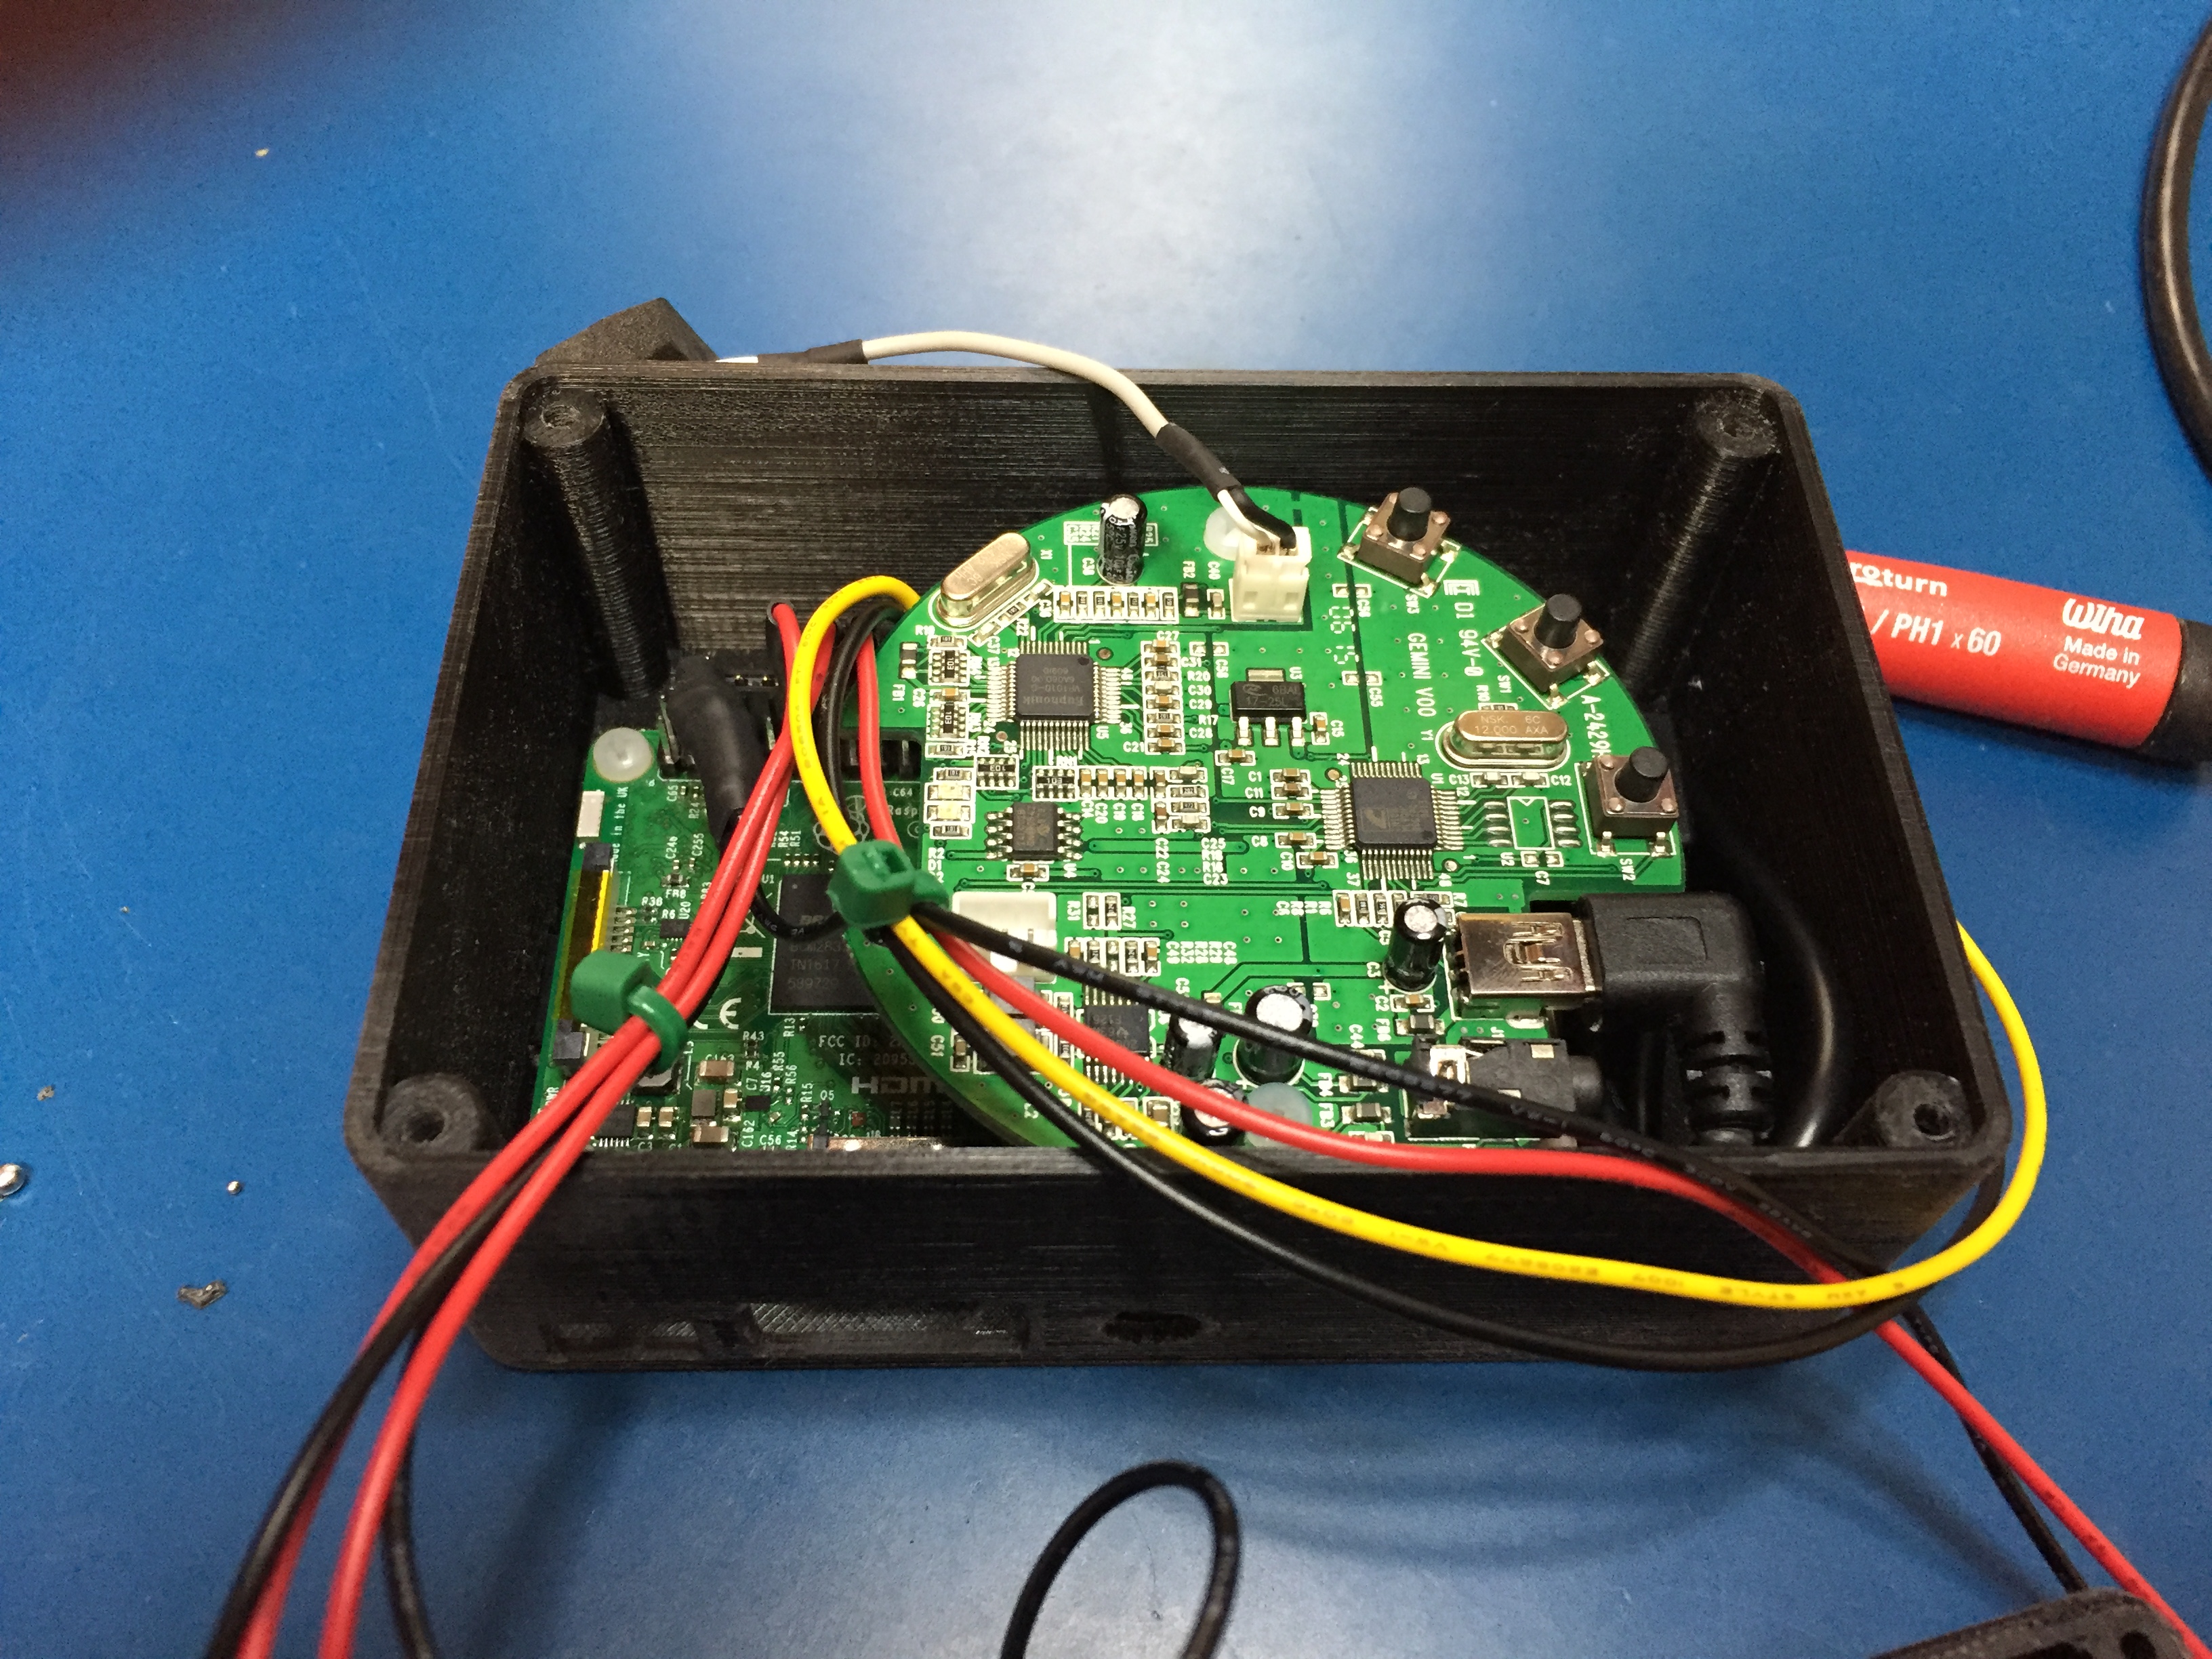\n\nFinally attach the top cover to the bottom. Be sure to feed the wires nicely, and that everything looks tucked out of the way inside. Again, check for any shorts before fastening the top with the M3 bolts.\n\n---\n\n### Enjoy your talkiepi!\n\nThats it! You're ready to talk to another mumble client or, if you made two, your other talkiepi!\n\n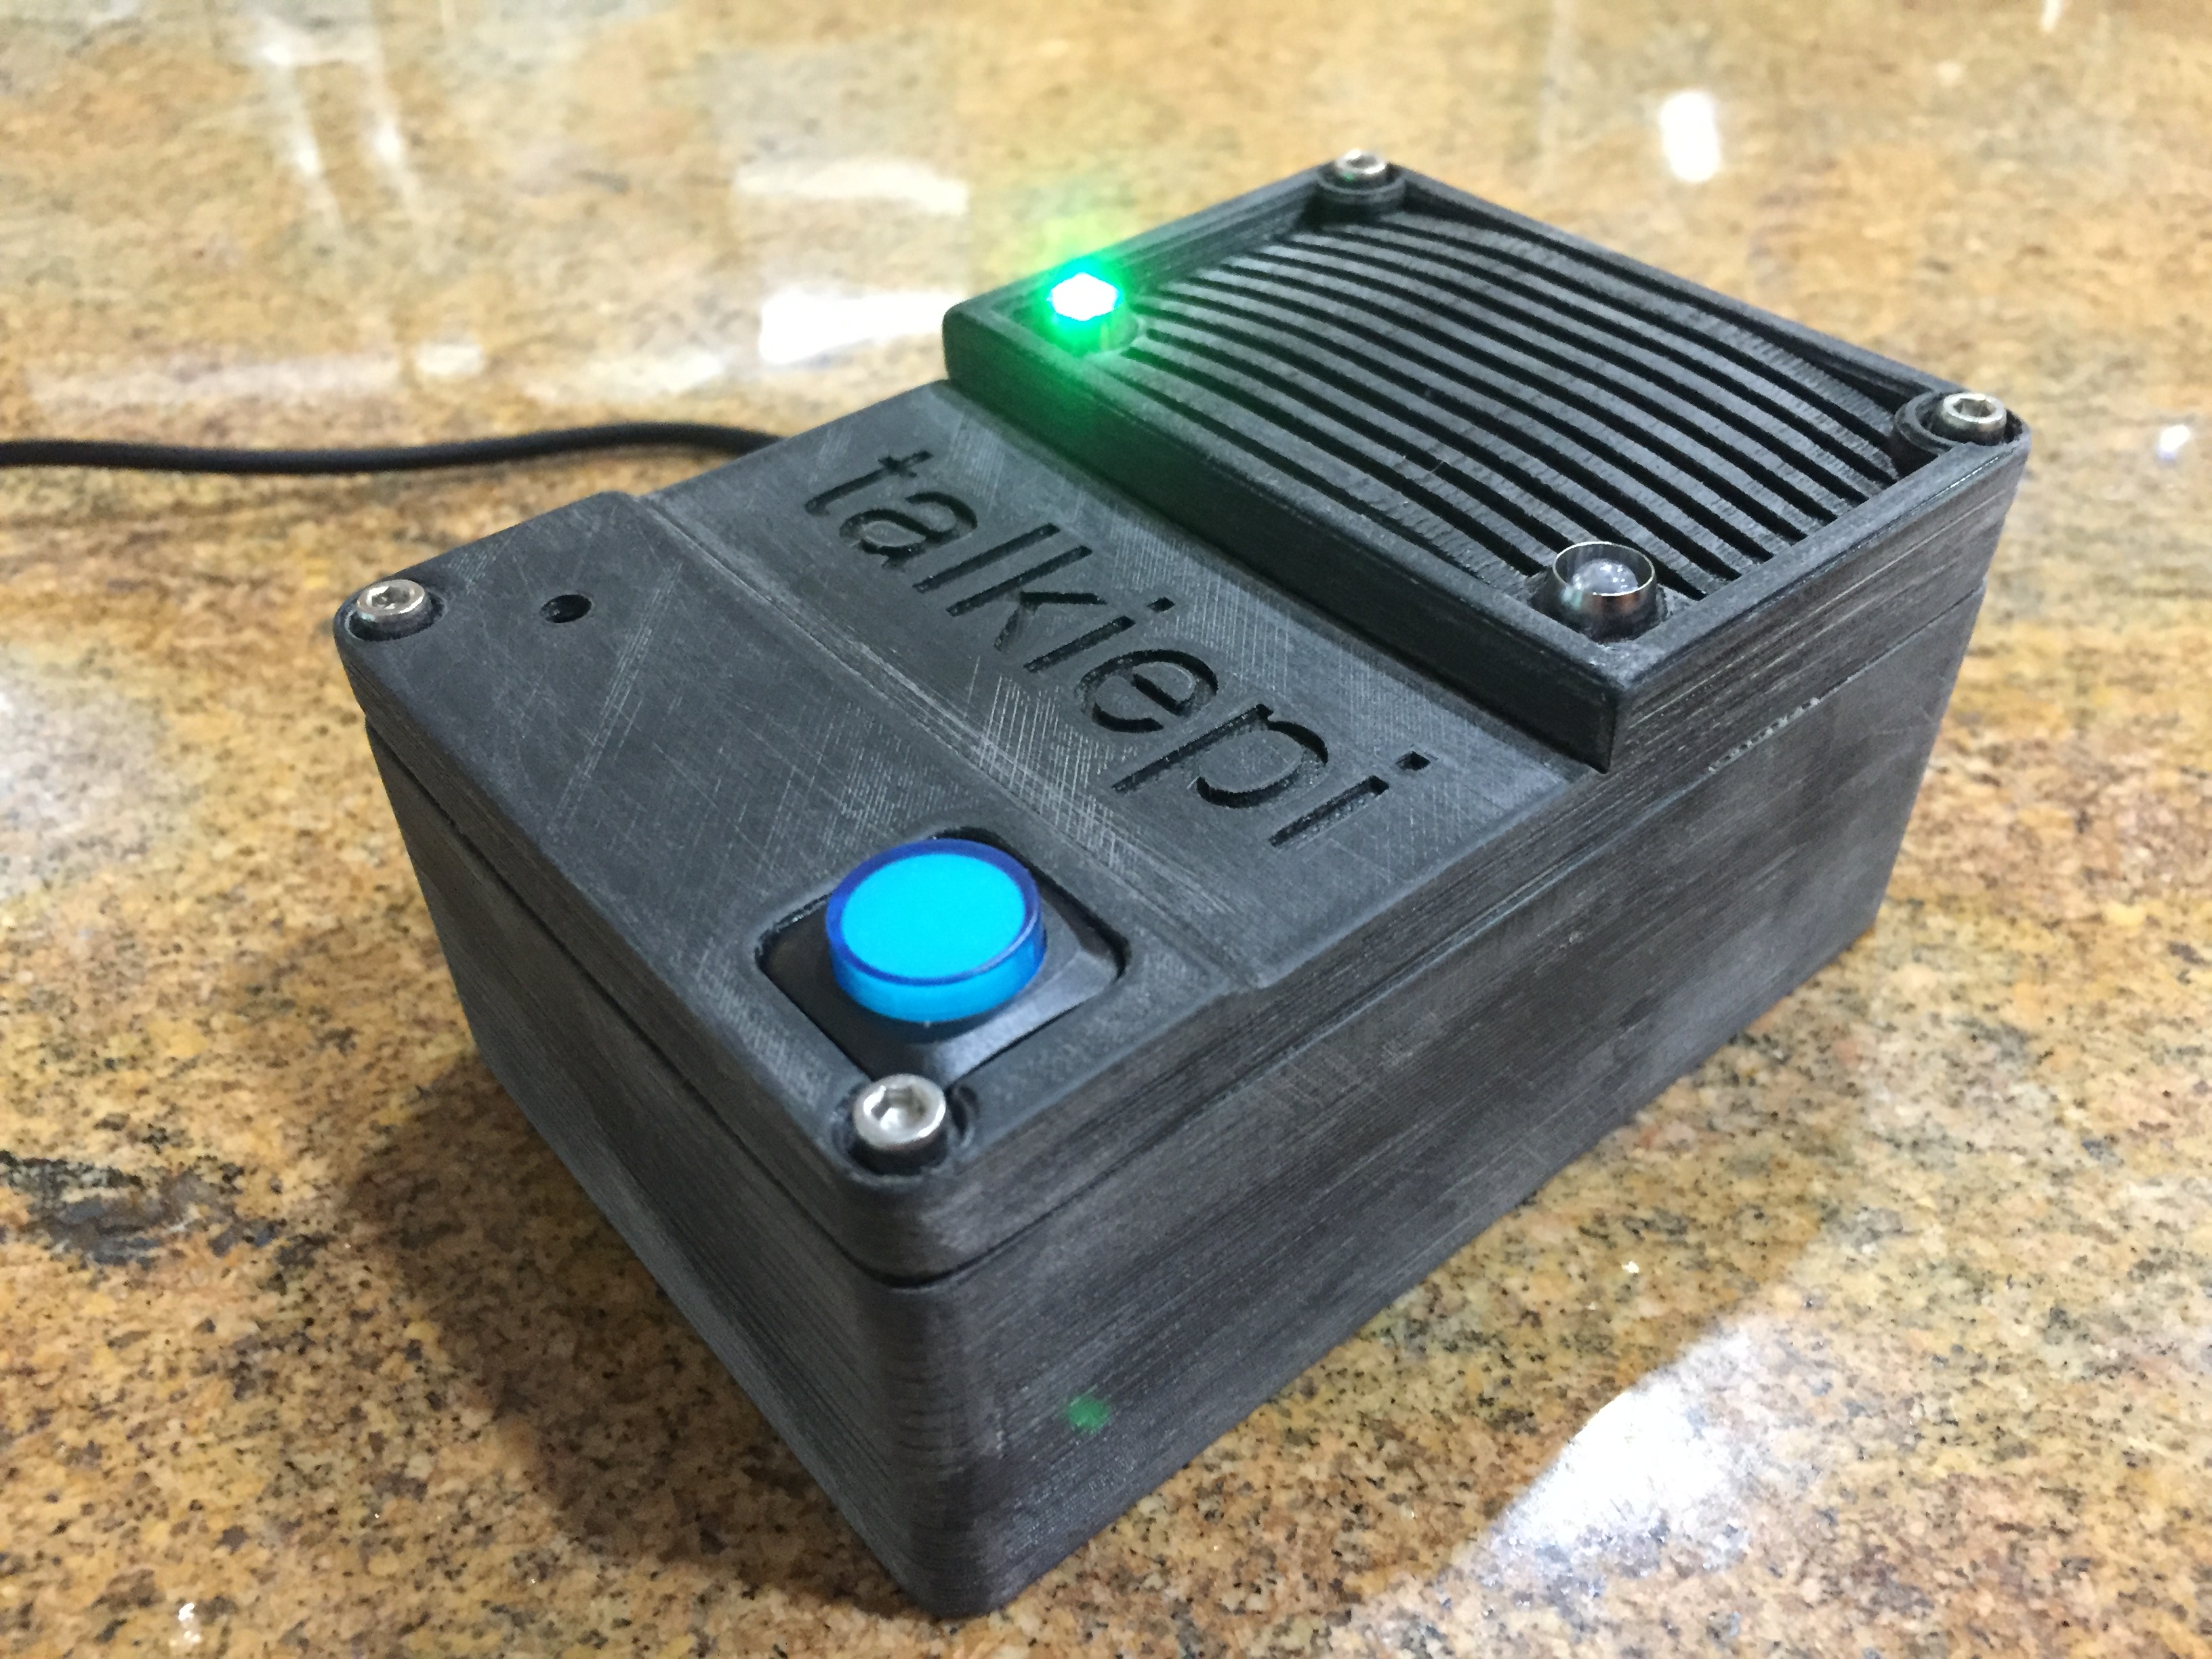\n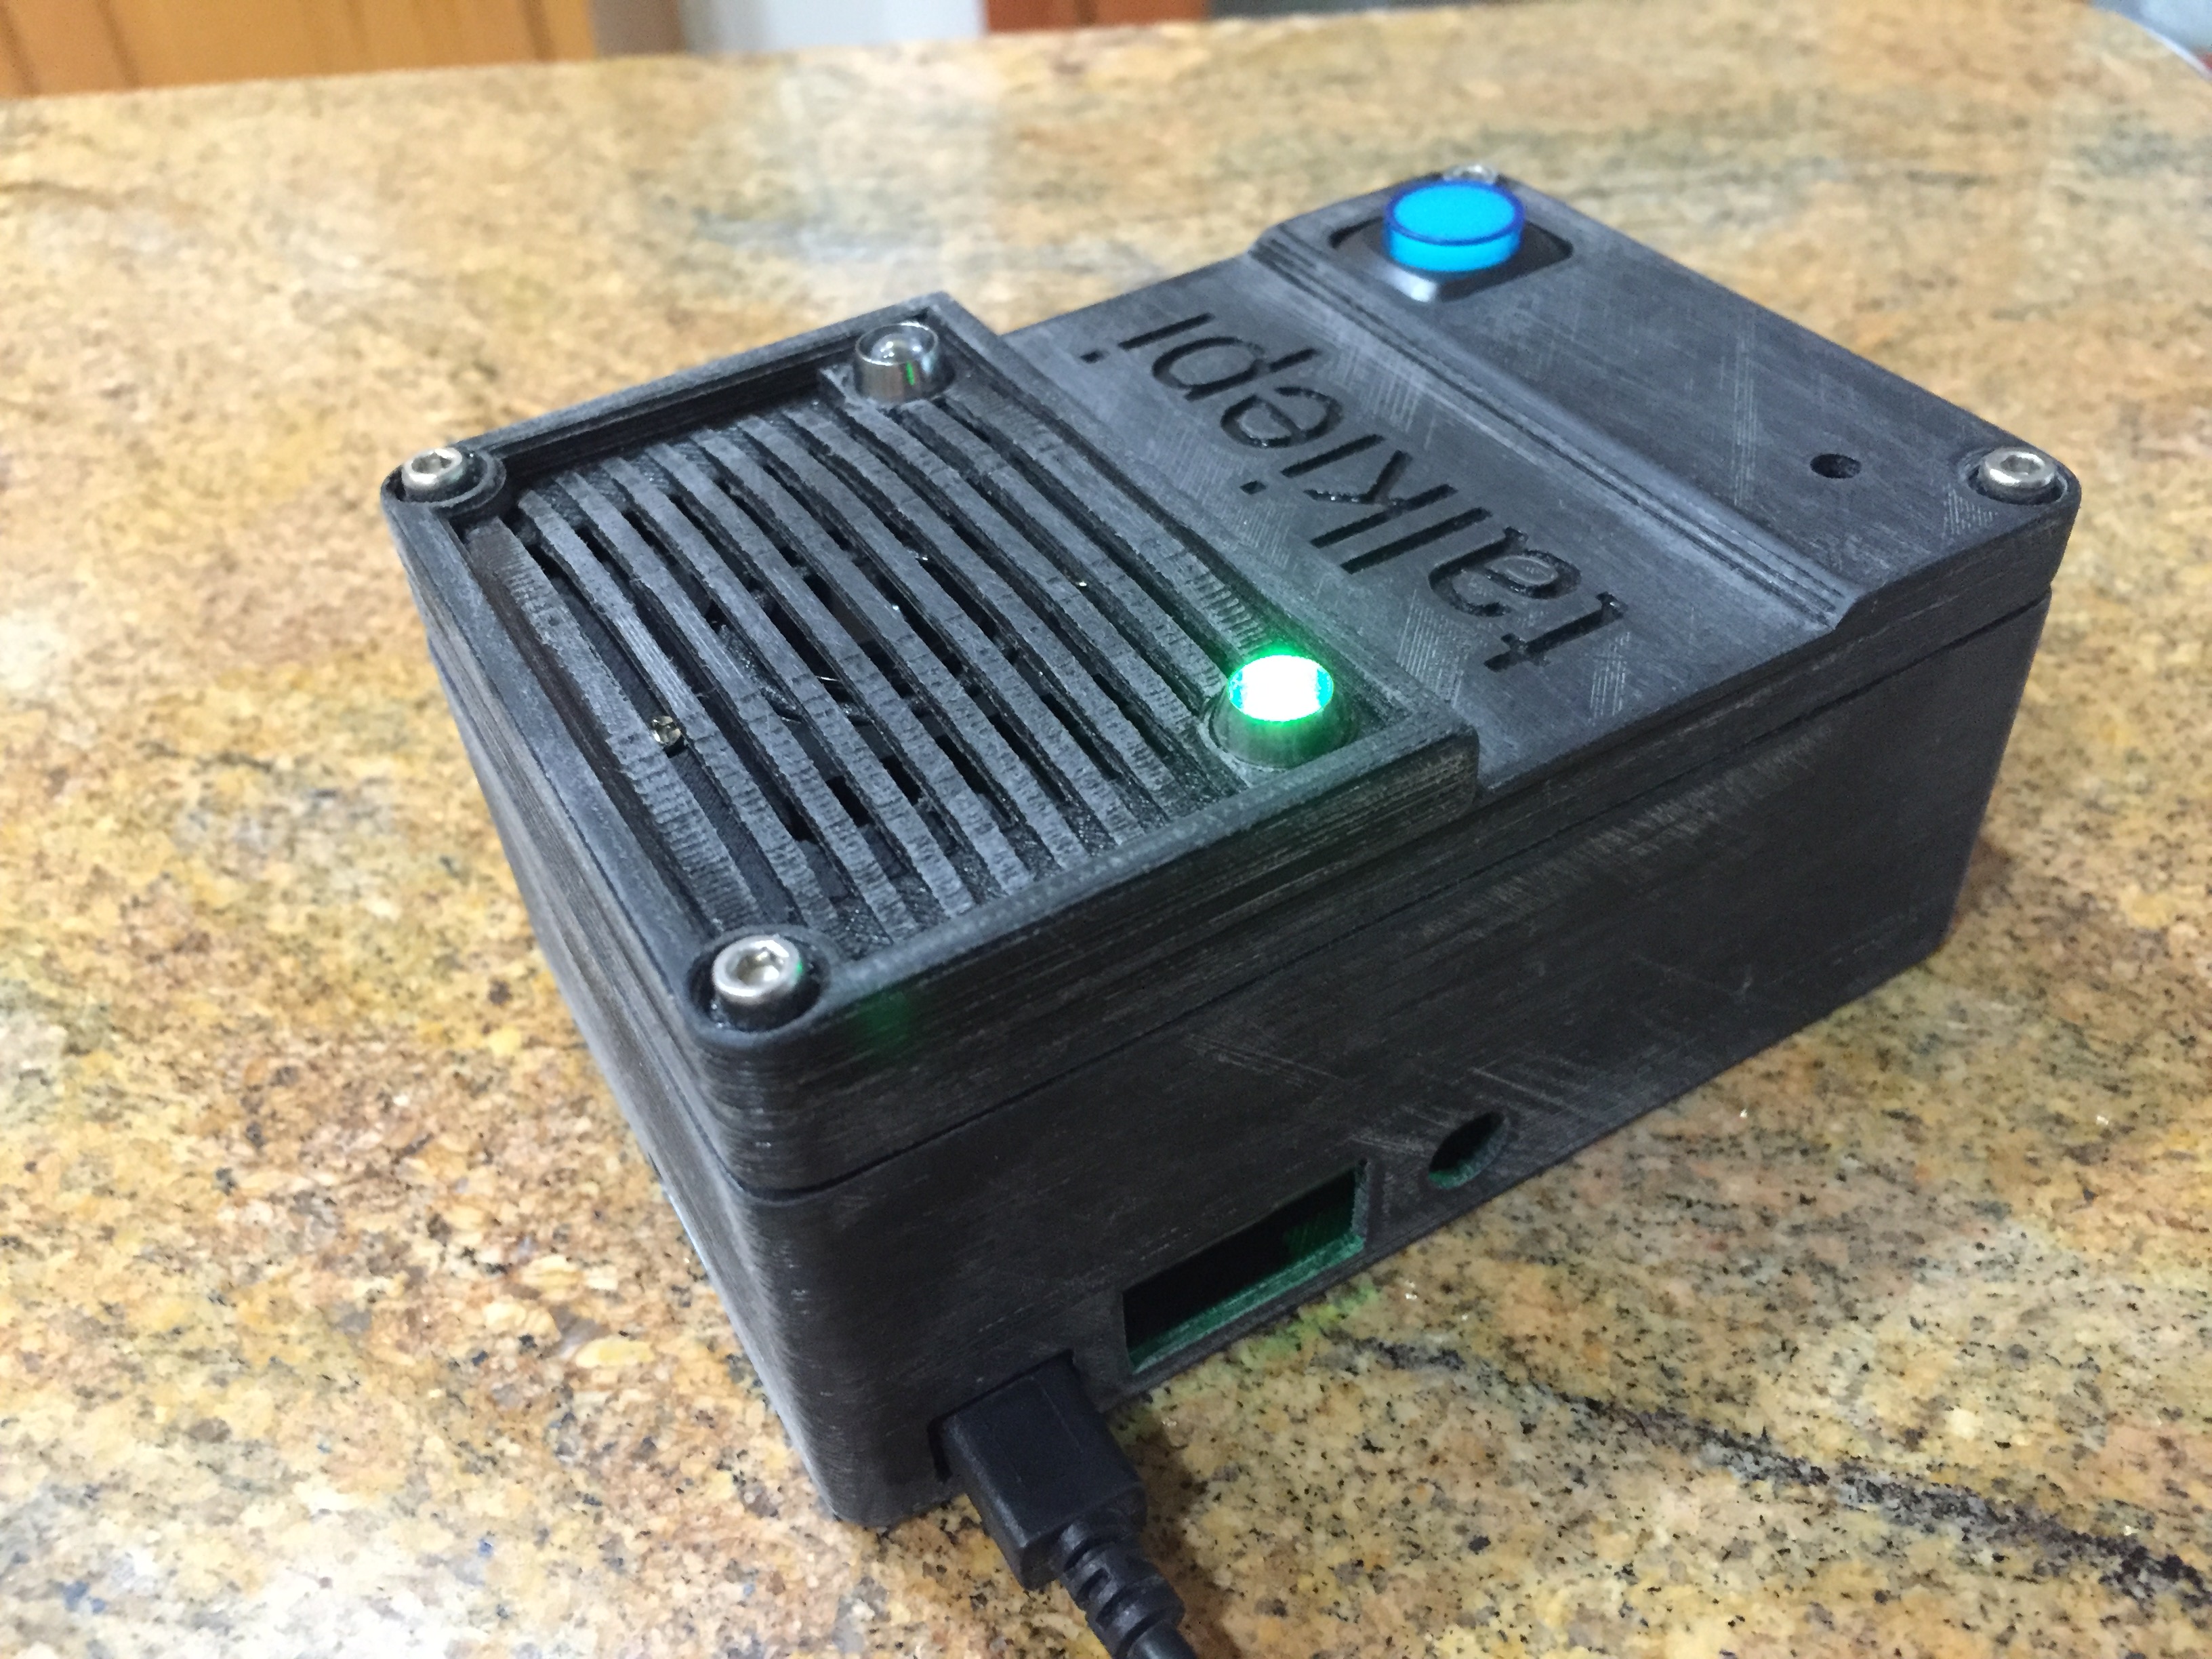\n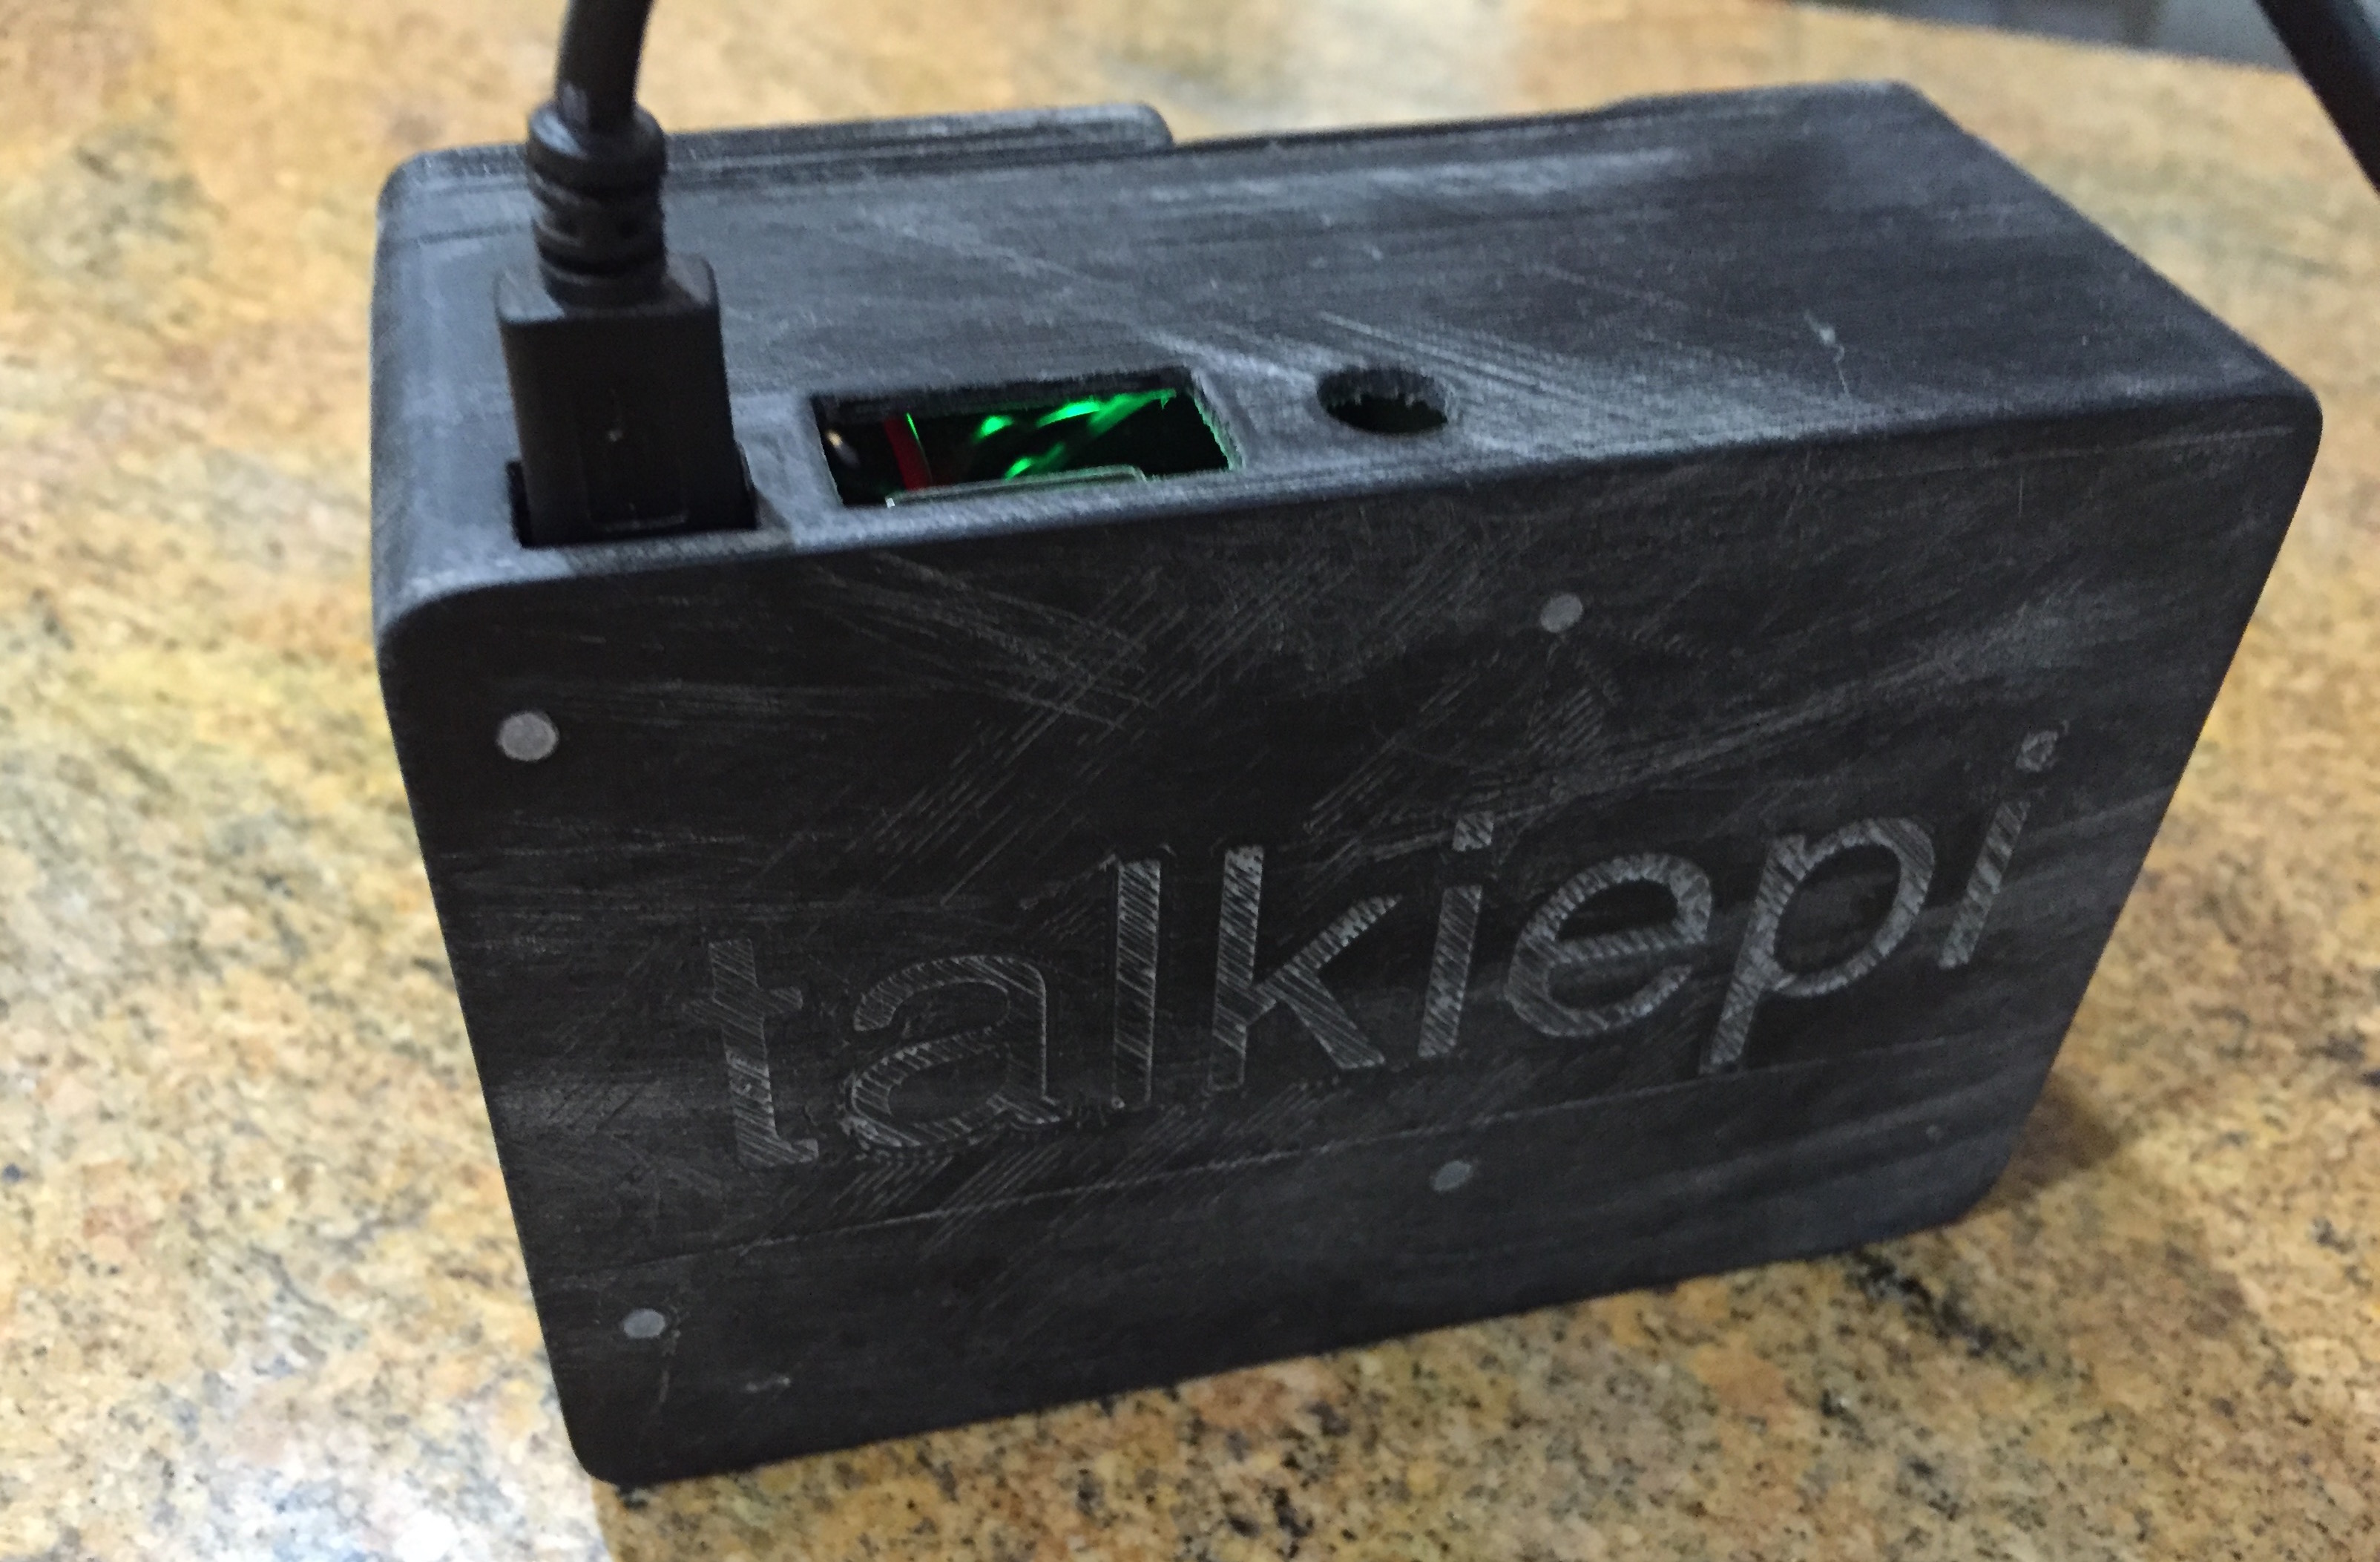\n\n\n---\n\n### Something different?\n\nI attempted to do a paint finish, but I just don't have the patience, or workspace to do a good job of spraying something this small. I do however have a bunch of different colored PLA. Check it out in blue and now red!\n\n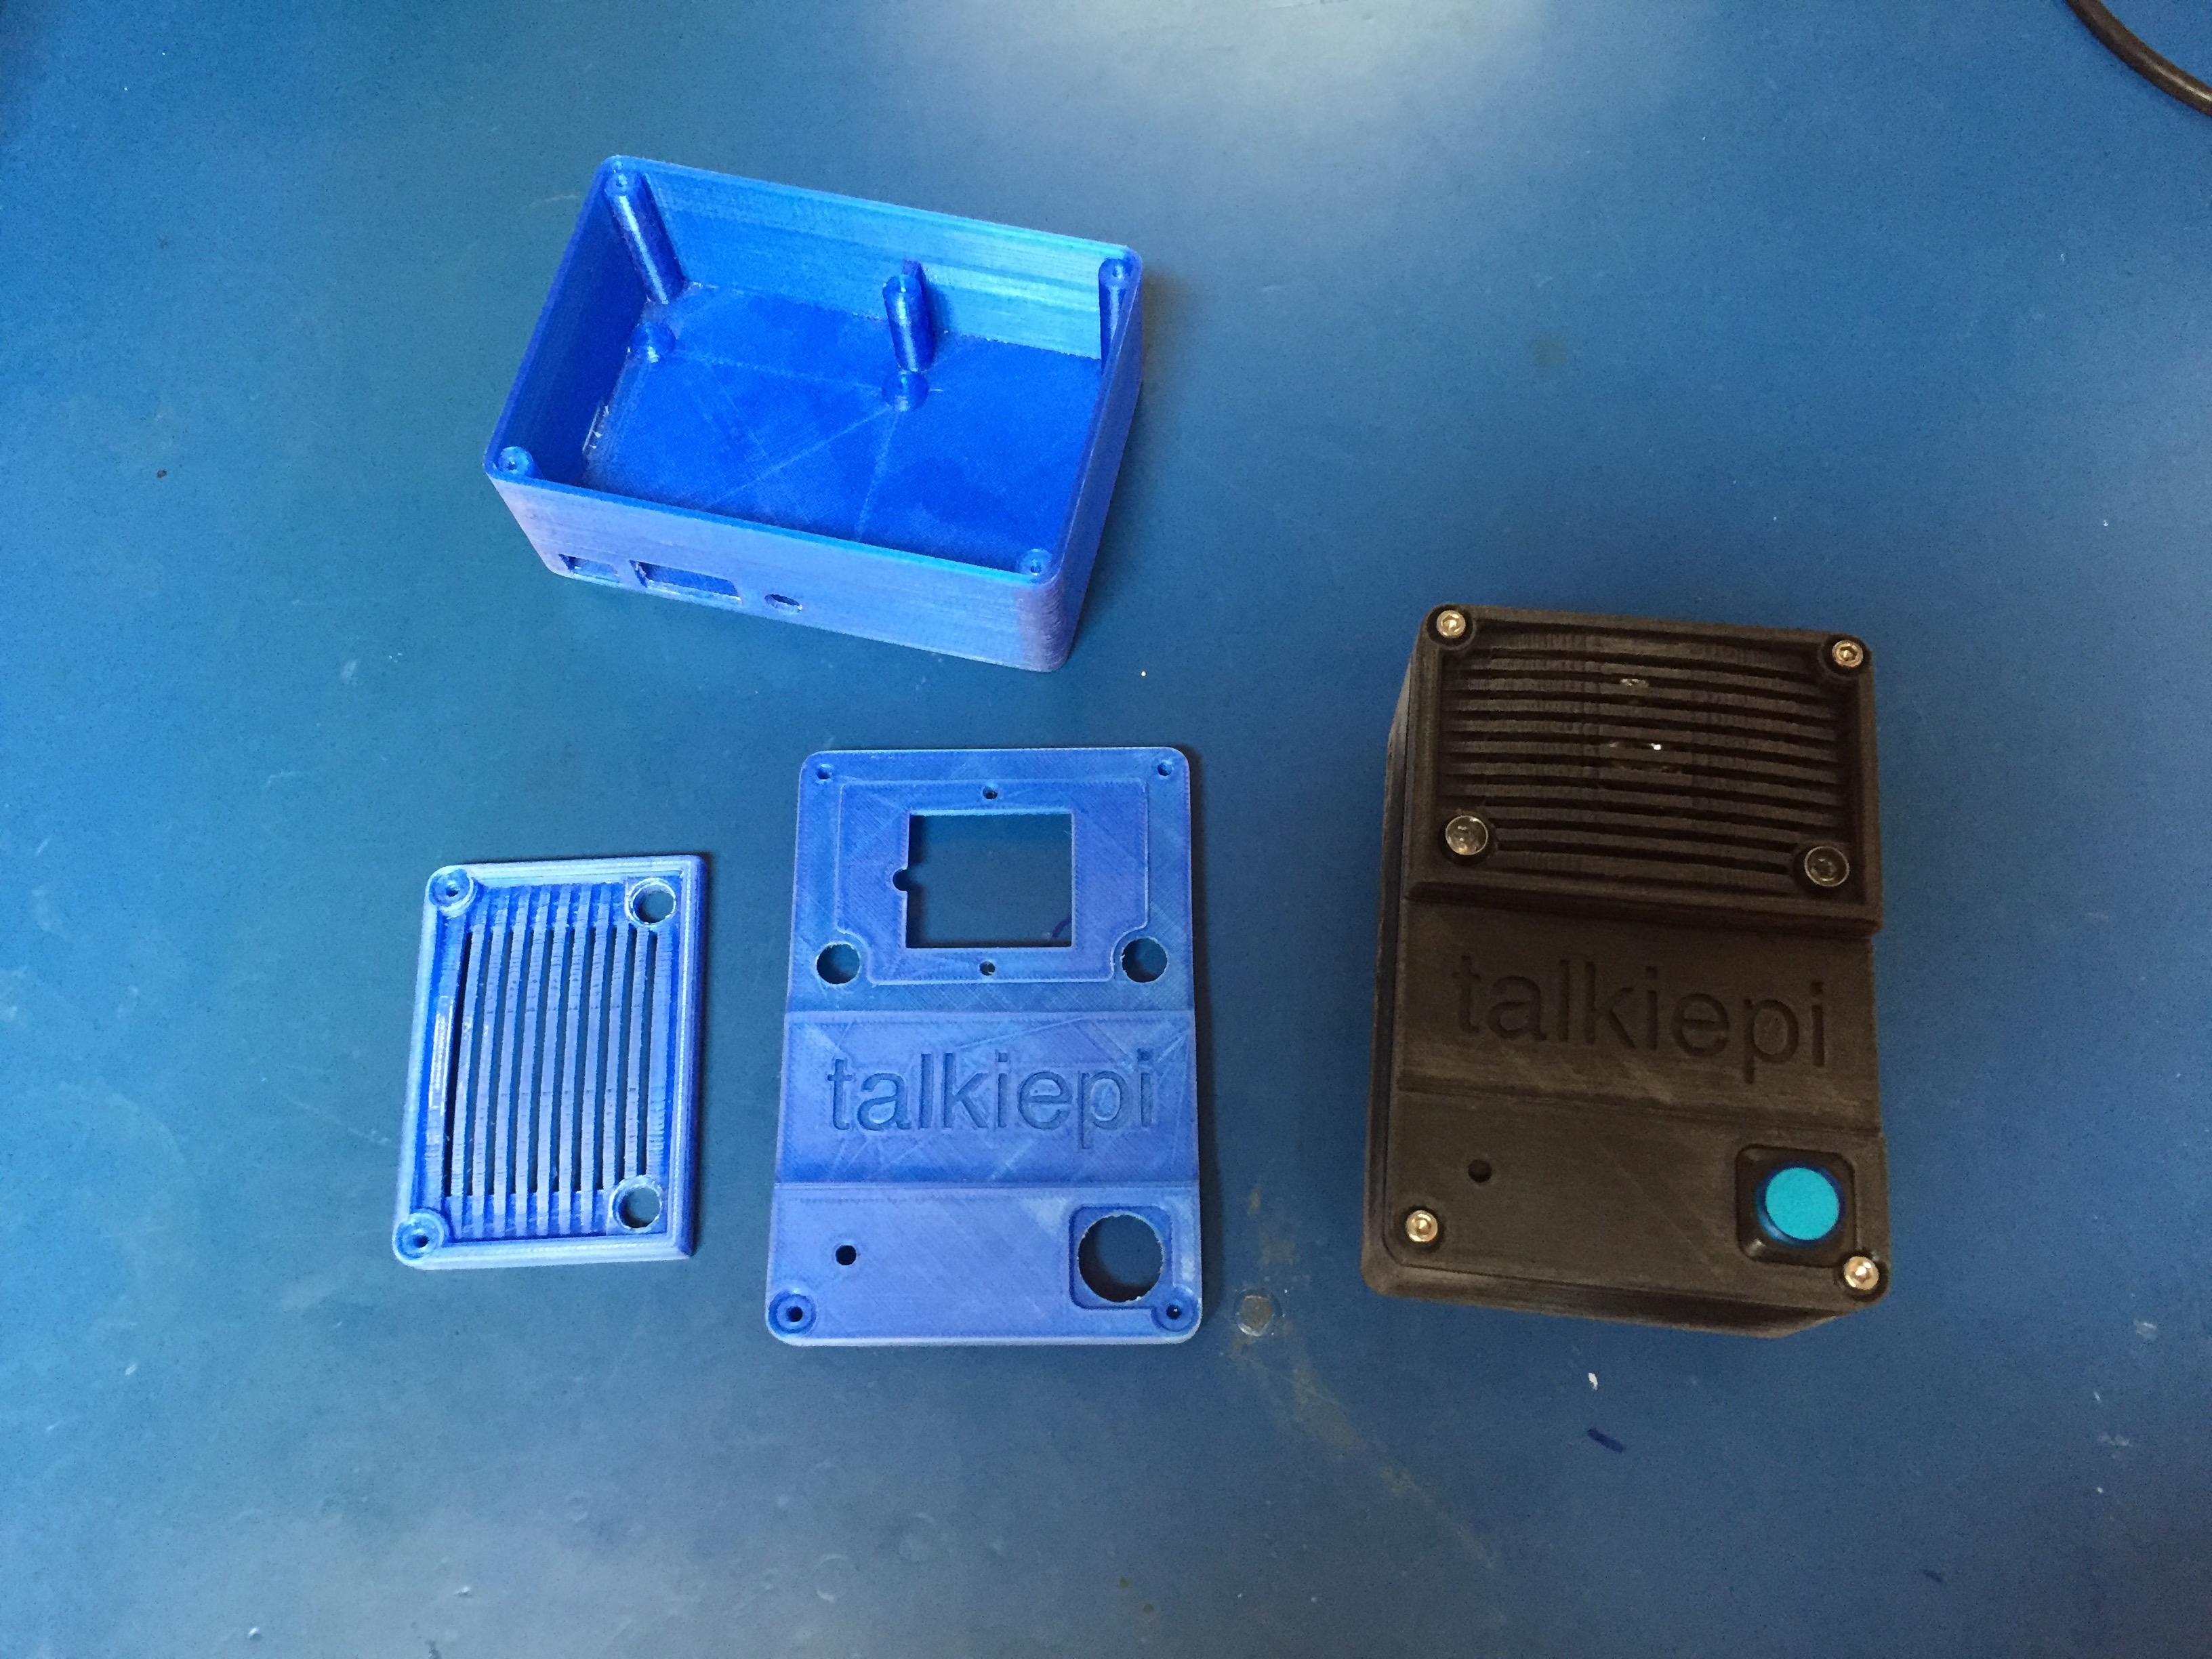\n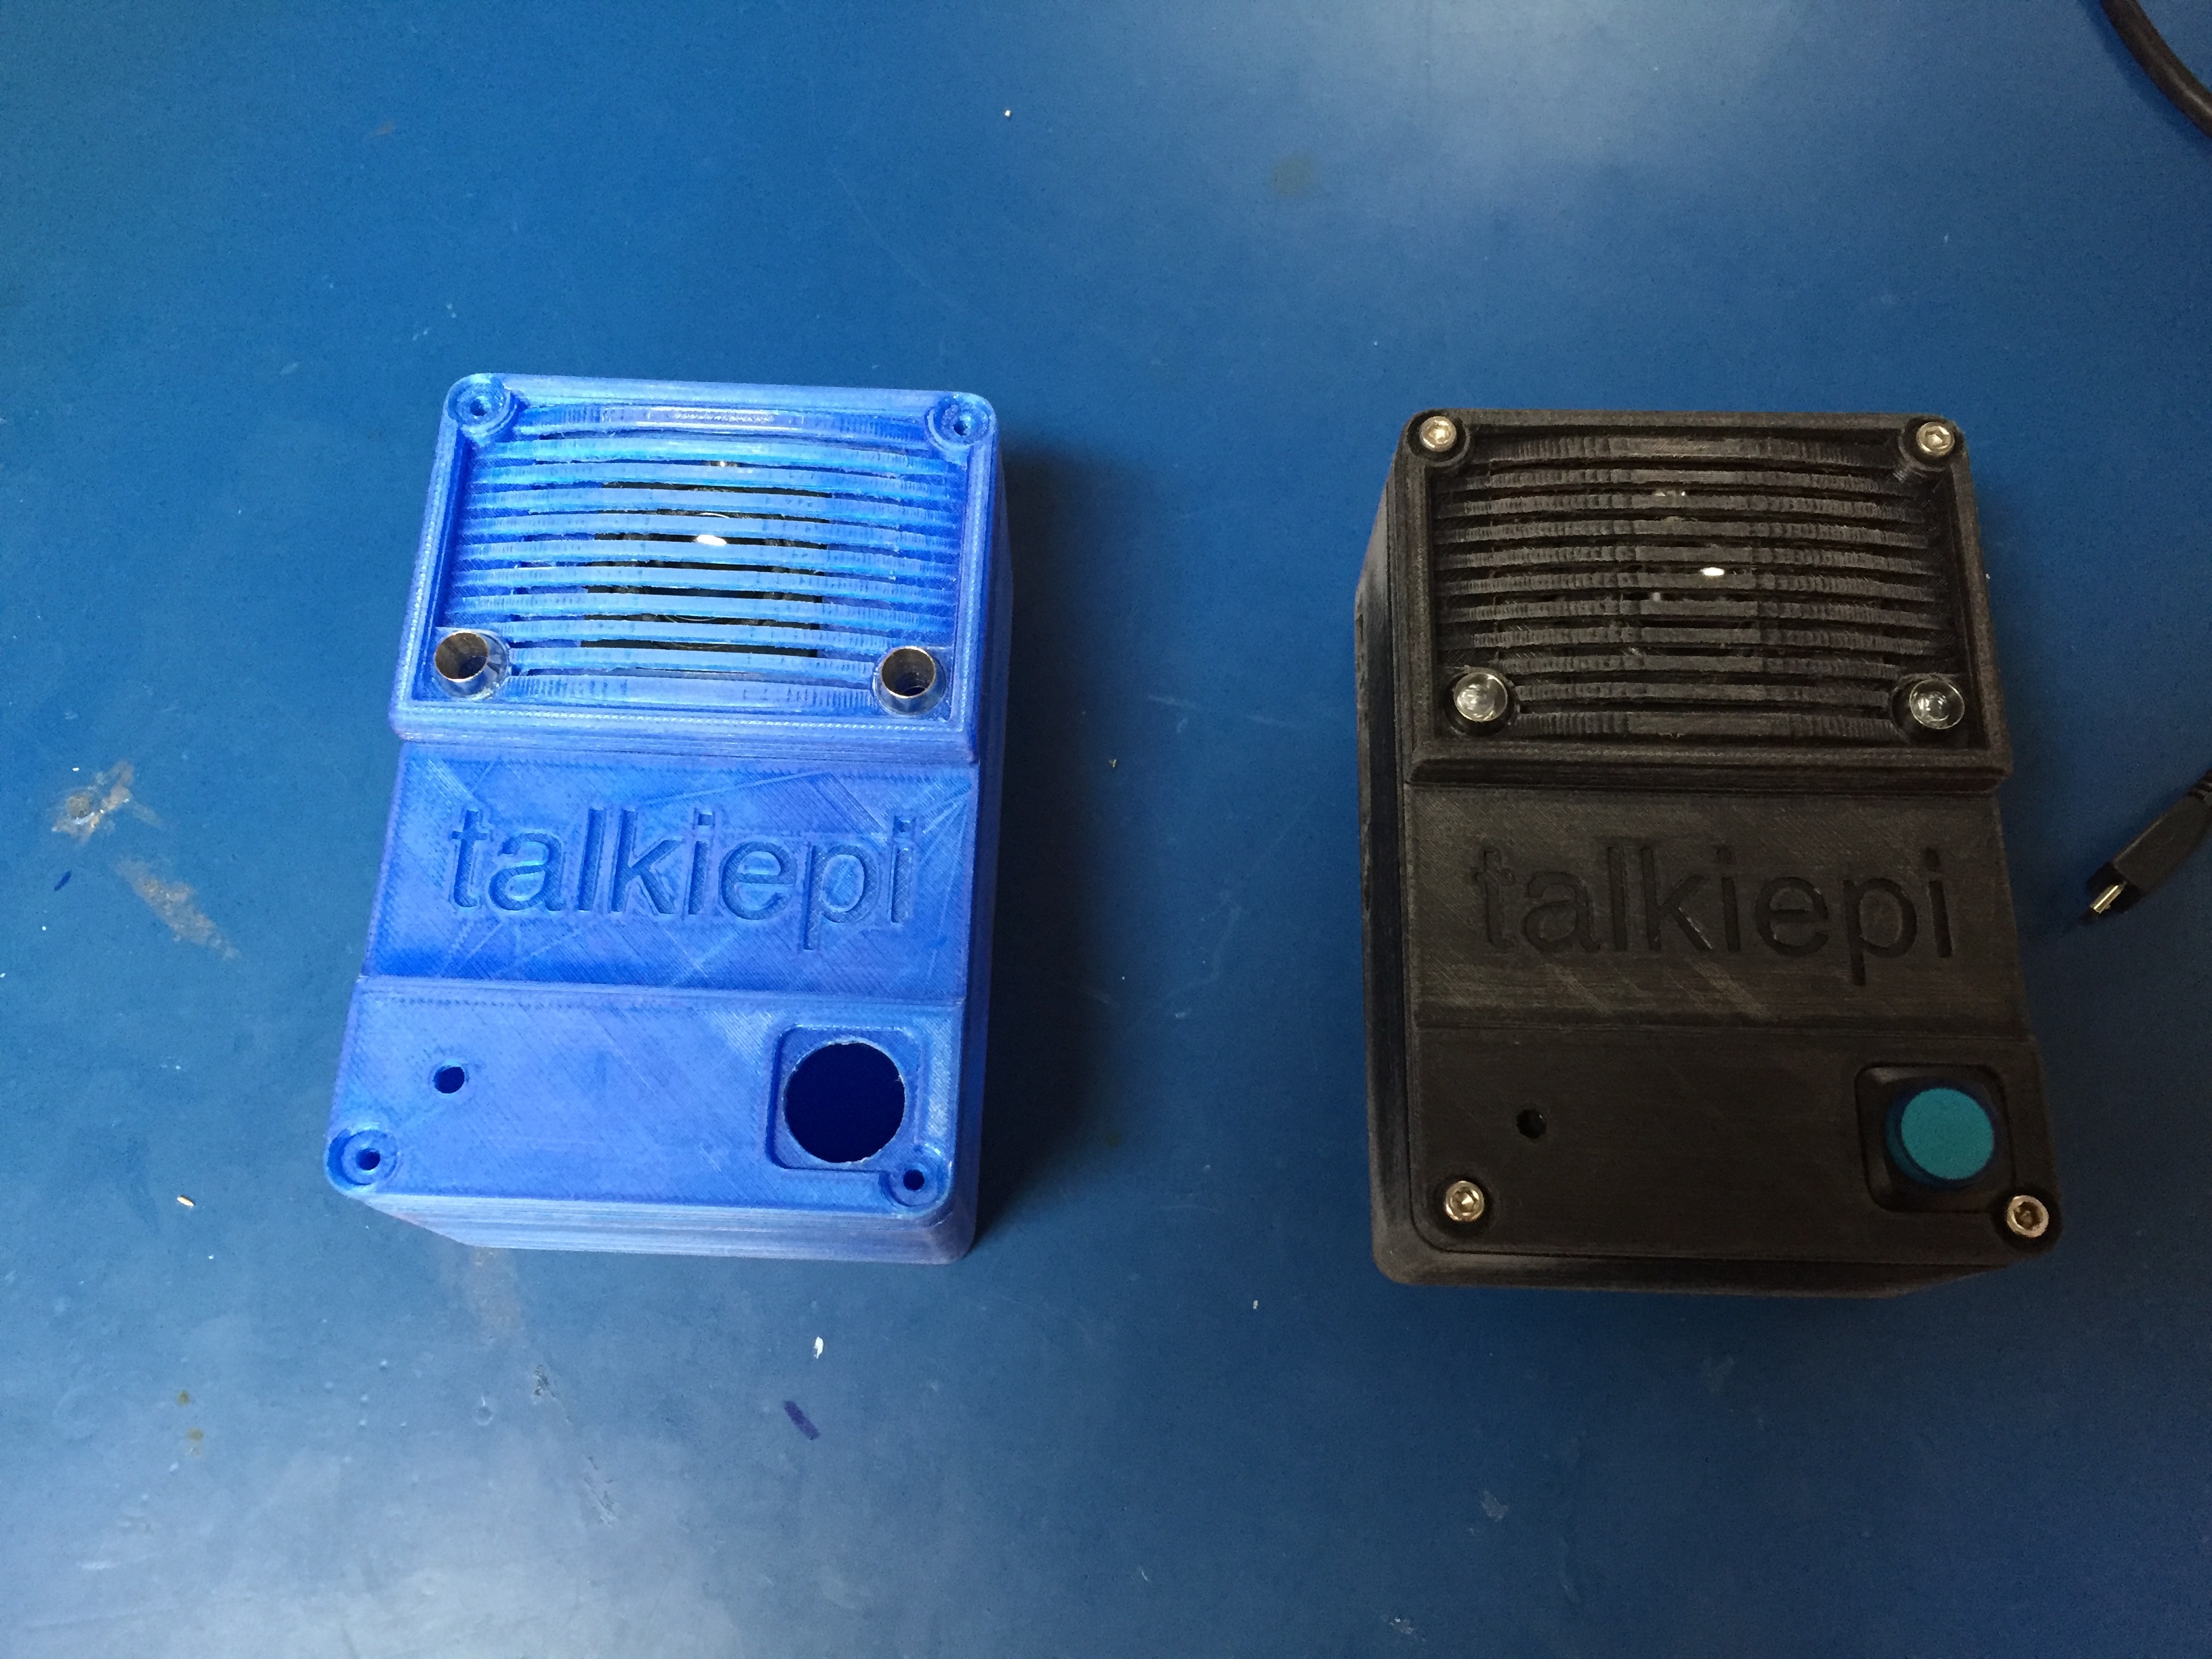\n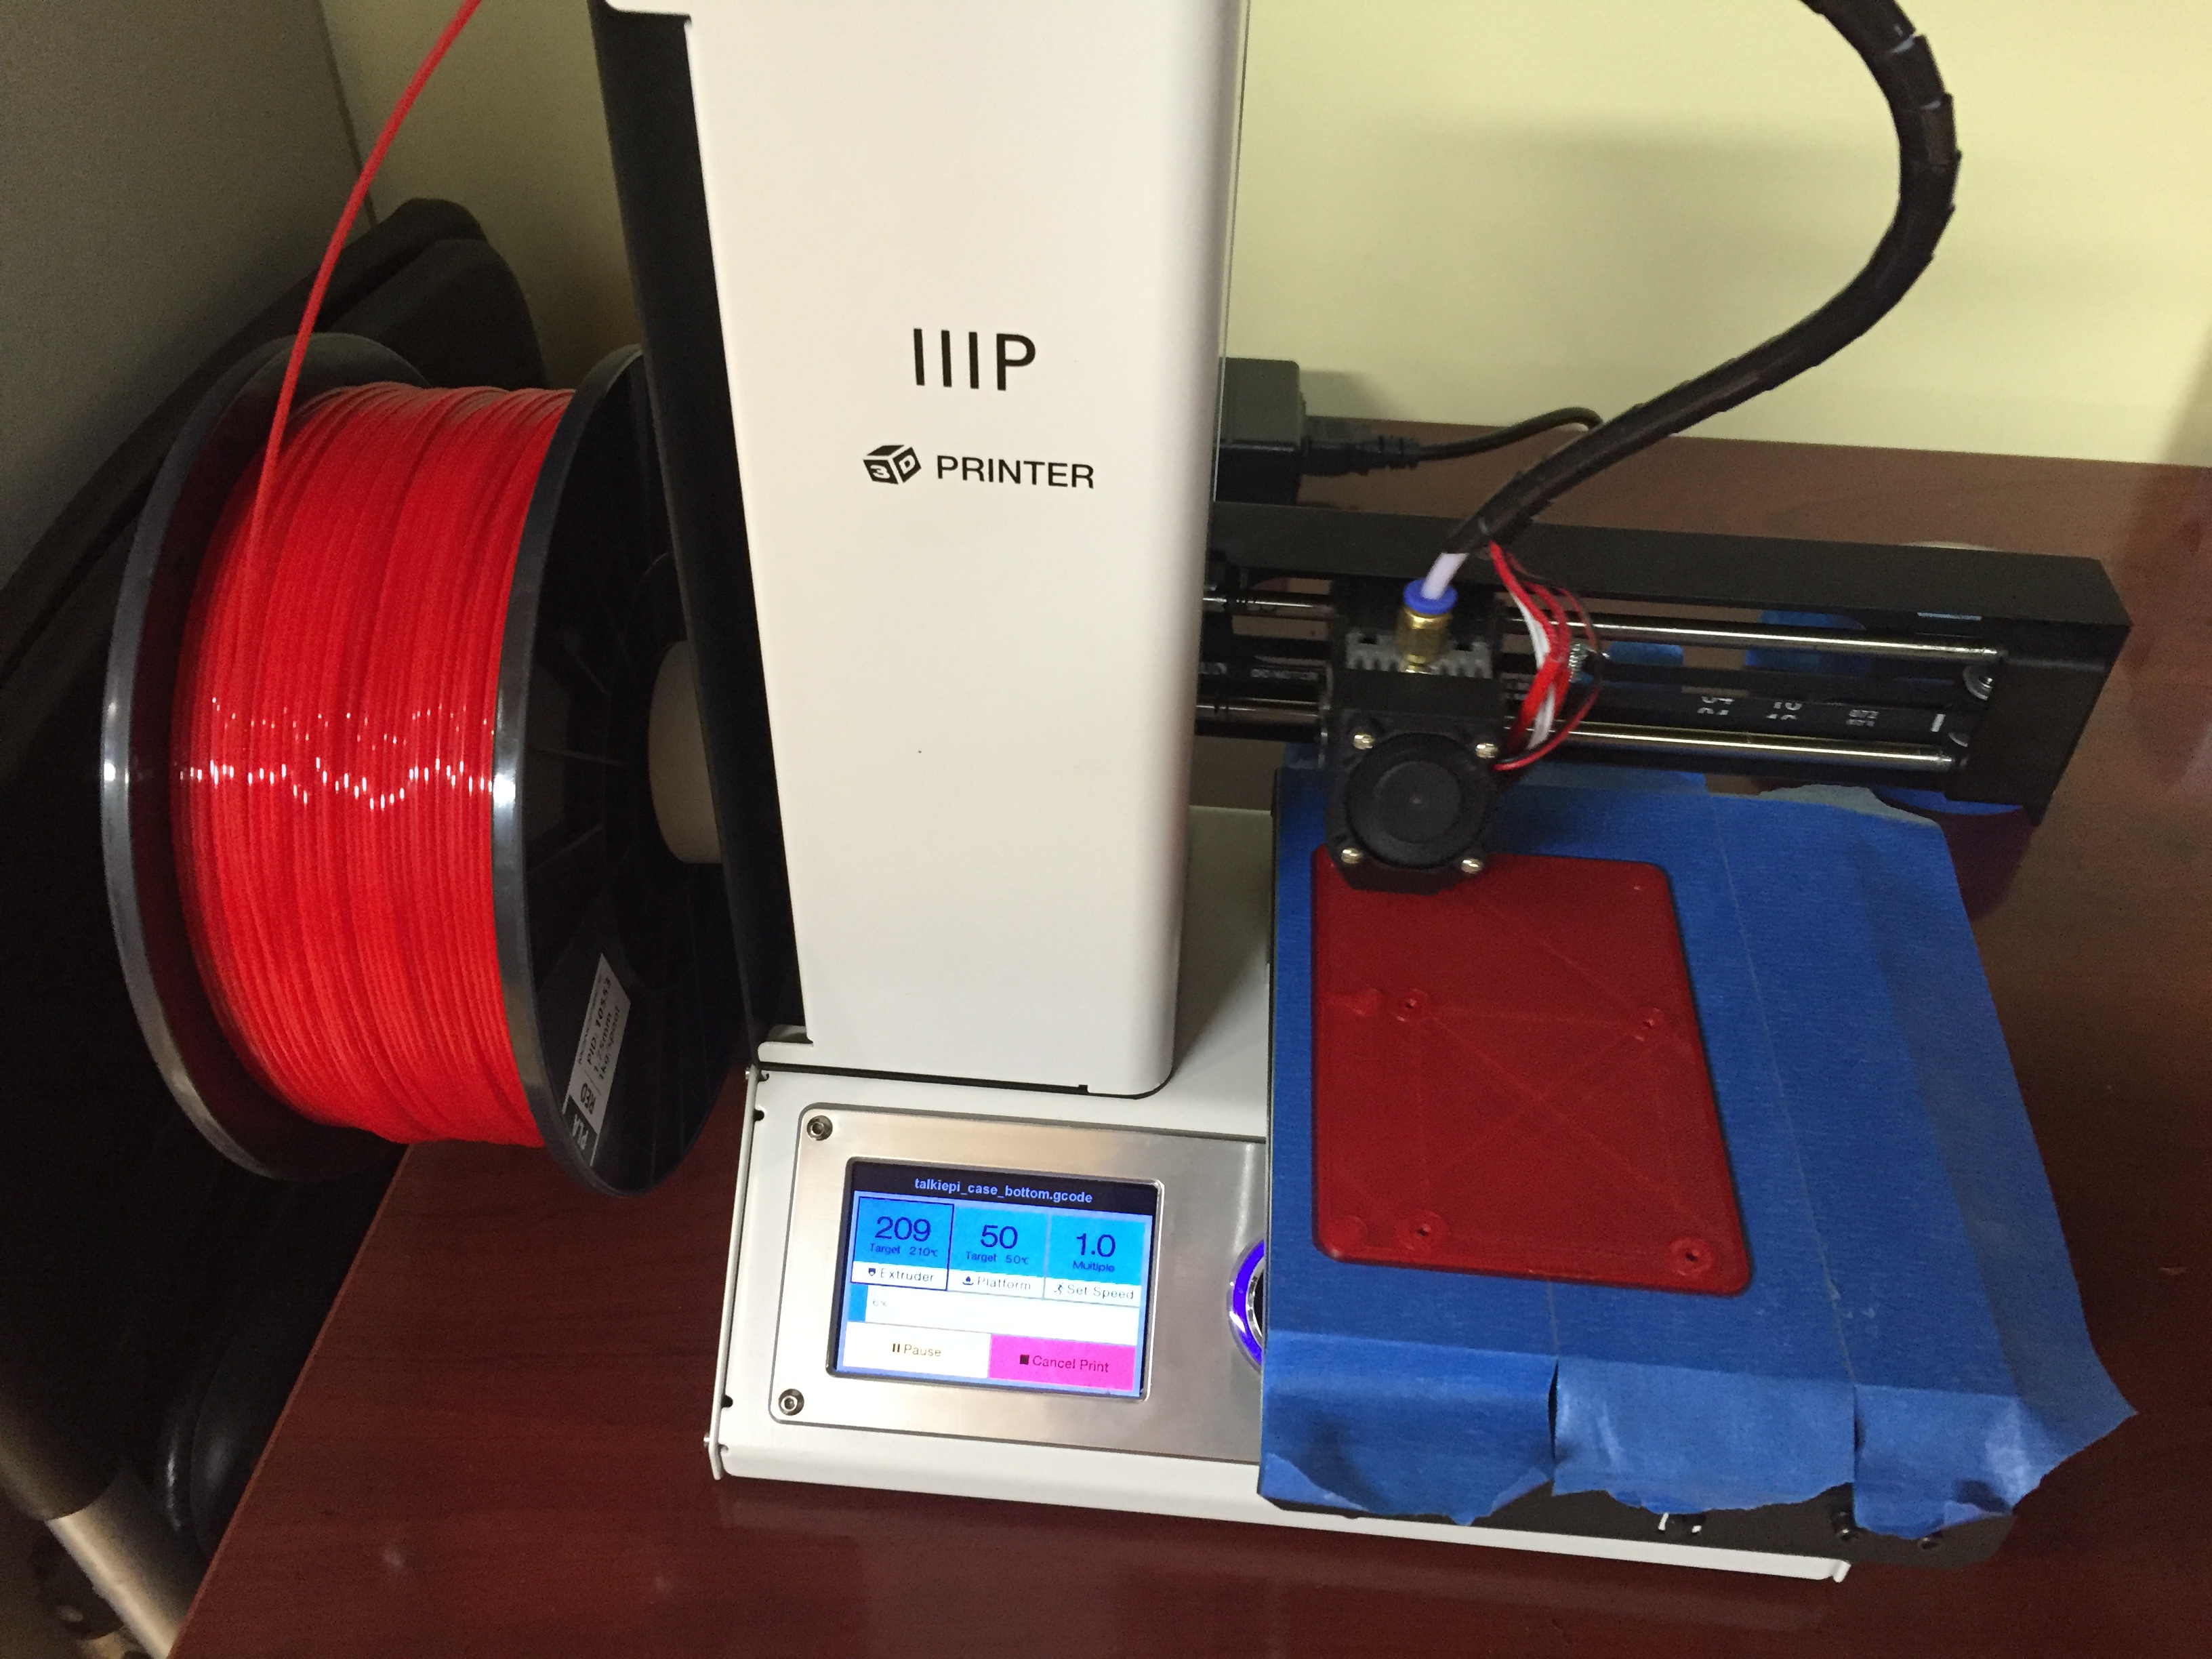\n\n\n### Whats next...\n\nI have a Raspberry Pi Zero, [HubPiWi](https://www.kickstarter.com/projects/1728237598/hubpiwi-raspberry-pi-zero-hub-with-wifi-no-cable-c), and a USB battery pack. \n\n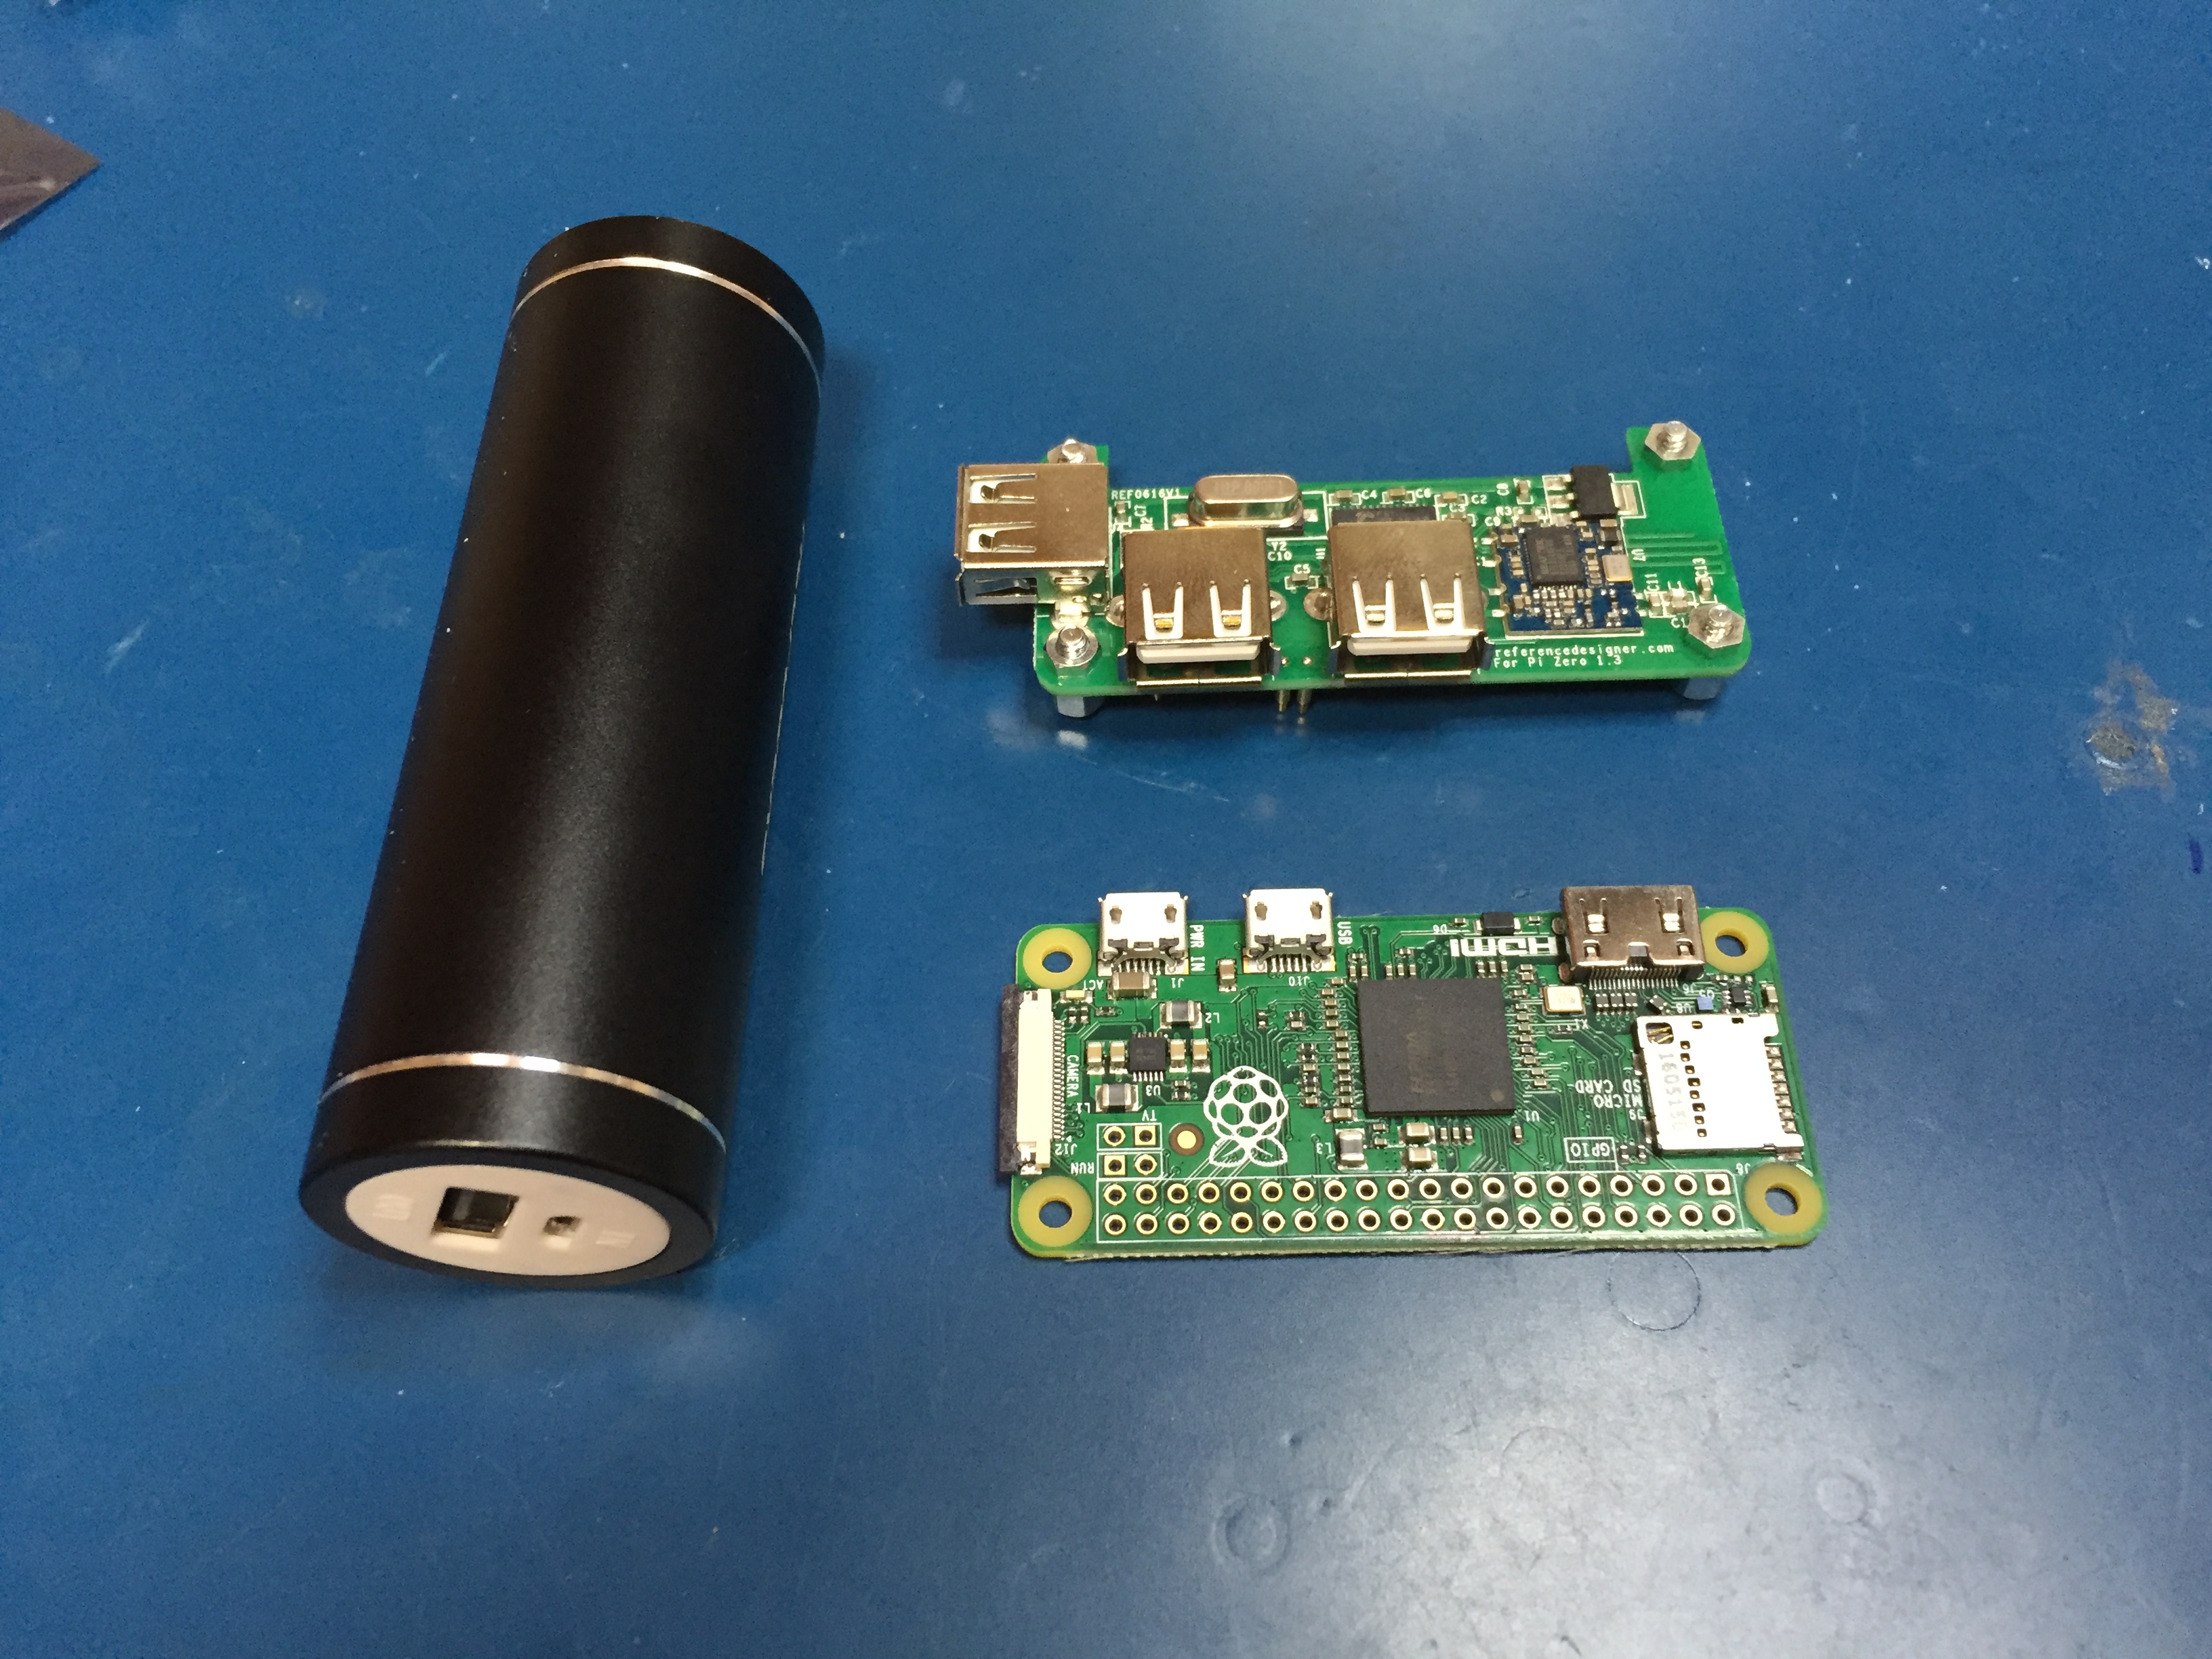\n\nI am going to attempt to build a much smaller and truly **walkie**, talkiepi. \n\nInitial testing and some minor code tweaks and talkiepi is running on a Raspberry Pi Zero with HubPiWi. \n\n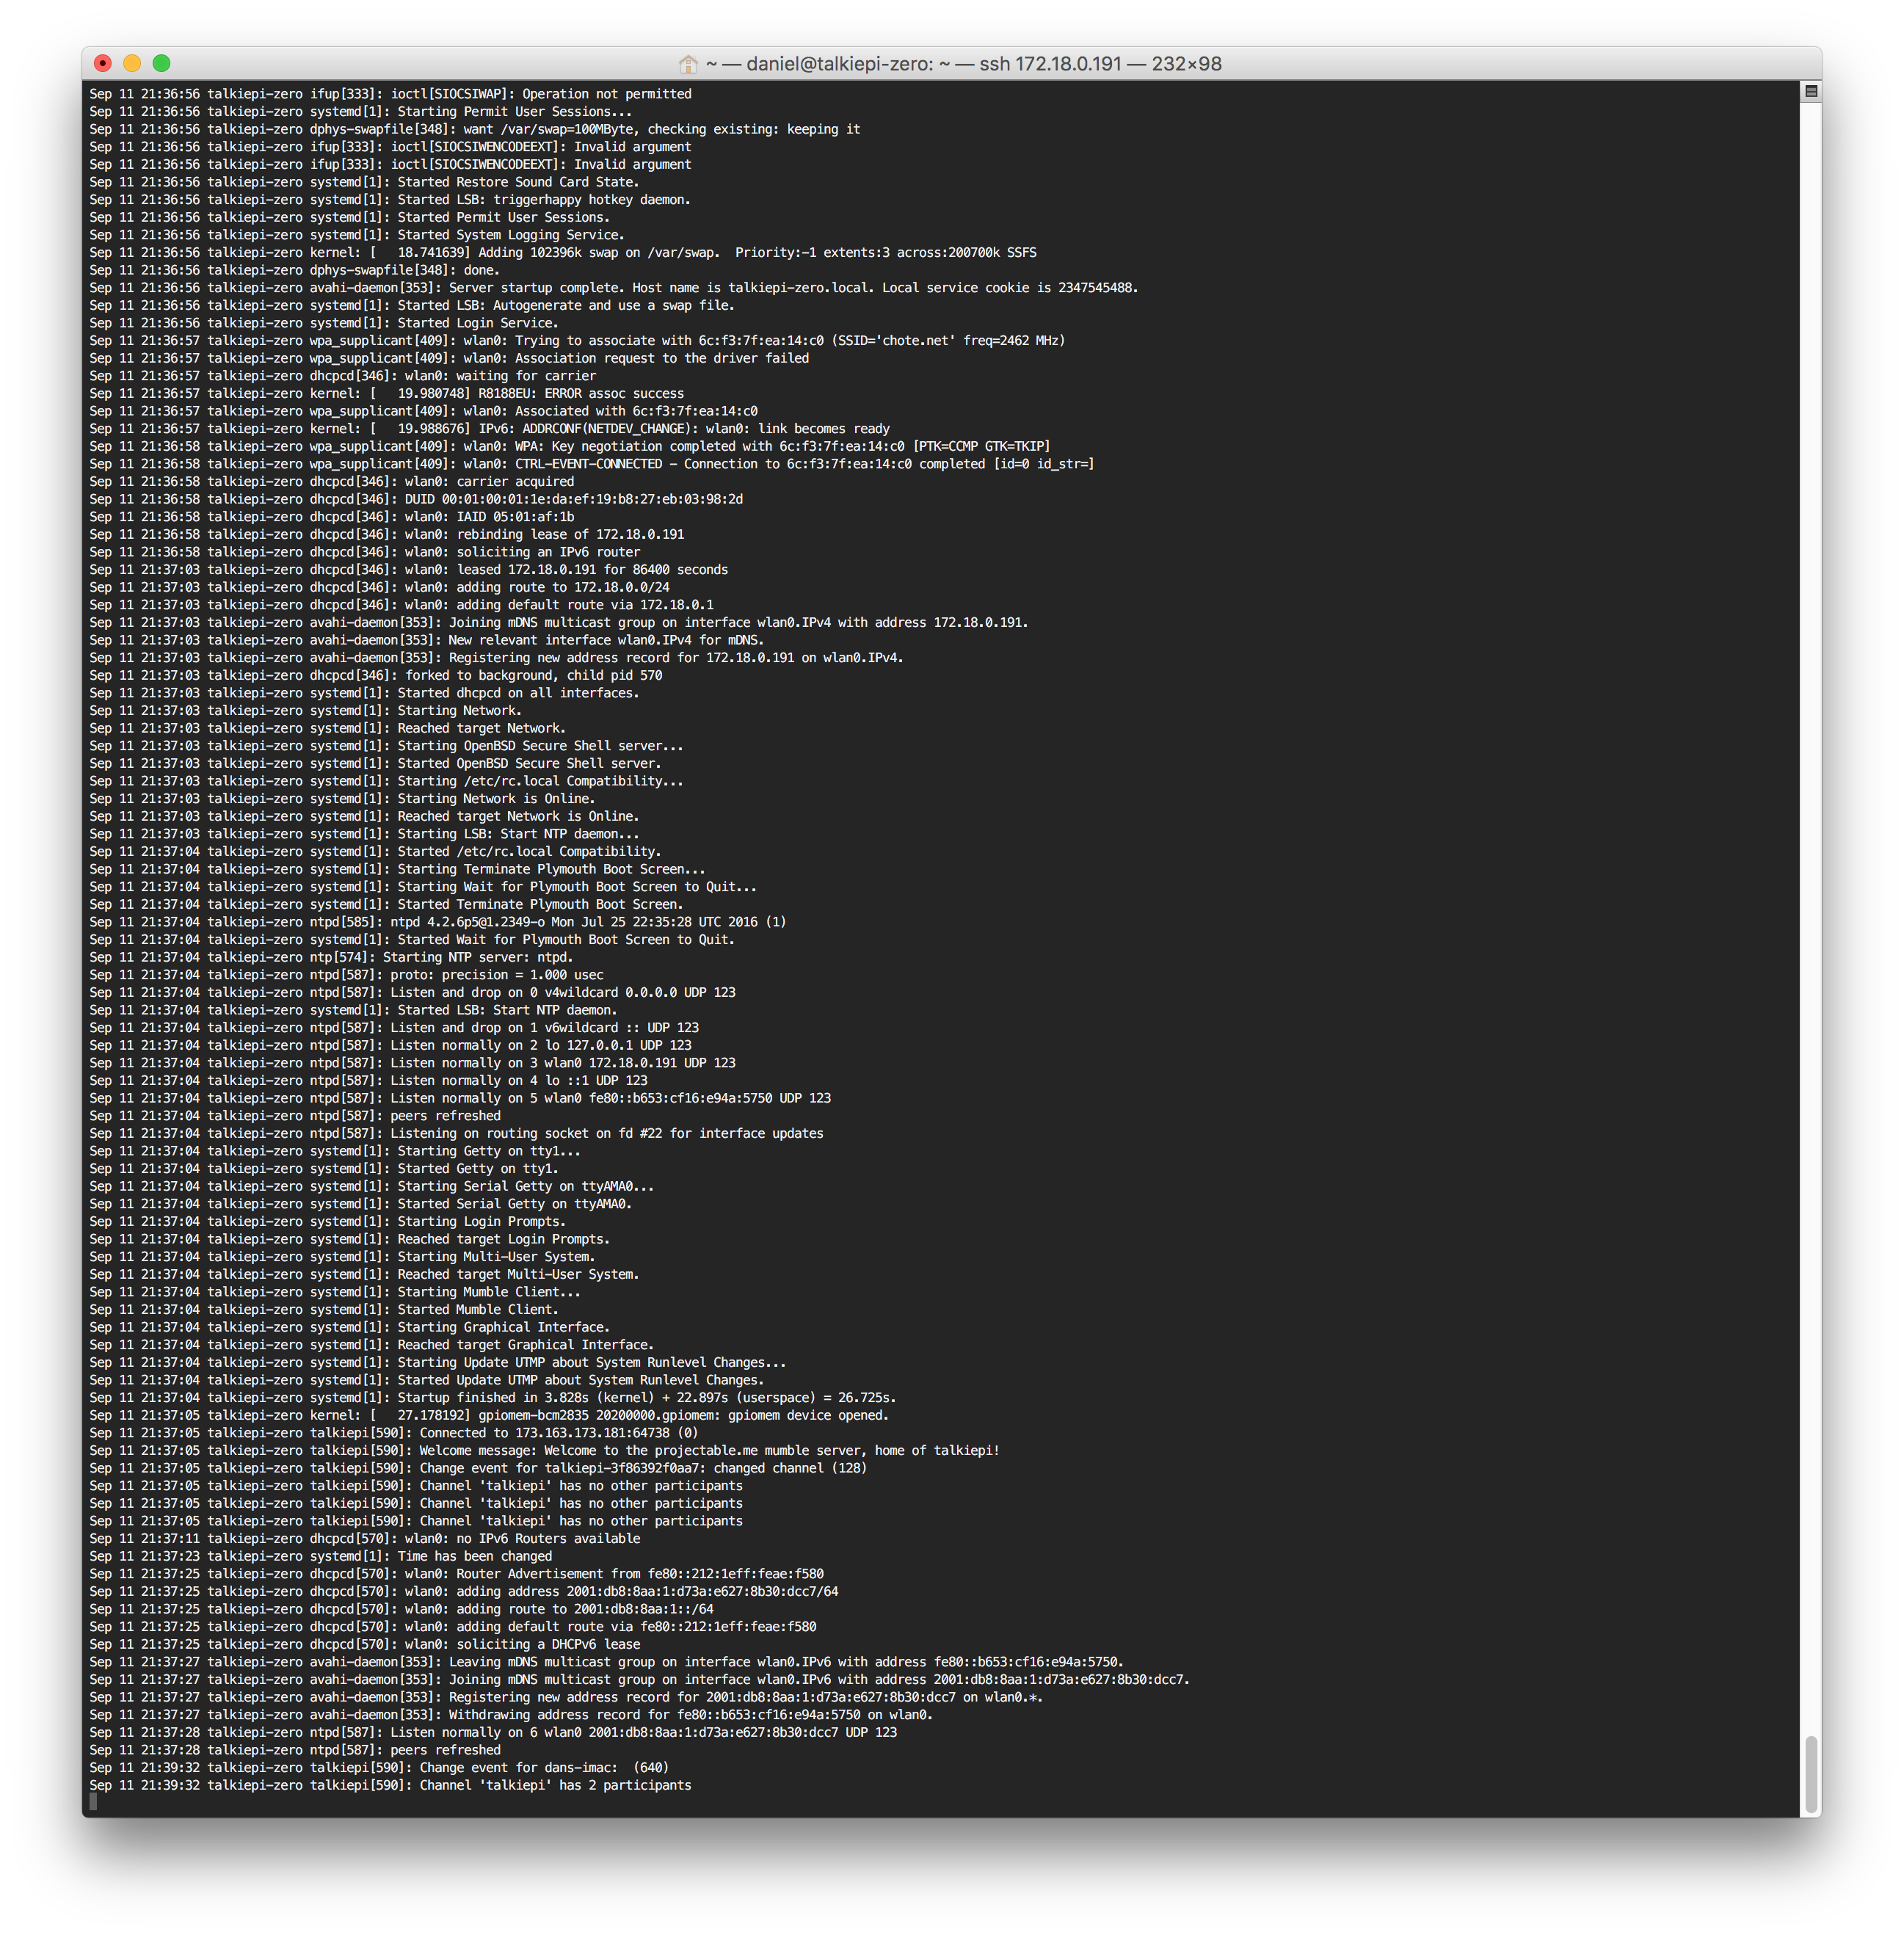\n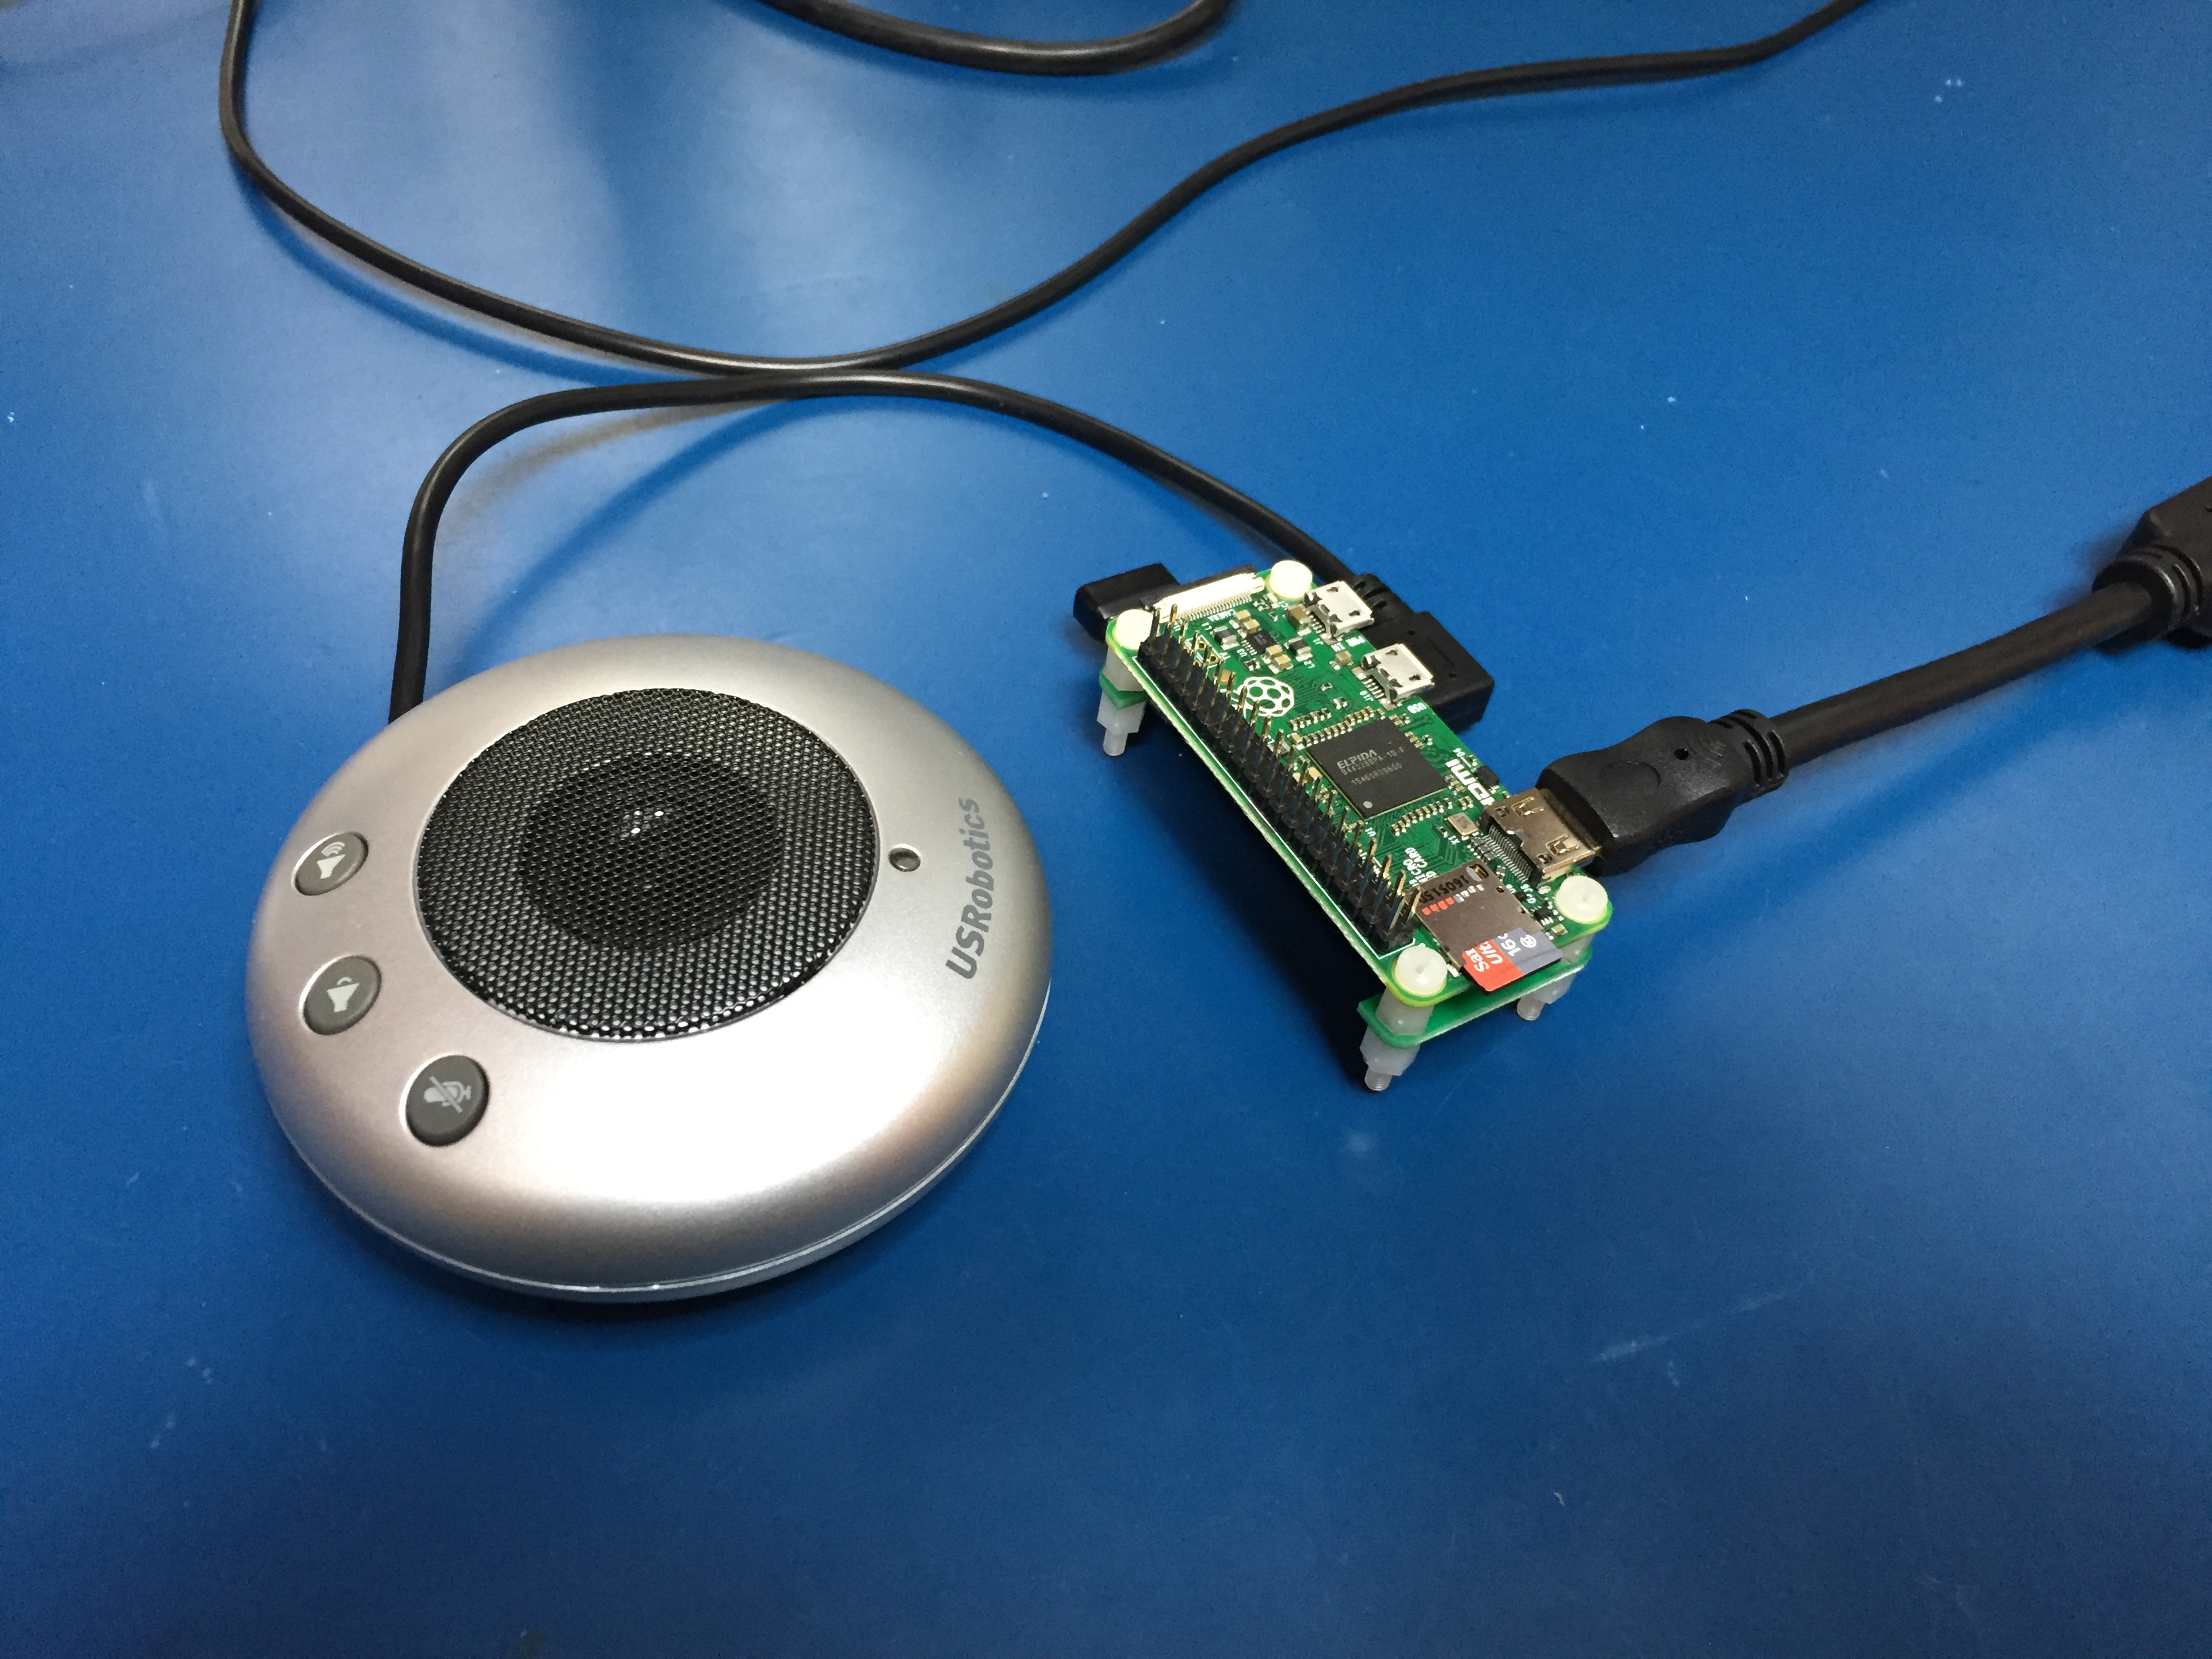\n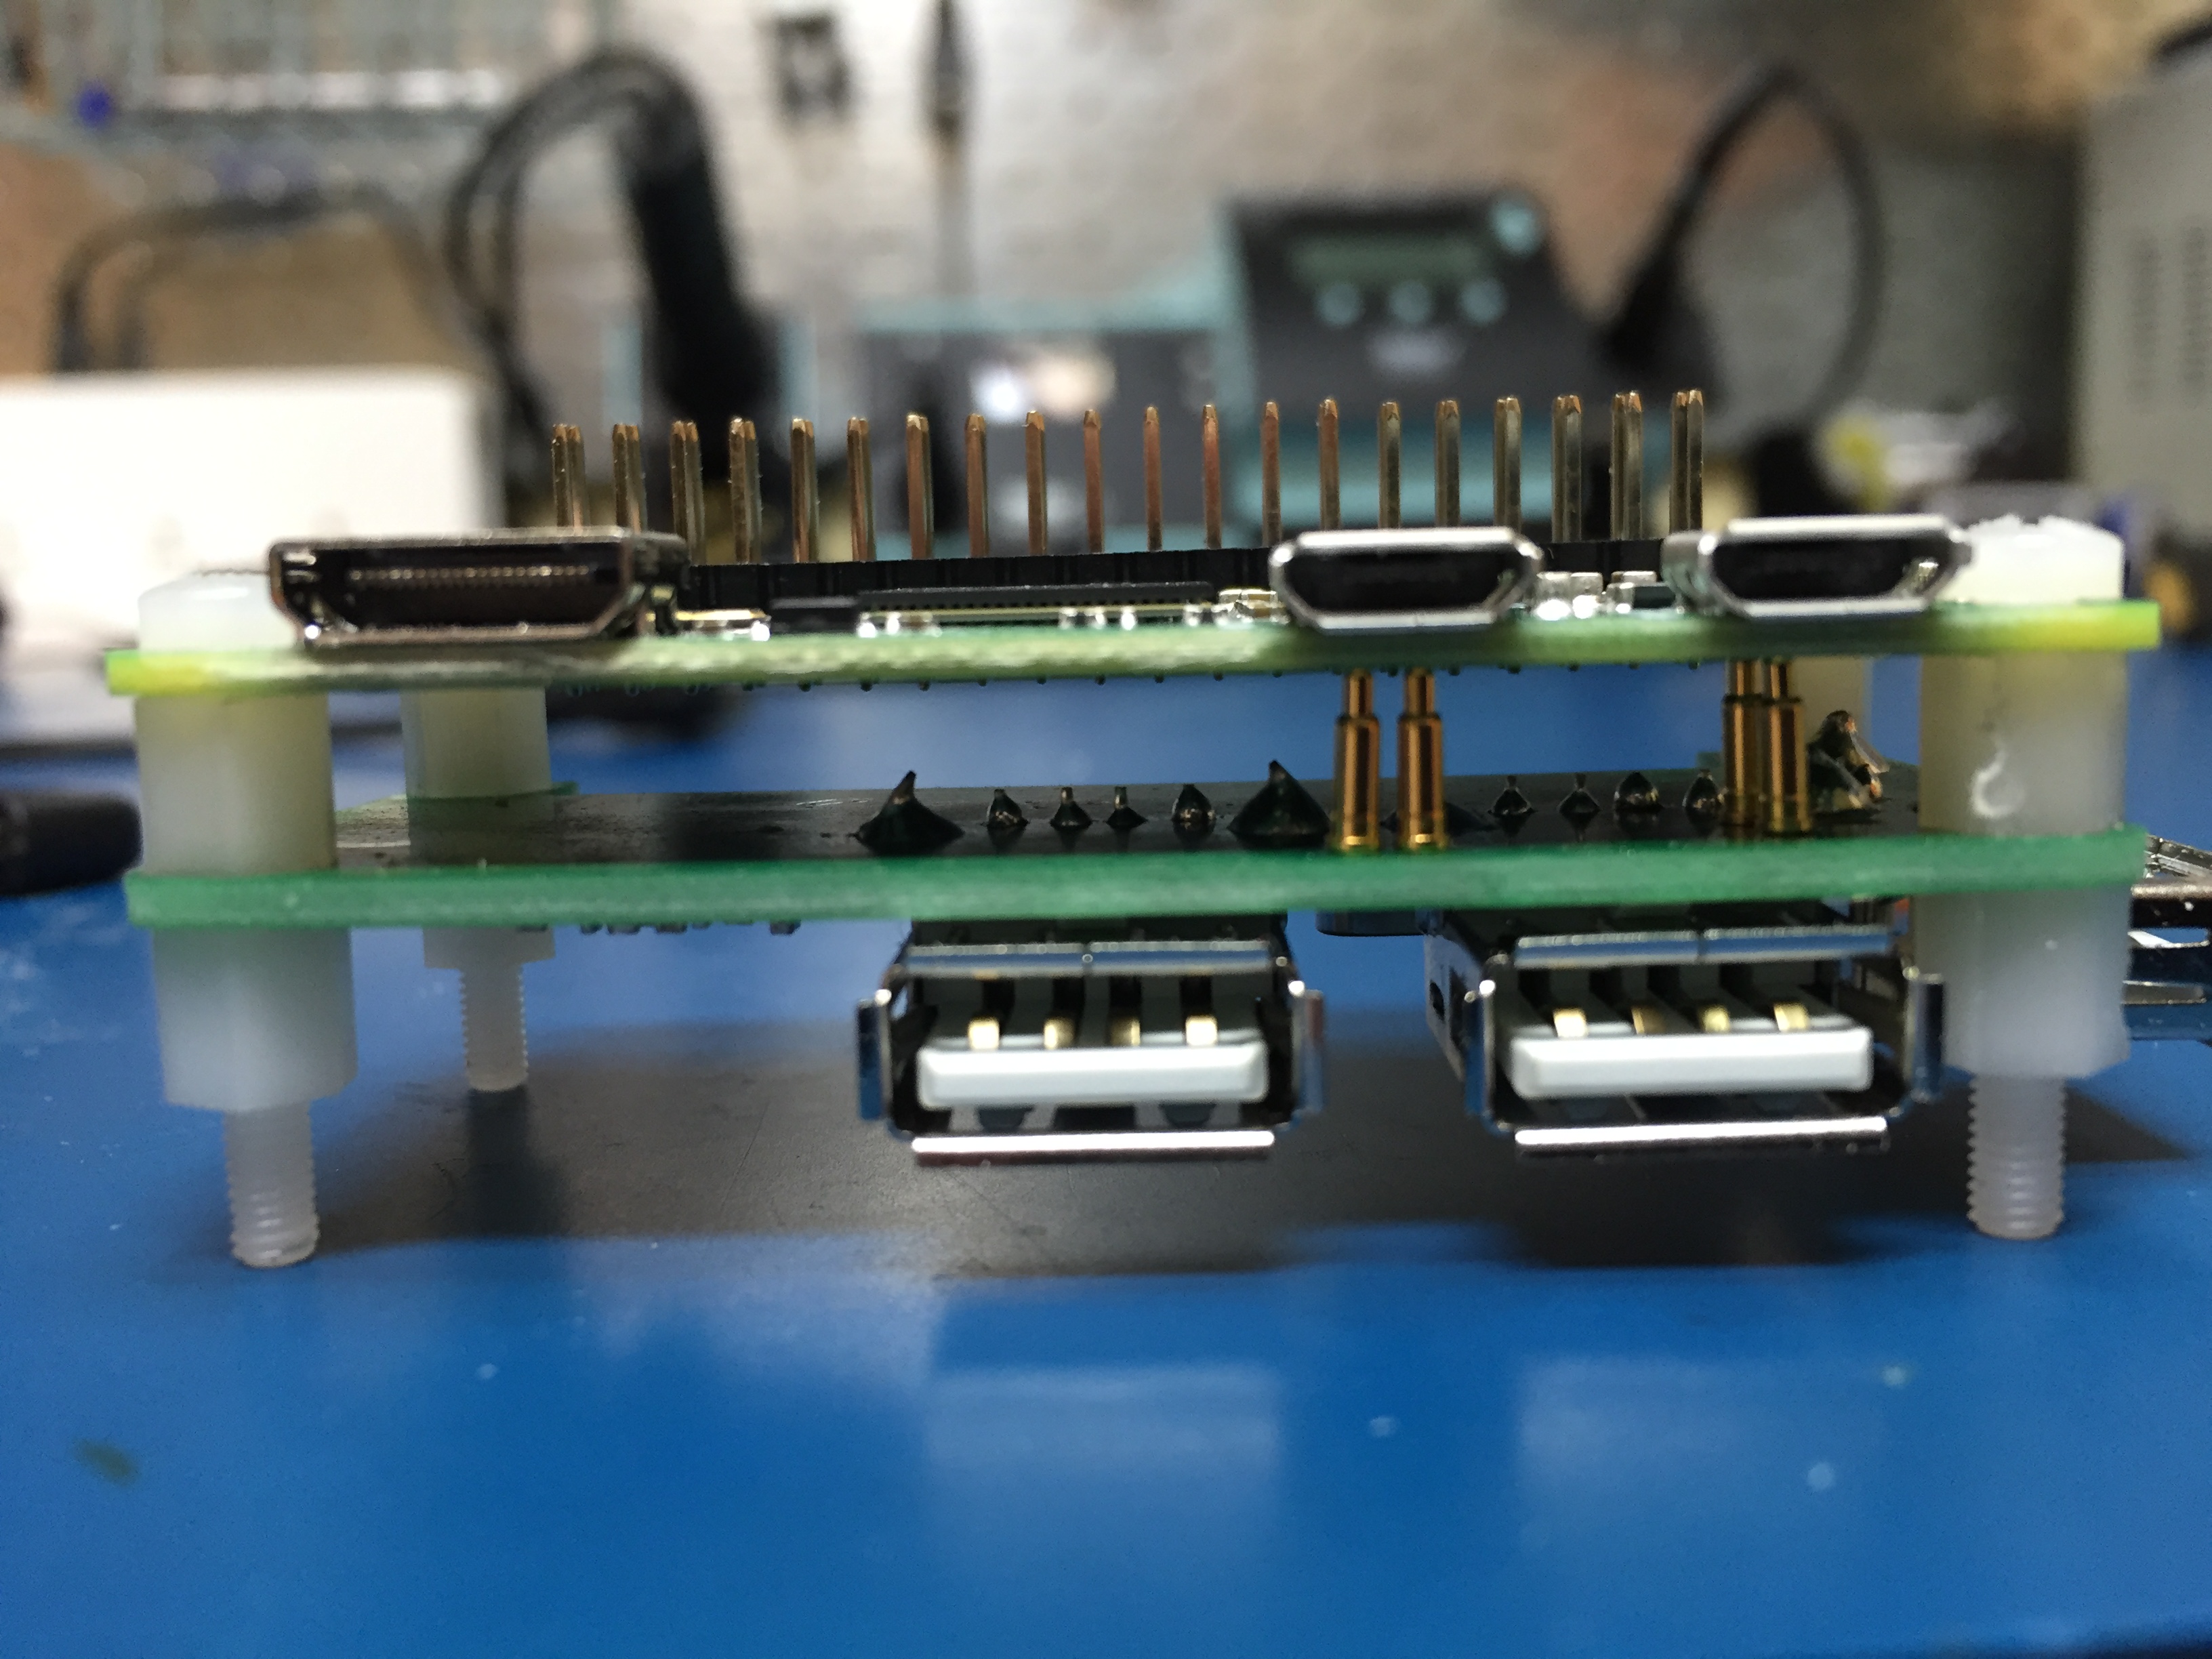\n\nOver the next few weeks I will be working on a new WALKIE talkiepi case design!\n\n**Stay tuned...**","html":"\u003ch2\u003eIntroducing \u003ca href=\"https://github.com/dchote/talkiepi\" rel=\"nofollow\"\u003etalkiepi\u003c/a\u003e\u003c/h2\u003e\n\u003cp\u003e\u003ca href=\"https://github.com/dchote/talkiepi\" rel=\"nofollow\"\u003etalkiepi\u003c/a\u003e is a wifi \u0026#34;walkie\u0026#34; talkie for your kids and their friends. It provides a very simple \u0026#34;push to talk\u0026#34; interface. When you push the button and talk, all the other talkiepis in the channel will hear what is being said.\u003c/p\u003e\n\u003cp\u003etalkiepi uses \u003ca href=\"http://mumble.info\" rel=\"nofollow\"\u003eMumble\u003c/a\u003e for its voice communication protocol. Mumble is an open source, lightweight, high quality voice chat system designed for use by PC gamers. Mumble lent itself perfectly for this use case. There are already software clients for all platforms (Mac, Win, Linux, IOS, Android), meaning you can talk with your talkiepi using your phone or computer, and you\u0026#39;re not limited to just talkiepi devices! By utilizing Mumble channels, user registration, and access control lists, you can configure different groups of talkiepis, just like using different channels on a traditional walkie talkie.\u003c/p\u003e\n\u003cp\u003e\u003ca href=\"https://github.com/dchote/talkiepi\" rel=\"nofollow\"\u003etalkiepi\u003c/a\u003e is built utilizing a \u003ca href=\"https://www.raspberrypi.org/products/raspberry-pi-3-model-b/\" rel=\"nofollow\"\u003eRaspberry Pi\u003c/a\u003e, \u003ca href=\"https://www.amazon.com/USRobotics-USB-Internet-Speakerphone-USR9610/dp/B000E6IL10\" rel=\"nofollow\"\u003eUSB speakerphone\u003c/a\u003e, some basic electronic components, and a 3D printed enclosure. \u003ca href=\"https://github.com/dchote/talkiepi\" rel=\"nofollow\"\u003etalkiepi\u003c/a\u003e runs a \u003ca href=\"http://mumble.info\" rel=\"nofollow\"\u003emumble\u003c/a\u003e \u003ca href=\"https://github.com/dchote/talkiepi\" rel=\"nofollow\"\u003eclient\u003c/a\u003e that has been designed specifically for push to talk via the push button interface. After it is setup on your wifi network and the software is configured, talkiepi will require little to no maintenance to use.\u003c/p\u003e\n\u003chr\u003e\n\u003ch3\u003etalkiepi software on your Raspberry Pi\u003c/h3\u003e\n\u003cp\u003eI have written an overview of the software and hardware interface at the \u003ca href=\"https://github.com/dchote/talkiepi\" rel=\"nofollow\"\u003egithub repository for talkiepi\u003c/a\u003e. An install guide can be found at \u003ca href=\"https://github.com/dchote/talkiepi/blob/master/doc/README.md\" rel=\"nofollow\"\u003ehttps://github.com/dchote/talkiepi/blob/master/doc/README.md\u003c/a\u003e, which will step you through installing talkiepi on your Raspberry Pi.\u003c/p\u003e\n\u003cp\u003e\u003cem\u003eOn September 10th there was a pull request against the go-openal library that broke things on Raspbian Jessie, I have since forked the library and reverted the changes. talkiepi now uses my fork of the library and should now build again\u003c/em\u003e\u003c/p\u003e\n\u003cp\u003eI have added some notes regarding my wifi trouble on the rpi3 \u003ca href=\"http://projectable.me/optimize-my-pi-wi-fi/\" rel=\"nofollow\"\u003ehere\u003c/a\u003e.\u003c/p\u003e\n\u003chr\u003e\n\u003ch3\u003eBuilding a talkiepi\u003c/h3\u003e\n\u003ch5\u003eBuild without an enclosure:\u003c/h5\u003e\n\u003cp\u003eYou can assemble a talkiepi with or without the 3D printed enclosure. I initially prototyped the GPIO stuff on a breadboard, and that would be more than sufficient to play with if you didn\u0026#39;t want to commit to a full build.\u003c/p\u003e\n\u003cimg src=\"/content/images/2016/09/IMG_8844.JPG\" alt=\"breadboard\"\u003e\n\u003ch5\u003ePrint an enclosure:\u003c/h5\u003e\n\u003cp\u003eIf you want to do a full build of talkiepi you can download the 3D models from the \u003ca href=\"https://github.com/dchote/talkiepi/tree/master/stl\" rel=\"nofollow\"\u003egithub repository\u003c/a\u003e. I printed my parts on my \u003ca href=\"http://www.monoprice.com/product?p_id=15365\" rel=\"nofollow\"\u003eMonoprice Select Mini 3D Printer\u003c/a\u003e. I printed in PLA with 100% infill. You \u003cem\u003ewill\u003c/em\u003e need to rotate the models to print, but if you already have a 3D printer, you probably know what you need to do. If you don\u0026#39;t own a 3D printer yet, there are many services that will print and mail you your parts!\u003c/p\u003e\n\u003cp\u003eI designed the talkiepi enclosure in Autodesk\u0026#39;s \u003ca href=\"http://www.autodesk.com/products/fusion-360/overview\" rel=\"nofollow\"\u003eFusion360\u003c/a\u003e. If anyone would like to tweak the Fusion360 assembly, drop me a tweet \u003ca href=\"https://http://twitter.com/dchote/\" rel=\"nofollow\"\u003e@dchote\u003c/a\u003e #talkiepi.\u003c/p\u003e\n\u003cimg src=\"/content/images/2016/09/14195449_10154470917845419_4831834876665870570_o.jpg\" alt=\"fusion360\"\u003e\n\u003cimg src=\"/content/images/2016/09/IMG_8946-1.JPG\" alt=\"\"\u003e\n\u003cimg src=\"/content/images/2016/09/IMG_8947.JPG\" alt=\"\"\u003e\n\u003cimg src=\"/content/images/2016/09/IMG_8939.JPG\" alt=\"\"\u003e\n\u003chr\u003e\n\u003ch3\u003etalkiepi parts\u003c/h3\u003e\n\u003cp\u003eI ordered most of these components from \u003ca href=\"https://www.adafruit.com\" rel=\"nofollow\"\u003eAdafruit\u003c/a\u003e, and a couple of parts from \u003ca href=\"https://www.amazon.com\" rel=\"nofollow\"\u003eAmazon.com\u003c/a\u003e. I already had the hookup wire, heat-shrink and resistors.\u003c/p\u003e\n\u003cimg src=\"/content/images/2016/09/IMG_8933.JPG\" alt=\"talkiepi parts\"\u003e\n\u003cul\u003e\n\u003cli\u003e\u003ca href=\"https://www.adafruit.com/products/3055\" rel=\"nofollow\"\u003eRaspberry Pi 3 Model B ~$35\u003c/a\u003e\u003c/li\u003e\n\u003cli\u003e\u003ca href=\"https://www.amazon.com/SanDisk-Ultra-Micro-Adapter-SDSQUNC-016G-GN6MA/dp/B010Q57SEE/ref=sr_1_3?ie=UTF8\u0026amp;qid=1472828023\u0026amp;sr=8-3\u0026amp;keywords=16G+micro+sd+card\" rel=\"nofollow\"\u003eMicro SD Card\u003c/a\u003e\u003c/li\u003e\n\u003cli\u003e\u003ca href=\"https://www.amazon.com/USRobotics-USB-Internet-Speakerphone-USR9610/dp/B000E6IL10/ref=sr_1_2?ie=UTF8\u0026amp;qid=1472828042\u0026amp;sr=8-2\u0026amp;keywords=US+Robotics+usb+speakerphone\" rel=\"nofollow\"\u003eUS Robotics USB Speakerphone (USR9610) between $4 and $12 (really cheap)\u003c/a\u003e\u003c/li\u003e\n\u003cli\u003e\u003ca href=\"https://www.amazon.com/gp/product/B01CXT43MQ/ref=oh_aui_detailpage_o02_s00?ie=UTF8\u0026amp;psc=1\" rel=\"nofollow\"\u003eShort right angle / left angle mini USB cable\u003c/a\u003e\u003c/li\u003e\n\u003cli\u003e5 x M3 nylon screws + 1 M3x20 nylon standoff\u003c/li\u003e\n\u003cli\u003eGPIO header connector (there are many options for this)\u003c/li\u003e\n\u003cli\u003e2 x 5mm LEDs with \u003ca href=\"https://www.adafruit.com/products/2176\" rel=\"nofollow\"\u003e5mm LED holders\u003c/a\u003e\u003c/li\u003e\n\u003cli\u003e\u003ca href=\"https://www.adafruit.com/product/1477\" rel=\"nofollow\"\u003ePushbutton with LED\u003c/a\u003e\u003c/li\u003e\n\u003cli\u003e3 x 330ohm resistors\u003c/li\u003e\n\u003cli\u003e2 x M3x15 + 2 x M3x25 stainless bolts (for the case)\u003c/li\u003e\n\u003cli\u003e2 x M3x10 stainless bolts + nuts (for the speaker)\u003c/li\u003e\n\u003cli\u003eHookup wire + heat-shrink\u003c/li\u003e\n\u003c/ul\u003e\n\u003chr\u003e\n\u003ch3\u003eThe GPIO stuff\u003c/h3\u003e\n\u003cp\u003eThe GPIO interface usage is actually very simple. It is a push button with 2 separate LEDs for status indication and 1 LED within the push button that illuminates when it is transmitting.\u003c/p\u003e\n\u003cimg src=\"https://github.com/dchote/talkiepi/raw/master/doc/gpio_diagram.png\" alt=\"\"\u003e\n\u003cp\u003eYou can use any type of header connector. I initially used \u003ca href=\"https://www.adafruit.com/product/2222\" rel=\"nofollow\"\u003eone of these\u003c/a\u003e, but using smaller connectors (such as a 8 pin for the LEDs and a 2 pin for the button) makes it easier to fit and assemble.\u003c/p\u003e\n\u003cimg src=\"/content/images/2016/09/IMG_8958.JPG\" alt=\"\"\u003e\n\u003cp\u003eSolder the 3 resistors to the ground pin, and solder your positive LED wires to the other pins.\u003c/p\u003e\n\u003cimg src=\"/content/images/2016/09/IMG_8959.JPG\" alt=\"\"\u003e\n\u003cp\u003eSolder your negative LED wires to each of the resistors.\u003c/p\u003e\n\u003cimg src=\"/content/images/2016/09/IMG_8960.JPG\" alt=\"\"\u003e\n\u003cp\u003eSlip on heat-shrink to protect from shorting. I put a larger piece of heat-shrink around all the resistors to keep them in a nice solid bundle.\u003c/p\u003e\n\u003cp\u003eNext up put together the button GPIO connector, you can either solder this on to your larger header, or like me, use a smaller 2 pin connector on pins 20 and 22.\u003c/p\u003e\n\u003cp\u003eSolder the 2 status LEDs on to their respective leads. Don\u0026#39;t forget to slip on the LED holder boots and the heat-shrink before you solder!\u003c/p\u003e\n\u003cimg src=\"/content/images/2016/09/IMG_8962.JPG\" alt=\"\"\u003e\n\u003chr\u003e\n\u003ch3\u003eThe USB speakerphone\u003c/h3\u003e\n\u003cp\u003eTaking the speakerphone apart is really simple. There are two screws hiding under the rubber feet and two more screws holding the speaker in place.\u003c/p\u003e\n\u003cimg src=\"/content/images/2016/09/IMG_8935.JPG\" alt=\"\"\u003e\n\u003cimg src=\"/content/images/2016/09/IMG_8936.JPG\" alt=\"\"\u003e\n\u003cimg src=\"/content/images/2016/09/IMG_8937.JPG\" alt=\"\"\u003e\n\u003cp\u003eLeave the foam on the microphone; the talkiepi case actually utilizes that to hold the microphone in place.\u003c/p\u003e\n\u003ch3\u003eAssembling talkiepi\u003c/h3\u003e\n\u003cp\u003eI designed the enclosure to accommodate the Pi3 and the US Robotics speakerphone PCB specifically. Once you have printed the enclosure parts, I recommend you get a 3mm tap and tap the holes. If you don\u0026#39;t have a tap, you can use one of your stainless bolts (carefully avoiding stripping out the holes).\u003c/p\u003e\n\u003cimg src=\"/content/images/2016/09/IMG_8940.JPG\" alt=\"\"\u003e\n\u003cp\u003eAttach the right/left angle USB cable to the bottom right USB port of your Raspberry Pi. Mount the Raspberry Pi using the nylon screws. Use the standoff in the hole next to the 3.5mm audio jack.\u003c/p\u003e\n\u003cimg src=\"/content/images/2016/09/IMG_8872.JPG\" alt=\"\"\u003e\n\u003cp\u003eCarefully unclip and disconnect the speaker from the speakerphone PCB and mount the speaker on the front panel using your M3x10 bolts+nuts. You will likely need to drill out the holes on the speaker to 3mm. Connect your GPIO harness to the Raspberry Pi.\u003c/p\u003e\n\u003cimg src=\"/content/images/2016/09/IMG_8963-1.JPG\" alt=\"\"\u003e\n\u003cp\u003ePlace the LED holders through the speaker cover and place the speaker cover and LED holders through the top panel, fastening the LED holders in place with their washers and nuts. Secure the LED push button in place.\u003c/p\u003e\n\u003cimg src=\"/content/images/2016/09/IMG_8964-1.JPG\" alt=\"\"\u003e\n\u003cimg src=\"/content/images/2016/09/IMG_8965-1.JPG\" alt=\"\"\u003e\n\u003cp\u003eNow slide the LEDs with boots into the LED holders (\u003cem\u003eI used a little bit of silicone sealant to ensure they dont push out\u003c/em\u003e).\u003c/p\u003e\n\u003cimg src=\"/content/images/2016/09/IMG_8968.JPG\" alt=\"\"\u003e\n\u003cp\u003eNow mount the speakerphone PCB with the USB port facing towards the rear of the case (same direction as the Pi USB ports). Use the other two nylon screws to secure (one into the case and one into the standoff). Connect the USB cable to the speakerphone connector, folding/tucking the excess cable in the space behind the USB ports. Ensure your GPIO leads are routed cleanly around the speakerphone PCB, and that nothing could be shorting.\u003c/p\u003e\n\u003cimg src=\"/content/images/2016/09/IMG_8969.JPG\" alt=\"\"\u003e\n\u003cp\u003eFinally attach the top cover to the bottom. Be sure to feed the wires nicely, and that everything looks tucked out of the way inside. Again, check for any shorts before fastening the top with the M3 bolts.\u003c/p\u003e\n\u003chr\u003e\n\u003ch3\u003eEnjoy your talkiepi!\u003c/h3\u003e\n\u003cp\u003eThats it! You\u0026#39;re ready to talk to another mumble client or, if you made two, your other talkiepi!\u003c/p\u003e\n\u003cimg src=\"/content/images/2016/09/IMG_8925-2.JPG\" alt=\"\"\u003e\n\u003cimg src=\"/content/images/2016/09/IMG_8926.JPG\" alt=\"\"\u003e\n\u003cimg src=\"/content/images/2016/09/IMG_8927-1.JPG\" alt=\"\"\u003e\n\u003chr\u003e\n\u003ch3\u003eSomething different?\u003c/h3\u003e\n\u003cp\u003eI attempted to do a paint finish, but I just don\u0026#39;t have the patience, or workspace to do a good job of spraying something this small. I do however have a bunch of different colored PLA. Check it out in blue and now red!\u003c/p\u003e\n\u003cimg src=\"/content/images/2016/09/IMG_8978.JPG\" alt=\"\"\u003e\n\u003cimg src=\"/content/images/2016/09/IMG_8979.JPG\" alt=\"\"\u003e\n\u003cimg src=\"/content/images/2016/09/IMG_8993.JPG\" alt=\"\"\u003e\n\u003ch3\u003eWhats next...\u003c/h3\u003e\n\u003cp\u003eI have a Raspberry Pi Zero, \u003ca href=\"https://www.kickstarter.com/projects/1728237598/hubpiwi-raspberry-pi-zero-hub-with-wifi-no-cable-c\" rel=\"nofollow\"\u003eHubPiWi\u003c/a\u003e, and a USB battery pack.\u003c/p\u003e\n\u003cimg src=\"/content/images/2016/09/IMG_8994.JPG\" alt=\"\"\u003e\n\u003cp\u003eI am going to attempt to build a much smaller and truly \u003cstrong\u003ewalkie\u003c/strong\u003e, talkiepi.\u003c/p\u003e\n\u003cp\u003eInitial testing and some minor code tweaks and talkiepi is running on a Raspberry Pi Zero with HubPiWi.\u003c/p\u003e\n\u003cimg src=\"/content/images/2016/09/Screen-Shot-2016-09-11-at-9-40-11-PM.png\" alt=\"\"\u003e\n\u003cimg src=\"/content/images/2016/09/IMG_9013.JPG\" alt=\"\"\u003e\n\u003cimg src=\"/content/images/2016/09/IMG_9011.JPG\" alt=\"\"\u003e\n\u003cp\u003eOver the next few weeks I will be working on a new WALKIE talkiepi case design!\u003c/p\u003e\n\u003cp\u003e\u003cstrong\u003eStay tuned...\u003c/strong\u003e\u003c/p\u003e\n","excerpt":"","metaTitle":"","metaDescription":"","status":"published","featured":false,"publishedAt":"2016-09-02T16:13:39Z","authorId":"190160de54f2192bd5b8734ec8808086","authorName":"Daniel Chote","authorSlug":"daniel","heroMediaId":"","projectId":"","tags":[{"id":"b529314e428273696b02c474dcf56132","name":"Raspberry Pi","slug":"raspberry-pi"},{"id":"b223b3e2ba0e78e7e6a6a8ff4349517d","name":"talkiepi","slug":"talkiepi"},{"id":"e2e48067ff28749272dbdc37a0f2023d","name":"golang","slug":"golang"}],"createdAt":"2026-10-18T13:16:27Z","updatedAt":"2026-10-18T13:16:27Z"}],"site":{"id":"projectable","theme":"projectable","title":"Daniel Chote's Project Blog","description":"Software Development, Hardware Hacking, Sim Racing, Multirotors and Robots!","timezone":"America/New_York","postsPerPage":10,"logoMediaId":"21557257b3f2ecc4b3fa875b808097a7","coverMediaId":"25f1417193daeb2af73861aaa0dd17fd","copyright":"© Daniel Chote","twitterUrl":"https://twitter.com/dchote","linkedinUrl":"https://www.linkedin.com/in/dchote","googleTagId":"G-07GJBQVM38","hosts":[{"host":"new.projectable.me","canonical":false},{"host":"projectable.me","canonical":true},{"host":"www.projectable.me","canonical":false}]},"tag":{"name":"golang","slug":"golang"},"tagId":"e2e48067ff28749272dbdc37a0f2023d","total":2}