{"authorId":"","cover":"/content/images/2016/08/IMG_7487.jpg","heroes":{"39b4d054f7e0bce8c6537f8d80a0a2e3":"/content/images/2017/04/IMG_0528.JPG"},"kind":"tag","logo":"/content/images/2016/08/projectable-me-4.png","nav":[{"id":"62e854d471683dea63488bcbca5c6188","label":"Home","url":"/","sortOrder":0},{"id":"1bc84fb15620acd635df7735a0b8ddd8","label":"Raspberry Pi","url":"/tag/raspberry-pi/","sortOrder":1},{"id":"3207e2fec51d66d2a5b3d8d04feb9dd8","label":"Sim Racing","url":"/tag/sim-racing/","sortOrder":2},{"id":"59115afd52e59a74faa4b386e00ae3fa","label":"About","url":"/about-me/","sortOrder":3}],"page":1,"perPage":10,"posts":[{"id":"39b4d054f7e0bce8c6537f8d80a0a2e3","siteId":"projectable","slug":"msi-gtx-1050ti-4g-oc-the-poor-mans-1u-inference-gpu","title":"MSI GTX 1050Ti 4G OC - The poor man's 1u inference GPU","markdown":"At [BrandYourself](http://brandyourself.com), we are diving deep in to Machine Learning to enhance some of our upcoming features. The issue I have with the current ML battlefield is that cloud based GPU instances are still relatively new and very expensive. When you start adding high availability requirements, as well as potential concurrent load, it gets prohibitively expensive quickly.\n\n### The Solution\n\nI set out with the goal to build my own 1u low power server with an NVIDIA GPU. I found a good low power server candidate from [Supermicro](https://www.supermicro.com), the [5018D-FN4T](https://www.supermicro.com/products/system/1u/5018/sys-5018d-fn4t.cfm) 8 core D-1541 Intel® Xeon® processor. It has a 200W power supply and PCI-E 3.0 x16. It's not the cheapest platform option, but it has great performance: m.2 for storage and a full x16 PCI-E 3.0 slot.\n\nFor the GPU it took a lot of looking at photos to determine a card that could be easily modified to fit in a 1u chassis and still maintain an adequate cooling solution. With the launch of the GTX 1050Ti from NVIDIA, I was excited to see MSI launch a product that seemed like it may be my perfect fit. The [GEFORCE® GTX 1050 TI 4G OC](https://www.msi.com/Graphics-card/GeForce-GTX-1050-Ti-4G-OC.html) is a bus powered (75W) 4G 10 series GPU with a stock cooler that has the heatsink fins running end to end on the card. \n4G of ram means we can run 4 workers on the card (our inference model footprint for image processing right now is ~850Mb) and still have a small buffer incase something grows. \nThe 75W power consumption over the PCI bus means no extra power cables required and a lower expected running temperature. \nThe stock heatsink on the card already has end to end fins, so we have the ability to place a 1u high RPM fan at the end of the card and maintain a decent level of airflow over the heatsink.\n\n\n\n### Making it fit\n**WARNING: This WILL void your GPU's warranty...** \n\u003cp align=\"center\"\u003e\n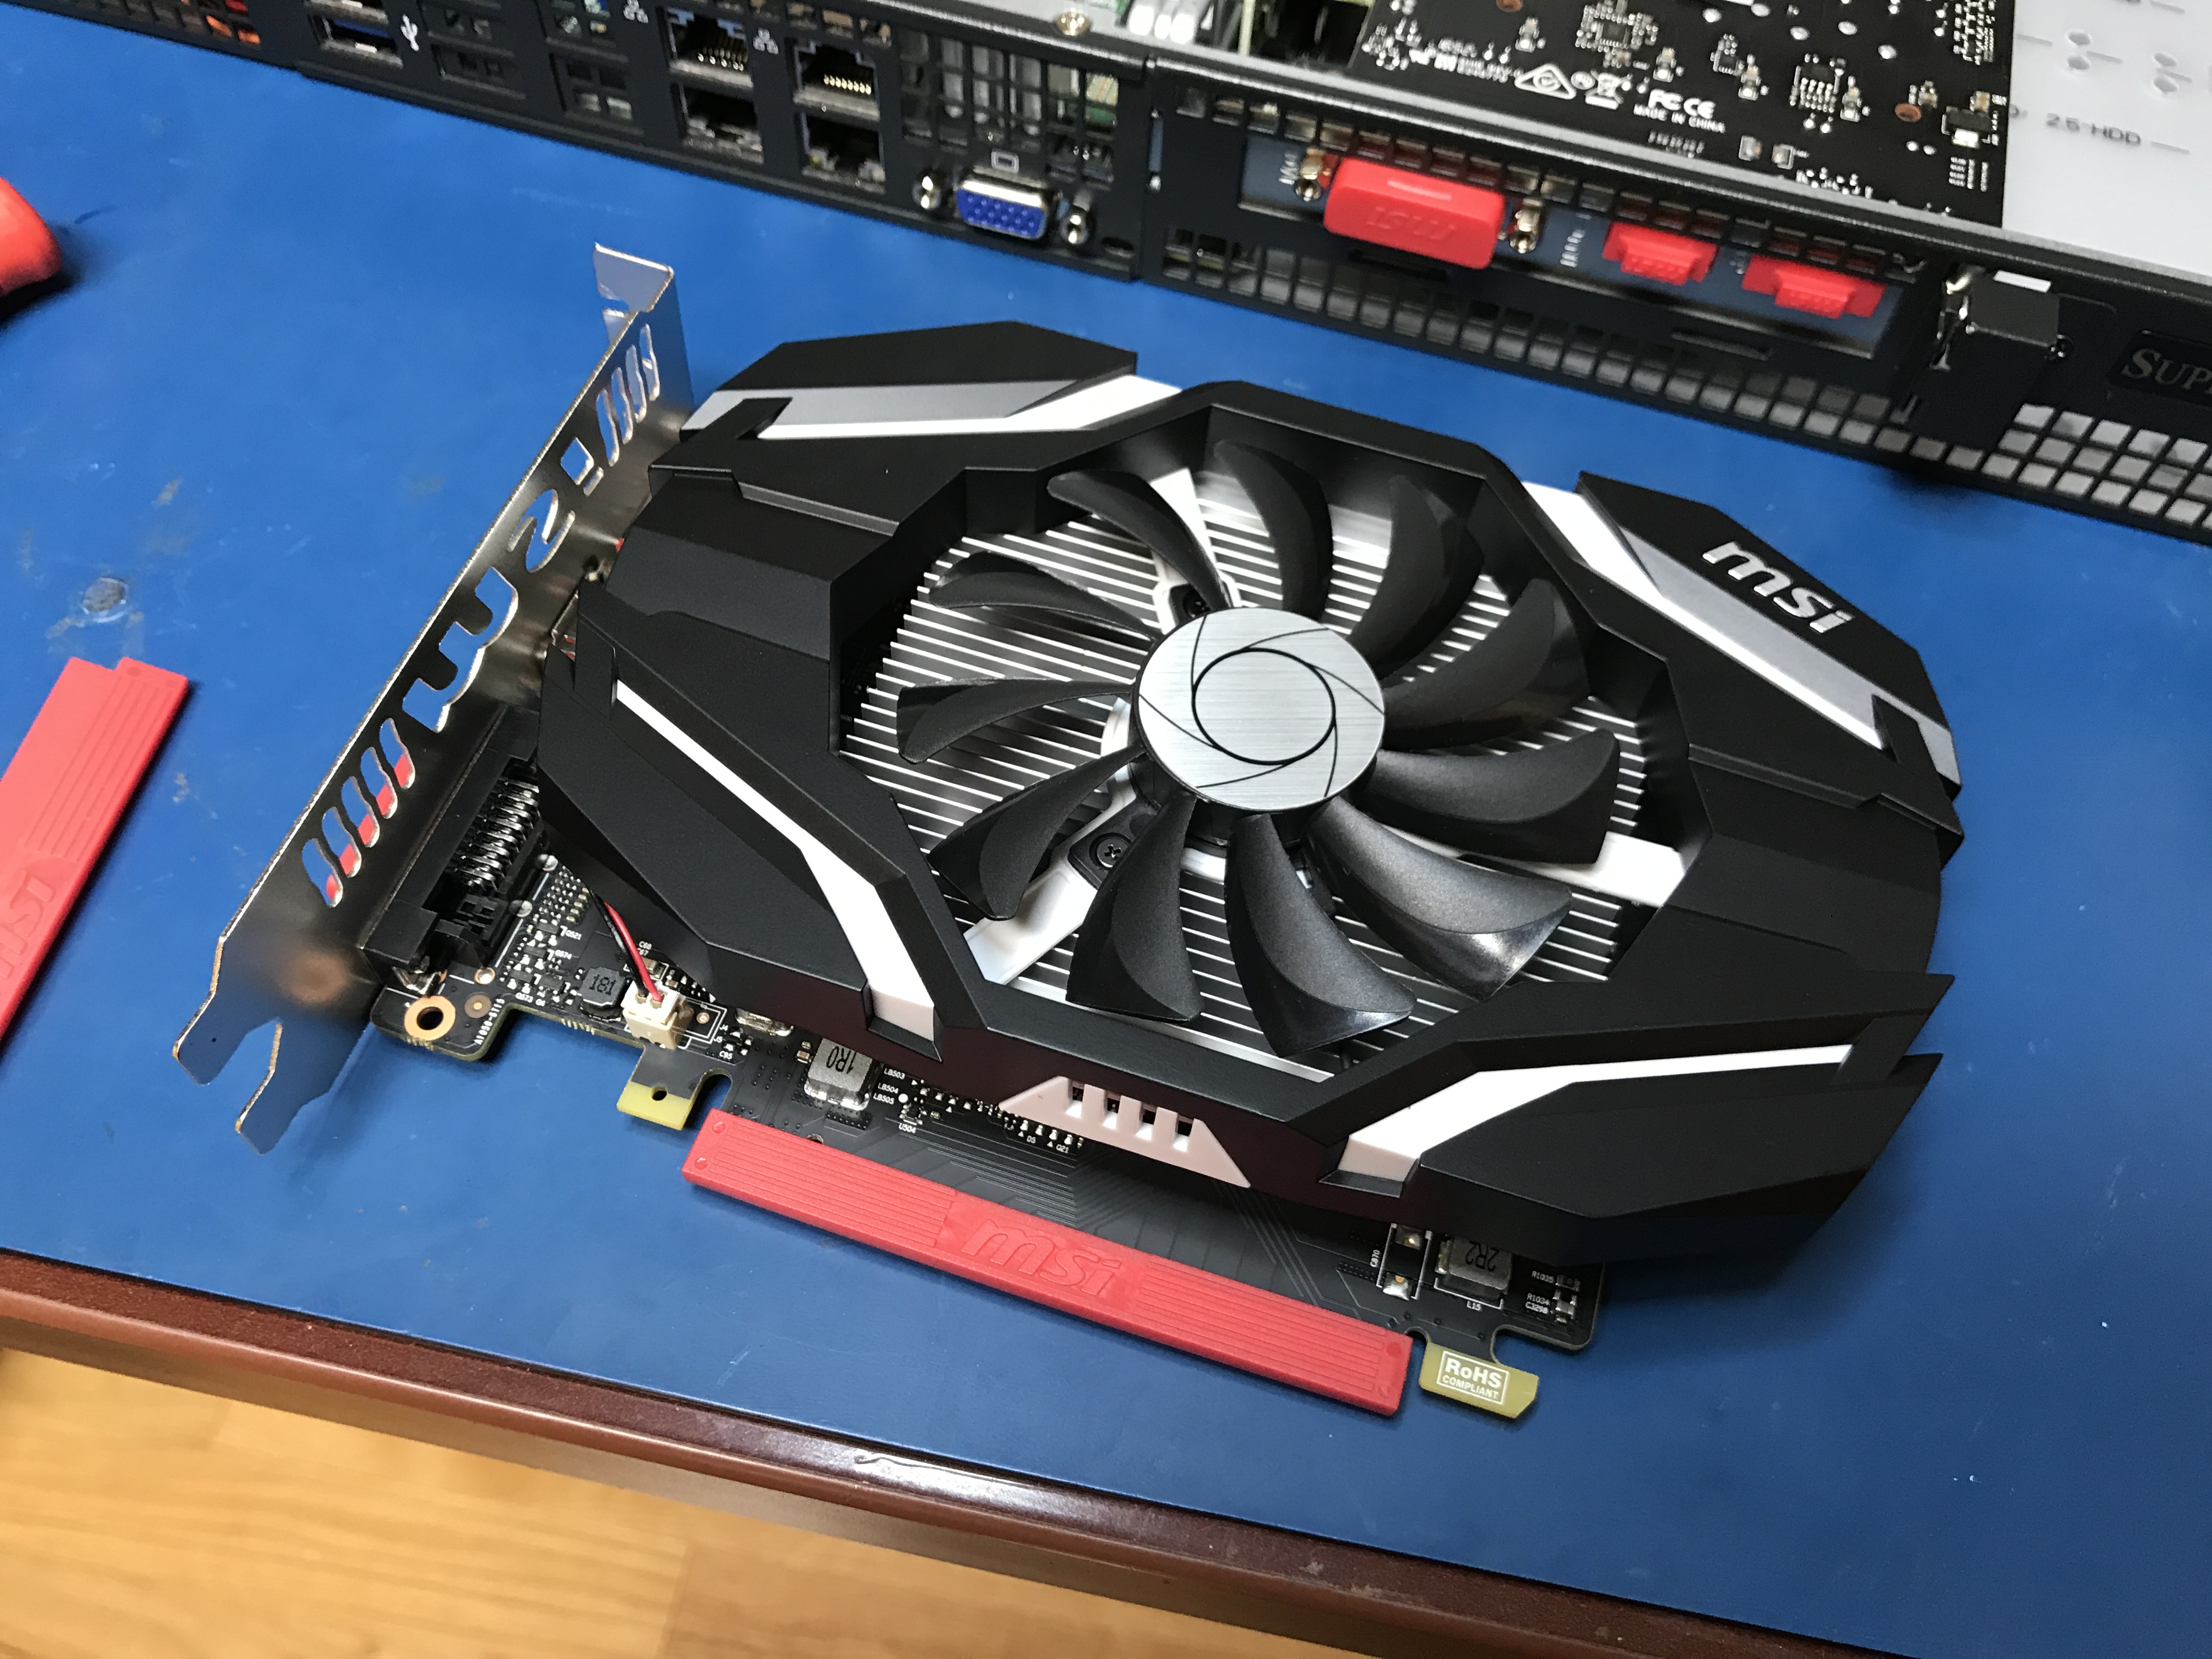\n\u003c/p\u003e\nAs you can see, the card is already pretty small and the DVI port is in the first row. This means that we can easily cut the bracket and not make any physical modifications to the card itself (such as desoldering or brute force cutting of the DVI port).\n\nDisassembling is very straight forward.\n\n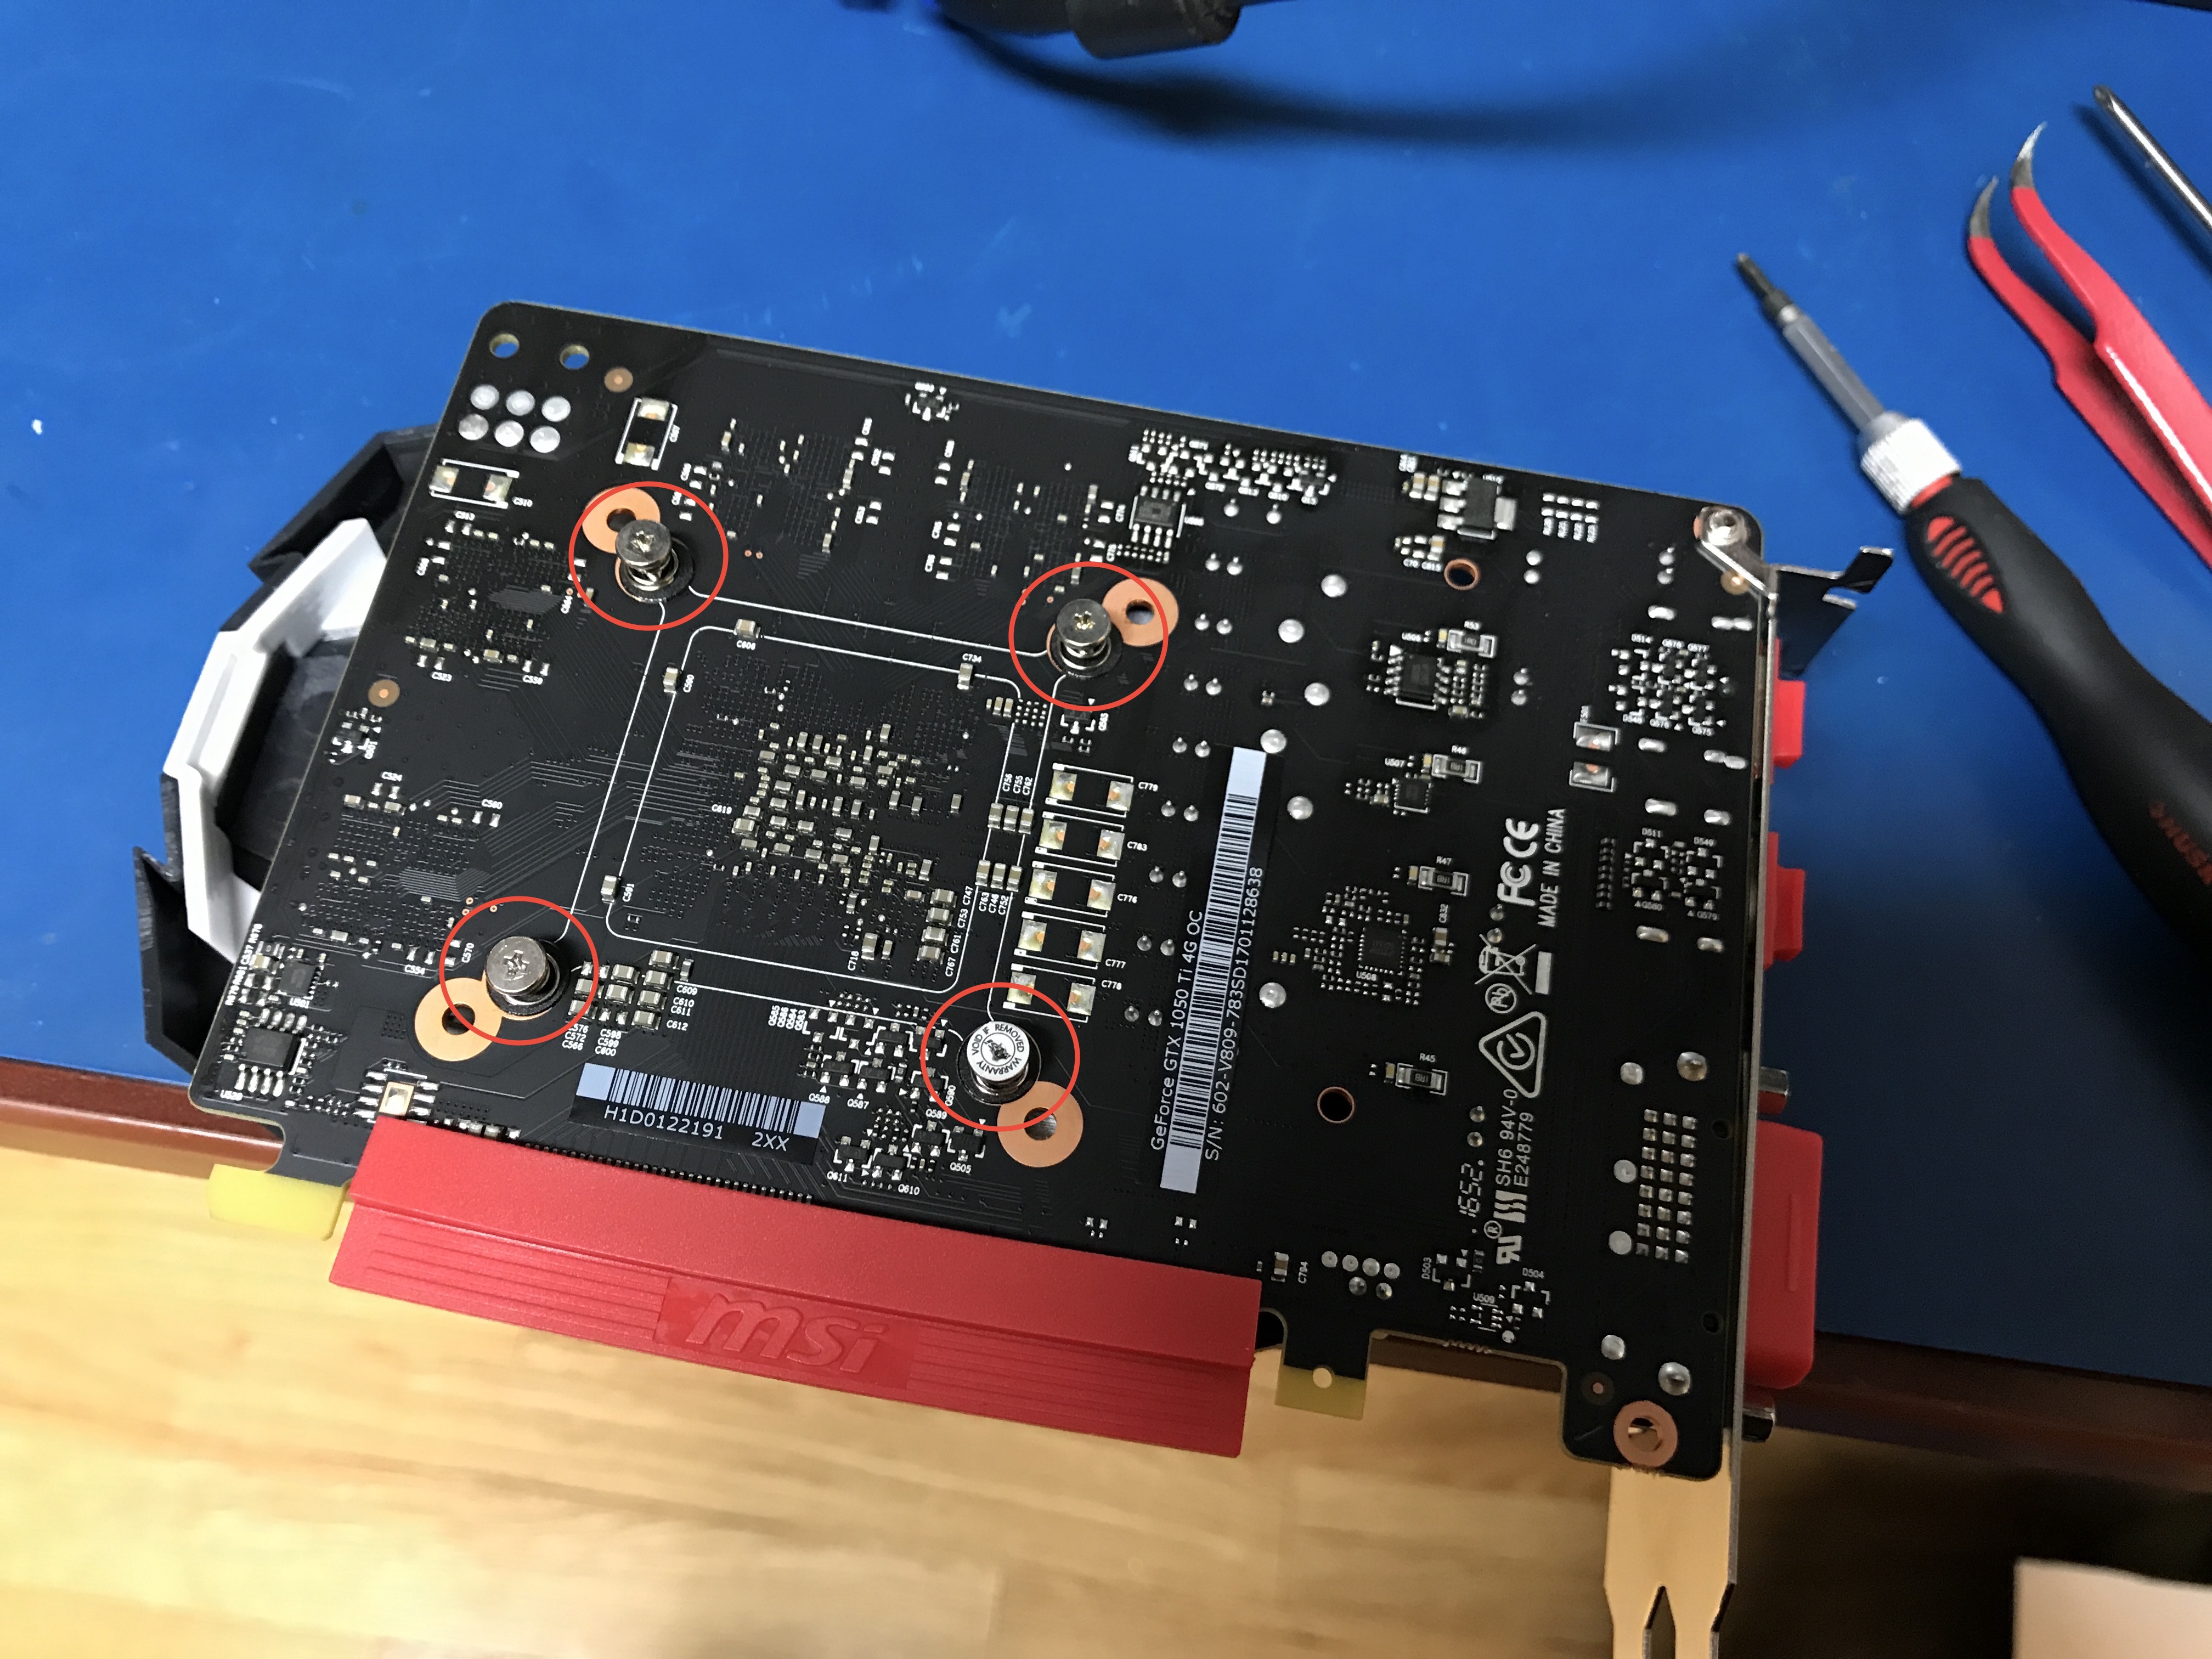\n \nThe 4 heatsink screws on the back of the card need to be removed.\n\n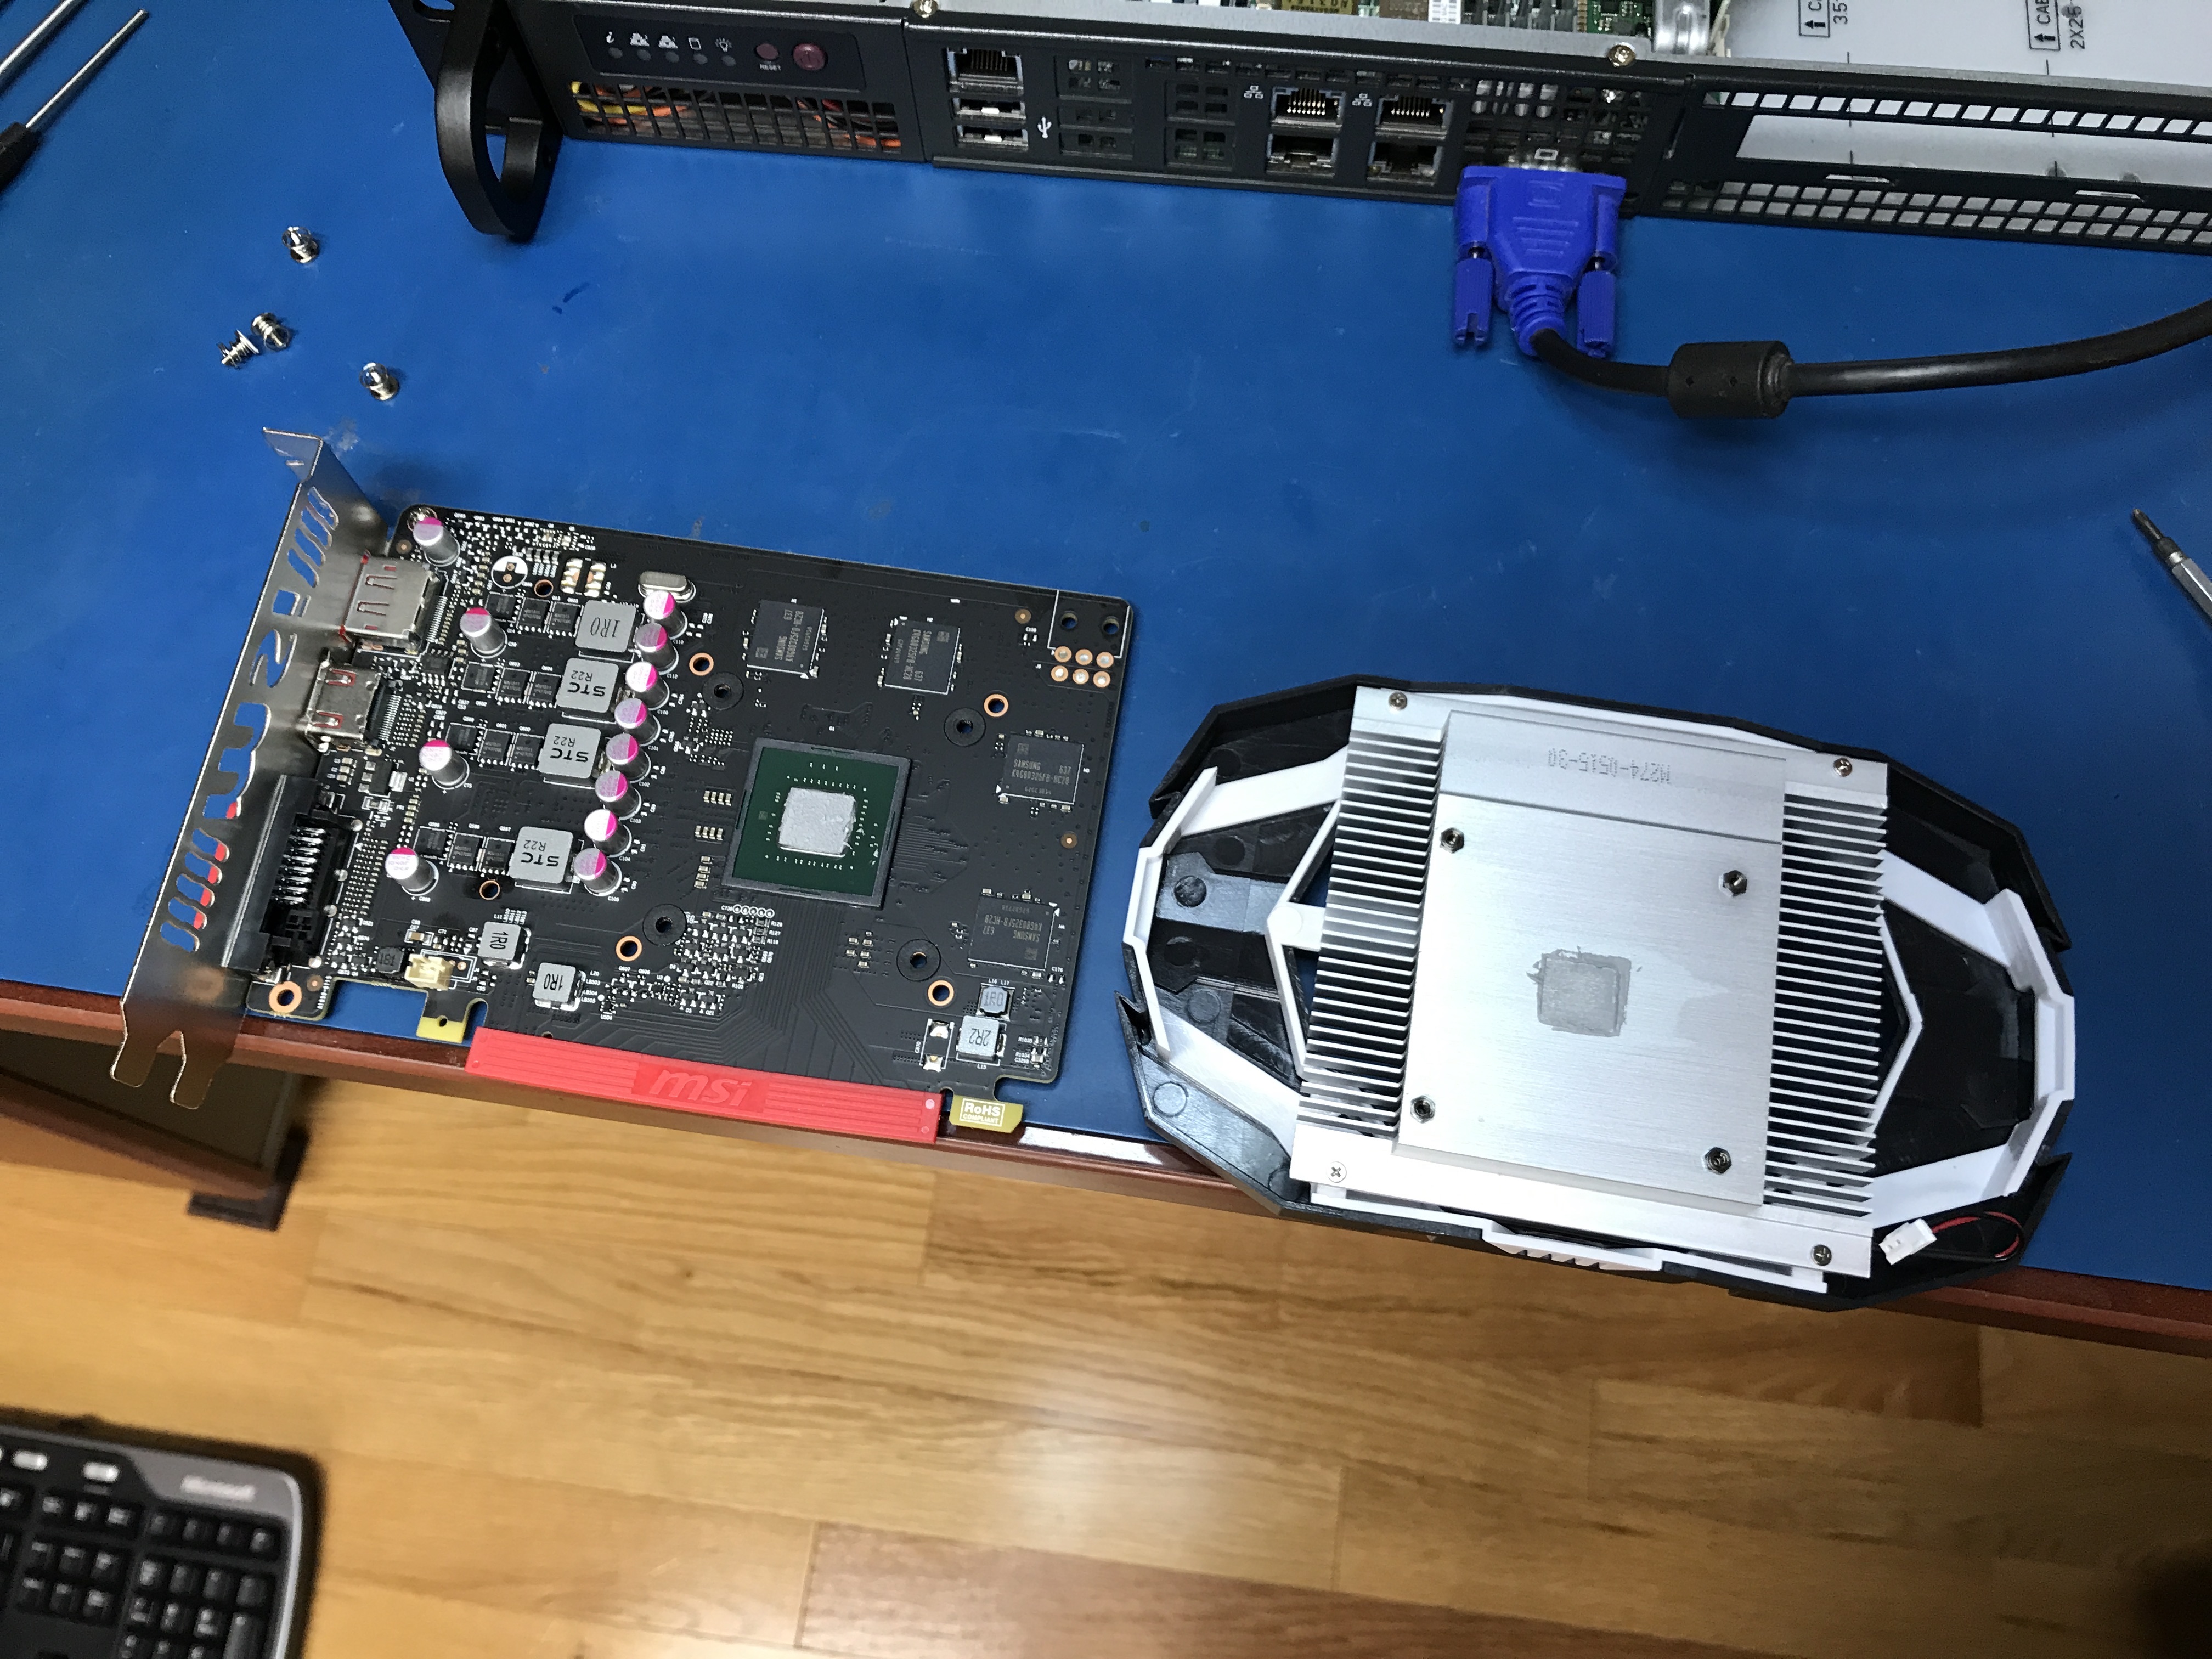\n\nCarefully disconnect the fan power connector and split apart. Avoid disturbing the heat transfer compound.\n\n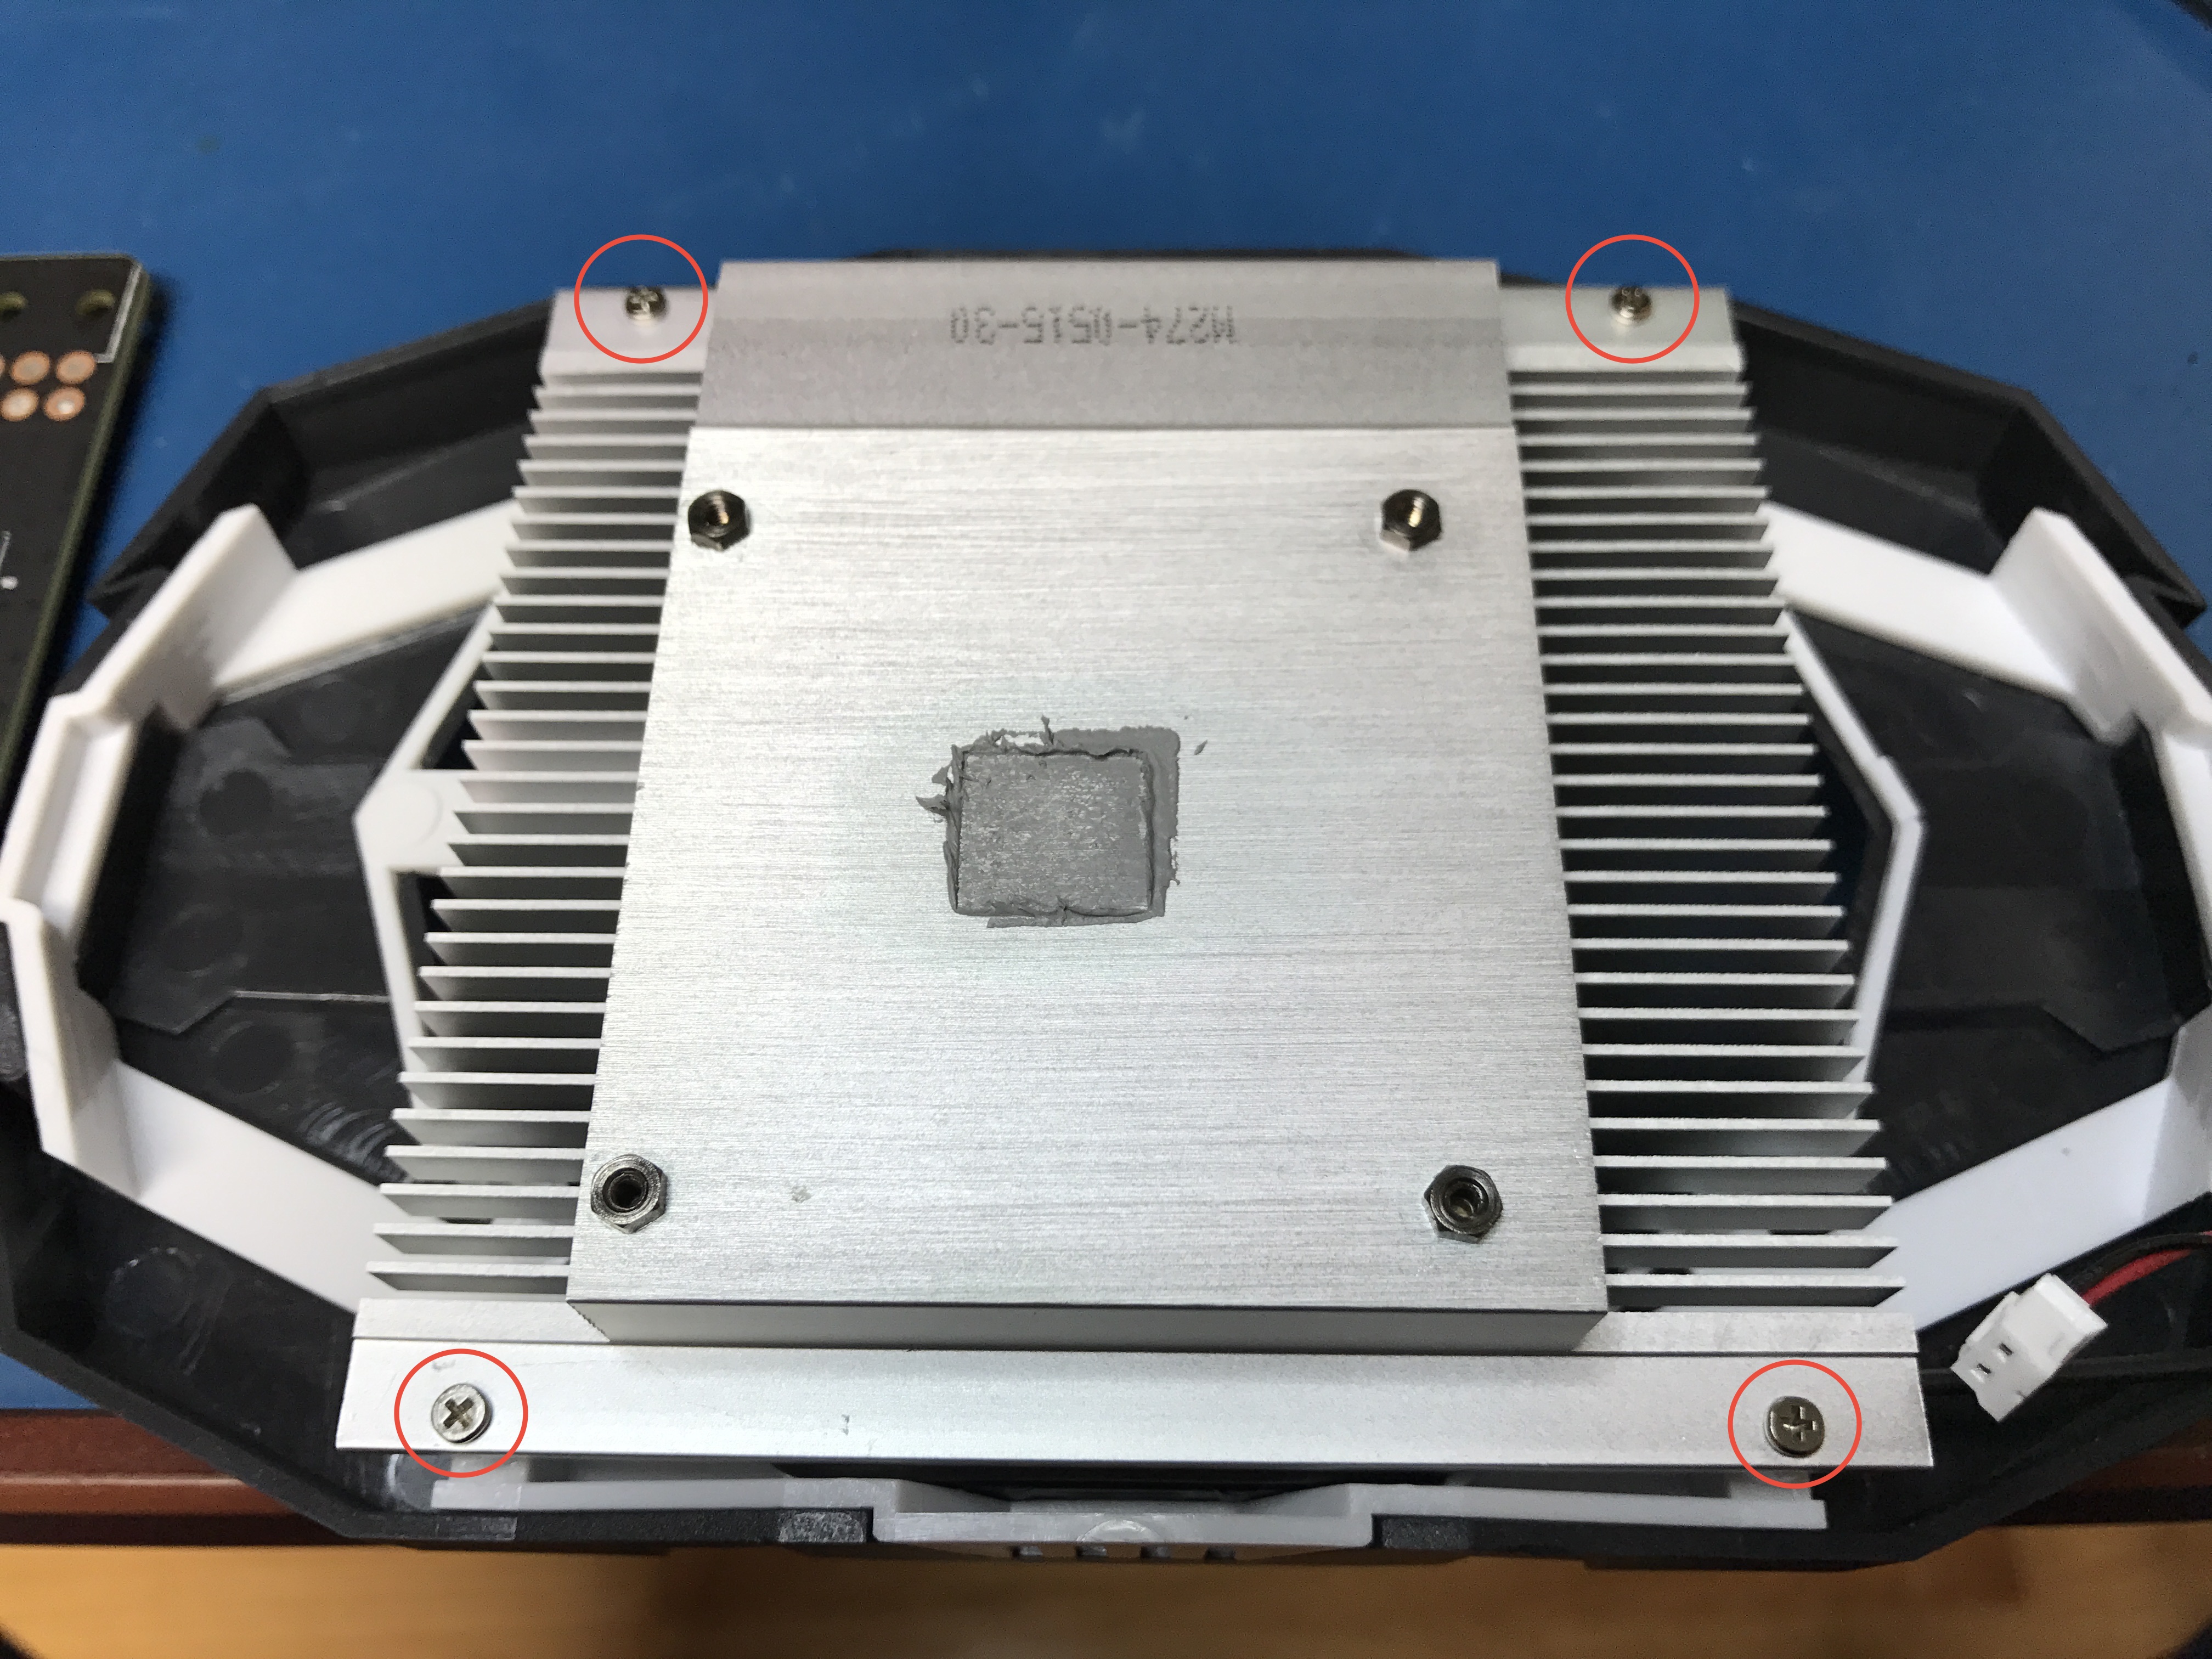\n\nThere are 4 screws holding the fan shroud to the heatsink. Remove those.\n\n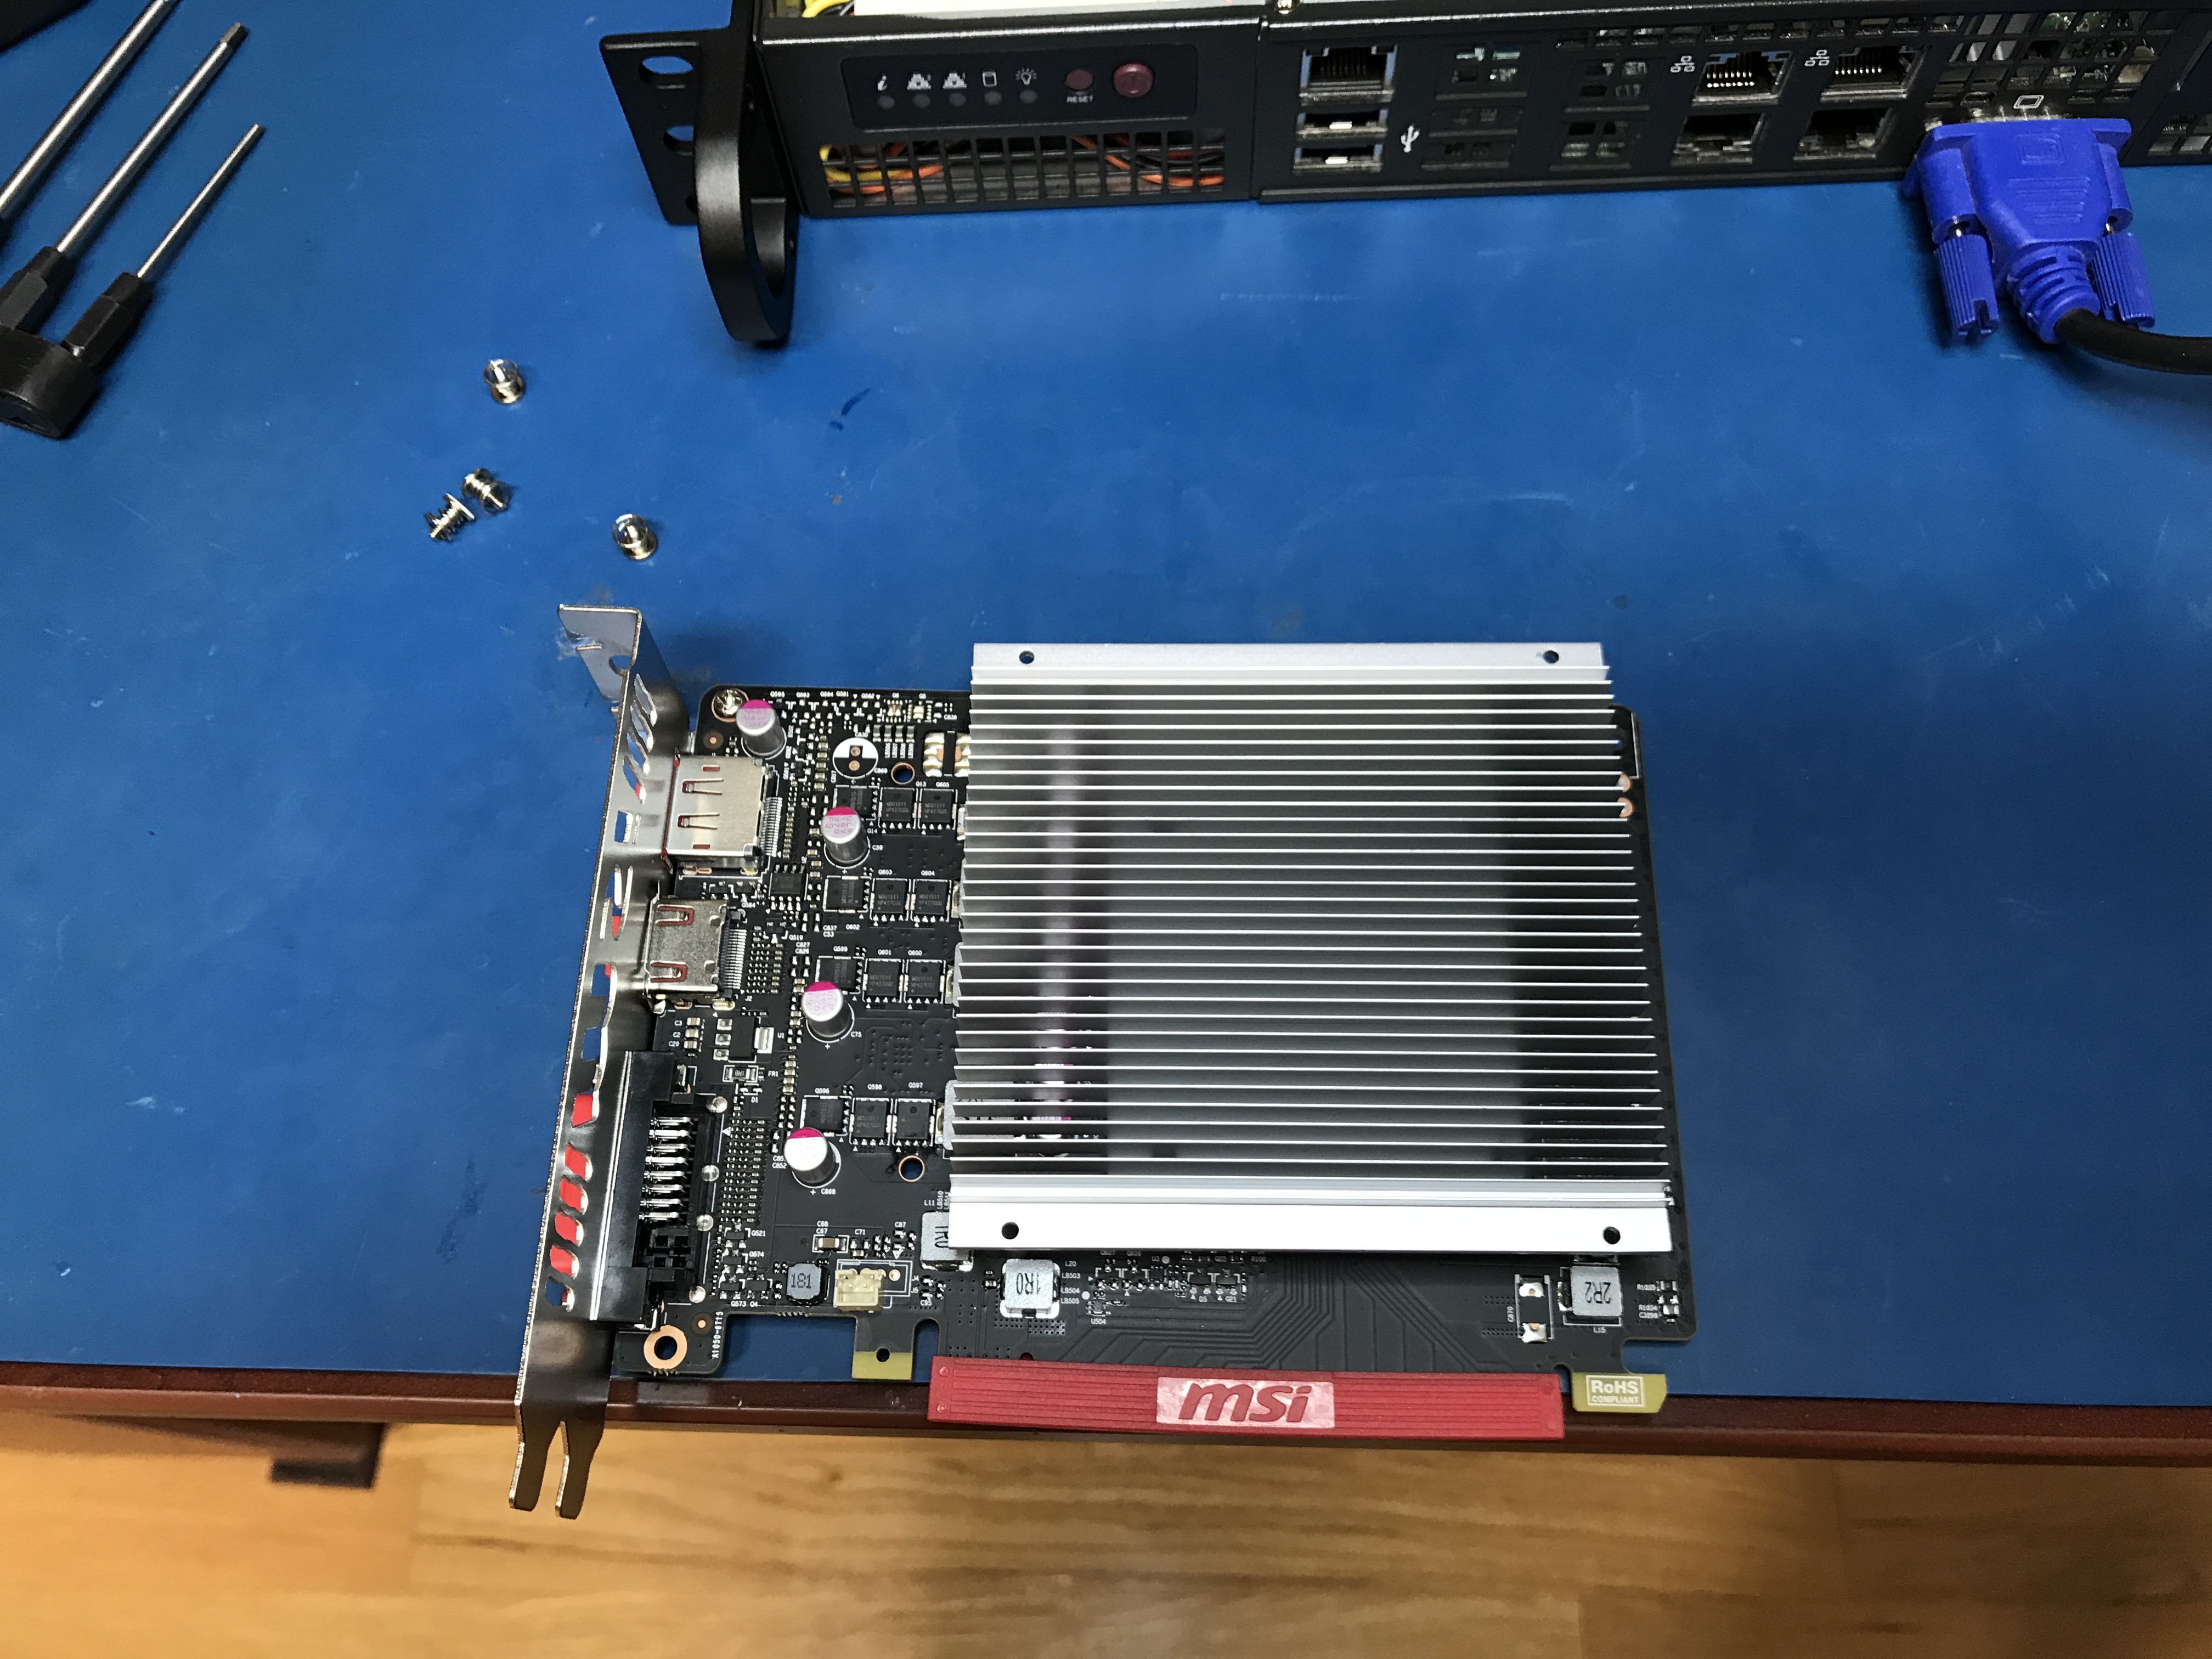\n\nPlace the heatsink back on (keeping the same orientation as before) and fasten in place with the original screws (the ones with the springs).\n\n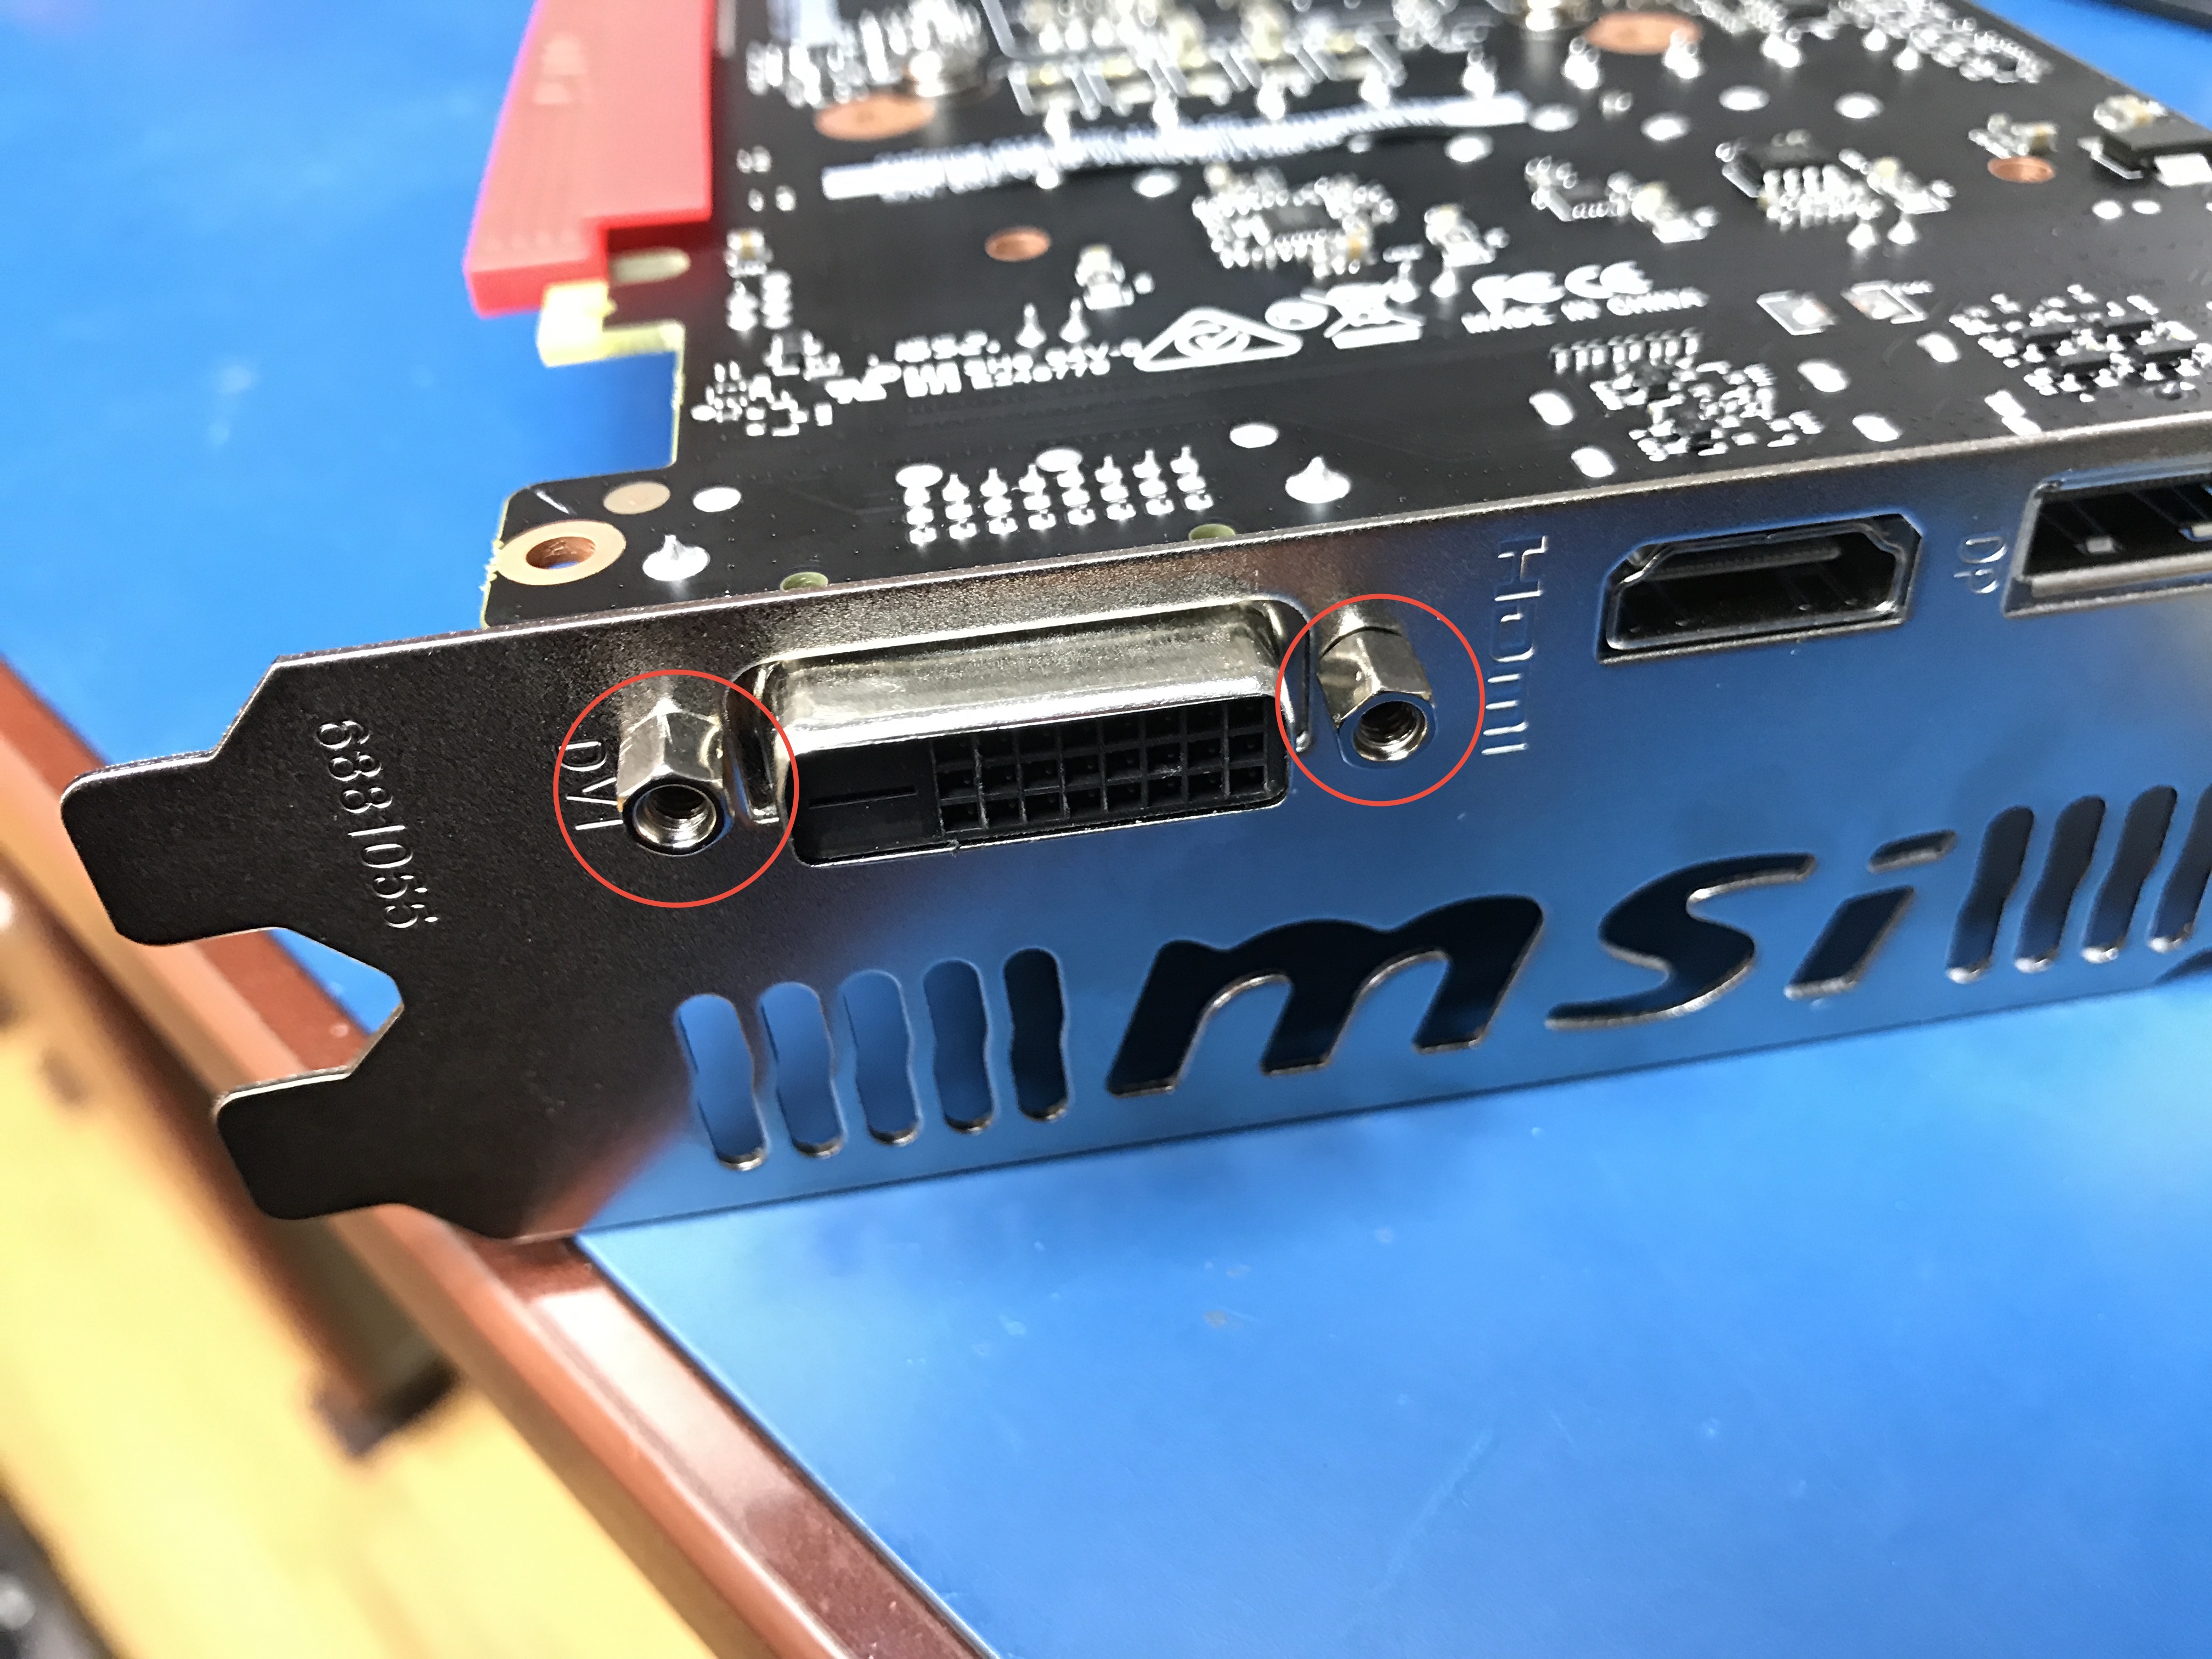\n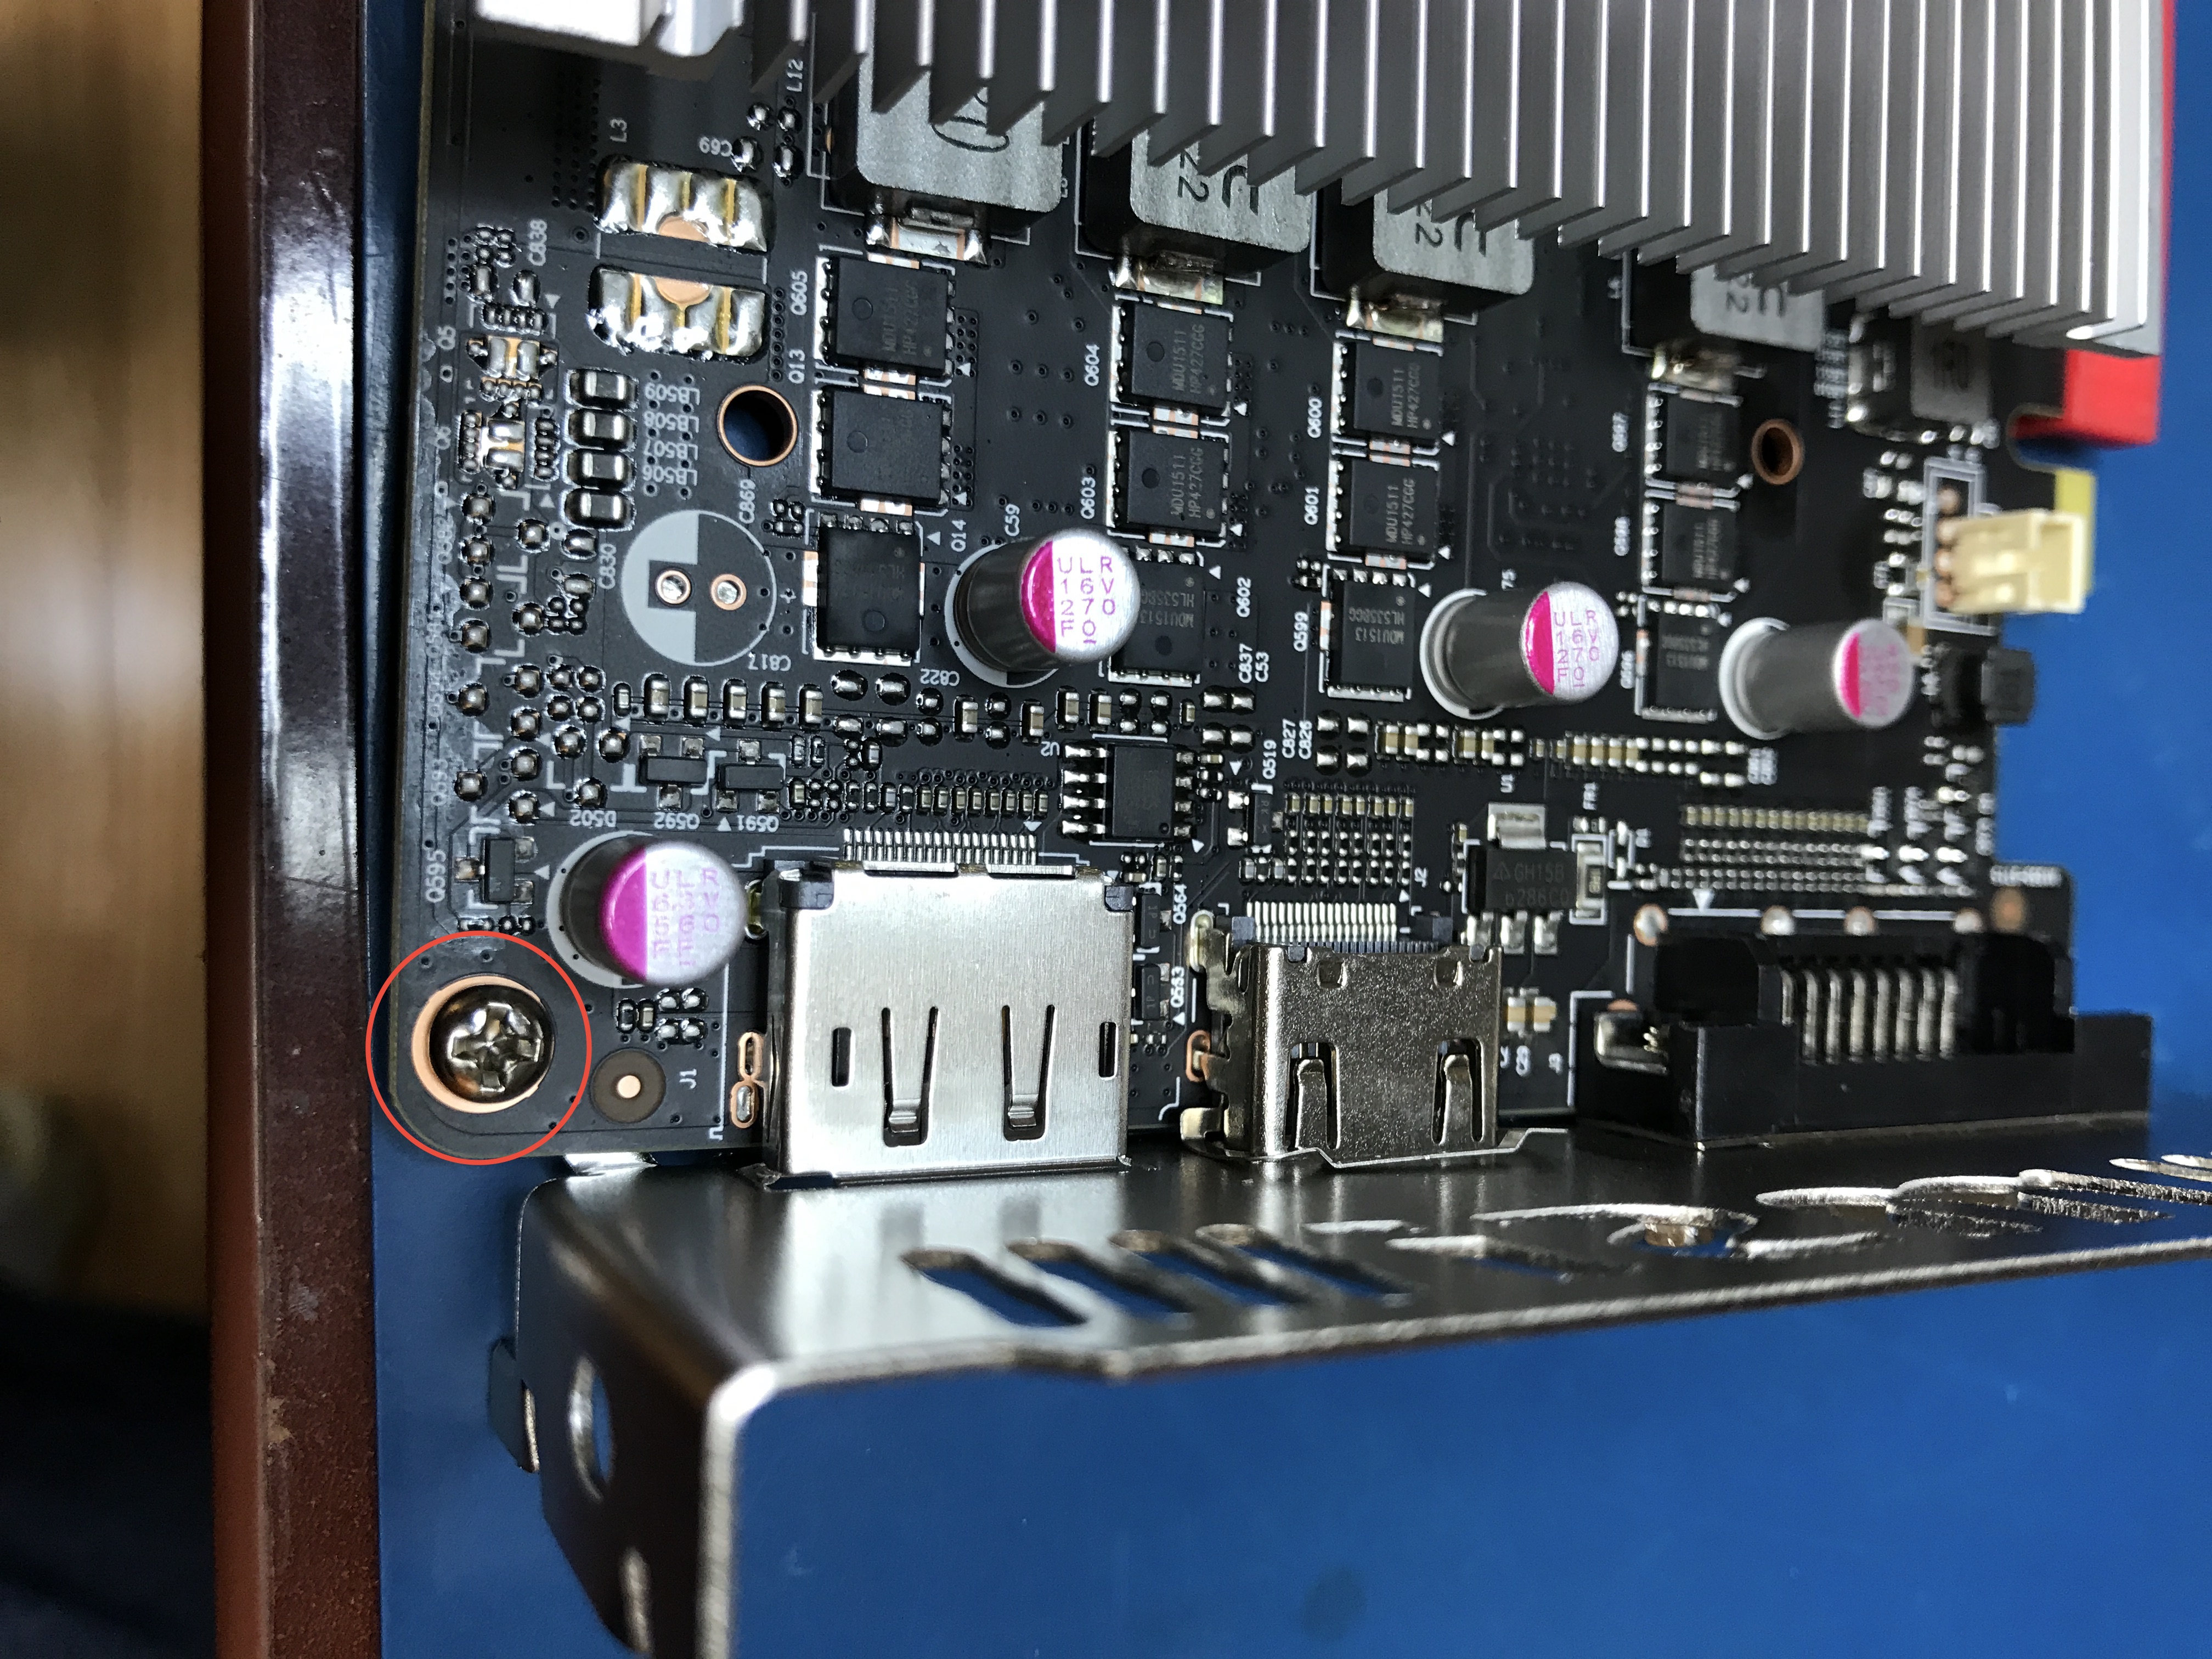\n\nNext, locate and remove the screws holding the mounting plate.\n\n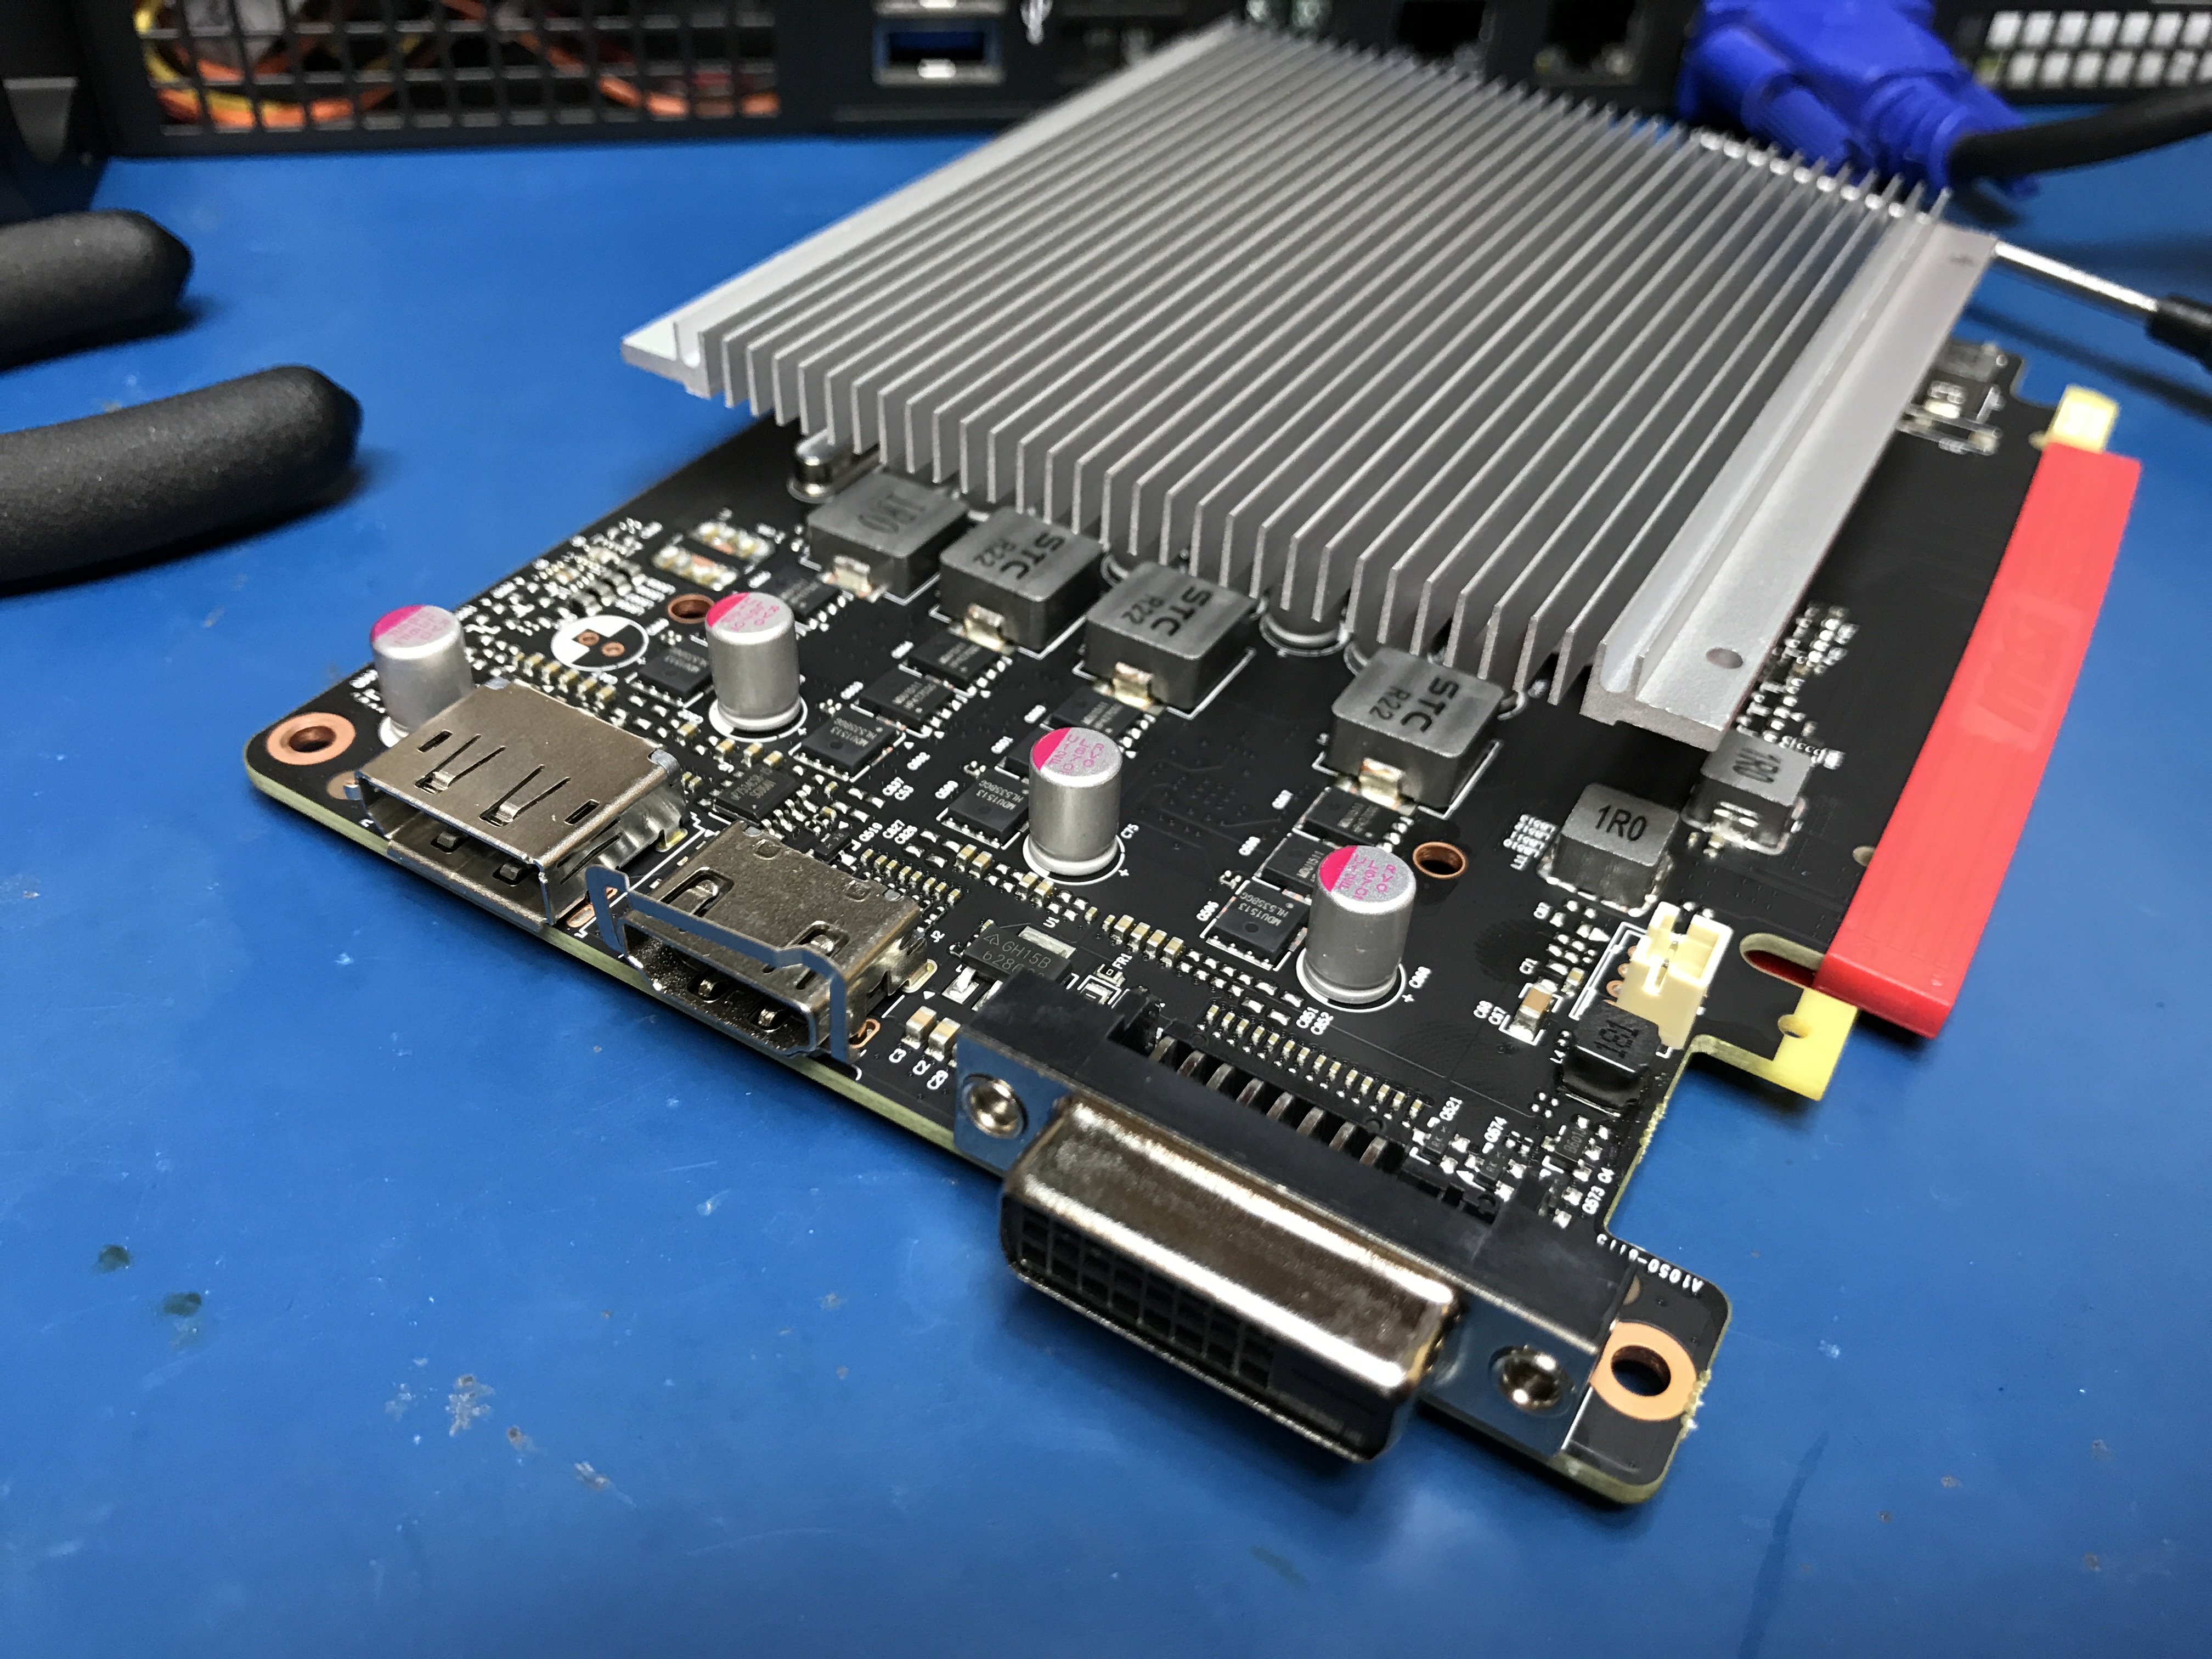\n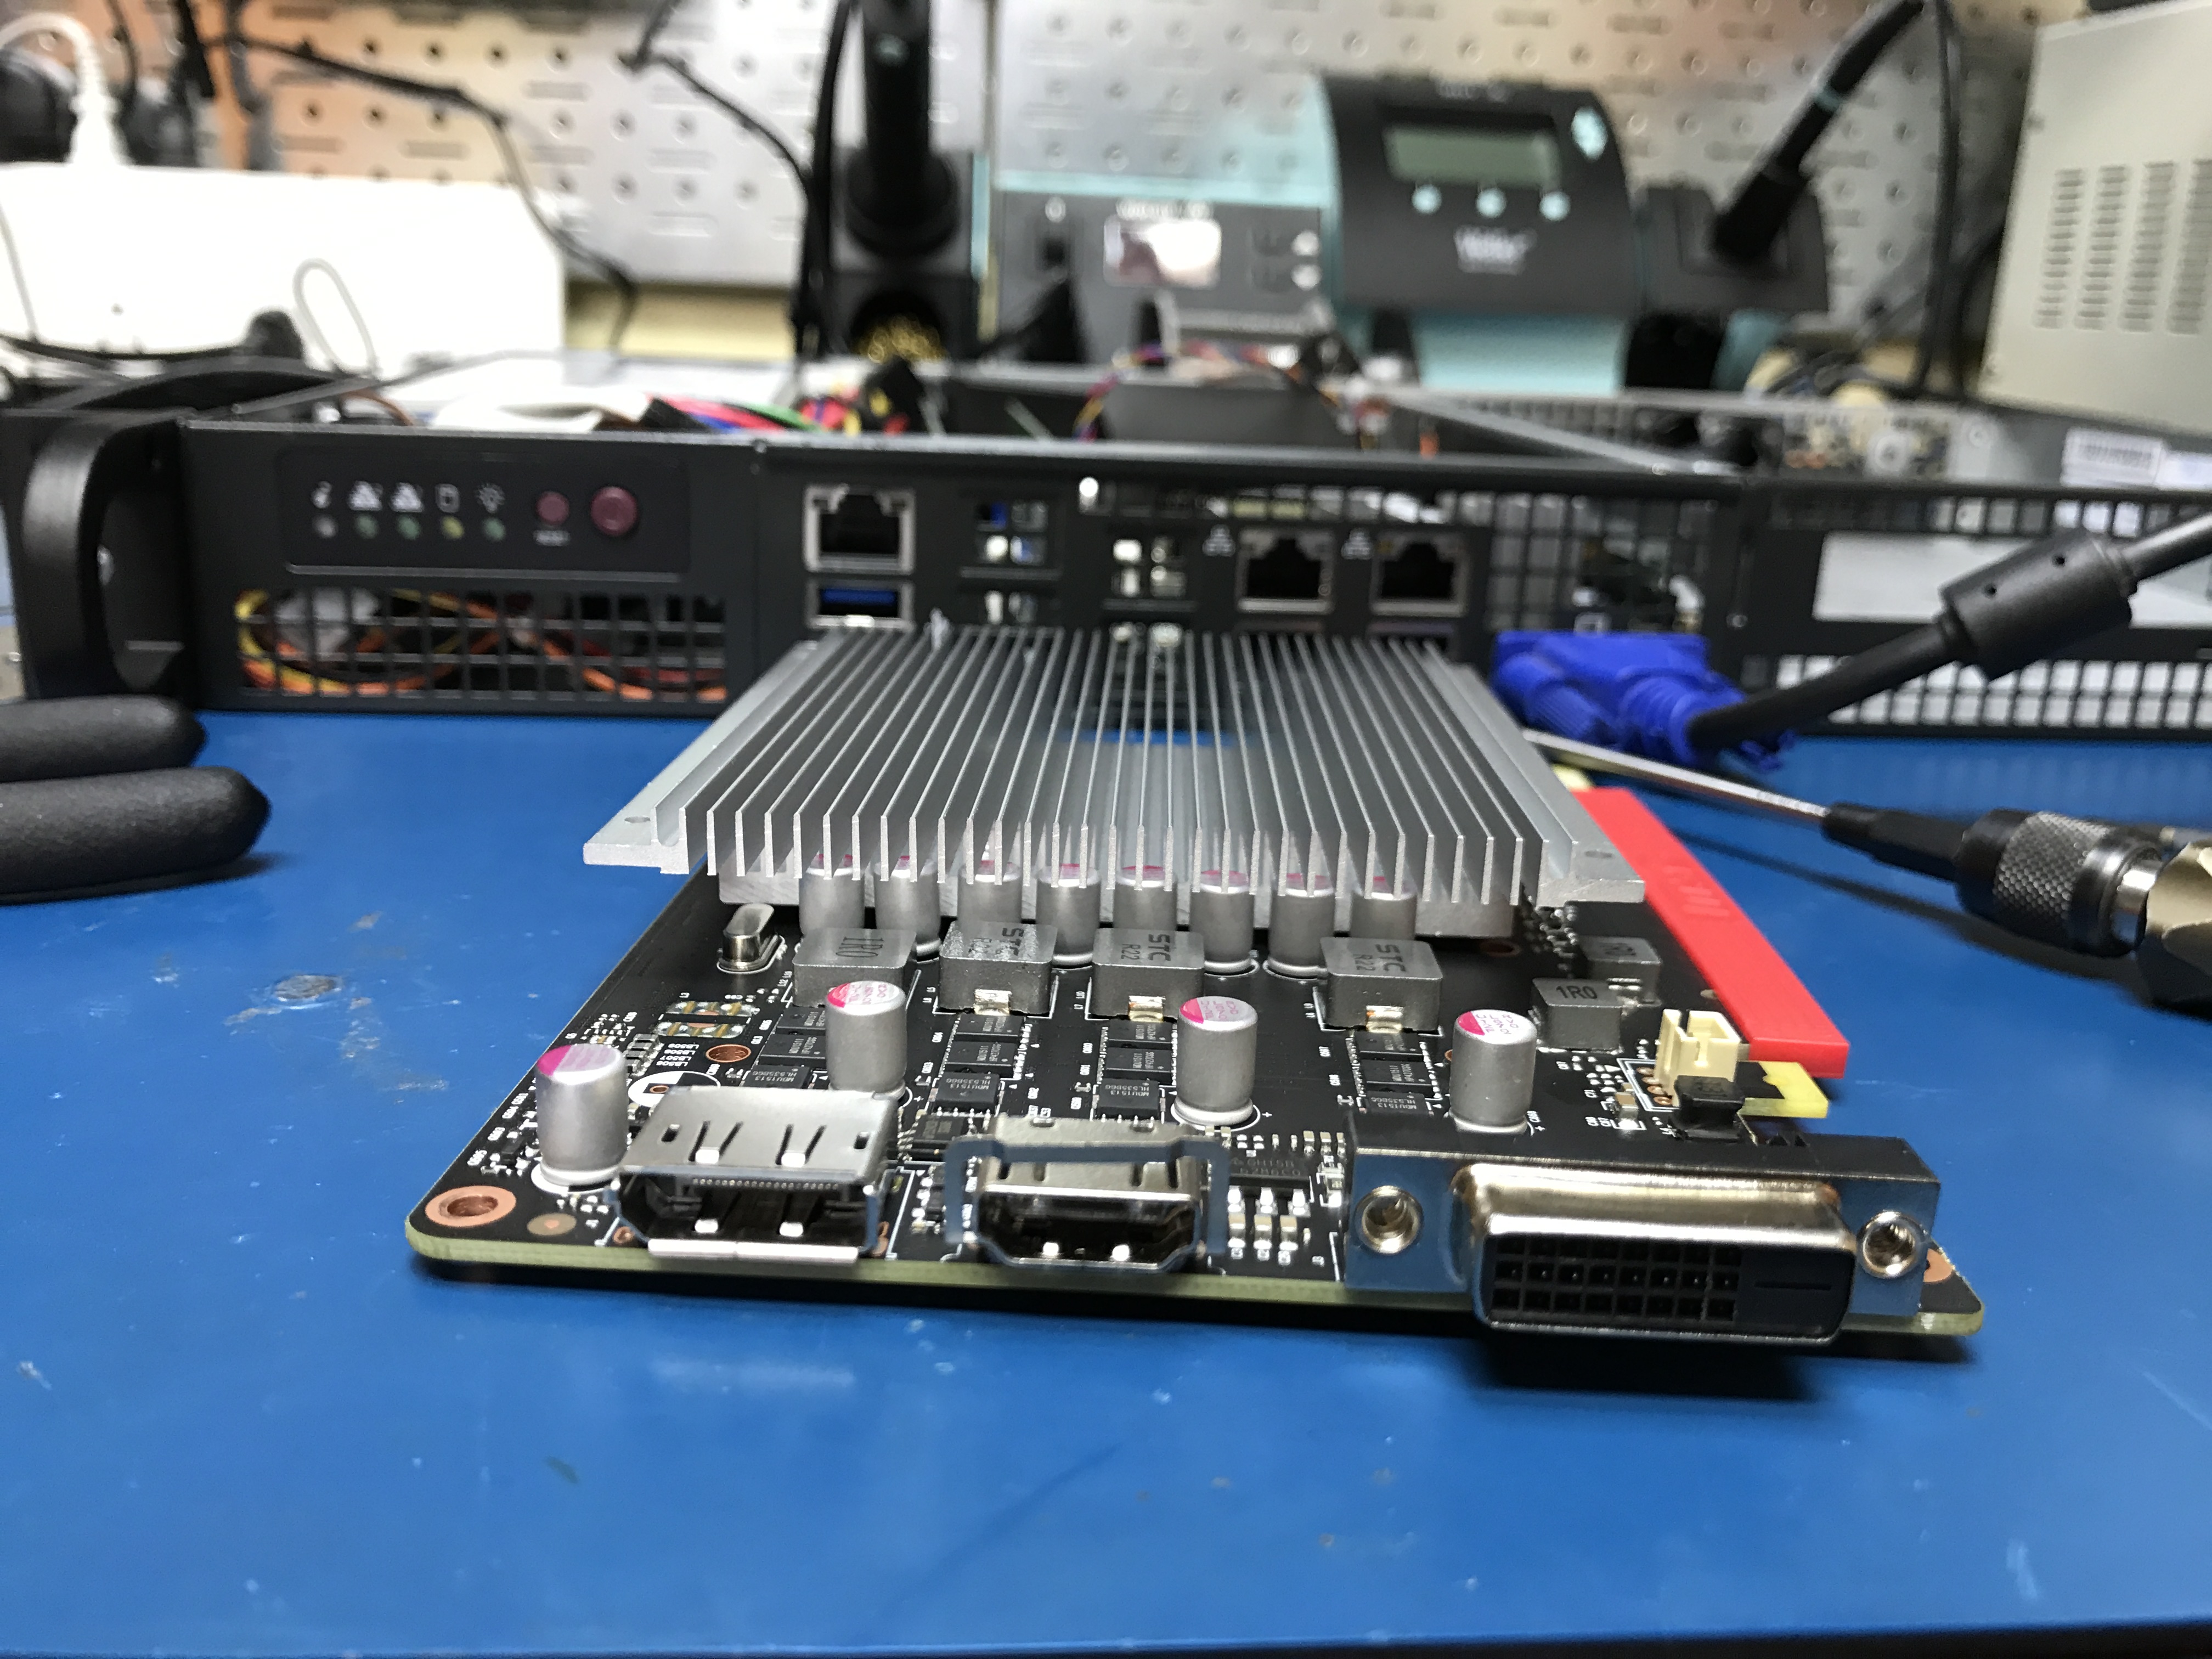\n\nAs you can see, this card is very slim.\n\n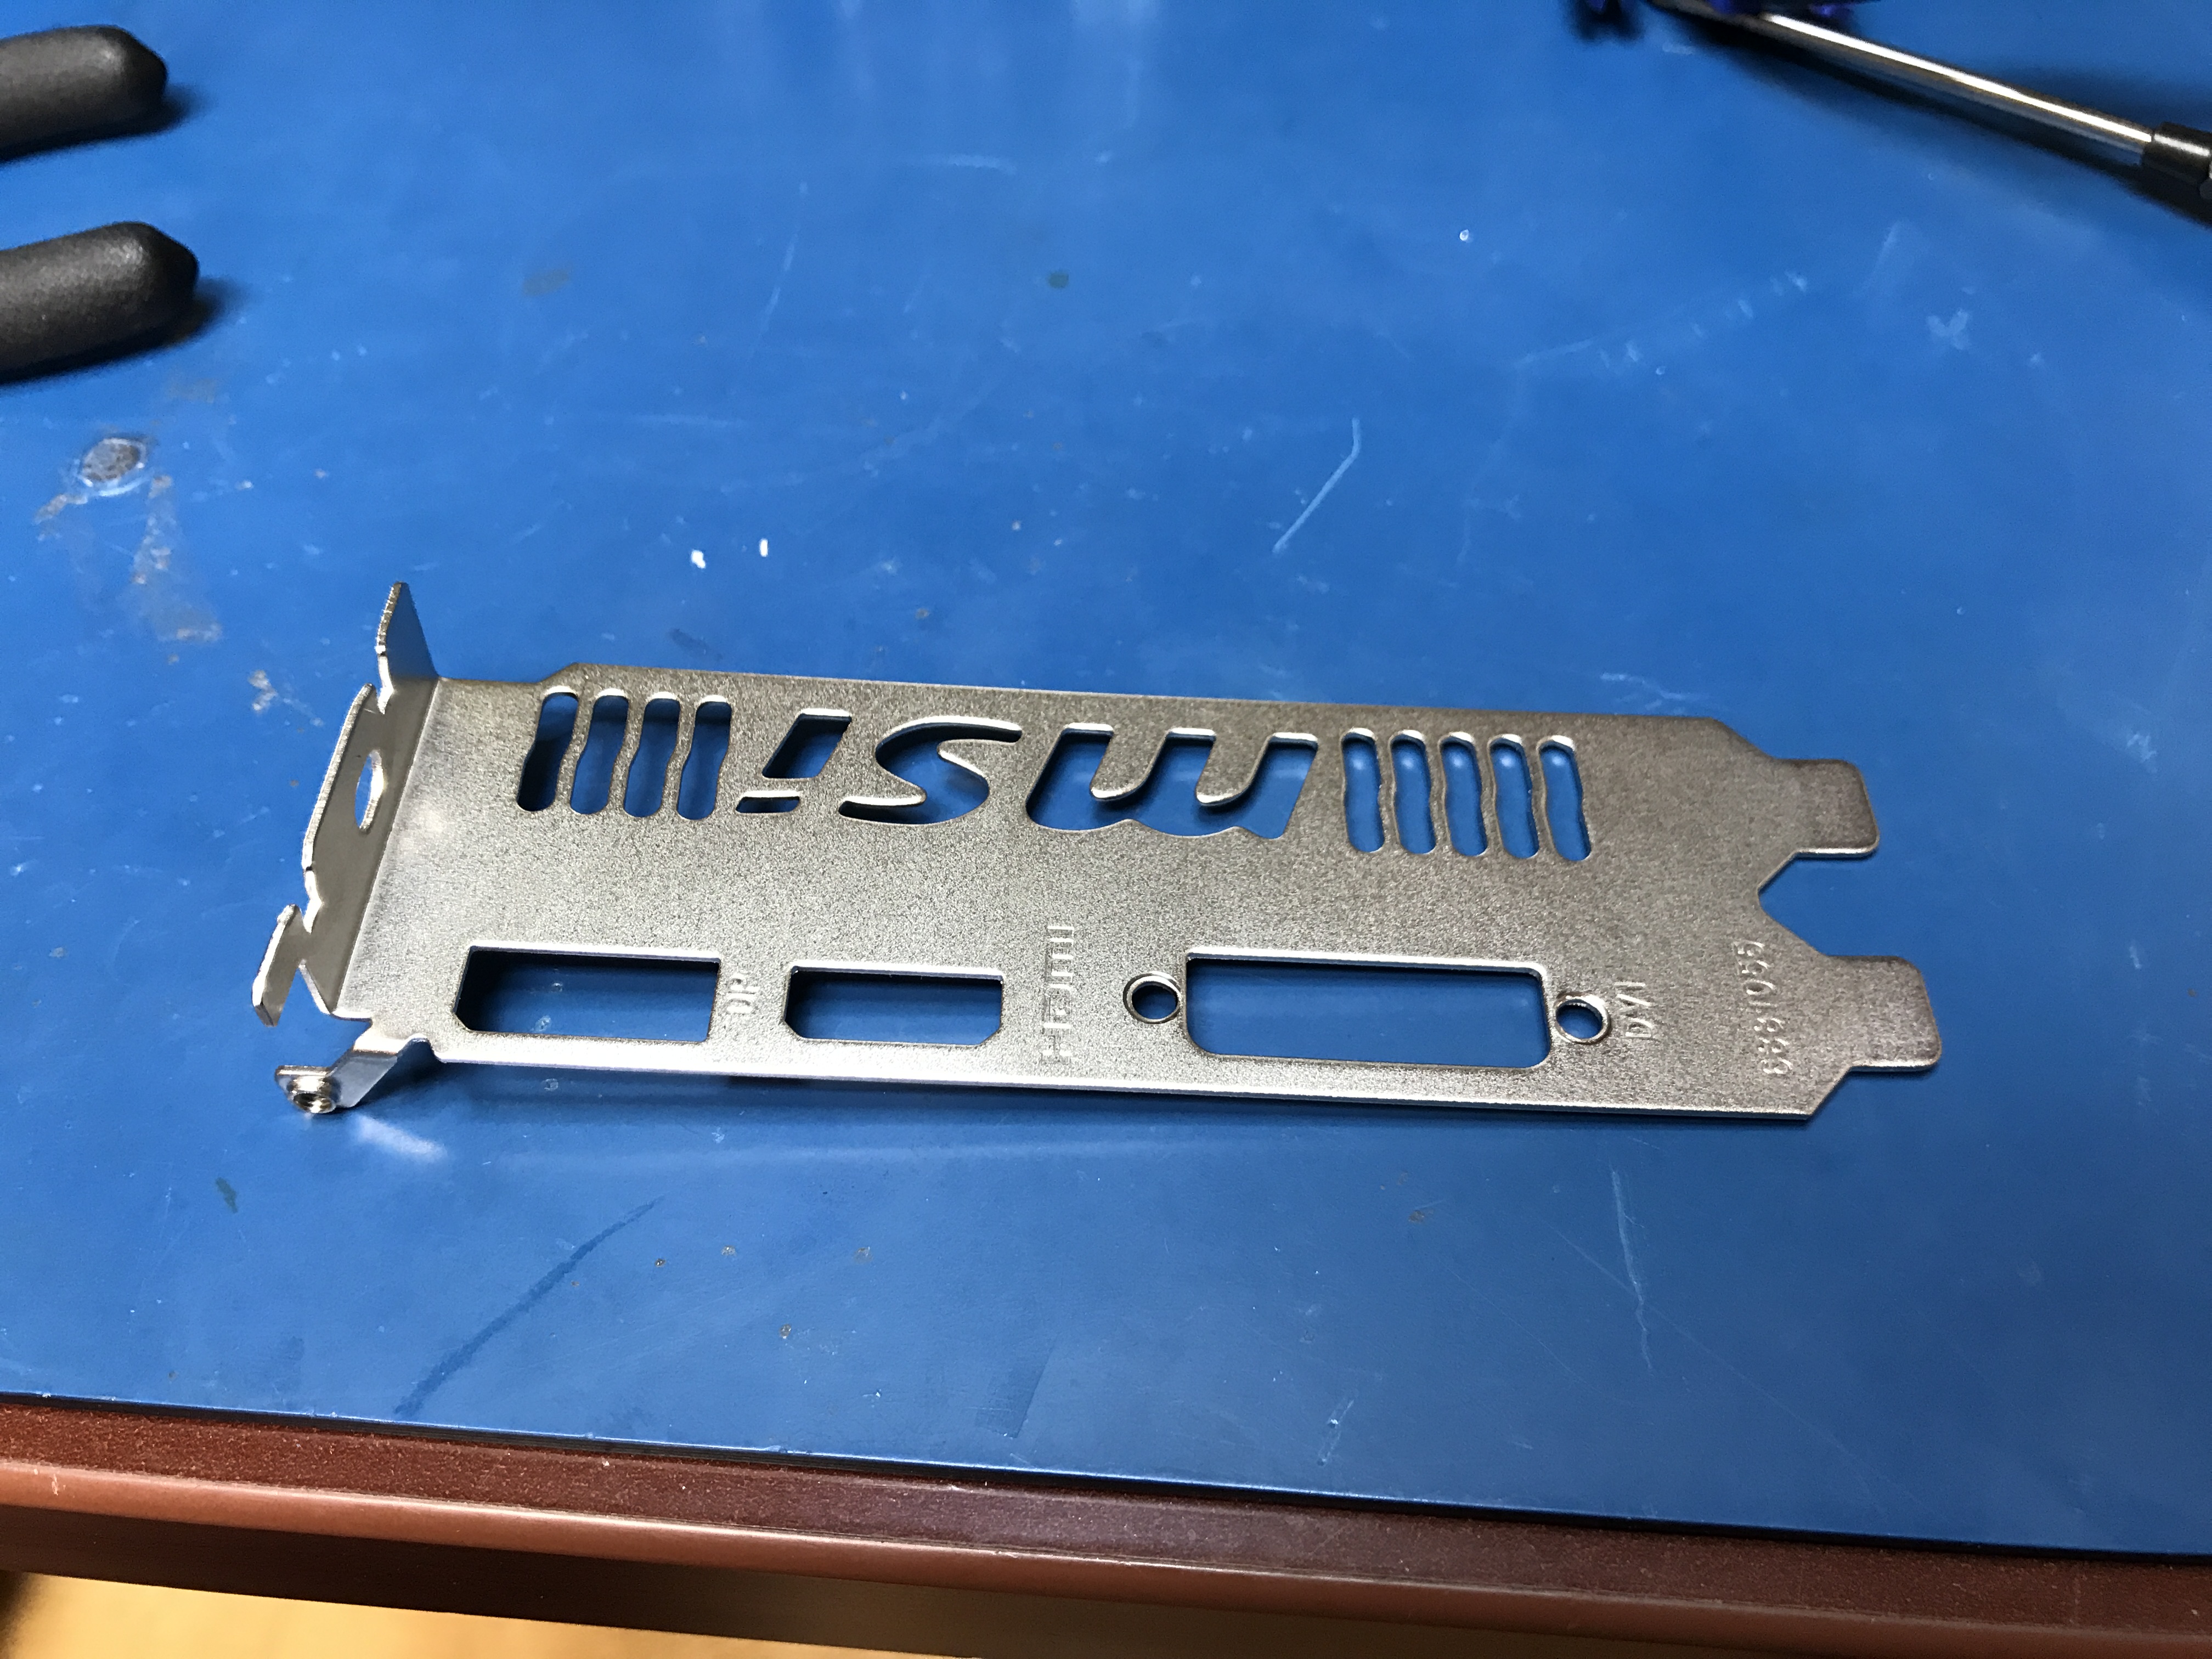\n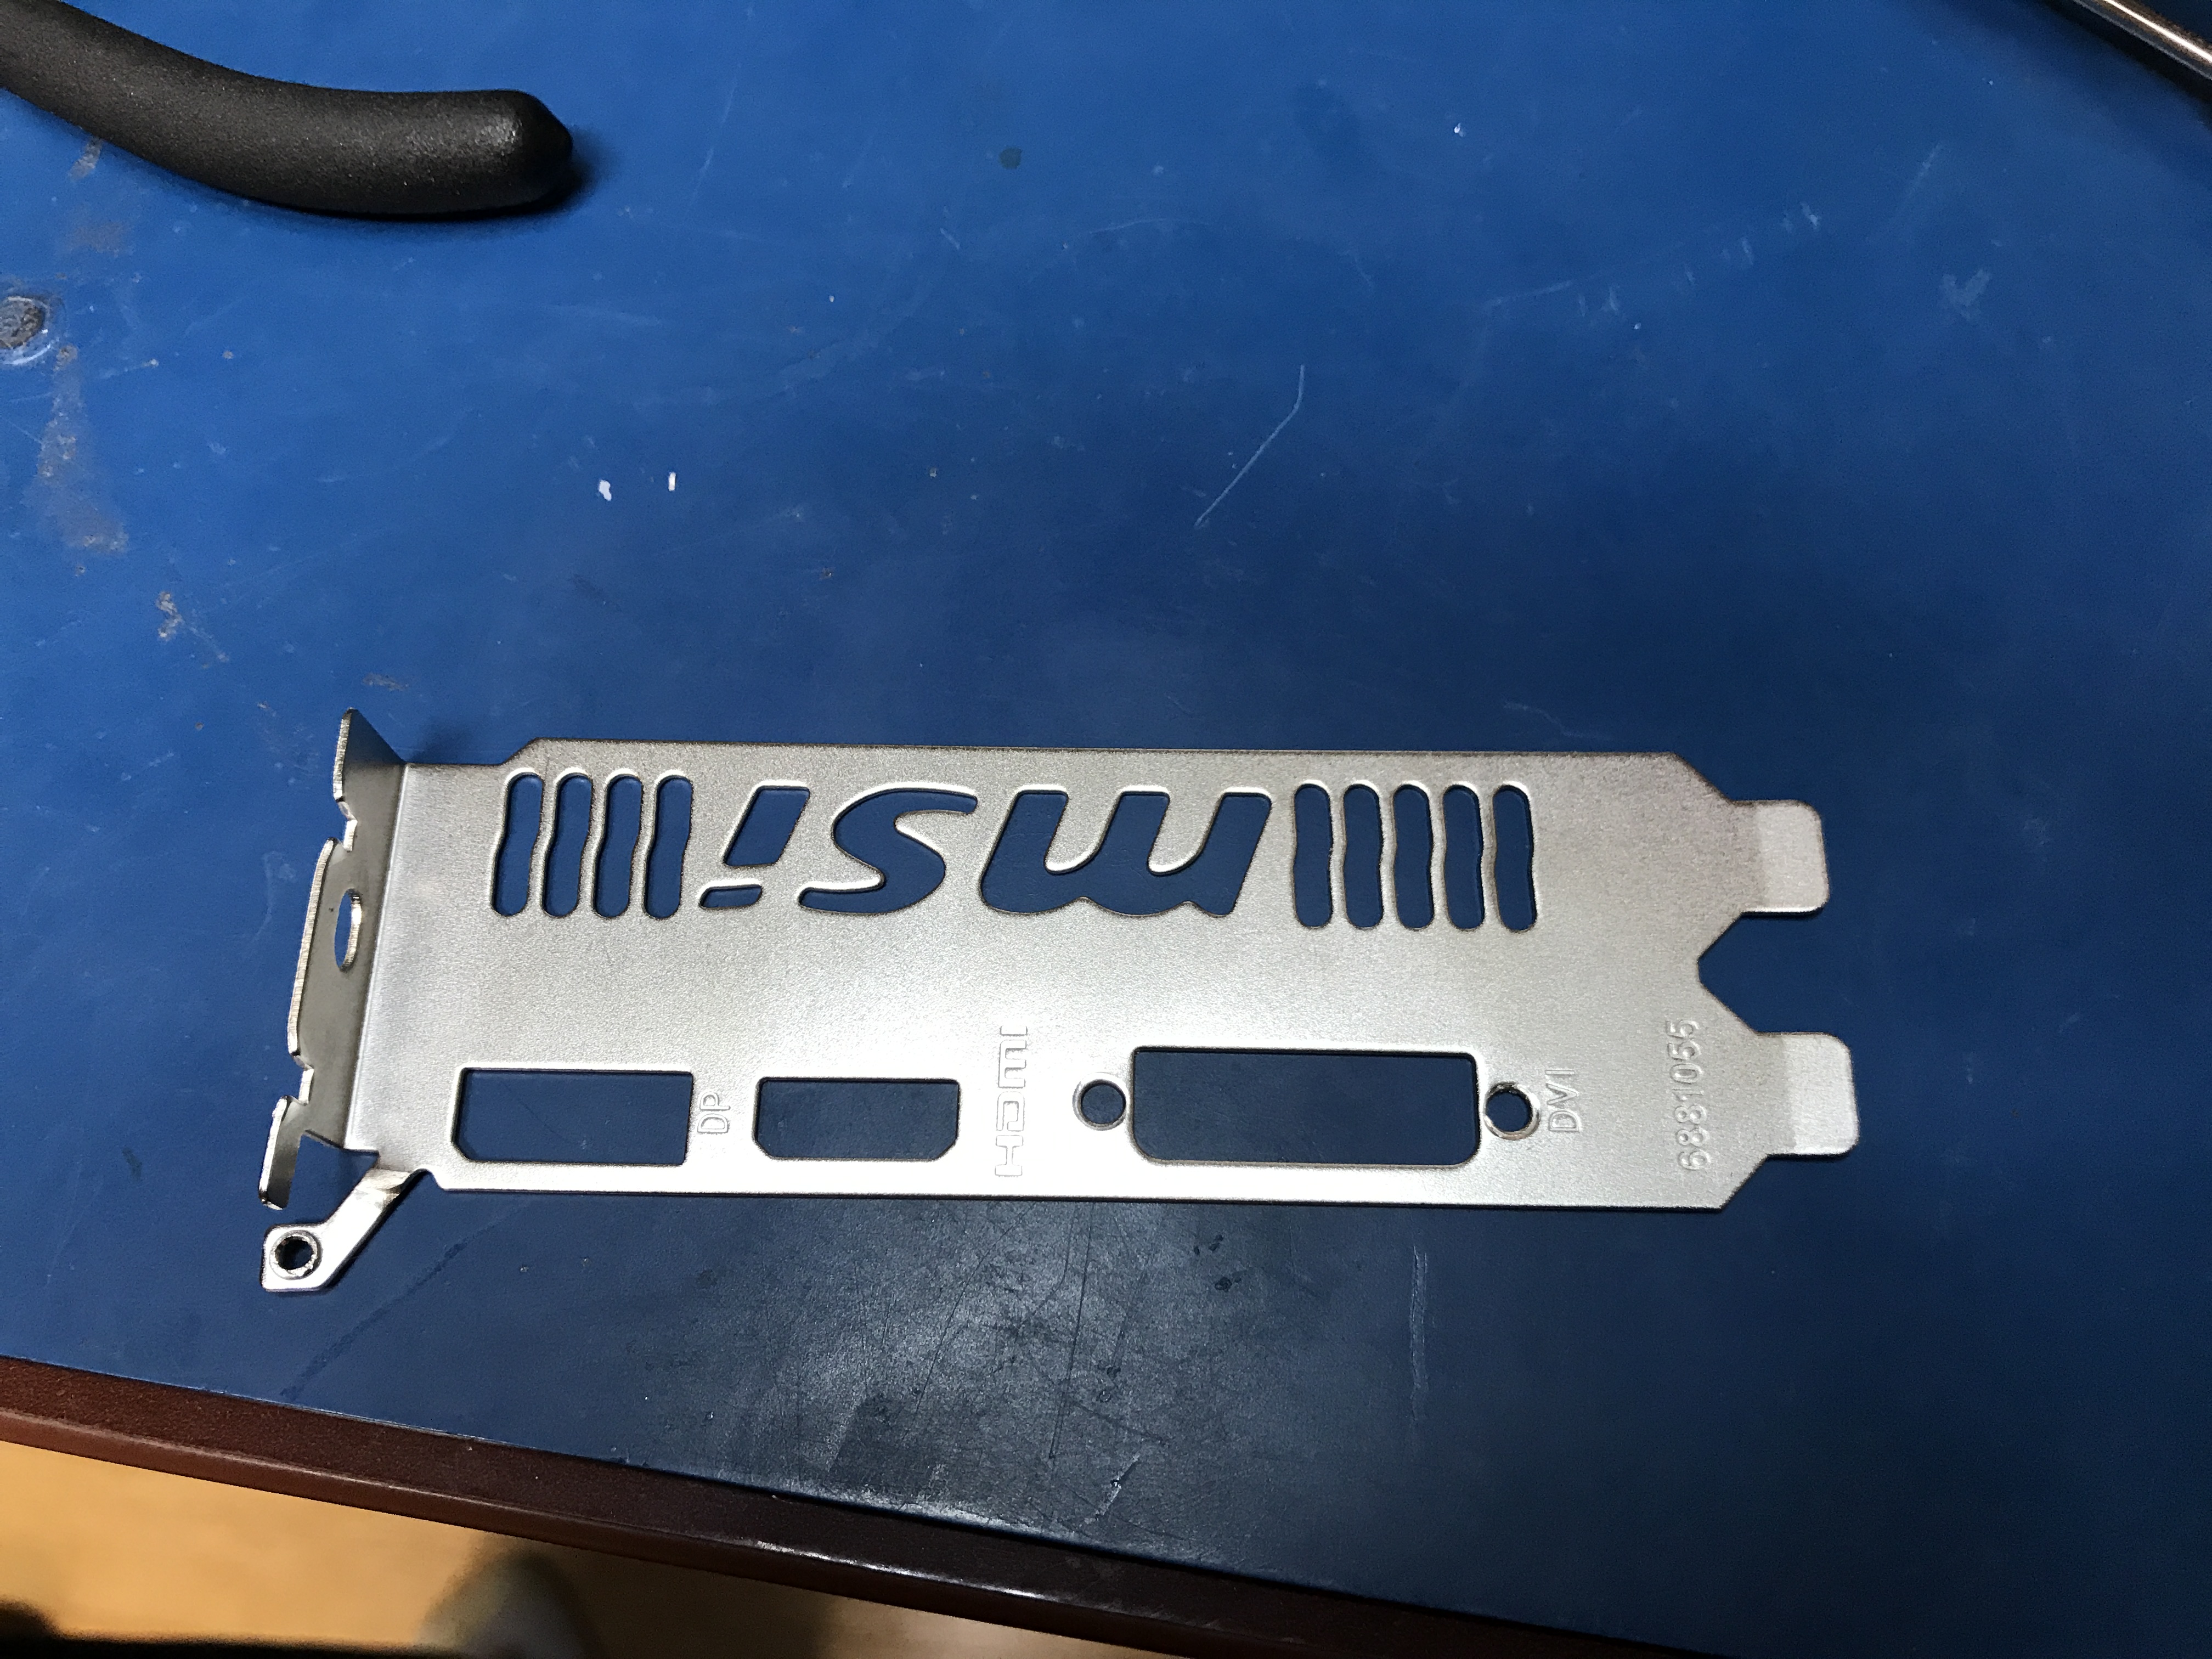\n\nWith a pair of pliers, carefully straighten the board mounting support so that the plate will sit flush on a surface.\n\n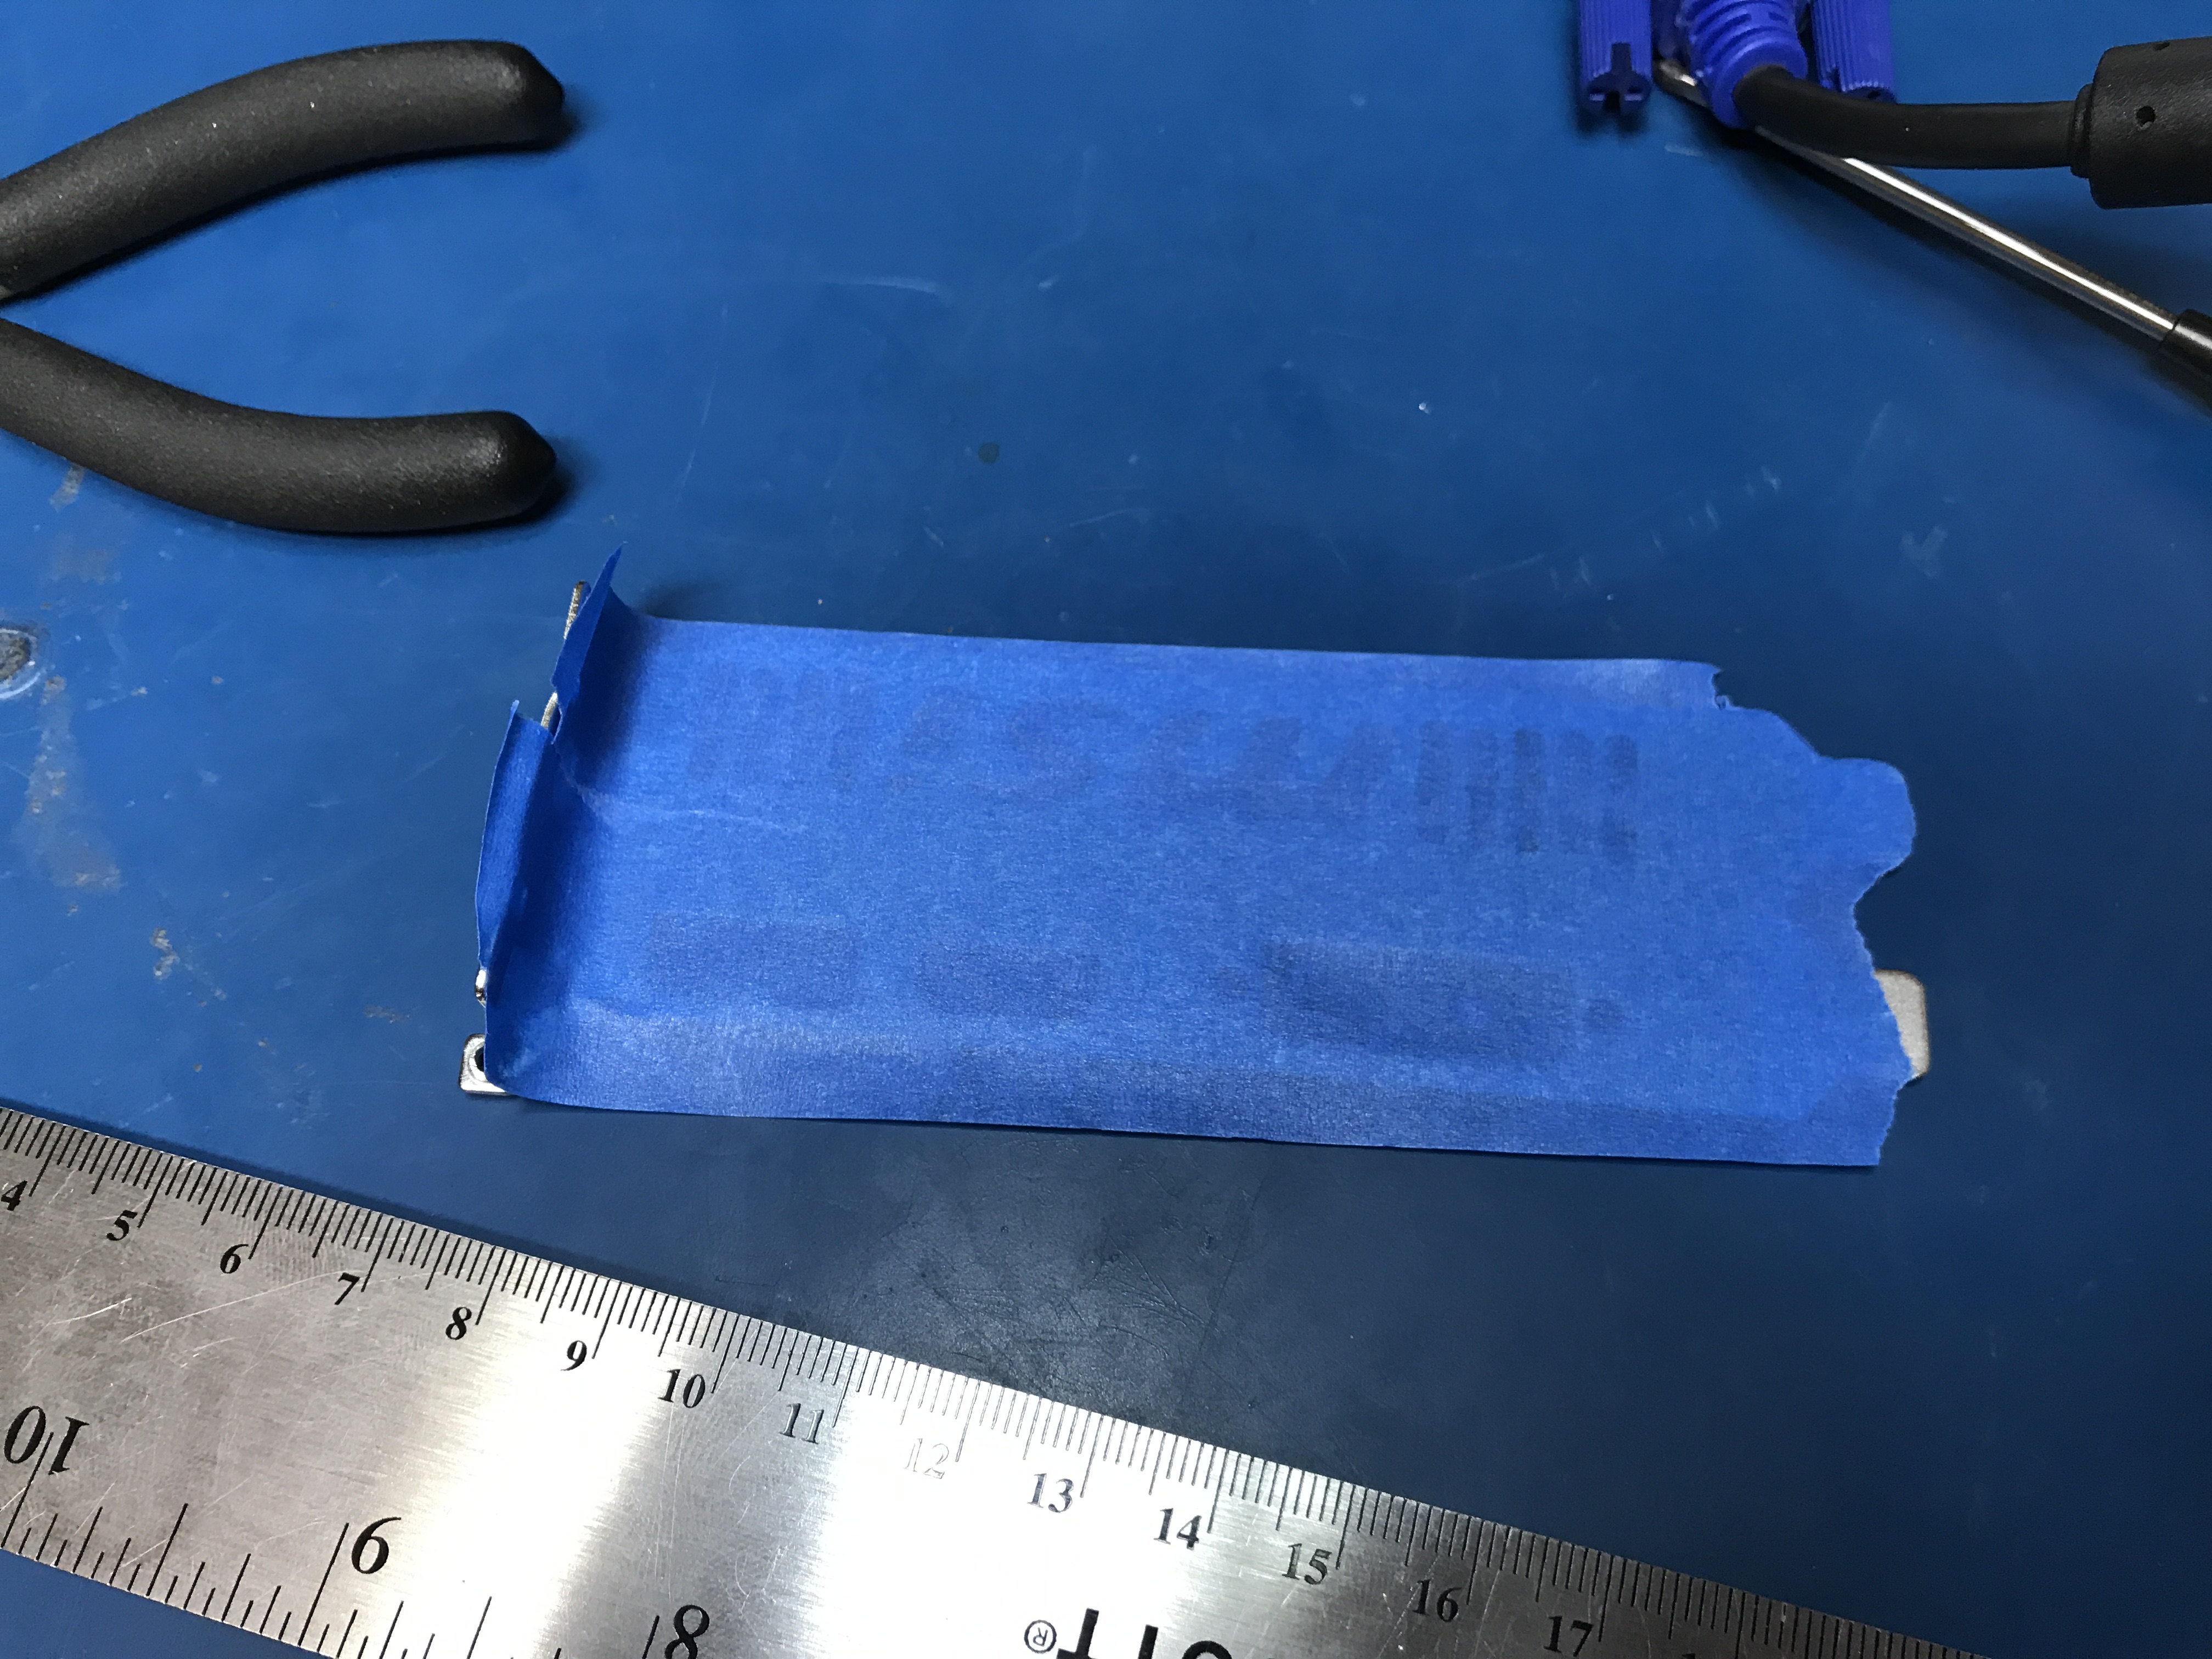\n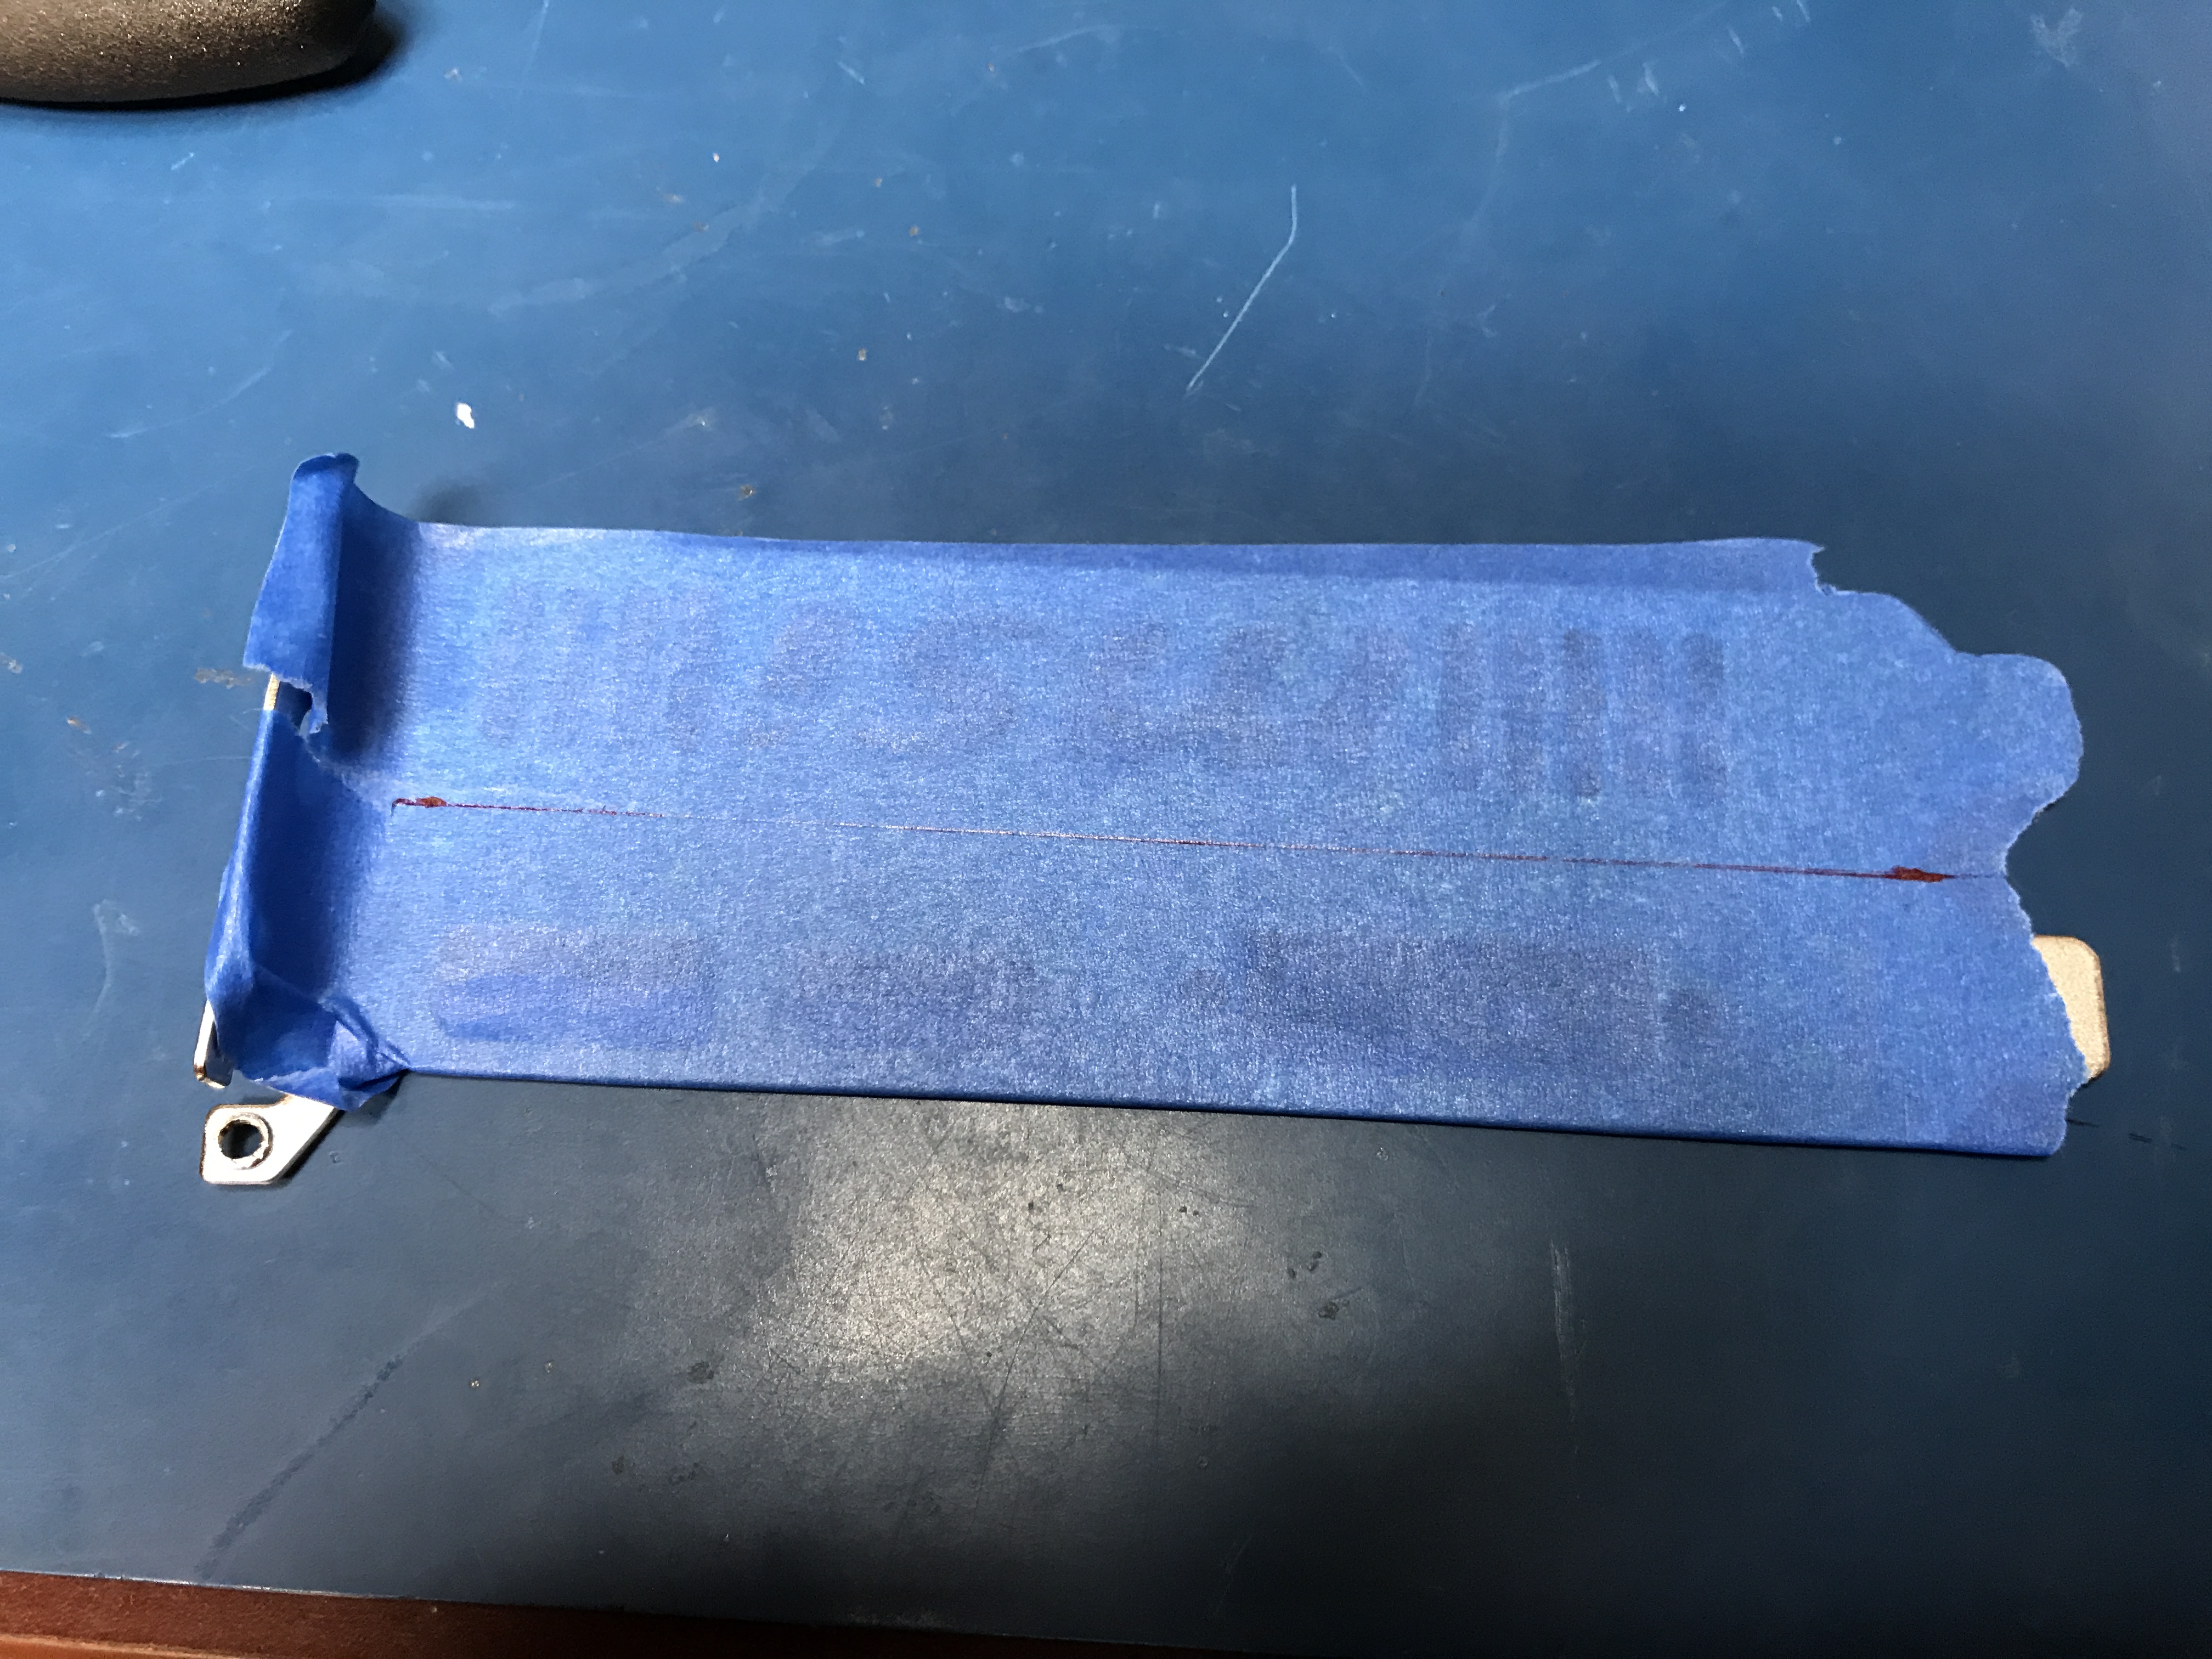\n\nApply some masking tape and draw your cutting line. Single slot plates are typically 18mm wide.\n\n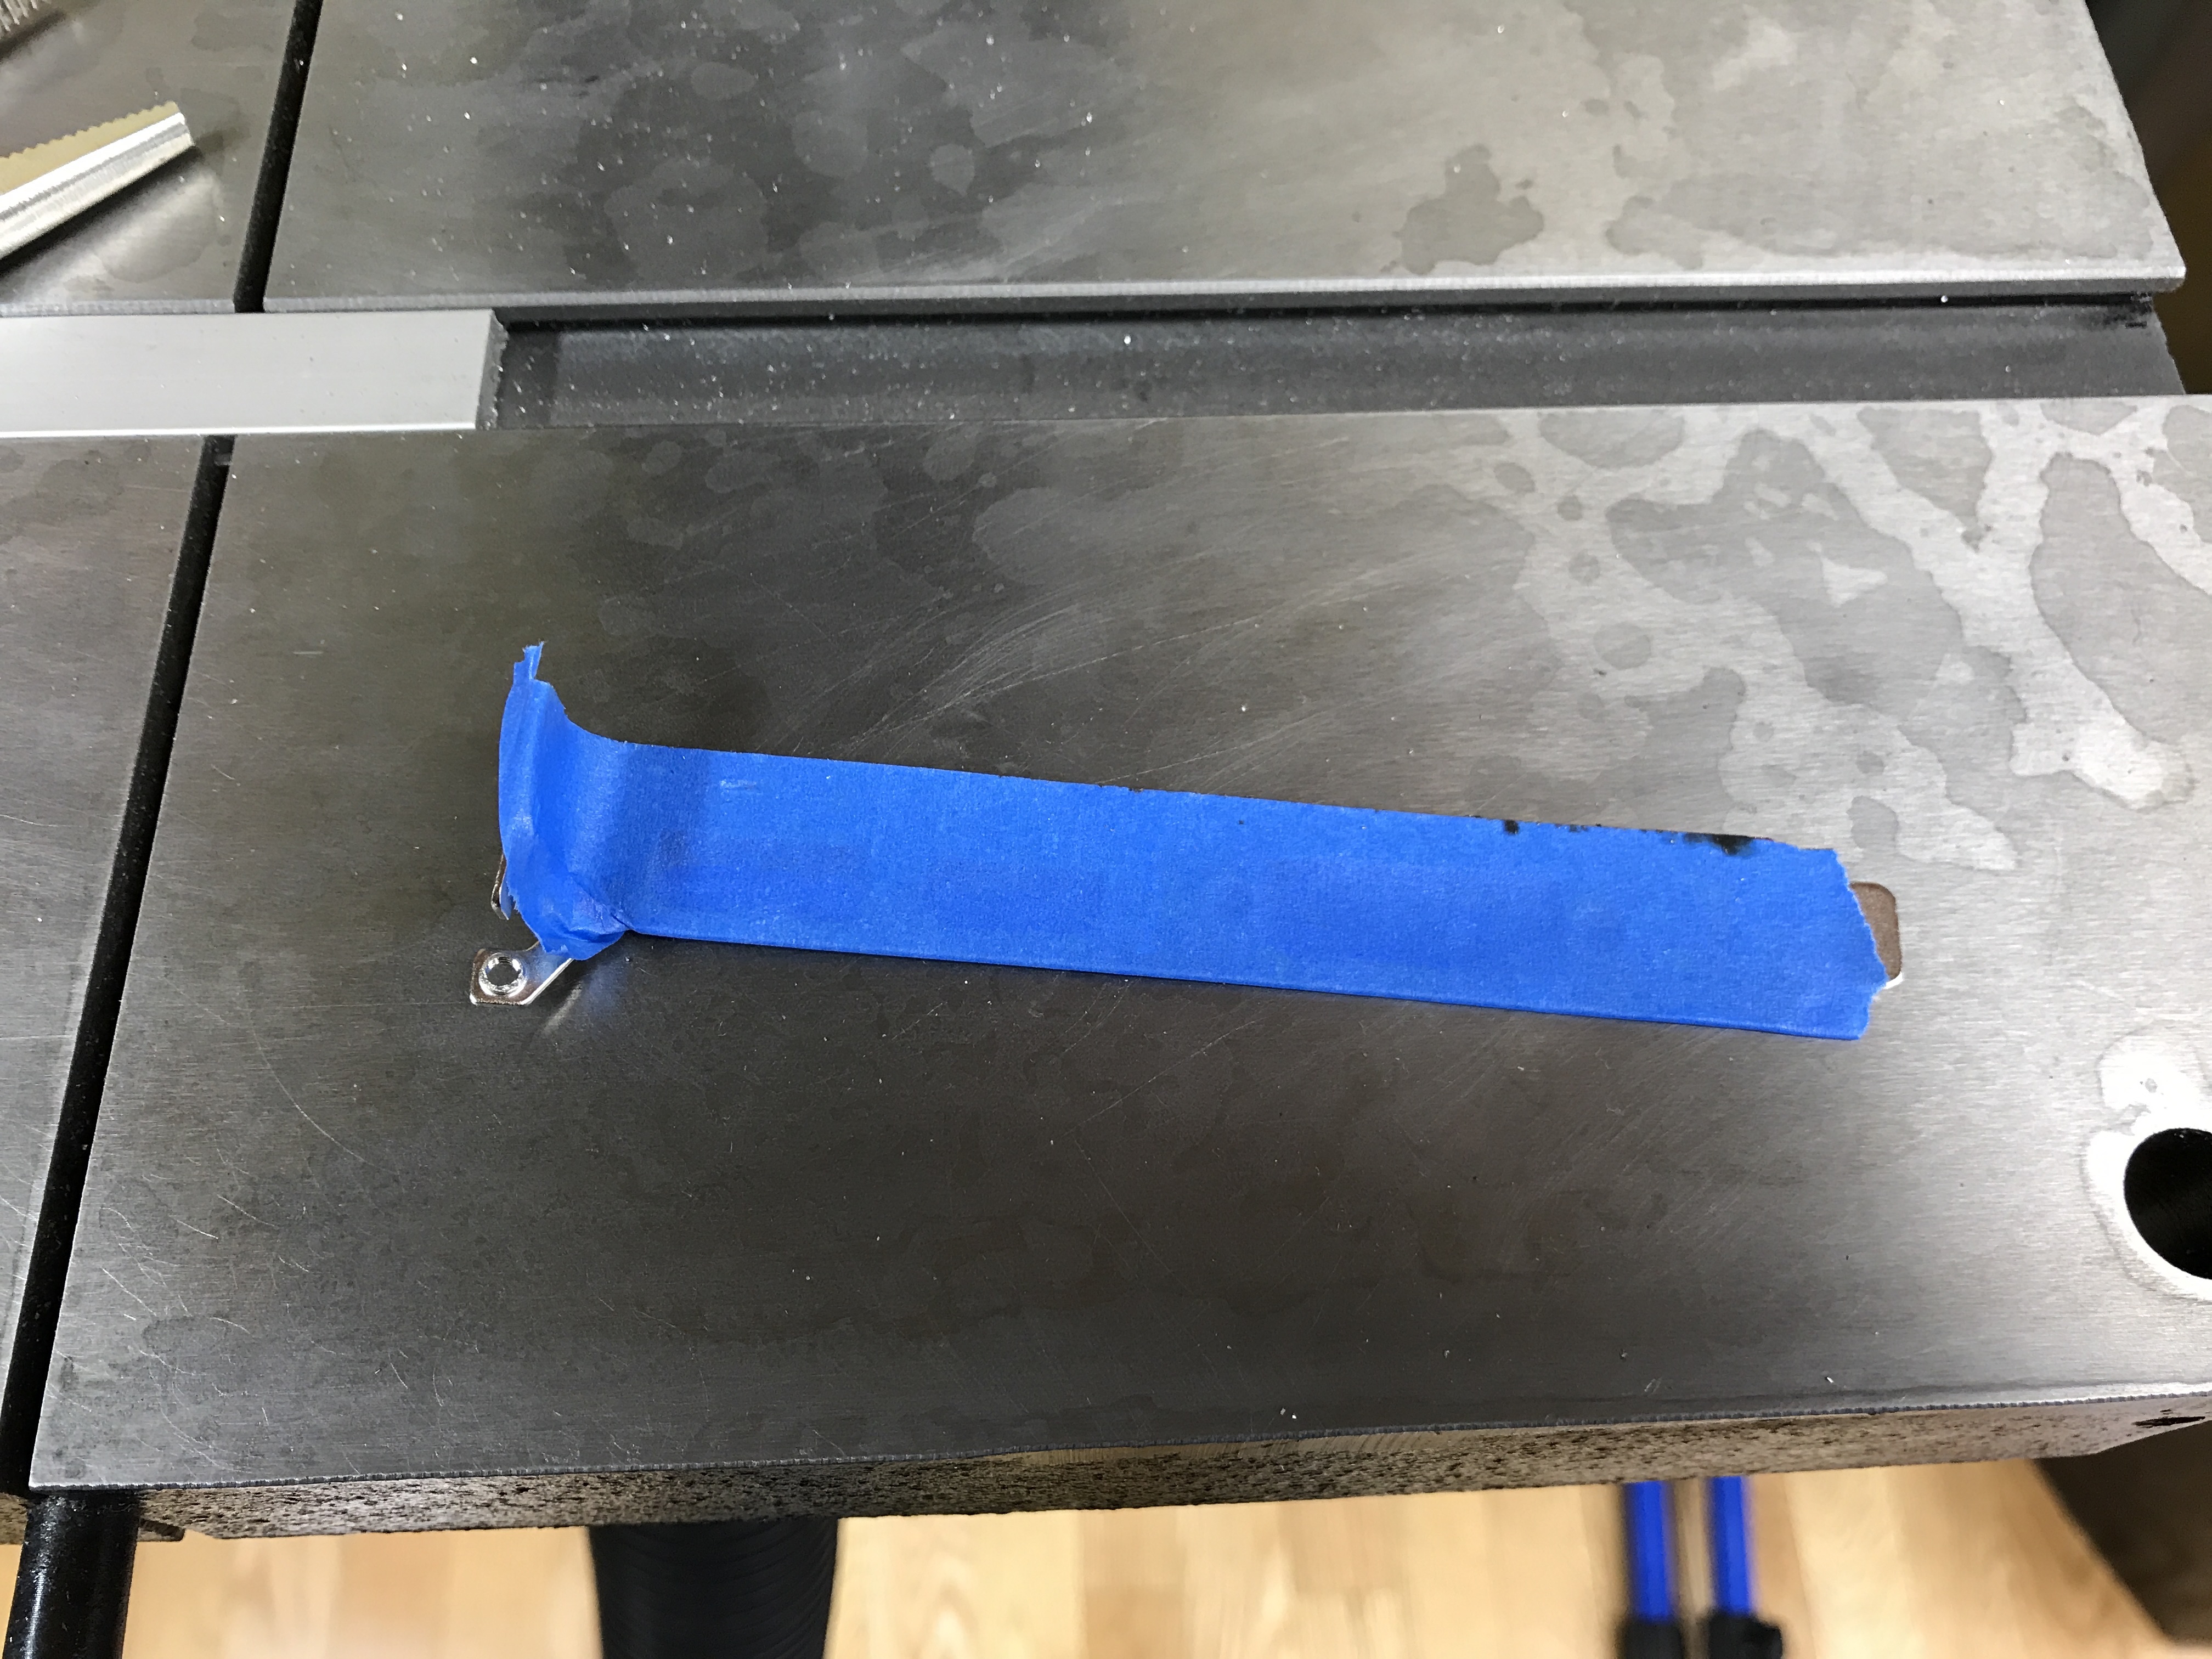\n\nWhile using appropriate safety equipment, cut along your line using a bandsaw (a hacksaw would probably work, too).\n\n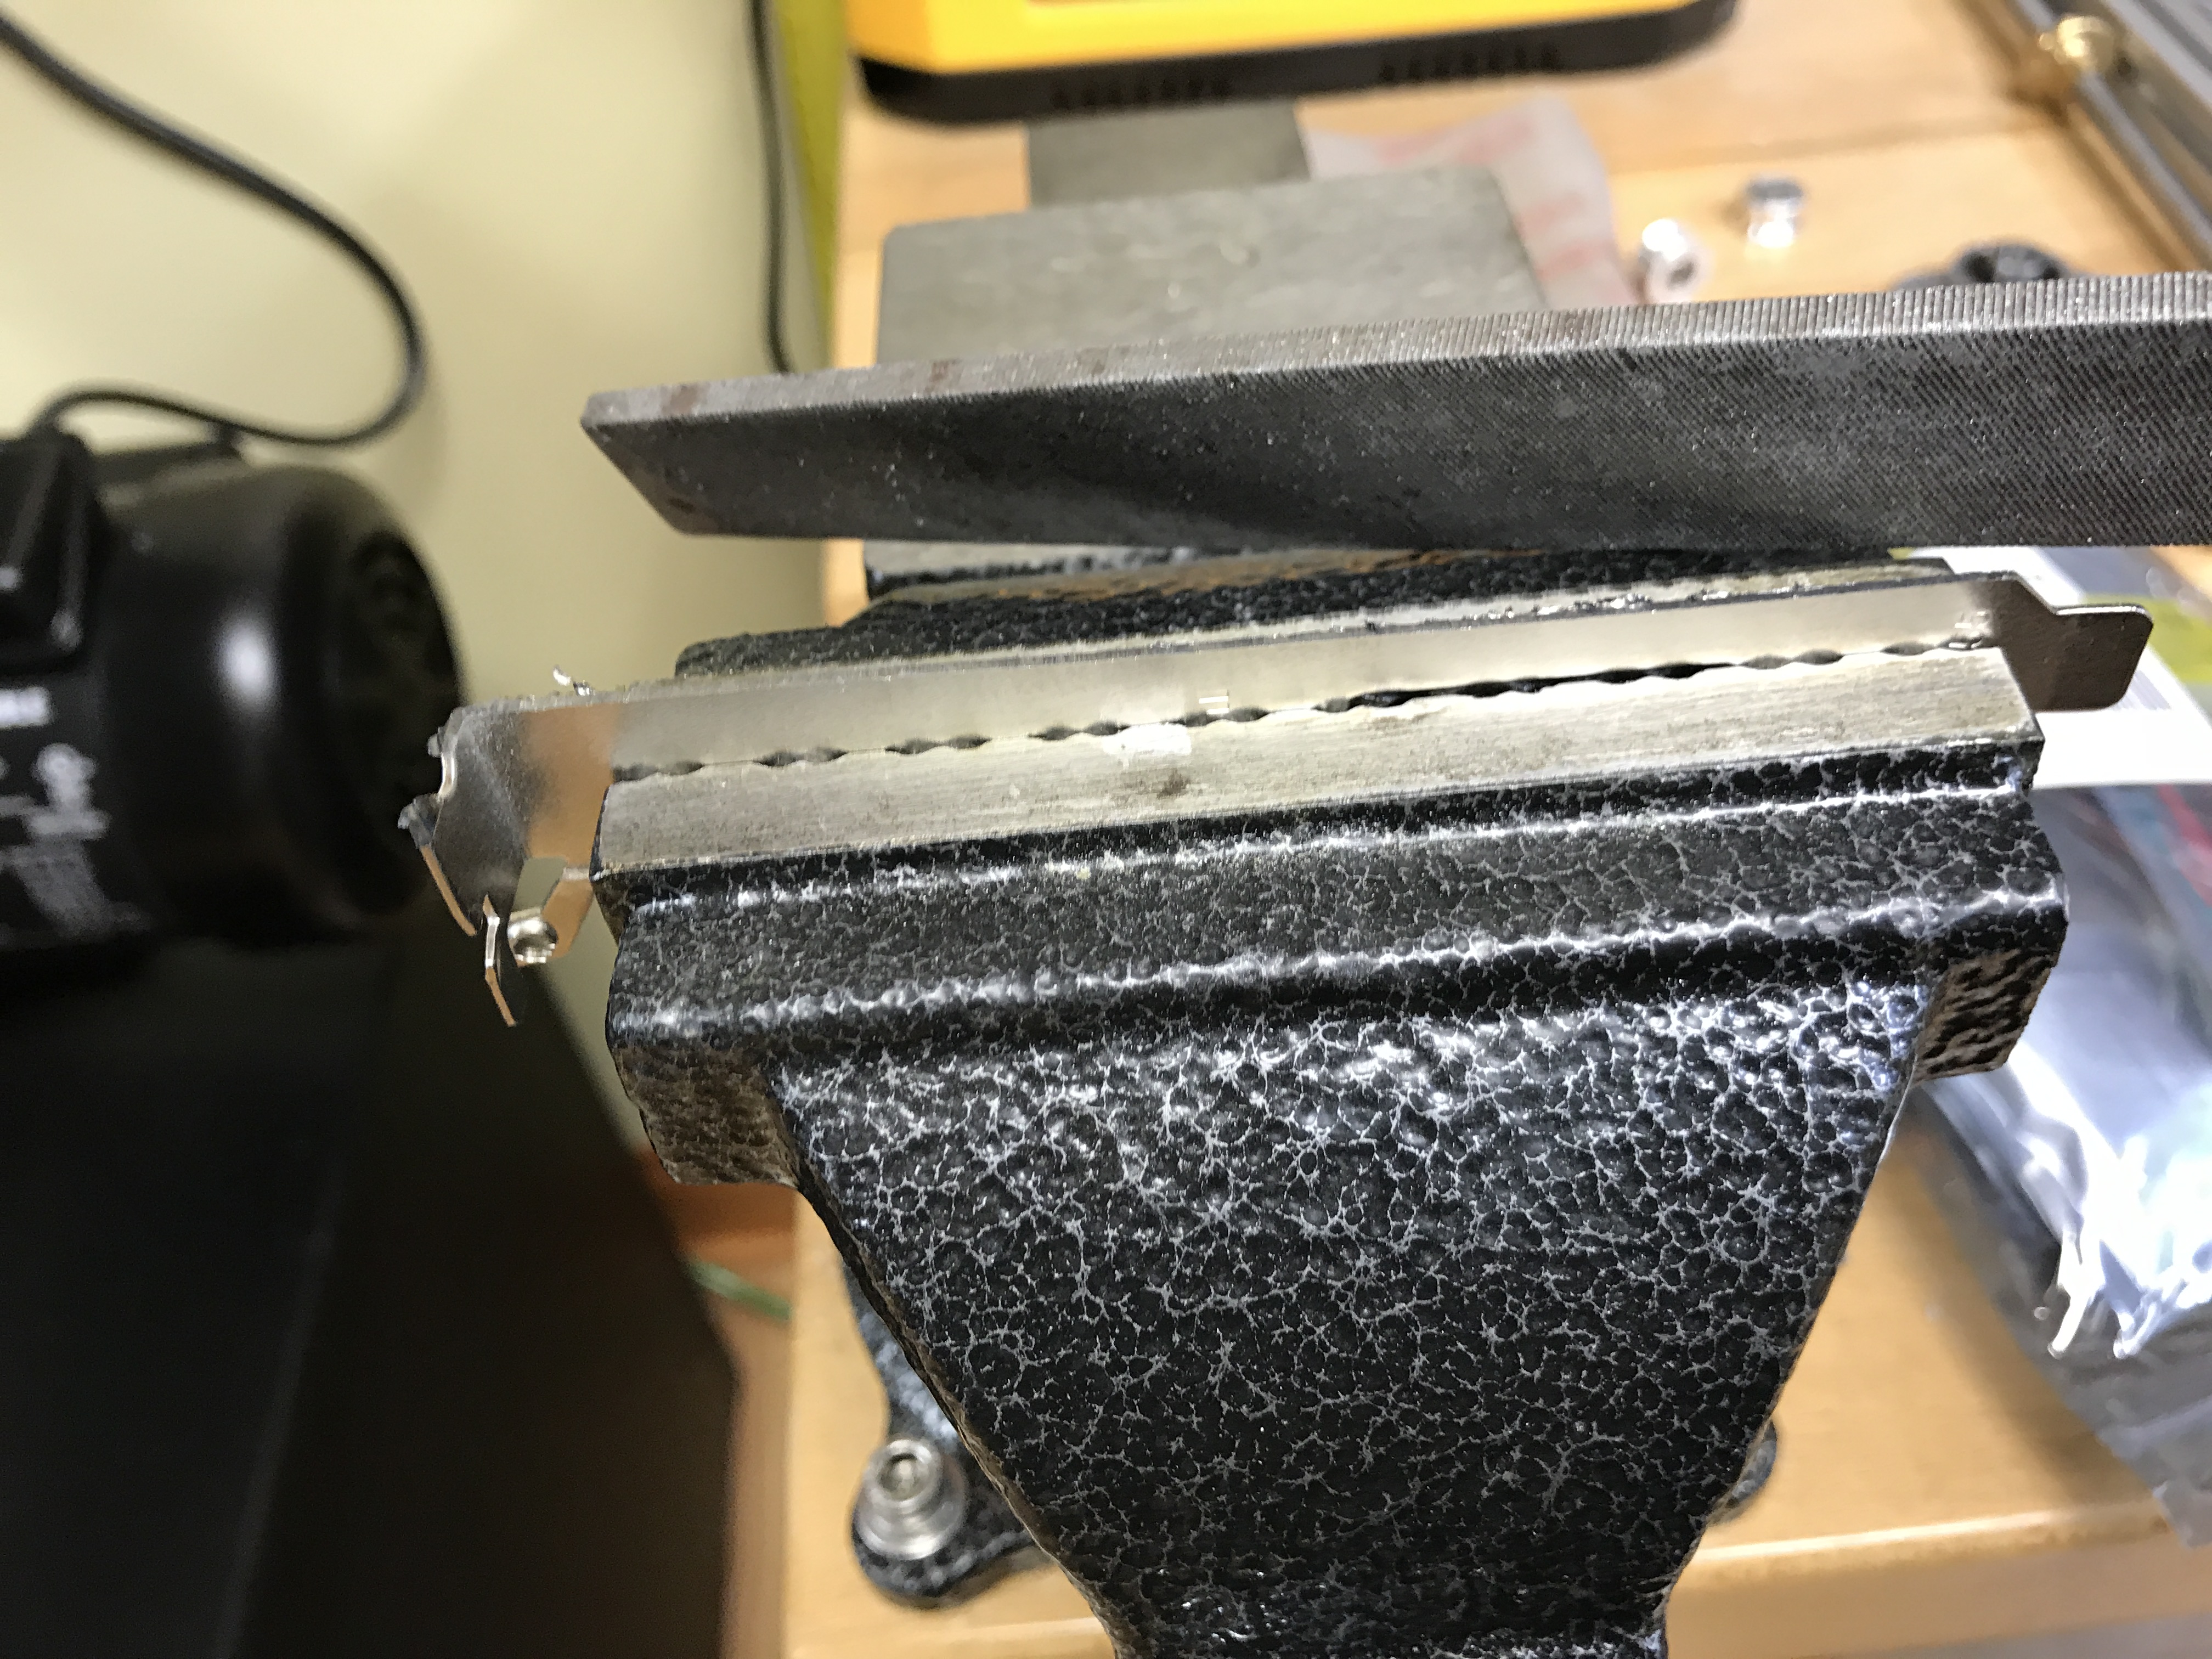\n\nFile off the sharp edges.\n\n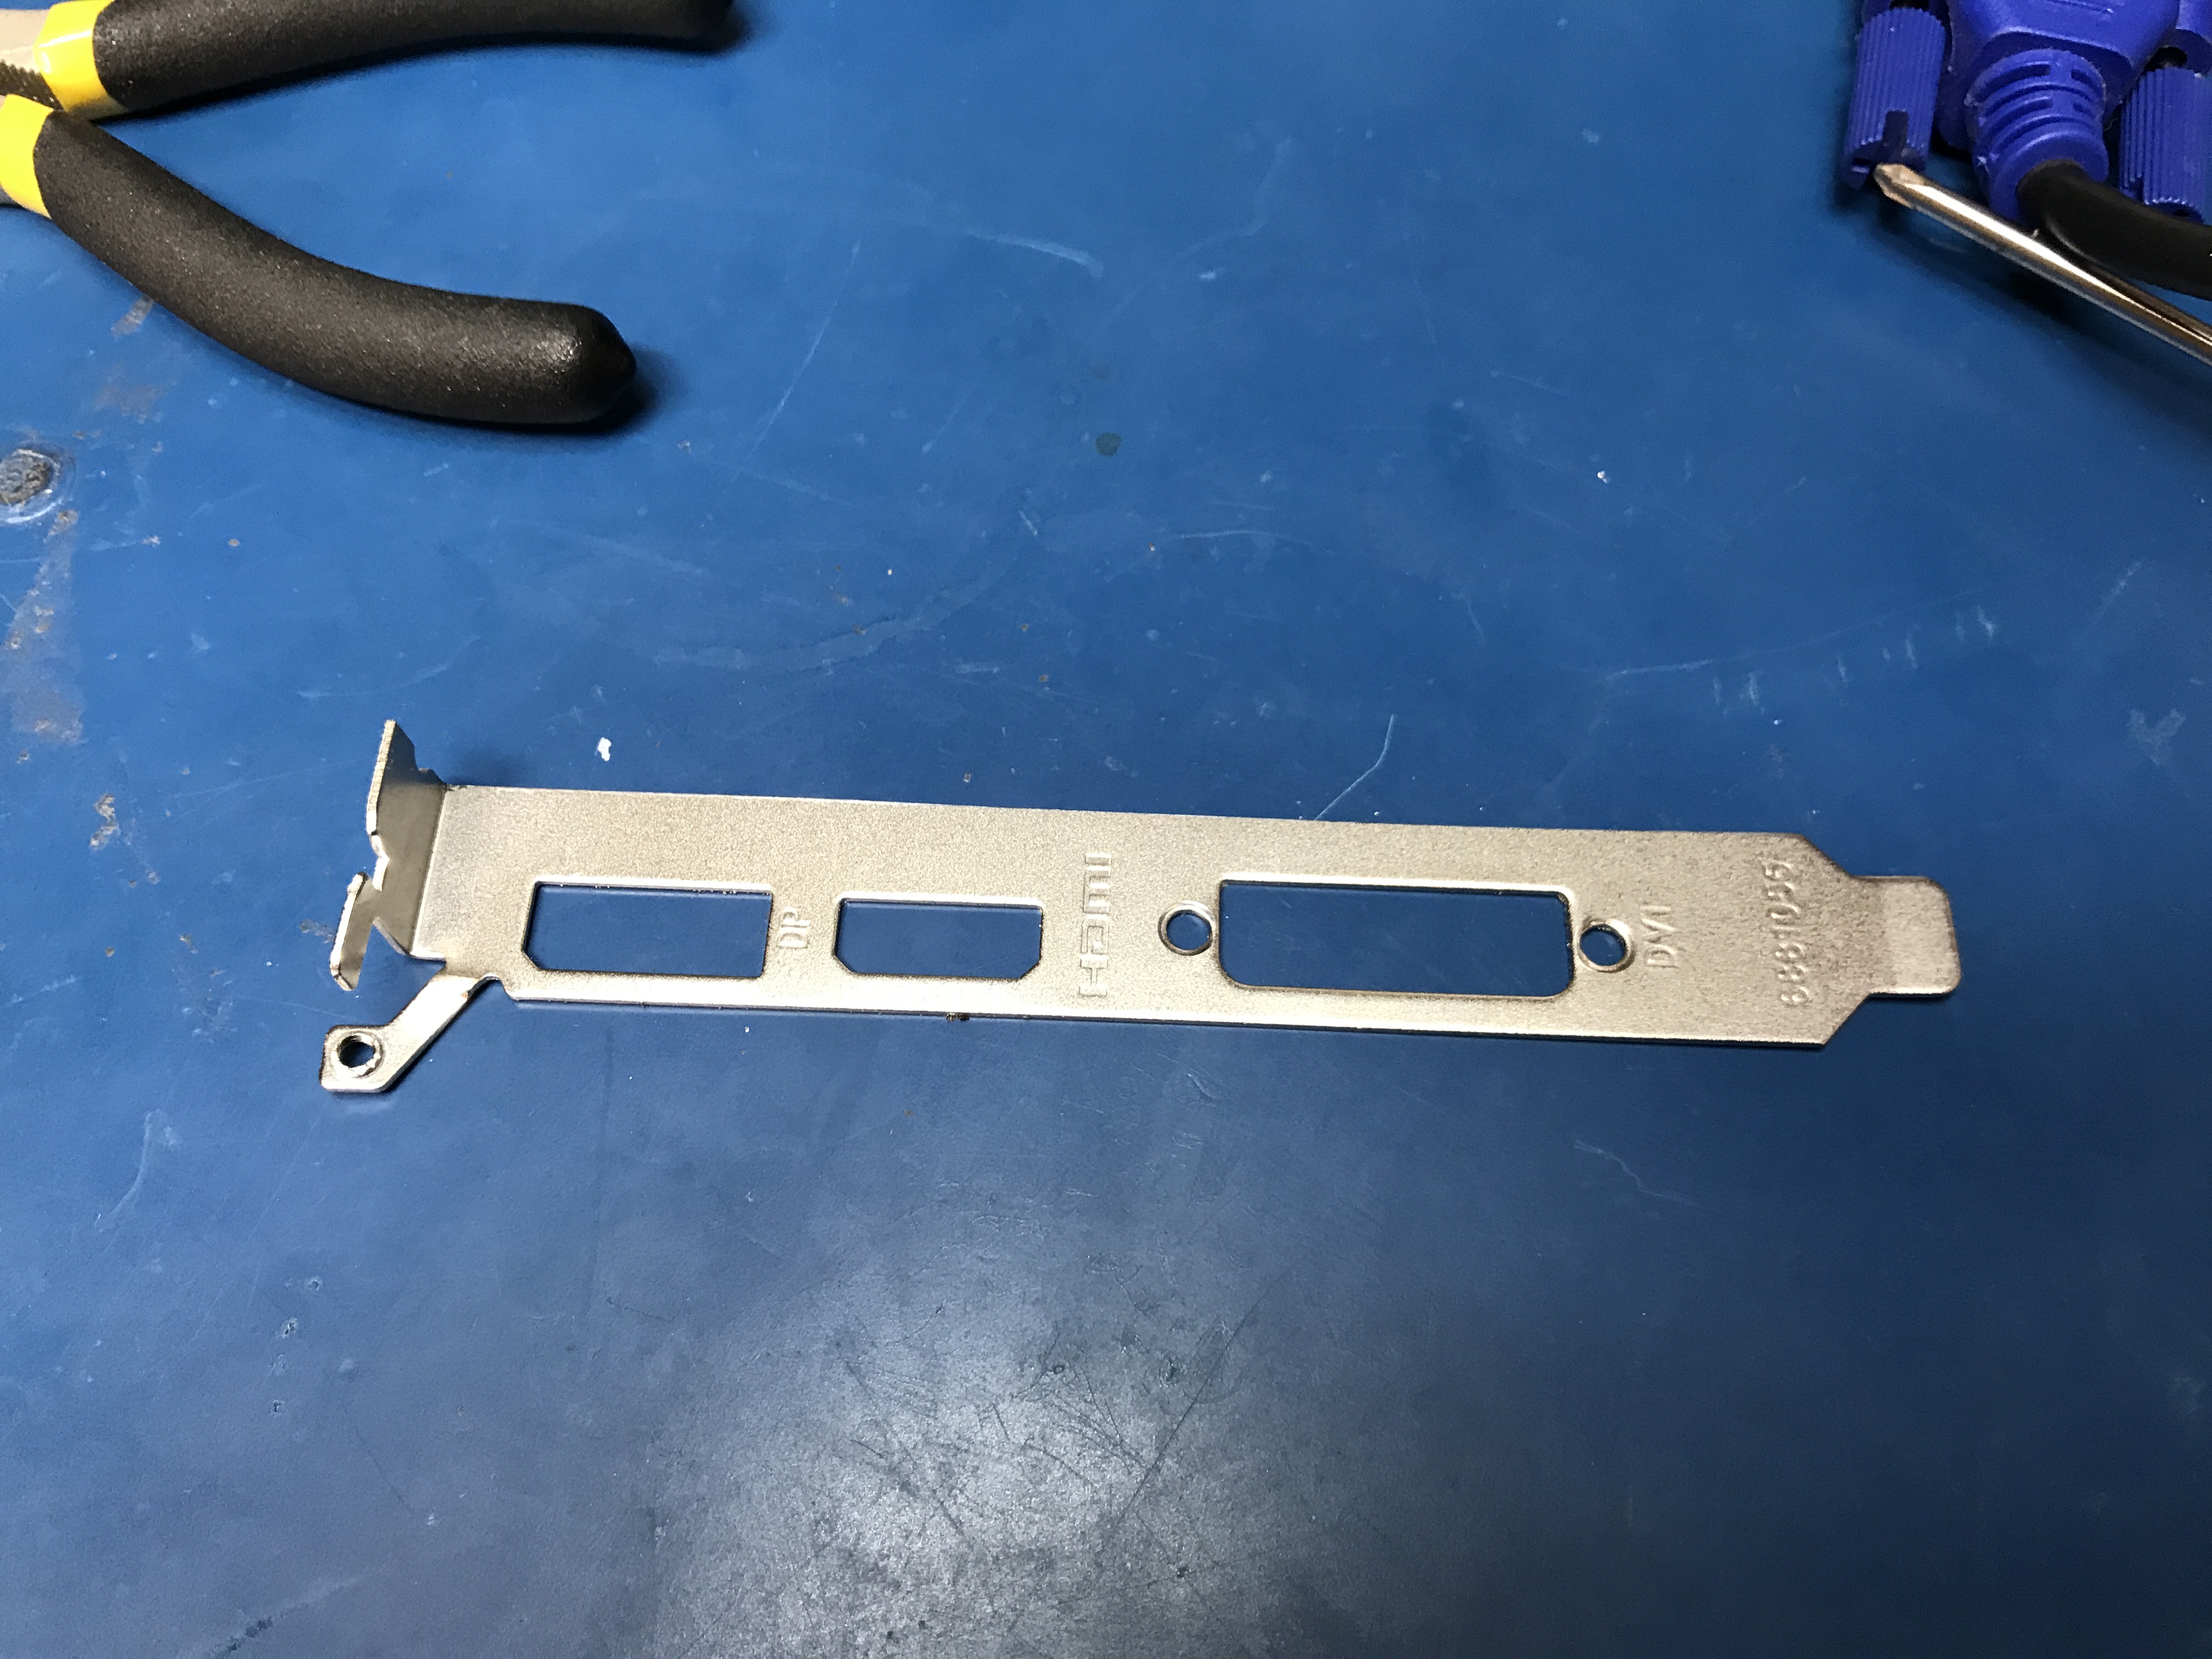\n\nHooray, we have a single slot mounting plate!\n\n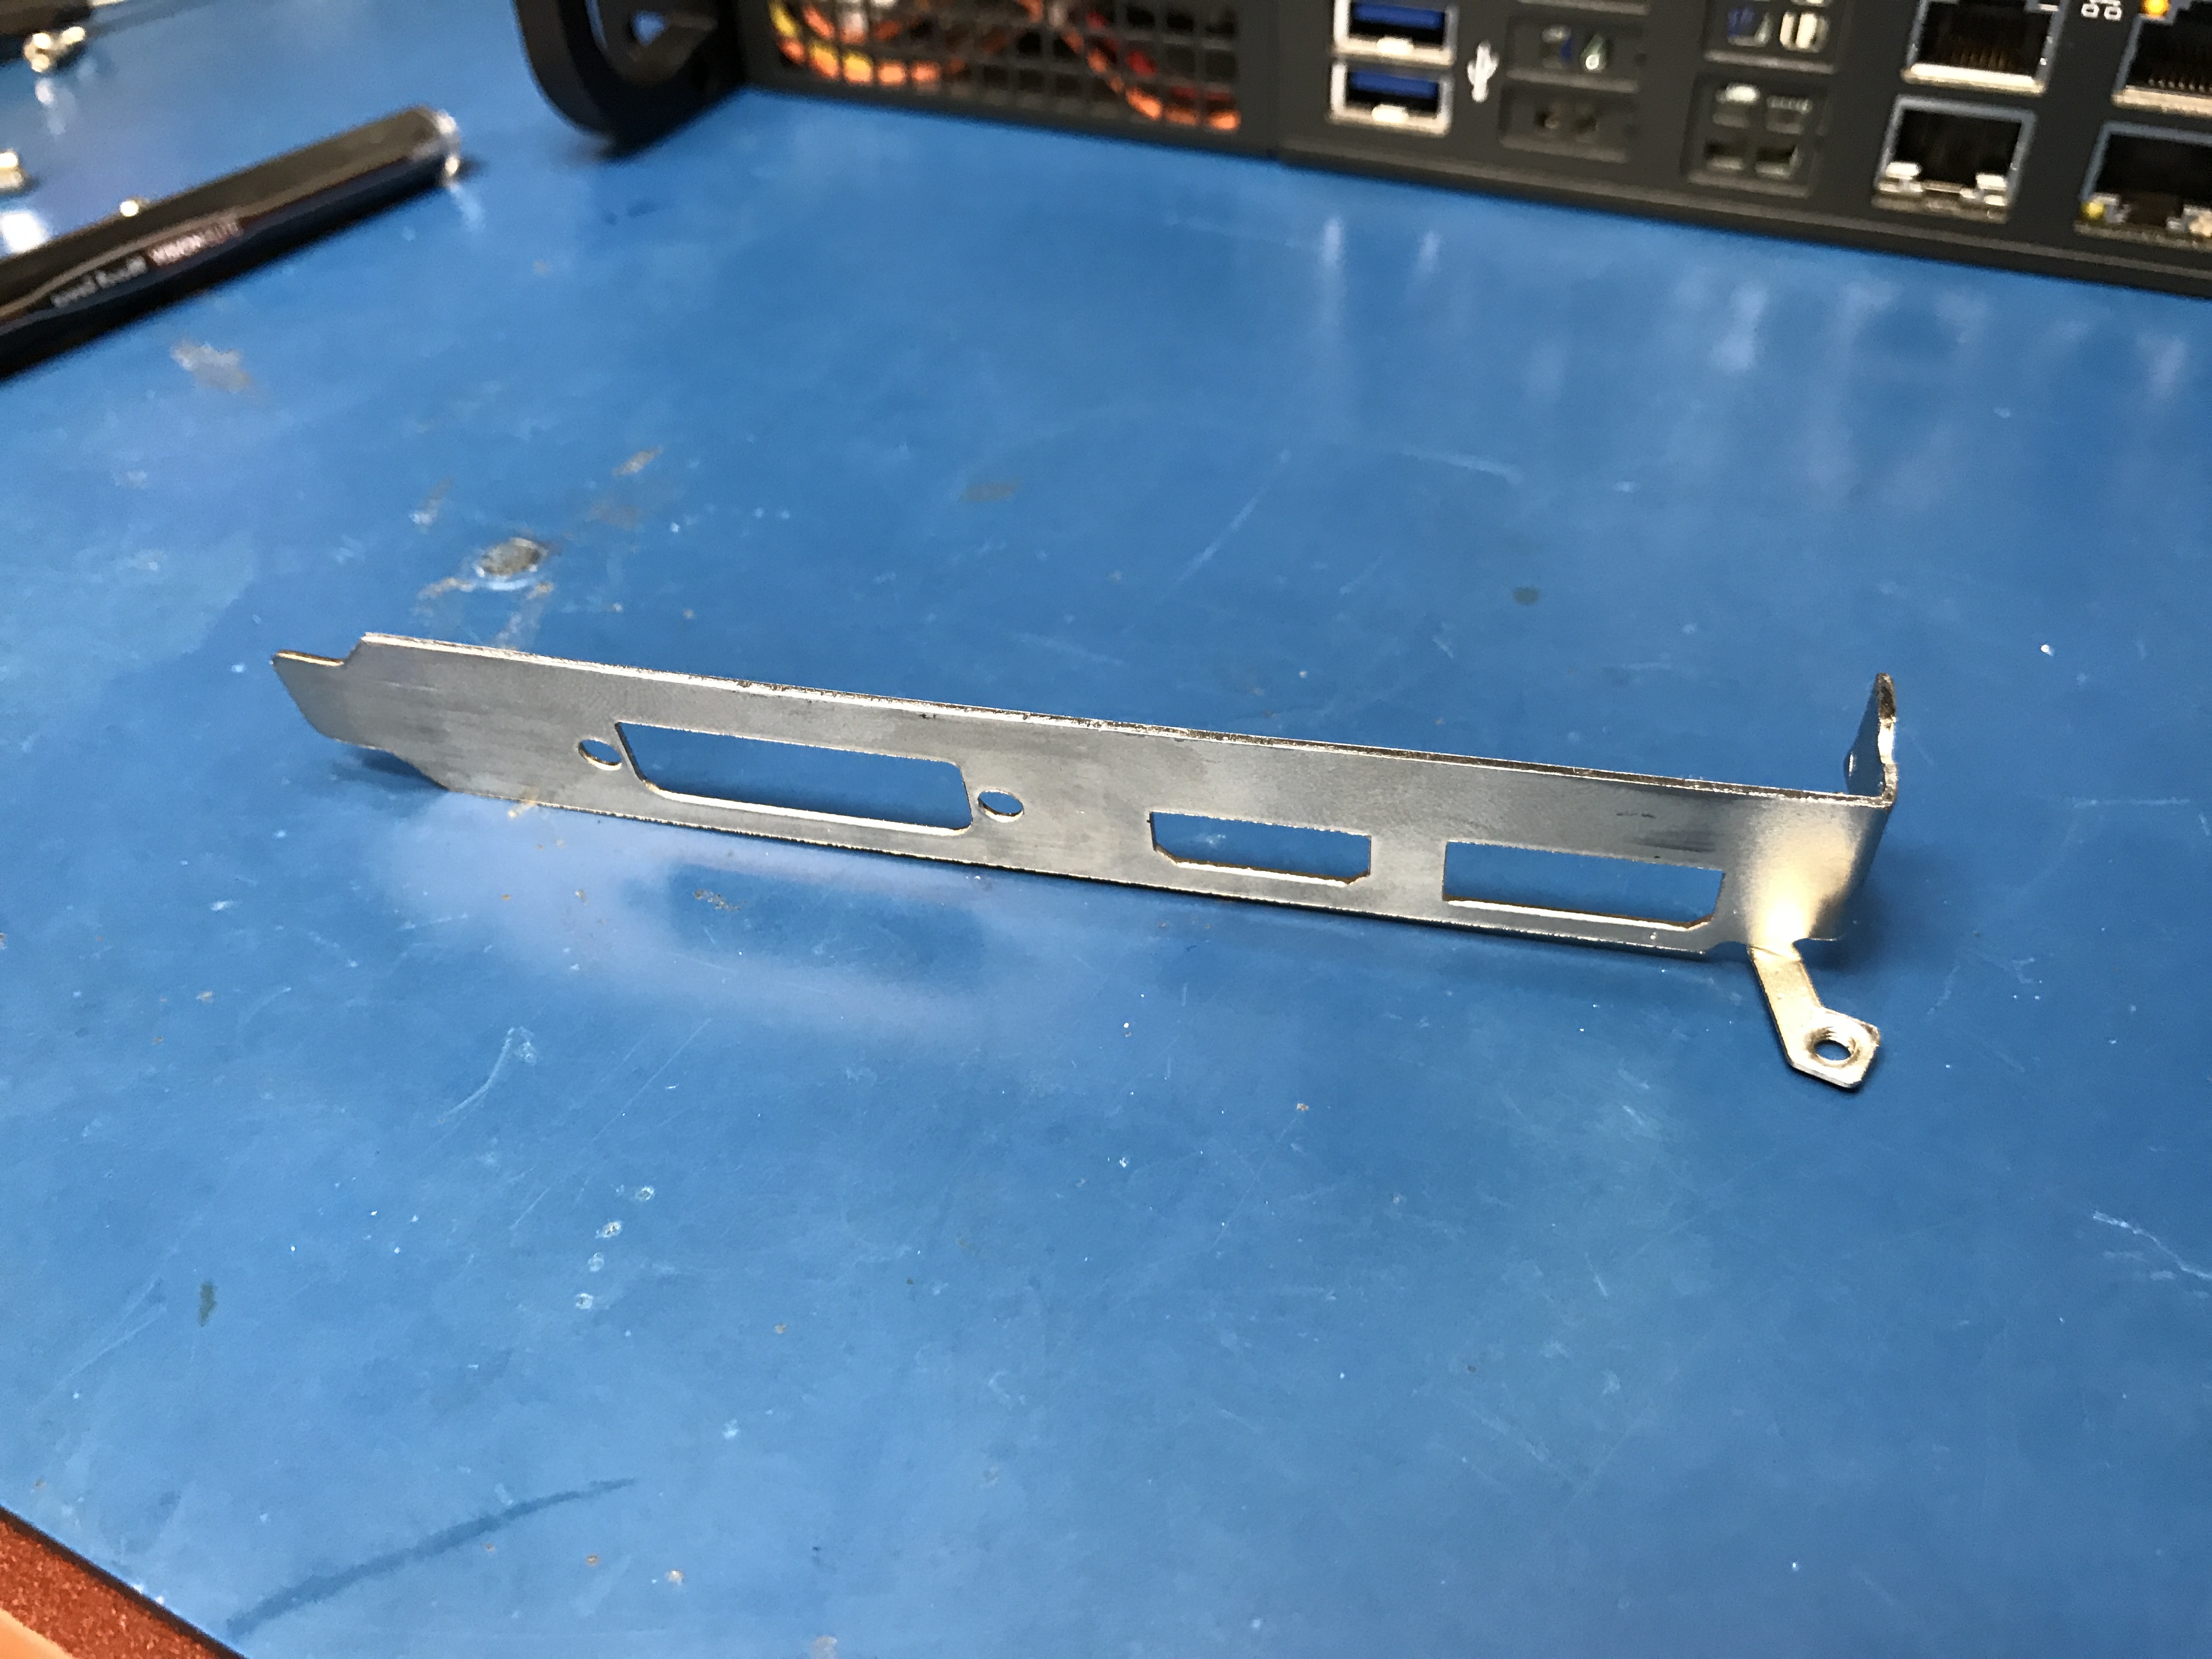\n\nBend back the board mounting support.\n\n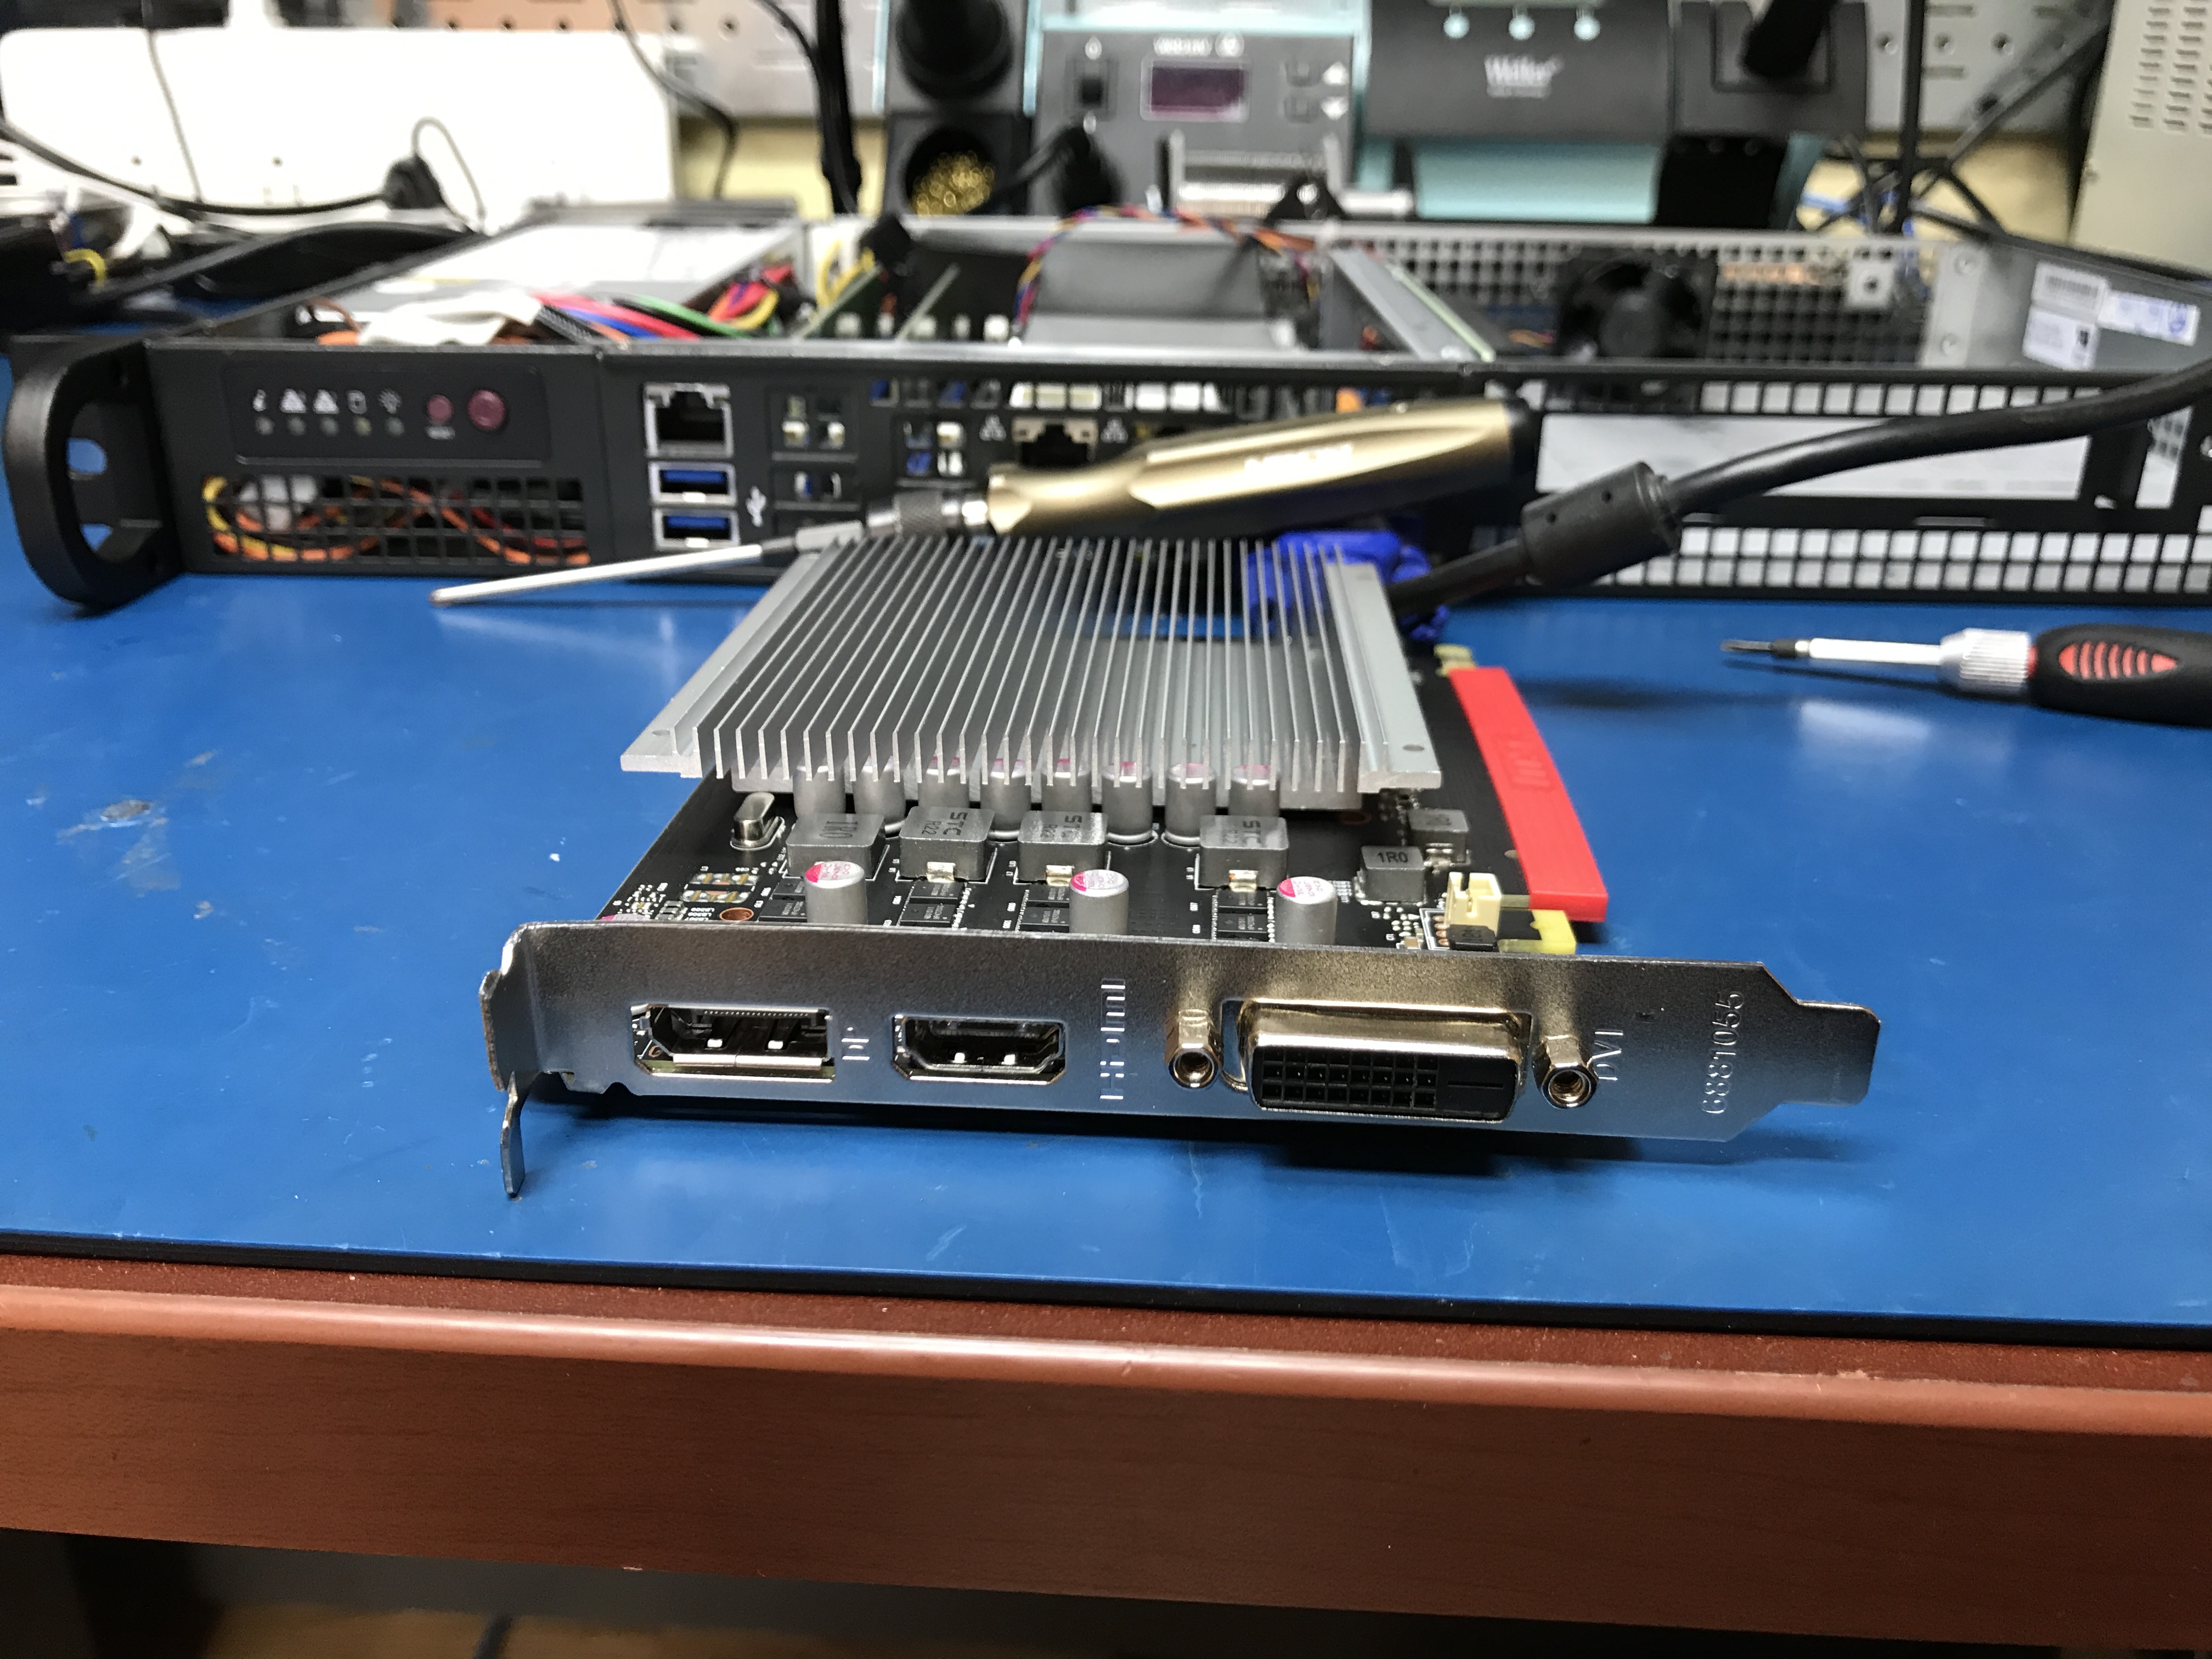\n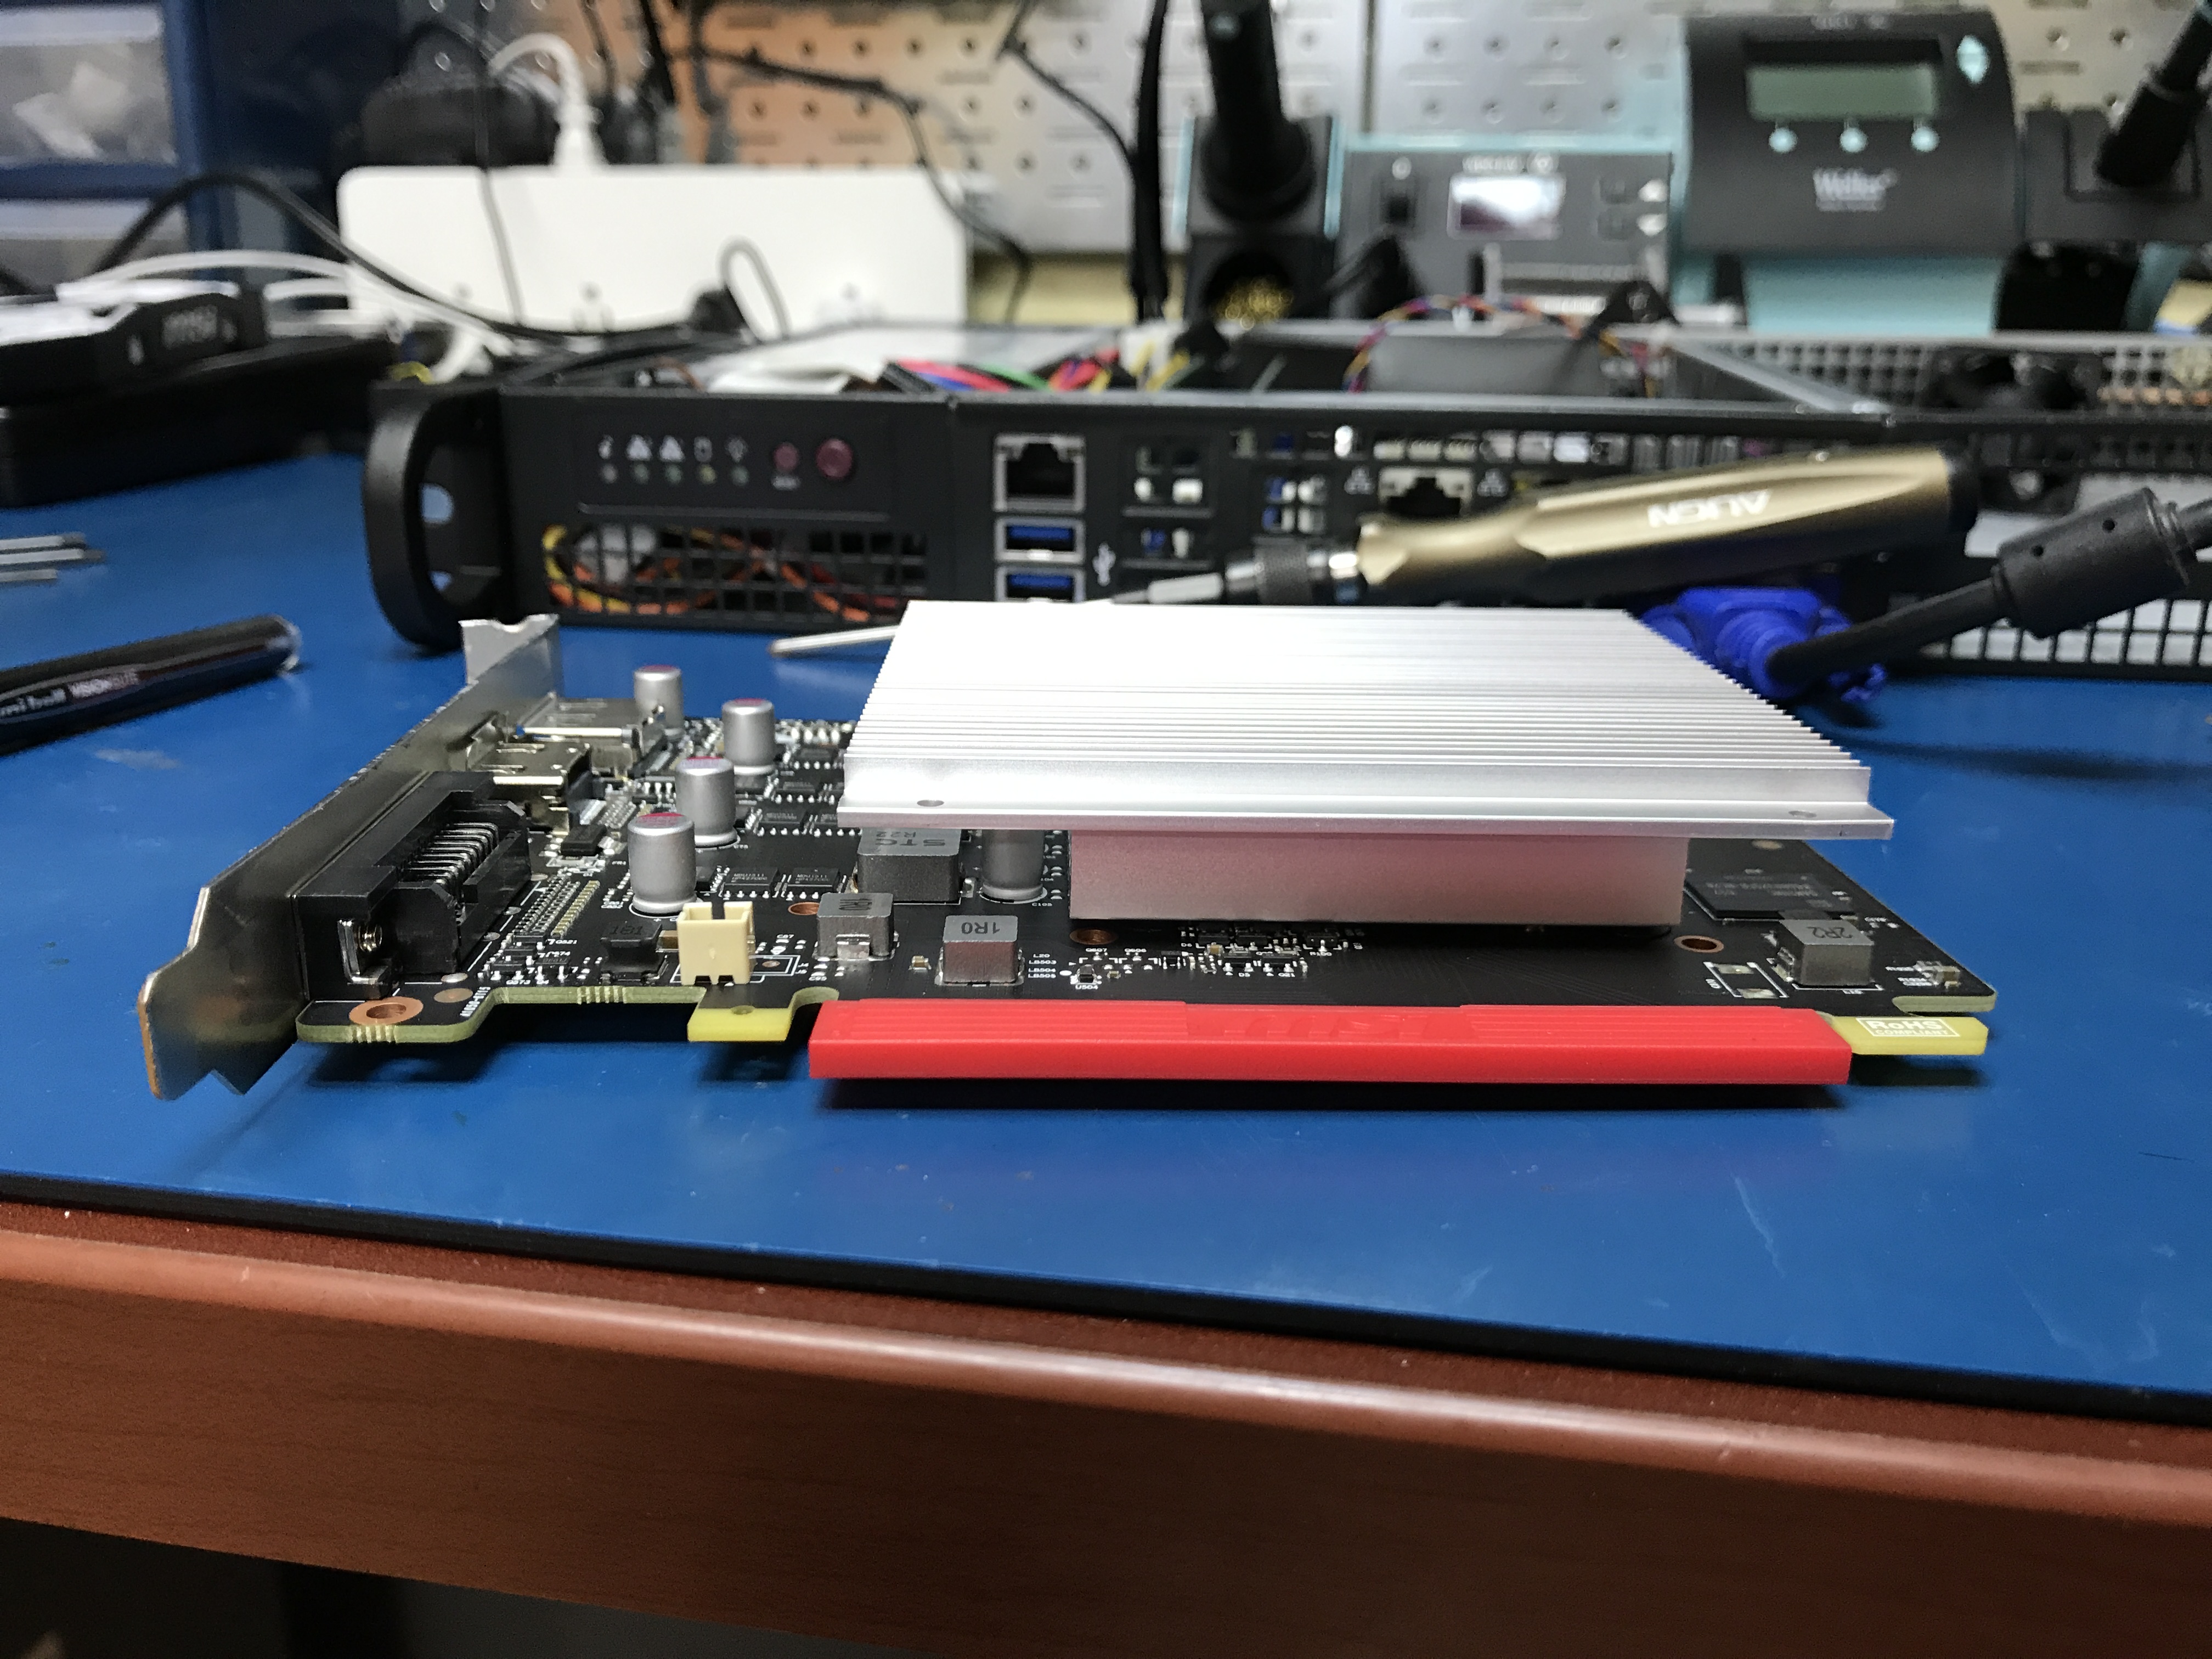\n\nNow we have a low profile GPU, without heavy modification or destruction of the PCB/components!\n\n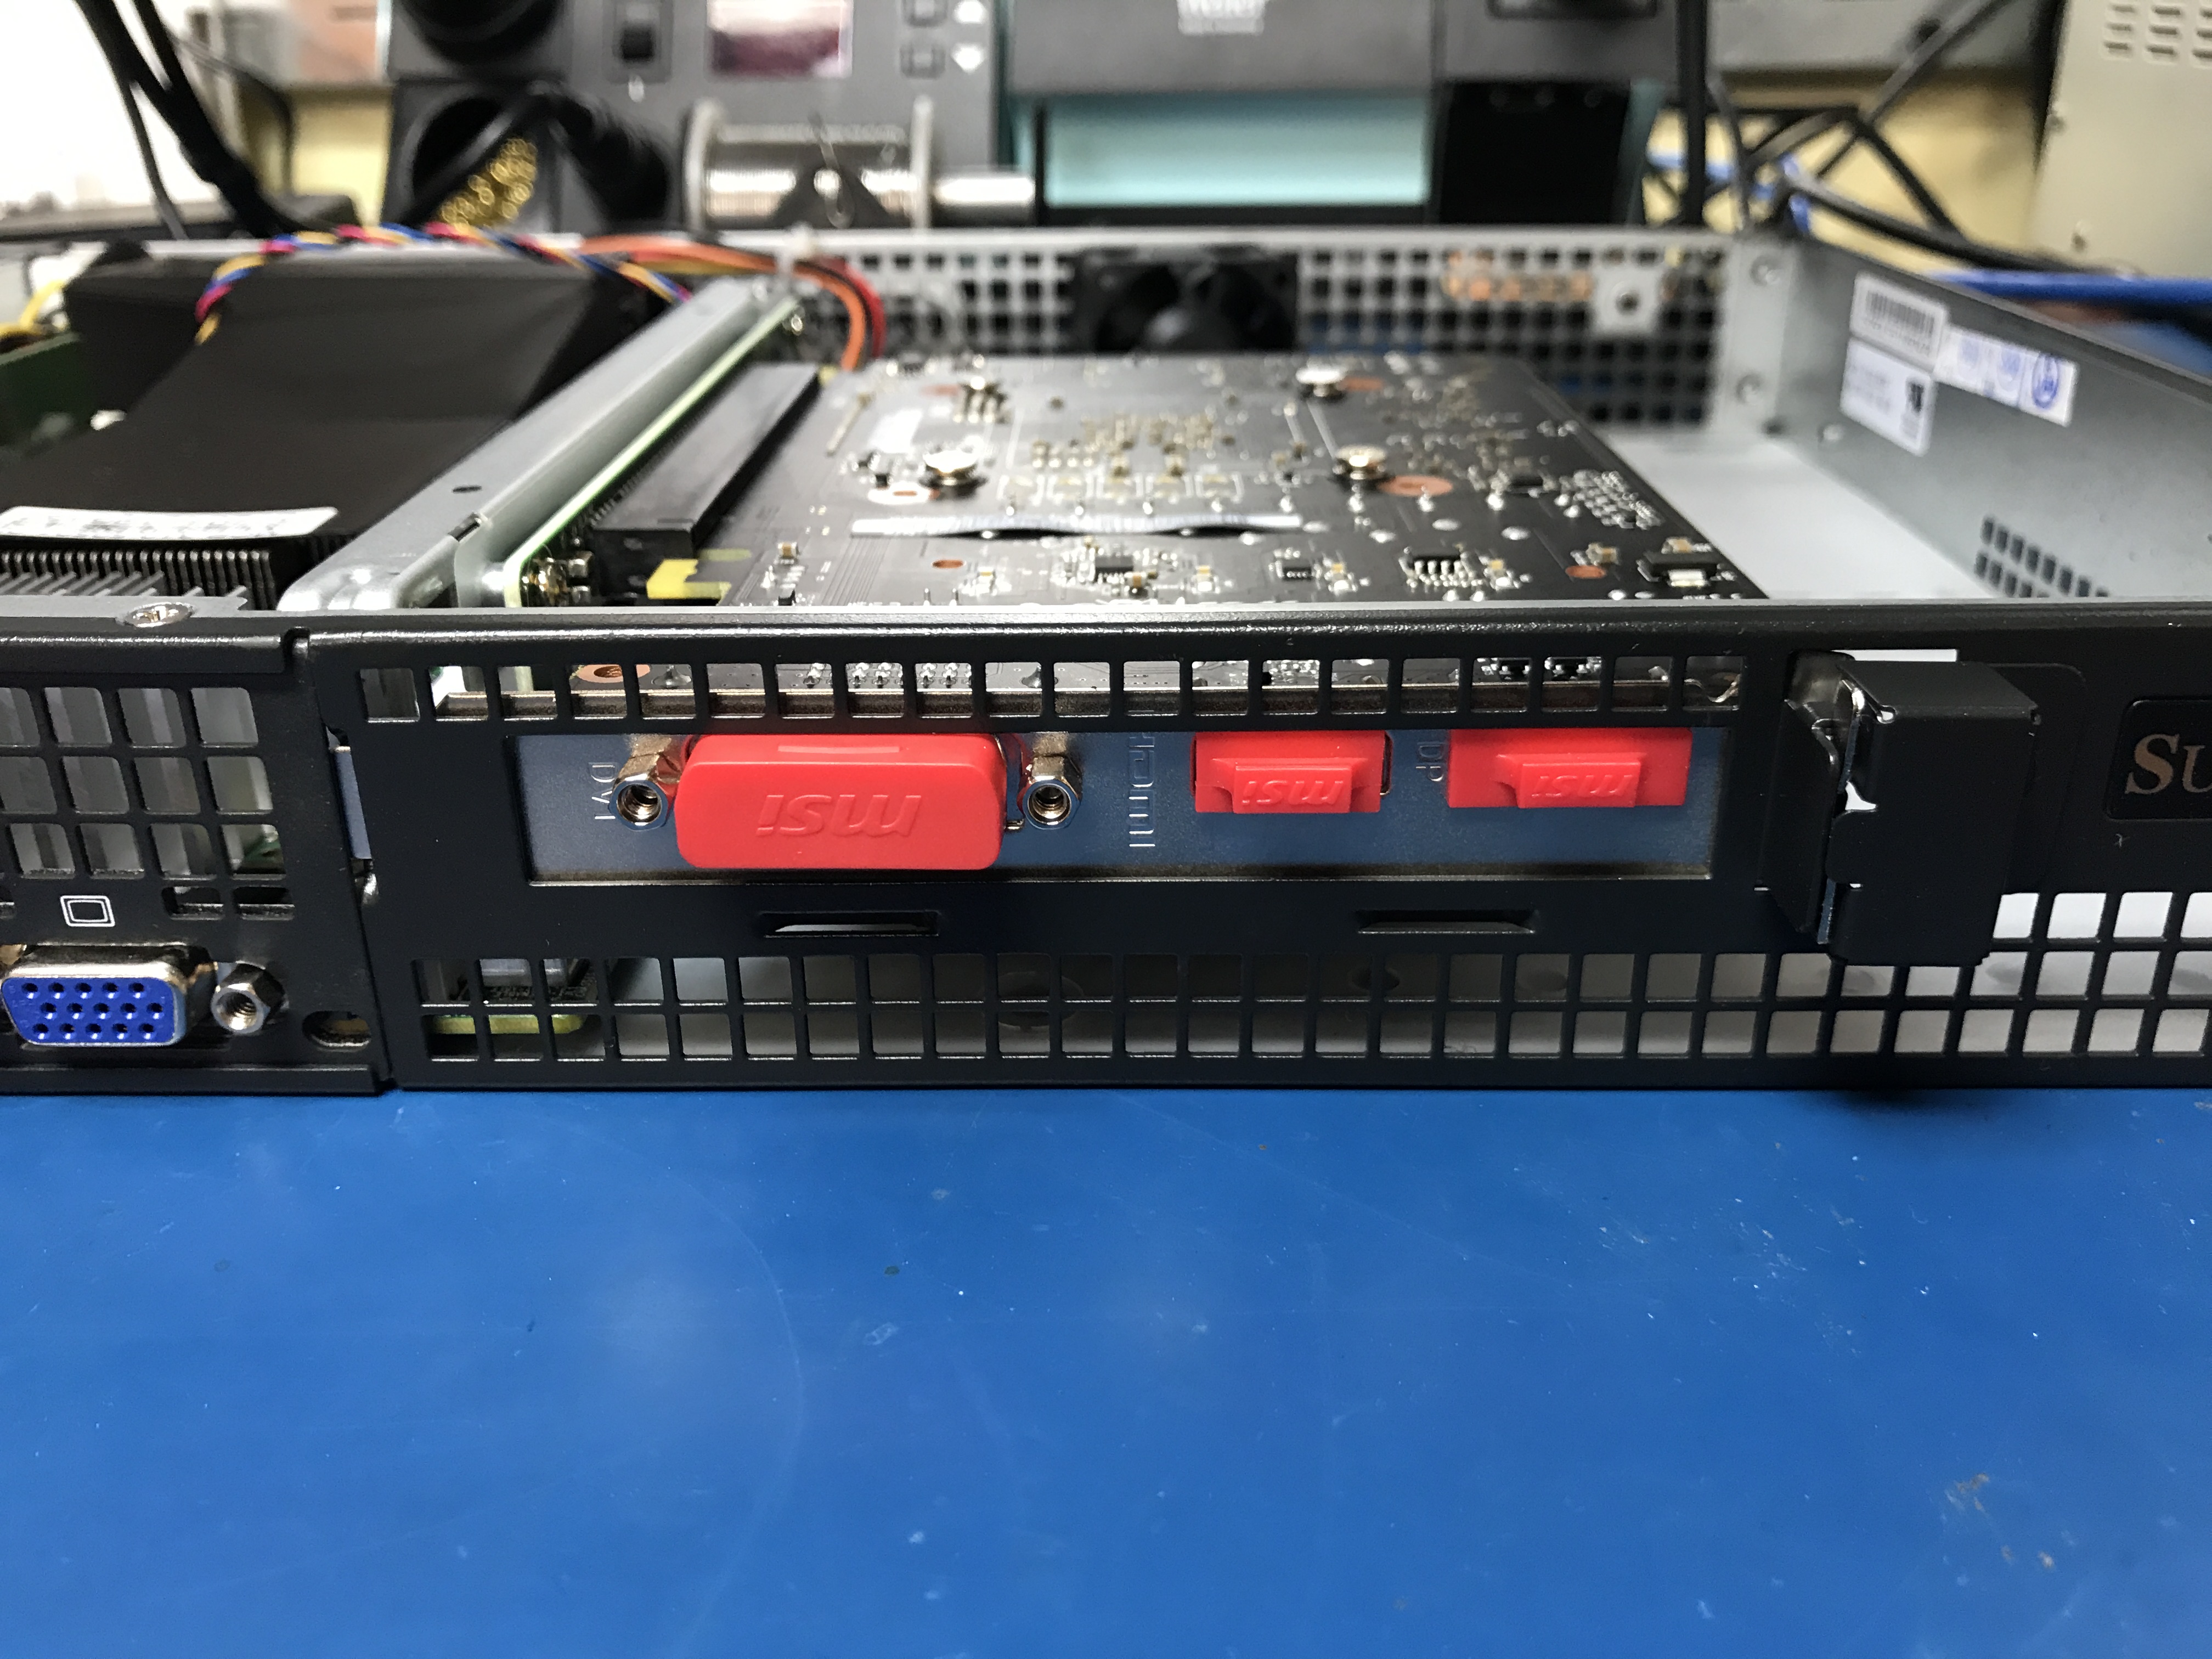\n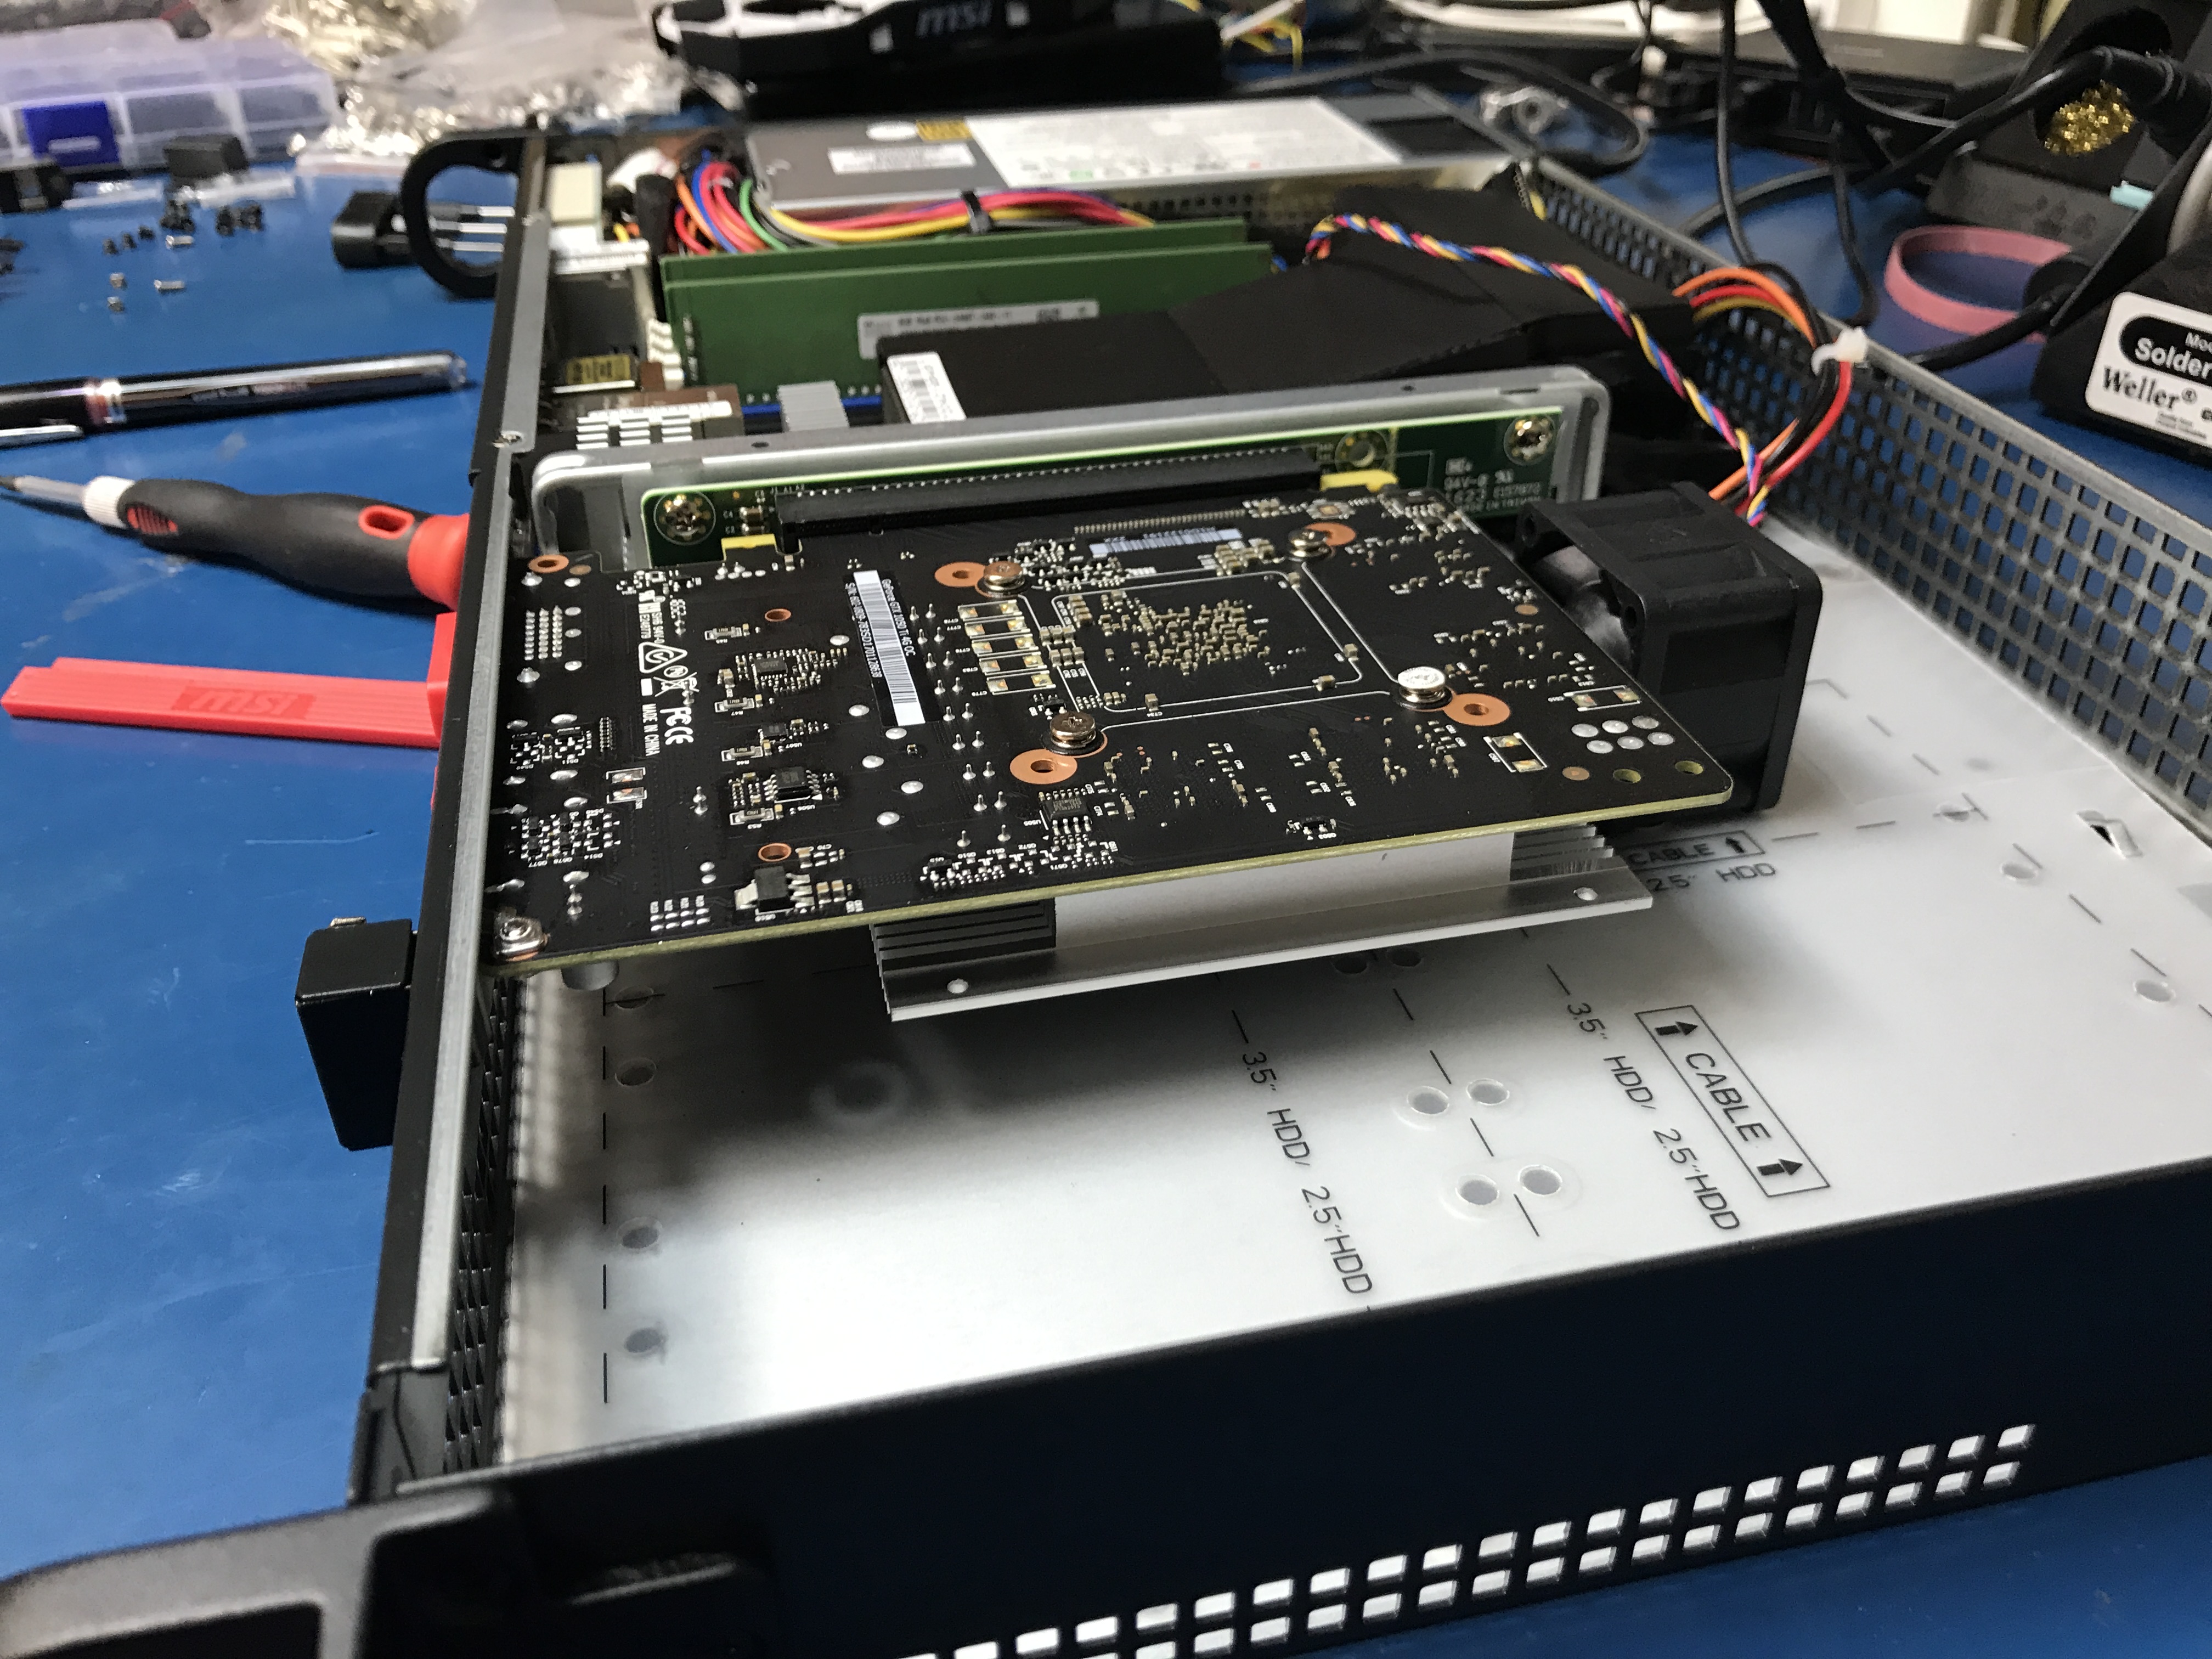\n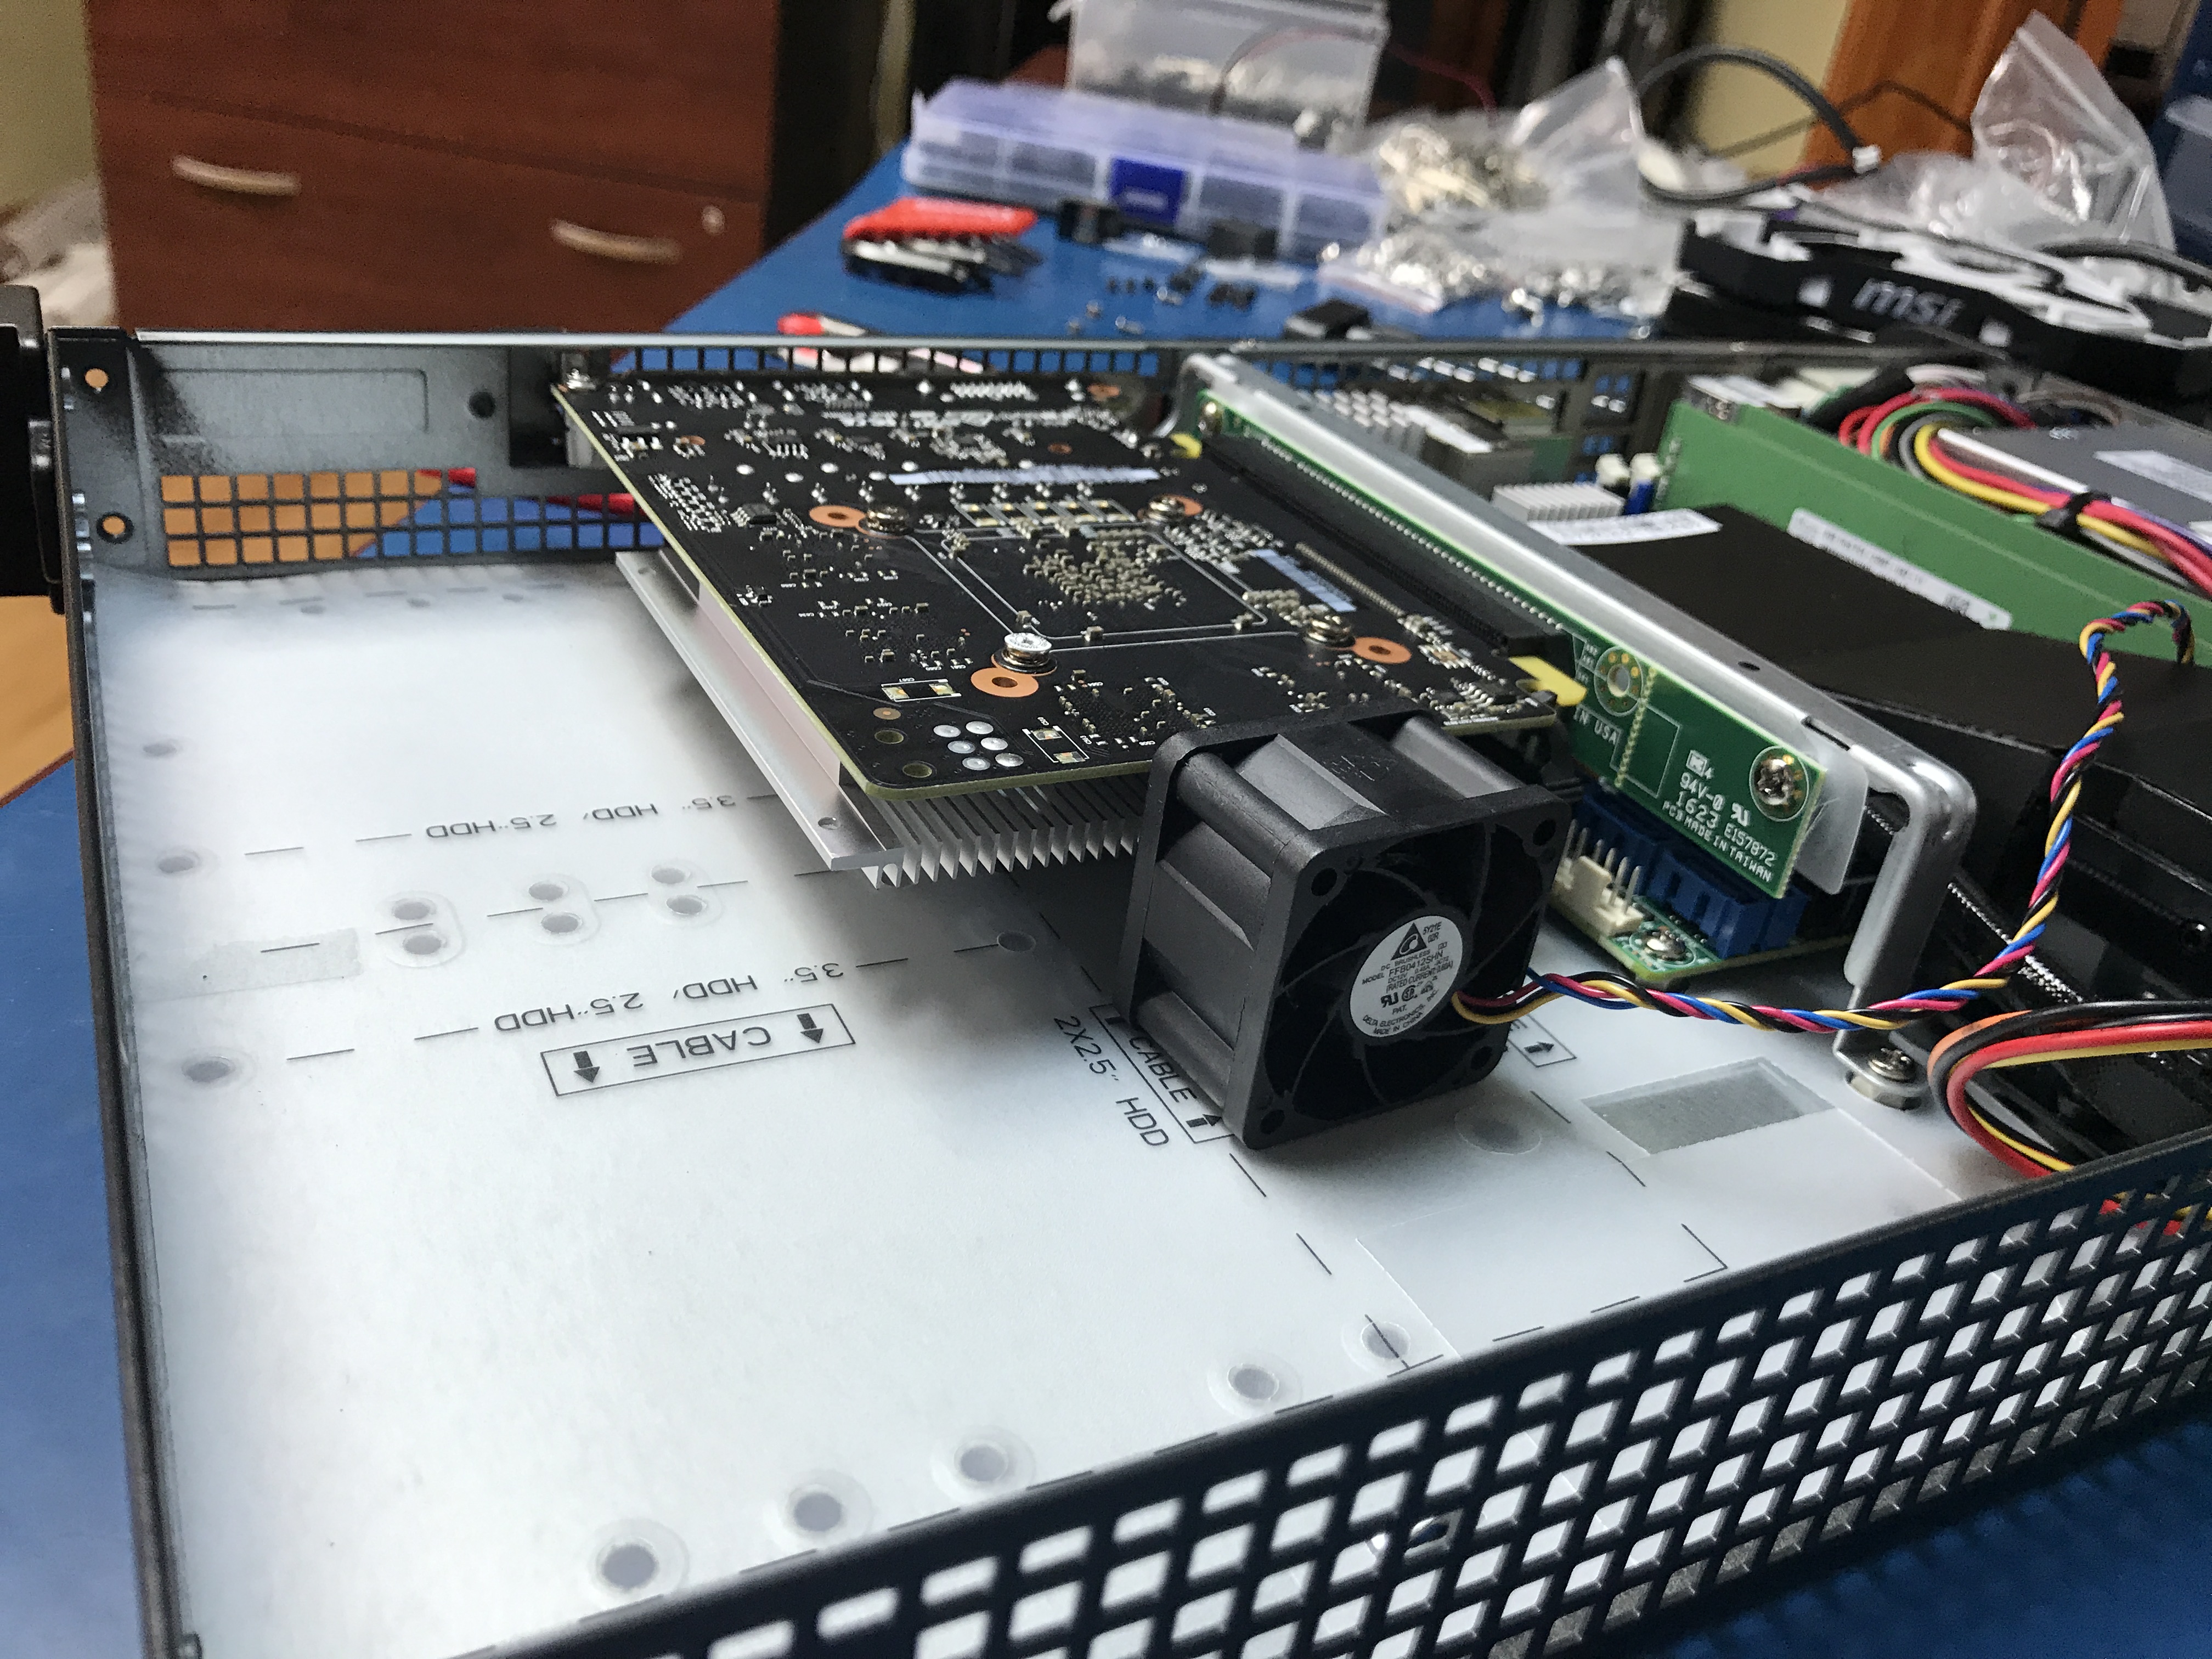\n\nAs you can see, it mounts nicely inside this 1u chassis, and a 1u high RPM fan can be placed behind it. I mount the fan in place with some high strength double sided tape.\n\n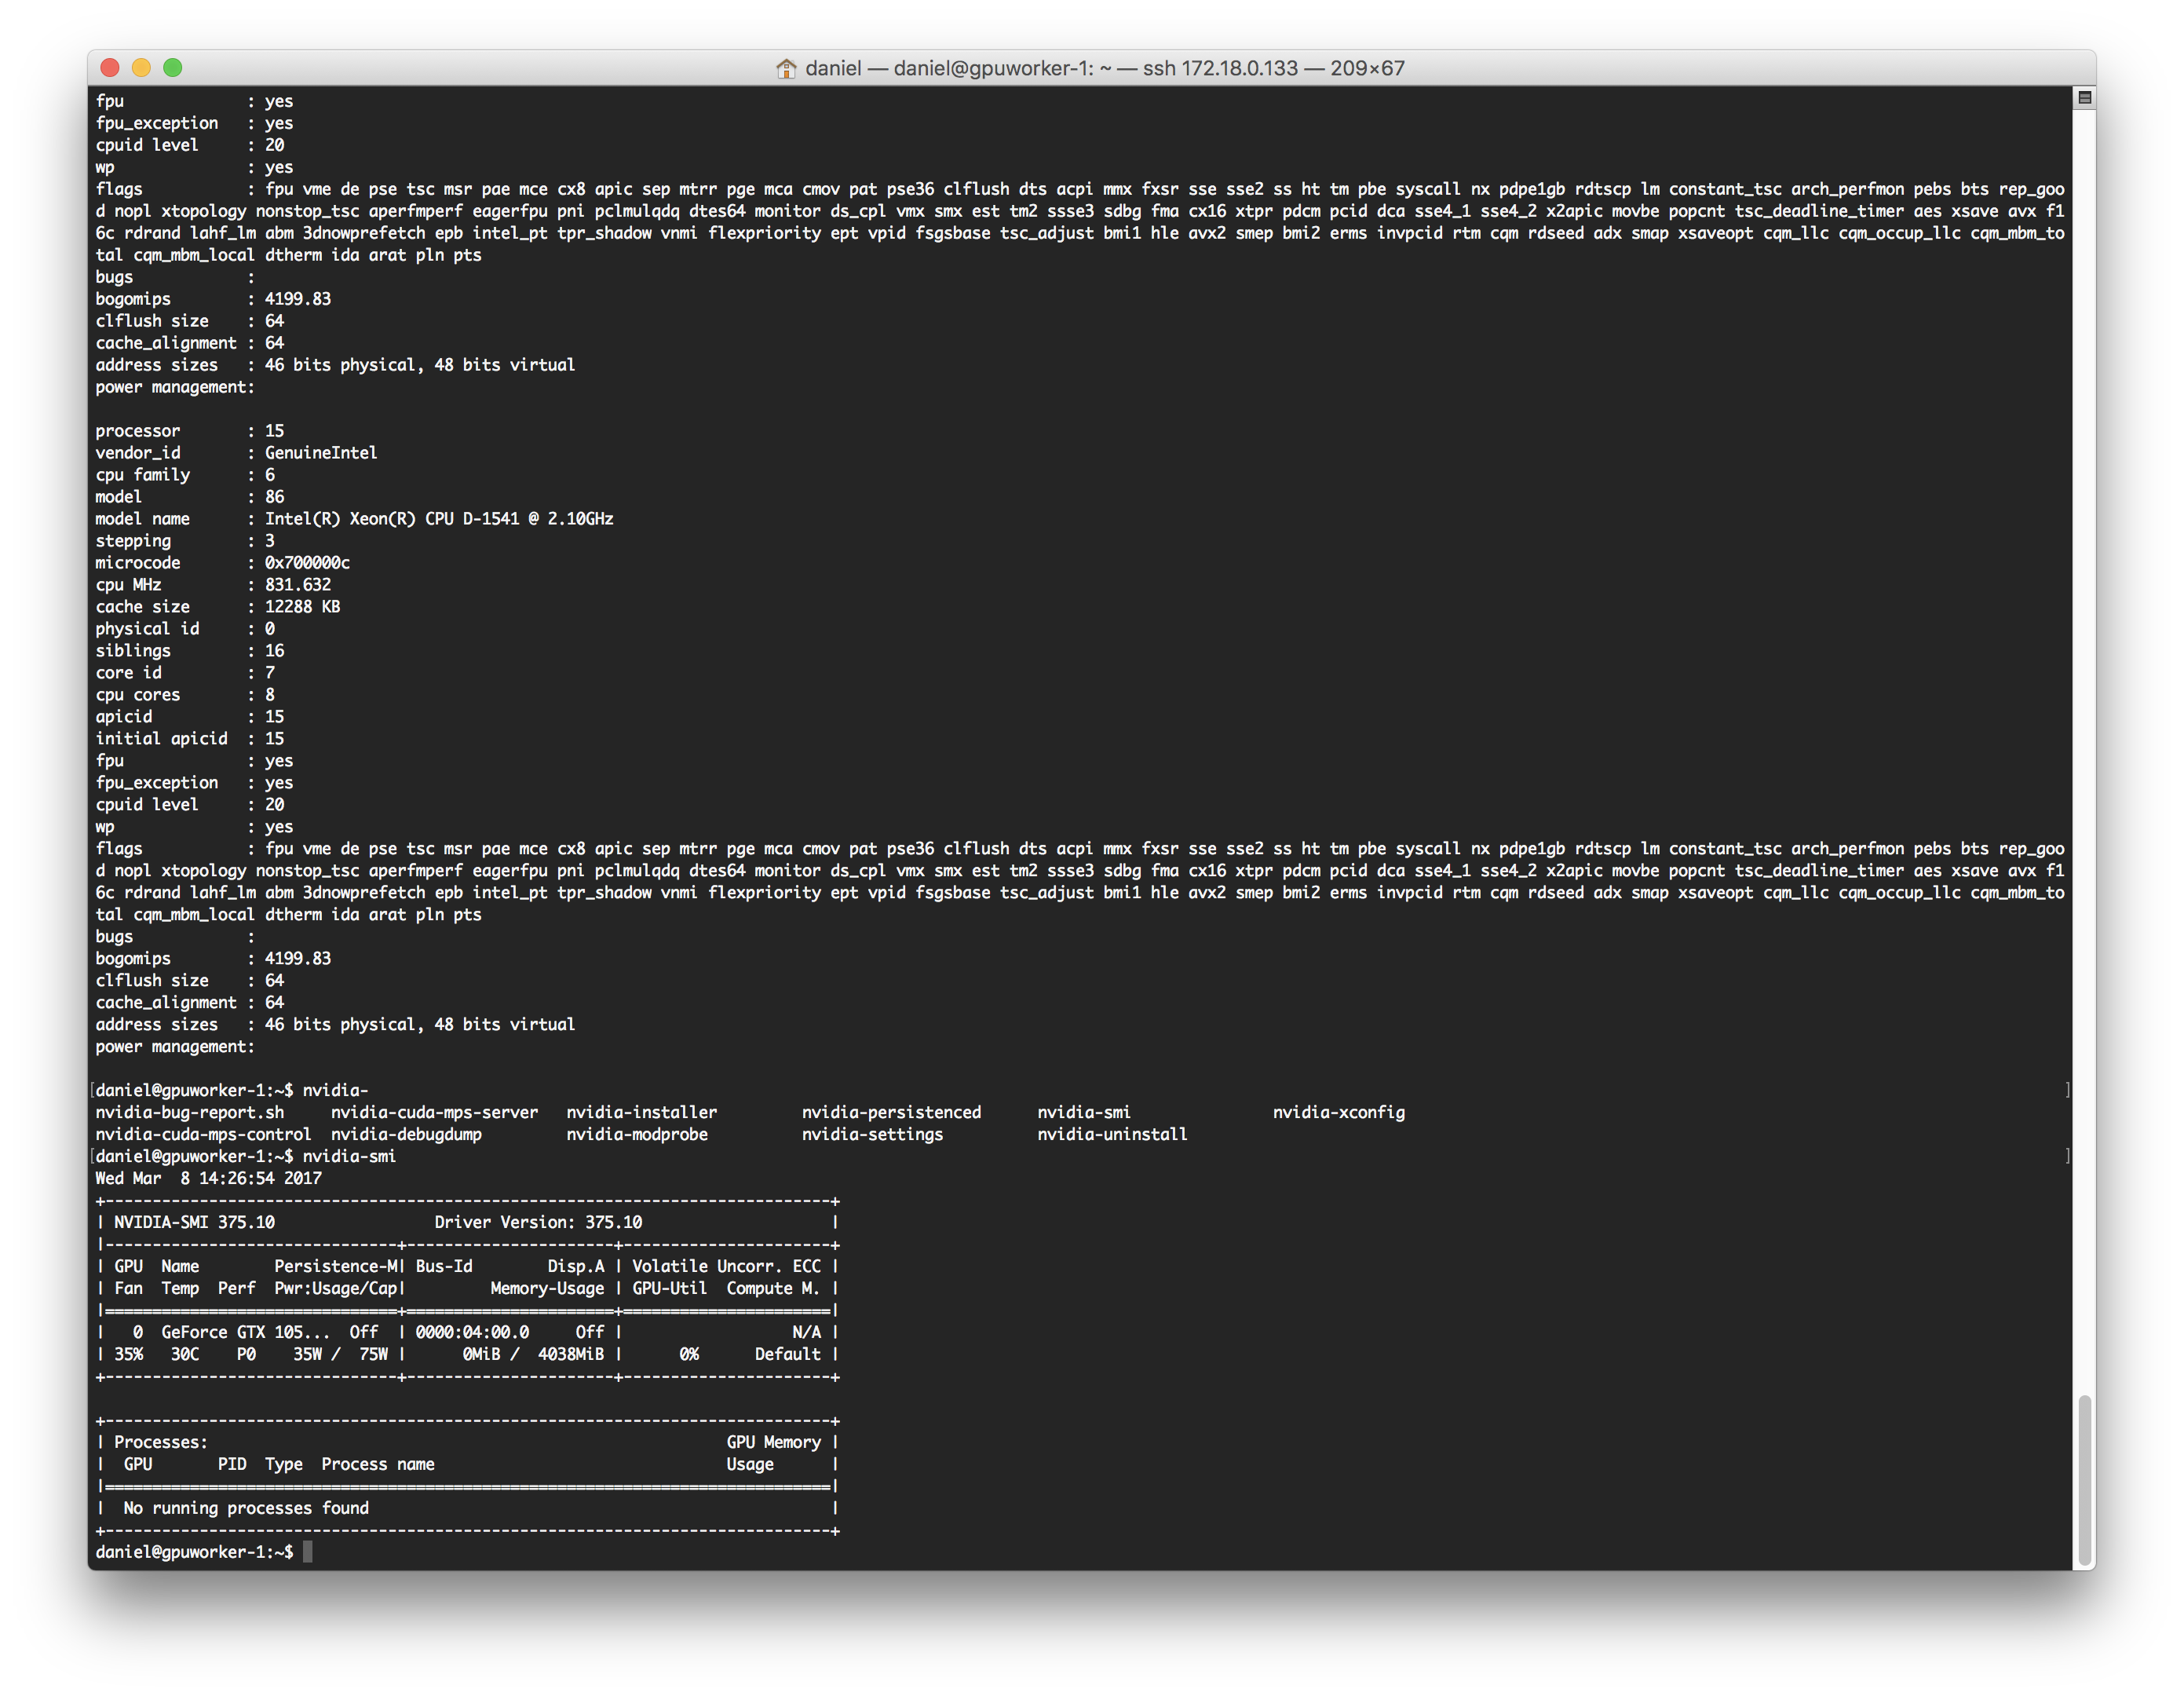\n\nThe GPU runs perfectly on ubuntu with the latest NVIDIA linux drivers and latest CUDA and CUDNN libraries. If you have any questions, drop me a comment below or tweet at me on twitter [@dchote](https://twitter.com/dchote).","html":"\u003cp\u003eAt \u003ca href=\"http://brandyourself.com\" rel=\"nofollow\"\u003eBrandYourself\u003c/a\u003e, we are diving deep in to Machine Learning to enhance some of our upcoming features. The issue I have with the current ML battlefield is that cloud based GPU instances are still relatively new and very expensive. When you start adding high availability requirements, as well as potential concurrent load, it gets prohibitively expensive quickly.\u003c/p\u003e\n\u003ch3\u003eThe Solution\u003c/h3\u003e\n\u003cp\u003eI set out with the goal to build my own 1u low power server with an NVIDIA GPU. I found a good low power server candidate from \u003ca href=\"https://www.supermicro.com\" rel=\"nofollow\"\u003eSupermicro\u003c/a\u003e, the \u003ca href=\"https://www.supermicro.com/products/system/1u/5018/sys-5018d-fn4t.cfm\" rel=\"nofollow\"\u003e5018D-FN4T\u003c/a\u003e 8 core D-1541 Intel® Xeon® processor. It has a 200W power supply and PCI-E 3.0 x16. It\u0026#39;s not the cheapest platform option, but it has great performance: m.2 for storage and a full x16 PCI-E 3.0 slot.\u003c/p\u003e\n\u003cp\u003eFor the GPU it took a lot of looking at photos to determine a card that could be easily modified to fit in a 1u chassis and still maintain an adequate cooling solution. With the launch of the GTX 1050Ti from NVIDIA, I was excited to see MSI launch a product that seemed like it may be my perfect fit. The \u003ca href=\"https://www.msi.com/Graphics-card/GeForce-GTX-1050-Ti-4G-OC.html\" rel=\"nofollow\"\u003eGEFORCE® GTX 1050 TI 4G OC\u003c/a\u003e is a bus powered (75W) 4G 10 series GPU with a stock cooler that has the heatsink fins running end to end on the card.\n4G of ram means we can run 4 workers on the card (our inference model footprint for image processing right now is ~850Mb) and still have a small buffer incase something grows.\nThe 75W power consumption over the PCI bus means no extra power cables required and a lower expected running temperature.\nThe stock heatsink on the card already has end to end fins, so we have the ability to place a 1u high RPM fan at the end of the card and maintain a decent level of airflow over the heatsink.\u003c/p\u003e\n\u003ch3\u003eMaking it fit\u003c/h3\u003e\n\u003cp\u003e\u003cstrong\u003eWARNING: This WILL void your GPU\u0026#39;s warranty...\u003c/strong\u003e\u003c/p\u003e\n\u003cp align=\"center\"\u003e\n\u003cimg src=\"/content/images/2017/04/IMG_0530.JPG\" alt=\"\"\u003e\n\u003c/p\u003e\nAs you can see, the card is already pretty small and the DVI port is in the first row. This means that we can easily cut the bracket and not make any physical modifications to the card itself (such as desoldering or brute force cutting of the DVI port).\n\u003cp\u003eDisassembling is very straight forward.\u003c/p\u003e\n\u003cimg src=\"/content/images/2017/04/IMG_0505-1.JPG\" alt=\"\"\u003e\n\u003cp\u003eThe 4 heatsink screws on the back of the card need to be removed.\u003c/p\u003e\n\u003cimg src=\"/content/images/2017/04/IMG_0506.JPG\" alt=\"\"\u003e\n\u003cp\u003eCarefully disconnect the fan power connector and split apart. Avoid disturbing the heat transfer compound.\u003c/p\u003e\n\u003cimg src=\"/content/images/2017/04/IMG_0507.JPG\" alt=\"\"\u003e\n\u003cp\u003eThere are 4 screws holding the fan shroud to the heatsink. Remove those.\u003c/p\u003e\n\u003cimg src=\"/content/images/2017/04/IMG_0508.JPG\" alt=\"\"\u003e\n\u003cp\u003ePlace the heatsink back on (keeping the same orientation as before) and fasten in place with the original screws (the ones with the springs).\u003c/p\u003e\n\u003cimg src=\"/content/images/2017/04/IMG_0509.JPG\" alt=\"\"\u003e\n\u003cimg src=\"/content/images/2017/04/IMG_0510.JPG\" alt=\"\"\u003e\n\u003cp\u003eNext, locate and remove the screws holding the mounting plate.\u003c/p\u003e\n\u003cimg src=\"/content/images/2017/04/IMG_0511.JPG\" alt=\"\"\u003e\n\u003cimg src=\"/content/images/2017/04/IMG_0512.JPG\" alt=\"\"\u003e\n\u003cp\u003eAs you can see, this card is very slim.\u003c/p\u003e\n\u003cimg src=\"/content/images/2017/04/IMG_0513.JPG\" alt=\"\"\u003e\n\u003cimg src=\"/content/images/2017/04/IMG_0515.JPG\" alt=\"\"\u003e\n\u003cp\u003eWith a pair of pliers, carefully straighten the board mounting support so that the plate will sit flush on a surface.\u003c/p\u003e\n\u003cimg src=\"/content/images/2017/04/IMG_0516.JPG\" alt=\"\"\u003e\n\u003cimg src=\"/content/images/2017/04/IMG_0517.JPG\" alt=\"\"\u003e\n\u003cp\u003eApply some masking tape and draw your cutting line. Single slot plates are typically 18mm wide.\u003c/p\u003e\n\u003cimg src=\"/content/images/2017/04/IMG_0518.JPG\" alt=\"\"\u003e\n\u003cp\u003eWhile using appropriate safety equipment, cut along your line using a bandsaw (a hacksaw would probably work, too).\u003c/p\u003e\n\u003cimg src=\"/content/images/2017/04/IMG_0519.JPG\" alt=\"\"\u003e\n\u003cp\u003eFile off the sharp edges.\u003c/p\u003e\n\u003cimg src=\"/content/images/2017/04/IMG_0520.JPG\" alt=\"\"\u003e\n\u003cp\u003eHooray, we have a single slot mounting plate!\u003c/p\u003e\n\u003cimg src=\"/content/images/2017/04/IMG_0521.JPG\" alt=\"\"\u003e\n\u003cp\u003eBend back the board mounting support.\u003c/p\u003e\n\u003cimg src=\"/content/images/2017/04/IMG_0522.JPG\" alt=\"\"\u003e\n\u003cimg src=\"/content/images/2017/04/IMG_0523.JPG\" alt=\"\"\u003e\n\u003cp\u003eNow we have a low profile GPU, without heavy modification or destruction of the PCB/components!\u003c/p\u003e\n\u003cimg src=\"/content/images/2017/04/IMG_0525.JPG\" alt=\"\"\u003e\n\u003cimg src=\"/content/images/2017/04/IMG_0526.JPG\" alt=\"\"\u003e\n\u003cimg src=\"/content/images/2017/04/IMG_0527.JPG\" alt=\"\"\u003e\n\u003cp\u003eAs you can see, it mounts nicely inside this 1u chassis, and a 1u high RPM fan can be placed behind it. I mount the fan in place with some high strength double sided tape.\u003c/p\u003e\n\u003cimg src=\"/content/images/2017/04/Screen-Shot-2017-03-08-at-2-27-00-PM.png\" alt=\"\"\u003e\n\u003cp\u003eThe GPU runs perfectly on ubuntu with the latest NVIDIA linux drivers and latest CUDA and CUDNN libraries. If you have any questions, drop me a comment below or tweet at me on twitter \u003ca href=\"https://twitter.com/dchote\" rel=\"nofollow\"\u003e@dchote\u003c/a\u003e.\u003c/p\u003e\n","excerpt":"","metaTitle":"","metaDescription":"","status":"published","featured":false,"publishedAt":"2017-04-06T14:51:54Z","authorId":"190160de54f2192bd5b8734ec8808086","authorName":"Daniel Chote","authorSlug":"daniel","heroMediaId":"90d32feb088156ee2cd4008f16ec17a7","projectId":"","tags":[{"id":"60103f47eb65b46c6138b9d6fc7b17d0","name":"Machine Learning","slug":"machine-learning"},{"id":"ea8ba22edf4d47c7325d88a051118500","name":"GPU","slug":"gpu"},{"id":"9b3625f33e46c5576a2ffb4c6ff5304c","name":"Supermicro","slug":"supermicro"},{"id":"614e3fef27b2bf48aec6759cb2c26bfb","name":"Low Power Server","slug":"low-power-server"},{"id":"39509342d1486390e4356778e40bda83","name":"BrandYourself","slug":"brandyourself"}],"createdAt":"2026-10-18T13:16:27Z","updatedAt":"2026-10-18T13:16:27Z"}],"site":{"id":"projectable","theme":"projectable","title":"Daniel Chote's Project Blog","description":"Software Development, Hardware Hacking, Sim Racing, Multirotors and Robots!","timezone":"America/New_York","postsPerPage":10,"logoMediaId":"21557257b3f2ecc4b3fa875b808097a7","coverMediaId":"25f1417193daeb2af73861aaa0dd17fd","copyright":"© Daniel Chote","twitterUrl":"https://twitter.com/dchote","linkedinUrl":"https://www.linkedin.com/in/dchote","googleTagId":"G-07GJBQVM38","hosts":[{"host":"new.projectable.me","canonical":false},{"host":"projectable.me","canonical":true},{"host":"www.projectable.me","canonical":false}]},"tag":{"name":"GPU","slug":"gpu"},"tagId":"ea8ba22edf4d47c7325d88a051118500","total":1}