{"authorId":"","cover":"/content/images/2016/08/IMG_7487.jpg","heroes":{"5c6c6c8242f9d3e5e6550eef9bddccaf":"/content/images/2016/08/IMG_8842.JPG"},"kind":"tag","logo":"/content/images/2016/08/projectable-me-4.png","nav":[{"id":"62e854d471683dea63488bcbca5c6188","label":"Home","url":"/","sortOrder":0},{"id":"1bc84fb15620acd635df7735a0b8ddd8","label":"Raspberry Pi","url":"/tag/raspberry-pi/","sortOrder":1},{"id":"3207e2fec51d66d2a5b3d8d04feb9dd8","label":"Sim Racing","url":"/tag/sim-racing/","sortOrder":2},{"id":"59115afd52e59a74faa4b386e00ae3fa","label":"About","url":"/about-me/","sortOrder":3}],"page":1,"perPage":10,"posts":[{"id":"5c6c6c8242f9d3e5e6550eef9bddccaf","siteId":"projectable","slug":"building-an-internet-walkie-talkie-using-a-raspberry-pi-v3","title":"Building an Internet Walkie Talkie using a Raspberry Pi v3","markdown":"###Introducing [talkiepi](https://github.com/dchote/talkiepi).\n\n**New post: http://projectable.me/i-built-a-wifi-walkie-talkie-for-my-kids-now-you-can-too/**\n\nIve had this idea for a VERY long time, to build a relatively cost effective, kid friendly, internet enabled walkie talkie. It has to be as simple as an oldschool walkie talkie to use, but it should run over wifi and allow kids to communicate with their friends in a simple and reliable way.\n\nI recently came across a commandline mumble client written in go, called [Barnard](https://github.com/layeh/barnard). When I tested it, it seemed to do the job, so this weekend I ran with it and created [talkiepi](https://github.com/dchote/talkiepi). \n\nThe biggest hurdle I had was finding a GPIO library that worked for my use case, and worked inside the existing barnard codebase. My initial digging with [go-rpio](https://github.com/stianeikeland/go-rpio) was a huge headache of crashes that shouldnt happen. So I decided to go the sysfs route and settled on a slight modification to [Brian Armstrong's](https://github.com/brian-armstrong/gpio) [go GPIO library](https://github.com/dchote/gpio). After getting this working I realized I still had to enable the internal pullup on the button pin, so I went back to using [go-rpio](https://github.com/stianeikeland/go-rpio) for just that.\n\nI managed to fix the bug that stopped audio from sending when you press the button the second time. talkiepi is now fully functional! I will be working on some cleanup and housekeeping stuff (such as config files) next.\n\n____\n\n###Try it yourself!\nYou can play with it on your pi and see how it goes, I do recommend using the latest raspbian image though.\n\nFirst install the required raspbian packages `apt-get install golang libopenal-dev libopus-dev`. Once installed setup your `GOPATH`. I recommend creating a directory in your home called `gocode`, then `export GOPATH=$HOME/gocode`. You can add that to your .profile to persist it for future logins etc.\n\nChange to your new directory `cd $GOPATH` and then run the following:\n```\ngo get github.com/layeh/gopus\ngo get github.com/dchote/talkiepi\n```\n\nNow you can jump in to the code and run it:\n```\ncd $GOPATH/src/github.com/dchote/talkiepi\ngo run cmd/talkiepi/main.go -server %YOUR_MUMBLE_SERVER_IP% -username %USERNAME_FOR_MUMBLE%\n```\n\nIf you want to use a USB speakerphone device like I am, plug it in and run `aplay -l` to determine the device number, and then edit your alsa config `/usr/share/alsa/alsa.conf` changing the defaults to use the index of your USB device (typically 1).\n```\ndefaults.ctl.card 1\ndefaults.pcm.card 1\n```\n----\n###Whats Next\nI will work on getting this stable in my free time. In short order here are the next set of features I will be adding:\n\n* Join a specified channel\n* Config file for all settings\n* Systemd script to start on boot\n\nI will also work on modeling an enclosure for everything to go in!\n\n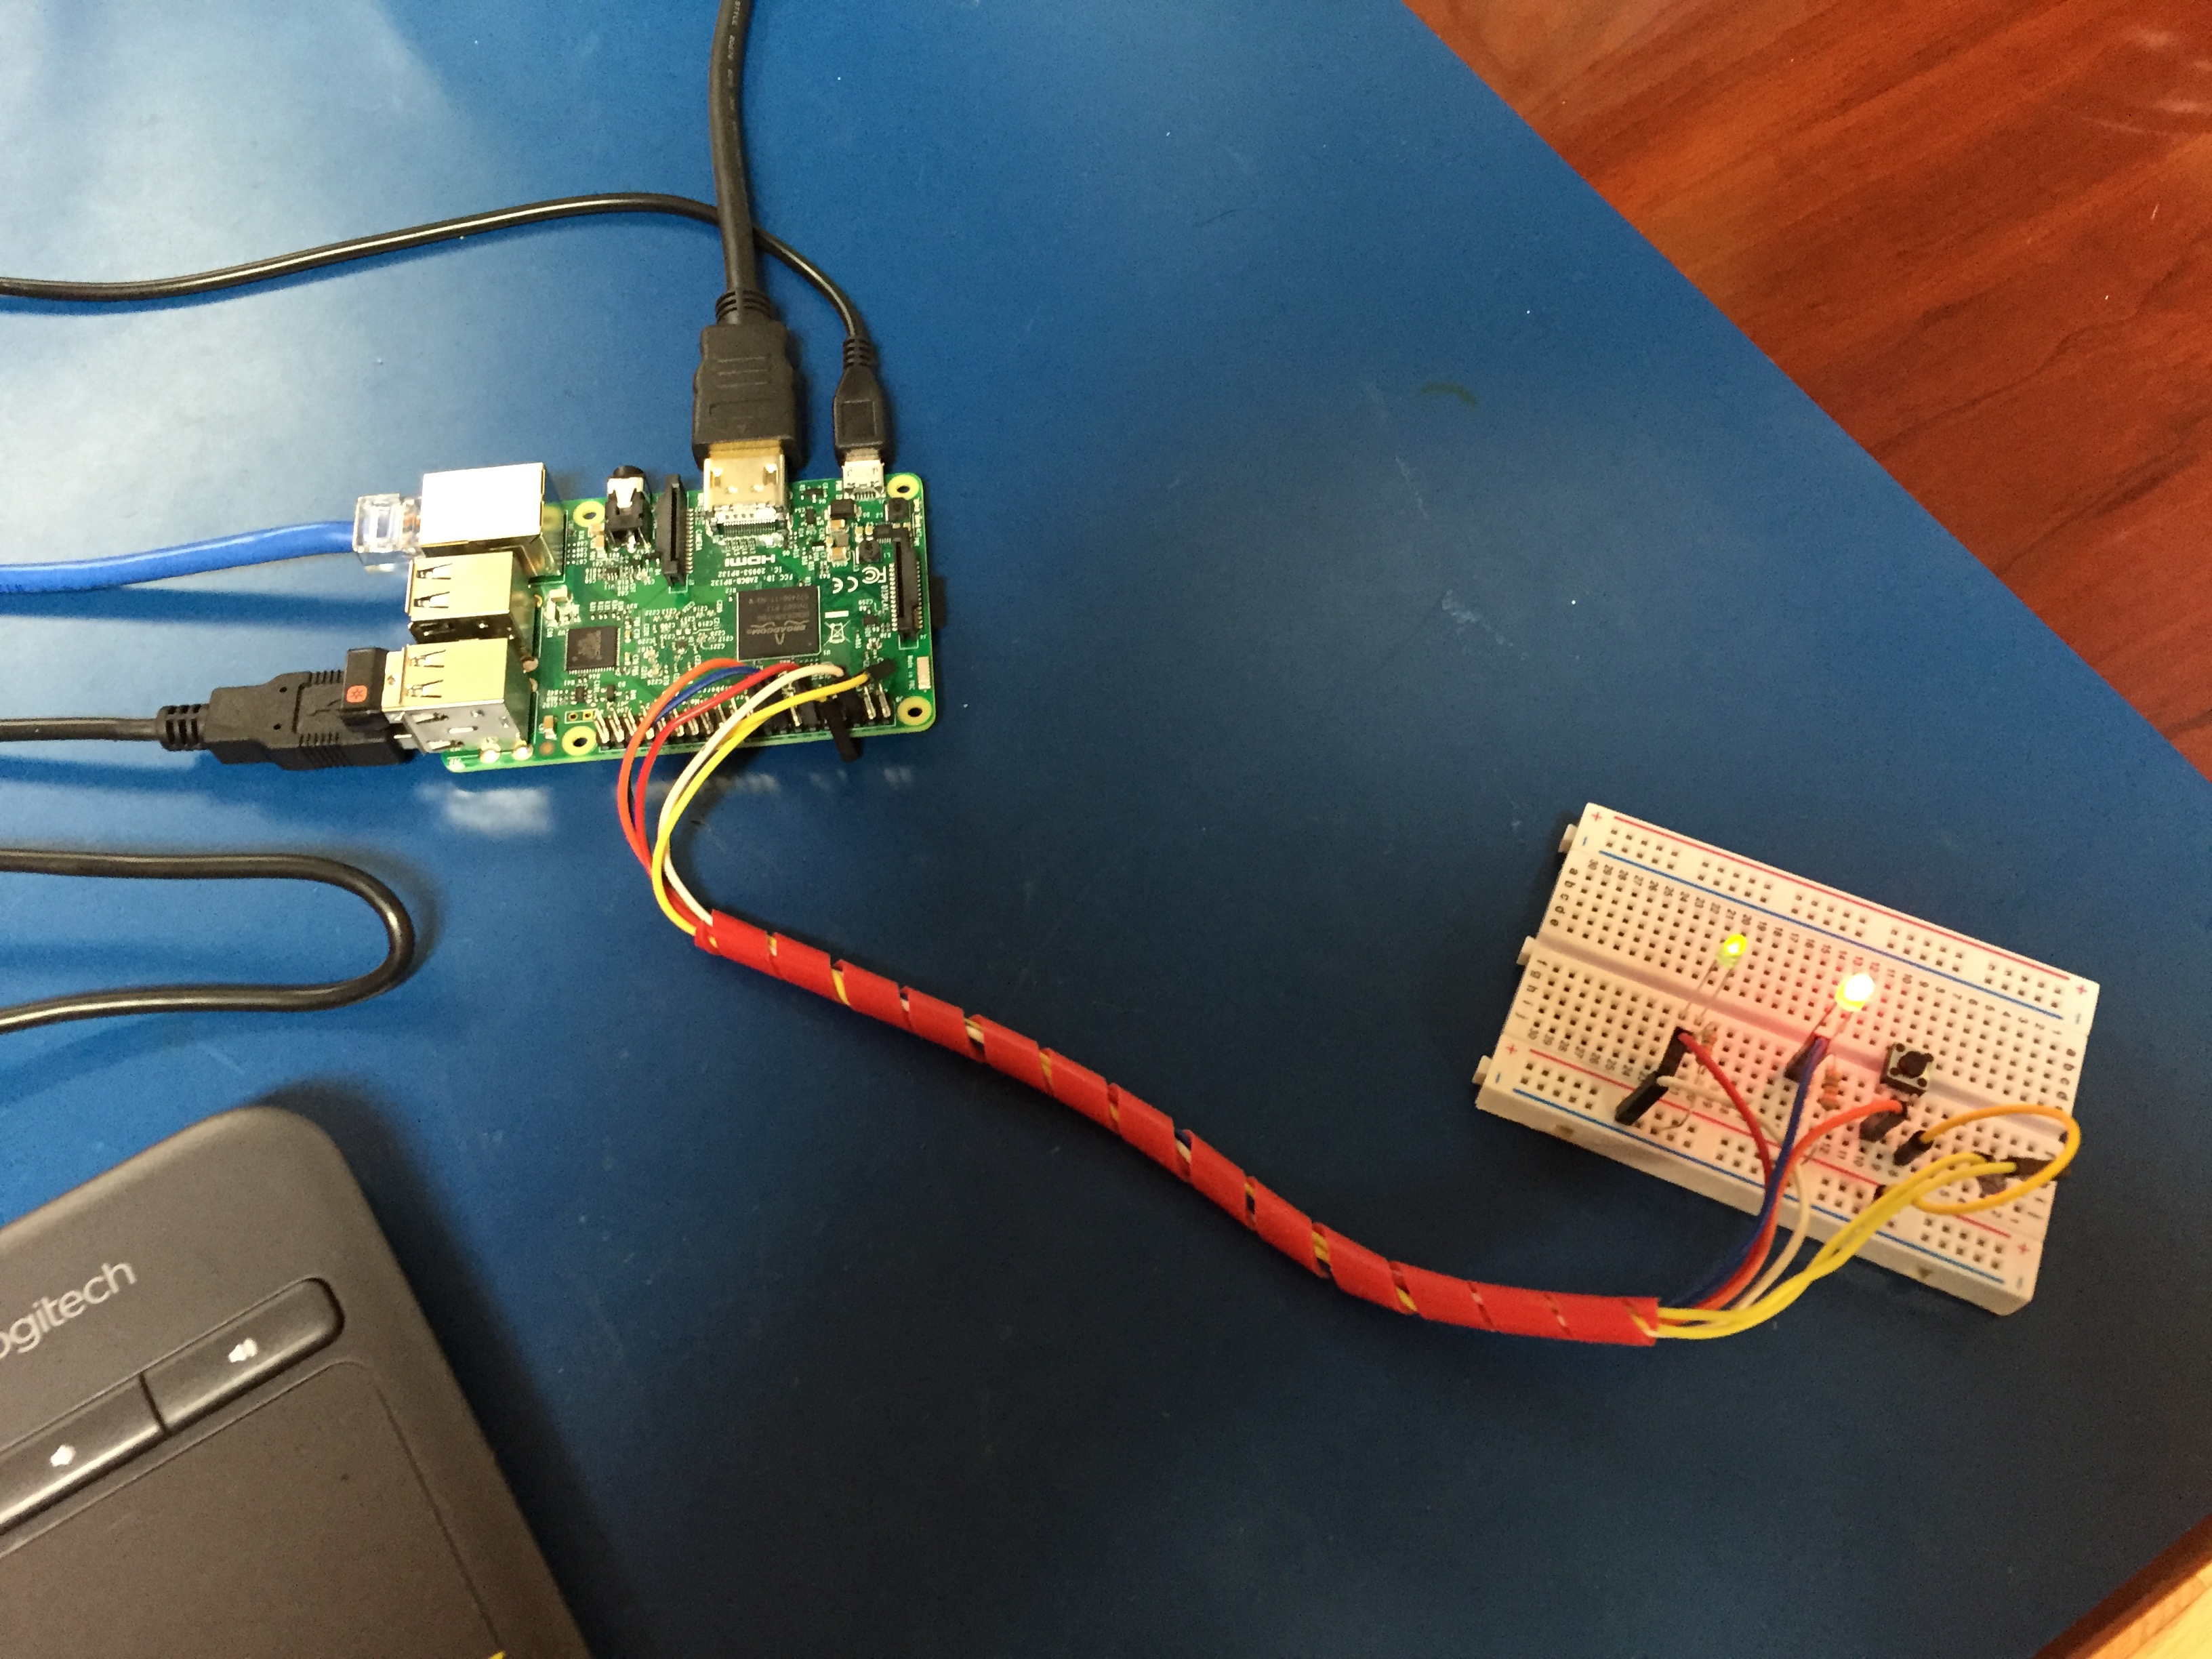\n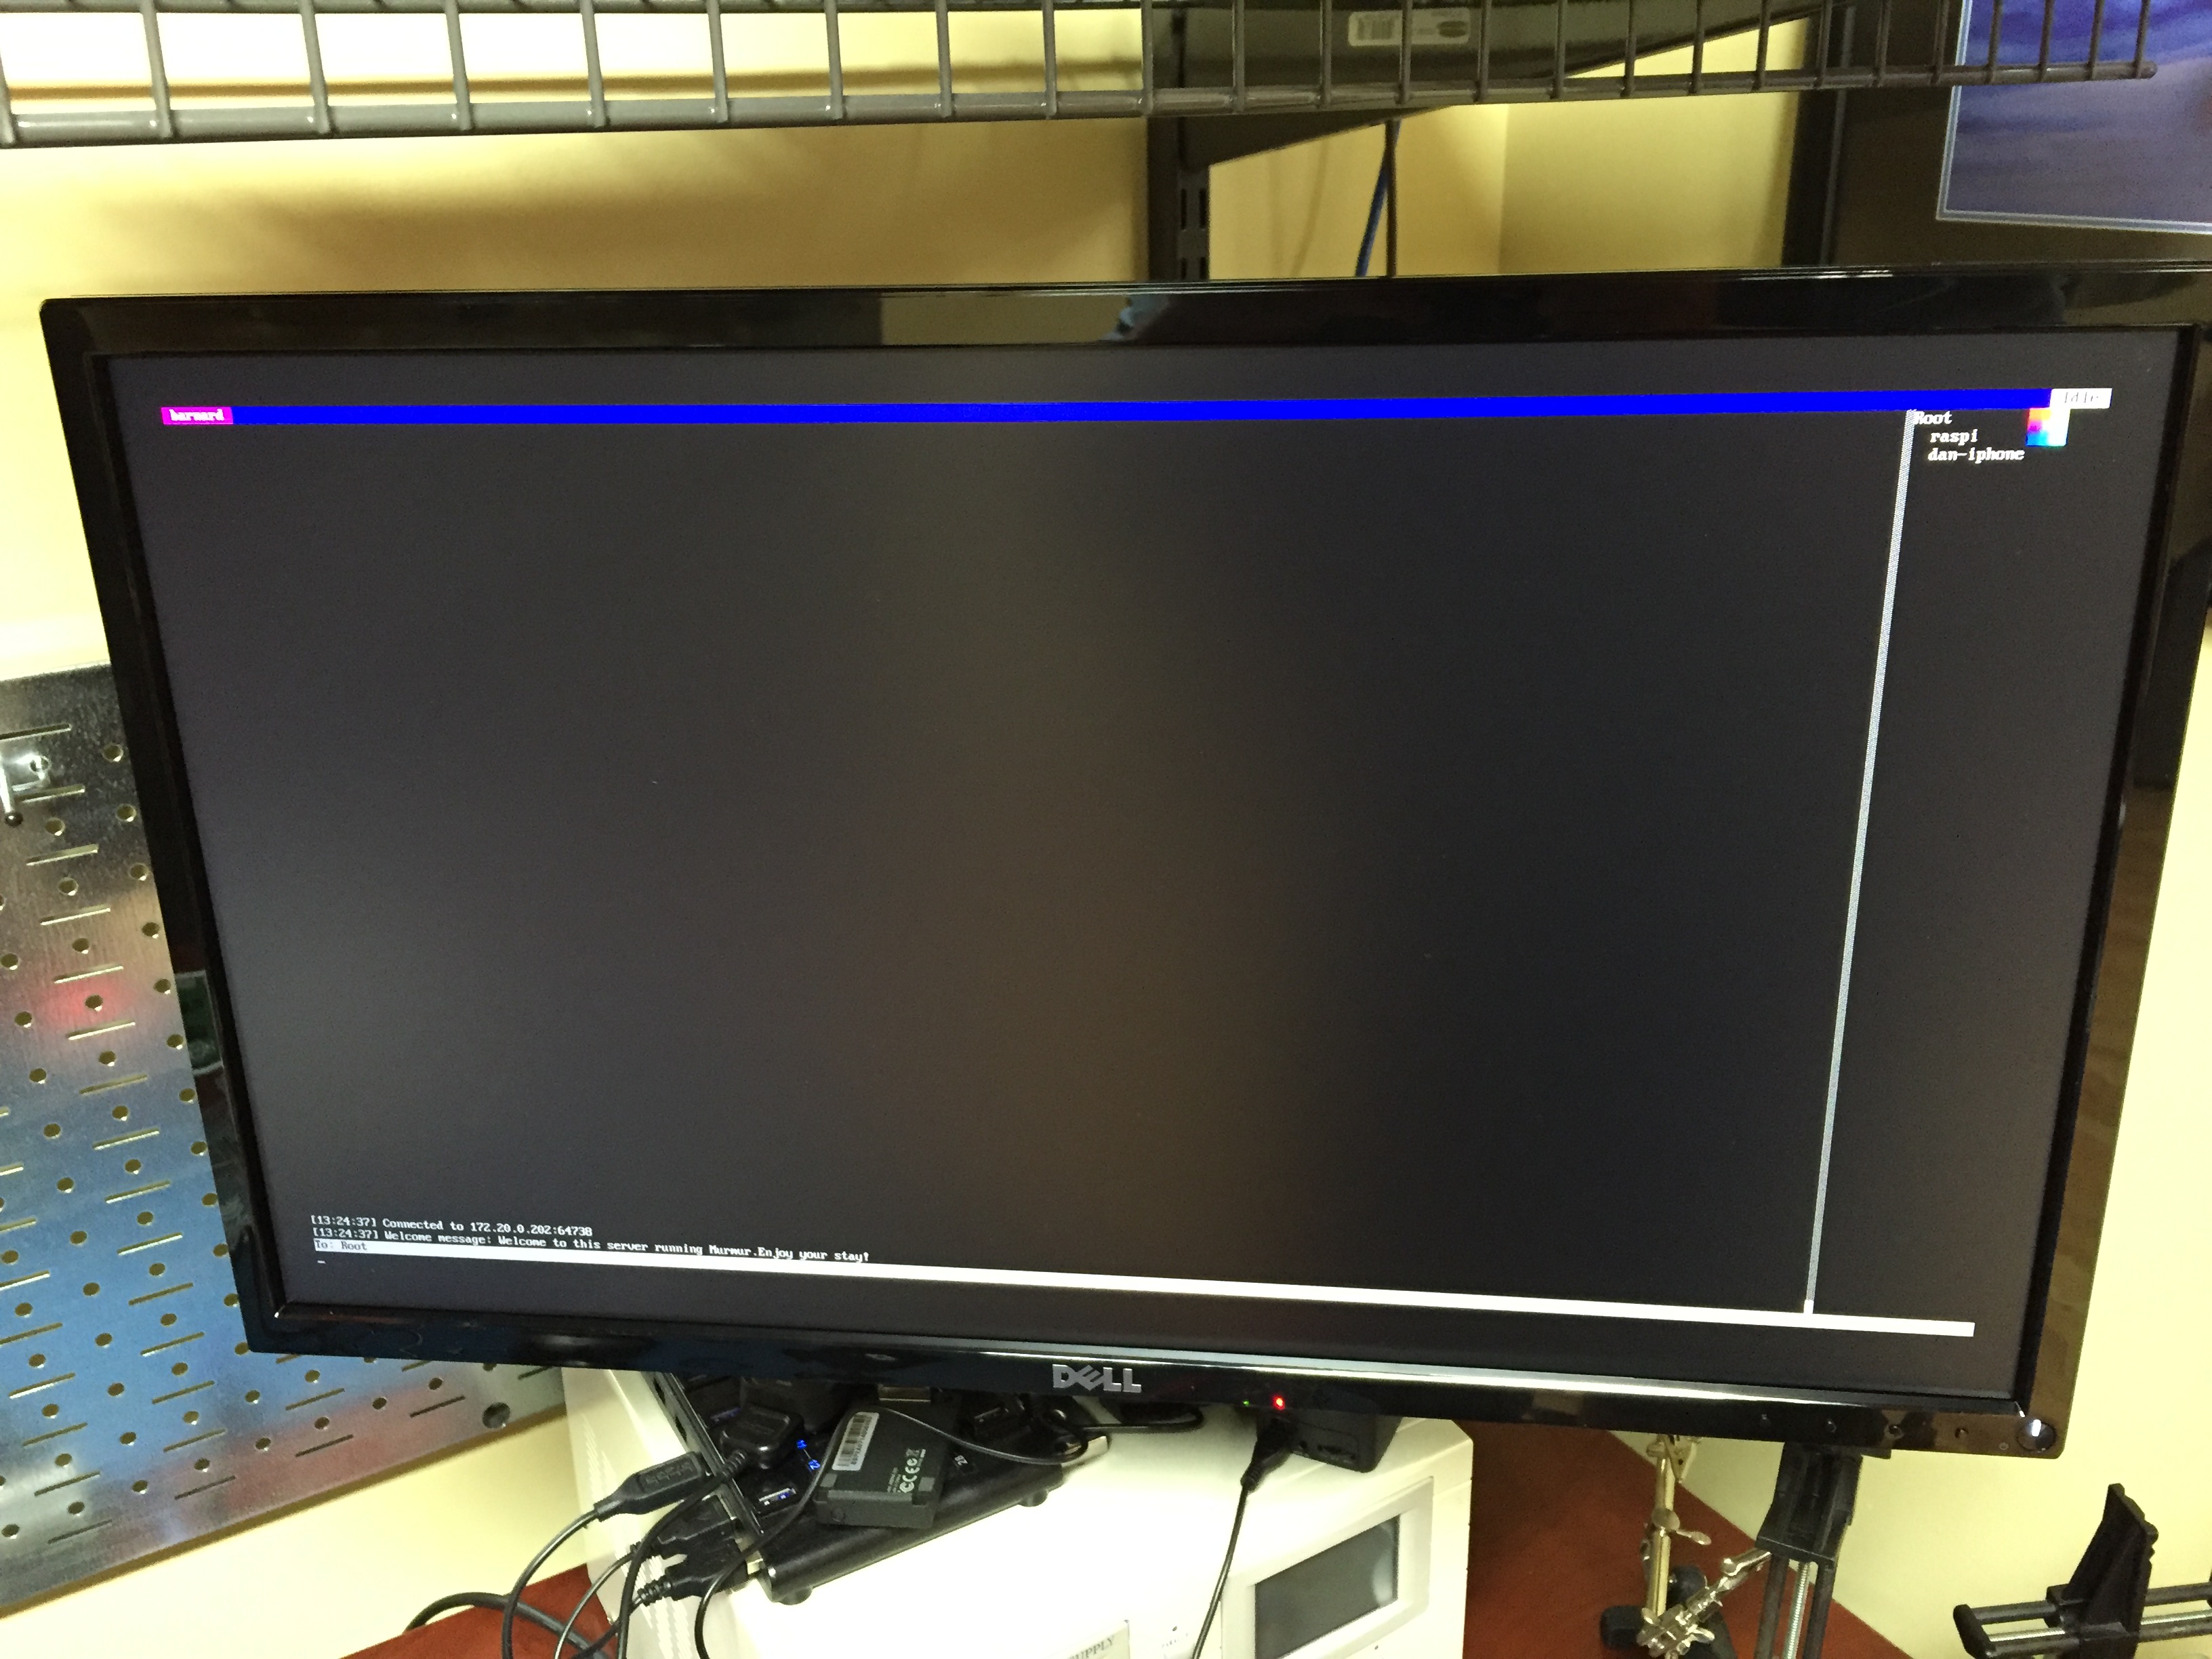\n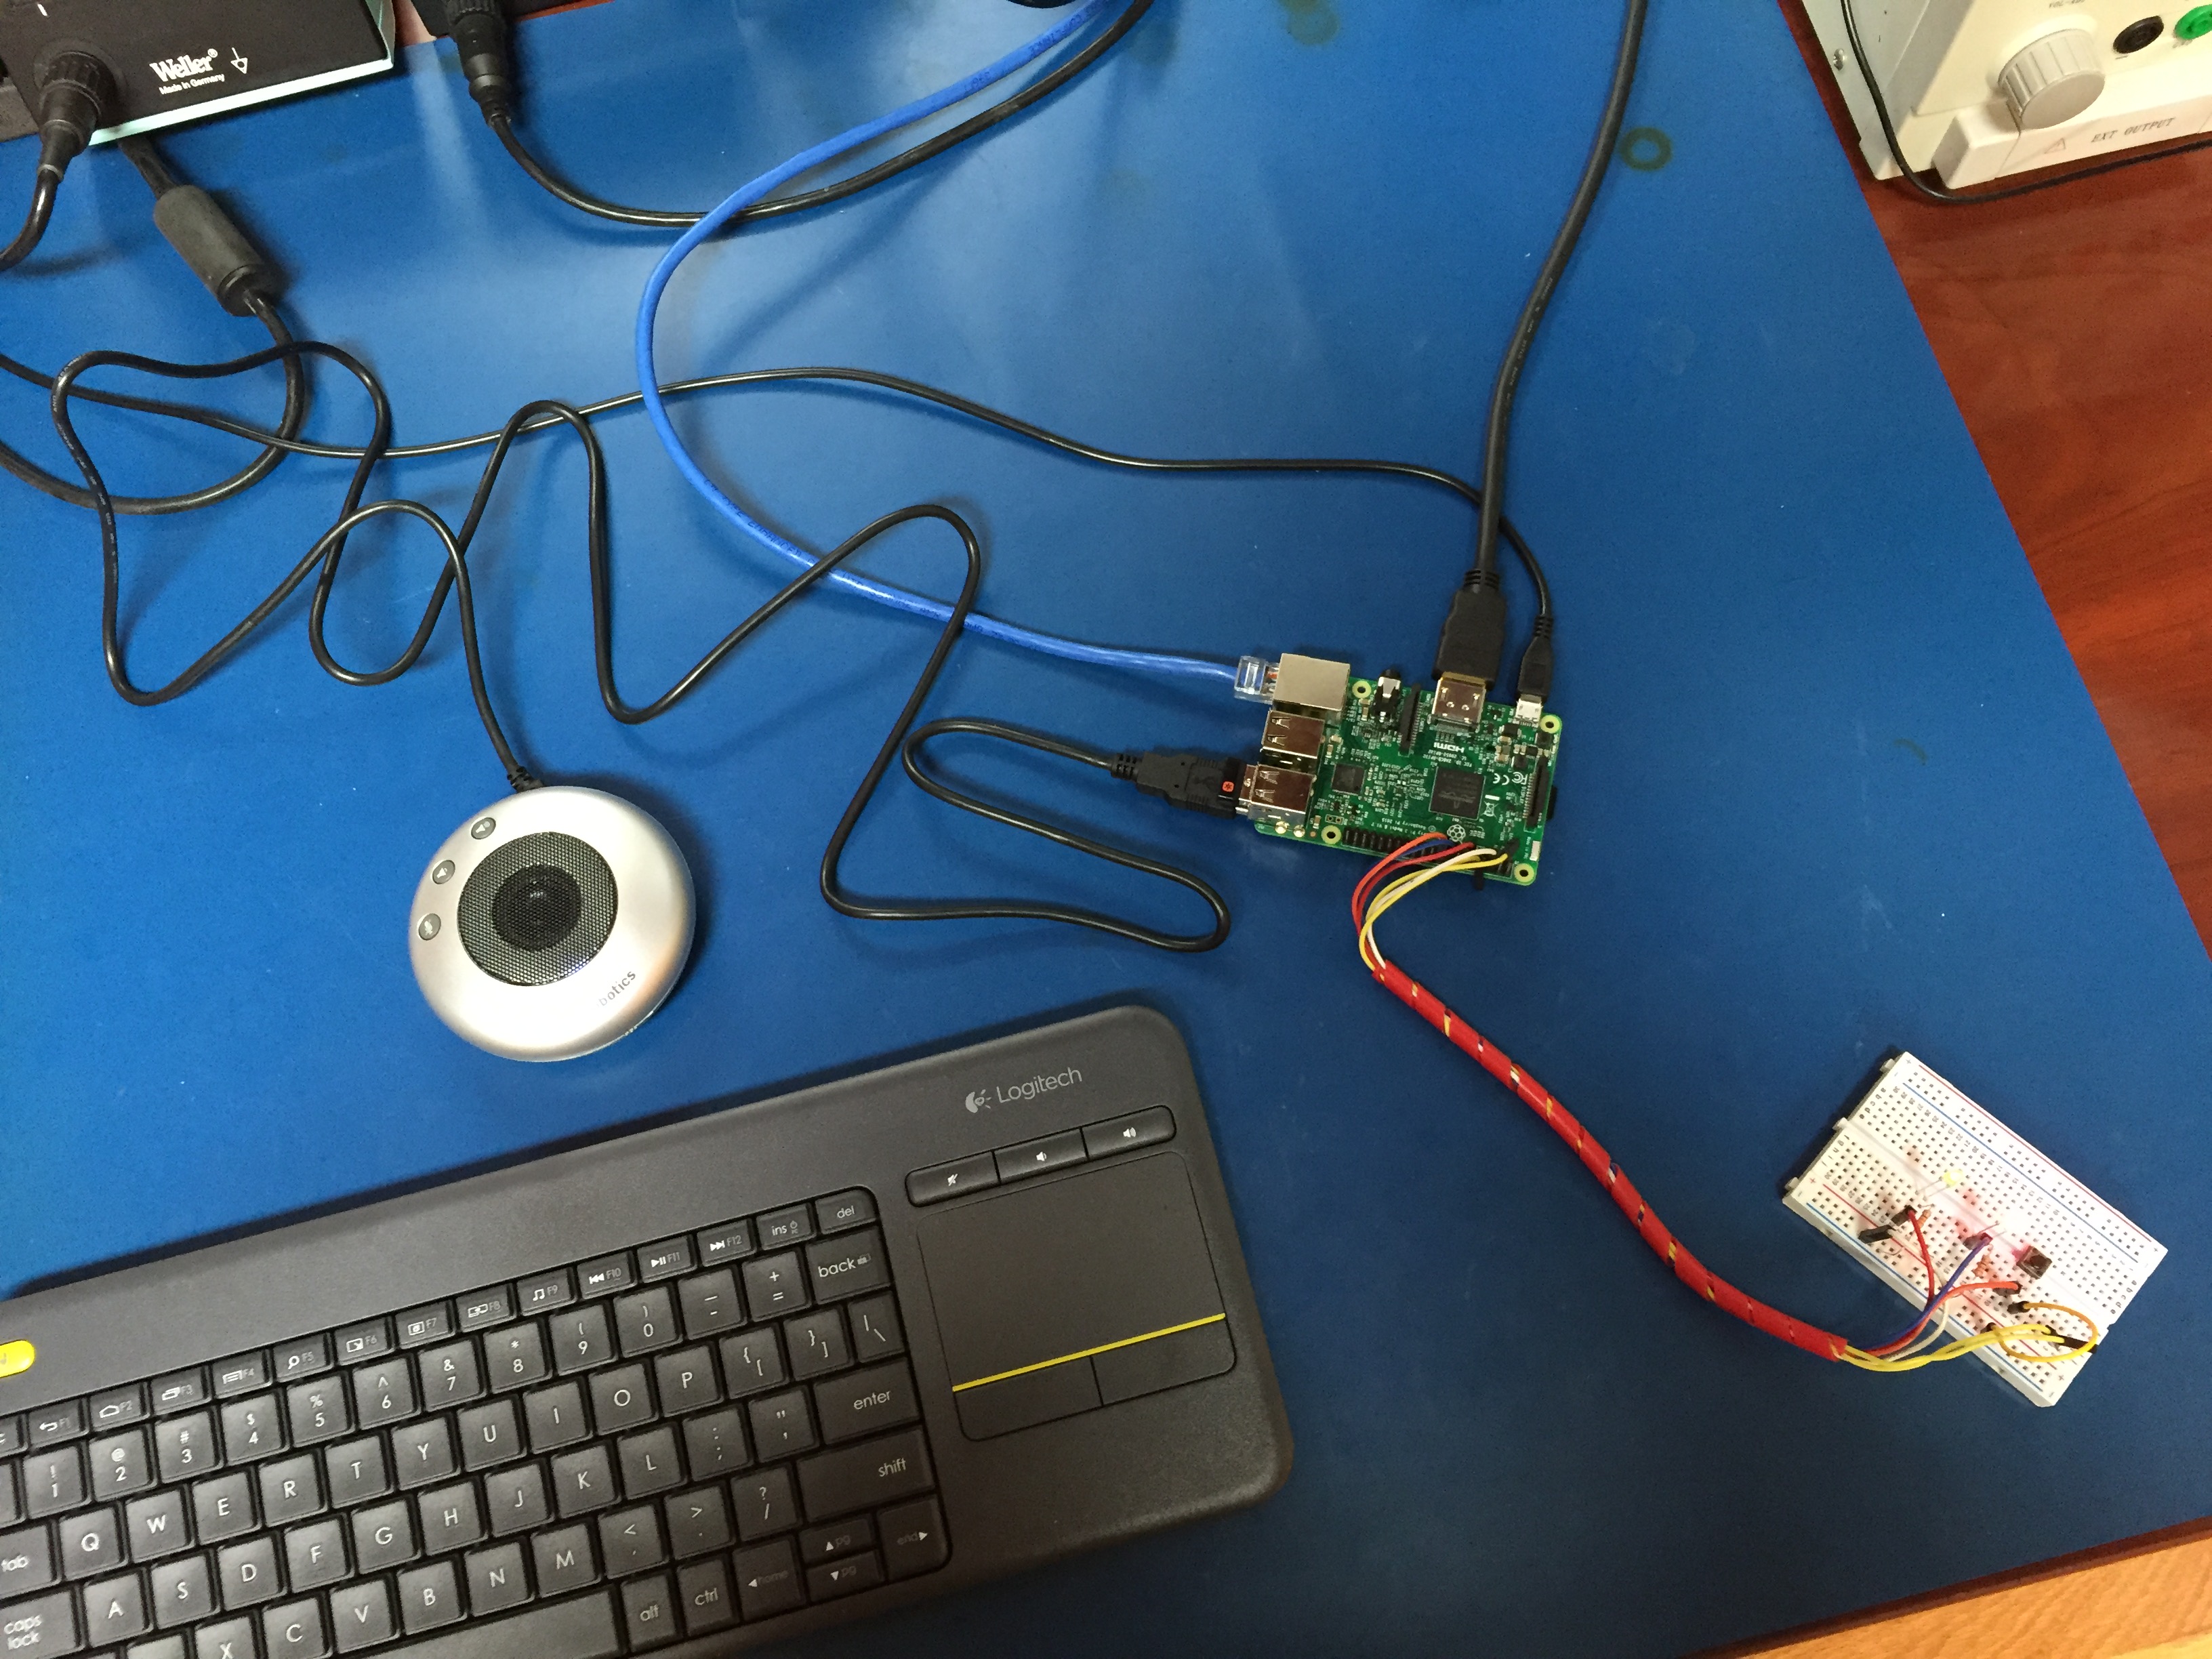 ","html":"\u003ch3\u003eIntroducing \u003ca href=\"https://github.com/dchote/talkiepi\" rel=\"nofollow\"\u003etalkiepi\u003c/a\u003e.\u003c/h3\u003e\n\u003cp\u003e\u003cstrong\u003eNew post: \u003ca href=\"http://projectable.me/i-built-a-wifi-walkie-talkie-for-my-kids-now-you-can-too/\" rel=\"nofollow\"\u003ehttp://projectable.me/i-built-a-wifi-walkie-talkie-for-my-kids-now-you-can-too/\u003c/a\u003e\u003c/strong\u003e\u003c/p\u003e\n\u003cp\u003eIve had this idea for a VERY long time, to build a relatively cost effective, kid friendly, internet enabled walkie talkie. It has to be as simple as an oldschool walkie talkie to use, but it should run over wifi and allow kids to communicate with their friends in a simple and reliable way.\u003c/p\u003e\n\u003cp\u003eI recently came across a commandline mumble client written in go, called \u003ca href=\"https://github.com/layeh/barnard\" rel=\"nofollow\"\u003eBarnard\u003c/a\u003e. When I tested it, it seemed to do the job, so this weekend I ran with it and created \u003ca href=\"https://github.com/dchote/talkiepi\" rel=\"nofollow\"\u003etalkiepi\u003c/a\u003e.\u003c/p\u003e\n\u003cp\u003eThe biggest hurdle I had was finding a GPIO library that worked for my use case, and worked inside the existing barnard codebase. My initial digging with \u003ca href=\"https://github.com/stianeikeland/go-rpio\" rel=\"nofollow\"\u003ego-rpio\u003c/a\u003e was a huge headache of crashes that shouldnt happen. So I decided to go the sysfs route and settled on a slight modification to \u003ca href=\"https://github.com/brian-armstrong/gpio\" rel=\"nofollow\"\u003eBrian Armstrong\u0026#39;s\u003c/a\u003e \u003ca href=\"https://github.com/dchote/gpio\" rel=\"nofollow\"\u003ego GPIO library\u003c/a\u003e. After getting this working I realized I still had to enable the internal pullup on the button pin, so I went back to using \u003ca href=\"https://github.com/stianeikeland/go-rpio\" rel=\"nofollow\"\u003ego-rpio\u003c/a\u003e for just that.\u003c/p\u003e\n\u003cp\u003eI managed to fix the bug that stopped audio from sending when you press the button the second time. talkiepi is now fully functional! I will be working on some cleanup and housekeeping stuff (such as config files) next.\u003c/p\u003e\n\u003chr\u003e\n\u003ch3\u003eTry it yourself!\u003c/h3\u003e\n\u003cp\u003eYou can play with it on your pi and see how it goes, I do recommend using the latest raspbian image though.\u003c/p\u003e\n\u003cp\u003eFirst install the required raspbian packages \u003ccode\u003eapt-get install golang libopenal-dev libopus-dev\u003c/code\u003e. Once installed setup your \u003ccode\u003eGOPATH\u003c/code\u003e. I recommend creating a directory in your home called \u003ccode\u003egocode\u003c/code\u003e, then \u003ccode\u003eexport GOPATH=$HOME/gocode\u003c/code\u003e. You can add that to your .profile to persist it for future logins etc.\u003c/p\u003e\n\u003cp\u003eChange to your new directory \u003ccode\u003ecd $GOPATH\u003c/code\u003e and then run the following:\u003c/p\u003e\n\u003cpre\u003e\u003ccode\u003ego get github.com/layeh/gopus\ngo get github.com/dchote/talkiepi\n\u003c/code\u003e\u003c/pre\u003e\n\u003cp\u003eNow you can jump in to the code and run it:\u003c/p\u003e\n\u003cpre\u003e\u003ccode\u003ecd $GOPATH/src/github.com/dchote/talkiepi\ngo run cmd/talkiepi/main.go -server %YOUR_MUMBLE_SERVER_IP% -username %USERNAME_FOR_MUMBLE%\n\u003c/code\u003e\u003c/pre\u003e\n\u003cp\u003eIf you want to use a USB speakerphone device like I am, plug it in and run \u003ccode\u003eaplay -l\u003c/code\u003e to determine the device number, and then edit your alsa config \u003ccode\u003e/usr/share/alsa/alsa.conf\u003c/code\u003e changing the defaults to use the index of your USB device (typically 1).\u003c/p\u003e\n\u003cpre\u003e\u003ccode\u003edefaults.ctl.card 1\ndefaults.pcm.card 1\n\u003c/code\u003e\u003c/pre\u003e\n\u003chr\u003e\n\u003ch3\u003eWhats Next\u003c/h3\u003e\n\u003cp\u003eI will work on getting this stable in my free time. In short order here are the next set of features I will be adding:\u003c/p\u003e\n\u003cul\u003e\n\u003cli\u003eJoin a specified channel\u003c/li\u003e\n\u003cli\u003eConfig file for all settings\u003c/li\u003e\n\u003cli\u003eSystemd script to start on boot\u003c/li\u003e\n\u003c/ul\u003e\n\u003cp\u003eI will also work on modeling an enclosure for everything to go in!\u003c/p\u003e\n\u003cimg src=\"/content/images/2016/08/IMG_8841.JPG\" alt=\"\"\u003e\n\u003cimg src=\"/content/images/2016/08/IMG_8843.JPG\" alt=\"\"\u003e\n\u003cimg src=\"/content/images/2016/08/IMG_8844.JPG\" alt=\"\"\u003e ","excerpt":"","metaTitle":"","metaDescription":"","status":"published","featured":false,"publishedAt":"2016-08-21T17:47:08Z","authorId":"190160de54f2192bd5b8734ec8808086","authorName":"Daniel Chote","authorSlug":"daniel","heroMediaId":"9c21764682e1f36dc05c194663cea46a","projectId":"","tags":[{"id":"b529314e428273696b02c474dcf56132","name":"Raspberry Pi","slug":"raspberry-pi"},{"id":"7ad64d8755c407b3e4ca41a0a3c369c1","name":"mumble","slug":"mumble"},{"id":"b223b3e2ba0e78e7e6a6a8ff4349517d","name":"talkiepi","slug":"talkiepi"}],"createdAt":"2026-10-18T13:16:27Z","updatedAt":"2026-10-18T13:16:27Z"}],"site":{"id":"projectable","theme":"projectable","title":"Daniel Chote's Project Blog","description":"Software Development, Hardware Hacking, Sim Racing, Multirotors and Robots!","timezone":"America/New_York","postsPerPage":10,"logoMediaId":"21557257b3f2ecc4b3fa875b808097a7","coverMediaId":"25f1417193daeb2af73861aaa0dd17fd","copyright":"© Daniel Chote","twitterUrl":"https://twitter.com/dchote","linkedinUrl":"https://www.linkedin.com/in/dchote","googleTagId":"G-07GJBQVM38","hosts":[{"host":"new.projectable.me","canonical":false},{"host":"projectable.me","canonical":true},{"host":"www.projectable.me","canonical":false}]},"tag":{"name":"mumble","slug":"mumble"},"tagId":"7ad64d8755c407b3e4ca41a0a3c369c1","total":1}